Thryptomene baeckeacea
Thryptomene costata
Thryptomene denticulata
Thryptomene saxicola
Thryptomene urceolaris
Thysanotus juncifolius
Thysanotus tuberosa
Tinospora smilacina
Tmesipteris obliqua
Tmesipteris ovata
Tmesipteris parva
Tmesipteris truncata
Todea barbara
Toechima dasyrrhache
Toechima tenax
Toona ciliata
Trachymene composita
Trachymene incisa
Trachymene procumbens
Tragia novae-hollandiae
Trema tomentosa
Tribulus cistoides
Trichoanthes cucumerina
Trichoanthes subvelutina
Trichodesma zeylanicum
Tricoryne anceps
Tricoryne elatior
Tricostularia pauciflora
Triglochin procera
Trimenia moorei
Triodia scariosa
Tripladenia cunninghamii
Triplarina imbricata
Tristaniopsis collina
Tristaniopsis laurina
Triunia youngiana
Trochocarpa laurina
Trochocarpa montana
Trophis scandens
Turraea pubescens
Tylophora barbata
Tylophora benthamii
Tylophora grandiflora
Tylophora woollsii
Typha domingensis
Typha orientalis
Typhonium brownii
Thryptomene baeckeacea
Classification:
Unranked: Eudicots
Unranked: Rosids
Order: Myrtales
Family: Myrtaceae
Subfamily: Myrtoideae
Tribe: Chamelaucieae
Genus: From Thryptomene, which is Ancient Greek for coy, shy or prudish. It refers to plants, which are often overlooked because of the small overall status, the size of their leaves and flowers thus they blend into the background and have little visual appeal in the wild.
Specie:Named in honour of Carl Linnaeus’s best friend Dr. Abraham Baeck; 1717-1795, who was a Swedish naturalist and physician and Acea which is Latin for the family. It refers to plants, which display very typical characteristics at the Family level down to the specie level in classification in that they resemble the Baeckea genus. Here it refers to the leaves being similar to those in the Baeckea genus.
Sub specie:
Common Name: Pink Thryptomene.
Distribution:
Thryptomene baeckeacea is mainly found along the west coast of Western Australia south from Exmouth to Arrowsmith and east to Mulewa. There are a few outlying populations along the Swan River and near Jurien Bay and Dalwalinu.
https://avh.ala.org.au/occurrences/search?taxa=Thryptomene+beackeacea#tab_mapView
Habitat Aspect Climate:
Thryptomene baeckeacea prefers dappled light shade to full sun. It grows in open woodlands or semi-arid areas where some moisture is retained after rain. The altitude ranges from 5 meter ASL to 100 meters ASL.
The temperatures range from 2 degrees in July to 38 degrees in January.
The rainfall ranges from lows of 250mm to 800mm average per annum.
Soil Requirements:
Thryptomene baeckeacea prefers fine sands to course sandy loams. The soils are derived from decomposed yellow, orange or red sandstones or accumulated beach sands. The soils pH ranges from 6.5pH to 8Ph. It does not tolerate waterlogged soils. Non saline soils to very saline soils are tolerated as are salt laden winds.
Height & Spread:
Wild Plants: 0.3m to 1.2m by 0.8m to 1.5m.
Characteristics:
Thryptomene baeckeacea grows as a small spreading shrub with arching to straight, pale grey to pinkish-brown rough scabrous stems. The branchlets are pale grey and only becoming green near the apex where the newer leaf growth occurs.
The whorls consist of two pairs of opposite, lanceolate to linear to oblong leaves of Thryptomene baeckeacea measure 2mm to 3.5mm in length by 1.5mm to 2.2mm in width. The base is broad cuneate while the apex is mucronate or broadly acuminate. The concolourous laminas are deep grass-green to sea-green, dull to semi glossy and glabrous. The leaf margins are entire, and flat. The mid veins and main laterals are not prominent on either lamina. The petioles are sessile.
Inflorescences of Thryptomene baeckeacea are born singularly from the leaf axils. The green pedicels are glabrous and measure 0.8mm to 1.2mm in length. The 5 green sepals are semi erect, clasping the petals and are glabrous. They measure 0.5mm to 0.8mm in length. The white, pale pink or lilac to deep pink petals and measure 3mm to 5mm in length.
The 10 exserted filaments are free for their entire length and form a ring on the edge of the hypanthia. They measure 1mm to 2mm in length. The filaments are white and taper near the junction with the brown anthers.
The white style and stigma are glabrous while the hypanthium is pastel creamy-green. The pistil measures 2mm to 3mm in length. Thryptomene baeckeacea flowers appear from late April through to October.
The conical capsules of Thryptomene baeckeacea are glabrous and measure 3mm to 4mm in length by 5mm to 6mm in diameter. The green capsules turn deep grey when ripe. The calyx lobes are persistent on the ripe fruit. The brown seeds are flattened, ellipsoidal, and woody and mixed with chaff.
Wildlife:
Thryptomene baeckeacea is attacked by the White Mealy Bug Maconellicoccus hirsutus.
Cultivation:
Thryptomene baeckeacea is a magnificent small shrub that could be grown in association with other frontal dune shrubs and heath plants. In cultivation it will grow from 0.3 meters to 1 meter in height by 1.2 meters to 1.8 meters in diameter when grown in the open.
It prefers sandy soils where deep leaf litter keeps the soil cool and moisture at an even level. If these requirements are met it can cope with temperatures as low as minus 2 degrees with light frosts and up to 40 degrees. It is moderately drought resistant.
Add to the above, if it is given an adequate supply of water and a little native fertilizer on a regular basis the plants will respond with good flowering and fruit over a long period.
It is ideal for around swimming pools, along fence lines and driveways where there is plenty of sunshine.
Thryptomene baeckeacea would make a good contribution to sandy or rocky terrain rock gardens close to the coast or further inland if water is not a problem. Here it can be used as fill in plants, scattered throughout the boulders. When you use them in area that is strewn with large boulders do not over crowd the scene as the boulders are a formidable part of the scene. Thryptomene baeckeacea is well suited to such conditions so use contours to display the plants. Boulder country are almost always rising and falling in contour and have sharp rises. Plants must be planted sparingly with short annuals or taller broadleaf annuals with deep red or brilliant yellow flowers between to give vibrant colour contrasts. Make the scene so you can see over the tallest ones with the exception of one or two plants at the most. The idea is to achieve a feeling of expansive harshness. This can be achieved with using Thryptomene baeckeacea small olive green leaves contrasting with larger deep green leaves or pale blues or soft grey to glaucous coloured foliage. If large deep green leaf plants are required try using them as a vertical space. Some of the smaller Anigozanthos or kangaroo paws would suffice nicely here. Use a lot of procumbent plants like Hibbertia species or Willdampier formosum to make the rocks look larger and the spaces between the plants bigger. Mix them with other smaller shrubs so none of them dominate the scene but blend in to give a mosaic of foliage colours that you oversee. Here I immediately think of Actinotis helianthi or Grevillea thelemanniana for two great contrasting foliage however Actinotis may be a little over powering.
Thryptomene baeckeacea makes an excellent cut flower for indoors.
Propagation:
Seeds: The seeds of Thryptomene baeckeacea can be removed easily from the capsules.
Sow fresh seeds directly into a seed raising mix covering them with 1mm to 2mm of fines mix. Keep them moist not wet. Do not over water as the seeds will rot off before germination takes place. Place the trays in a warm not hot sunny position. When the seedlings are 30mm to 60mm tall, prick them out and plant them into 50mm native tubes using a good organic mix.
As the seedlings roots reach the bottom of the tubes plant them out into their permanent position.
Cuttings:
Fortunately Thryptomene baeckeacea cuttings are relatively easy to strike easy. Use 100mm to 200mm long tip cuttings or lateral shoots from the present season’s growth. Take them in warmer months of the year. Remove half the leaves from the bottom section being careful not to tear the bark.
1 Prepare the cutting mix by adding two thirds sharp clean river sand, one third peat or one third perlite. These ingredients must be sterilized,
2 Select good material from non diseased plants,
3 Select semi green stems for cuttings. Look for a stem with two or three nodes,
4 Place the cutting on a flat, hard surface, and make a clean cut down one side of the cutting at the base for 10mm with a sharp sterile knife or razor blade. – This scarification of the node will increase the chances of roots emerging from this spot. Now remove all but one or two the leaves, leaving the apex leaves in tact. If the leaves are very large in proportion to the stem, cut off the apical halves.
5 Fill a saucer with water, and place a little medium strength rooting hormone into another container like a milk bottle top. Dip the node end of the cutting into the water and then into the rooting hormone. Tap off any excess hormone,
6 Use a small dipple stick or old pencil to poke a hole into the soilless potting mix. Ensure the hole is slightly larger than the stem diameter and be careful not to wipe the rooting hormone off the cuttings base. Place 2 to 4 cuttings in each of the 50mm native tubes,
7 I like to place the tubes in bucket with holes drilled in the bottom to allow excess water to drain out. A plastic bag that fits over the bucket is ideal to help maintain temperature and moisture. Place in a semi shaded, warm position like under 50mm shade cloth.
8 When the cuttings have struck, open the bag to allow air circulation for a few days to a week,
9 Once hardened off remove the cuttings from the bag and allow to further hardening for a few more days to a week,
10 Transplant into a good potting mix to grow on.
Fertilize using seaweed, fish emulsion or organic chicken pellets soaked in water on an alternate basis. Fertilize every two months until the plants are established then annually in early September or March to maintain health, vitality and better flowering.
Further Comments from Readers:
“Hi reader, it seems you use The Bible of Botany a lot. That’s great as we have great pleasure in bringing it to you! It’s a little awkward for us to ask, but our first aim is to purchase land approximately 1,600 hectares to link several parcels of N.P. into one at The Pinnacles NSW Australia, but we need your help. We’re not salespeople. We’re amateur botanists who have dedicated over 30 years to saving the environment in a practical way. We depend on donations to reach our goal. If you donate just $5, the price of your coffee this Sunday, We can help to keep the planet alive in a real way and continue to bring you regular updates and features on Australian plants all in one Botanical Bible. Any support is greatly appreciated. Thank you.”
In the spirit of reconciliation we acknowledge the Bundjalung, Gumbaynggirr and Yaegl and all aboriginal nations throughout Australia and their connections to land, sea and community. We pay our respect to their Elders past, present and future for the pleasures we have gained.
Thryptomene costata
Classification:
Unranked: Eudicots
Unranked: Rosids
Order: Myrtales
Family: Myrtaceae
Subfamily: Myrtoideae
Tribe: Chamelaucium
Genus: From Thryptomene, which is Ancient Greek for coy, shy or prudish. It refers to plants, which are often overlooked because of the small overall status, the size of their leaves and flowers thus they blend into the background and have little visual appeal in the wild.
Specie: From Costālis, which is Latin for a rib or ribbed. It refers to a structure or an organ which is obviously coarsely raised.
Sub specie:
Common Name:
Distribution:
Thryptomene costata is found in the south west of Western Australia south from between Mulewa to Meekatharra and Dowerin to Menzies in the south.
https://avh.ala.org.au/occurrences/search?taxa=Thryptomene+costata#tab_mapView
Habitat Aspect Climate:
Thryptomene costata prefers dappled light shade to full sun. It grows in open woodlands in semi-arid areas. The altitude ranges from 5 meter ASL to 600 meters ASL.
The temperatures range from 2 degrees in July to 38 degrees in January.
The rainfall ranges from lows of 150mm to 500mm average per annum.
Soil Requirements:
Thryptomene costata prefers skeletal to shallow, course, sands between rocky outcrops. The soils are derived from decomposed Granite. The soils pH ranges from 4pH to 6pH. It does not tolerate waterlogged soils. Non saline soils to moderately saline soils are tolerated.
Height & Spread:
Wild Plants: 1m to 3m by 1.8m to 3m.
Characteristics:
Thryptomene costata is an erect shrub that typically grows to a height of 1 meter to 3 meters. The many branches and stems are found to ground level. The semi erect stems of Thryptomene costata are pale grey to glabrous. The branchlets are pale grey and only becoming green near the apex where the newer leaf growth occurs.
The opposite, ovate leaves measure 2mm to 4.3mm in length by 1.4mm to 1.8mm in width. The terete petiole measures 0.4mm to 0.7mm in length.
The concolourous laminas are deep grass-green to sea-green, dull to semi glossy and glabrous. The flat leaves have entire margins. The mid veins and main laterals are not prominent on either lamina.
The inflorescences of Thryptomene costata are born in pairs or up to 4 from the leaf axis. The green pedicels are glabrous and measure 1mm to 2mm in length. The 5 ovate, caduceus bracteoles measure 1.3mm to 3mm in length. The pale green sepals measure 2mm to 2.5mm in length. The white, pale pink or lilac to deep pink ovate petals measure 2.5mm to 3.3mm in diameter. The 10 stamens are in pairs opposite the sepals and petals.
Thryptomene costata’s flowers appear from late May through to early November.
The fruits of Thryptomene costata are conical capsules. The capsules are glabrous and measure 7.5mm to 9.5mm in diameter. The green capsules turn deep grey when ripe. The sepal’s lobes are persistent on the ripe fruit. The brown seeds are flattened and ellipsoidal.
Wildlife:
Thryptomene costata flowers are attractive to the local native colony bee Leioproctus muelleri.
Cultivation:
Thryptomene costata is another small shrub that could be grown in association with other semi-arid plants especially those shrubs and heath plants that prefer granite based soils. In cultivation it will grow from 0.5 meters to 1.5 meter in height by 2 meters to 3 meters in diameter when grown in the open.
It grows exceptionally well on sandy loams where deep leaf litter keeps the soil cool and moisture at an even level. If these requirements are met it can cope with temperatures as low as minus 2 degrees with moderate frosts and up to 40 degrees. It is moderately drought resistant once established.
Add to the above, if it is given an adequate supply of water and a little native fertilizer on a regular basis the plants will respond with good flowering and fruit over a long period.
It is ideal for around swimming pools, along fence lines and driveways where there is plenty of sunshine.
Thryptomene costata would make a great contribution to sandy or rocky terrain rock gardens close to the coast or further inland if water is not a problem. Here its bright green small leaves and bright mid pink flowers will draw attention to a garden bed or if scattered throughout the boulders highlight the boulders. When you use them in area that is strewn with large boulders do not over crowd the scene as the boulders are a formidable part of the scene. Thryptomene costata is well suited to such conditions so use contours to display the plants. Boulder country are almost always rising and falling in contour and have sharp rises. Plants must be planted sparingly with short annuals or taller broadleaf annuals with deep red or brilliant yellow flowers between to give vibrant colour contrasts. Make the scene so you can see over the tallest ones with the exception of one or two plants at the most. The idea is to achieve a feeling of expansive harshness. This can be achieved with using Thryptomene costata small bright green leaves contrasting with larger deep green leaves or pale blues to soft grey glaucous coloured foliage. If large deep green leaf plants are required try using them as a vertical space. Some of the smaller Anigozanthos or kangaroo paws would suffice nicely giving a vertical look that will contrast vividly. Use a lot of procumbent plants like Hibbertia species or Willdampier formosum to make the rocks look larger and the spaces between the plants bigger. Mix them with other smaller shrubs so none of them dominate the scene but blend in to give a mosaic of foliage colours that you oversee. Here I immediately think of Actinotis helianthi or Grevillea thelemanniana for two great contrasting foliage however Actinotis species may be a little over powering.
It responds well to pruning with hard pruning once established.
Thryptomene costata makes an excellent cut flower for indoors.
Propagation:
Seeds: The seeds of Thryptomene costata can be removed easily from the capsules. The capsules must be removed as soon as it is ripe.
Sow fresh seeds directly into a seed raising mix covering them with 1mm to 2mm of fines mix. Keep them moist not wet. Do not over water as the seeds will rot off before germination takes place. Place the trays in a warm not hot sunny position. When the seedlings are 30mm to 60mm tall, prick them out and plant them into 50mm native tubes using a good organic mix.
As the seedlings roots reach the bottom of the tubes plant them out into their permanent position. Do not delay.
Cuttings:
Fortunately Thryptomene costata cuttings are relatively easy to strike. Try using 80mm to 160mm long tip cuttings, lateral shoots or semi hardwood cuttings from the present season’s growth. Take them in warmer months of the year. Remove half the leaves from the bottom section being careful not to tear the bark.
1 Prepare the cutting mix by adding two thirds sharp clean river sand, one third peat or one third perlite. These ingredients must be sterilized,
2 Select good material from non diseased plants,
3 Select semi green stems for cuttings. Look for a stem with two or three nodes,
4 Place the cutting on a flat, hard surface, and make a clean cut down one side of the cutting at the base for 10mm with a sharp sterile knife or razor blade. – This scarification of the node will increase the chances of roots emerging from this spot. Now remove all but one or two the leaves, leaving the apex leaves in tact. If the leaves are very large in proportion to the stem, cut off the apical halves.
5 Fill a saucer with water, and place a little medium strength rooting hormone into another container like a milk bottle top. Dip the node end of the cutting into the water and then into the rooting hormone. Tap off any excess hormone,
6 Use a small dipple stick or old pencil to poke a hole into the soilless potting mix. Ensure the hole is slightly larger than the stem diameter and be careful not to wipe the rooting hormone off the cuttings base. Place 2 to 4 cuttings in each of the 50mm native tubes,
7 I like to place the tubes in bucket with holes drilled in the bottom to allow excess water to drain out. A plastic bag that fits over the bucket is ideal to help maintain temperature and moisture. Place in a semi shaded, warm position like under 50mm shade cloth.
8 When the cuttings have struck, open the bag to allow air circulation for a few days to a week,
9 Once hardened off remove the cuttings from the bag and allow to further hardening for a few more days to a week,
10 Transplant into a good potting mix to grow on.
Fertilize using seaweed, fish emulsion or organic chicken pellets soaked in water on an alternate basis. Fertilize every two months until the plants are established then annually in early September or October to maintain health, vitality and better flowering.
Further Comments from Readers:
“Hi reader, it seems you use The Bible of Botany a lot. That’s great as we have great pleasure in bringing it to you! It’s a little awkward for us to ask, but our first aim is to purchase land approximately 1,600 hectares to link several parcels of N.P. into one at The Pinnacles NSW Australia, but we need your help. We’re not salespeople. We’re amateur botanists who have dedicated over 30 years to saving the environment in a practical way. We depend on donations to reach our goal. If you donate just $5, the price of your coffee this Sunday, We can help to keep the planet alive in a real way and continue to bring you regular updates and features on Australian plants all in one Botanical Bible. Any support is greatly appreciated. Thank you.”
In the spirit of reconciliation we acknowledge the Bundjalung, Gumbaynggirr and Yaegl and all aboriginal nations throughout Australia and their connections to land, sea and community. We pay our respect to their Elders past, present and future for the pleasures we have gained.
Thryptomene denticulata
Classification:
Unranked: Eudicots
Unranked: Rosids
Order: Myrtales
Family: Myrtaceae
Subfamily: Myrtoideae
Tribe: Chamelaucium
Genus: From Thryptomene, which is Ancient Greek for coy, shy or prudish. It refers to plants, which are often overlooked because of the small overall status, the size of their leaves and flowers thus they blend into the background and have little visual appeal in the wild.
Specie: From Odoús/Odonta, which is Ancient Greek or Dēns, which is Latin for a tooth or teeth and Ocalātum which is Latin for with an eye. It refers to leaf margins which have very fine teeth that need a keen eye to see them.
Sub specie:
Common Name:
Distribution:
Thryptomene denticulata is found in the far west of central Western Australia south from between the Kalbarri National Park to Goomalling and Mukinbudin. There are two outlying populations on the eastern side of Shark Bay north to Carnarvon and on the main land side of Exmouth north to Tent Island Nature Reserve.
https://avh.ala.org.au/occurrences/search?taxa=Thryptomene+denticulata#tab_mapView
Habitat Aspect Climate:
Thryptomene denticulata prefers dappled light shade to full sun. It grows in open woodlands or semi-arid areas on yellow to yellow orange flat to slightly undulating plains. The altitude ranges from 5 meter ASL to 150 meters ASL.
The temperatures range from 2 degrees in July to 38 degrees in January.
The rainfall ranges from lows of 150mm to 800mm average per annum.
Soil Requirements:
Thryptomene denticulata prefers coarse to fine yellow sands to yellow sandy loams derived from decomposed sandstones. The soils pH ranges from 4pH to 6pH. It does not tolerate waterlogged soils. Non saline soils to moderately saline soils are tolerated.
Height & Spread:
Wild Plants: 0.5m to 1.5m by 0.8m to 1.5m.
Characteristics:
Thryptomene denticulata grows as a medium shrub with slender, straight, erect pale fawn and glabrous. The branchlets are pale grey-fawn and only becoming green near the apex where the newer leaf growth occurs.
The leaves on Thryptomene denticulata are decussate, broad linear and measure 3.5mm to 5mm in length by 2.5mm to 3mm in width. The base is broad cuneate while the apex is mucronate or broadly acuminate. The concolourous laminas are deep grass-green to sea-green, dull to semi glossy and glabrous. The leaf margins are entire, and flat. The mid veins and main laterals are not prominent on either lamina. The petioles are sessile.
Inflorescences of Thryptomene denticulata are born singularly from the leaf axils. The green pedicels are glabrous, sessile to 1mm in length. The 5 pale pink sepals are semi erect to divaricate, glabrous and measure 0.8mm to 1mm in length. The pale pink or lilac to deep pink petals and measure 2.5mm to 3mm in length.
The 10, or 20 exserted filaments are free for their entire length and form a ring at the edge of the hypanthia. They measure 1.8mm to 2mm in length. The filaments are white and taper near the junction with the brown anthers.
The white style and stigma are glabrous while the hypanthium is pink turning to a deep pink to maroon-red following anthesis. The pistil measures 1mm to 1.2mm in length. Thryptomene denticulata flowers appear from late May through to July with the odd flower appearing through to November.
The fruits of Thryptomene denticulata are conical capsules. The capsules are glabrous and measure 2mm to 2.2mm in length by 2.2mm to 2.5mm in diameter. The green capsules turn deep grey when ripe. The calyx lobes are persistent on the ripe fruit. The brown seeds are flattened, ellipsoidal, and woody and mixed with chaff.
Wildlife:
Thryptomene denticulata flowers are attractive to the local native colony bee Leioproctus muelleri.
Cultivation:
Thryptomene denticulata is another magnificent small shrub that can be grown in association with other sand dune shrubs and heath plants. In cultivation it will grow from 0.3 meters to 1 meter in height by 1.2 meters to 1.8 meters in diameter when grown in the open.
It grows exceptionally well on lighter soils where deep leaf litter keeps the soil cool and moisture at an even level. If these requirements are met it can cope with temperatures as low as minus 2 degrees with light frosts and up to 40 degrees. It is moderately drought resistant.
Add to the above, if it is given an adequate supply of water and a little native fertilizer on a regular basis the plants will respond with good flowering and fruit over a long period.
It is an ideal size for around swimming pools, along fence lines and driveways where there is plenty of sunshine.
Thryptomene denticulata would make a great contribution to sandy or rocky terrain rock gardens close to the coast or in semi arid zones where water is not a problem. Here it can be used as fill in plants, scattered throughout the boulders. It is equally at home strewn with amongst large boulders or in a flat heath scene. Do not over crowd the scene as the boulders are a formidable part of the scene or the flowers are important in a flat heath garden. Thryptomene denticulata is well suited to such conditions and can be used formally or informal with contours to display the plants. Plants should be planted sparingly with short annuals or taller broadleaf annuals with deep red or brilliant yellow flowers between to give vibrant colour contrasts. Make the scene so you can see over the tallest ones with the exception of one or two plants at the most. The idea is to achieve a feeling of expansive harshness. This can be achieved with using Thryptomene denticulata small olive green leaves contrasting with larger deep green leaves or pale blues or soft grey to glaucous coloured foliages. If large deep green leaf plants are required try using them as a vertical space.
Some of the smaller Anigozanthos, kangaroo paws would suffice nicely here. Use a lot of procumbent plants like Hibbertia species or Willdampier formosum to make the rocks look larger and the spaces between the plants bigger. Mix them with other smaller shrubs so none of them dominate the scene but blend in to give a mosaic of foliage colours that you oversee. Here I immediately think of Actinotis helianthi or Grevillea thelemanniana for two great contrasting foliage however Actinotis specie may be a little overpowering.
It responds well to pruning with hard pruning once established. Thryptomene denticulata makes an excellent cut flower for indoors.
Propagation:
Seeds: The seeds of Thryptomene denticulata can be removed easily from the capsules.
Sow fresh seeds directly into a seed raising mix covering them with 1mm to 2mm of fines mix. Keep them moist not wet. Do not over water as the seeds will rot off before germination takes place. Place the trays in a warm not hot sunny position. When the seedlings are 30mm to 60mm tall, prick them out and plant them into 50mm native tubes using a good organic mix.
As the seedlings roots reach the bottom of the tubes plant them out into their permanent position. Do not delay.
Cuttings:
Fortunately Thryptomene denticulata cuttings strike relatively easy. Try using 80mm to 120mm long tip cuttings or lateral shoots from the present season’s growth. Take them in warmer months of the year. Remove half the leaves from the bottom section being careful not to tear the bark.
1 Prepare the cutting mix by adding two thirds sharp clean river sand, one third peat or one third perlite. These ingredients must be sterilized,
2 Select good material from non diseased plants,
3 Select semi green stems for cuttings. Look for a stem with two or three nodes,
4 Place the cutting on a flat, hard surface, and make a clean cut down one side of the cutting at the base for 10mm with a sharp sterile knife or razor blade. – This scarification of the node will increase the chances of roots emerging from this spot. Now remove all but one or two the leaves, leaving the apex leaves in tact. If the leaves are very large in proportion to the stem, cut off the apical halves.
5 Fill a saucer with water, and place a little medium strength rooting hormone into another container like a milk bottle top. Dip the node end of the cutting into the water and then into the rooting hormone. Tap off any excess hormone,
6 Use a small dipple stick or old pencil to poke a hole into the soilless potting mix. Ensure the hole is slightly larger than the stem diameter and be careful not to wipe the rooting hormone off the cuttings base. Place 2 to 4 cuttings in each of the 50mm native tubes,
7 I like to place the tubes in bucket with holes drilled in the bottom to allow excess water to drain out. A plastic bag that fits over the bucket is ideal to help maintain temperature and moisture. Place in a semi shaded, warm position like under 50mm shade cloth.
8 When the cuttings have struck, open the bag to allow air circulation for a few days to a week,
9 Once hardened off remove the cuttings from the bag and allow to further hardening for a few more days to a week,
10 Transplant into a good potting mix to grow on.
Fertilize using seaweed, fish emulsion or organic chicken pellets soaked in water on an alternate basis. Fertilize every two months until the plants are established then annually in early September or October to maintain health, vitality and better flowering.
Further Comments from Readers:
“Hi reader, it seems you use The Bible of Botany a lot. That’s great as we have great pleasure in bringing it to you! It’s a little awkward for us to ask, but our first aim is to purchase land approximately 1,600 hectares to link several parcels of N.P. into one at The Pinnacles NSW Australia, but we need your help. We’re not salespeople. We’re amateur botanists who have dedicated over 30 years to saving the environment in a practical way. We depend on donations to reach our goal. If you donate just $5, the price of your coffee this Sunday, We can help to keep the planet alive in a real way and continue to bring you regular updates and features on Australian plants all in one Botanical Bible. Any support is greatly appreciated. Thank you.”
In the spirit of reconciliation we acknowledge the Bundjalung, Gumbaynggirr and Yaegl and all aboriginal nations throughout Australia and their connections to land, sea and community. We pay our respect to their Elders past, present and future for the pleasures we have gained.
Thryptomene saxicola
Classification:
Unranked: Eudicots
Unranked: Rosids
Order: Myrtales
Family: Myrtaceae
Subfamily: Myrtoideae
Tribe: Chamelaucium
Genus: From Thryptomene, which is Ancient Greek for coy, shy or prudish. It refers to plants, which are often overlooked because of the small overall status, the size of their leaves and flowers thus they blend into the background and have little visual appeal in the wild.
Specie: From Saxum, which is Latin for a rock and Kola, which is Ancient Greek or Cola, which is Latin for to dwell. It refers to plants, which prefer rocky or boulder type habitats.
Sub specie:
Common Name:
Distribution:
Thryptomene saxicola is found in the south west corner of Western Australia south from south-west of Geraldton, Dunsborough to Augusta, Denmark to Green Range and Hopetown to Cape Arid national Park.
https://avh.ala.org.au/occurrences/search?taxa=Thryptomene+saxicola#tab_mapView
Habitat Aspect Climate:
Thryptomene saxicola prefers dappled light shade to full sun. It grows in open woodlands where some moisture is retained after rain on slopes, hill tops or along ridges. The altitude ranges from 5 meters ASL to 250 meters ASL.
The temperatures range from 2 degrees in July to 38 degrees in January.
The rainfall ranges from lows of 400mm to 1500mm average per annum.
Soil Requirements:
Thryptomene saxicola prefers sandy loams to light clays derived from better quality decomposed granites, and sandstones. The soils pH ranges from 4.5pH to 8pH. It does not tolerate waterlogged soils. Non saline soils to moderately saline soils are tolerated.
Height & Spread:
Wild Plants: 0.6m to 1.5m by 0.8m to 1.5m.
Characteristics:
Thryptomene saxicola grows as a small open shrub with slender, pendulant to arching, pale grey, scabrous stems. The branchlets are pale grey and only becoming green near the apex where the present seasons leaf growth occurs.
The decussate, narrow lanceolate, linear, narrow elliptical, ovate or narrow oblong leaves of Thryptomene saxicola measure 5mm to 10mm in length by 1.5mm to 3mm in width. The bases are broad cuneate while the apexes are acute. The concolourous laminas are deep grass-green to sea-green, dull to semi glossy and glabrous. The leaf margins are entire, and flat. The mid veins and main laterals are not prominent on either lamina. The petioles are sessile.
Inflorescences’ of Thryptomene saxicola are born singularly or in pairs from the leaf axils. The creamy pink, creamy yellow or creamy green pedicels are glabrous and measure 6mm to 10mm in length. The 2 linear, caducous, stipes are below the hypanthium. The stipes measure 2mm to 3mm in length. The 5 minute green sepals are semi erect to divaricate and glabrous. The white, pale pink or lilac to deep pink, orbicular petals measure 5mm to 7mm in length by 5.5mm to 7.5mm in length.
The 10 exserted filaments are free for their entire length and form a ring at the edge of the hypanthia. They measure 2.5mm to 3mm in length. The filaments are white and taper near the junction with the brown anthers.
The white style and stigma are glabrous while the hypanthium is green. The pistil measures 2.5mm to 3mm in length. Thryptomene saxicola flowers appear from late May through to early November.
The fruits of Thryptomene saxicola are conical capsules. The capsules are glabrous and measure 4mm to 5mm in length by 4mm to 5mm in diameter. The green capsules turn deep grey when ripe. The calyx lobes are persistent on the ripe fruit. The brown seeds are flattened, ellipsoidal, and woody and mixed with chaff.
Wildlife:
Thryptomene saxicola flowers attract a myriad of small native pollen flies, native bees and small honey eaters when in flower.
Cultivation:
Thryptomene saxicola is a magnificent small cascading shrub that could be grown in association with other sand dune or semi arid shrubs and heath plants. In cultivation it grows from 0.8 meters to 1 meter in height by 0.8 meters to 1.5 meters in diameter when grown in the open.
It grows exceptionally well on lighter soils where deep leaf litter keeps the soil cool and moisture at an even level. If these requirements are met it can cope with temperatures as low as minus 2 degrees with light frosts and up to 40 degrees. It is moderately drought resistant.
Add to the above, if it is given an adequate supply of water and a little native fertilizer on a regular basis the plants will respond with excellent flowering over a long period.
This is an excellent plant for on steep slopes or banks where the cascading branches can be viewed to full advantage especially where there is plenty of sunshine. It is one of the west coast plants that does well on the east coast.
Thryptomene saxicola makes a great contribution to any sandy or rocky terrain gardens. Here it can be used as fill in plants, scattered throughout the boulders or old logs on a slope. When it is used on slopes ensure there is room for the branches to spread out. If the area that is strewn with boulders or old logs do not over crowd the scene as these can be used to advantage to highlight the foliage and bright pale pink flowers when in flower. Thryptomene saxicola is well suited to such conditions so use contours to display the plants. Boulder country are almost always rising and falling in contour and have sharp rises. Plants must be planted sparingly with short annuals or taller broadleaf annuals with deep red or brilliant yellow flowers between to give vibrant colour contrasts. Make the scene so you can see over the tallest ones with the exception of one or two plants at the most. The idea is to achieve a feeling of expansive harshness. This can be achieved with using Thryptomene saxicola small bright green leaves contrast well with larger deep green leaves or pale blues or soft grey to glaucous coloured foliage. If large deep green leaf plants are required try using them as a vertical space. Some of the smaller Anigozanthos or kangaroo paws would suffice nicely here breaking up the horizontal flat lines. Use a lot of procumbent plants like Hibbertia linearis, Hibbertia obtusifolia or Willdampier formosum to make the rocks look larger and the spaces between the plants bigger. Mix them with other smaller shrubs so none of them dominate the scene but blend in to give a mosaic of foliage colours that you oversee. Here I immediately think of Actinotis helianthi, smaller Anigozanthos specie, Goodenia species or even mass plantings of Pattersonia specie with Geranium neglectum or Geranium solanderi for a few great contrasting foliage.
Thryptomene saxicola makes an excellent cut flower for indoors.
Propagation:
Seeds: The seeds of Thryptomene saxicola can be removed easily from the capsules.
Sow fresh seeds directly into a seed raising mix covering them with 1mm to 2mm of fines mix. Keep them moist not wet. Do not over water as the seeds will rot off before germination takes place. Place the trays in a warm not hot sunny position. When the seedlings are 30mm to 60mm tall, prick them out and plant them into 50mm native tubes using a good organic mix.
As the seedlings roots reach the bottom of the tubes plant them out into their permanent position. Do not delay.
Cuttings:
Fortunately Thryptomene saxicola cuttings strike relatively easy. Try using 80mm to 120mm long tip cuttings or lateral shoots from the present season’s growth. Take them in warmer months of the year. Remove half the leaves from the bottom section being careful not to tear the bark.
1 Prepare the cutting mix by adding two thirds sharp clean river sand, one third peat or one third perlite. These ingredients must be sterilized,
2 Select good material from non diseased plants,
3 Select semi green stems for cuttings. Look for a stem with two or three nodes,
4 Place the cutting on a flat, hard surface, and make a clean cut down one side of the cutting at the base for 10mm with a sharp sterile knife or razor blade. – This scarification of the node will increase the chances of roots emerging from this spot. Now remove all but one or two the leaves, leaving the apex leaves in tact. If the leaves are very large in proportion to the stem, cut off the apical halves.
5 Fill a saucer with water, and place a little medium strength rooting hormone into another container like a milk bottle top. Dip the node end of the cutting into the water and then into the rooting hormone. Tap off any excess hormone,
6 Use a small dipple stick or old pencil to poke a hole into the soilless potting mix. Ensure the hole is slightly larger than the stem diameter and be careful not to wipe the rooting hormone off the cuttings base. Place 2 to 4 cuttings in each of the 50mm native tubes,
7 I like to place the tubes in bucket with holes drilled in the bottom to allow excess water to drain out. A plastic bag that fits over the bucket is ideal to help maintain temperature and moisture. Place in a semi shaded, warm position like under 50mm shade cloth.
8 When the cuttings have struck, open the bag to allow air circulation for a few days to a week,
9 Once hardened off remove the cuttings from the bag and allow to further hardening for a few more days to a week,
10 Transplant into a good potting mix to grow on.
Fertilize using seaweed, fish emulsion or organic chicken pellets soaked in water on an alternate basis. Fertilize every two months until the plants are established then twice annually in early September or October to maintain health, vitality and better flowering.
Further Comments from Readers:
“Hi reader, it seems you use The Bible of Botany a lot. That’s great as we have great pleasure in bringing it to you! It’s a little awkward for us to ask, but our first aim is to purchase land approximately 1,600 hectares to link several parcels of N.P. into one at The Pinnacles NSW Australia, but we need your help. We’re not salespeople. We’re amateur botanists who have dedicated over 30 years to saving the environment in a practical way. We depend on donations to reach our goal. If you donate just $5, the price of your coffee this Sunday, We can help to keep the planet alive in a real way and continue to bring you regular updates and features on Australian plants all in one Botanical Bible. Any support is greatly appreciated. Thank you.”
In the spirit of reconciliation we acknowledge the Bundjalung, Gumbaynggirr and Yaegl and all aboriginal nations throughout Australia and their connections to land, sea and community. We pay our respect to their Elders past, present and future for the pleasures we have gained.
Thryptomene urceolaris
Classification:
Unranked: Eudicots
Unranked: Rosids
Order: Myrtales
Family: Myrtaceae
Subfamily: Myrtoideae
Tribe: Chamelaucium
Genus: From Thryptomene, which is Ancient Greek for coy, shy or prudish. It refers to plants, which are often overlooked because of the small overall status, the size of their leaves and flowers thus they blend into the background and have little visual appeal in the wild.
Specie: From Urceolus, which is Latin for a small pitcher or pot. It refers to flower buds or fruits, which have a distinct urn shape.
Sub specie:
Common Name: Urn Fruited Thryptomene.
Distribution:
Thryptomene urceolaris is found in south west Western Australia. It is found east from Lake Yindarlgooda to north of Mount Jackson, Karroune Hill Nature Reserve and from Southern Cross to Merriden and Kalgoorlie. There is a small outlying population near Wickepin.
https://avh.ala.org.au/occurrences/search?taxa=Thryptomene+urceolaris#tab_mapView
Habitat Aspect Climate:
Thryptomene urceolaris prefers dappled light shade to full sun. It grows in open Acacia woodlands on undulating plains. The altitude ranges from 200 meters ASL to 500 meters ASL.
Temperatures range from 2 degrees in July to 38 degrees in January.
Rainfall ranges from lows of 300mm to 450mm average per annum.
Soil Requirements:
Thryptomene urceolaris prefers yellow, orange or red sands to sandy loams. The soils are derived from decomposed sandstones. The soils pH ranges from 5pH to 6.5pH. It does not tolerate waterlogged soils. Non saline soils to moderately saline soils are tolerated.
Height & Spread:
Wild Plants: 0.4m to 3m by 0.5m to 2m.
Characteristics:
The stems of Thryptomene urceolaris are slender, erect to arching, pale grey and scabrous. The branchlets are pale grey and only becoming green near the apex where the present seasons leaf growth occurs.
The sub globose to shortly clavate sessile or almost sessile leaves of Thryptomene urceolaris measure 1.5mm to 2mm in length by 0.4mm to 0.5mm in width. The base tapers very slightly while the apex is mucronate to shortly apiculate. The concolourous laminas are deep grass-green to sea-green, dull to semi glossy and glabrous. The leaf margins are entire, and flat. The mid veins and main laterals are not prominent on either lamina. The petioles are sessile.
The inflorescences of Thryptomene urceolaris are mostly born singularly from the leaf axils. The green pedicels are glabrous and measure 1mm to 1.5mm in length. The 5 green sepals are depressed, ovate. It is distinctly clawed, inserted irregularly below the rim and measure 0.8mm to 1mm in length. The pale pink to mid pink petals measure 1.2mm to 2mm in length.
The 5 or 10 exserted filaments are free for their entire length and sit opposite the sepals at the edge of the hypanthia. They measure 1mm to 1.5mm in length. The filaments are white and taper near the junction with the brown anthers and have a connective globular gland, as large as the locule. The hypanthium is narrowly obconical, attenuated into a smooth or somewhat rugose surface and measures 1.5mm to 2mm in length.
The white style and stigma are glabrous while the hypanthium is green. The pistil measures 0.5mm to 1mm in length. Thryptomene urceolaris flowers appear from July through to late October.
The fruits of Thryptomene urceolaris are conical capsules. The capsules are glabrous and measure 20mm to 52mm in length by 22mm to 52mm in diameter. The green capsules turn deep grey when ripe. The calyx lobes are persistent on the ripe fruit. The brown seeds are flattened, ellipsoidal, woody and mixed with chaff.
Wildlife:
Thryptomene urceolaris flowers are attractive to the local native colony bee Leioproctus muelleri.
Cultivation:
Thryptomene urceolaris is a larger Thryptomene species that can be grown in association with other sand loving shrubs or heath plants. In cultivation it will grow from 0.3 meters to 0.5 meter in height by 0.6 meters to 0.8 meters in diameter when grown in the open.
It grows exceptionally well on lighter soils where deep leaf litter keeps the soil cool and moisture at an even level. If these requirements are met it can cope with temperatures as low as minus 2 degrees with light frosts and up to 40 degrees. It is moderately drought resistant.
Add to the above, if it is given an adequate supply of water and a little native fertilizer on a regular basis the plants will respond with good flowering and fruit over an extended period.
It is ideal for around swimming pools, along fence lines and driveways where there is plenty of sunshine. It can be easily pruned and respond well to pruning on an annual basis.
Thryptomene urceolaris would make a great contribution to a bush garden or formally in rows or along fence lines. Plants can be mass planted dotted in a scene where the flowers are highlighted and on display for prolonged periods. Shorter summer flowering annuals with broad leaves and red, orange or yellow flowers can give a twelve month display of colour. Some of the smaller Anigozanthos, kangaroo paws could be extensively planted if a winter show is required especially if the red, orange or yellow flowering forms are used.. Use a lot of procumbent plants like Hibbertia species or Willdampier formosum to make the rocks look larger and the spaces between the plants bigger. Mix them with other smaller shrubs so none of them dominate the scene but blend in to give a mosaic of foliage colours that you oversee. Here I immediately think of Actinotis helianthi or Grevillea thelemanniana for two great contrasting foliage however Actinotis specie may be a little overpowering.
Thryptomene urceolaris makes an excellent cut flower for indoors and can act as pruning the plants. This will add to the number of shoots and stems for flowering in the next flowering season.
Propagation:
Seeds: The seeds of Thryptomene urceolaris can be removed easily from the capsules.
Sow fresh seeds directly into a seed raising mix covering them with 1mm to 2mm of fines mix. Keep them moist not wet. Do not over water as the seeds will rot off before germination takes place. Place the trays in a warm not hot sunny position. When the seedlings are 30mm to 60mm tall, prick them out and plant them into 50mm native tubes using a good organic mix.
As the seedlings roots reach the bottom of the tubes plant them out into their permanent position. Do not delay.
Cuttings:
Use 60mm to 70mm long half ripened material when growing from cuttings from the present season’s growth. Take them in mid-autumn or early spring. Remove half the leaves from the bottom section being careful not to tear the bark. Remove any flowers and buds if possible. Take a 10mm slice off the bark from the bottom of the cutting on one side. Use a weak rooting hormone, dip the cutting in and place it in a moist sterile seed raising mix.
Place the trays under 30mm shade and keep the trays warm. Bottom heat is beneficial when striking the cuttings. Ideally temperatures should be maintained at between 22 to 24 degrees.
When the cuttings have obviously struck and have developed good roots treat them as for seedlings.
Fertilize using seaweed, fish emulsion or organic chicken pellets soaked in water on an alternate basis. Fertilize every two months until the plants are established then twice annually in early September or October to maintain better colour, health, vitality and flowering.
Further Comments from Readers:
“Hi reader, it seems you use The Bible of Botany a lot. That’s great as we have great pleasure in bringing it to you! It’s a little awkward for us to ask, but our first aim is to purchase land approximately 1,600 hectares to link several parcels of N.P. into one at The Pinnacles NSW Australia, but we need your help. We’re not salespeople. We’re amateur botanists who have dedicated over 30 years to saving the environment in a practical way. We depend on donations to reach our goal. If you donate just $5, the price of your coffee this Sunday, We can help to keep the planet alive in a real way and continue to bring you regular updates and features on Australian plants all in one Botanical Bible. Any support is greatly appreciated. Thank you.”
In the spirit of reconciliation we acknowledge the Bundjalung, Gumbaynggirr and Yaegl and all aboriginal nations throughout Australia and their connections to land, sea and community. We pay our respect to their Elders past, present and future for the pleasures we have gained.
Thysanotus juncifolius
Classification:
Unranked: Monocots
Order: Asparagales
Family: Asparagaceae
Sub Family: Lamandroideae
Genus: From Thysanotos, which is Ancient Greek for a fringe. It refers to the flowers, which have the inner three tepals covered in a long fringe.
Specie: From Juncus, which is Ancient Greek for a rush or Jingere, which is Latin for to tie or bind and Folium, which is Latin for foliage. It refers to plants, which have foliage, which resembles that of the Juncus genus.
Sub specie:
Common Name: Branching Fringe Lily.
Distribution:
Thysanotus juncifolius is found in 2 distinct disjunct populations, south from Port Macquarie in central coastal New South Wales to Orbost in north eastern Victoria with an disjunct population further west on the Grampians. It is found east of the Great Dividing Range.
The southern populations are found east from Kangaroo Island to the Glenelg River coastal plain and north to Adelaide in South Australia.
https://avh.ala.org.au/occurrences/search?taxa=Thysanotus+juncifolius#tab_mapView
Habitat Aspect Climate:
Thysanotus juncifolius prefers dappled light shade to full sun. It grows in moist, open Eucalyptus forests in moist heaths. The altitude ranges from 5 meters ASL to 1100 meters ASL.
The temperatures range from 2 degrees in July to 38 degrees in January.
The rainfall ranges from lows of 300mm to 3000mm average per annum.
Soil Requirements:
Thysanotus juncifolius prefers sands to sandy loams. The soils are usually derived from decomposed sandstones or granites. The soils pH ranges from 4.5pH to 6pH. It does not tolerate waterlogged soils however the soils are continually moist usually through capillary action. Non saline soils to moderately saline soils are tolerated.
Height & Spread:
Wild Plants: 0.4m to 0.6m by 0.2m to 0.3m.
Characteristics:
Thysanotus juncifolius grows as a perennial herb with small white rhizomes and fibrous roots.
The 1 to 3 linear leaves of Thysanotus juncifolius measure 80mm to 250mm in length by 1mm to 1.5mm in width. The bases are clasping while the apex is tapering acute. The concolourous laminas are grass-green to deep green, dull or semi glossy and glabrous. The leaf margins are entire, flat or in rolled.
The inflorescences of Thysanotus juncifolius are loose paniculate branches from the underground tubers. There are 1 to 3 umbels on the panicles each with 1 to 5 flowers near the apex and at times 1 to 5 sessile flowers enclosed in appressed bracts. The peduncles, rachis and pedicels are deep green striated and glabrous or sparsely covered in white hirsute hairs. The peduncles measure 20mm to 80mm in length while the rachis measure 130mm to 570mm in length and the pedicels and measure 6mm to 11mm in length.
The 6 pale lilac to deep pink or violet tepals measure 10mm to 15mm in length by 1.6mm to 2.2mm in width. The 3 inner tepals are winged with long fimbriate margins. The wings measure 1.5mm to 2mm in width while the fimbriate margin measures 2.2mm to 3.5mm in length.
The 6 exserted stamens are free for their entire length. The white filaments measure 1mm to 1.5mm in length while the 3 pale lilac to deep pink or violet, narrow lanceolate anthers measure 2mm to 2.5mm in length. The 3 linear staminodes anthers measure 6mm to 8.5mm in length. The anthers are poricidal dehiscing. The crooked, white style measures 8mm to 9.5mm in length. The flowers appear from early September through to early March.
Thysanotus juncifolius’s fruits are globose to obovoidal capsules. The glabrous capsules measure 3mm to 4mm in length by 3mm to 4mm in diameter. The green capsules turn deep grey when ripe. The small, black, glossy seeds are flattened ovoidal and resinous.
Wildlife:
Thysanotus juncifolius’s flowers are very popular with native bees, which include Tetragonula carbonaria, the Blue banded bee Amegilla cingulate and the many Yellow and Black Pollen Flies like Helophilus fasciatus.
Cultivation:
Thysanotus juncifolius is a magnificent small herb that deserves a place in every small rockery or in gardens of those who collect lilies. In cultivation it grows as a compact small rush from 0.4 meters to 0.6 meters in height by 0.2 meters to 0.3 meters in diameter when grown in the open.
It grows exceptionally well on lighter sandy soils to heavy clay soils where deep leaf litter keeps the soil cool and moisture at an even level. If these requirements are met they can cope with temperatures as low as minus 2 degrees and up to 36 degrees. It is moderately drought resistant in their climatic zones once established.
Add to the above, if it is given an adequate supply of water and a little native fertilizer on an annual basis the plants respond with maximum size flowers, flowering and fruit over a prolonged period.
This is a difficult herb to start a garden with but once established is easy to divide and collect the seeds for further use. Mass plantings of 10 or more plants in small areas are a wonderful sight to behold. Plants should be planted at 0.5 meter centers or 1 meter if the form is to be highlighted.
It is best used adjacent to small areas of bush close to paths or the house so their deep pink and purple flowers can be viewed regularly. It looks great in small rockeries as a fill in plant or it can be planted in small groups for really spectacular displays to create a splash of colour between small evergreen shrubs other heath plants or to contrast rocks or water. If it is surrounded by short plants with deep green broad foliages and white or yellow flowers it will dominate at the center giving height and strength to the other plants and the bed especially when it is in flower.
It makes a good display if planted in rows along fence lines or along the back of pools.
For a woodland scene it can be planted below the trees so the whole bed is covered, or sparsely plant for a rockier looking scene. Mass planting offsets their small size and gives you control over the lines and patterns in the garden.
Propagation:
Seeds: The seeds of Thysanotus juncifolius can be removed easily from the fruits.
Seeds need to be scarified so place them in a calico bag then place the bag in the vegetable crisper for several weeks prior to sowing in late winter or early spring.
Sow freshly treated seeds directly into a seed raising mix, keeping them moist not wet. Do not over water as the seeds will rot off before germination takes place. Place the trays in a cool shaded area with 50mm shade cloth in the bush house. When the seedlings are 20 to 25 mm tall, prick them out and plant them into 50mm native tubes using a good organic mix.
As the seedlings roots reach the bottom of the tubes plant them out into their permanent position. Do not delay.
Fertilize using seaweed, fish emulsion or organic chicken pellets soaked in water on an alternate basis. Fertilize every two months until the plants are established then annually in early September or October to maintain better colour, health, vitality and flowering.
Further Comments from Readers:
“Hi reader, it seems you use The Bible of Botany a lot. That’s great as we have great pleasure in bringing it to you! It’s a little awkward for us to ask, but our first aim is to purchase land approximately 1,600 hectares to link several parcels of N.P. into one at The Pinnacles NSW Australia, but we need your help. We’re not salespeople. We’re amateur botanists who have dedicated over 30 years to saving the environment in a practical way. We depend on donations to reach our goal. If you donate just $5, the price of your coffee this Sunday, We can help to keep the planet alive in a real way and continue to bring you regular updates and features on Australian plants all in one Botanical Bible. Any support is greatly appreciated. Thank you.”
In the spirit of reconciliation we acknowledge the Bundjalung, Gumbaynggirr and Yaegl and all aboriginal nations throughout Australia and their connections to land, sea and community. We pay our respect to their Elders past, present and future for the pleasures we have gained.

Author’s Garden The Pinnacles NSW
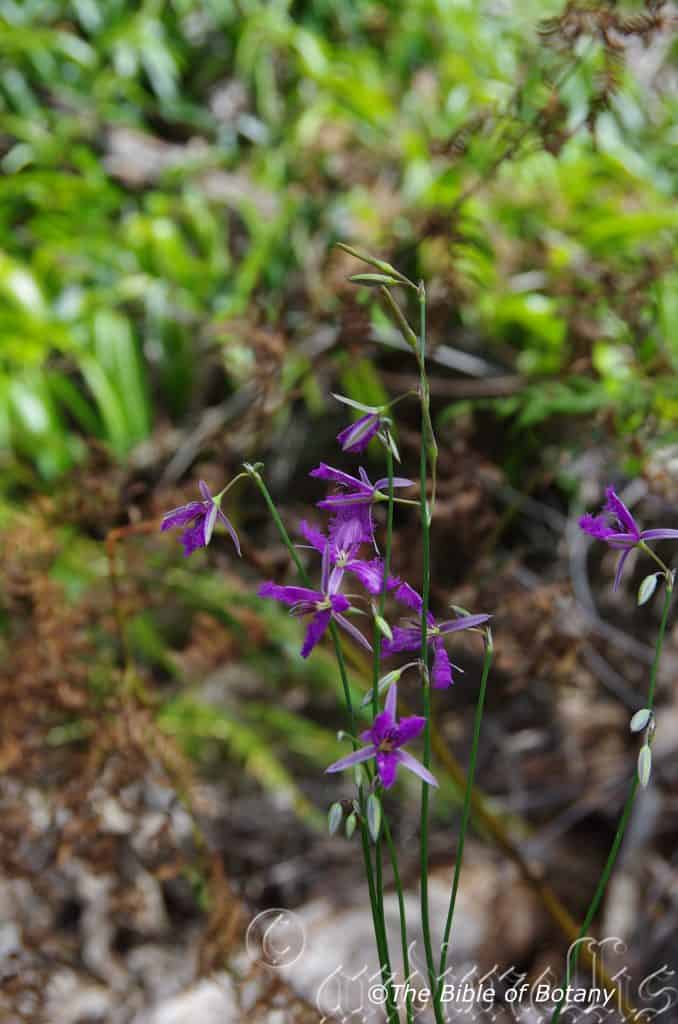
Author’s Garden The Pinnacles NSW
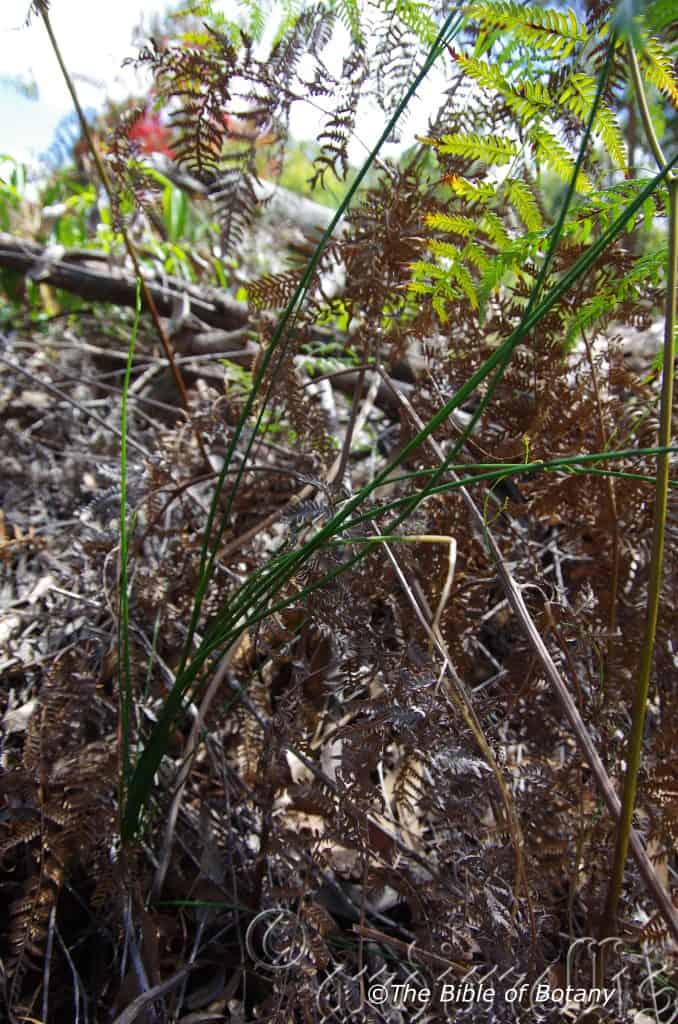
Author’s Garden The Pinnacles NSW
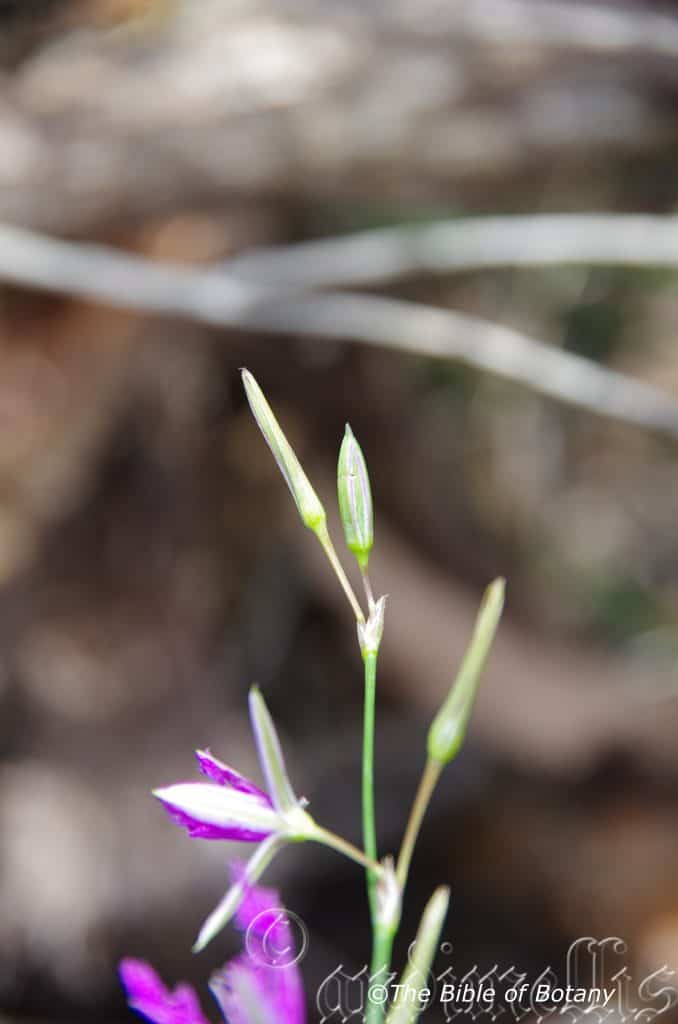
Author’s Garden The Pinnacles NSW
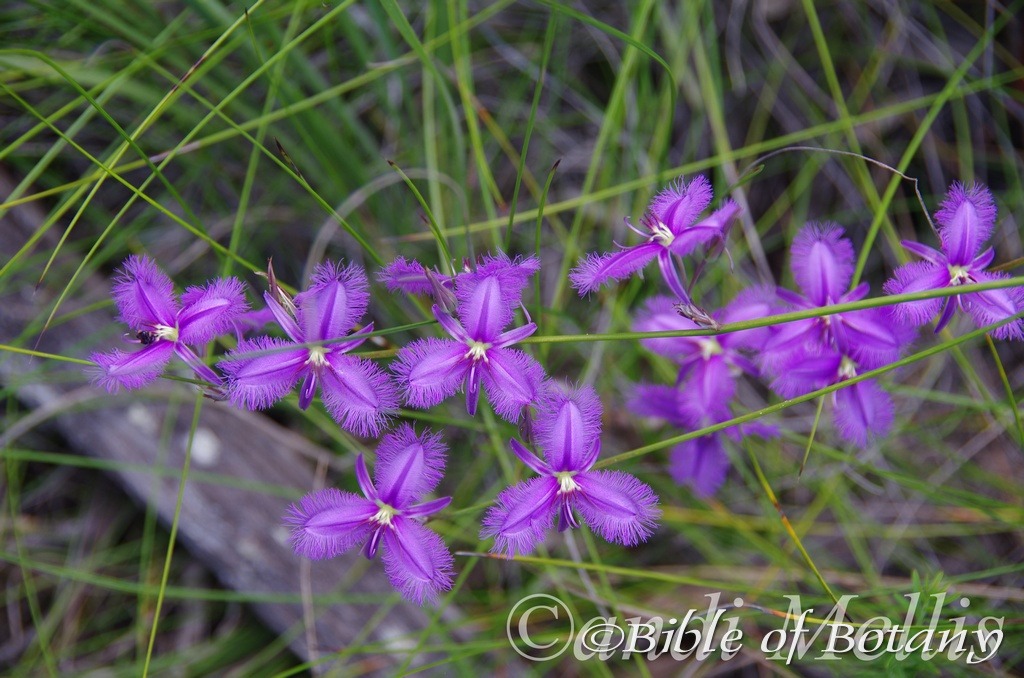
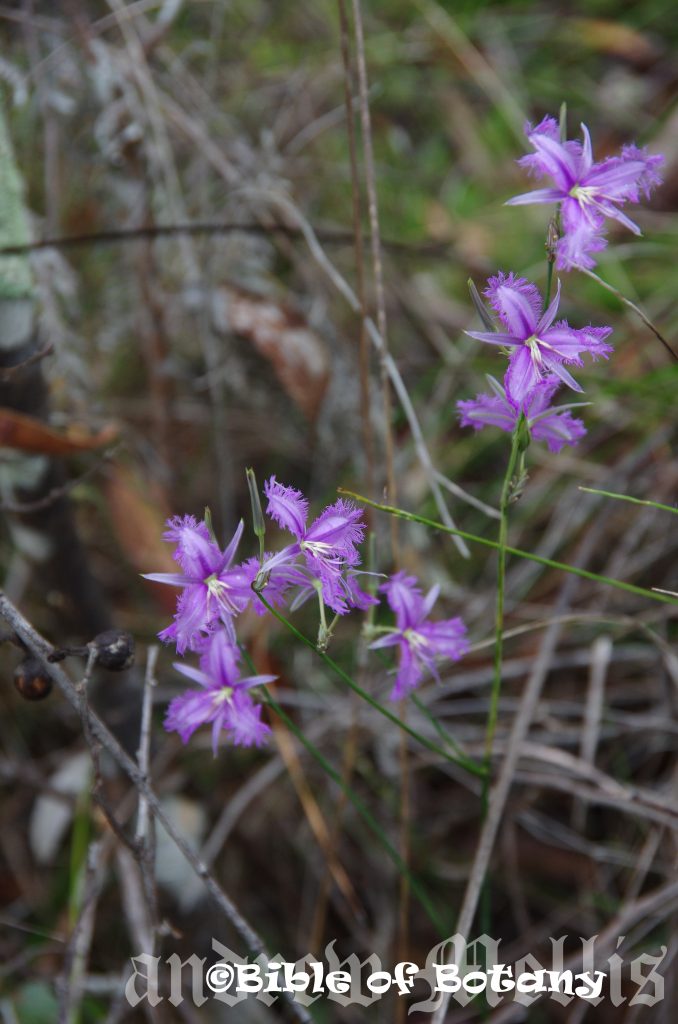
Author’s Garden The Pinnacles NSW
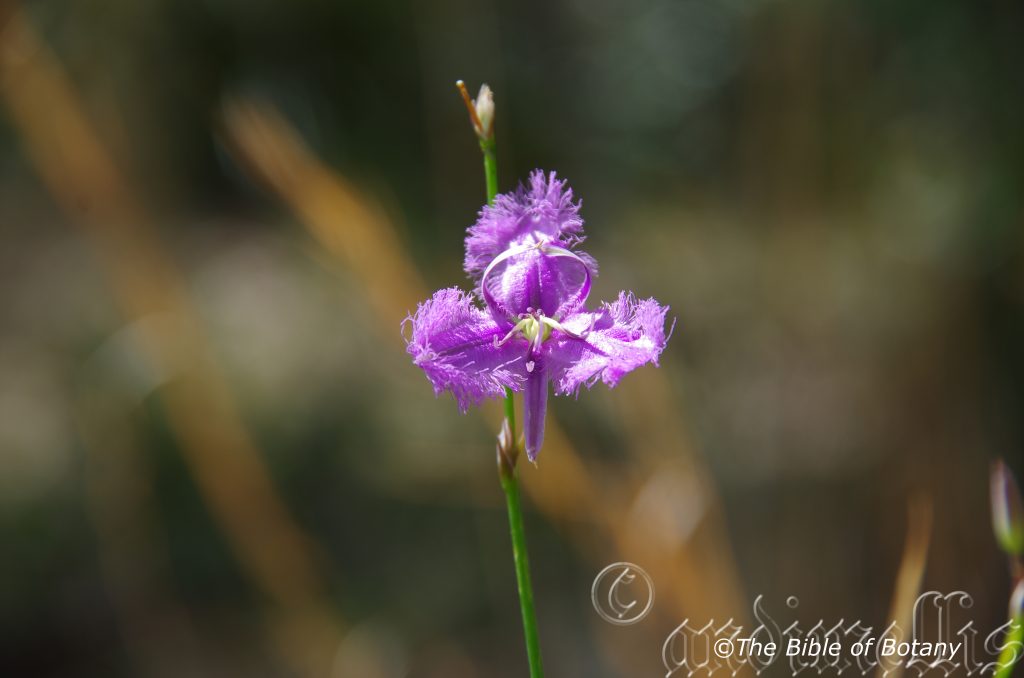
Author’s Garden The Pinnacles NSW
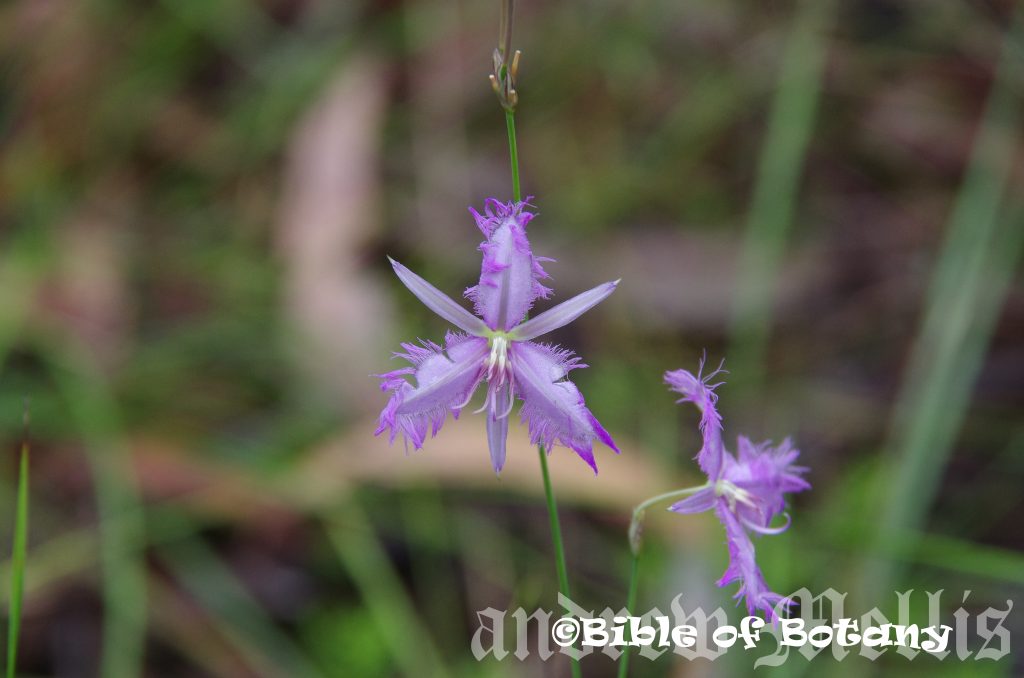
Author’s Garden The Pinnacles NSW
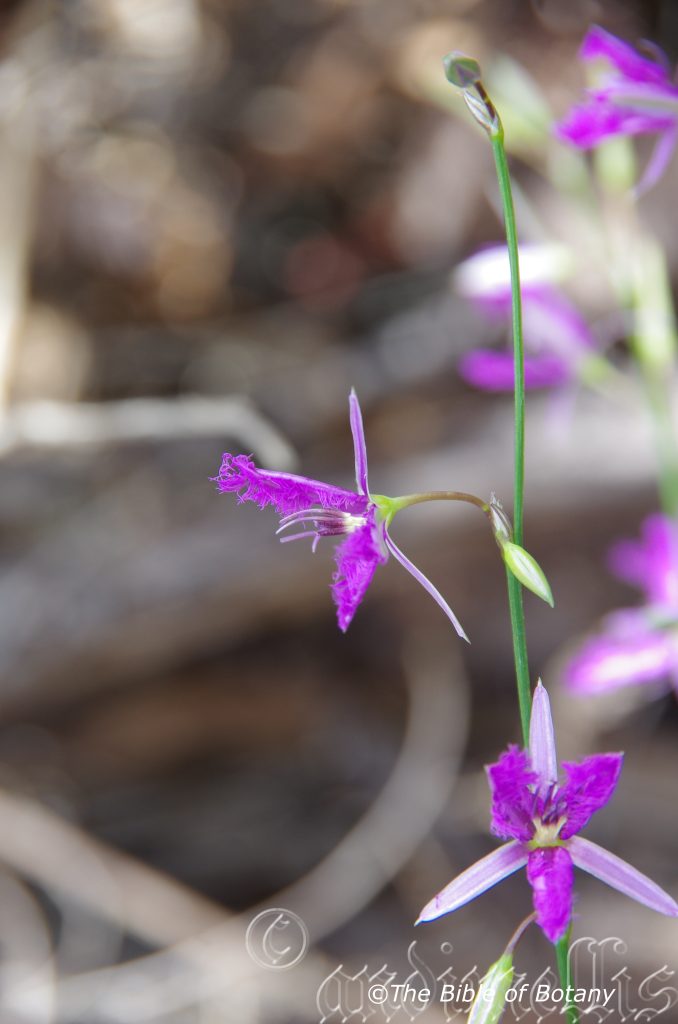
Author’s Garden The Pinnacles NSW
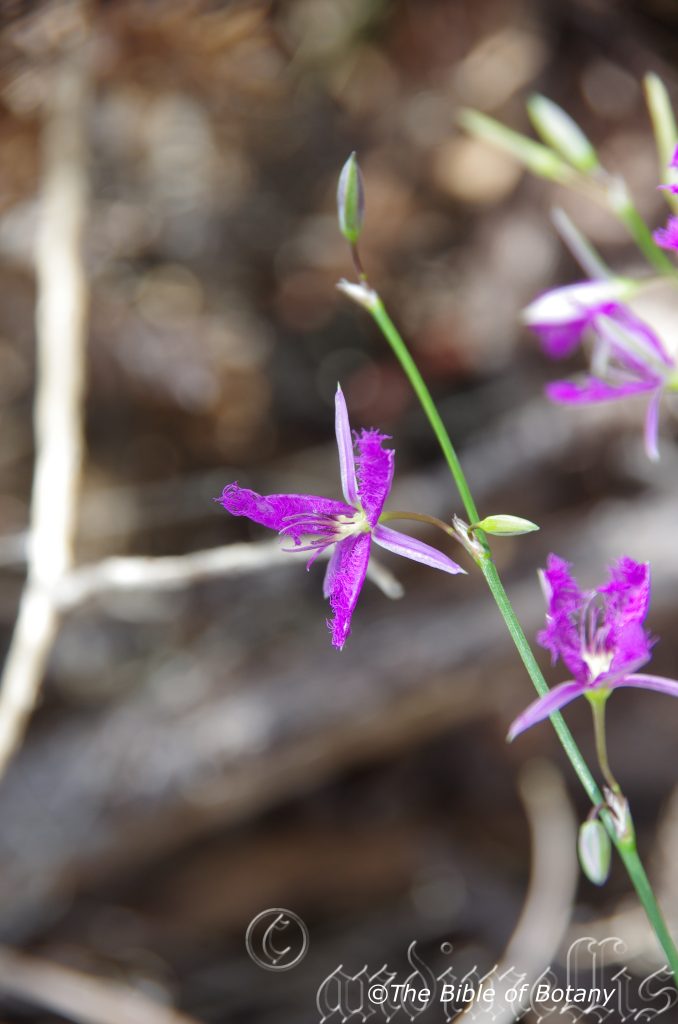
Author’s Garden The Pinnacles NSW
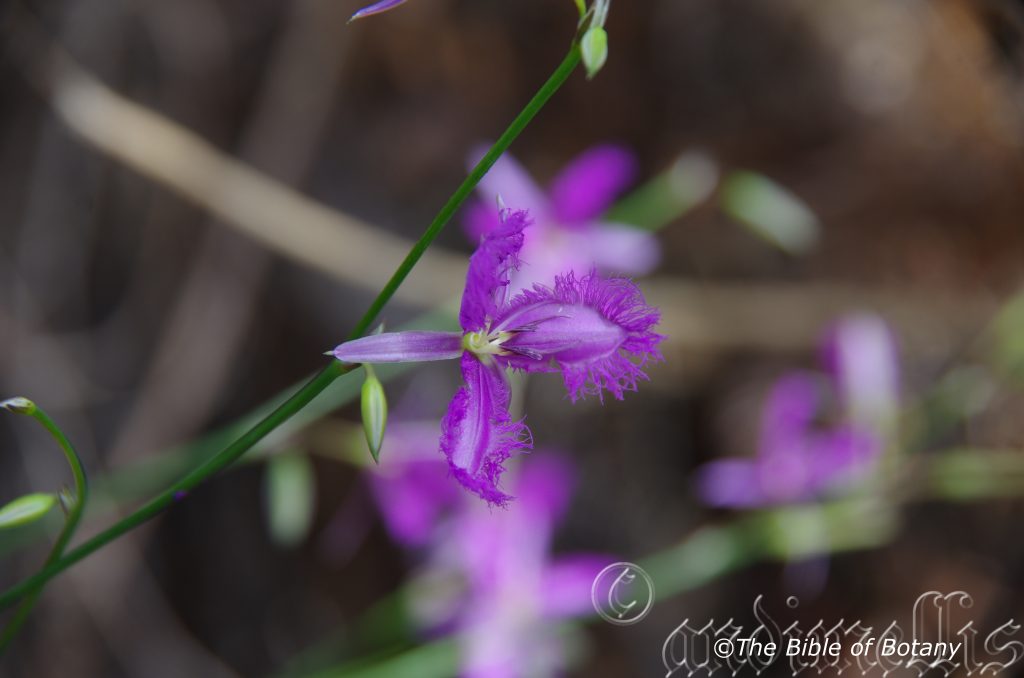
Author’s Garden The Pinnacles NSW
Thysanotus tuberosa
Classification:
Unranked: Monocots
Order: Asparagales
Family: Asparagaceae
Sub Family: Lamandroideae
Genus: From Thysanotos, which is Ancient Greek for a fringe. It refers flowers, which have the inner three tepals covered in a long fringe.
Specie: From Tūberōsus, which is Latin for a tuber. It refers to plants which have enlarged rhizomes or stoloniferous tubers.
Sub specie: Thysanotus tuberosus subsp. parviflorus. From Paûros, which is Ancient Greek or Parvum which is Latin for small and Flōris which is Latin for a flower or Flōs from the Roman goddess of spring and flowers. It refers to flowers, which are somewhat smaller when compared to other species in the genus.
Sub specie: Thysanotus tuberosus subsp. tuberosus. From Tūberōsus, which is Latin for a tuber. It refers to plants which have enlarged rhizomes or stoloniferous tubers.
Common Name: Fringe Lily.
Distribution:
Thysanotus tuberosus subsp. parviflorus is found south from Mount Moffit National Park near Injune in central Queensland to Mount Gambier in south eastern South Australia. There is an isolated population much further north in the Paluma National Park.
Thysanotus tuberosus subsp. tuberosus is found south from Cape York Peninsula in far north eastern Queensland to Mount Gambier in south eastern South Australian. There are a few disjunct populations near Anangu Pitjantjatjara and Barossa in South Australia and also near Beaconsfield on the central north coast of Tasmania.
https://avh.ala.org.au/occurrences/search?taxa=Thysanotus+tuberosa#tab_mapView
Habitat Aspect Climate:
Thysanotus tuberosus prefers dappled light shade to full sun. It grows in open woodlands on undulating plains along riparian zones, dry open savannah woodlands or dry or moist heath lands. The altitude ranges from 5 meters ASL to 1050 meters ASL.
The temperatures range from 2 degrees in July to 38 degrees in January.
The rainfall ranges from lows of 300mm to 3000mm average per annum.
Soil Requirements:
Thysanotus tuberosus prefers soils that are creamy yellow, yellow, orange or red sands to sandy loams. The soils are usually derived from decomposed sandstones. The soils pH ranges from 4pH to 6.5pH. It does not tolerate waterlogged soils. Non saline soils to moderately saline soils are tolerated.
Height & Spread:
Wild Plants: 0.4m to 0.6m by 0.2m to 0.4m.
Characteristics:
The stems of Thysanotus tuberosus are herbs with roots spreading from a central tuft below the leaves. The tubers are cylindrical to ellipsoid and measure 10mm to 30mm or rarely 50mm in length.
The linear leaves of Thysanotus tuberosus measure 200mm to 600mm in length by 4mm to 10mm in width. The bases are clasping while the apexes are acute becoming terete. The concolourous laminas are grass-green to deep sea-green, dull and glabrous. The leaf margins are entire with small wings, flat or recurve from the center to the margins.
Inflorescences of Thysanotus tuberosus are paniculate with many branches. The panicles measure 20mm to 80mm in length. The individual umbels on the panicles have 2 to 8 flowers. The deep sea-green pedicles are erect, glabrous and measure 6mm to 22mm in length. The 6 tepals measure 7mm to 19mm in length. The pale creamy green to pale lilac through to deep pink 3 outer tepals measure 1.5mm to 2.5mm in width. The 3 rarely white, pale lilac through to deep pink to deep purple or violet inner tepals are fimbriate and measure 5mm to 12mm in width. The fimbriate sections measure 4mm in length.
The 6 dimorphic exserted stamens are free for their entire length. The filaments are pale yellow to yellow while the anthers yellow at their bases and deep maroon at their apexes. The anthers are poricidal dehiscing.
The 3 shorter, stocky filaments measure 0.5mm to 1.5mm in length while their long conical anthers measure 3mm to 4mm in length.
The 3 longer stamens are flat, twisted, recurve towards the apexes and measure 0.5mm to 1.5mm in length. The long flat anthers measure 4mm to 11mm in length
The base colour style and paler stigma and green ovary are all glabrous. The style and stigma measure 4mm to 9mm in length. Thysanotus tuberosus flowers appear from early September to early April.
Thysanotus tuberosus fruits are globose to obovoidal capsules. The capsules are glabrous and measure 3mm to 8mm in length by 2mm to 4mm in diameter. The green capsules turn deep grey when ripe. The small, black, glossy seeds are flattened ovoidal and resinous.
Wildlife:
Thysanotus tuberosa’s flowers are very popular with native bees, which include Tetragonula carbonaria, the Blue banded bee Amegilla cingulate and the many Yellow and Black Pollen Flies like Helophilus fasciatus.
Cultivation:
Thysanotus tuberosus is a magnificent small rush like plant that deserves a place in small rockery or bush gardens, where Lily like plants are cherished. In cultivation it grows as a compact small rush from 0.4 meters to 0.6 meters in height by 0.1 meters to 0.2 meters in diameter when grown in the open.
It grows exceptionally well on lighter sandy soils to heavy clay soils where deep leaf litter keeps the soil cool and moisture at an even level. If these requirements are met it can cope with temperatures as low as minus 2 degrees and up to 40 degrees. It is moderately drought resistant in its climatic zones once established.
Add to the above, if it is given an adequate supply of water and a little native fertilizer on an annual basis the plants respond with maximum size flowers, flowering and fruit over a prolonged period.
This is a difficult herb to start a garden with but once established is easy to divide and collect the seeds for further use. Mass plantings of 10 or more plants in small areas are a wonderful sight to behold. Plants should be planted at 0.5 meter centers or 1 meter if the form is to be highlighted.
It is best used adjacent to small areas of bush close to paths or the house so their deep pink and purple flowers can be viewed regularly. It looks great in small rockeries as a fill in plant or it can be planted in small groups for really spectacular displays to create a splash of colour between small evergreen shrubs other heath plants or to contrast rocks or water. If it is surrounded by short plants with deep green broad foliage and white or yellow flowers it will dominate at the center giving height and strength to the other plants and the bed especially when it is in flower.
It makes a good display if planted in rows along fence lines or along the back of pools.
For a woodland scene it can be planted below the trees so the whole bed is covered, or sparsely plant for a more barren looking scene. Mass planting offsets their small size and gives you control over the lines and patterns in the garden.
I have used Thysanotus tuberosus to great affect with Viola banksii as a ground cover for several years before it succumbed to the other plants.
Propagation:
Seeds: The seeds of Thysanotus tuberosus can be removed easily from the fruits.
Seeds need to be scarified so place them in a calico bag then place the bag in the vegetable crisper for several weeks prior to sowing in late winter or early spring.
Sow freshly treated seeds directly into a seed raising mix, keeping them moist not wet. Do not over water as the seeds will rot off before germination takes place. Place the trays in a cool shaded area with 50mm shade cloth in the bush house. When the seedlings are 20 to 25 mm tall, prick them out and plant them into 50mm native tubes using a good organic mix.
As the seedlings roots reach the bottom of the tubes plant them out into their permanent position. Do not delay.
Fertilize using seaweed, fish emulsion or organic chicken pellets soaked in water on an alternate basis. Fertilize every two months until the plants are established then annually in early September or October to maintain better colour, health, vitality and flowering.
Further Comments from Readers:
“Hi reader, it seems you use The Bible of Botany a lot. That’s great as we have great pleasure in bringing it to you! It’s a little awkward for us to ask, but our first aim is to purchase land approximately 1,600 hectares to link several parcels of N.P. into one at The Pinnacles NSW Australia, but we need your help. We’re not salespeople. We’re amateur botanists who have dedicated over 30 years to saving the environment in a practical way. We depend on donations to reach our goal. If you donate just $5, the price of your coffee this Sunday, We can help to keep the planet alive in a real way and continue to bring you regular updates and features on Australian plants all in one Botanical Bible. Any support is greatly appreciated. Thank you.”
In the spirit of reconciliation we acknowledge the Bundjalung, Gumbaynggirr and Yaegl and all aboriginal nations throughout Australia and their connections to land, sea and community. We pay our respect to their Elders past, present and future for the pleasures we have gained.
Tinospora smilacina
Classification:
Unranked: Eudicots
Class: Rosids
Order: Ranunculales
Family: Menispermaceae
Genus: From Tinos, which is Ancient Greek for very tiny and Sporos, which is Ancient Greek for a fern seed. It refers to the size of the seeds or spores, which are very small.
Specie: From Smilax, which is a Greek for a nymph. It refers to the Nymph Smilax, who was slighted by her lover Krokos; who was unhappy with her, so he transformed her into a prickly bramble that no one would dare touch. It refers to leaves or phyllodes which very closely resembles the leaves and stems of the Smilax genus.
Sub specie:
Common Name:
Distribution:
Tinospora smilacina is found in the northern half of Australia from Karratha to Exmouth in the west to the Carnarvon Gorge in eastern central Queensland and south to Nambucca Heads in north eastern New South Wales.
https://avh.ala.org.au/occurrences/search?taxa=Tinospora+smilacina#tab_mapView
Habitat Aspect Climate:
Tinospora smilacina prefers dappled light shade to full sun. It grows in warm dry sub-tropical rainforests, cool dry tropical rainforests, monsoonal forests, gallery forests or littoral rainforests. The altitude ranges from 2 meters ASL to 680 meters ASL.
The temperatures range from 1 degree in July to 42 degrees in January.
The rainfall ranges from lows of 200mm to 3200mm average per annum.
Soil Requirements:
Tinospora smilacina prefers creamy yellow, yellow, orange or red sands to sandy loams. The soils are usually derived from decomposed sandstones. The soils pH ranges from 4.5pH to 6.5pH. It does not tolerate waterlogged soils. Non saline soils to moderately saline soils are tolerated.
Height & Spread:
Wild Plants: 4m to 8m by 1m to 2m.
Characteristics:
Tinospora smilacina grows as a small to medium, slender, twinning climber. It often scrambles over nearby shrubs and trees. The older stems are reddish-grey to reddish-brown while the younger stems and new growth is somewhat fleshy, deep green and glabrous.
The opposite deltoid to cordate leaves measure 40mm to 100mm in length by 20mm to 110mm in width. The pale green to mid-green, glabrous petioles measure 40mm to 90mm in length. The laminas are held at right angles to the petioles and hang perpendicularly. The bases are shallow cordate almost truncate to deep cordate while the apexes are acute. The discolourous laminas are deep green to sea-green, dull to semi glossy and glabrous on the upper laminas while the lower laminas are paler and dull. The laminas are flat to strongly recurve upwards from the mid vein to the margins. The margins are entire. The mid vein and the 4 lateral veins from the base are prominent on the lower lamina and are clearly visible from the upper laminas. The 4 pinnate lateral veins are faintly prominent on the lower lamina.
The dioecious inflorescences are racemes born 4mm to 8mm on the apical side of the leaf axis or old leaf axis. The pale green to grass-green peduncle, rachis and pedicels are glabrous. The peduncles measure 25mm to 40mm in length while the rachis measures 25mm to 40mm in length and the pedicels measure 6mm to 13mm in length.
The 6 lime-green to mid-green sepals on the male flowers are in 2 whirls. The 3 orbicular outer sepals measure 0.5mm in length. The 3 ovate inner sepals measure 3mm to 4.5mm in length. The 6 lime-green to mid-green petals are spherical and measure 1.5mm to 2mm in length by 1.5mm to 2mm in diameter. The lime-green to mid-green petals encircle the staminal filaments. The 6 clavate stamens measure 4mm to 6mm in length including the pale yellow basifixed anthers that measure 0.7mm to 1mm in length by 1mm in diameter.
The 6 lime-green to mid green sepals on the female flowers are in 2 whirls. The 3 orbicular outer sepals measure 1.5mm to 2mm in length in length. The 3 ovate inner sepals measure 4.5mm to 5mm in length by 3mm to 4mm in width. The 6 lime-green to mid green ovate petals measure 1.5mm to 2mm in length by 1mm to 1.5mm in diameter. The 3 to 6 usually 3 staminodes are opposite the petals and measure 1.5mm in length. The 3 lime-green to mid green ovaries radiate out from the disc and measure 1.5mm to 2mm in length. The stigma is sessile. There is 1 ovule in each locule. The flowers appear from late March in the north to mid-December in the south.
Tinospora smilacina fruits are globular to ellipsoidal drupes. The glabrous drupes measure 6mm to 10mm in length by 6mm to 9mm in diameter. The green drupes turn deep scarlet red when ripe. The stigma is persistent on the ripe fruit. The brown, rugose seeds are measure 6mm to 7mm in length by 4mm to 5mm in diameter. The drupes ripen from February to April.
Wildlife:
Tinospora smilacina leaves are eaten by the Fruit Piercing Moth Eudocima fullonia, Jordon’s Fruit Piercing Moth Eudocima jordani and Eudocima maternal.
Cultivation:
Tinospora smilacina is a slender vine, which could be grown in association with dry rainforest. In cultivation it grows from 1 meters to 2 meter in height by 3 meter to 5 meters across when grown in the open on a fence.
It is a good climber where quick growth is required on a fence or over a small pergola or where a ground cover is wanted in medium to dense shade. The early appearance of the scarlet red fruits in the third year from seed and the fact that they hang for many weeks is a good enough reason for planting one. The plant is best used in a semi shaded area to dense shade. It is fast growing when fed with our recommended fertilizing regime and the soils kept cool and moist. It will thrive in most soils that have a deep layer of mulch.
If you plan to grow Tinospora smilacina on a trellis or a pergola you will need some shade from surrounding trees or the leaves will burn off or even defoliate in really hot weather especially if it turns dry. Plant it at 100mm to 150mm back from the support in case you want to remove it at a later date. This will also allow it to room to develop its stems without being restricted to early on. As it is a twinning creeper it will need some support like a few long nails or twine wrapped loosely around the posts in the early years.
Propagation:
Seeds: The seeds of Tinospora smilacina can be removed easily from the capsules.
Sow the fresh seeds directly into a seed raising mix covering them with 1mm to 2mm of the mix. Place the trays under 50mm to 70mm shade and keep the trays warm not hot. Keep them moist not wet. Do not over water as the seeds will rot off before germination takes place. Place the trays in a warm not hot sunny position. When the seedlings are 30mm to 60mm tall, prick them out and plant them into 50mm native tubes using a good organic mix.
As the seedlings roots reach the bottom of the tubes plant them out into their permanent position. Do not delay.
Cuttings: Fortunately Tinospora smilacina cuttings are relatively easy to strike. Use 100mm to 150mm long cuttings from the present season’s growth that have at least 2 pairs of nodes. Take them in warmer months of the year. Remove half the leaves from the bottom section being careful not to tear the bark.
1 Prepare the cutting mix by adding two thirds sharp clean river sand, one third peat or one third perlite. These ingredients must be sterilized,
2 Select good material from non diseased plants,
3 Select semi green stems for cuttings. Look for a stem with two or three nodes,
4 Place the cutting on a flat, hard surface, and make a clean cut down one side of the cutting at the base for 10mm with a sharp sterile knife or razor blade. – This scarification of the node will increase the chances of roots emerging from this spot. Now remove all but one or two the leaves, leaving the apex leaves in tact. If the leaves are very large in proportion to the stem, cut off the apical halves.
5 Fill a saucer with water, and place a little medium strength rooting hormone into another container like a milk bottle top. Dip the node end of the cutting into the water and then into the rooting hormone. Tap off any excess hormone,
6 Use a small dipple stick or old pencil to poke a hole into the soilless potting mix. Ensure the hole is slightly larger than the stem diameter and be careful not to wipe the rooting hormone off the cuttings base. Place 2 to 4 cuttings in each of the 50mm native tubes,
7 I like to place the tubes in bucket with holes drilled in the bottom to allow excess water to drain out. A plastic bag that fits over the bucket is ideal to help maintain temperature and moisture. Place in a semi shaded, warm position like under 50mm shade cloth.
8 When the cuttings have struck, open the bag to allow air circulation for a few days to a week,
9 Once hardened off remove the cuttings from the bag and allow to further hardening for a few more days to a week,
10 Transplant into a good potting mix to grow on.
Fertilize using seaweed, fish emulsion or organic chicken pellets soaked in water on an alternate basis. Fertilize every two months until the plants are established then annually in early September or October to maintain health, vitality and better flowering.
Further Comments from Readers:
“Hi reader, it seems you use The Bible of Botany a lot. That’s great as we have great pleasure in bringing it to you! It’s a little awkward for us to ask, but our first aim is to purchase land approximately 1,600 hectares to link several parcels of N.P. into one at The Pinnacles NSW Australia, but we need your help. We’re not salespeople. We’re amateur botanists who have dedicated over 30 years to saving the environment in a practical way. We depend on donations to reach our goal. If you donate just $5, the price of your coffee this Sunday, We can help to keep the planet alive in a real way and continue to bring you regular updates and features on Australian plants all in one Botanical Bible. Any support is greatly appreciated. Thank you.”
In the spirit of reconciliation we acknowledge the Bundjalung, Gumbaynggirr and Yaegl and all aboriginal nations throughout Australia and their connections to land, sea and community. We pay our respect to their Elders past, present and future for the pleasures we have gained.
Tmesipteris obliqua
Classification:
Unranked: Tracheophytes
Division: Polypodiophyta
Class: Polypodiopsida
Order: Psilotales
Family: Psilotaceae
Genus: From Tmesis, which is Ancient Greek for a cutting and Pteris, which is Ancient Greek for a fern. It refers to the forked fertile fronds, which have very deep incisions or clefts.
Specie: From Obliquus, which is Latin for a slant or to slant. It refers to the angles at the base of leaves, which are different; that is to have the bases either side of the midvein same leaf not the same size.
Sub specie:
Common Name: Long Fork Fern.
Distribution:
Tmesipteris obliqua is found south from the Blue Mountains National Park in central eastern New South Wales to the Glenelg Coastal Plains in south western Victoria.
It is also found on the eastern Bass Strait Islands and most of Tasmania except the highest altitudes through the central mid highlands.
https://avh.ala.org.au/occurrences/search?taxa=Tmesipteris+obliqua#tab_mapView
Habitat Aspect Climate:
Tmesipteris obliqua usually grows as an epiphyte on the trunks of tree ferns, trees with a spongy bark or rarely as a lithophyte. It is found in cool, moist sub-tropical rainforest, moist temperate rainforests to sub alpine temperate rainforests. The altitude ranges from 200 meters ASL to 1200 meters ASL.
The temperatures range from minus 5 degrees in July to 35 degrees in January.
The rainfalls range from lows of 600mm to 3200mm average per annum. Most areas receive extra moisture through orographic precipitation.
Soil Requirements:
Tmesipteris obliqua prefers hosts that grow in better quality cool moist sandy loams to medium clays.
Height & Spread:
Wild Plants: 0.2m to 0.7m by 0.1m to 0.2m.
Characteristics:
Tmesipteris obliqua grows as a pendant aerial epiphyte. The simple stipes are usually unbranched and measure 150mm to 700mm in length. The stipes are grooved on the upper surface.
The pinnae reduce in size as they approach the apex. The slender grass-green to deep green rachis is covered in minute whitish scales. The 40 to 140 pinnae are broad oblong, oblong to narrow rhomboidal. The pinnae measure 25mm to 35mm in length by 4mm to 9mm in width near the base. The asymmetric bases are sessile while the apexes are truncate. The midvein extends past the last pinnae to form an aristate tip.
The fertile fronds are similar to the sterile fronds. Tmesipteris obliqua synangium are towards the base of the pinnae and turn brownish when ripe. The large synangia measure 5mm to 7mm in length with acute apices. The brown spores are spherical.
Confusing Species:
Tmesipteris obliqua has pinnules that are at 20 to 25 degrees. The rachis measures 200mm to 700mm in length. The pinnules reduce in size as they approach the apex of the rachis. The apex is truncate with an aristate tip.
Tmesipteris ovata has pinnules that are at 40 to 50 degrees. The rachis measures 200mm to 700mm in length. The pinnules are of an even size along the rachis. The apex is mucronate.
Tmesipteris parva has pinnules that are at 60 to 85 degrees. The rachis measures 70mm to 150mm in length. The pinnules taper evenly from the base to the apex.
tmesipteris truncata has pinnules that are at 50 to 55 degrees. The pinnules are of an even size along the rachis or are somewhat variable in size and often reduced near the base and near the apex. The apex is obtuse with an aristate tip.
Wildlife:
Tmesipteris obliqua’s wildlife is unknown to the author.
Cultivation:
It is a small epiphytic or lithophilic fern for cultivation in cool, wet, shady areas. It could be difficult to establish. When the microclimate is right it will thrive. It is most suitable for use as a rainforest understory plant where it can break the monotony of large deep green leaves. It likes humidity to maintain moisture on the trunks or rocks and a cool root zone.
It always looks green and fresh giving a tropical look in a short time. It is cold tolerant to temperatures as low as minus 2 degrees once established though some frond burning may occur at lower temperatures or where frost will collect on the fronds.
Propagation:
Fern Spores: All ferns that are declared rare, vulnerable or endangered are protected by Federal and State Laws and must not be removed from the wild unless you are a land developer, forestry, mining company or main Roads department etc. This includes bulbs, roots, leaves and flowers. No part of any plant can be removed from Federal, State or Local Government land without the prior permission of the authority and this includes the spore.
Most people are put off at the thought of growing ferns from spore. Like all plants that produce their offspring from seed or spore the methods are basically the same. Remember nature has been doing this for millions of years and has been very successful. I have had excellent results growing over 200 different species of Australian ferns so don’t be afraid. Give it a go.
The spores of Tmesipteris obliqua can be removed easily from the fronds as the fertile fronds begin to brown off. Cut and place a frond or two in a paper bag for a week or so in a cool shady place.
Step 1. Select spore from the fern fronds. Wait until the fern is just starting to release its spore. Rinse the fronds under clean running water and dry. This is to wash off any other spores from rogue ferns that may have settled onto the fronds. (There is nothing worse than having common brake or common soft bracken contaminating a prized tree fern or epiphyte.)
Step 2. Place the dry fronds in a clean brown paper bag and keep them in a cool dark place like the linen closet for about a week to ten days before you are ready to sow the spore. The exception to this rule applies to ferns, which produce green spores. These must be sown immediately that they are released. Todea Barbara is a good example of a fern, which produces green spore.
Step 3. Take a large ice cream container, a small ice cream container and a clean clear plastic bag large enough to seal the large ice cream container and three or four milk bottle tops.
Step 4. Punch or drill 6 to 10 5mm holes in the bottom of the small ice cream container.
Step 5. Wash both containers, tops and plastic bag so that they are very clean and sterile.
Step 6. Use a clean fine seed raising mi. We used 30mm fine sand, 30mm peat and 30mm perlite and 10mm vermiculite. We used crushed basalt, crusher dust and peat in a 50:50 ratio for epiphytes. Moisten the mix enough that water does not run out when the mix is squeezed between the fingers.
Step 7. Place the moisten mix (Enough to half fill the small ice cream container) in the microwave oven with a large glass of water for 7 or 8 minutes, until the water is boiling. Allow them to cool in the oven. You will need the water later so do not tip it out.
Step 8. Take the brown paper bag out of the linen closet. Shake the bag and remove the fronds. You should have a yellow, brown, black or rarely greenish brown or ochre powder or very fine, small round pin head size spore depending on the specie involved.
Step 9. Remove the mixture from the oven once it has cooled and place it in the small ice cream container and level.
Step 10. Sprinkle the spore sparsely over the mixture in the small ice cream container.
Step 11. Place the milk bottle tops in the large ice cream container with the flat surface facing down. Place the small ice cream container in the large ice cream container so that it is sitting on the milk bottle tops.
Step 12. Remove the water from the microwave and pour it into the larger ice cream container so there is 25mm to 30mm of water in the bottom.
Step 13. Place the ice cream containers in the plastic bag and seal. Step 14. Place the contents and bag in a warm shady place preferably 50mm to 70mm shade depending on the specie. Shade houses and some window sills are ideal.
Step 15. The surface should turn green within a week to two weeks. The prothallus will then develop. From the prthalus the first true fronds will appear. Wait until the ferns are 20mm to 35mm in height before you attempt to transplant them. Once they are ready open the bag up slightly and allow the air to flow around the little ferns. Every 3 to 5 days open the bag a little further so the ferns get use to their new environment. Allow them a week to two weeks to harden off before you transplant them following the removal of the plastic bag. Carefully prick them out into 50mm standard squat tubes as you would any seedling.
Do not try to transplant them as single plants as they are still a little delicate still.
Once the smaller ones again reach 50mm to 70mm you may wish to divide the stronger and hardier individual plants into smaller clumps in 100mm squat pots.
Step 16. We fertilized with seaweed, fish emulsion or organic chicken pellets soaked in water on an alternate basis until established. Fertilize every two months for one year even when in the ground with half strength solution to help increase frond production and healthy.
Further Comments from Readers:
“Hi reader, it seems you use The Bible of Botany a lot. That’s great as we have great pleasure in bringing it to you! It’s a little awkward for us to ask, but our first aim is to purchase land approximately 1,600 hectares to link several parcels of N.P. into one at The Pinnacles NSW Australia, but we need your help. We’re not salespeople. We’re amateur botanists who have dedicated over 30 years to saving the environment in a practical way. We depend on donations to reach our goal. If you donate just $5, the price of your coffee this Sunday, We can help to keep the planet alive in a real way and continue to bring you regular updates and features on Australian plants all in one Botanical Bible. Any support is greatly appreciated. Thank you.”
In the spirit of reconciliation we acknowledge the Bundjalung, Gumbaynggirr and Yaegl and all aboriginal nations throughout Australia and their connections to land, sea and community. We pay our respect to their Elders past, present and future for the pleasures we have gained.
Tmesipteris ovata
Classification:
Unranked: Tracheophytes
Division: Polypodiophyta
Class: Polypodiopsida
Order: Psilotales
Family: Psilotaceae
Genus: From Tmesis, which is Ancient Greek for a cutting and Pteris, which is Ancient Greek for a fern. It refers to the forked fertile fronds, which have very deep incisions or clefts.
Specie: From Ovatis, which is Latin for almost an egg shape. It usually refers to organs, which have an ovate shape or form like an egg.
Sub specie:
Common Name:
Distribution:
It is found in several disjunct populations on the coastal ranges. It is found south from near Port Douglas to Cardwell in far north eastern Queensland and from Toowoomba in south eastern Queensland to Wilson’s Promontory in southern Victoria.
https://avh.ala.org.au/occurrences/search?taxa=Tmesipteris+ovata#tab_mapView
Habitat Aspect Climate:
Tmesipteris ovata prefers deep shade to medium shade. It grows as an epiphyte on the trunks of tree ferns, trees with a spongy bark or rarely as a lithophyte. It grows in cool, wet tropical rainforests, cool, wet subtropical rainforests and warm wet temperate rainforests or adjacent to waterfalls and seepage lines on sheltered cliffs. The altitude ranges from 100 meters ASL to 800 meters ASL.
The temperatures range from minus 2 degrees in July to 35 degrees in January.
The rainfalls range from lows of 500mm to 3200mm average per annum. Additional moisture is often acquired through orographic precipitation.
Soil Requirements:
It prefers hosts that grow in better quality cool moist sandy loams to medium clays.
Height & Spread:
Wild Plants: 5m by 10m by 200mm by 400mm.
Characteristics:
It grows as a pendant aerial epiphyte. The simple stipes is usually unbranched and measure 100mm to 200mm in length.
The pinnules do not reduce is size as they approach the apexes. The slender grass-green to deep green rachis is covered in minute whitish scales. The 26 to 50 pinnae are obovate to oblanceolate. The pinnae measure 8mm to 15mm in length by 2mm to 3mm in width near the base. The asymmetric bases are sessile while the apexes are mucronate.
The fertile fronds are similar to the sterile fronds. Tmesipteris ovata’s synangia are towards the base of the pinnae and turn rusty-red when ripe. The small synangia measure 2.5mm to 3mm in diameter with obtuse apexes. The brown spores are spherical.
Confusing Specie:
Tmesipteris ovata’s pinnules are at 40 to 50 degrees. The rachis measures 200mm to 700mm in length. The pinnules are of an even size along the rachis. The apex is mucronate.
Tmesipteris obliqua’s pinnules are at 20 to 25 degrees. The rachis measures 200mm to 700mm in length. The pinnules reduce in size as they approach the apex of the rachis. The apex is truncate with an aristate tip.
Tmesipteris parva’s are at 60 to 85 degrees. The rachis measures 70mm to 150mm in length. The pinnules are of an even size along the rachis but are somewhat variable in size. The apex is mucronate.
Tmesipteris truncata’s pinnules are at 50 to 55 degrees. The pinnules are of an even size along the rachis or are somewhat variable in size and often reduced near the base and near the apex. The apex is obtuse with an aristate tip.
Wildlife:
Tmesipteris ovata’s wildlife is unknown to the author.
Cultivation:
Tmesipteris ovata is a small epiphytic or lithophilic fern for cultivation in cool, wet, shady areas. It could be difficult to establish. When the microclimate is right it will thrive. It is most suitable for use as a rainforest understory plant where it can break the monotony of large deep green leaves. It likes humidity to maintain moisture on the trunks or rocks and a cool root zone.
It always looks green and fresh giving a tropical look in a short time. It is cold tolerant to temperatures as low as minus 2 degrees once established though some frond burning may occur at lower temperatures or where frost will collect on the fronds.
Propagation:
Fern Spores: All ferns that are declared rare, vulnerable or endangered are protected by Federal and State Laws and must not be removed from the wild unless you are a land developer, forestry, mining company or main Roads department etc. This includes bulbs, roots, leaves and flowers. No part of any plant can be removed from Federal, State or Local Government land without the prior permission of the authority and this includes the spore.
Most people are put off at the thought of growing ferns from spore. Like all plants that produce their offspring from seed or spore the methods are basically the same. Remember nature has been doing this for millions of years and has been very successful. I have had excellent results growing over 200 different species of Australian ferns so don’t be afraid. Give it a go.
The spores of Tmesipteris ovata can be removed easily from the fronds as the fertile fronds begin to brown off. Cut and place a frond or two in a paper bag for a week or so in a cool shady place.
Step 1. Select spore from the fern fronds. Wait until the fern is just starting to release its spore. Rinse the fronds under clean running water and dry. This is to wash off any other spores from rogue ferns that may have settled onto the fronds. (There is nothing worse than having common brake or common soft bracken contaminating a prized tree fern or epiphyte.)
Step 2. Place the dry fronds in a clean brown paper bag and keep them in a cool dark place like the linen closet for about a week to ten days before you are ready to sow the spore. The exception to this rule applies to ferns, which produce green spores. These must be sown immediately that they are released. Todea Barbara is a good example of a fern, which produces green spore.
Step 3. Take a large ice cream container, a small ice cream container and a clean clear plastic bag large enough to seal the large ice cream container and three or four milk bottle tops.
Step 4. Punch or drill 6 to 10 5mm holes in the bottom of the small ice cream container.
Step 5. Wash both containers, tops and plastic bag so that they are very clean and sterile.
Step 6. Use a clean fine seed raising mi. We used 30mm fine sand, 30mm peat and 30mm perlite and 10mm vermiculite. We used crushed basalt, crusher dust and peat in a 50:50 ratio for epiphytes. Moisten the mix enough that water does not run out when the mix is squeezed between the fingers.
Step 7. Place the moisten mix (Enough to half fill the small ice cream container) in the microwave oven with a large glass of water for 7 or 8 minutes, until the water is boiling. Allow them to cool in the oven. You will need the water later so do not tip it out.
Step 8. Take the brown paper bag out of the linen closet. Shake the bag and remove the fronds. You should have a yellow, brown, black or rarely greenish brown or ochre powder or very fine, small round pin head size spore depending on the specie involved.
Step 9. Remove the mixture from the oven once it has cooled and place it in the small ice cream container and level.
Step 10. Sprinkle the spore sparsely over the mixture in the small ice cream container.
Step 11. Place the milk bottle tops in the large ice cream container with the flat surface facing down. Place the small ice cream container in the large ice cream container so that it is sitting on the milk bottle tops.
Step 12. Remove the water from the microwave and pour it into the larger ice cream container so there is 25mm to 30mm of water in the bottom.
Step 13. Place the ice cream containers in the plastic bag and seal. Step 14. Place the contents and bag in a warm shady place preferably 50mm to 70mm shade depending on the specie. Shade houses and some window sills are ideal.
Step 15. The surface should turn green within a week to two weeks. The prothallus will then develop. From the prthalus the first true fronds will appear. Wait until the ferns are 20mm to 35mm in height before you attempt to transplant them. Once they are ready open the bag up slightly and allow the air to flow around the little ferns. Every 3 to 5 days open the bag a little further so the ferns get use to their new environment. Allow them a week to two weeks to harden off before you transplant them following the removal of the plastic bag. Carefully prick them out into 50mm standard squat tubes as you would any seedling.
Do not try to transplant them as single plants as they are still a little delicate still.
Once the smaller ones again reach 50mm to 70mm you may wish to divide the stronger and hardier individual plants into smaller clumps in 100mm squat pots.
Step 16. We fertilized with seaweed, fish emulsion or organic chicken pellets soaked in water on an alternate basis until established. Fertilize every two months for one year even when in the ground with half strength solution to help increase frond production and healthy.
Further Comments from Readers:
“Hi reader, it seems you use The Bible of Botany a lot. That’s great as we have great pleasure in bringing it to you! It’s a little awkward for us to ask, but our first aim is to purchase land approximately 1,600 hectares to link several parcels of N.P. into one at The Pinnacles NSW Australia, but we need your help. We’re not salespeople. We’re amateur botanists who have dedicated over 30 years to saving the environment in a practical way. We depend on donations to reach our goal. If you donate just $5, the price of your coffee this Sunday, We can help to keep the planet alive in a real way and continue to bring you regular updates and features on Australian plants all in one Botanical Bible. Any support is greatly appreciated. Thank you.”
In the spirit of reconciliation we acknowledge the Bundjalung, Gumbaynggirr and Yaegl and all aboriginal nations throughout Australia and their connections to land, sea and community. We pay our respect to their Elders past, present and future for the pleasures we have gained.
Tmesipteris parva
Classification:
Unranked: Tracheophytes
Division: Polypodiophyta
Class: Polypodiopsida
Order: Psilotales
Family: Psilotaceae
Genus: From Tmesis, which is Ancient Greek for a cutting and Pteris, which is Ancient Greek for a fern. It refers to the forked fertile fronds, which have very deep incisions or clefts.
Specie: From Parva which is Latin for very small and insignificant. It refers to structures or organs, which are much smaller than other species in the genus.
Sub specie:
Common Name: Small Fork Fern.
Distribution:
Tmesipteris parva is found in several disjunct populations on the coastal Ranges south from Deervale in far north east New South Wales to the Dandenong Mountains, Wilson’s Promontory and the Bass Strait Islands.
https://avh.ala.org.au/occurrences/search?taxa=Tmesipteris+parva#tab_mapView
Habitat Aspect Climate:
Tmesipteris parva prefers deep shade to medium shade. It grows as an epiphyte on the trunks of tree ferns, trees with a spongy bark or rarely as a lithophyte. It grows in cool, wet subtropical rainforests, warm wet temperate rainforests and cool wet Eucalyptus forests. The altitude ranges from 20 meters ASL to 800 meters ASL.
The temperatures range from minus 3 degrees in July to 37 degrees in January.
The rainfalls range from lows of 800mm to 2100mm average per annum. All the locations are subject to some orographic precipitation.
Soil Requirements:
Tmesipteris parva prefers hosts that grow in better quality cool moist sandy loams to medium clays.
Height & Spread:
Wild Plants: 0.07m to .15m by 0.5m.
Characteristics:
Tmesipteris parva grows as a pendant aerial epiphyte. The simple stipes are usually unbranched and measure 70mm to 150mm in length. The stipes are grooved on the upper surface.
Tmesipteris parva pinnules do not reduce is size as they approach the apexes though a pinnae few are reduced in size at the base. The slender grass-green to deep green rachis are glabrous. The 20 to 40 pinnae are narrow lanceolate to narrow falcate. The pinnae measure 9mm to 16mm in length by 2mm to 4.5mm in width near the base. The asymmetric bases are sessile while the apexes are usually acute with a mucronate tip.
The fertile fronds are similar to the sterile fronds. Tmesipteris parva‘s synangia are towards the base of the pinnae and turn pale brownish when ripe. The small synangia measure 2.5mm to 3mm in diameter with obtuse apexes. The brown spores are spherical.
Confusing Specie:
Tmesipteris parva’s are at 60 to 85 degrees. The rachis measures 70mm to 150mm in length. The pinnules are of an even size along the rachis but are somewhat variable in size. The apex is mucronate.
Tmesipteris ovata’s pinnules are at 40 to 50 degrees. The rachis measures 200mm to 700mm in length. The pinnules are of an even size along the rachis. The apex is mucronate.
Tmesipteris obliqua’s pinnules are at 20 to 25 degrees. The rachis measures 200mm to 700mm in length. The pinnules reduce in size as they approach the apex of the rachis. The apex is truncate with an aristate tip.
Tmesipteris truncata’s pinnules are at 50 to 55 degrees. The pinnules are of an even size along the rachis or are somewhat variable in size and often reduced near the base and near the apex. The apex is obtuse with an aristate tip.
Wildlife:
Tmesipteris parva’s wildlife is unknown to the author.
Cultivation:
Tmesipteris parva is a small epiphytic or lithophilic fern for cultivation in cool, wet, shady areas. It could be difficult to establish. When the microclimate is right it will thrive. It is most suitable for use as a rainforest understory plant where it can break the monotony of large deep green leaves. It likes humidity to maintain moisture on the trunks or rocks and a cool root zone.
It always looks green and fresh giving a tropical look in a short time. It is cold tolerant to temperatures as low as minus 2 degrees once established though some frond burning may occur at lower temperatures or where frost will collect on the fronds.
Propagation:
Fern Spores: All ferns that are declared rare, vulnerable or endangered are protected by Federal and State Laws and must not be removed from the wild unless you are a land developer, forestry, mining company or main Roads department etc. This includes bulbs, roots, leaves and flowers. No part of any plant can be removed from Federal, State or Local Government land without the prior permission of the authority and this includes the spore.
Most people are put off at the thought of growing ferns from spore. Like all plants that produce their offspring from seed or spore the methods are basically the same. Remember nature has been doing this for millions of years and has been very successful. I have had excellent results growing over 200 different species of Australian ferns so don’t be afraid. Give it a go.
The spores of Tmesipteris parva can be removed easily from the fronds as the fertile fronds begin to brown off. Cut and place a frond in a paper bag for a week or so in a cool shady place.
Step 1. Select spore from the fern fronds. Wait until the fern is just starting to release its spore. Rinse the fronds under clean running water and dry. This is to wash off any other spores from rogue ferns that may have settled onto the fronds. (There is nothing worse than having common brake or common soft bracken contaminating a prized tree fern or epiphyte.)
Step 2. Place the dry fronds in a clean brown paper bag and keep them in a cool dark place like the linen closet for about a week to ten days before you are ready to sow the spore. The exception to this rule applies to ferns, which produce green spores. These must be sown immediately that they are released. Todea Barbara is a good example of a fern, which produces green spore.
Step 3. Take a large ice cream container, a small ice cream container and a clean clear plastic bag large enough to seal the large ice cream container and three or four milk bottle tops.
Step 4. Punch or drill 6 to 10 5mm holes in the bottom of the small ice cream container.
Step 5. Wash both containers, tops and plastic bag so that they are very clean and sterile.
Step 6. Use a clean fine seed raising mi. We used 30mm fine sand, 30mm peat and 30mm perlite and 10mm vermiculite. We used crushed basalt, crusher dust and peat in a 50:50 ratio for epiphytes. Moisten the mix enough that water does not run out when the mix is squeezed between the fingers.
Step 7. Place the moisten mix (Enough to half fill the small ice cream container) in the microwave oven with a large glass of water for 7 or 8 minutes, until the water is boiling. Allow them to cool in the oven. You will need the water later so do not tip it out.
Step 8. Take the brown paper bag out of the linen closet. Shake the bag and remove the fronds. You should have a yellow, brown, black or rarely greenish brown or ochre powder or very fine, small round pin head size spore depending on the specie involved.
Step 9. Remove the mixture from the oven once it has cooled and place it in the small ice cream container and level.
Step 10. Sprinkle the spore sparsely over the mixture in the small ice cream container.
Step 11. Place the milk bottle tops in the large ice cream container with the flat surface facing down. Place the small ice cream container in the large ice cream container so that it is sitting on the milk bottle tops.
Step 12. Remove the water from the microwave and pour it into the larger ice cream container so there is 25mm to 30mm of water in the bottom.
Step 13. Place the ice cream containers in the plastic bag and seal. Step 14. Place the contents and bag in a warm shady place preferably 50mm to 70mm shade depending on the specie. Shade houses and some window sills are ideal.
Step 15. The surface should turn green within a week to two weeks. The prothallus will then develop. From the prthalus the first true fronds will appear. Wait until the ferns are 20mm to 35mm in height before you attempt to transplant them. Once they are ready open the bag up slightly and allow the air to flow around the little ferns. Every 3 to 5 days open the bag a little further so the ferns get use to their new environment. Allow them a week to two weeks to harden off before you transplant them following the removal of the plastic bag. Carefully prick them out into 50mm standard squat tubes as you would any seedling.
Do not try to transplant them as single plants as they are still a little delicate still.
Once the smaller ones again reach 50mm to 70mm you may wish to divide the stronger and hardier individual plants into smaller clumps in 100mm squat pots.
Step 16. We fertilized with seaweed, fish emulsion or organic chicken pellets soaked in water on an alternate basis until established. Fertilize every two months for one year even when in the ground with half strength solution to help increase frond production and healthy.
Further Comments from Readers:
“Hi reader, it seems you use The Bible of Botany a lot. That’s great as we have great pleasure in bringing it to you! It’s a little awkward for us to ask, but our first aim is to purchase land approximately 1,600 hectares to link several parcels of N.P. into one at The Pinnacles NSW Australia, but we need your help. We’re not salespeople. We’re amateur botanists who have dedicated over 30 years to saving the environment in a practical way. We depend on donations to reach our goal. If you donate just $5, the price of your coffee this Sunday, We can help to keep the planet alive in a real way and continue to bring you regular updates and features on Australian plants all in one Botanical Bible. Any support is greatly appreciated. Thank you.”
In the spirit of reconciliation we acknowledge the Bundjalung, Gumbaynggirr and Yaegl and all aboriginal nations throughout Australia and their connections to land, sea and community. We pay our respect to their Elders past, present and future for the pleasures we have gained.
Tmesipteris truncata
Classification:
Unranked: Tracheophytes
Division: Polypodiophyta
Class: Polypodiopsida
Order: Psilotales
Family: Psilotaceae
Genus: From Tmesis, which is Ancient Greek for a cutting and Pteris, which is Ancient Greek for a fern. It refers to the forked fertile fronds, which have very deep incisions or clefts.
Specie: From Truncāta, which is Latin for to maim as in to have the limbs cut off. It refers to structures or organs that have no appendages.
Sub specie:
Common Name:
Distribution:
Tmesipteris truncata is found on and east of the Great Dividing Range south from Cooktown in far north eastern Queensland to Bega in south eastern New South Wales.
https://avh.ala.org.au/occurrences/search?taxa=Tmesipteris+truncata#tab_mapView
Habitat Aspect Climate:
Tmesipteris truncata prefers dense shade to medium shade. It grows as an epiphyte usually on the trunks of Todea Barbara or at times on trees with a spongy bark or rarely as a lithophyte in wet sheltered shady locations in sandstone gullies especially near water falls or seepages. It grows in cool, wet subtropical rainforests, warm wet temperate rainforests and cool wet Eucalyptus forests. The altitude ranges from 120 meters ASL to 913 meters ASL.
The temperatures range from minus 2 degrees in July to 35 degrees in January.
The rainfalls range from lows of 700mm to 2100mm average per annum. The locations usually acquire additional moisture from orographic precipitation.
Soil Requirements:
Tmesipteris truncata prefers hosts that grow in better quality cool moist sandy loams to medium clays.
Height & Spread:
Wild Plants: 0.5m to 2m by 2m to large areas of 50 or more square meters.
Characteristics:
It grows as a pendant aerial epiphyte, lithophyte or at times a terrestrial fern near waterfalls and seepages. The simple stipes are usually unbranched and measure 150mm to 350mm in length. The stipes are ridged near the base and have 3 or 4 faint grooves on the upper surface.
The pinnules are of an even size along the rachis or are somewhat variable in size and often reduced near the base and near the apex. The slender pale greens to deep green rachis are glabrous. The 30 to 70 pinnae are narrow lanceolate to narrow falcate. The pinnae measure 15mm to 25mm in length by 2.5mm to 5.5mm in width near the base. The asymmetric bases are sessile while the apexes are usually truncate or rarely broad obtuse with the rachis growing out to form an aristate tip.
The fertile fronds are similar to the sterile fronds. Tmesipteris truncata’s synangia are towards the base of the pinnae and turn rusty-red when ripe. The long pinnules measure 3mm to 5mm in length usually with a ridged apexes or rarely obtuse apex. The brown spores are spherical.
Confusing Specie:
Tmesipteris truncata’s pinnules are at 50 to 55 degrees. The pinnules are of an even size along the rachis. The apex is obtuse with an aristate tip.
Tmesipteris obliqua’s pinnules are at 20 to 25 degrees. The rachis measures 200mm to 700mm in length. The pinnules reduce in size as they approach the apex of the rachis. The apex is truncate with an aristate tip.
Tmesipteris ovata’s pinnules are at 40 to 50 degrees. The rachis measures 200mm to 700mm in length. The pinnules are of an even size along the rachis. The apex is mucronate.
Tmesipteris parva’s are at 60 to 85 degrees. The rachis measures 70mm to 150mm in length. The pinnules are of an even size along the rachis or are somewhat variable in size and often reduced near the base and near the apex. The apex is mucronate.
Wildlife:
Tmesipteris truncata’s wildlife is unknown to the author.
Cultivation:
Tmesipteris truncata It is a small epiphytic or lithophilic fern for cultivation in cool, wet, shady areas. It could be difficult to establish. When the microclimate is right it will thrive. It is most suitable for use as a rainforest understory plant where it can break the monotony of large deep green leaves. It likes humidity to maintain moisture on the trunks or rocks and a cool root zone.
It always looks green and fresh giving a tropical look in a short time. It is cold tolerant to temperatures as low as minus 2 degrees once established though some frond burning may occur at lower temperatures or where frost will collect on the fronds.
Propagation:
Fern Spores: All ferns that are declared rare, vulnerable or endangered are protected by Federal and State Laws and must not be removed from the wild unless you are a land developer, forestry, mining company or main Roads department etc. This includes bulbs, roots, leaves and flowers. No part of any plant can be removed from Federal, State or Local Government land without the prior permission of the authority and this includes the spore.
Most people are put off at the thought of growing ferns from spore. Like all plants that produce their offspring from seed or spore the methods are basically the same. Remember nature has been doing this for millions of years and has been very successful. I have had excellent results growing over 200 different species of Australian ferns so don’t be afraid. Give it a go.
The spores of Tmesipteris truncata can be removed easily from the fronds as the fertile fronds begin to brown off. Cut and place a frond in a paper bag for a week or so in a cool shady place.
Step 1. Select spore from the fern fronds. Wait until the fern is just starting to release its spore. Rinse the fronds under clean running water and dry. This is to wash off any other spores from rogue ferns that may have settled onto the fronds. (There is nothing worse than having common brake or common soft bracken contaminating a prized tree fern or epiphyte.)
Step 2. Place the dry fronds in a clean brown paper bag and keep them in a cool dark place like the linen closet for about a week to ten days before you are ready to sow the spore. The exception to this rule applies to ferns, which produce green spores. These must be sown immediately that they are released. Todea Barbara is a good example of a fern, which produces green spore.
Step 3. Take a large ice cream container, a small ice cream container and a clean clear plastic bag large enough to seal the large ice cream container and three or four milk bottle tops.
Step 4. Punch or drill 6 to 10 5mm holes in the bottom of the small ice cream container.
Step 5. Wash both containers, tops and plastic bag so that they are very clean and sterile.
Step 6. Use a clean fine seed raising mi. We used 30mm fine sand, 30mm peat and 30mm perlite and 10mm vermiculite. We used crushed basalt, crusher dust and peat in a 50:50 ratio for epiphytes. Moisten the mix enough that water does not run out when the mix is squeezed between the fingers.
Step 7. Place the moisten mix (Enough to half fill the small ice cream container) in the microwave oven with a large glass of water for 7 or 8 minutes, until the water is boiling. Allow them to cool in the oven. You will need the water later so do not tip it out.
Step 8. Take the brown paper bag out of the linen closet. Shake the bag and remove the fronds. You should have a yellow, brown, black or rarely greenish brown or ochre powder or very fine, small round pin head size spore depending on the specie involved.
Step 9. Remove the mixture from the oven once it has cooled and place it in the small ice cream container and level.
Step 10. Sprinkle the spore sparsely over the mixture in the small ice cream container.
Step 11. Place the milk bottle tops in the large ice cream container with the flat surface facing down. Place the small ice cream container in the large ice cream container so that it is sitting on the milk bottle tops.
Step 12. Remove the water from the microwave and pour it into the larger ice cream container so there is 25mm to 30mm of water in the bottom.
Step 13. Place the ice cream containers in the plastic bag and seal. Step 14. Place the contents and bag in a warm shady place preferably 50mm to 70mm shade depending on the specie. Shade houses and some window sills are ideal.
Step 15. The surface should turn green within a week to two weeks. The prothallus will then develop. From the prthalus the first true fronds will appear. Wait until the ferns are 20mm to 35mm in height before you attempt to transplant them. Once they are ready open the bag up slightly and allow the air to flow around the little ferns. Every 3 to 5 days open the bag a little further so the ferns get use to their new environment. Allow them a week to two weeks to harden off before you transplant them following the removal of the plastic bag. Carefully prick them out into 50mm standard squat tubes as you would any seedling.
Do not try to transplant them as single plants as they are still a little delicate still.
Once the smaller ones again reach 50mm to 70mm you may wish to divide the stronger and hardier individual plants into smaller clumps in 100mm squat pots.
Step 16. We fertilized with seaweed, fish emulsion or organic chicken pellets soaked in water on an alternate basis until established. Fertilize every two months for one year even when in the ground with half strength solution to help increase frond production and healthy.
Further Comments from Readers:
“Hi reader, it seems you use The Bible of Botany a lot. That’s great as we have great pleasure in bringing it to you! It’s a little awkward for us to ask, but our first aim is to purchase land approximately 1,600 hectares to link several parcels of N.P. into one at The Pinnacles NSW Australia, but we need your help. We’re not salespeople. We’re amateur botanists who have dedicated over 30 years to saving the environment in a practical way. We depend on donations to reach our goal. If you donate just $5, the price of your coffee this Sunday, We can help to keep the planet alive in a real way and continue to bring you regular updates and features on Australian plants all in one Botanical Bible. Any support is greatly appreciated. Thank you.”
In the spirit of reconciliation we acknowledge the Bundjalung, Gumbaynggirr and Yaegl and all aboriginal nations throughout Australia and their connections to land, sea and community. We pay our respect to their Elders past, present and future for the pleasures we have gained.
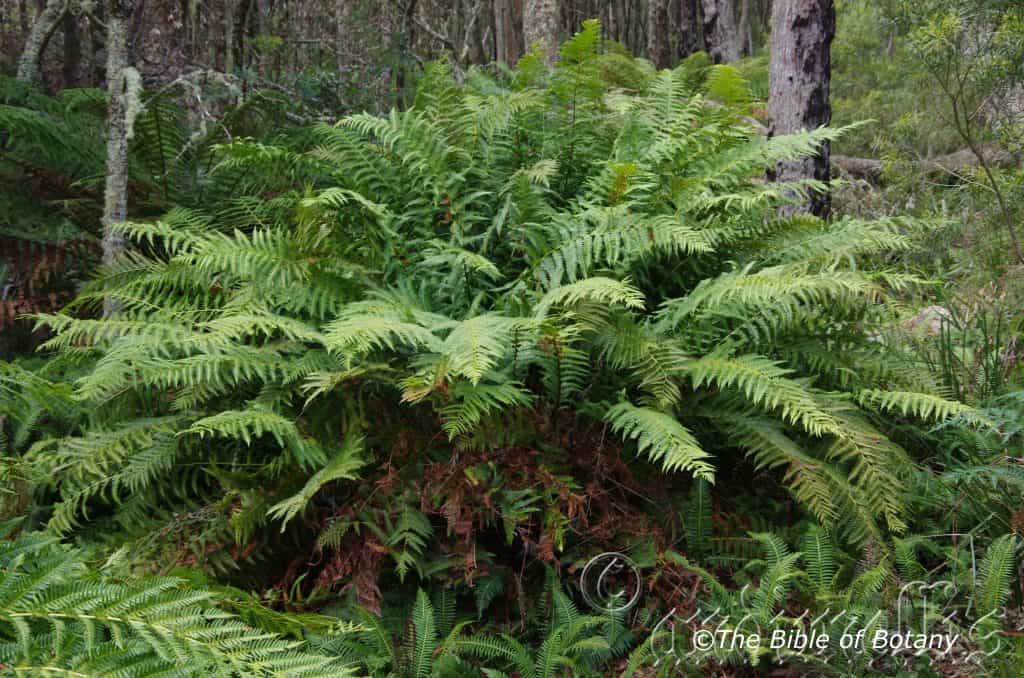
Cathedral Rocks National Park Ebor NSW
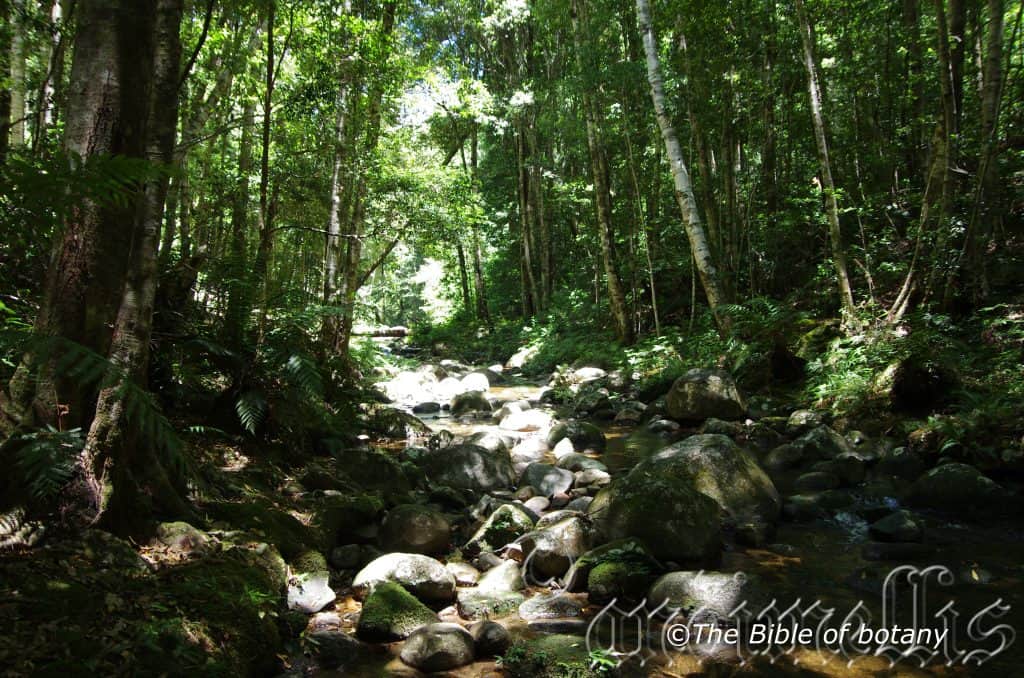
Washpool National Park Ebor NSW
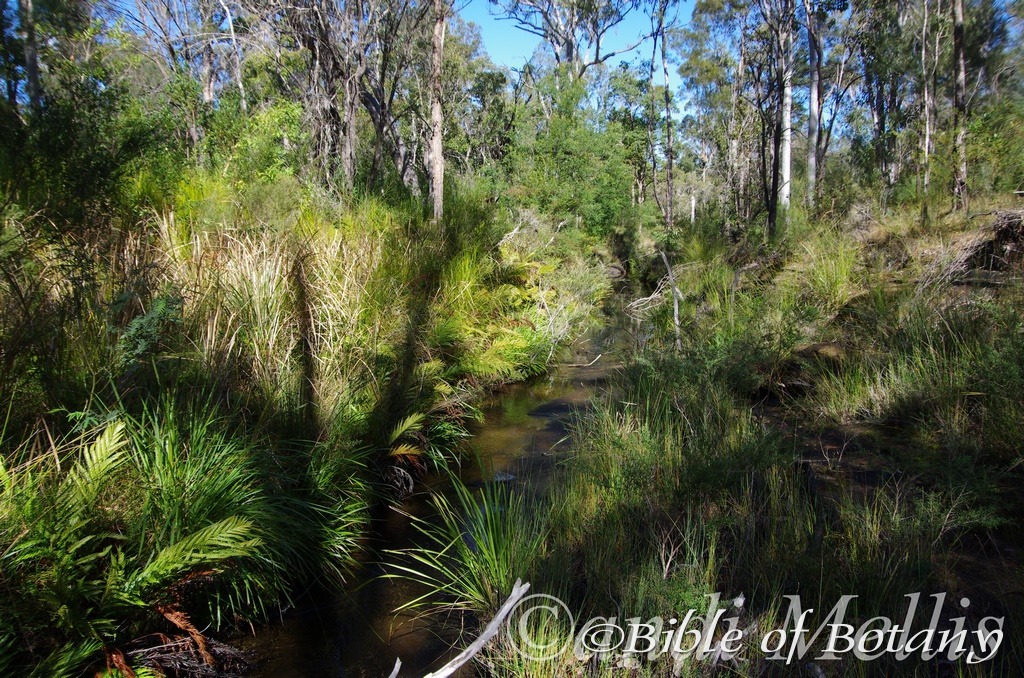
Banyabba National Park NSW
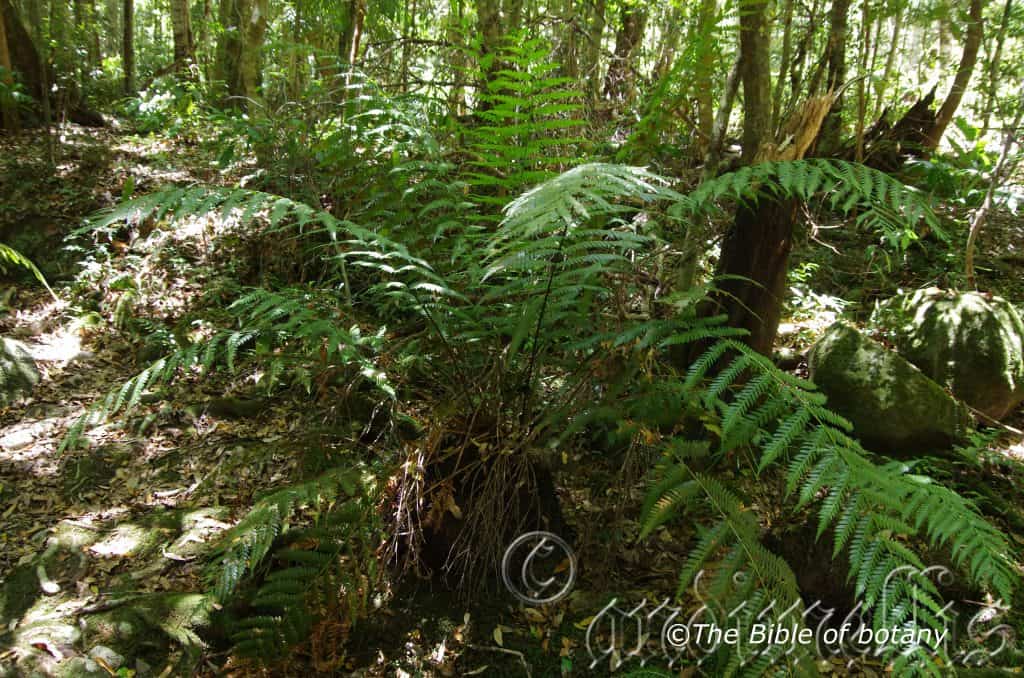
Washpool National Park Ebor NSW
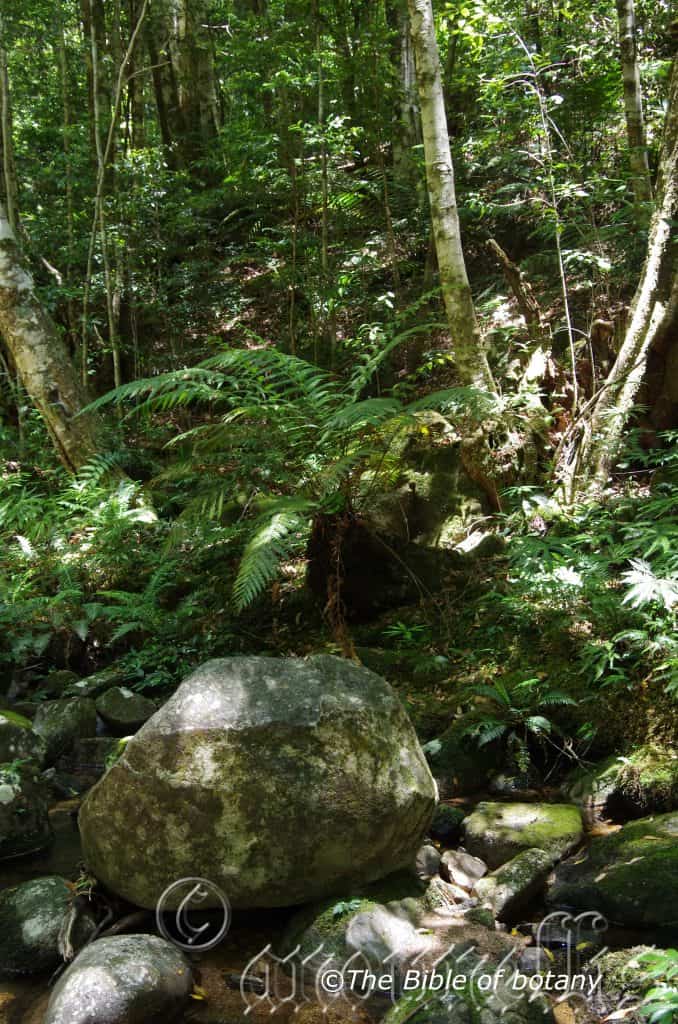
Washpool National Park Ebor NSW
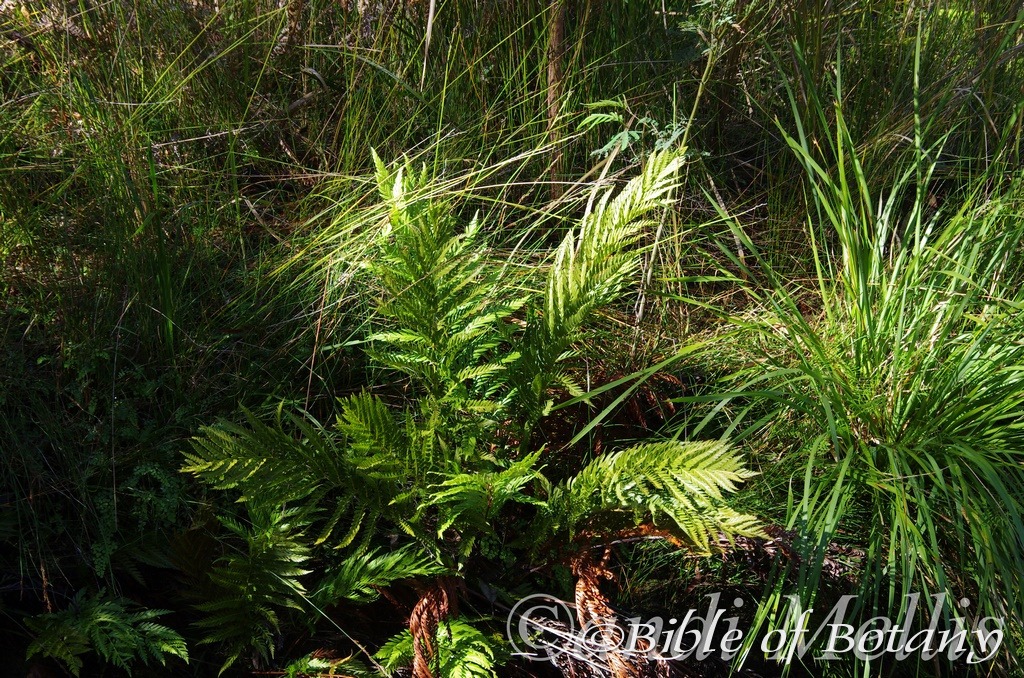
Banyabba National Park NSW
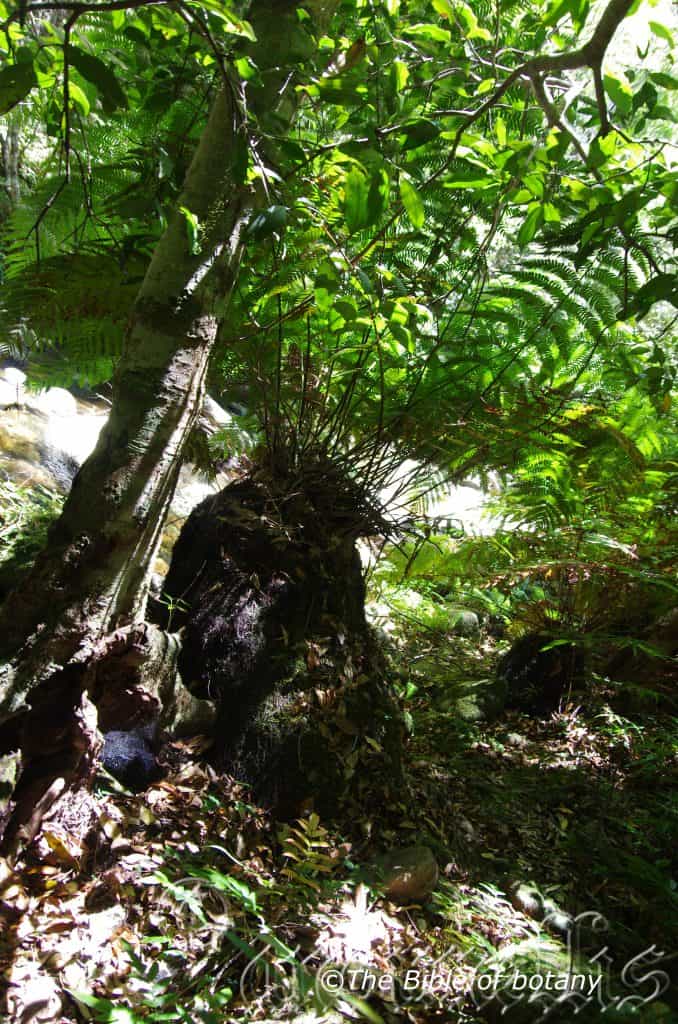
Washpool National Park Ebor NSW
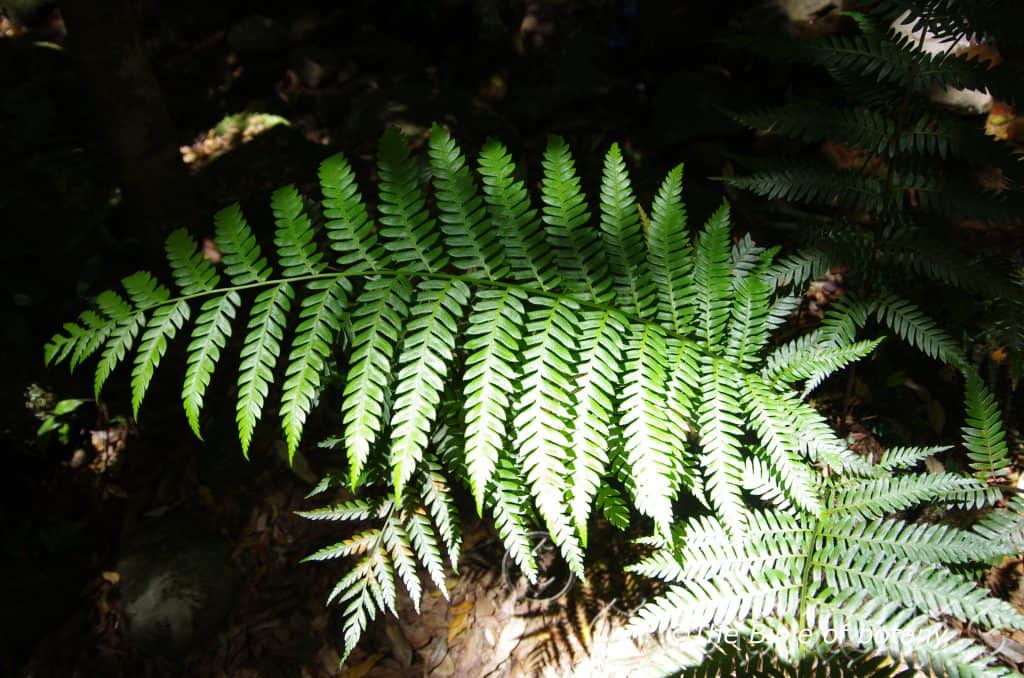
Washpool National Park Ebor NSW
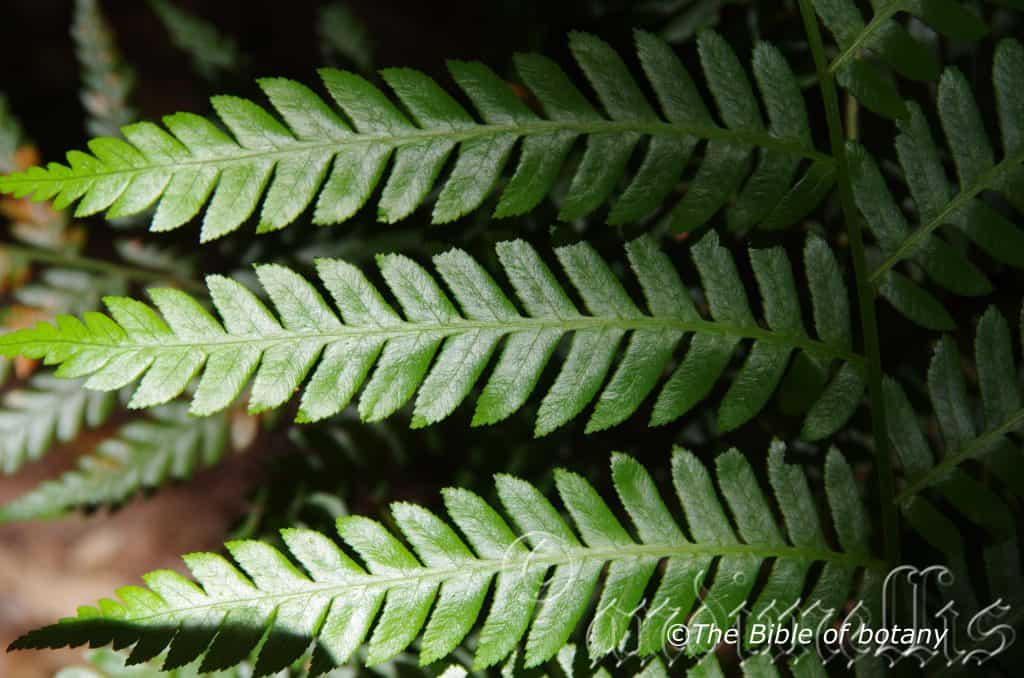
Washpool National Park Ebor NSW
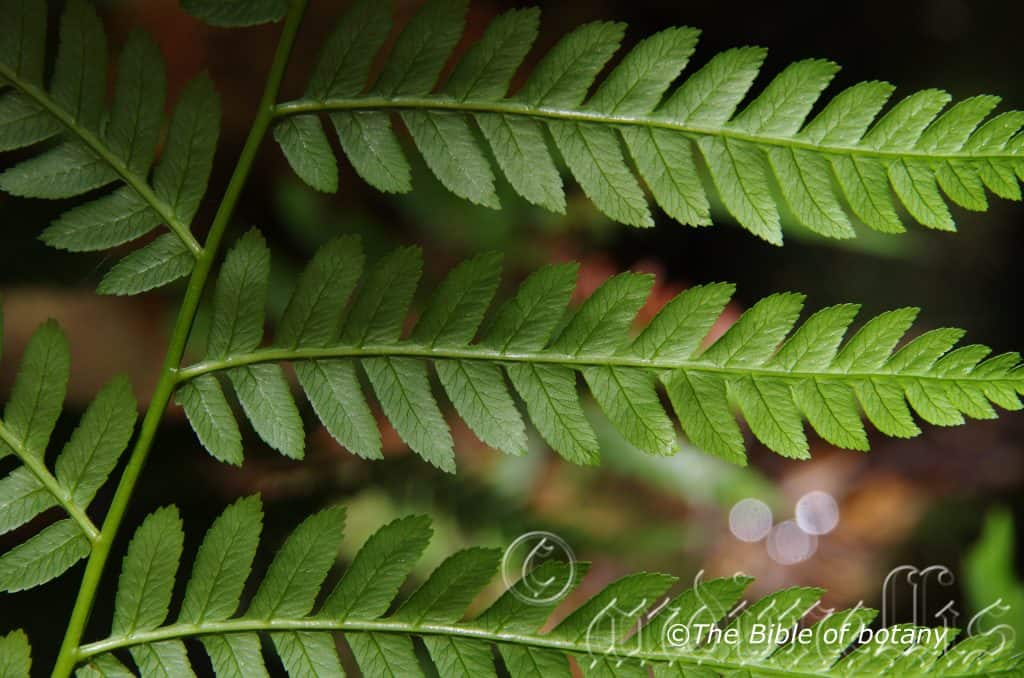
Washpool National Park Ebor NSW
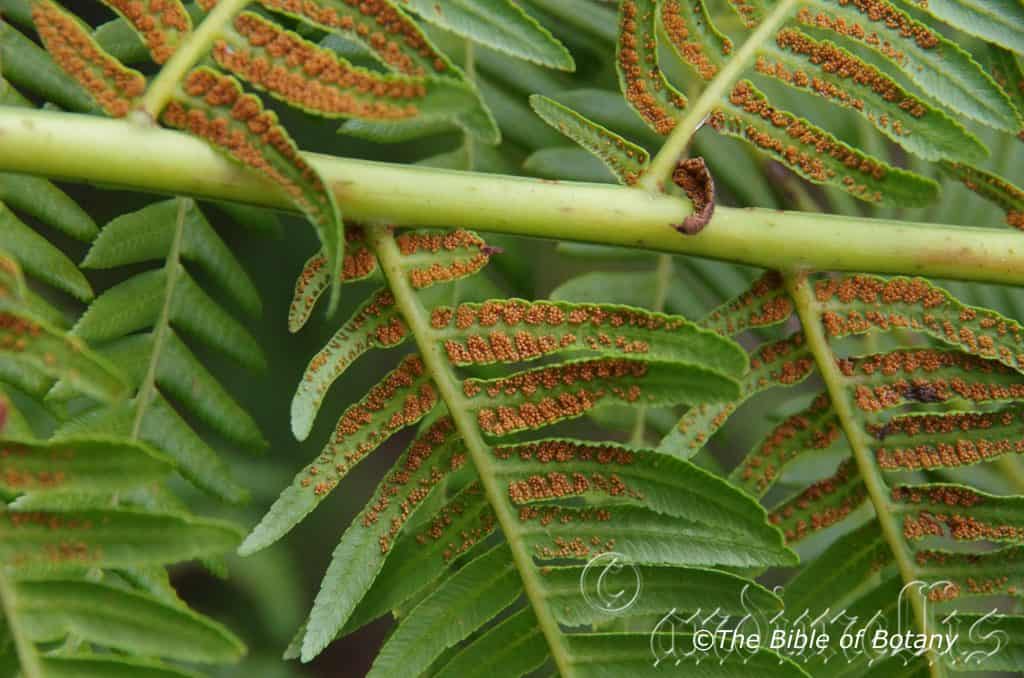
Washpool National Park Ebor NSW
Todea barbara
Classification:
Unranked: Tracheophyte
Ranked: Polypodiophyta
Class: Polypodiopsida
Order: Osmundales
Family: Osmundaceae
Genus: Is named in honour of Henrich Julius Tode; 1733-1797, who was a German clergyman, educator, botanist mycologist and cryptogamist.
Specie: From Barbātum, which is Latin for a beard or a barb. It refers to the barbs on the basal half of the rachis.
Common Name: King Fern.
Distribution:
Todea barbara is found in several disjunct populations south from the Daintree National Park in far northern Queensland to the Grampians in western Victoria and Kangaroo Island and the lower Flinders Rangers in South Australia. It is mainly found on and east of the Great Dividing Range.
It circumnavigates most of Tasmania including the Bass Strait Islands except for the south east corner.
https://avh.ala.org.au/occurrences/search?taxa=Todea+barbara#tab_mapView
Habitat Aspect Climate:
Todea barbara prefers light dappled shade to dense shade. It grows in well-developed cool moist subtropical rainforests and warm to cool moist temperate rainforests. It is usually found growing close to permanent water or even in rivulets, creeks, streams and rivers where seasonal inundations occur. The altitude ranges from 5 meters ASL to 900 meters ASL.
The temperatures range from minus 4 degrees in August to 34 degrees in January.
The rainfall ranges from lows of 500mm to an average of 2000mm. In the lower rainfall areas the plants favour ground where the moisture content of the soil is more even throughout the year and can be found growing as a lithophyte on rocks especially in creeks and streams.
Soil Requirements:
Todea barbara prefers poor to better quality river gravels, sands loams to medium clays. The soils are usually derived from decomposed basalts close to the parent rock. The soils are sandy loams to light medium clays. The soils pH ranges from 5.5pH to 6.5pH. It does tolerate waterlogged soils. Non saline soils to moderately saline soils are tolerated.
Height & Spread:
Wild Plants: 0.3m to 8m by 1m to 1.5m.
Characteristics:
Todea barbara’s rhizomes are very thick, long and measure 1000mm to 3000mm in length and 3400mm to 650mm in diameter. The deep grey-brown to deep brown rhizome is covered in deep brown to black caducous scales and has 2 or more crowns of fronds.
Todea barbara’s has simple bipinnate fronds. The fronds measure 500mm to 2500mm in length by 250mm to 600mm in width over all. The petioles, rachises and petiolules are lemon-green, to deep green or purple-green. The petioles measure 150mm to 800mm in length while the rachises measure 750mm to 1600mm in length and the petiolules measure120mm to 300mm in length. The 10 to 20 pairs of pinnae measure 10mm to 36mm in overall length by 4mm to 8mm in width. Both forms may be fertile or sterile. The laminas, rachises and petiolules are covered in pale fawn caducous hairs and scales.
The fertile fronds are similar to the sterile fronds with the lower 3 to 8 pairs of pinnae carrying the sori and spore. Todea barbara’s fruiting bodies measure 3mm to 5mm diameter and are circular. They form a single row adjacent to the costa with one between each of the main lateral veins each side of the mid vein. The sori cover the whole of the lower pinnae lamina.
Wildlife:
Todea barbara’s wildlife is unknown to the author however wild plants often have the fronds damaged.
Cultivation:
Todea barbara makes an excellent fern for bright filtered light to dense shade. It always looks green and fresh especially where adequate ground moisture is retained in the soil. It is very suitable on sandy loams to light sandy clays and is most suitable for small medium and large gardens close to the coast or high in the mountains. As garden subjects it must have a continuous supply of water, plenty of mulch and will eventually grow from 1 meter to 2 meters in height by 1 meter to 2 meters in diameter with several crowns of leaves.
It is most suitable for use as a rainforest understory plant. It prefers high soil fertility, good soil moisture and a cool root zone.
Propagation:
Fern Spores: All ferns that are declared rare, vulnerable or endangered are protected by Federal and State Laws and must not be removed from the wild unless you are a land developer, forestry, mining company or main Roads department etc. This includes bulbs, roots, leaves and flowers. No part of any plant can be removed from Federal, State or Local Government land without the prior permission of the authority and this includes the spore.
Most people are put off at the thought of growing ferns from spore. Like all plants that produce their offspring from seed or spore the methods are basically the same. Remember nature has been doing this for millions of years and has been very successful. I have had excellent results growing over 200 different species of Australian ferns so don’t be afraid. Give it a go.
The spores of Todea barbara can be removed easily from the fronds as the fertile fronds begin to yellow off. Cut and place a frond in a paper bag for a couple of days in a cool shady place. Remove the old frond and sow as soon as possible as the spore has a very short shelf life even if refrigerated.
Step 1. Select spore from the fern fronds. Wait until the fern is just starting to release its spore. Rinse the fronds under clean running water and dry. This is to wash off any other spores from rogue ferns that may have settled onto the fronds. (There is nothing worse than having common brake or common soft bracken contaminating a prized tree fern or epiphyte.)
Step 2. Place the dry fronds in a clean brown paper bag and keep them in a cool dark place like the linen closet for about a week to ten days before you are ready to sow the spore. The exception to this rule applies to ferns, which produce green spores. These must be sown immediately that they are released. Todea Barbara is a good example of a fern, which produces green spore.
Step 3. Take a large ice cream container, a small ice cream container and a clean clear plastic bag large enough to seal the large ice cream container and three or four milk bottle tops.
Step 4. Punch or drill 6 to 10 5mm holes in the bottom of the small ice cream container.
Step 5. Wash both containers, tops and plastic bag so that they are very clean and sterile.
Step 6. Use a clean fine seed raising mi. We used 30mm fine sand, 30mm peat and 30mm perlite and 10mm vermiculite. We used crushed basalt, crusher dust and peat in a 50:50 ratio for epiphytes. Moisten the mix enough that water does not run out when the mix is squeezed between the fingers.
Step 7. Place the moisten mix (Enough to half fill the small ice cream container) in the microwave oven with a large glass of water for 7 or 8 minutes, until the water is boiling. Allow them to cool in the oven. You will need the water later so do not tip it out.
Step 8. Take the brown paper bag out of the linen closet. Shake the bag and remove the fronds. You should have a yellow, brown, black or rarely greenish brown or ochre powder or very fine, small round pin head size spore depending on the specie involved.
Step 9. Remove the mixture from the oven once it has cooled and place it in the small ice cream container and level.
Step 10. Sprinkle the spore sparsely over the mixture in the small ice cream container.
Step 11. Place the milk bottle tops in the large ice cream container with the flat surface facing down. Place the small ice cream container in the large ice cream container so that it is sitting on the milk bottle tops.
Step 12. Remove the water from the microwave and pour it into the larger ice cream container so there is 25mm to 30mm of water in the bottom.
Step 13. Place the ice cream containers in the plastic bag and seal. Step 14. Place the contents and bag in a warm shady place preferably 50mm to 70mm shade depending on the specie. Shade houses and some window sills are ideal.
Step 15. The surface should turn green within a week to two weeks. The prothallus will then develop. From the prthalus the first true fronds will appear. Wait until the ferns are 20mm to 35mm in height before you attempt to transplant them. Once they are ready open the bag up slightly and allow the air to flow around the little ferns. Every 3 to 5 days open the bag a little further so the ferns get use to their new environment. Allow them a week to two weeks to harden off before you transplant them following the removal of the plastic bag. Carefully prick them out into 50mm standard squat tubes as you would any seedling.
Do not try to transplant them as single plants as they are still a little delicate still.
Once the smaller ones again reach 50mm to 70mm you may wish to divide the stronger and hardier individual plants into smaller clumps in 100mm squat pots.
Step 16. We fertilized with seaweed, fish emulsion or organic chicken pellets soaked in water on an alternate basis until established. Fertilize every two months for one year even when in the ground at half the recommended strength..
Further Comments from Readers:
“Hi reader, it seems you use The Bible of Botany a lot. That’s great as we have great pleasure in bringing it to you! It’s a little awkward for us to ask, but our first aim is to purchase land approximately 1,600 hectares to link several parcels of N.P. into one at The Pinnacles NSW Australia, but we need your help. We’re not salespeople. We’re amateur botanists who have dedicated over 30 years to saving the environment in a practical way. We depend on donations to reach our goal. If you donate just $5, the price of your coffee this Sunday, We can help to keep the planet alive in a real way and continue to bring you regular updates and features on Australian plants all in one Botanical Bible. Any support is greatly appreciated. Thank you.”
In the spirit of reconciliation we acknowledge the Bundjalung, Gumbaynggirr and Yaegl and all aboriginal nations throughout Australia and their connections to land, sea and community. We pay our respect to their Elders past, present and future for the pleasures we have gained.
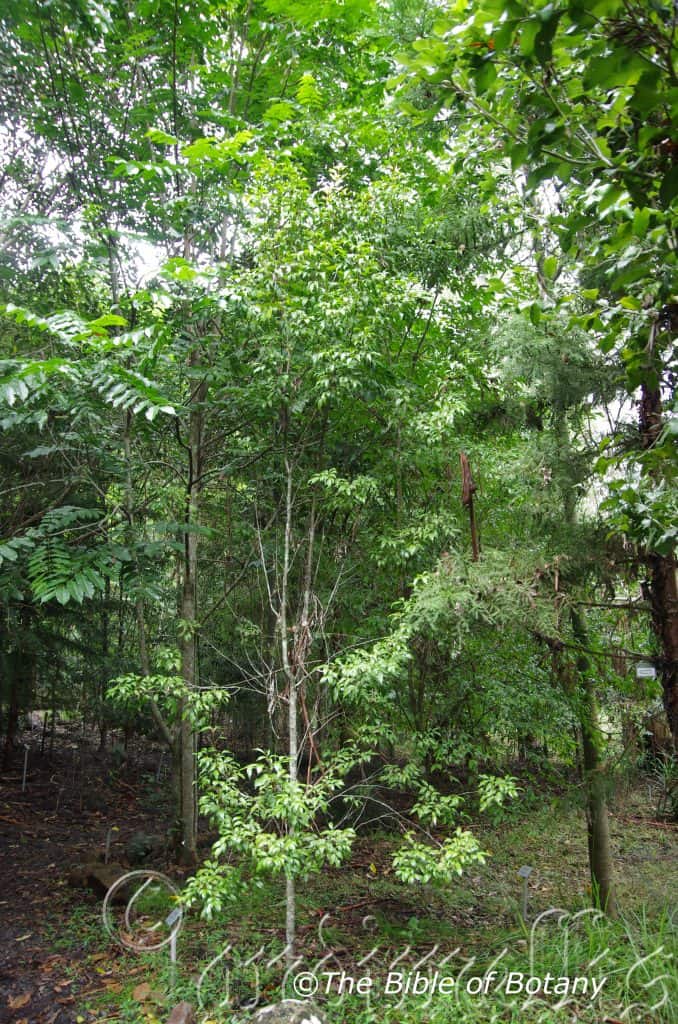
LBG Lismore NSW
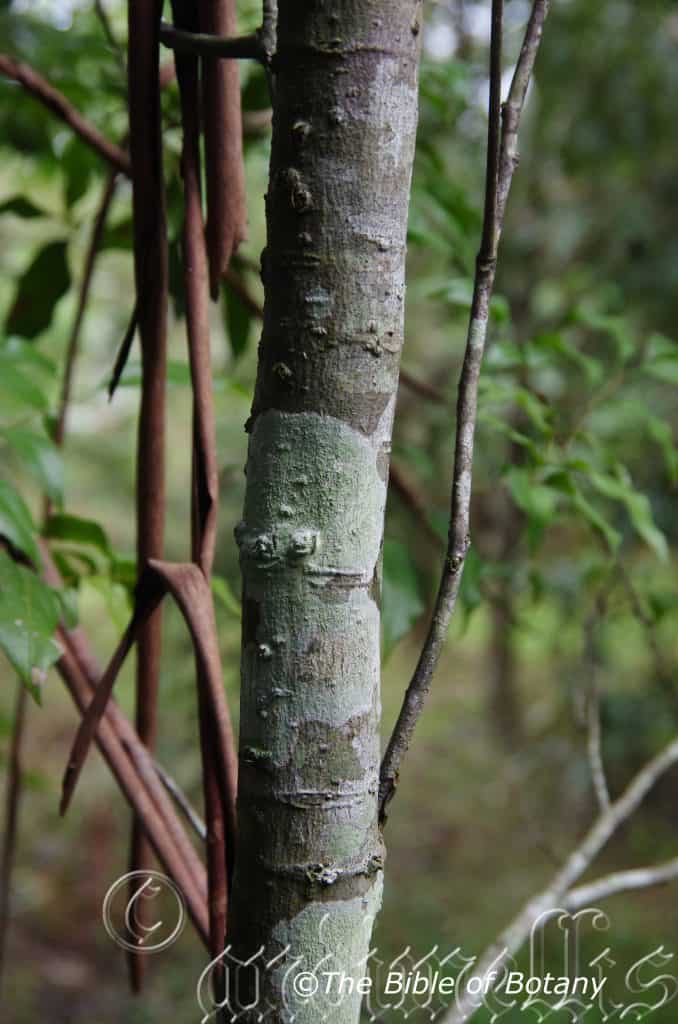
Rosser Garden’s Benowa Qld.
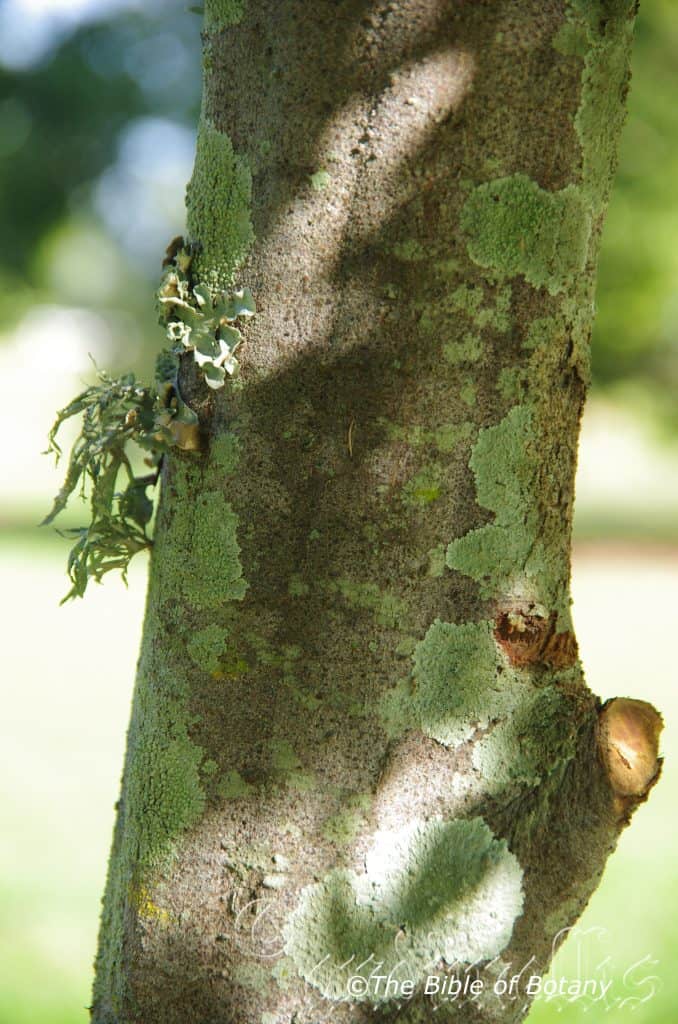
LBG Lismore NSW
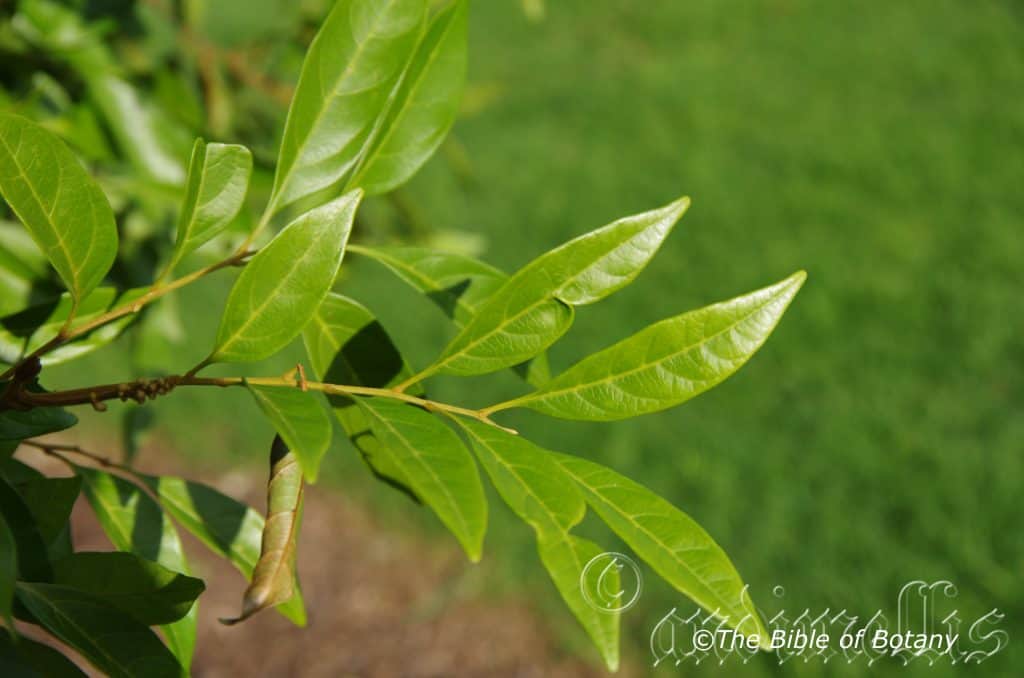
Rosser Garden’s Benowa Qld.
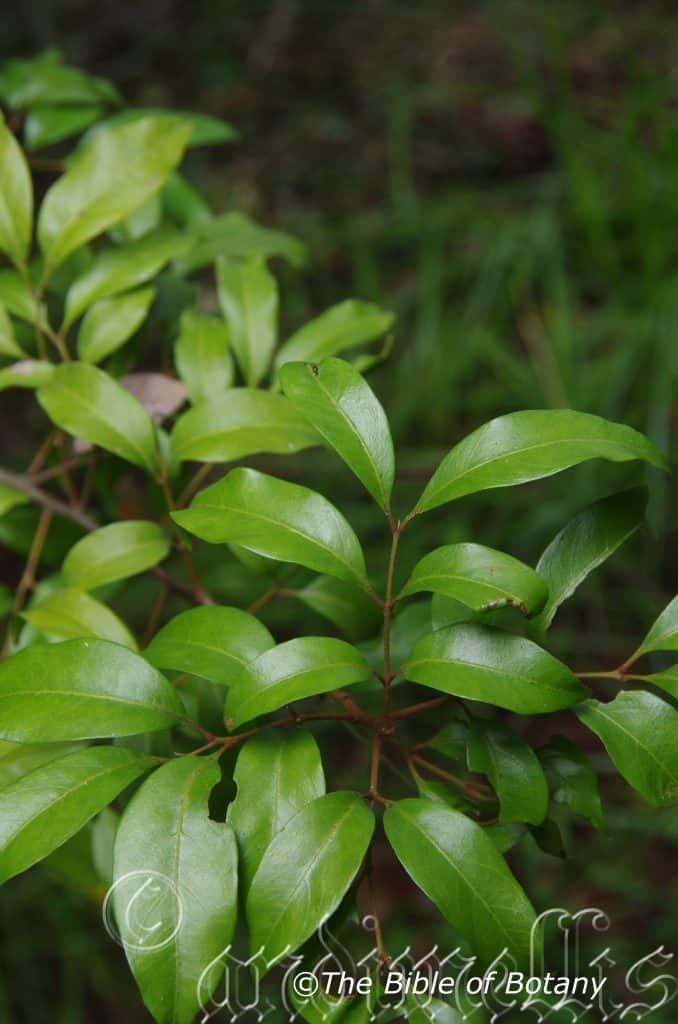
LBG Lismore NSW
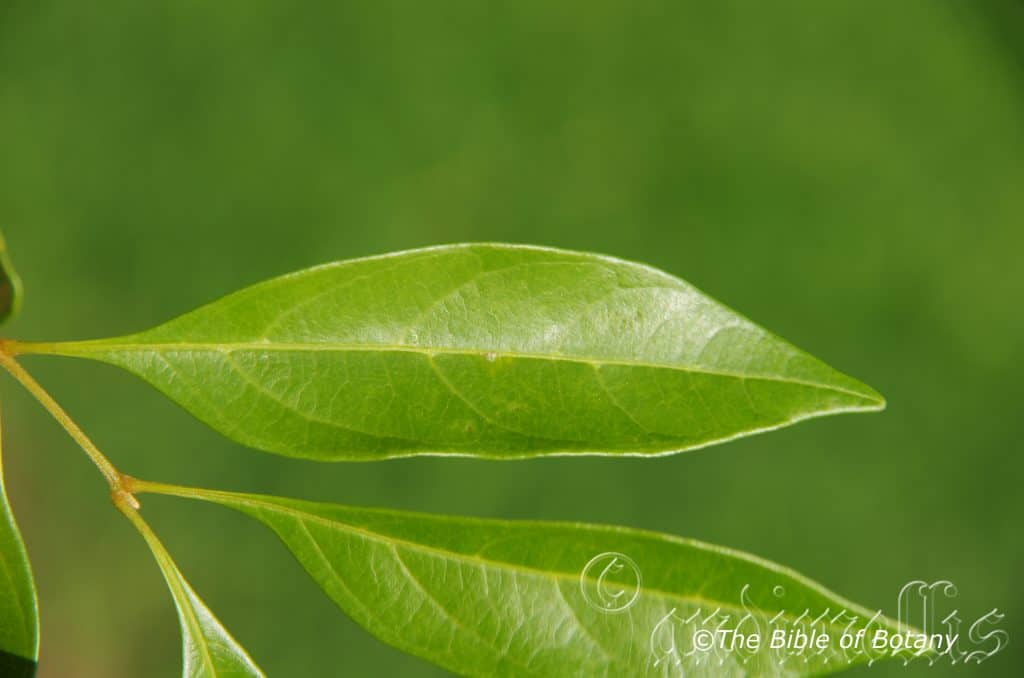
Rosser Garden’s Benowa Qld.
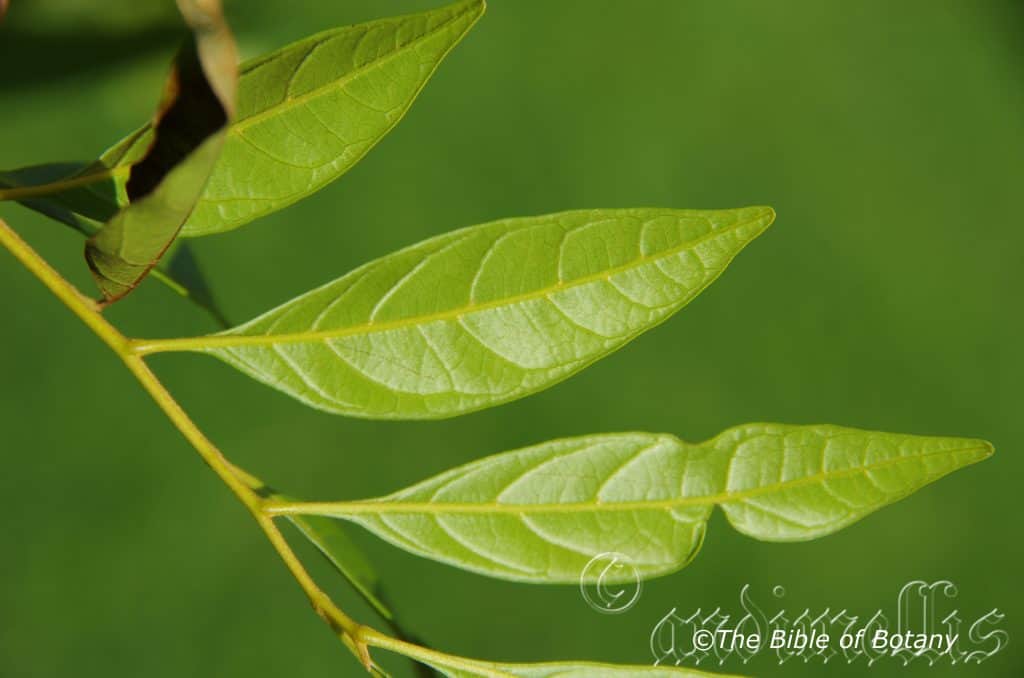
Rosser Garden’s Benowa Qld.
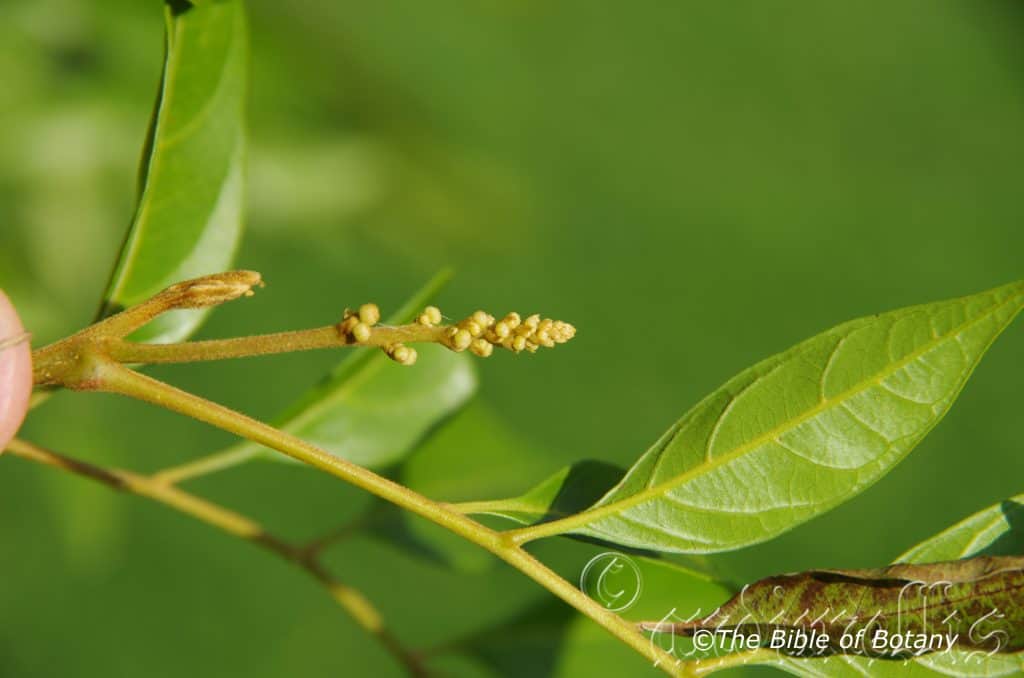
Rosser Garden’s Benowa Qld.
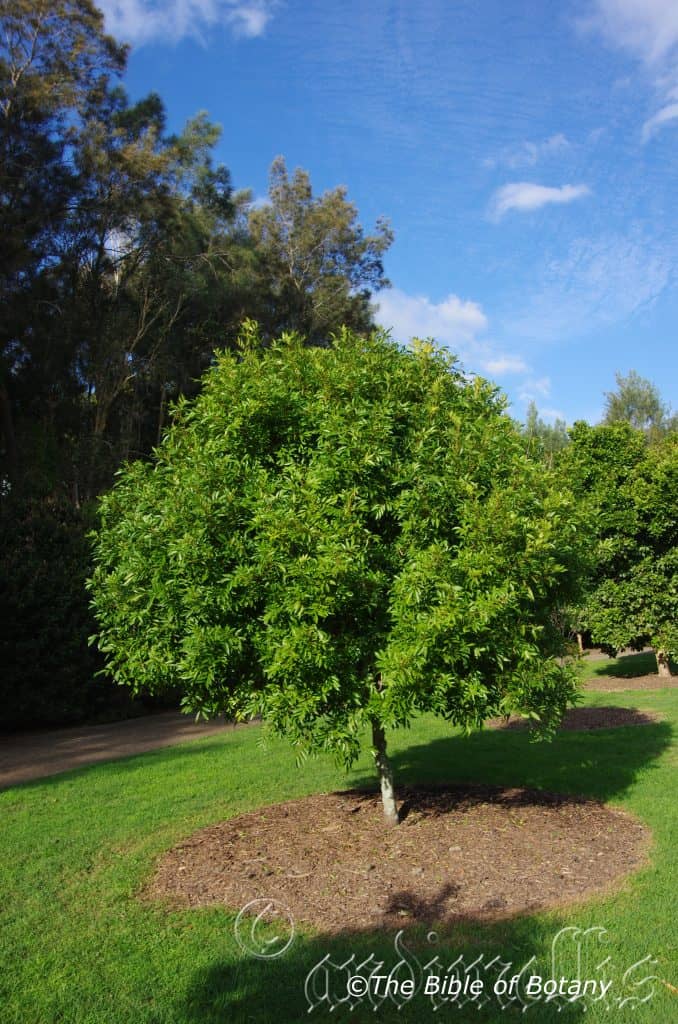
Rosser Gardens Benowa Qld.
Toechima dasyrrhache
Classification:
Unranked: Eudicots
Class: Rosids
Order: Sapindales
Family: Sapindaceae
Genus: From Toichos, which is Ancient Greek for a wall and Ima, which is Ancient Greek for a cloak. It refers to sepals on the fruits inner surface, which resembles a cloak covered in short soft pubescent hairs.
Specie: From Dasys, which is Greek scruffy, shaggy or not neat and Rachis, which is Ancient Greek for a leaf or flower stalk. It refers to the young stems and rachis.
Sub specie:
Common Name: Blunt Leaved Steelwood.
Distribution:
Toechima dasyrrhache is found in several disjunct populations on and east of the Great Dividing Range. It is found south of Miriam Vale in south east Queensland to Victoria Park National Park near Narrabri in New South Wales.
https://avh.ala.org.au/occurrences/search?taxa=Toechima+dasyrrhache#tab_mapView
Habitat Aspect Climate:
Toechima dasyrrhache prefers full shade, dappled light shade to full sun. It grows in well-developed subtropical rainforests. The altitude ranges from 30 meters ASL to 230 meters ASL.
The temperatures range from minus 2 degrees in July to 36 degrees in January.
The rainfall ranges from lows of 1200mm to 200mm average per annum.
Soil Requirements:
Toechima dasyrrhache prefers better quality medium clays. The soils are usually derived from decomposed black basalts. The soils pH ranges from 5pH to 6.5pH. It does not tolerate waterlogged soils. Non saline soils to moderately saline soils are tolerated.
Height & Spread:
Wild Plants: 15m to 18m by 8m to 10m.
Characteristics:
Toechima dasyrrhache grows as a small tree with an erect pale grey trunk. The trunk is very finely fissured with horizontal raised sections. The branchlets are brownish turning olive brown near their apexes and are moderately covered in rusty-brown villous hairs.
The alternate, even pinnate leaves measure 80mm to 180mm in length by 60mm to 120mm in width. The 4 to 10 narrow elliptical to elliptical leaflets measure 20mm to 70mm in length by 10mm to 30mm in width. The petiole are pale green to olive green often tinged reddish and are sparsely to moderately covered in rusty-brown villous hairs. The petioles measure 20mm to 40mm in length while the rachis measures 0mm to 100mm in length and the petiolules 3mm to 6mm in length. The asymmetrical bases are cuneate and decurrent on the petiole while the apexes are acuminate.
The discolourous laminas are deep green, dull and glabrous on the upper lamina while the lower lamina is paler and glabrous or sparsely to moderately covered in rusty-brown villous hairs. The new growth is pale bright glossy green and are glabrous or sparsely to moderately covered in rusty-brown villous hairs. The laminas are undulating, flat or recurve slightly from the midvein to the margins and are straight or undulating and decurve from the base to the apex or decurve from the base to mid-point or decurve from the mid-point to the apex. The margins are entire. The mid vein and 10 to 12 pinnate, lateral veins are prominent on the lower laminas and are distinctly visible from the upper laminas. The domatia when present are minute and are covered in small tufts of rusty-brown villous hairs.
The inflorescences are born in loose panicles born from the upper leaf axils or the terminals. The panicles measure 10mm to 80mm in length by 30mm to 120mm in diameter. The peduncles, rachises, pedunculate and pedicels are olive–green to green and often tinged reddish are usually sparsely to moderately covered in rusty-brown villous hairs or at times glabrous. The peduncles measure 5mm to 15mm in length, the rachises measure 5mm to 65mm in length, while the pedunculates measure 10mm to 30mm in length and the pedicels measure 4mm to 6mm in length. The pastel fawnish-yellow or creamy calyx and calyx lobes are sparsely to moderately covered in rusty-brown villous hairs or at times glabrous externally and are glabrous internally. The calyx measures 0.6mm to 1.2mm in length while the triangular lobes measure 0.5mm to 1mm in length. The 5 white petals are orbicular and measure 2mm to 3.5mm in length.
The 7 erect, stamens are free for their entire length and are inserted into the yellow disc below the ovary. The white filaments measure 5mm to 5.5mm in length. The pale yellow dorsifixed anthers measure 0.6mm in diameter.
The bright yellow styles are sessile or shortly pedicellate. The stigmas measure 1mm to 1.2mm in diameter. The flowers appear from early September to mid-November.
The fruits are trigonous-spherical capsules. The capsules are glabrous and measure 10mm to 20mm in length by 12mm to 24mm in diameter. The mid green capsules turn orange-red to orangey-red when ripe. The style turns orange-yellow and is persistent on the ripe fruit. The usually 3 spherical, black glossy seeds measure 6mm to 7mm in length by 6mm to 6mm in diameter. The seeds fusiform aril is pale yellow.
Wildlife:
Toechima dasyrrhache wildlife is unknown to the author.
Cultivation:
Toechima dasyrrhache is a good small tree that can be grown in association with other small rainforest specie or as a small park feature tree. It is ideal at the edge of a rainforest or deep in the center of the rainforest. It also makes a great park tree offering quick growth and good shade for the children to play beneath. In cultivation it grows from 10 meters to 12 meters in height by 9 meters to 12 meters in diameter when grown in the open or taller and narrower if grown closer together as a rainforest tree.
It grows exceptionally well on lighter soils where deep leaf litter keeps the soil cool and moisture at an even level. If these requirements are met they can cope with temperatures as low as minus 3 degrees and up to 40 degrees though tip burning and slow growth is attained in the early years until the trees manage to outgrow the highest frosts. It is moderately drought resistant once established.
Add to the above, if it is given an adequate supply of water and a little native fertilizer on a regular basis the plants should respond with good flowering and fruit over a long period.
It would make a very good accent tree in front of low set commercial buildings, industrial sheds, school buildings or low set homes where it will break up hard rigid architectural lines and give warmth and breadth to a building. In front of high rise buildings it would give balance especially where it could be grown in curves meandering to the entry doors or on the nature strip.
The trunks can be a feature especially when mixed with other small rainforest trees like Cupaniopsis anacharioides, Harpullia pendula, Elaeocarpus reticulatus or small Corymbia like Corymbia curtisii or Corymbia ptycocarpa.
Propagation:
Seeds: The seeds can be removed easily from the fruits. The seeds have a short viability so should be sown as soon as possible.
Sow fresh seeds directly into a seed raising mix, keeping them moist not wet. Do not over water as the seeds will rot off before germination takes place. Place the trays in a cool shaded area with 50mm shade cloth in the bush house. When the seedlings are 20mm to 25mm tall, prick them out and plant them into 50mm native tubes using a good organic mix.
As the seedlings roots reach the bottom of the tubes plant them out into their permanent position. Do not delay.
Fertilize using Seaweed, fish emulsion or organic chicken pellets soaked in water and apply the liquid on an alternate basis. Fertilize every 2 months until the plants are well established then on an annual basis in September or October to maintain good health, vigour and better flowering.
Further Comments from Readers:
“Hi reader, it seems you use The Bible of Botany a lot. That’s great as we have great pleasure in bringing it to you! It’s a little awkward for us to ask, but our first aim is to purchase land approximately 1,600 hectares to link several parcels of N.P. into one at The Pinnacles NSW Australia, but we need your help. We’re not salespeople. We’re amateur botanists who have dedicated over 30 years to saving the environment in a practical way. We depend on donations to reach our goal. If you donate just $5, the price of your coffee this Sunday, We can help to keep the planet alive in a real way and continue to bring you regular updates and features on Australian plants all in one Botanical Bible. Any support is greatly appreciated. Thank you.”
In the spirit of reconciliation we acknowledge the Bundjalung, Gumbaynggirr and Yaegl and all aboriginal nations throughout Australia and their connections to land, sea and community. We pay our respect to their Elders past, present and future for the pleasures we have gained.
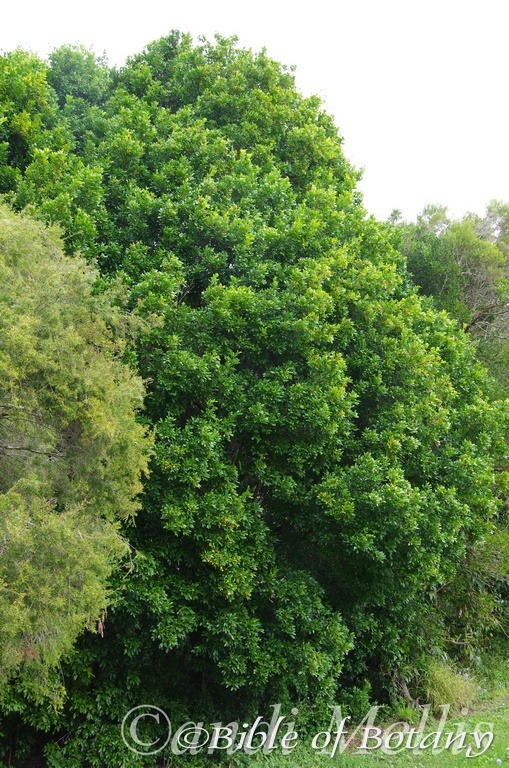
Indigiscapes Capalaba Qld.
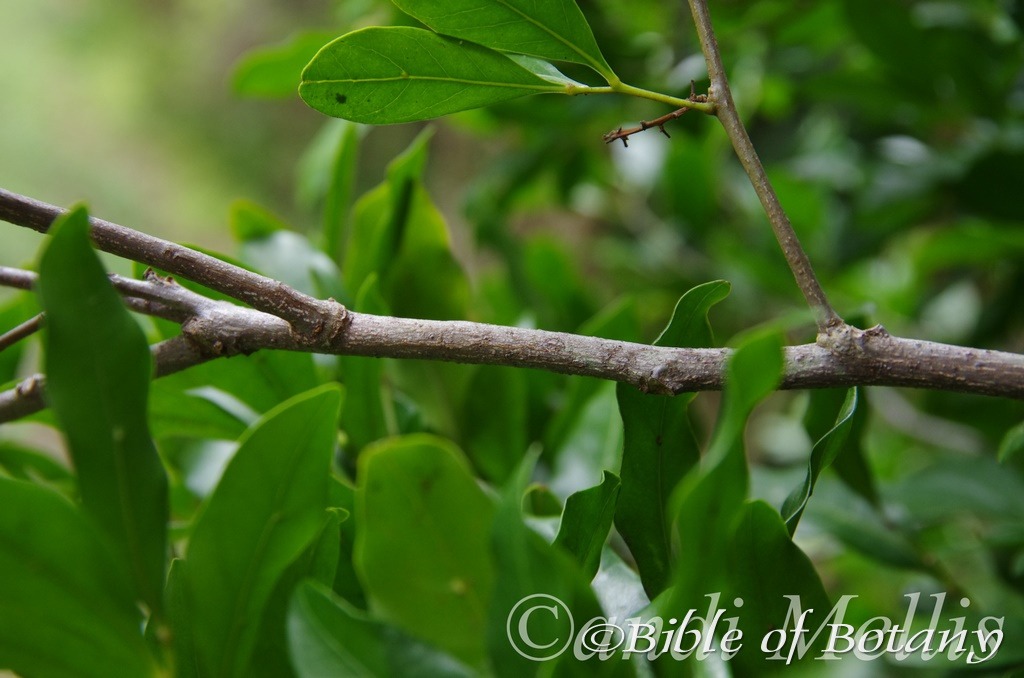
Indigiscapes Capalaba Qld.
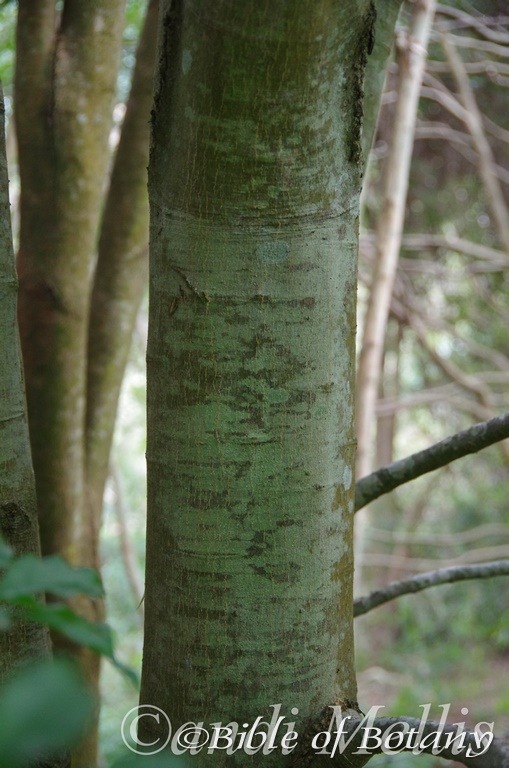
Indigiscapes Capalaba Qld.
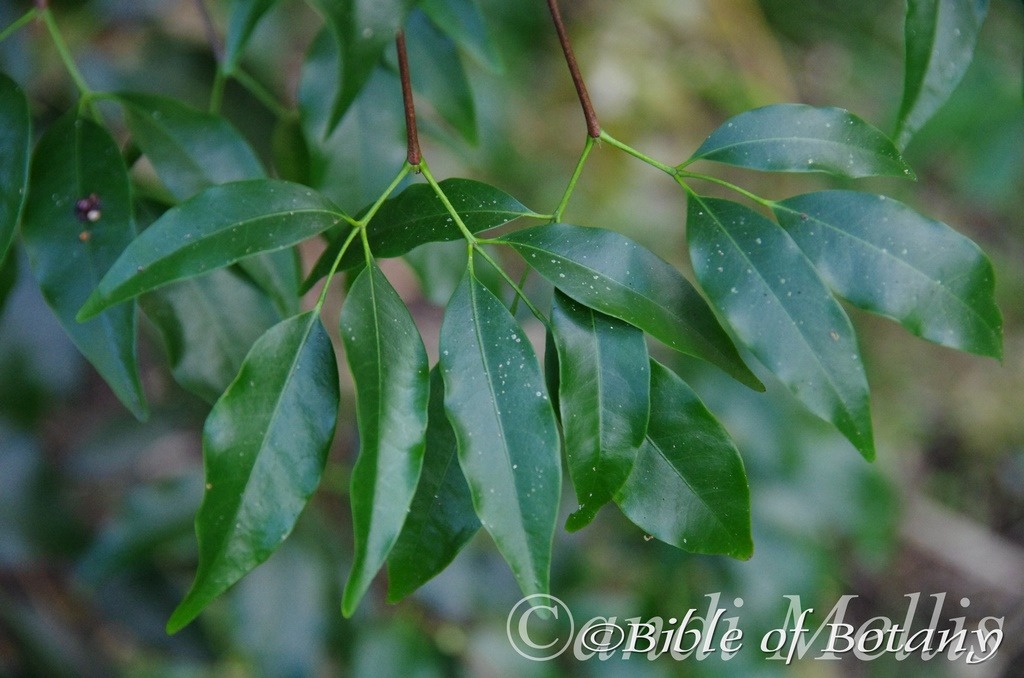
Mount Cootha Botanical Gardens Qld.
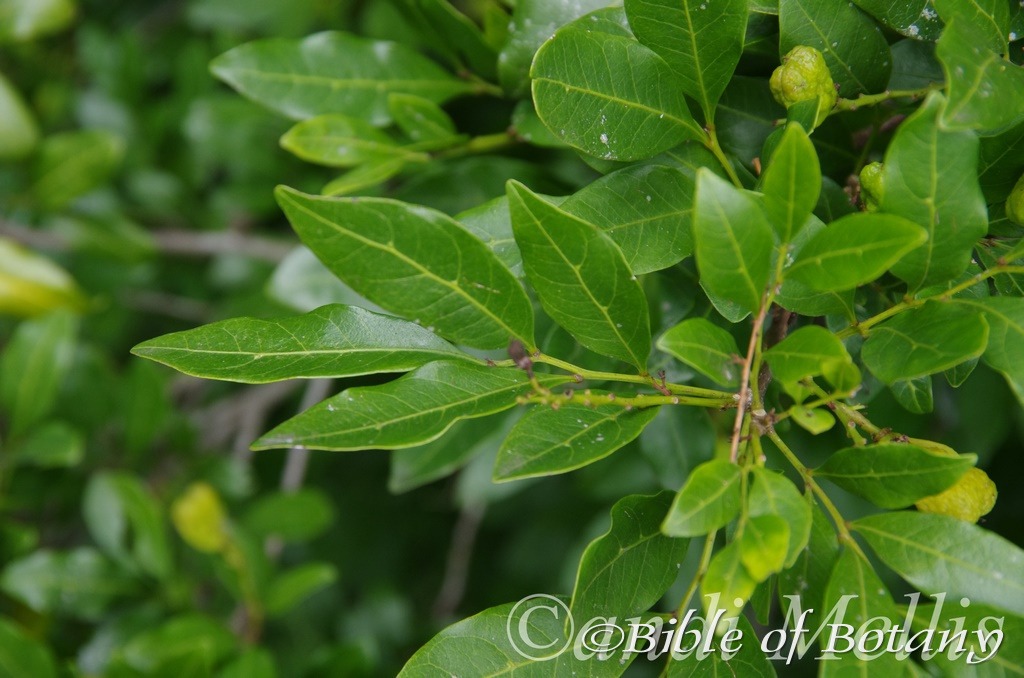
Indigiscapes Capalaba Qld.
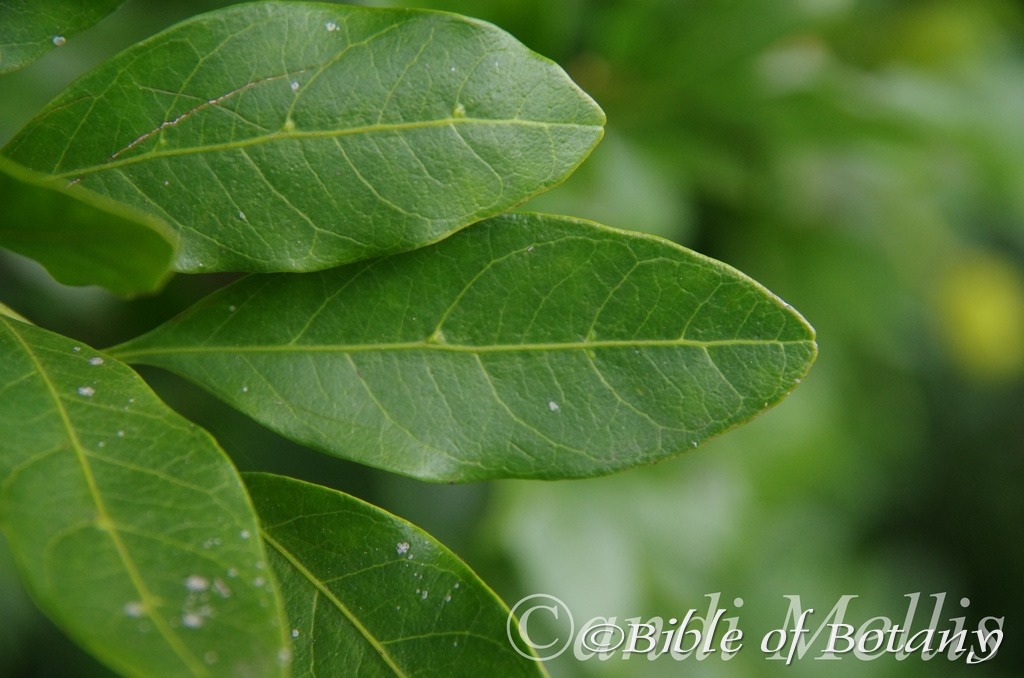
Indigiscapes Capalaba Qld.
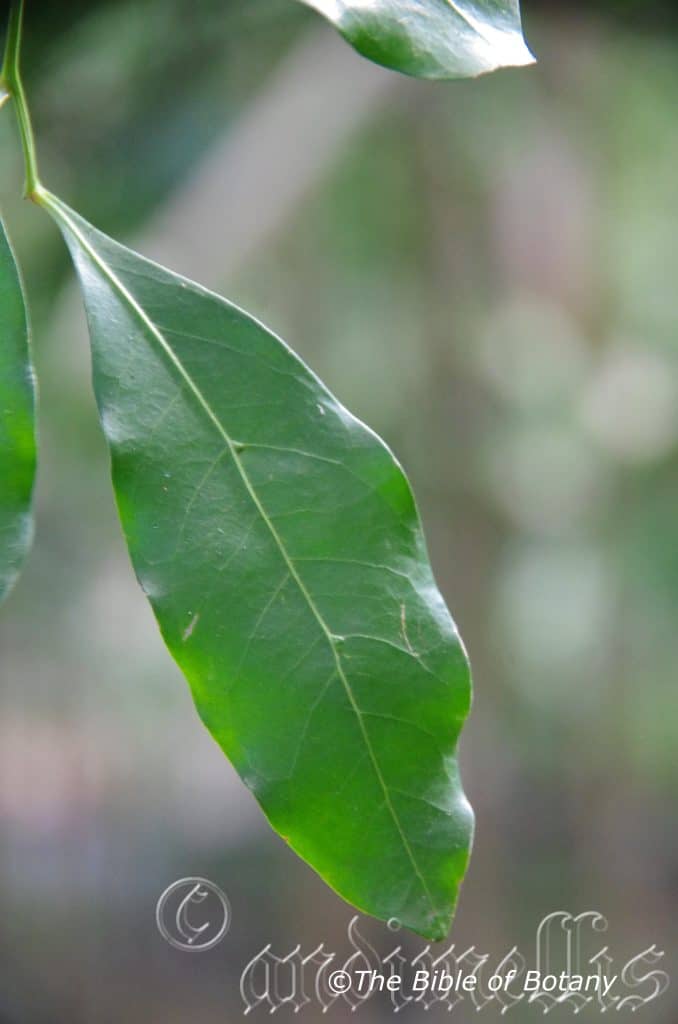
LBG Lismore NSW
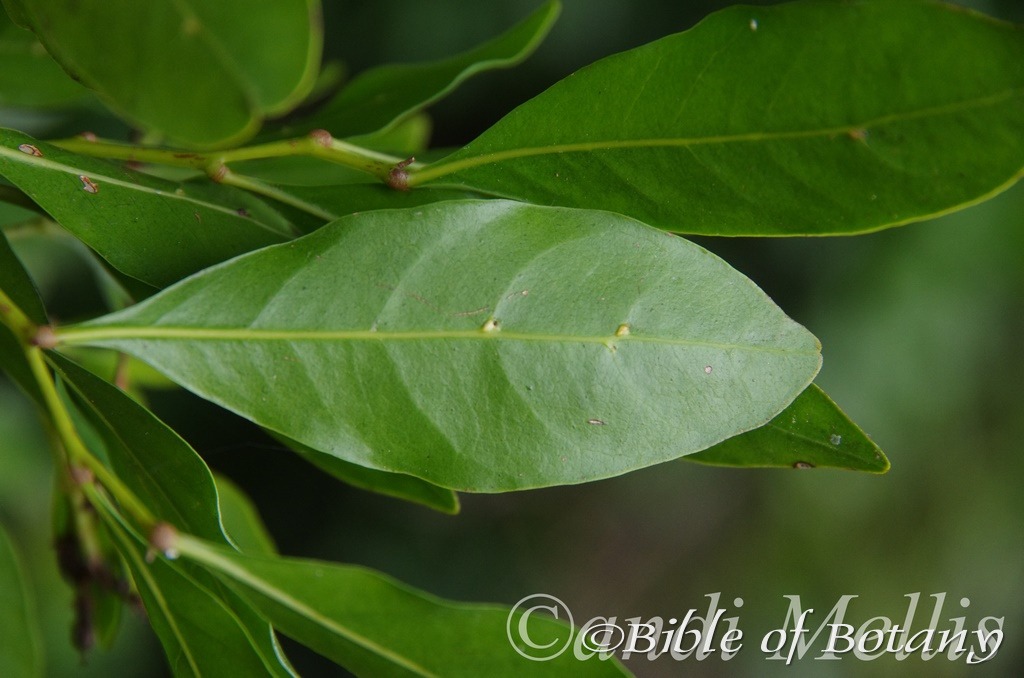
Indigiscapes Capalaba Qld.
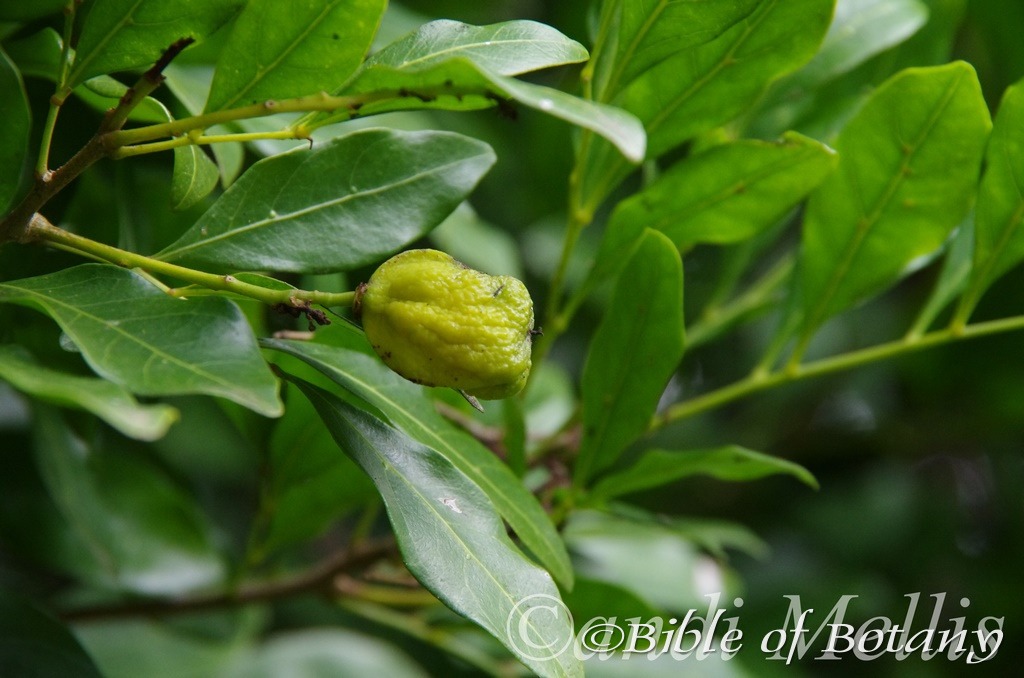
Indigiscapes Capalaba Qld.
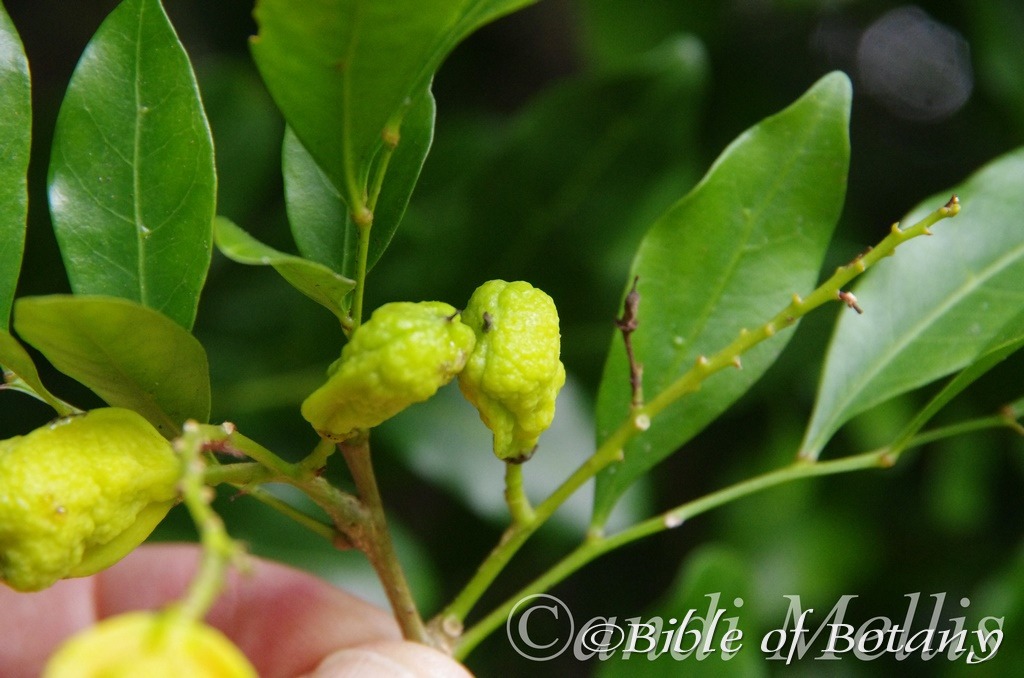
Indigiscapes Capalaba Qld.
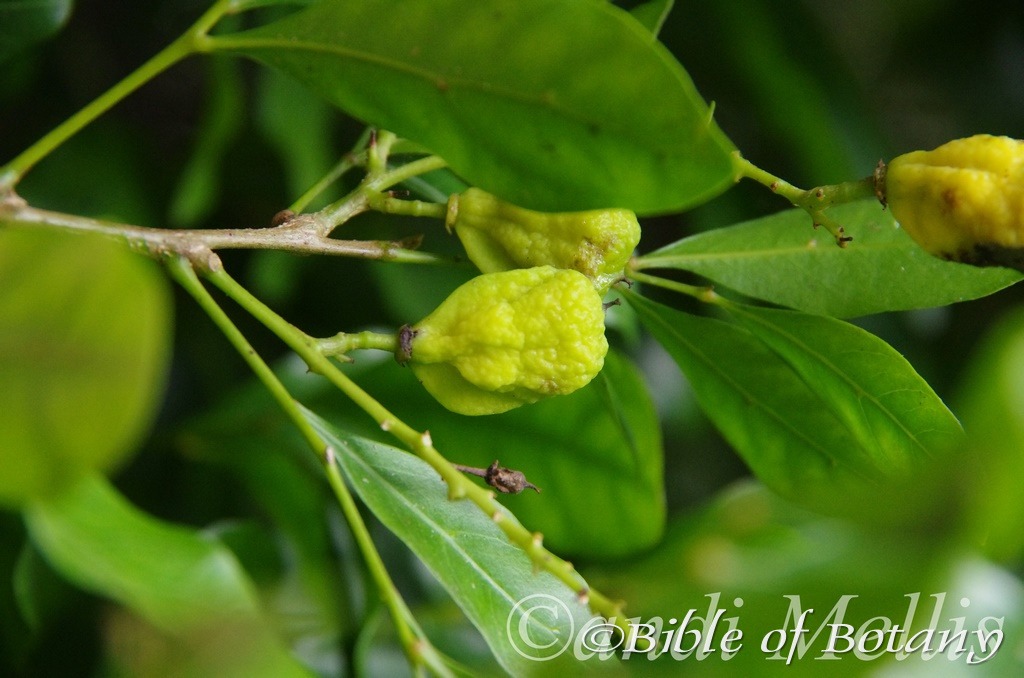
Indigiscapes Capalaba Qld.
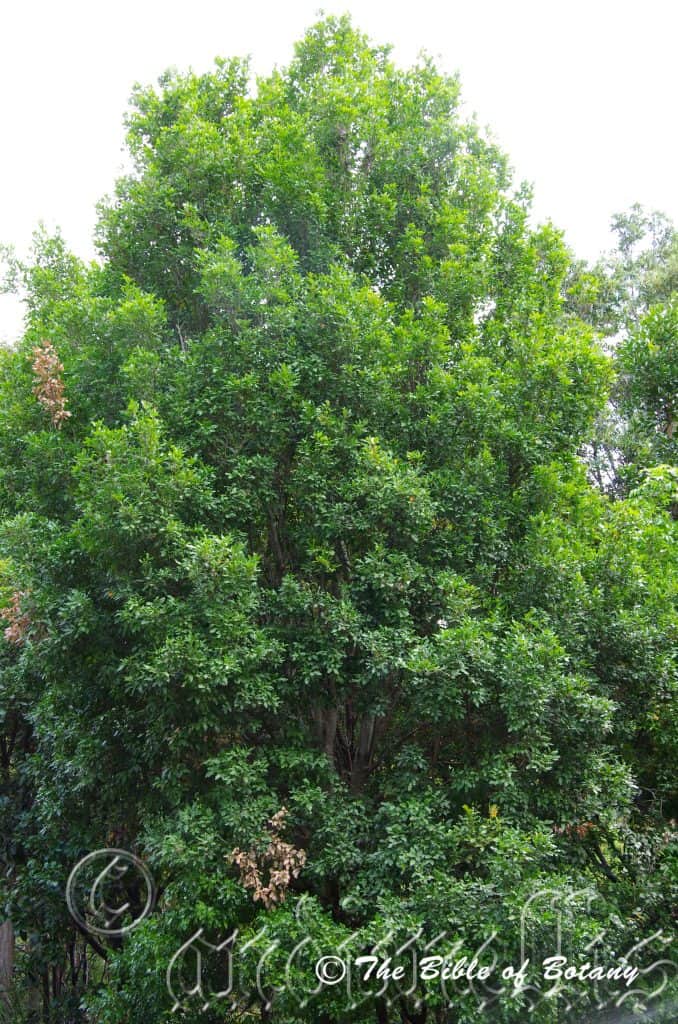
Mount Cootha Botanical Gardens Qld.
Toechima tenax
Classification:
Unranked: Eudicots
Class: Rosids
Order: Sapindales
Family: Sapindaceae
Genus: From Toichos, which is Ancient Greek for a wall and Ima, which is Ancient Greek for a cloak. It refers to sepals on the fruits inner surface, which resembles a cloak covered in short soft pubescent hairs.
Specie: From Tenax, which is Latin for tough or tenacious. It refers to plants which have the ability once capturing its prey never letting it get away or living in harsh habitats where other plants cede.
Sub specie:
Common Name: Brush Teak.
Distribution:
Toechima tenax is found in several disjunct populations on and east of the Great Dividing Range. It is found south from Coen in far north Queensland to Milton in New South Wales.
https://avh.ala.org.au/occurrences/search?taxa=Toechima+tenax#tab_mapView
Habitat Aspect Climate:
Toechima tenax prefers dense shade to medium shade or dappled light shade to full sun. It grows in well-developed rainforests. The altitude ranges from 5 meters ASL to 250 meters ASL.
The temperatures range from 2 degrees in July to 34 degrees in January.
The rainfall ranges from lows of 800mm to 3200mm average per annum.
Soil Requirements:
Toechima tenax prefers better quality loams to medium clays. The soils are usually derived from decomposed brown basalts, black basalts or shale. The altitude ranges from 11 meters ASL to 11 meters ASL.
The soils pH ranges from 5pH to 6.5pH. It does not tolerate waterlogged soils. Non saline soils to moderately saline soils are tolerated.
Height & Spread:
Wild Plants: 15m to 20m by 10m to 12m.
Characteristics:
Toechima tenax grows as a small tree with an erect pale grey trunk. The trunk is very finely fissured with horizontal raised sections. The branchlets are brownish turning mid green near their apexes and are usually glabrous or at times are sparsely covered in fine white puberulent hairs.
The even pinnate leaves measure 50mm to 150mm in length by 60mm to 100mm in width. The 2 to 6 obovate to elliptical alternate, disjunct leaflets measure 30mm to 60mm in length by 10mm to 30mm in width. The mid green petiole, rachis and petiolules are usually glabrous or very rarely sparsely covered in fine white caducous, puberulent hairs. The petioles measure 10mm to 30mm in length while the rachis measures 0mm to 40mm in length and the petiolules 2mm to 5mm in length. The asymmetrical, oblique bases are tapering to attenuate while the apexes are obtuse, tapering obtuse to acuminate even on the same stem. The discolourous laminas are mid green, semi glossy and glabrous on the upper lamina while the lower laminas are paler. The new growth is pale, bright, glossy green and glabrous. The laminas are flat, straight and undulating while the margins are entire. The obtuse mid vein is prominent on the lower lamina and is distinctly visible from the upper laminas. The usually 3 or at times 2 or 4 domatia are very prominent as sunken depressions on the lower laminas which are distinctly visible from the upper laminas.
The inflorescences are born in loose pendant, panicles born from the upper leaf axils or the terminals. The panicles measure 30mm to 80mm in length by 30mm to 40mm in diameter. The peduncles, rachises, pedunculate and pedicels are mid green and glabrous. The peduncles measure 10mm to 15mm in length, the rachises measure 20mm to 60mm in length, while the pedunculates measure 8mm to 14mm in length and the pedicels measure 5mm to 8mm in length. The mid green calyxes are glabrous. The 7 dimorphic white petals are densely covered in white pilose hairs especially on the basal half. The petals measure 1mm to 2.5mm in length by 1mm to 2.5mm in width.
The 5 stamens are free for their entire length and are inserted into the green disc below the style. The dimorphic, white filaments are densely covered in white pilose hairs on the basal half and measure 2mm to 3mm in length. The brownish basifixed anthers are longitudinally 4 ribbed.
The lime-green style and ovary are glabrous. The ovary measures 1.5mm to 2mm in length by 2mm to 2.2mm in diameter while the style measures 2mm to 2.2mm in length. The stigma is shortly bifid. The flowers appear from late March to early June or in favourable seasons as late as early July.
The fruits are obcordate to obovoid capsules. The glabrous capsules measure 15mm to 22mm in length by 15mm to 20mm in diameter. The mid green capsules are glabrous, irregularly covered in variable size, smooth, lepidote lumps and turn orange-yellow externally and yellow internally when ripe. The style turns orange yellow and is persistent on the ripe fruit. The usually 2 globose to oblong, black glossy seeds measure 8mm to 12mm in length by 6mm to 8mm in diameter. The seeds fusiform aril is pale yellow.
Wildlife:
Toechima tenax’s wildlife is unknown to the author.
Cultivation:
This is another magnificent small tree that can be grown in association with other small rainforest specie or as a park feature. It is ideal at the edge of a rainforest or deep in the center of a dwarf rainforest. It also makes a good park tree offering quick growth and good shade for the children to play beneath. In cultivation it grows from 12 meters to 15 meters in height by 12 meters to 15 meters in diameter when grown in the open or taller and narrower if grown closer together as a rainforest tree.
It grows exceptionally well on lighter clays where deep leaf litter keeps the soil cool and moisture at an even level. If these requirements are met it can cope with temperatures as low as minus 3 degrees and up to 40 degrees though tip burning and slow growth is attained in the early years until the trees manage to outgrow the highest frosts. It is moderately drought resistant once established.
Add to the above, if it is given an adequate supply of water and a little native fertilizer on an annual basis the plants should respond with good flowering and fruit over a long period.
The trees make very good accent trees in front of low set commercial buildings, industrial sheds, school buildings or low set homes where they will break up hard rigid architectural lines and give warmth and breadth to a building. In front of high rise buildings it gives balance especially where they could be grown in curves meandering to the entry doors or on the nature strip.
The trunks can be a feature especially when mixed with other small rainforest trees like Toechima dasyrrhache, Harpullia pendula, Cupaniopsis anacharioides, Elaeocarpus reticulatus or small Corymbia like Corymbia curtisii or Corymbia ptycocarpa and can be used for growing stags and orchids.
Propagation:
Seeds: The seeds can be removed easily from the fruits.
Sow freshly treated seeds directly into a seed raising mix, keeping them moist not wet. Do not over water as the seeds will rot off before germination takes place. Place the trays in a cool shaded area with 50mm shade cloth in the bush house. When the seedlings are 20mm to 25mm tall, prick them out and plant them into 50mm native tubes using a good organic mix.
As the seedlings roots reach the bottom of the tubes plant them out into their permanent position. Do not delay.
Fertilize using Seaweed, fish emulsion or organic chicken pellets soaked in water and apply the liquid on an alternate basis. Fertilize every 2 months until the plants are well established then on an annual basis in September to October to maintain good health, vigour and better flowering.
Further Comments from Readers:
“Hi reader, it seems you use The Bible of Botany a lot. That’s great as we have great pleasure in bringing it to you! It’s a little awkward for us to ask, but our first aim is to purchase land approximately 1,600 hectares to link several parcels of N.P. into one at The Pinnacles NSW Australia, but we need your help. We’re not salespeople. We’re amateur botanists who have dedicated over 30 years to saving the environment in a practical way. We depend on donations to reach our goal. If you donate just $5, the price of your coffee this Sunday, We can help to keep the planet alive in a real way and continue to bring you regular updates and features on Australian plants all in one Botanical Bible. Any support is greatly appreciated. Thank you.”
In the spirit of reconciliation we acknowledge the Bundjalung, Gumbaynggirr and Yaegl and all aboriginal nations throughout Australia and their connections to land, sea and community. We pay our respect to their Elders past, present and future for the pleasures we have gained.
Nana Glen NSW
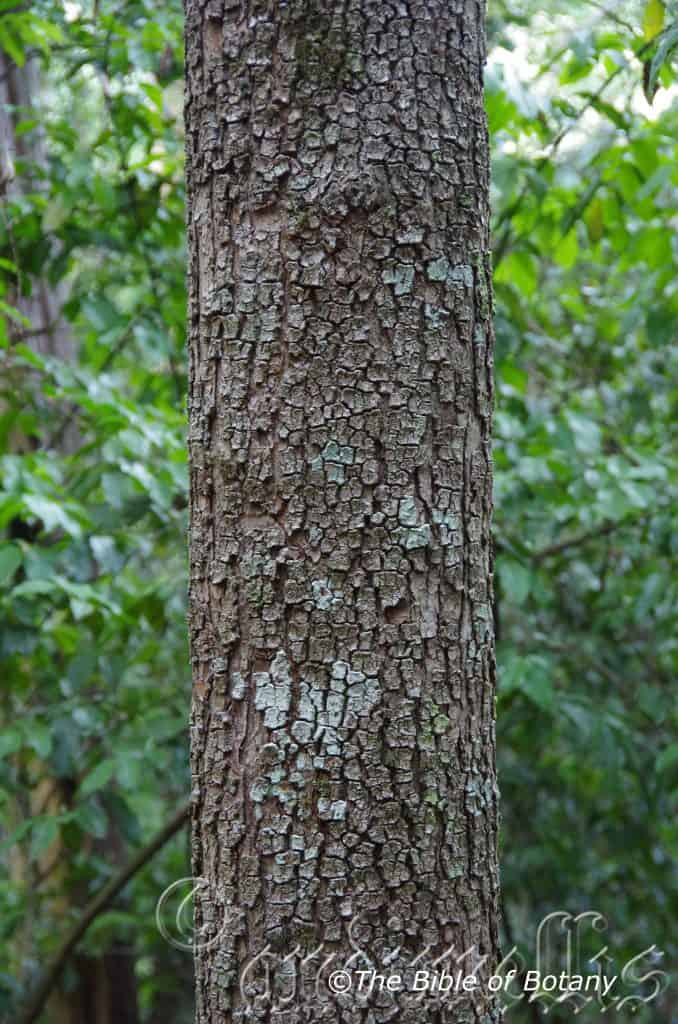
Border Ranges National Park NSW
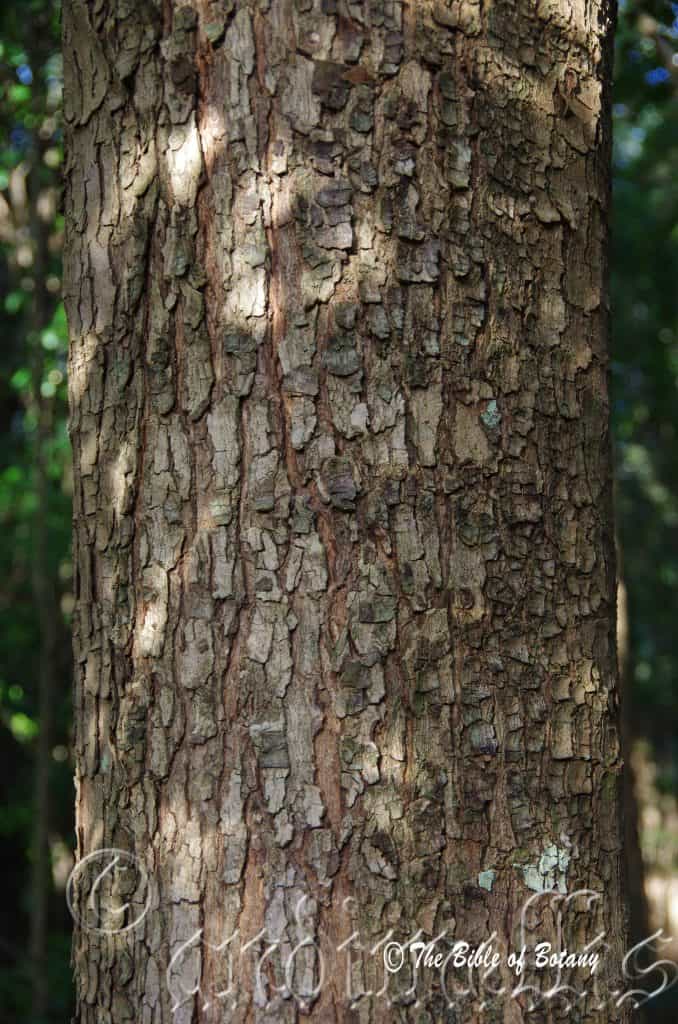
NCBG Coffs Harbour NSW
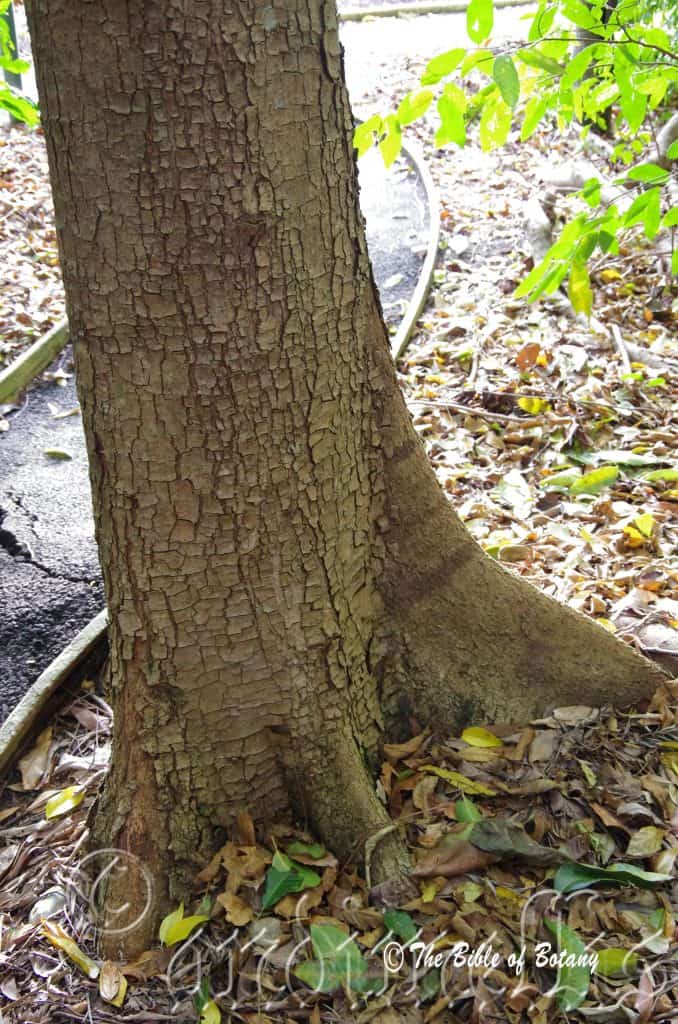
NCBG Coffs Harbour NSW
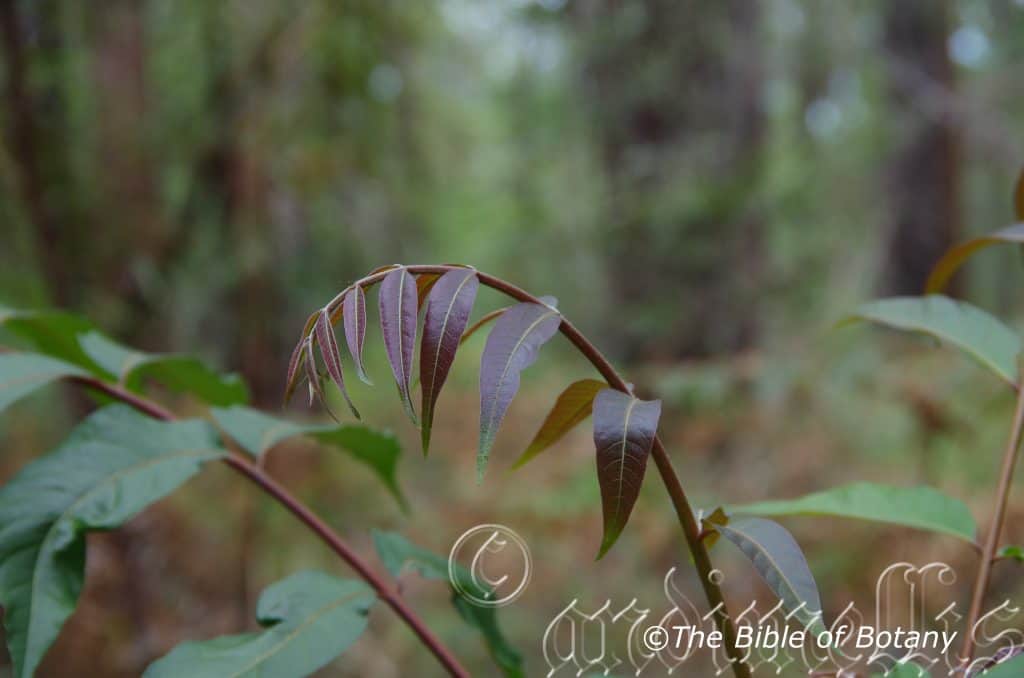
Author’s Garden The Pinnacles NSW
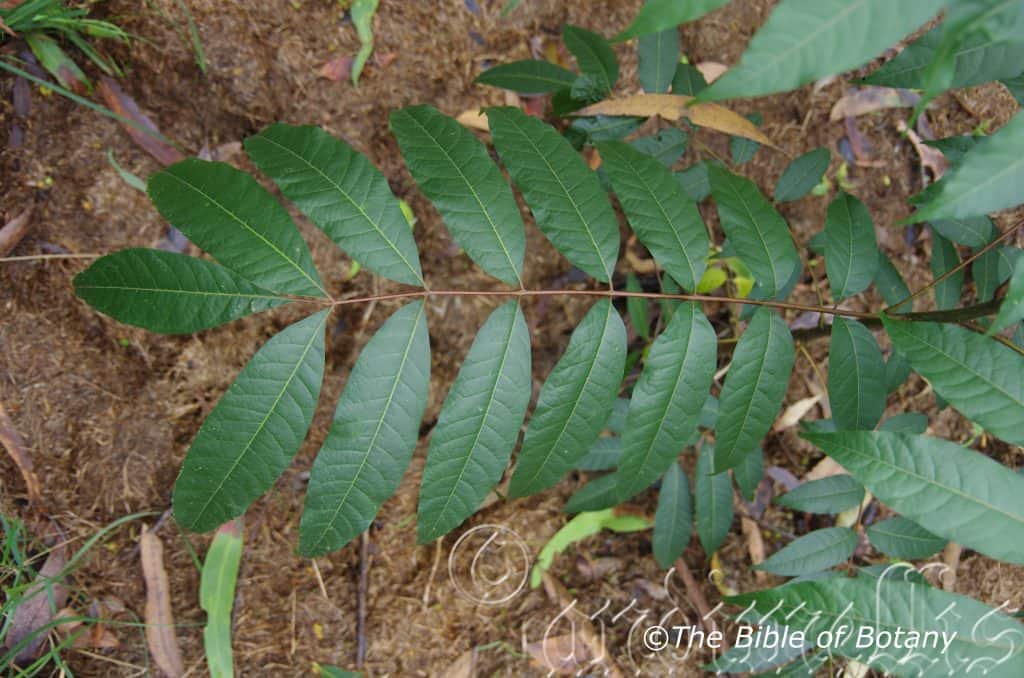
Author’s Garden The Pinnacles NSW
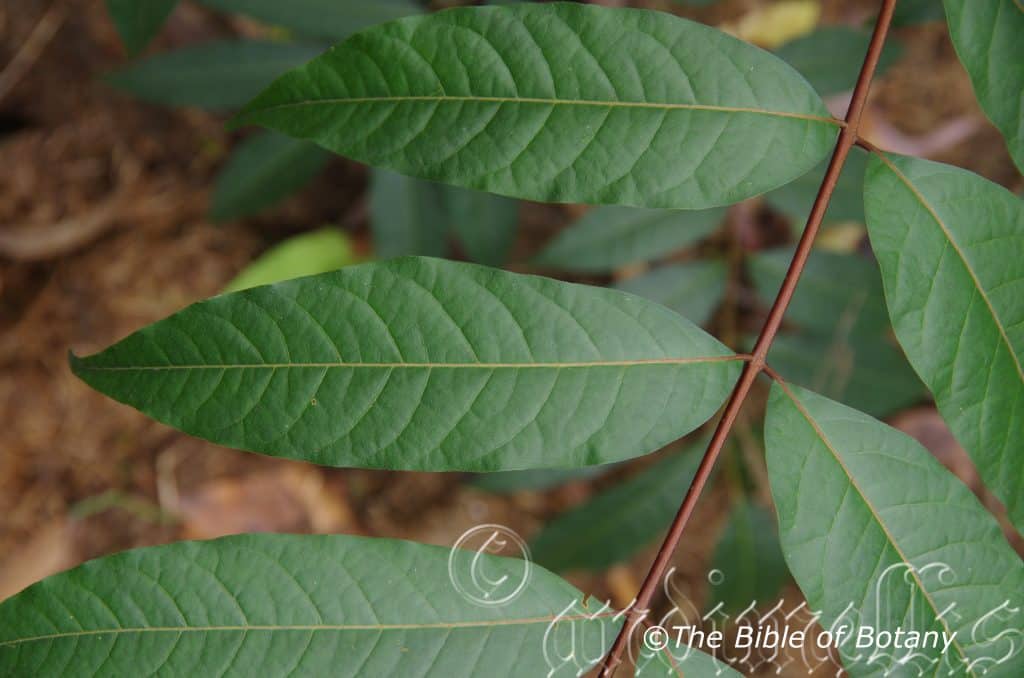
Author’s Garden The Pinnacles NSW
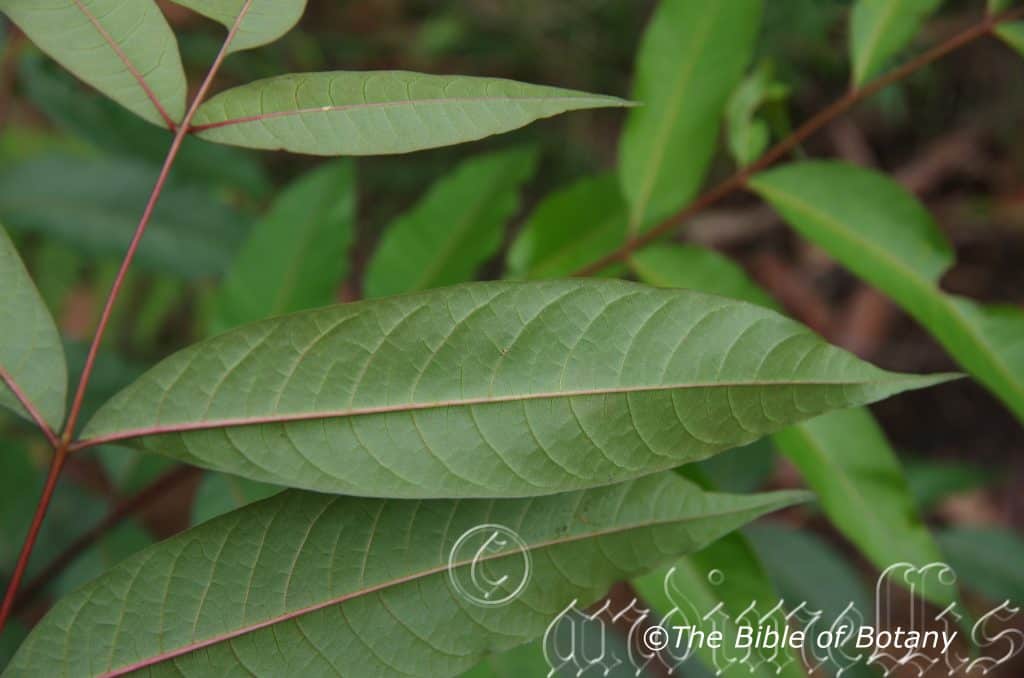
Author’s Garden The Pinnacles NSW
Toona ciliata
Classification:
Unranked: Eudicots
Class: Rosids
Order: Sapindales
Family: Meliaceae
Subfamily: Cedreloideae
Genus: From Toon, which is Latinized from the Indian vernacular for a tree in this genus from India. It refers to the Australian trees, which closely resemble the genus found and first named from Indian.
Specie: From Ciliāre, which is Latin for a fringe of hair or an eye lash. It refers to the hairs on the margins of leaves, sepals, petals, ligules or other organs of a plant and some microscopic animals.
Sub specie:
Common Name: Red Cedar.
Distribution:
Toona ciliata is found in several disjunct populations on and east of the Great Dividing Range, south from Coen in far north Queensland to Milton in New South Wales.
https://avh.ala.org.au/occurrences/search?taxa=Toona+ciliata#tab_mapView
Habitat Aspect Climate:
Toona ciliata prefers medium shade, dappled light shade to full sun. It grows in well-developed rainforests. The altitude ranges from 10 meters ASL to 1000 meters ASL.
The temperatures range from 2 degrees in July to 34 degrees in January.
The rainfall ranges from lows of 800mm to 3200mm average per annum.
Soil Requirements:
Toona ciliata prefers better quality loams to medium clays. The soils are usually derived from decomposed brown basalts, black basalts or shale. The soils pH ranges from 5pH to 6.5pH. It does not tolerate waterlogged soils. Non saline soils to moderately saline soils are tolerated.
Height & Spread:
Wild Plants: 40m to 60m by 18m to 24m.
Characteristics:
Toona ciliata grows as a tall, straight tree with a large diameter trunk that is grey to brown, tessellated, scaly and flanged on old trees to 2 meters above the ground. The boles have been recorded at over 3 meters in diameter. The upper trunk and branches are usually covered with lichens and mosses even at a very early age while older trees will have a dense covering of ferns and orchids. The branches are pale grey to brown scabrous or scaly and only becoming greenish-brown near the apex where the newer leaf growth occurs. The smaller branches are covered in cream or paler coloured lenticels. The branchlets are sparsely covered in rusty caducous hirsute hairs.
The alternate, even pinnate leaves on mature trees are often odd pinnate on juvenile trees. The strongly asymmetrical leaves of Toona ciliata measure 150mm to 460mm in length by 80mm to 260mm in width. The 8 to 20 ovate, broad elliptical to broadly falcate leaflets measure 40mm to 120mm in length by 15mm to 50mm in width. The petioles, rachises and petiolules are pale green to yellow-green and glabrous to sparsely covered in rusty hirsute hairs. The petioles measure 20mm to 30mm in length while the rachises measure 35mm to 80mm in length and the petiolules measure 5mm to 12mm in length. The strongly oblique bases are rounded while the apexes are acuminate. The discolourous laminas are sea-green, dull and glabrous on the upper lamina while the lower lamina is paler and dull. The new growth is deep rusty red to deep maroon. The leaf margins are entire or covered in small teeth especially on juvenile trees. The laminas are flat to convex between the lateral veins on the upper lamina and recurve from the mid vein to the margins and decurve closer to the apex while the apex decurves strongly. The domatia are present as small tufts of rusty hirsute hairs. The mid vein and main laterals are prominent on the lower laminas and are distinctly visible from the upper laminas.
Inflorescences of Toona ciliata are born in loose pendant, panicles born from the upper leaf axils or the terminals. The panicles measure 180mm to 360mm in length by 60mm to 360mm in diameter. The peduncles, rachises, pedunculate and pedicels are green and glabrous. The peduncles measure 30mm to 60mm in length, the rachises measure 160mm to 300mm in length, while the pedunculate measures 2mm to 6mm in length and the pedicels measure 2mm to 5mm in length. The pale green calyxes and 5 pale green and glabrous. The calyx lobes measure 0.8mm to 1.2mm in length. The 5 pale white, pale creamy fawn to pale lilac petals are oblong while the apex is obtuse. The petals measure 4mm to 5.5mm in length by 2mm to 2.5mm in width.
The 5 stamens are free for their entire length and are inserted into the orange-green disc below the ovary. The white filaments are covered in white hirtellus hairs and measure 3.5mm to 5mm in length. The white to purple anthers are level with the petals apexes.
The pale green, stout styles are covered in short white hirtellus hairs while the stigmas are glabrous and pale green. The pistil measures 0.6mm to 1mm in length. Toona ciliate’s flowers appear from early September through to mid-November.
The fruits of Toona ciliata are ellipsoidal capsules. The capsules are glabrous and measure 10mm to 20mm in length by 6mm to 9mm in diameter. The sea-green capsules are sparsely covered in tuberculate lumps and turn orange-brown then deep grey-brown when ripe. The styles are persistent on the ripe fruit. The off white, papery seeds are flattened ellipsoidal with unequal wings attached at each end. The seeds measure 8mm to 13mm in length by 2mm to 3mm in width including the wings.
Wildlife:
Toona ciliata’s is affected by Mahogany tip borer Hypspyla robusta, especially when grown in the open or as a monoculture plant. The moth is the major reason why the trees cannot be grown in forestry projects. The trees have been extensively logged for the deep red timber with all mature trees now being protected by law.
Cultivation:
Toona ciliata is a magnificent small shrub that should be grown in association with other rainforest specie. It is ideal at the edge of a rain forest or deep in the center of the rainforest. It also make great park trees offering quick growth, and good light shade except when it is in the deciduous state at the end of the dry season. In cultivation it will grow from 15 meters to 20 meters in height by 10 meters to 18 meters in diameter when grown in the open or taller and narrower if grown closer together as a rainforest tree.
It grows exceptionally well on lighter soils where deep leaf litter keeps the soil cool and moisture at an even level. If these requirements are met it can cope with temperatures as low as minus 5 degrees and up to 36 degrees though tip burning and slow growth is attained in the early years until the trees manage to outgrow the highest frosts. It is moderately drought resistant once established.
Add to the above, if it is given an adequate supply of water and a little native fertilizer on a regular basis the plants should respond with good flowering and fruit over a long period.
It often forms a well-shaped tree in just 12 to 15 years and flower from the seventh or ninth year from seed and take another 120 to 150 years to reach maturity.
Propagation:
Seeds: The seeds of Toona ciliata can be removed easily from the fruits.
Sow freshly treated seeds directly into a seed raising mix, keeping them moist not wet. Do not over water as the seeds will rot off before germination takes place. Place the trays in a cool shaded area with 50mm shade cloth in the bush house. When the seedlings are 20mm to 25mm tall, prick them out and plant them into 50mm native tubes using a good organic mix.
As the seedlings roots reach the bottom of the tubes plant them out into their permanent position. Do not delay.
Fertilize using seaweed, fish emulsion or organic chicken pellets soaked in water on an alternate basis. Fertilize every two months until the plants are established then annually in early September to October to maintain better colour, health, vitality and flowering.
Further Comments from Readers:
“Hi reader, it seems you use The Bible of Botany a lot. That’s great as we have great pleasure in bringing it to you! It’s a little awkward for us to ask, but our first aim is to purchase land approximately 1,600 hectares to link several parcels of N.P. into one at The Pinnacles NSW Australia, but we need your help. We’re not salespeople. We’re amateur botanists who have dedicated over 30 years to saving the environment in a practical way. We depend on donations to reach our goal. If you donate just $5, the price of your coffee this Sunday, We can help to keep the planet alive in a real way and continue to bring you regular updates and features on Australian plants all in one Botanical Bible. Any support is greatly appreciated. Thank you.”
In the spirit of reconciliation we acknowledge the Bundjalung, Gumbaynggirr and Yaegl and all aboriginal nations throughout Australia and their connections to land, sea and community. We pay our respect to their Elders past, present and future for the pleasures we have gained.
xxxxxxxxxxxxxxxxxxxxxxxxxxxxxxxxxxxxxxxxxxxxxxTrachymene composita
Classification:
Unranked: Eudicots
Class: Asterids
Order: Apiales
Family: Araliaceae
Genus: From Trākhús, which is Ancient Greek for rough and Meninx which is Ancient Greek for a membrane. It refers to fruits which have a membranous skin.
Specie: From Com/Cum, which is Latin for to come together and Ponere, which is Latin for to be made up of disparate or separate parts or elements. It refers to flowers, which have more than one type of flower together in a single head.
Sub specie: Trachymene composita var. composita. From Com/Cum, which is Latin for to come together and Ponere, which is Latin for to be made up of disparate or separate parts or elements. It refers to flowers, which have more than one type of flower together in a single head.
Subspecie: Trachymene composita var. robertsonii. Is named in honour of John George Robertson; 1803–1862, who was a Scottish born Australian naturalist and botanist who discovered the type specimen.
Common Name:
Distribution:
Trachymene composita var. composita is found in several disjunct populations south from the Tweed River in far north eastern New South Wales to Seaford in south eastern Victoria. It is also found further west on the Glenelg Coastal Plain and on Flinders Island and in the north western corner of Tasmania and down the east coast of Tasmania to Hobart.
Trachymene composita var. robertsonii is found in several disjunct populations south from the Bega Valley in southern New South Wales, the Glenelg Coastal Plain in south western Victoria and Freycinet National Park and the Derwent Valley in Tasmania.
https://avh.ala.org.au/occurrences/search?taxa=Trachymene+composita#tab_mapView
Habitat Aspect Climate:
Trachymene composita prefer light dappled light shade to full sun. It grows wet coastal heaths and mountain heaths. The altitude ranges from 5 meters ASL to 1750 meters ASL.
The temperatures range from minus 5 degrees in July to 34 degrees in January.
The rainfall ranges from lows of 600mm to 2100mm average per annum.
Soil Requirements:
Trachymene composita prefer better quality sandy loams to medium clays. The soils are usually derived from decomposed granites, sandstones or accumulated peaty beach sands. The altitude ranges from 11 meters ASL to 11 meters ASL. The soils pH ranges from 4.5pH to 7pH. It does not tolerate waterlogged soils however continuous soil moisture is important for its survival. Non saline soils to moderately saline soils are tolerated.
Height & Spread:
Wild Plants: 0.2m to 0.25m by 0.2m to 0.3m or 1.8 in meters in height when in flower.
Characteristics:
It grows as an erect robust annual or biennial herb with a stout taproot. The tap root measures 20mm to 60mm in length by 10mm to 20mm in diameter. The stems are very sparsely to moderately covered in white villous and glandular hairs.
The basal oblong, broad ovate to orbicular leaves are deeply dissected into 3 to 5 lobes. The leaves measure 30mm to 80mm in length by 40mm to 100mm in width. The obovate to elliptical lobes measure 25mm to 70mm in length by 4mm to 32mm in width. The sheathing petioles are grass-green, glabrous and often covered in white ciliate hairs on the basal third. The petioles measure 100mm to 200mm. The discolourous laminas are mid green to grass-green, dull and glabrous on the upper lamina while the lower lamina is paler. The lobe margins are further deeply to shallowly divide into 3 to 5 smaller lobes and are finely to coarsely tooth. The mid vein and the palmate lateral veins are prominent on the lower laminas and are faintly visible from the upper laminas.
The inflorescences are born on compound umbels from the tap root. The umbels themselves are born from dichasial cymes. There are 100 to 200 individual umbels in the compound umbel and 100 to 200 individual flowers in each individual umbel. The umbels measure 20mm to 45mm in diameter. The peduncles, rachises and pedunculates are mid green to grass-green and glabrous while the pedicels are white. The peduncles measure 30mm to 120mm in length, the rachises measure 150mm to 1200mm in length, while the pedunculate measure 100mm to 300mm in length and the pedicels measure 8mm to 20mm in length.
The 20 to 35 linear, involucral bracts are glabrous and measure 4mm to 7mm in length. The bisexual flowers are white. The 5 oblong to ovate petals measures 1.5mm to 2.5mm in length by 1mm to 1.8mm in width.
The 5 exserted stamens are free for their entire length. The white filaments measure 2mm to 2.5mm in length while the anthers are orange.
The unilocular or bilocular ovary is glabrous or moderately covered in white villous hairs. The pale green, stout style is glabrous and measures 1.5mm to 2mm in length. The flowers appear from October to April.
The fruits are flattened ovate to semicircular capsules. The capsules are glabrous and measure 3mm to 4mm in diameter by 1.3mm to 1.6mm in diameter. The mid green to grass-green capsules are glabrous and turn brown when ripe. The styles are persistent or non-persistent on the ripe fruit. The usually singular or at times 2 mericarps measure 2.1mm to 3mm in width. The carpophores are entire and measure 1mm to 2mm in length.
Confusing Varieties:
Trachymene composita var. composita unilocular or bilocular ovary is glabrous.
Trachymene composita var. robertsonii unilocular or bilocular ovary is moderately covered in white villous hairs. It is only found in coastal heaths.
Wildlife:
Trachymene composita is very attractive to many varieties of pollen flies, native bees and butterflies when in flower. It also attracts many parasitic native wasps which prey on the pollen flies.
The leaves and parsnip like tubers are edible. They have a similar flavour to carrot leaves.
Cultivation:
Trachymene composita is a medium herb that always gives a magnificent show of white flowers when mass planted. It is ideal in a small rockery or as a fill in plant in a bush heath garden. It also makes a good display in formal or Cottage type gardens. In cultivation it grows from 0.5 meters to 1 meter in height by 0.1 meters to 0.2 meters in diameter when in flower and grown in the open.
It grows exceptionally well on medium to heavy clays where deep leaf litter keeps the soil cool and moisture at an even level. If these requirements are met it can cope with temperatures as low as minus 5 degrees and up to 36 degrees.
Add to the above, if it is given an adequate supply of water and a little native fertilizer on a regular basis the plants should respond with good flowering and fruit over a long period.
It is best used when mass planted. When mass planting plant them at 300mm to 400mm centers so the flowers support each other and look far denser than if planted singularly.
Trachymene composita would make an interesting addition to the vegetable dish as a side vegetable. The flavour is sweet and strong.
Further work is required on the species to produce better size taproots that would make them a profitable farm produce.
Propagation:
Seeds: The seeds can be removed easily from the fruits. Gather the seeds as soon as they have swollen and turn brown.
Sow fresh treated seeds directly into a seed raising mix, keeping them moist not wet. Do not over water as the seeds will rot off before germination takes place. Place the trays in a cool shaded area with 20mm shade cloth in the bush house. When the seedlings are 20mm to 25mm tall, they can be planted out into their permanent position.
Once good quantities of seeds have been secured direct drilling would be a far better way to go to produce larger numbers.
Keep the seeds from plants that are producing the best leaves or the best size and shape roots. Keep the seeds separate from each parent plant. Sow half of the seeds from each parent plant at different times and carefully keep record of which roots are from each parent. The best flavoured root seeds can be planted the following season to gain the best size and shape roots. Again the seeds should be harvested, named and kept separately. It may take several generations usually 3 before any marked differences begin to appear and 10 generations before your seeds display very uniform results bearing excellent qualities in roots and flavour that you desired.
Fertilize using seaweed, fish emulsion or organic chicken pellets soaked in water on an alternate basis. Fertilize every two months until the plants are established then annually in early September to October to maintain better colour, health, vitality and flowering.
Further Comments from Readers:
“Hi reader, it seems you use The Bible of Botany a lot. That’s great as we have great pleasure in bringing it to you! It’s a little awkward for us to ask, but our first aim is to purchase land approximately 1,600 hectares to link several parcels of N.P. into one at The Pinnacles NSW Australia, but we need your help. We’re not salespeople. We’re amateur botanists who have dedicated over 30 years to saving the environment in a practical way. We depend on donations to reach our goal. If you donate just $5, the price of your coffee this Sunday, We can help to keep the planet alive in a real way and continue to bring you regular updates and features on Australian plants all in one Botanical Bible. Any support is greatly appreciated. Thank you.”
In the spirit of reconciliation we acknowledge the Bundjalung, Gumbaynggirr and Yaegl and all aboriginal nations throughout Australia and their connections to land, sea and community. We pay our respect to their Elders past, present and future for the pleasures we have gained.
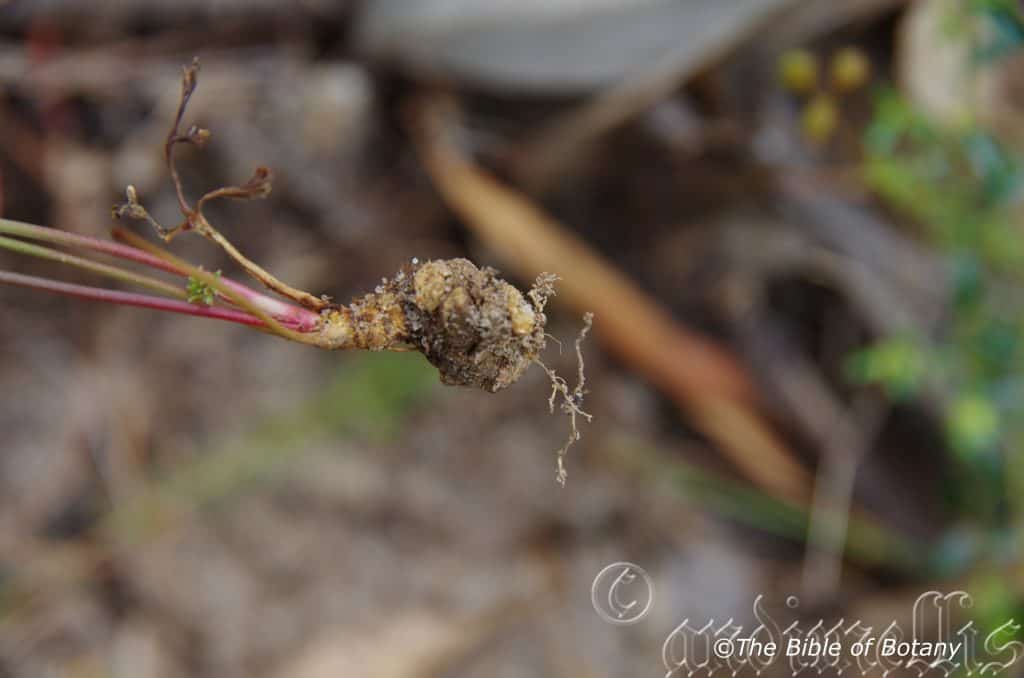
The Pinnacles NSW
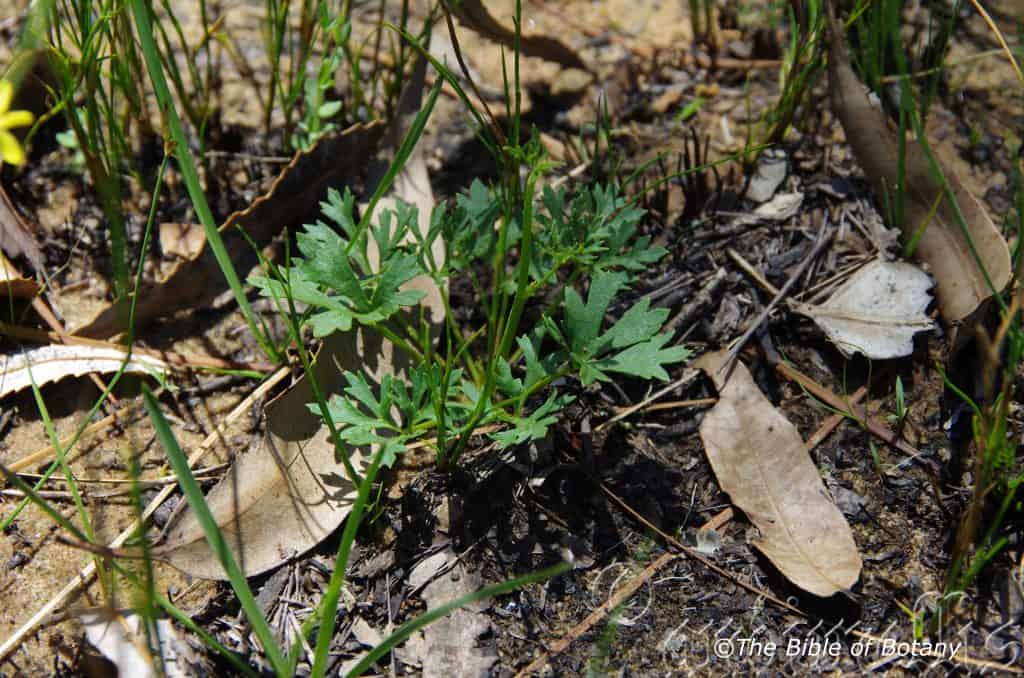
The Pinnacles NSW
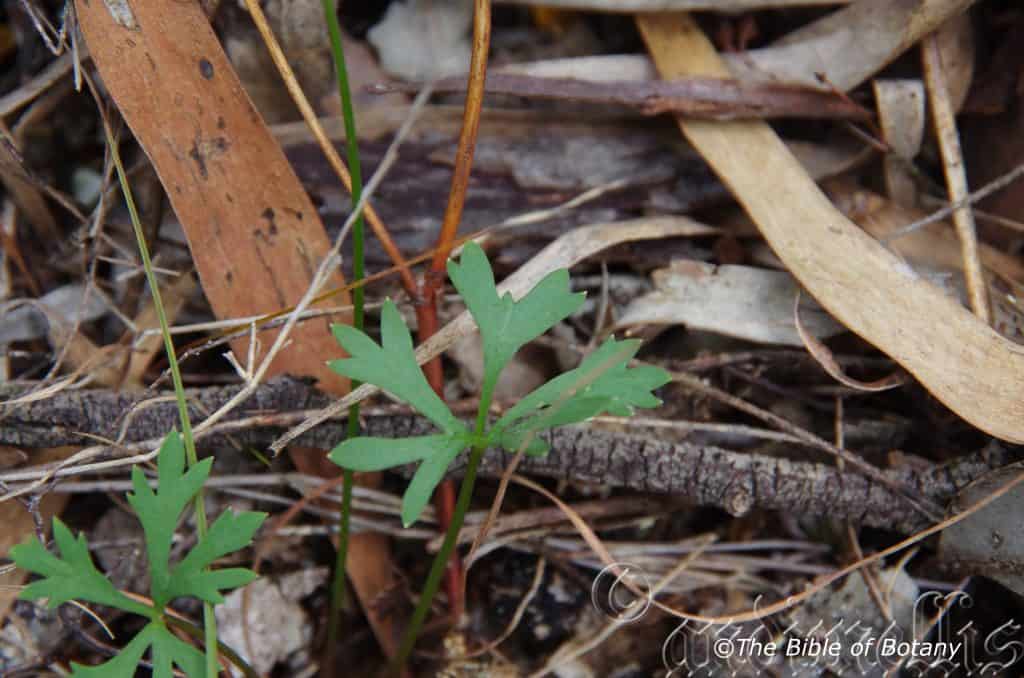
The Pinnacles NSW
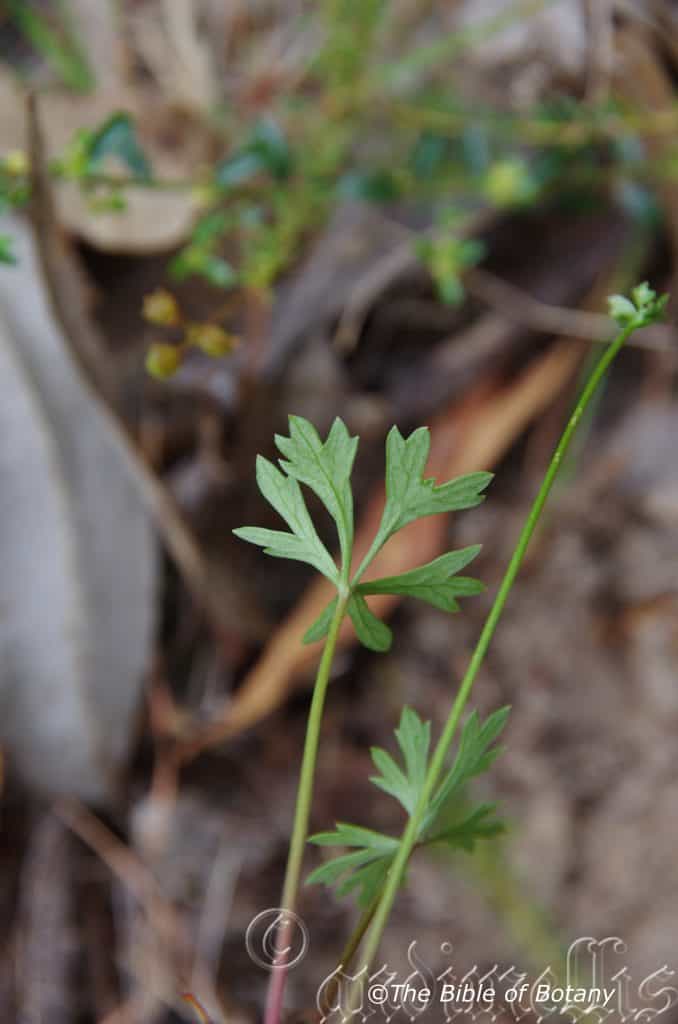
The Pinnacles NSW
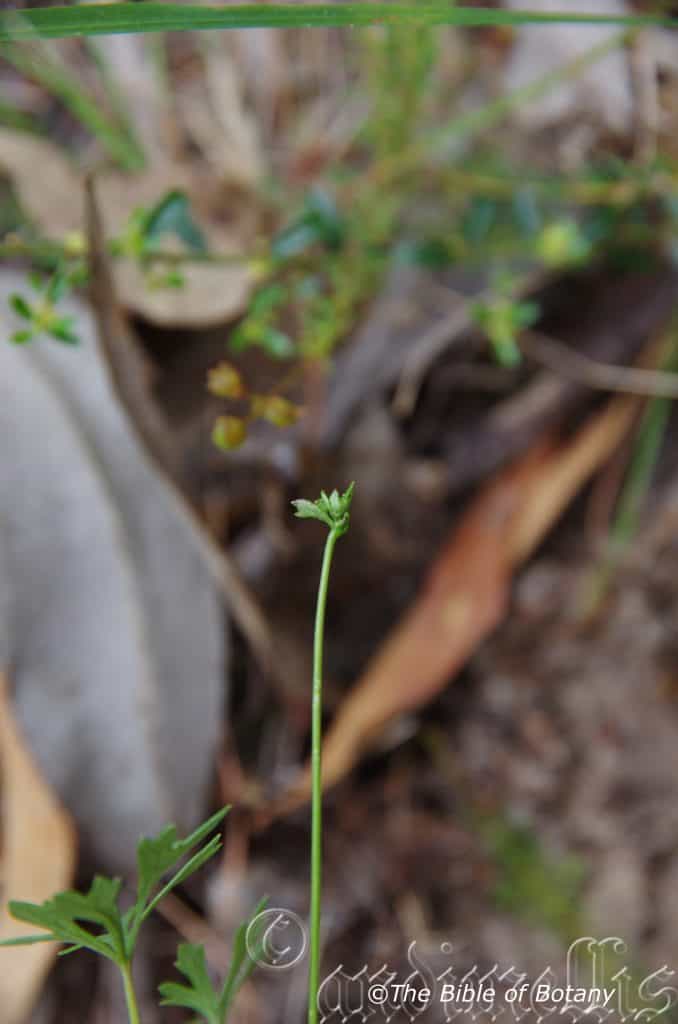
The Pinnacles NSW
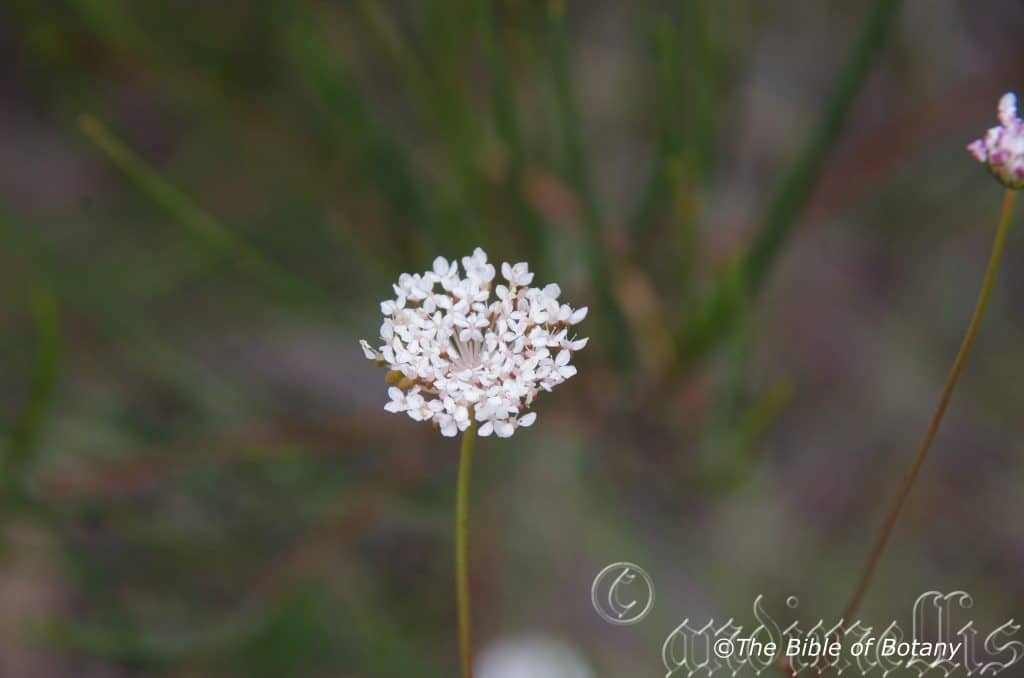
The Pinnacles NSW
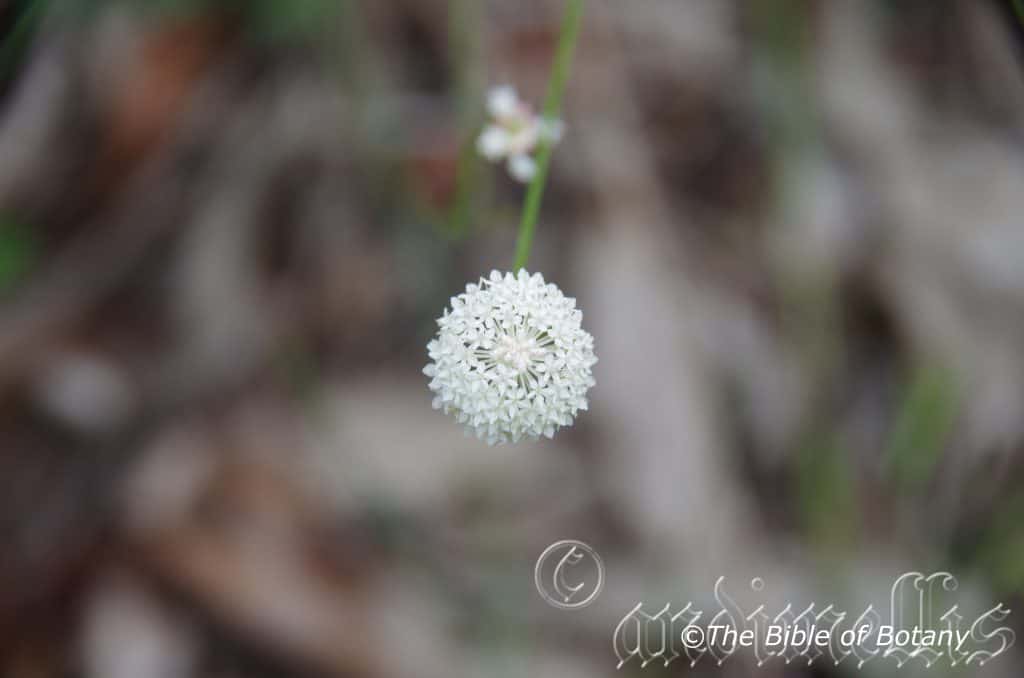
The Pinnacles NSW

The Pinnacles NSW
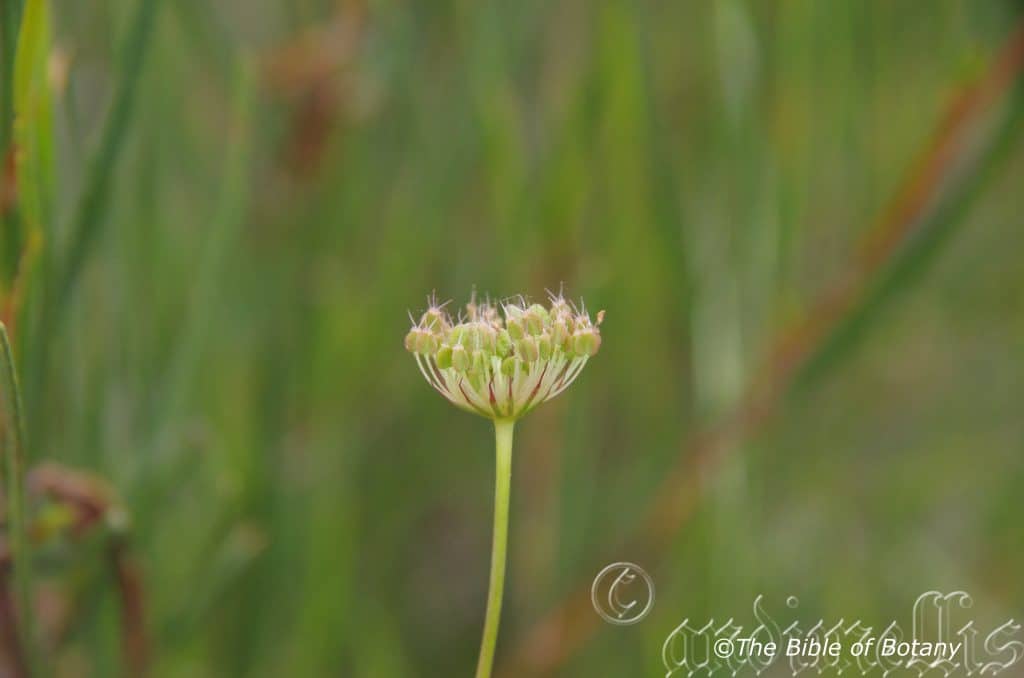
The Pinnacles NSW
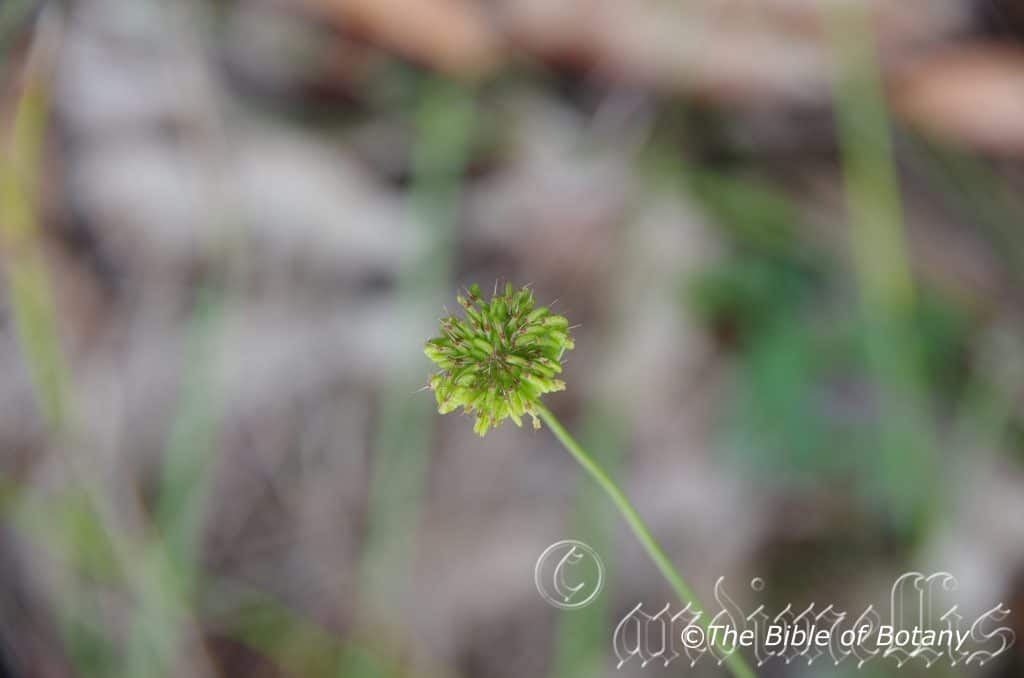
The Pinnacles NSW
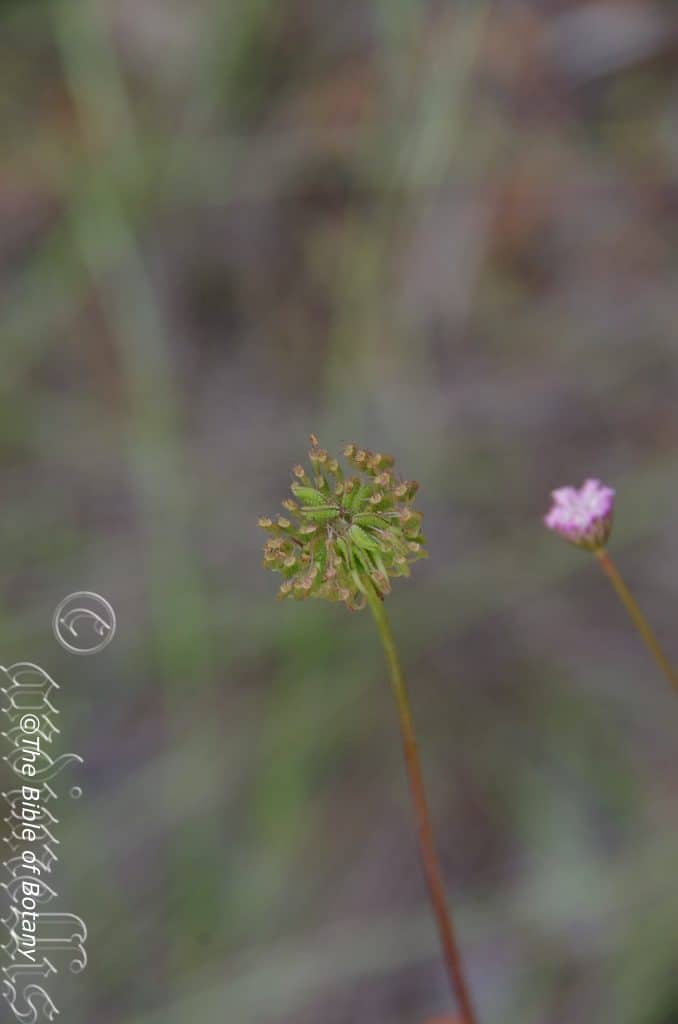
The Pinnacles NSW
Trachymene incisa
Classification:
Unranked: Eudicots
Class: Asterids
Order: Apiales
Family: Araliaceae
Genus: From Trākhús, which is Ancient Greek for rough and Meninx which is Ancient Greek for a membrane. It refers to fruits which have a membranous skin.
Specie: From Incisus, which is Latin for to be deeply cut. It refers to leaf margins, which have a deeply cut or torn appearance.
Sub specie: Trachymene incisa subsp. corrugata. From Corrugatus, which is Latin for to be wrinkled or have corrugations. It refers to leaf margins, which are deeply cut or torn appearance or have many wrinkles.
Sub specie: Trachymene incisa subsp. incisa. From Incisus, which is Latin for to be deeply cut. It refers to leaf margins, which have a deeply cut or torn appearance.
Common Name:
Distribution:
Trachymene incisa subsp. corrugata is found and restricted to a few populations between Narrabri and Barradine in central New South Wales.
Trachymene incisa subsp. incisa is found south from North Burnett River in south eastern Queensland to Mongarlowe in south eastern New South Wales. It is found on and east of the Great Dividing Range to the coast and off shore islands.
https://avh.ala.org.au/occurrences/search?taxa=Trachymene+incisa#tab_mapView
Habitat Aspect Climate:
Trachymene incisa prefers light dappled shade to full sun. It grows in dry sclerophyll forests, open woodlands or savannah woodlands. The altitude ranges from 5 meters ASL to 850 meters ASL.
The temperatures range from minus degrees in July to 40 degrees in January.
The rainfall ranges from lows of 300mm to 2000mm average per annum.
Soil Requirements:
Trachymene incisa prefers course sands, fine sands, to light fatty clays. The soils are usually derived from decomposed granites, sandstones or accumulated peaty beach sands often behind the frontal dunes. The soils pH ranges from 4.5pH to 7pH. It does not tolerate waterlogged soils. Non saline soils to moderately saline soils are tolerated as are salt laden winds.
Height & Spread:
Wild Plants: 0.5m to 0.8m by 0.3m to 0.5m.
Characteristics:
Trachymene incisa grows as an erect perennial herb with a thick white to cream taproot. The tap root is similar to a carrot and measures 20mm to 150mm in length by 8mm to 20mm in diameter. The glabrous grass-green stems are deep reddish near the base.
The basal oblong, broad ovate to orbicular leaves are deeply dissected into 3 to 5 lobes. The leaves measure 15mm to 70mm in length by 15mm to 80mm in width. The elliptic to linear lobes measure 10mm to 40mm in length by 1mm to 5mm in width. The sheathing petioles are grass-green and glabrous. The petioles measure 80mm to 130mm. The discolourous laminas are mid green to deep grass-green, dull and glabrous on the upper lamina while the lower laminas are pale blue-green. The lobe margins are entire and are deeply to shallowly divide into 3 to 5 smaller lobes. The mid vein and the palmate lateral veins are prominent on the lower laminas and are faintly visible from the upper laminas.
The inflorescences are born on compound umbels from the tap root. The umbels themselves are born from dichasial cymes. There are 30 to 40 individual umbels in the compound umbel and 30 to 60 individual flowers in each individual umbel. The umbels measure 8mm to 25mm in diameter. The peduncles, rachises and pedunculates are mid green to deep grass-green and glabrous while the pedicels are white. The peduncles measure 40mm to 100mm in length, the rachises measure 150mm to 250mm in length, while the peduncula measure 60mm to 150mm in length and the pedicels measure 5mm to 11mm in length.
The 10 to 15 linear, involucral bracts are glabrous and measure 3mm to 7mm in length. The bisexual flowers are usually white or pastel pink. The 5 oblong to elliptical petals measures 1mm to 2.5mm in length by 0.7mm to 1.5mm in width.
The 5 exserted stamens are free for their entire length. The white filaments measure 2mm to 2.5mm in length while the anthers are pink to deep mauve.
The unilocular or bilocular ovary is glabrous. The pale green, stout style is glabrous and measures 1.5mm to 2mm in length. The flowers appear from early September to April.
Trachymene incisa fruits are flattened ovate to semicircular capsules. The capsules are glabrous and measure 2.5mm to 3.5mm in diameter by 1.2mm to 1.5mm in diameter. The mid green to grass-green capsules are glabrous and turn brown when ripe. The styles are persistent or non-persistent on the ripe fruit. The usually singular or at times 2 mericarps measure 1.8mm to 2mm in width. The carpophores are entire or shortly bifid or 4 fid and measure 1.2mm to 2mm in length.
Confusing Subspecie:
Trachymene incisa subsp. corrugata mericarps are dull, smooth or tuberculate or papillate. It is found close to the Great Dividing Range on the Western Plains, on the range to the coast.
Trachymene incisa subsp. incisa mericarps are glossy, smooth or tuberculate. It is only found in the Pilliga area.
Wildlife:
Trachymene incisa very attractive to many varieties of pollen flies, native bees like Tetragonula carbonaria and butterflies when in flower. It also attracts many parasitic native wasps which prey on the pollen flies.
The leaves and parsnip like the tubers are edible. They have a similar flavour to carrots or parsnips.
Cultivation:
Trachymene incisa is a medium herb that always gives a magnificent show of white flowers when mass planted. It is ideal in a small rockery or as a fill in plant in a bush heath garden. It also makes a great display in formal or Cottage type gardens. In cultivation it grows from 0.5 meters to 1 meter in height by 0.1 meters to 0.2 meters in diameter when in flower and grown in the open.
It grows exceptionally well on medium to heavy clays where deep leaf litter keeps the soil cool and moisture at an even level. If these requirements are met they can cope with temperatures as low as minus 5 degrees and up to 36 degrees.
Add to the above, if it is given an adequate supply of water and a little native fertilizer on a regular basis the plants should respond with good flowering and fruit over a long period.
It is best mass planted. When mass planting plant them at 300mm to 400mm centers so the flowers support each other and look far denser than if planted singularly.
Trachymene incisa would make an interesting addition to the vegetable dish as a side vegetable. The flavour is sweet and strong.
Further work is required on the species to produce better size taproots that would make them a profitable farm produce. Present taproot sizes in the wild would indicate that it would be possible in a very short time; for the entrepreneurial farmer, to grow plants with roots that would measure 150mm to 200mm in length by 40mm or even 40mm in diameter.
Propagation:
Seeds: The seeds can be removed easily from the fruits. Gather the seeds as soon as they have swollen and turn brown. Excess seeds can be stored in the vegetable crisper for 1 or 2 seasons before viability decreases dramatically.
Sow fresh treated seeds directly into a seed raising mix, keeping them moist not wet. Do not over water as the seeds will rot off before germination takes place. Place the trays in a cool shaded area with 20mm shade cloth in the bush house. When the seedlings are 20mm to 25mm tall, they can be planted out into their permanent position.
Once good quantities of seeds have been secured direct drilling would be a far better way to go to produce larger numbers.
Keep the seeds from plants that are producing the best leaves or the best size and shape roots. Keep the seeds separate from each parent plant. Sow half of the seeds from each parent plant at different times and carefully keep record of which roots are from each parent. The best flavoured root seeds can be planted the following season to gain the best size and shape roots. Again the seeds should be harvested, named and kept separately. It may take several generations usually 3 before any marked differences begin to appear and 10 generations before your seeds display very uniform results bearing excellent qualities in roots and flavour that you desired.
Fertilize using seaweed, fish emulsion or organic chicken pellets soaked in water on an alternate basis. Fertilize every two months until the plants are established then annually in early September to October to maintain better colour, health, vitality and flowering.
Further Comments from Readers:
“Hi reader, it seems you use The Bible of Botany a lot. That’s great as we have great pleasure in bringing it to you! It’s a little awkward for us to ask, but our first aim is to purchase land approximately 1,600 hectares to link several parcels of N.P. into one at The Pinnacles NSW Australia, but we need your help. We’re not salespeople. We’re amateur botanists who have dedicated over 30 years to saving the environment in a practical way. We depend on donations to reach our goal. If you donate just $5, the price of your coffee this Sunday, We can help to keep the planet alive in a real way and continue to bring you regular updates and features on Australian plants all in one Botanical Bible. Any support is greatly appreciated. Thank you.”
In the spirit of reconciliation we acknowledge the Bundjalung, Gumbaynggirr and Yaegl and all aboriginal nations throughout Australia and their connections to land, sea and community. We pay our respect to their Elders past, present and future for the pleasures we have gained.
Trachymene procumbens
Classification:
Unranked: Eudicots
Class: Asterids
Order: Apiales
Family: Araliaceae
Genus: From Trākhús, which is Ancient Greek for rough and Meninx which is Ancient Greek for a membrane. It refers to fruits which have a membranous skin.
Specie: From Procumbent, which is Latin for bending forward. It refers to plants, which lay across the ground but do not root easily at the nodes or axis.
Common Name:
Distribution:
Trachymene procumbens is found in several disjunct populations on and east of the Great Dividing Range. It is found south from Cape York Peninsula in far north Queensland to near Sydney in central coastal New South Wales.
https://avh.ala.org.au/occurrences/search?taxa=Trachymene+procumbens#tab_mapView
Habitat Aspect Climate:
Trachymene procumbens prefers medium shade, dappled light shade to full sun. It grows in dry sclerophyll forests or closed, moist woodlands. The altitude ranges from 10 meters ASL to 890 meters ASL.
The temperatures range from minus 3 degrees in August to 34 degrees in January.
The rainfall ranges from lows of 600mm to 2600mm average per annum.
Soil Requirements:
Trachymene procumbens prefer soils that are better quality sandy loams to light gritty or gravely clays. The soils are usually derived from decomposed fatty sandstone, fatty granites, brown basalts, black basalts, metamorphic rocks or shale. The soils pH ranges from 4.5pH to 6.5pH. It does not tolerate waterlogged soils. Non saline soils to moderately saline soils are tolerated.
Height & Spread:
Wild Plants: 0.6m to 1m by 0.4m to 0.5m when in flower.
Characteristics:
Trachymene procumbens grows as a procumbent to ascending perennial herb with a thick white to cream taproot. The creamy-white tap root is similar to a carrot and measures 20mm to 60mm in length by 5mm to 8mm in diameter. The grass-green stems are sparsely covered in white, hirtellous caducous hairs.
The basal oblong, broad ovate to orbicular leaves are deeply dissected into 3 to 5 lobes. The leaves measure 10mm to 50mm in length by 15mm to 55mm in width. The elliptic to linear lobes measure 14mm to 30mm in length by 3mm to 7mm in width. The sheathing petioles are grass-green, glabrous and measure 10mm to 80mm. The discolourous laminas are mid green to deep green, dull and glabrous on the upper lamina while the lower laminas are pale blue-green. The lobe margins are entire and are deeply to shallowly further divided into 3 to 6 smaller lobes. The mid vein and the palmate lateral veins are prominent on the lower laminas and are faintly visible from the upper laminas.
The inflorescences are born on compound umbels from the tap root. The umbels themselves are born from dichasial cymes. There are 10 to 30 individual umbels in the compound umbel and 15 to 50 individual flowers in each individual umbel. The umbels measure 8mm to 20mm in diameter. The peduncles, rachises and pedunculates are mid green to deep grass-green and glabrous while the pedicels are white. The peduncles measure 40mm to 100mm in length, the rachises measure 100mm to 200mm in length, while the pedunculates measure 60mm to 150mm in length and the pedicels measure 6mm to 9mm in length.
The 10 to 15 linear, involucral bracts are glabrous and measure 2mm to 5mm in length. The bisexual flowers are white to pastel pink. The 5 elliptical to broad elliptical petals measures 1.2mm to 1.5mm in length by 0.9mm to 1.4mm in width.
The 5 exserted stamens are free for their entire length. The white filaments measure 0.8mm to 1.2mm in length while the anthers are pink to mauve.
The unilocular or bilocular ovary is glabrous. The pale pinkish-mauve, stout style is glabrous and measures 0.8mm to 1.2mm in length. The flowers appear throughout the year when conditions are favourable.
The fruits are flattened ovate to semicircular capsules. The capsules are glabrous and measure 2mm to 4mm in diameter by 2mm to 3mm in diameter. The glossy mid green to grass-green capsules are glabrous and turn brown when ripe. The styles are persistent or non-persistent on the ripe fruit. The singular or 2 mericarps are papillate and measure 1.4mm to 2mm in width. The carpophores are entire or shortly bifid or 4 fid and measure 0.7mm to 1.5mm in length.
Wildlife:
Trachymene procumbens is very attractive to many varieties of pollen flies, native bees and butterflies when in flower. It also attracts many parasitic native wasps which prey on the pollen flies.
The leaves and parsnip like tubers are edible. They have a similar flavour to parsnips leaves.
Cultivation:
Trachymene procumbens is a medium size herb that always gives a magnificent show of white to very pale pink flowers when mass planted. It is ideal in a rockery or as a fill in plant in a bush heath garden. It also makes a great display in formal or Cottage type gardens. In cultivation it grows from 0.5 meters to 1 meter in height by 0.2 meters to 0.3 meters in diameter when in flower and grown in the open.
It grows exceptionally well on medium to heavy clays where deep leaf litter keeps the soil cool and moisture at an even level. If these requirements are met they can cope with temperatures as low as minus 5 degrees and up to 36 degrees.
Add to the above, if it is given an adequate supply of water and a little native fertilizer on a regular basis the plants should respond with good flowering and fruit over a long period.
It is best used when mass planted. When mass planting plant them at 200mm to 300mm centers so the flowers support each other and look far denser than if planted singularly.
Trachymene procumben would make an interesting addition to the vegetable dish as a side vegetable. The flavour is sweet and strong.
Propagation:
Seeds: The seeds can be removed easily from the fruits. Gather the seeds as soon as they have swollen and turn brown. Excess seeds can be stored in the vegetable crisper for 1 or 2 seasons before viability decreases dramatically.
Sow fresh treated seeds directly into a seed raising mix, keeping them moist not wet. Do not over water as the seeds will rot off before germination takes place. Place the trays in a cool shaded area with 20mm shade cloth in the bush house. When the seedlings are 20mm to 25mm tall, they can be planted out into their permanent position.
Once good quantities of seeds have been secured direct drilling would be a far better way to go to produce larger numbers.
Fertilize using seaweed, fish emulsion or organic chicken pellets soaked in water on an alternate basis. Fertilize every two months until the plants are established then annually in early September to October to maintain better colour, health, vitality and flowering.
Further Comments from Readers:
“Hi reader, it seems you use The Bible of Botany a lot. That’s great as we have great pleasure in bringing it to you! It’s a little awkward for us to ask, but our first aim is to purchase land approximately 1,600 hectares to link several parcels of N.P. into one at The Pinnacles NSW Australia, but we need your help. We’re not salespeople. We’re amateur botanists who have dedicated over 30 years to saving the environment in a practical way. We depend on donations to reach our goal. If you donate just $5, the price of your coffee this Sunday, We can help to keep the planet alive in a real way and continue to bring you regular updates and features on Australian plants all in one Botanical Bible. Any support is greatly appreciated. Thank you.”
In the spirit of reconciliation we acknowledge the Bundjalung, Gumbaynggirr and Yaegl and all aboriginal nations throughout Australia and their connections to land, sea and community. We pay our respect to their Elders past, present and future for the pleasures we have gained.
Tragia novae-hollandiae
Classification:
Unranked: Eudicots
Class: Rosids
Order: Malpighiales
Family: Euphorbiaceae
Subfamily: Euphorbiaceae
Tribe: Euphorbiaceae
Genus: Is named in honour of Hieronymus Bock; 1498-1553, who was a German botanist who referred to himself as Trágos which is Ancient Greek for a tragedy, a goat or scapegoat.
Specie: From Novae/Novus, which is Latin for new and Hollandia which is Latin for Holland. It refers to plants, which are distinctly Australian and originate from Australia.
Sub specie:
Common Name: Stinging Vine.
Distribution:
Tragia novae-hollandiae is found south from Cooktown in far north Queensland to Kempsey in central coastal New South Wales.
https://avh.ala.org.au/occurrences/search?taxa=Tragia+novae-hollandiae#tab_mapView
Habitat Aspect Climate:
Tragia novae-hollandiae prefers medium shade, dappled light shade to full sun. It grows adjacent to moist rainforest in moist locations in dry rainforests, moist gallery forests, moist littoral rainforests or creek and stream meanders in riparian zones. The altitude ranges from 5 meters ASL to 750 meters ASL.
The temperatures range from minus 3 degrees in July to 37 degrees in January.
The rainfall ranges from lows of 600mm to 3200mm average per annum.
Soil Requirements:
Tragia novae-hollandiae prefers better quality light clays, medium clays, light silts or heavy silts. The soils are derived from decomposed brown basalts, black basalts, metamorphic rocks, shale or alluvial deposits. The altitude ranges from 11 meters ASL to 11 meters ASL. The soils pH ranges from 5pH to 6.5pH. It does not tolerate waterlogged soils. Non saline soils to moderately saline soils are tolerated.
Height & Spread:
Wild Plants: 1m to 2m by 1m to 2m
Characteristics:
Tragia novae-hollandiae grows as a twining plant with stems that are sparsely covered in erect, white, stinging hairs. The stems are mid green to deep green.
The alternate, broad triangular, ovate or lanceolate disjunct leaves measure 30mm to 90mm in length by 15mm to 50mm in width. The elliptical to narrow ovate stipules measure 2mm to 3mm in length. The grass-green to pinkish–maroon petioles are sparsely covered in erect, white, stinging hairs. The petioles measure 20mm to 40mm in length. The bases are cordate while the apexes are narrow acute to broad acute. The discolourous laminas are sea-green, dull and sparsely covered in erect stinging hairs on the upper lamina while the lower laminas are paler to pale glaucous-green and dull. The laminas are flat or gently decurve downwards from the mid vein to the margins and gently decurve downwards from near the base or and near the apex. The laminas are also slightly convex between the mid vein and lateral veins. The margins are entire sparsely coarsely toothed. The mid vein and the pinnate lateral veins are prominent on the lower laminas and are distinctly visible from the upper laminas.
The inflorescences are racemes born from the upper leaf axils or the terminals. The female flowers develop on the basal half while the male flowers develop on the apical half. The peduncle, rachis and pedicles are covered in erect, white stinging hairs. The peduncles measure 10mm to 20mm in length while the rachises measure 0mm to 90mm in length and the pedicels measure 2mm to 3mm in length.
The male floral bracts measure 1.5mm to 2mm in length. The petiole is subtended by a long narrow appressed bract that measures 1.5mm to 2.5mm in length. The 4 strongly, retrorse green tepals are broad triangular with an obtuse apex. The tepals measure 1mm to 1.5mm in length. The 3 or 5 pale yellow stamens are positioned on the outer orifice of the disc.
The female flowers petiole is subtended by a long narrow appressed bract that measures 2mm to 3mm in length. The 8 erect, narrow elliptical tepals measure 1.5mm to 2mm in length. The thick, green style measures 1.5mm in length while the trifid stigma arms measure 1mm in length. The ovary is densely covered in erect to semi appressed white stinging hairs. The flowers appear from early October to January.
The fruits are trigonous capsules. The capsules are densely covered in erect, white stinging hairs and measure 10mm to 12mm in length by 6mm to 8mm in diameter. The sea-green capsules turn grey-brown when ripe. The perianth is persistent at the base of the capsules while the style remnants are persistent at the apex on the ripe fruits. The 3 spherical seeds per fruit measure 4mm to 5mm in diameter.
Wildlife:
Tragia novae-hollandiae’s wildlife is unknown to the author.
Cultivation:
Tragia novae-hollandiae is more of a curiosity for the garden than a practical plant for use as a ground cover. The few I nurtured in Nana Glen were always resentful of my attention and let me know it on numerous occasions. The pain while sharp, is short lived and more of an irritant than painful.
However the same cannot be said for dogs and probably cats. Our pet Fox Terrier had a couple of unfortunate encounters which made us break into hysterical laughter every time and her take a wide berth on future walks. It was as though she had been stung by a bee each time.
This is where Tragia novae-hollandiae may have a good practical use and that is as a cat and dog repellent. Sorry still laughing at Meili our little miniature fox terrier. Planted out around the edges where dogs and cats frequent or grown. Cutting the stems and placing them across their paths in the evening will very quickly deter them from coming around.
Propagation:
Seeds: The seeds can be removed easily from the dried fruits. Remember to use gloves when handling the fruits as the stems and leaves are irritant to slightly painful.
Sow freshly treated seeds directly into a seed raising mix, keeping them moist not wet. Do not over water as the seeds will rot off before germination takes place. Place the trays in a cool shaded area with 50mm shade cloth in the bush house. When the seedlings are 20mm to 25mm tall, prick them out and plant them into 50mm native tubes using a good organic mix.
As the seedlings roots reach the bottom of the tubes plant them out into their permanent position.
Fertilize using seaweed, fish emulsion or organic chicken pellets soaked in water on an alternate basis. Fertilize every two months until the plants are established then annually in early September to October to maintain better colour, health, vitality and flowering.
Further Comments from Readers:
“Hi reader, it seems you use The Bible of Botany a lot. That’s great as we have great pleasure in bringing it to you! It’s a little awkward for us to ask, but our first aim is to purchase land approximately 1,600 hectares to link several parcels of N.P. into one at The Pinnacles NSW Australia, but we need your help. We’re not salespeople. We’re amateur botanists who have dedicated over 30 years to saving the environment in a practical way. We depend on donations to reach our goal. If you donate just $5, the price of your coffee this Sunday, We can help to keep the planet alive in a real way and continue to bring you regular updates and features on Australian plants all in one Botanical Bible. Any support is greatly appreciated. Thank you.”
In the spirit of reconciliation we acknowledge the Bundjalung, Gumbaynggirr and Yaegl and all aboriginal nations throughout Australia and their connections to land, sea and community. We pay our respect to their Elders past, present and future for the pleasures we have gained.
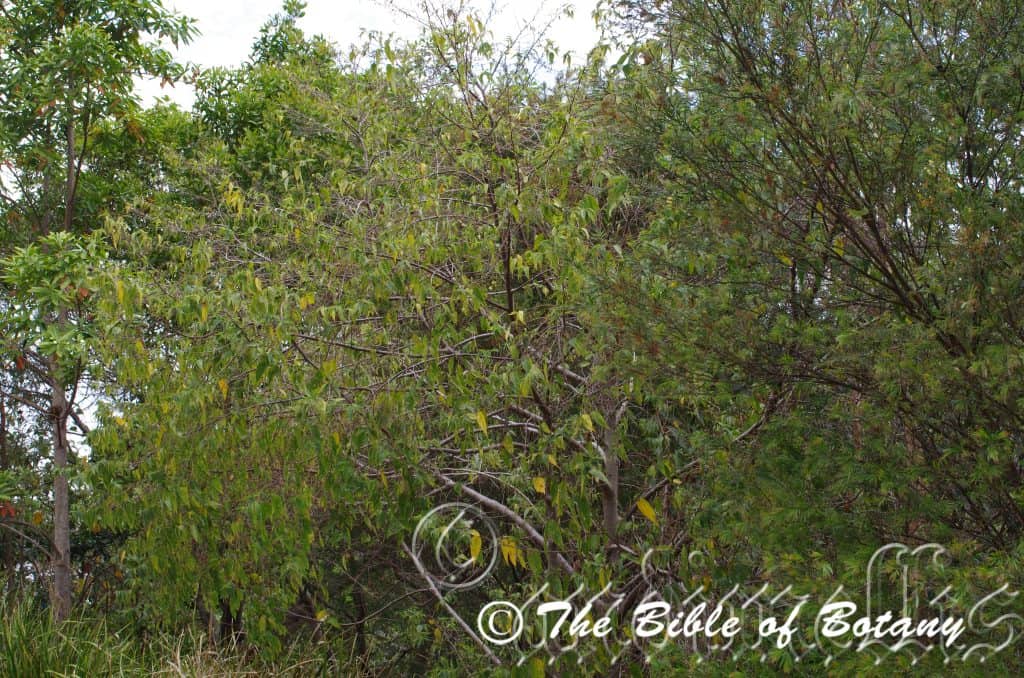
Author’s Garden The Pinnacles NSW
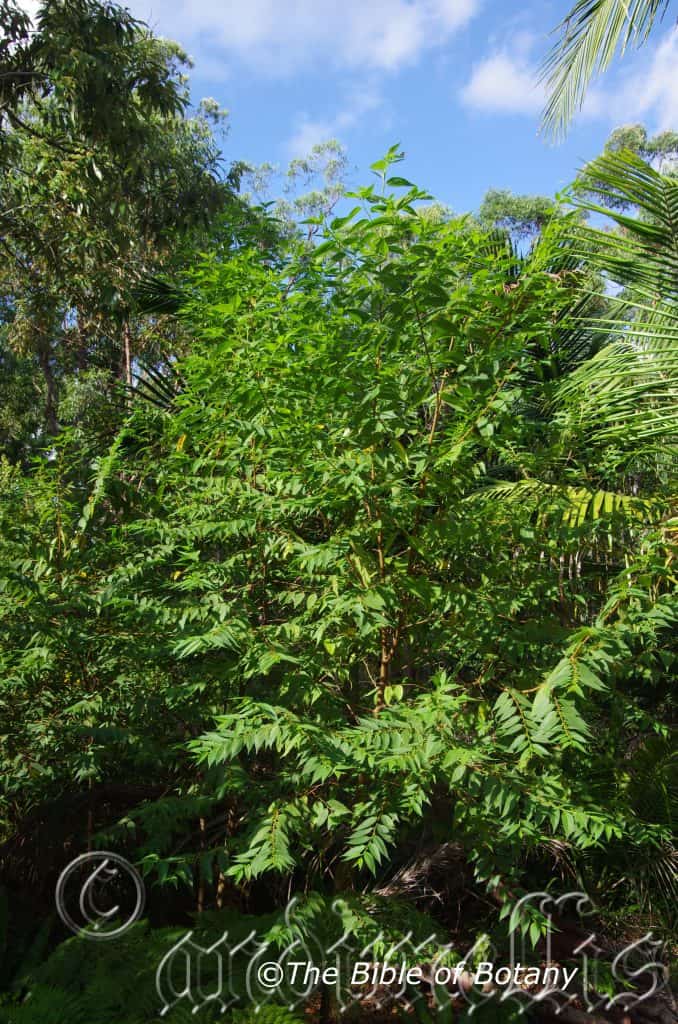
Author’s Garden The Pinnacles NSW
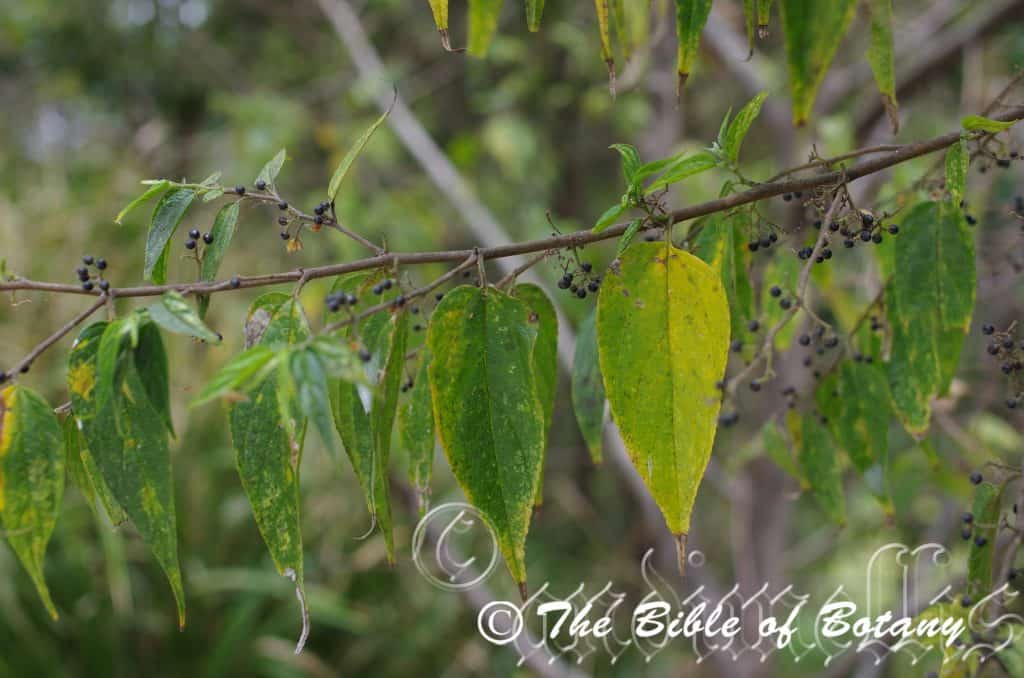
Author’s Garden The Pinnacles NSW
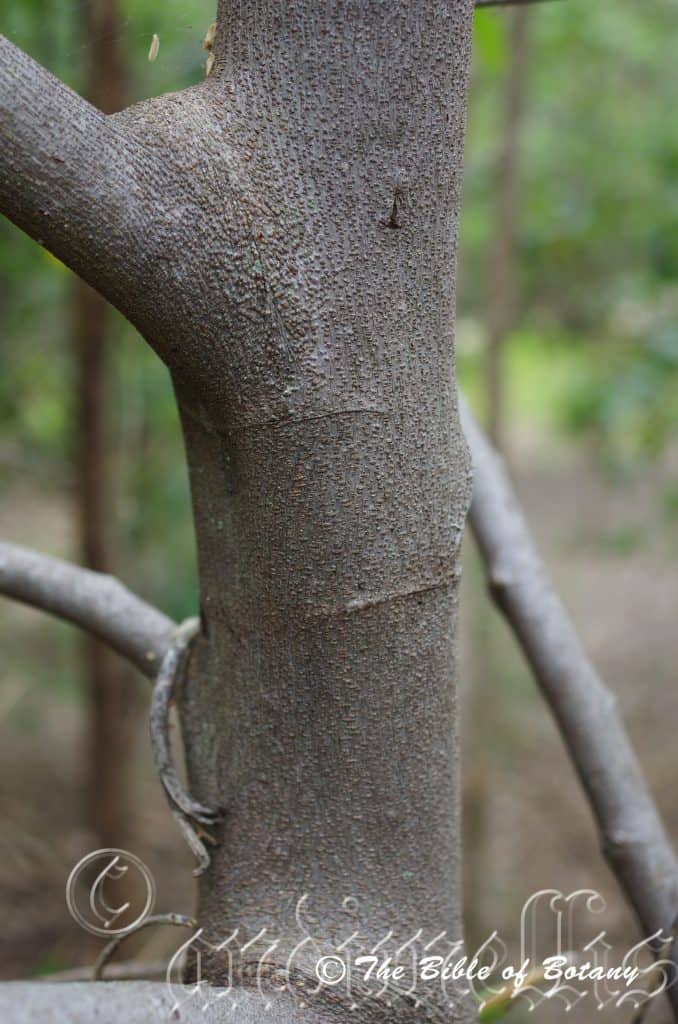
Author’s Garden The Pinnacles NSW
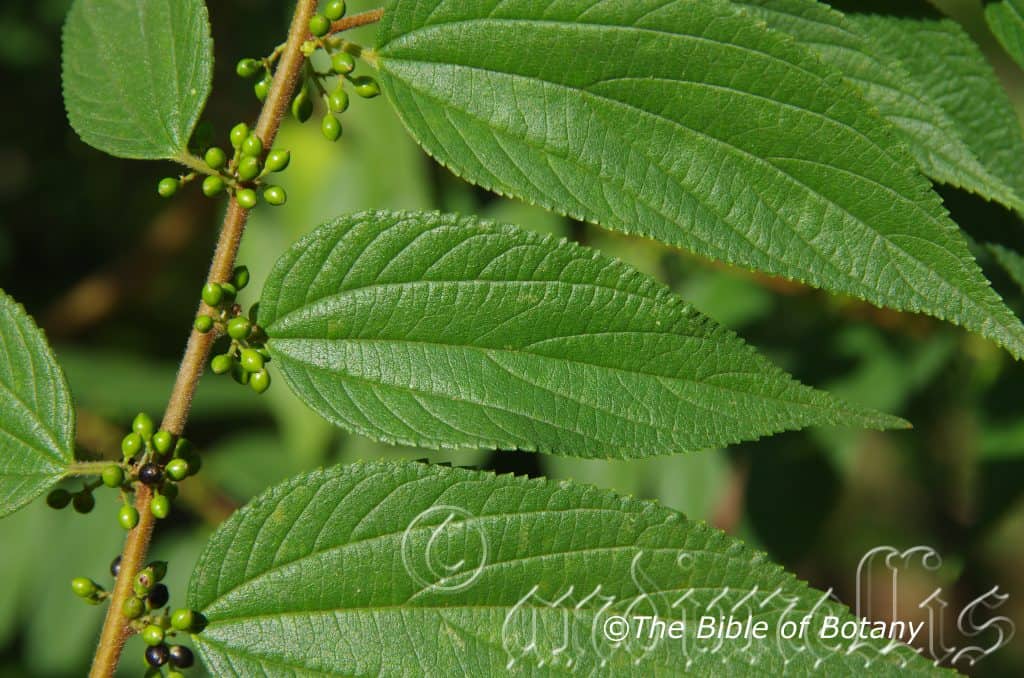
Author’s Garden The Pinnacles NSW
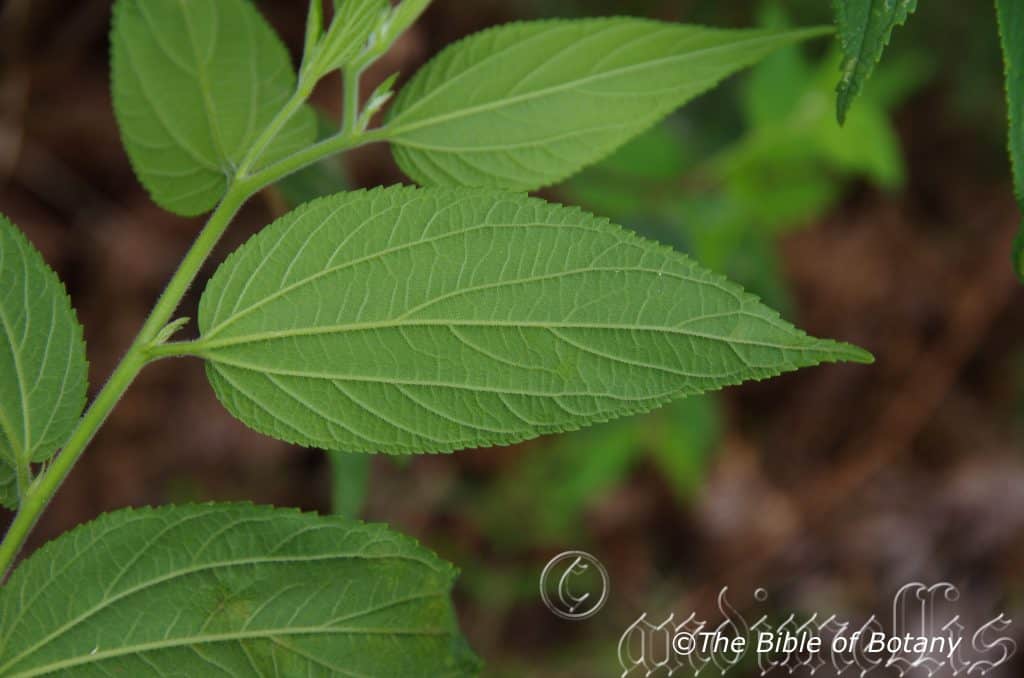
Author’s Garden The Pinnacles NSW

Upper flower showing unopened stamens Author’s Garden The Pinnacles NSW
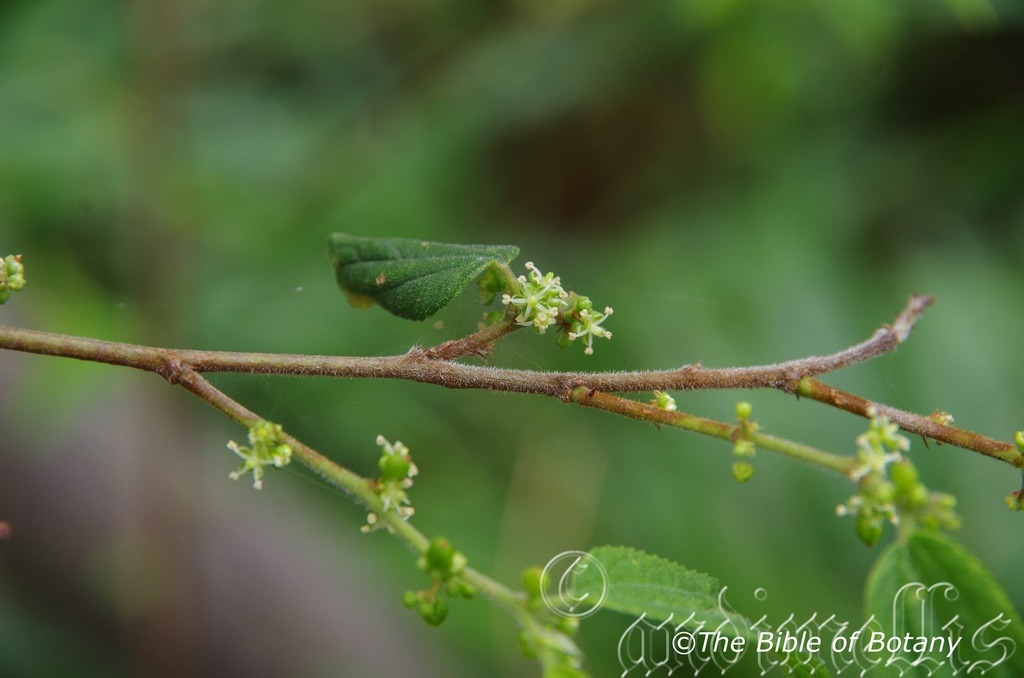
Stamens opened with anthers all intack Author’s Garden The Pinnacles NSW
Stamens opened with anthers dropping Author’s Garden The Pinnacles NSW
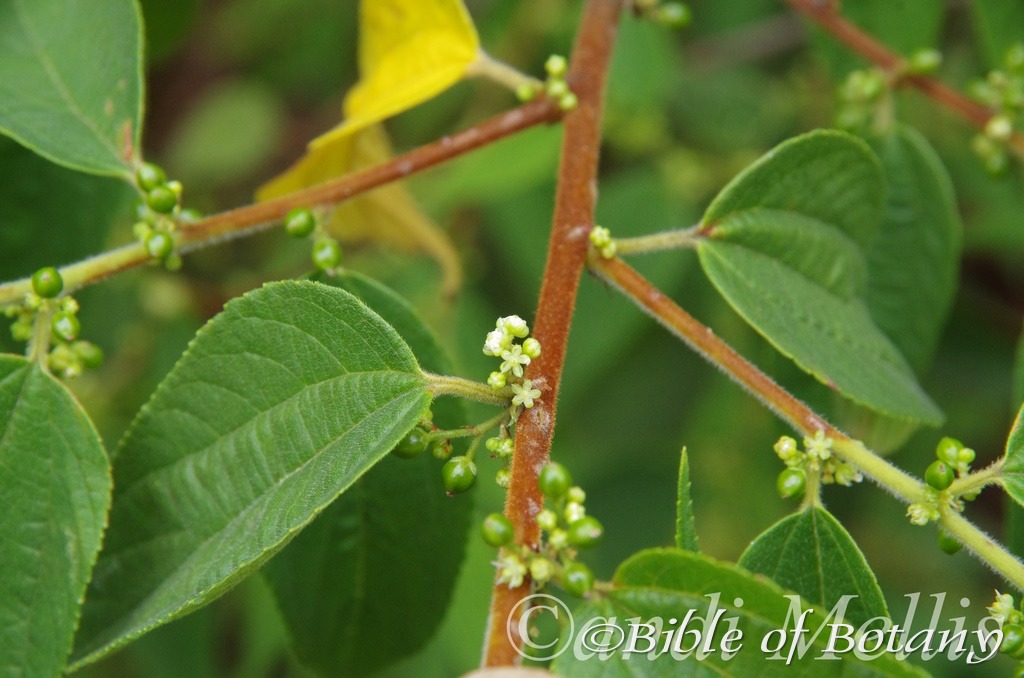
All anthers discarded with receptive pistil on the lower two flowers Author’s Garden The Pinnacles NSW
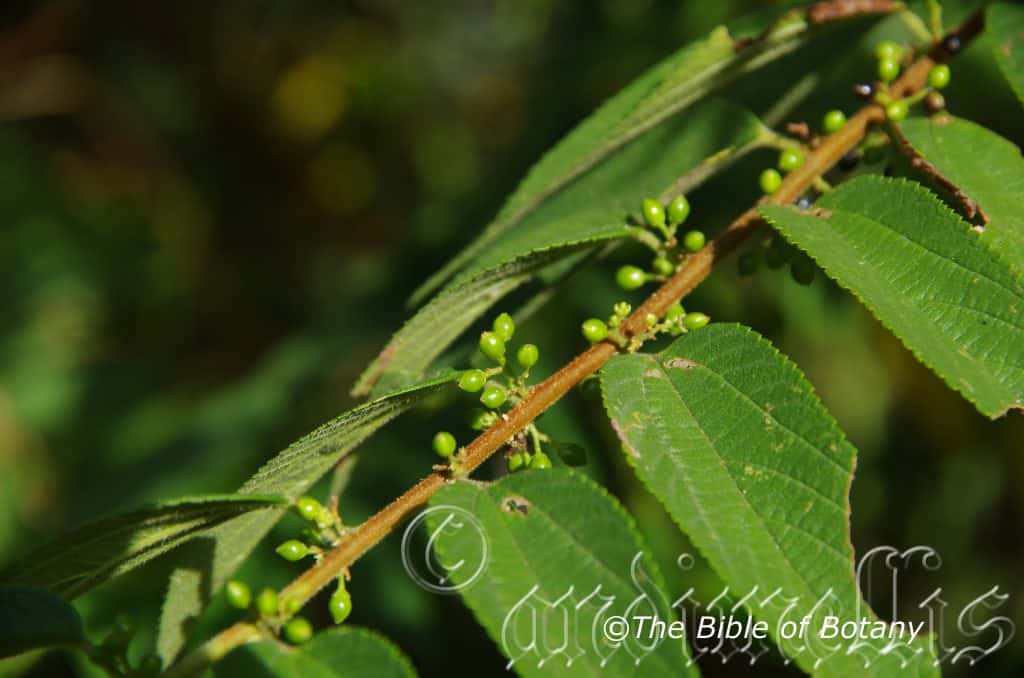
Author’s Garden The Pinnacles NSW
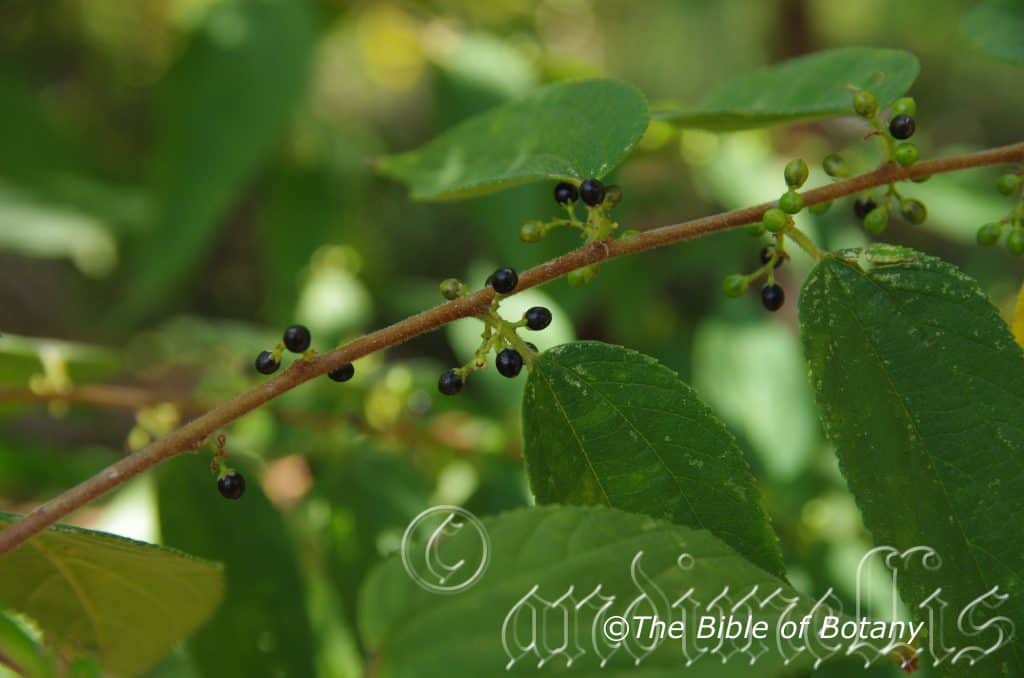
Author’s Garden The Pinnacles NSW
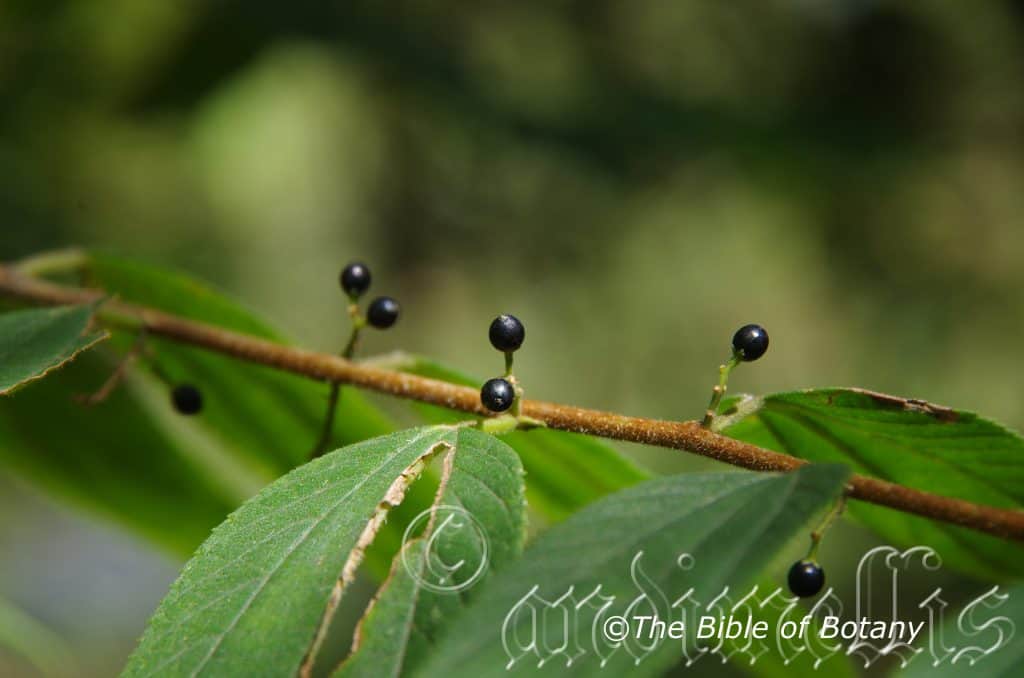
Author’s Garden The Pinnacles NSW
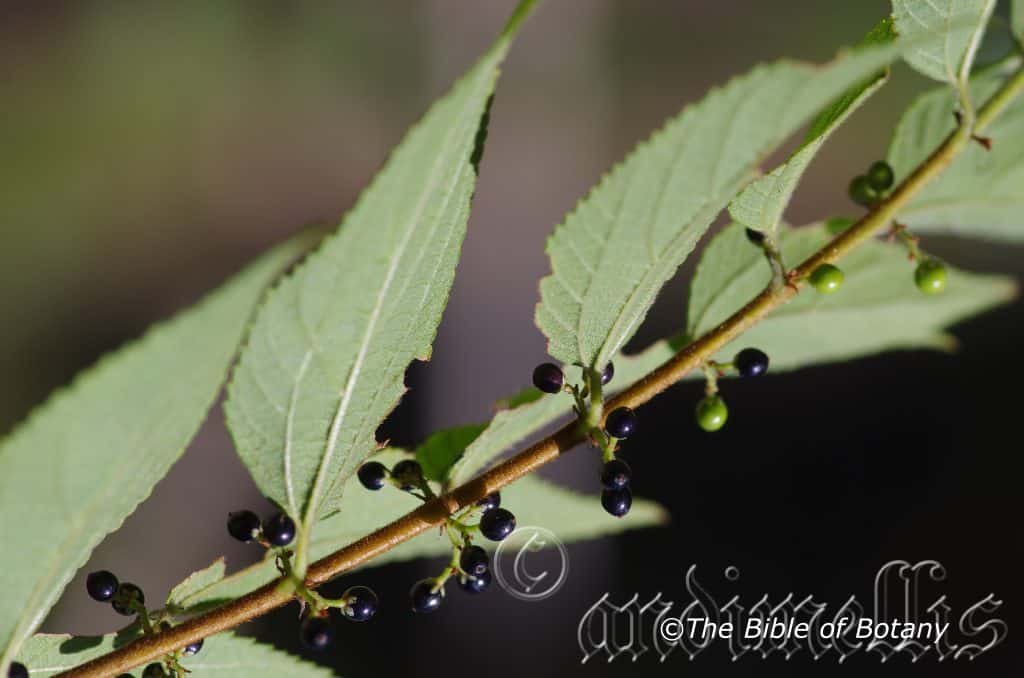
Author’s Garden The Pinnacles NSW
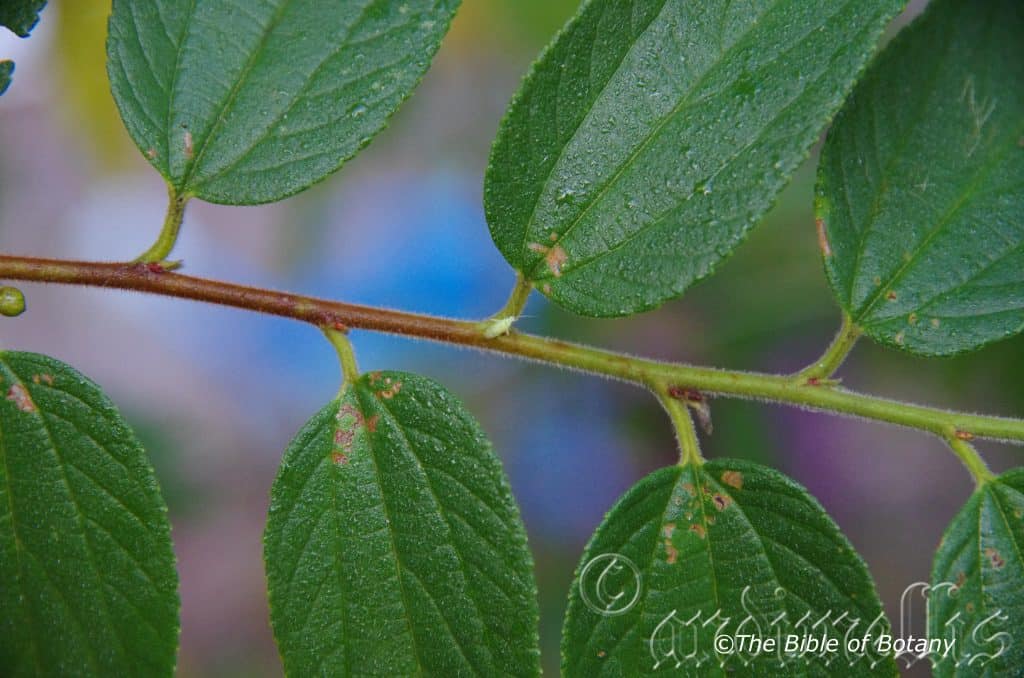
Probably a Neuroptera specie which are beneficial insects to have in the garden Author’s Garden The Pinnacles NSW
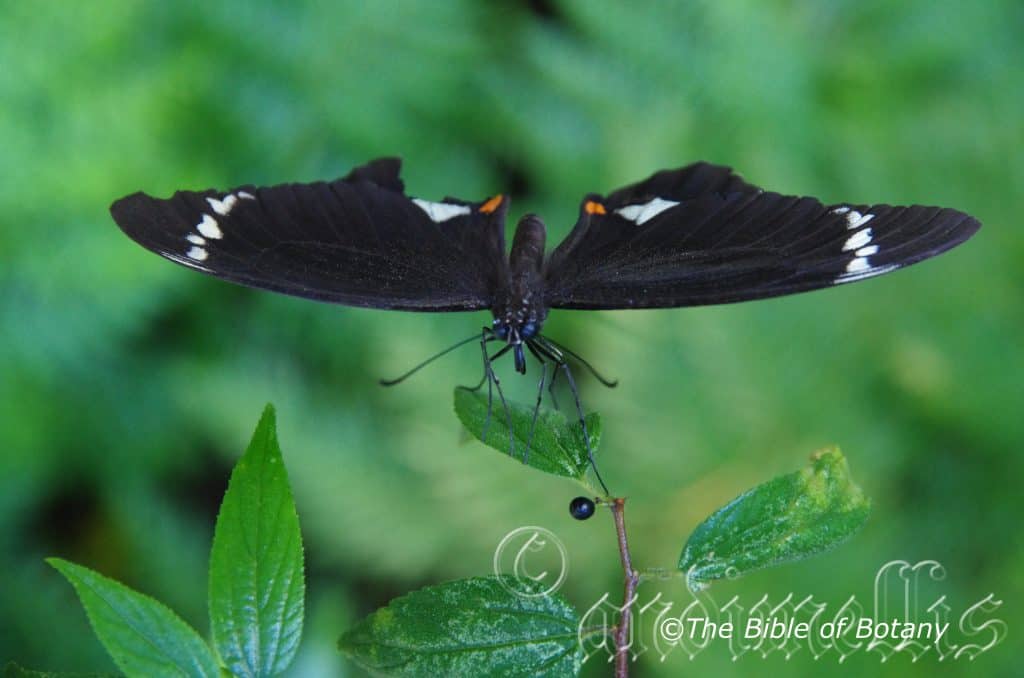
Male Papilo aegeus, the butterflies feed on nectar from the flowers Author’s Garden The Pinnacles NSW
Trema tomentosa
Classification:
Class: Eudicots
Class: Rosids
Order: Rosales
Family: Cannabaceae
Genus: From Trema, which is Ancient Greek for a hole or aperture. It refers to seeds, which have a hollow like depression which resembles an aperture.
Specie: From Tōmentōsa, which is Latin for to be covered in long down. It refers to hairs, which are long, soft and wavy or matted.
Variety: Trema tomentosa var. aspera. From Asper, which is Ancient Greek for rough like a rasp. It refers to surfaces usually the leaves phyllodes or fronds or at times the stems, which are rather rough.
Variety: Trema tomentosa var. tomentosa. From Tōmentōsa, which is Latin for to be covered in long down. It refers to hairs, which are long, soft and wavy or matted.
Variety: Trema tomentosa var. viridis. From Virens, which is Latin for green. It refers to any structure or organ, which is bright green.
Common Name: Poison Peach.
Distribution:
Trema tomentosa var. aspera is found east from Sunday Island off the Kimberley Coast in north west Western Australia down through most of the Northern Territory to the northern half of Queensland then down the east coast to the Bega Valley in far southern New South Wales.
Trema tomentosa var. tomentosa is found in scattered populations east from the Keep River National Park in north west Northern Territory across the top end then down the east coast to Rafferties Creek in norther New South Wales.
Trema tomentosa var. viridis is found east from Sunday Island off the Kimberley Coast in north west Western Australia down through most of the Northern Territory to the northern half of Queensland then down the east coast to the Bega Valley in far southern New South Wales.
It is also found in Andaman Islands, Assam, Bangladesh, Borneo, Cambodia, China South-Central, Christmas Island, East Himalaya, Hainan Island, India, Java, Laos, Lesser Sunda Island, Malaya, Maluku, Myanmar, Nepal, New Caledonia, New Guinea, Nicobar Island, Papua, Philippines, Sulawesi, Sumatra, Thailand, Tibet, Tonga, Vietnam.
https://avh.ala.org.au/occurrences/search?taxa=Trema+tomentosa#tab_mapView
Habitat Aspect Climate:
Trema tomentosa prefers dappled light shade to full sun. It grows adjacent to well-developed sub-tropical rainforests, tropical rainforests, monsoonal forests, moist Eucalyptus forests or riparian zones along both permanent and seasonal rivers, streams and creeks. The altitude ranges from 5 meters ASL to 1010 meters ASL.
The temperatures range from 4 degrees in July to 40 degrees in January.
The rainfall ranges from lows of 200mm to 3200mm average per annum.
Soil Requirements:
Trema tomentosa prefers most types of soils from sandy loams to heavy clays. The soils are mostly derived from decomposed brown basalts, black basalts, sandstones, shale, metamorphic rocks or granites.
The soils pH ranges from 4pH to 6.5pH. It does not tolerate waterlogged soils. Non saline soils to moderately saline soils are tolerated.
Height & Spread:
Wild Plants: 4m to 7m by 4m to 7m.
Characteristics:
Trema tomentosa grows as a small tree with a straight, pinkish-brown, scabrous, scaly trunk that is usually covered in white or at times pale rusty tomentose hairs on Trema tomentosa var. tomentosa while the hairs are pulverulent on Trema tomentosa var. aspera. The branches are pale grey-brown and only becoming green near the apex where the newer leaf growth occurs. The branchlets are sparsely covered in lighter coloured lenticels.
The alternate, ovate to lanceolate leaves of Trema tomentosa var. tomentosa measure 50mm to 160mm in length by 18mm to 65mm in width. The base is rounded to slightly cordate while the apex is very long narrowly acute. The discolourous laminas are olive-green to sea-green, semi glossy, scabrous and covered in white or pale rusty tomentose hairs on the upper lamina while the lower lamina is paler and dull. The leaf margins are regularly toothed while the laminas are flat to recurve slightly from the mid vein to the margins. The mid vein 2 lateral laterals are strongly prominent while the lateral veins are prominent on the lower laminas and distinctly visible from the upper laminas. The petiole measures 5mm to 10mm in length.
The alternate, ovate to lanceolate leaves of Trema tomentosa var. aspera measure 20mm to 80mm in length by 10mm to 30mm in width. The base is rounded to cuneate while the apex is very long narrowly acute. The discolourous laminas are olive-green to sea-green, dull, scabrous and covered in white pulverulent hairs on the upper lamina while the lower lamina is paler. The leaf margins are regularly toothed while the laminas are flat to recurve slightly from the mid vein to the margins. The mid vein 2 lateral laterals are strongly prominent while the lateral veins are prominent on the lower laminas and distinctly visible from the upper laminas. The petiole measures 5mm to 10mm in length.
Inflorescences of Trema tomentosa are born in compact panicles from the leaf axils. The pastel green peduncles, rachises and pedicels are covered in fine white to tomentose hairs. The peduncles measure 2mm to 3.5mm in length while the rachises measure 73mm to 4mm in length and the pedicels measure 1.5mm to 2.5mm in length. The 5 pastel green, cupular petals are covered in white tomentose hairs externally and are glabrous internally. The petals measure 1.5mm to 2mm in length by 1mm to 1,5mm in width.
The 5 flatish filaments are free for their entire length and rest on the petals. The filaments measure 2mm to 2.5mm in length. The filaments are pale grass-green while the anthers are white. The anthers dehisce ten are shed prior to the pistil becoming receptive.
The pastel green globose style and stigma are glabrous. The pistil measures 1mm to 1.5mm in length. Trema tomentosa flowers appear from mid November through to early May.
The fruits of Trema tomentosa are globose to obovoidal drupes. The drupes are initially covered in white caducous hirsute hairs and measure 3mm to 4.5mm in length by 2.5mm to 4mm in diameter. The green drupes turn deep purple black externally and translucent burgundy internally when ripe. The calyx lobes are persistent on the ripe fruit. The single black seeds are flattened “U” shaped and measure 2mm to 2.5mm in length and width by 2mm in depth. The fruit ripen from early March through to late May.
Wildlife:
Trema tomentosa fruits are eaten by many small to medium size honey eaters. The Brown Cuckoo Dove, Macropygia amboinensis is a frequent visitor and consumes large quantities of the fruit as does the Crested pigeon, Ocyphaps lophotes.
Cultivation:
Trema tomentosa is a magnificent small shrub that should be grown in association with other rainforest specie. It is ideal at the edge of a rainforest. It also make great contribution to park gardens offering quick growth, flowering from an early age and balance to any scene. In cultivation it will grow from 4 meters to 6 meters in height by 4 meters to 6 meters in diameter when grown in the open or taller and narrower if grown closer together as a rainforest tree.
It grows exceptionally well on lighter soils where deep leaf litter keeps the soil cool and moisture at an even level. If these requirements are met it can cope with temperatures as low as minus 5 degrees and up to 36 degrees. It is moderately drought resistant.
Add to the above, if it is given an adequate supply of water and a little native fertilizer on a regular basis the plants should respond with good flowering and fruit over a long period.
It can be tipped pruned or fairly hard pruned to form smaller denser shrubs. Plants that are not pruned form a taller pyramidal small tree which is very open in habit.
In country areas trees frequently appear over or near septic trenches where they can colonize large areas very quickly. It is an excellent small tree for removing excess moisture form the ground yet with their more open canopy still allow air movement to aid in the drying of the ground along sullage drains.
I have grown Trema tomentosa subsp. aspera as a bonsai plant for over 12 years where a trunk diameter of 70mm was achieved. This could be an excellent plant for beginners to practice on as it is quick growing giving a good affect in a few years.
Propagation:
Seeds: The seeds of Trema tomentosa can be removed easily from the fruits however care should be taken as the fruits are considered toxic to humans.
Sow freshly treated seeds directly into a seed raising mix, keeping them moist not wet. Do not over water as the seeds will rot off before germination takes place. Place the trays in a cool shaded area with 50mm shade cloth in the bush house. When the seedlings are 20mm to 25mm tall, prick them out and plant them into 50mm native tubes using a good organic mix.
As the seedlings roots reach the bottom of the tubes plant them out into their permanent position. Do not delay.
Fertilize using seaweed, fish emulsion or organic chicken pellets soaked in water on an alternate basis. Fertilize every two months until the plants are established then annually in early September to October to maintain better colour, health, vitality and flowering.
Further Comments from Readers:
“Hi reader, it seems you use The Bible of Botany a lot. That’s great as we have great pleasure in bringing it to you! It’s a little awkward for us to ask, but our first aim is to purchase land approximately 1,600 hectares to link several parcels of N.P. into one at The Pinnacles NSW Australia, but we need your help. We’re not salespeople. We’re amateur botanists who have dedicated over 30 years to saving the environment in a practical way. We depend on donations to reach our goal. If you donate just $5, the price of your coffee this Sunday, We can help to keep the planet alive in a real way and continue to bring you regular updates and features on Australian plants all in one Botanical Bible. Any support is greatly appreciated. Thank you.”
In the spirit of reconciliation we acknowledge the Bundjalung, Gumbaynggirr and Yaegl and all aboriginal nations throughout Australia and their connections to land, sea and community. We pay our respect to their Elders past, present and future for the pleasures we have gained.
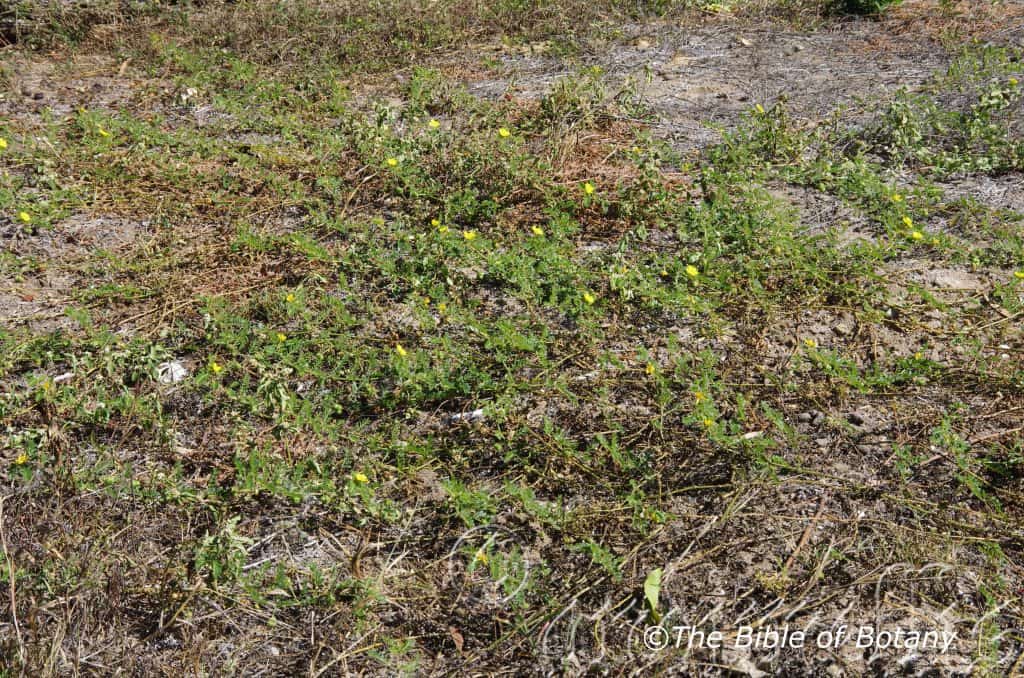
Bushland Beach Qld.
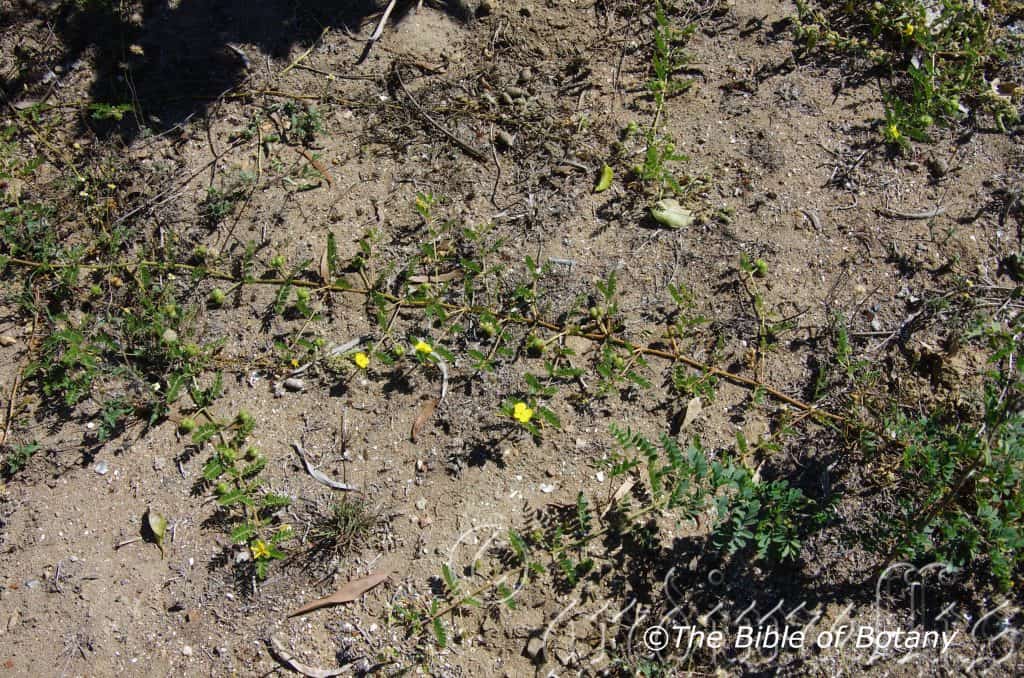
Bushland Beach Qld.
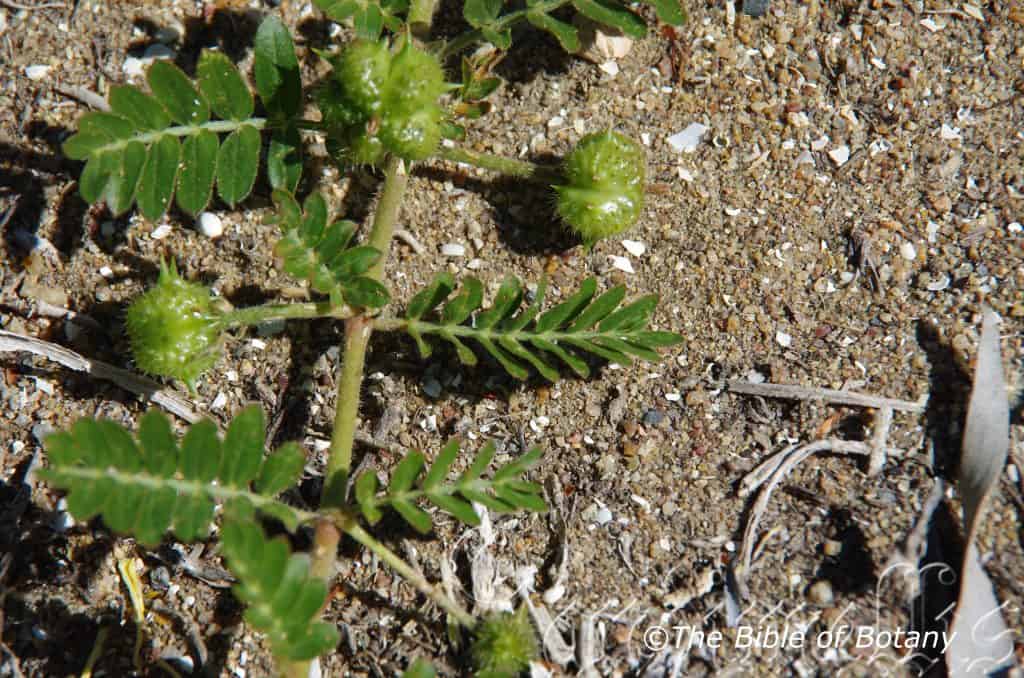
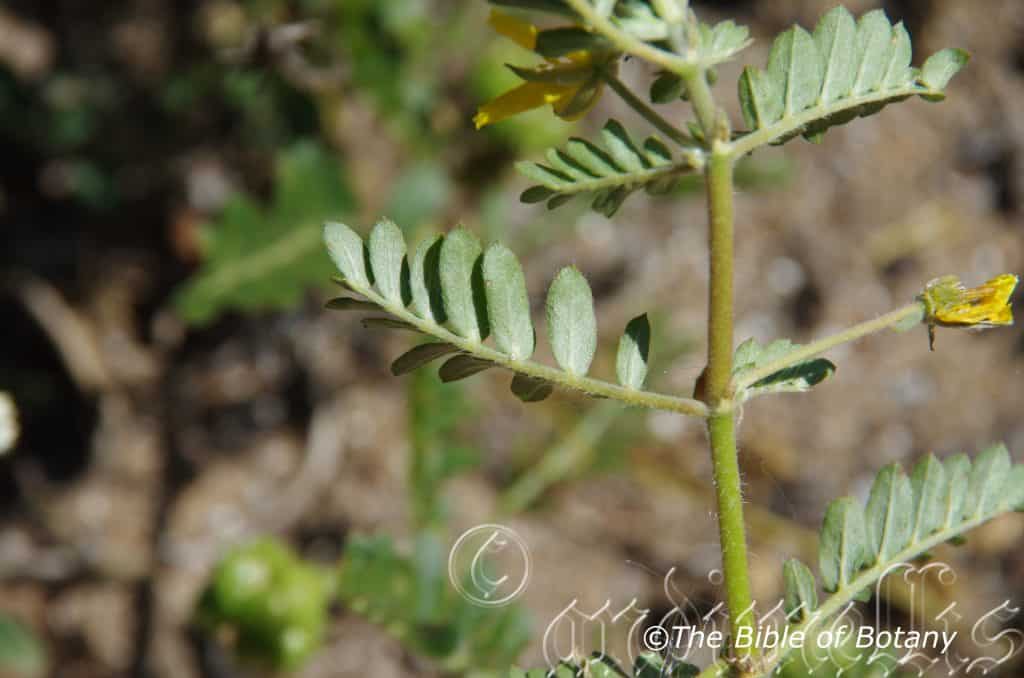
Bushland Beach Qld.
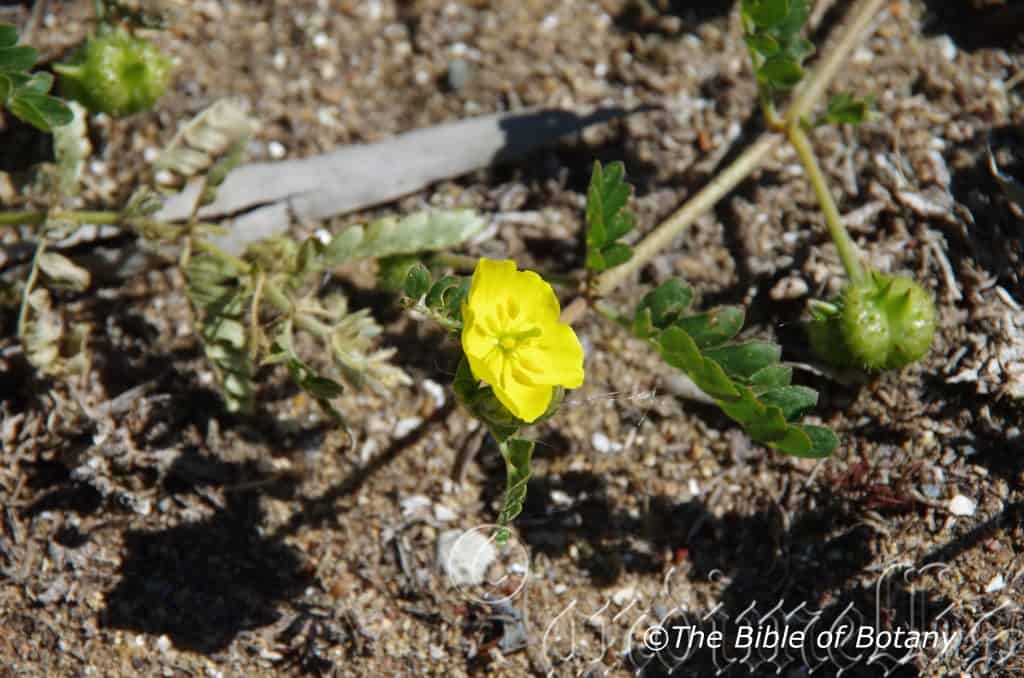
Bushland Beach Qld.
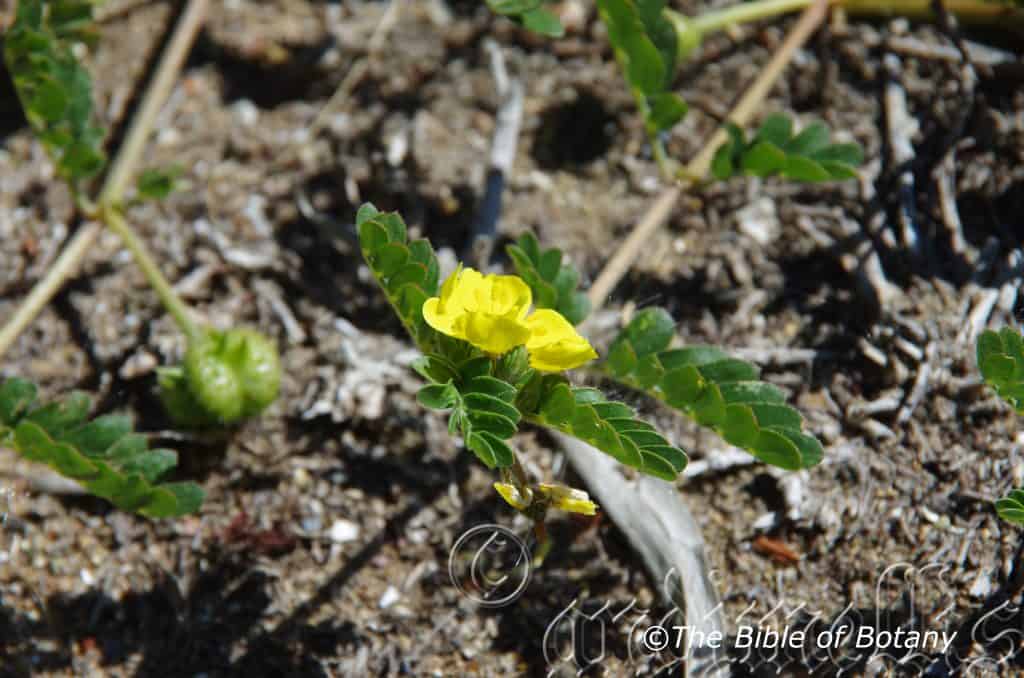
Bushland Beach Qld.
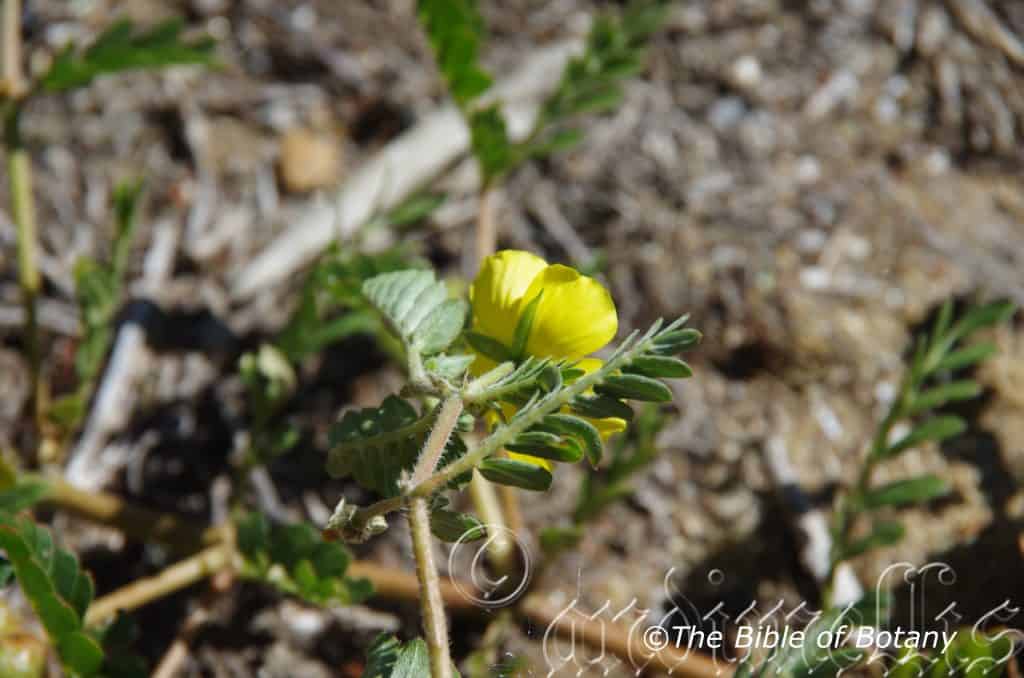
Bushland Beach Qld.

Bushland Beach Qld.
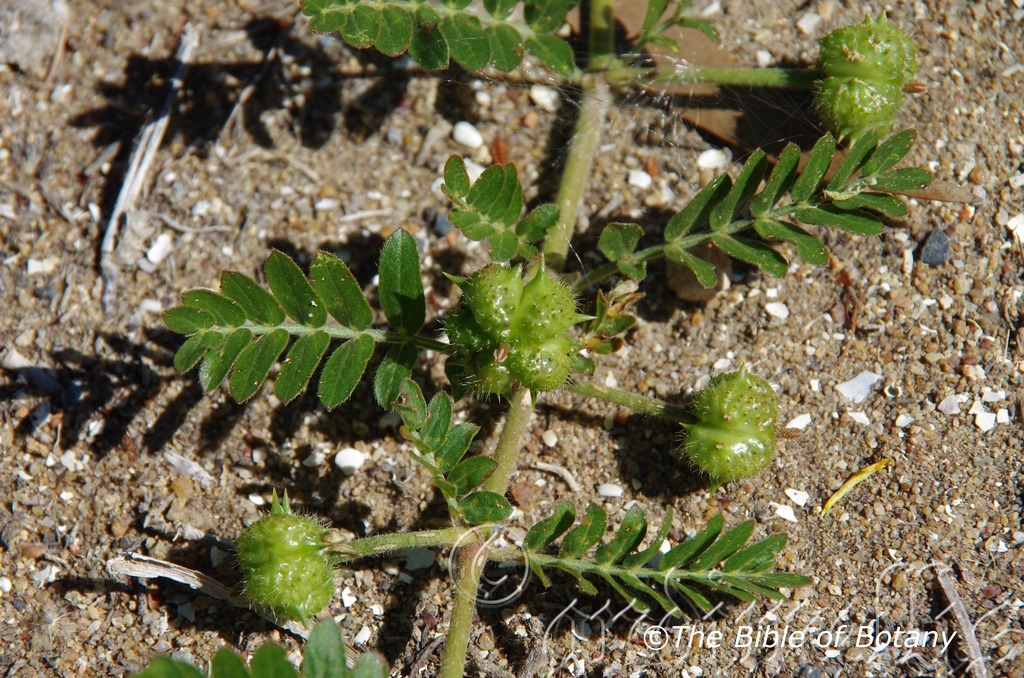
Bushland Beach Qld.

Bushland Beach Qld.
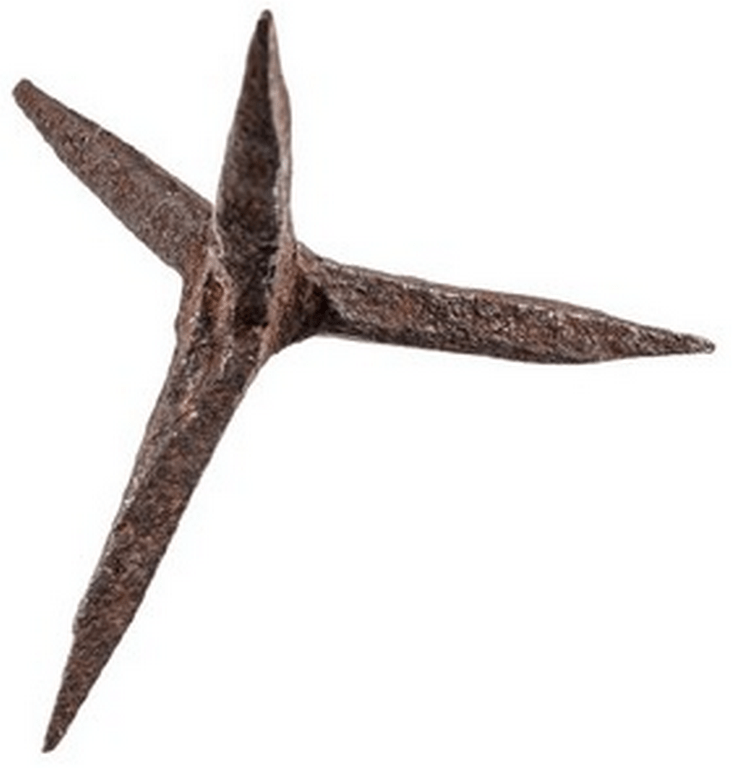
Ancient Persian Invention. Caltrop common weapon against troops and their horses.
Tribulus cistoides
Classification:
Class: Eudicots
Class: Rosids
Order: Zygophyllales
Family: Zygophyllaceae
Genus: From Tríbolos, which is Ancient Greek for a caltrop, which is a weapon when placed on the ground always has one point facing upwards to pierce the foot, boots of the enemy or their horses. It refers to fruits, which have spines in a typical caltrop form.
Specie: From Kístē, which is Ancient Greek for a chest or casket and Eîdos/Oides, which are Ancient Greek for alike or similar to. It refers to fruits, which resemble little caskets with caltrop spines.
Common Name: Caltrop or Goats Head Burr.
Distribution:
Tribulus cistoides is found in the northern half of mainland Australia especially along the coastlines.
It is also found in Cape Verde, Southern and Central China, Comoros, Eritrea, Ethiopia, Gilbert Island, Hainan, Howland-Baker Island, Jawa, Kenya, Lesser Sunda Island, Madagascar, Maluku, Mozambique, Mozambique Channel Islands, New Caledonia, New Guinea, Papua, Phoenix Islands, Somalia, South China Sea, Sudan, Sulawesi, Taiwan, Tanzania, Thailand, Tokelau-Manihiki and Vietnam.
https://avh.ala.org.au/occurrences/search?taxa=Tribulus+cistoides#tab_mapView
Habitat Aspect Climate:
Tribulus cistoides prefers dappled light shade to full sun. It grows in well drained exposed situations along coastal bays, islands dry riparian zones in arid and desert habitats. The altitude ranges from 5 meters ASL to 550 meters ASL.
The temperatures range from 4 degrees in July to 46 degrees in January.
The rainfall ranges from lows of 150mm to 3200mm average per annum.
Soil Requirements:
Tribulus cistoides prefers most types of sandy soils. The soils are derived from decomposed, sandstones, granites, accumulated beach sands on back dunes, accumulated desert sands, alluvial silts and screes. The soils pH ranges from 4pH to 7.5pH. It does not tolerate waterlogged soils. Non saline soils to strongly saline soils are tolerated as are salt laden winds.
Height & Spread:
Wild Plants: 100mm to 150mm by 600mm to 1500mm.
Characteristics:
Tribulus cistoides grows as a prostrate or ascending perennial over adjacent small herbs. The branches are pale reddish-brown and glabrous or sparsely covered in white villous hairs. The olive-green stems are sparsely to moderately covered in white villous hairs.
There are 4 to 7 pairs of opposite, oblong leaflets on a leaf of Tribulus cistoides that measure 8mm to 20mm in length by 5mm to 9mm in width. The rachis and petioles are moderately to densely covered in long, white villous hairs. The rachis measures 12mm to 65mm in length, while the petioles are sessile to 1mm in length. The slightly oblique base is rounded, while the apex is broad acute with a small mucronate tip. The discolourous laminas are deep green, dull and glabrous on the upper lamina, while the lower lamina is densely covered in long, white villous hairs. The leaf margins are entire and recurve slightly upwards from the mid vein to the margins. The mid vein is strongly prominent on the lower lamina and is sunken on the upper lamina, while the lateral veins are barely noticeable.
The inflorescences of Tribulus cistoides are born singularly from the leaf axils. The pale olive-green pedicels are sparsely to moderately covered in long, white villous hairs. The pedicels continue to lengthen from the bud stage until the fruits near maturation and measure 8mm to 45mm in length. The 5 pale grass-green narrow lanceolate sepals are sparsely to moderately covered in long, white villous hairs externally, are glabrous internally and measure 11mm to 14mm in length by 2mm to 4mm in width. The 5 bright yellow, glabrous petals measure 15mm to 18mm in length by 12mm to 15mm in width.
The 10 tapering filaments are greenish-yellow at the base and deep yellow on the apical half. The filaments are somewhat erect, free for their entire length and measure 4mm to 4.5mm in length. The deep yellow basi fixed, oblong anthers measure 2mm to 2.5mm in length.
The pale green erect style is sparsely covered in long, white villous hairs at the base while the glabrous stigma is cylindrical. The pistil measures 8mm to 10mm in length. The flowers may appear throughout the year but are more frequent following rain.
The fruits of Tribulus cistoides are globose to obovoidal subglabrous drupes with a few scattered, long, white hairs arising from a tubercules. Each carpel on the drupes have 2 pungent rigid spines. The drupes measure 20mm to 25mm in length by 30mm to 40mm in diameter.
Wildlife:
Tribulus cistoides flowers are visited by ants that collect nectar from the nectaries.
Cultivation:
Tribulus cistoides is a small prostrate ground cover that would make a great contribution to medium rockeries where the fruits can be easily controlled. In cultivation it will grow from 150mm to 300mm in height by up to 2 meters in diameter when grown in the open.
It grows exceptionally well on lighter sandy soils with a lack of leaf litter where the sands can reach very high temperatures. If these requirements are met it can cope with temperatures as low as 2 degrees and up to 49 degrees. It is moderately drought resistant once established.
Add to the above, if it is given a little extra water with a little native fertilizer on a regular basis the plants will respond with good flowering and fruit over a long period.
It can be tipped pruned to form smaller denser shrubs with copious flowering.
It adds a lot of colour to the ground especially when mixed with native paper daisies like the pink or red flowers of Xerochrysum bracteatum or Rhodanthe chlorocephala. Other interesting plants that can be used successfully in a dry arid type garden could include Halosarcia bulbosa, Tecticornia verrucosa, Sarcocornia blackiana or Carpobrotus rossii to mention a few.
Propagation:
Seeds: The seeds of Tribulus cistoides can be removed easily from the fruits however care should be taken as the drupes have those pungent spines. Place the drupes in a paper bag and leave in the car for a few days to a week.
Sow fresh seeds directly into a seed raising mix, keeping them moist not wet. Do not over water as the seeds will rot off before germination takes place. Place the trays in a cool shaded area with 30mm shade cloth in the bush house. When the seedlings reach 20mm to 25mm tall, prick them out and plant them into 50mm native tubes using a good organic mix.
As the seedlings roots reach the bottom of the tubes plant them out into their permanent position.
Fertilize using seaweed, fish emulsion or organic chicken pellets soaked in water on an alternate basis. Fertilize every two months until the plants are established then annually in early September to October to maintain better colour, health, vitality and flowering.
Further Comments from Readers:
“Hi reader, it seems you use The Bible of Botany a lot. That’s great as we have great pleasure in bringing it to you! It’s a little awkward for us to ask, but our first aim is to purchase land approximately 1,600 hectares to link several parcels of N.P. into one at The Pinnacles NSW Australia, but we need your help. We’re not salespeople. We’re amateur botanists who have dedicated over 30 years to saving the environment in a practical way. We depend on donations to reach our goal. If you donate just $5, the price of your coffee this Sunday, We can help to keep the planet alive in a real way and continue to bring you regular updates and features on Australian plants all in one Botanical Bible. Any support is greatly appreciated. Thank you.”
In the spirit of reconciliation we acknowledge the Bundjalung, Gumbaynggirr and Yaegl and all aboriginal nations throughout Australia and their connections to land, sea and community. We pay our respect to their Elders past, present and future for the pleasures we have gained.
Trichoanthes cucumerina
Classification:
Unranked: Eudicots
Unranked: Rosids
Order: Cucurbitales
Family: Cucurbitaceae
Subfamily: Cucurbitoideae
Genus: From Thrix, which is Ancient Greek for a hair or like and ántha/ánthos, which are Ancient Greek for the male reproductive organs on a flower or the flower. It refers to plants, which have hairy flowers or anthers.
Specie: From Curcuma, which is Latinized from the Arabic vernacular, Kurkum for tumeric. It refers to plants, which have a structure or organ, which resembles the tumeric root or cucumber.
Sub specie: Trichosanthes cucumerina var. cucumerina. From Curcuma, which is Latinized from the Arabic vernacular, Kurkum for tumeric. It refers to plants, which have a structure or organ, which resembles the tumeric root or cucumber. This is the only sub species found in Australia.
Common Name: Native Cucumber or Native Luffa.
Distribution:
Trichosanthes cucumerina is found throughout the northern tropics of Australia from the Ashburton River in coastal Western Australia to Cairns in far north coastal Queensland.
https://avh.ala.org.au/occurrences/search?taxa=Trichoanthes+cucumerina#tab_mapView
Habitat Aspect Climate:
Trichosanthes cucumerina prefer dappled light shade to full sun, growing adjacent to and on the margins of drier monsoonal rainforests well developed rainforests and riparian zones of moist rainforests and open woodlands. The altitude ranges from 5 meters ASL to 550 meters ASL.
The temperatures range from 8 degrees in July to 40 degrees in January.
The rainfall ranges from lows of 700mm to 3000mm average per annum.
Soil Requirements:
Trichosanthes cucumerina prefer soils are better quality sandy loams to medium clays often with scattered rocks and boulders. The soils are derived from decomposed sandstones. The soils pH ranges from 4.5pH to 6pH. It does not tolerate waterlogged soils. Non saline soils to moderately saline soils are tolerated.
Height & Spread:
Wild Plants: 3m to 5m by 3m to 5m.
Characteristics:
The stems of Trichosanthes cucumerina are twinning, blue-green, scabrous, scaly and usually scrambles over nearby shrubs or climbs on any available support. The branches are pale green and are sparsely but at times moderately covered in white glandular hairs that are viscous when new.
The alternate, broadly ovate, cordate or deltoid leaves of Trichosanthes cucumerina often have 3 or more variable lobes. The leaves measure 60mm to 190mm in length by 60mm to 160mm in width. The bases are broadly truncate with 2 broad lobes further out while the apexes are acuminate with a caudate to apiculate tip. The discolourous laminas are blue-green, dull and are moderately covered in white glandular hairs that are viscous when new on the upper laminas while the lower laminas are paler. The leaf margins are entire, and slightly lobed with or without teeth. The Australian specie to my knowledge is always toothed and hangs downwards. The mid vein and 8 to 12 laterals are slightly prominent on the lower laminas. The petiole measures 40mm to 65mm in length. The tendrils are three branched with haustoria at the apex of each branch and measure 85mm to 220mm in length. The leaves emit an unpleasant dull odour reminiscent of stale vomit when crushed.
The plants are monoecious producing imperfect inflorescences on the same plant. Trichosanthes cucumerina female flowers are usually born singularly while the male flowers are produced on a small loose panicle from the leaf axils. The pale blue-green peduncles, rachises and pedicels are sparsely covered in white glandular hairs. The pale blue-green calyxes and 5 calyx lobes are glabrous. The calyx tubes measure 16mm to 22mm in length while the narrowly linear lobes measure 1.5mm to 2mm in length. The white petals turn cream to pale creamy yellow after anthesis. The elliptical petals are fimbriate with a divided acuminate apex. The petals measure 12mm to 18mm in length including the 8mm to 12mm fimbriate margin.
The 3 inserted filaments are free for their entire length and measure 0.5mm to 1.5mm in length. The filaments are white while the anthers are green. Two anthers are bilocular while the third is unilocular. The sinus is locules of the anthers measure 0.5mm in length and 0.8mm to 1.2mm in diameter.
The cream to bright yellow style and stigma are glabrous while the ovary is green and sparsely covered in white hirsute hairs. The pistil measures 8mm to 10mm in length. The 3 staminodes are generally inconspicuous. Trichosanthes cucumerina flowers appear from late February through to early August.
The fruits of Trichosanthes cucumerina are obpyriform gourds with a pointed apex. The gourds are glabrous or sparsely covered in white hirsute hairs and measure 25mm to 52mm in length by 20mm to 30mm in diameter. The green capsules turn paler green with cream or white spots and blotches becoming larger when ripe. The styles are persistent on the ripe fruit. The 6 to 10, pale fawn, flat seeds are ellipsoidal and measure 8mm to 12mm in length by 5mm to 6.5mm in width and 3.5mm to 5mm in depth.
Wildlife:
Trichosanthes cucumerina seeds are eaten by native rats and mice.
The exotic species have long slender fruits known as snake gourds and are cultivated as a culinary delight in many Asian countries. The Australian species offer the same benefits as the Asian varieties with smaller unusual shaped fruits. I would suspect like the exotic varieties that this variety could be grown commercially throughout the year in tropical zones where water is not a problem.
Cultivation:
Trichosanthes cucumerina is an interesting native worthwhile trying as far south as Grafton in frost free zones. In cultivation it grows from 4 meters to 6 meters in height by 5 meters to 8 meters in across when grown in the open on a trellis.
It grows exceptionally well on sandy to medium clays where deep leaf litter keeps the soil cool and moisture at an even level. If these requirements are met they can cope with temperatures as low as minus 5 degrees and up to 36 degrees.
Add to the above, if it is given an adequate supply of water and some native fertilizer on a regular basis the plants could rival their exotic counterparts in fruit production but gain a premium price due to their smaller size.
Propagation:
Seeds: The seeds of Trichosanthes cucumerina can be removed easily from the fruits.
Sow fresh seeds sparingly directly into a seed raising mix, keeping them moist not wet. Do not over water as the seeds will rot off before germination takes place. Place the trays in a warm sunny position. Alternatively place 3 or 4 seeds in a 75mm container and treat as above.
When the seedlings are 20mm to 25mm tall, prick them and plant out or transplant them directly into some prepared soil that has had well-rotted manure or composted incorporated a week earlier. The holes are best at 3 meter centers with a height which can be easily managed for harvesting the fruits.
Cull to 2 plants leaving the 2 stronger plants per hole when they reach 100mm to 150mm in height.
Fertilize using Seaweed, fish emulsion or organic chicken pellets soaked in water and apply the liquid on an alternate basis. Fertilize every month until the plants are well established then on an annual basis in September to October to maintain good health, vigour and better flowering.
Further Comments from Readers:
“Hi reader, it seems you use The Bible of Botany a lot. That’s great as we have great pleasure in bringing it to you! It’s a little awkward for us to ask, but our first aim is to purchase land approximately 1,600 hectares to link several parcels of N.P. into one at The Pinnacles NSW Australia, but we need your help. We’re not salespeople. We’re amateur botanists who have dedicated over 30 years to saving the environment in a practical way. We depend on donations to reach our goal. If you donate just $5, the price of your coffee this Sunday, We can help to keep the planet alive in a real way and continue to bring you regular updates and features on Australian plants all in one Botanical Bible. Any support is greatly appreciated. Thank you.”
In the spirit of reconciliation we acknowledge the Bundjalung, Gumbaynggirr and Yaegl and all aboriginal nations throughout Australia and their connections to land, sea and community. We pay our respect to their Elders past, present and future for the pleasures we have gained.
Trichoanthes subvelutina
Classification:
Unranked: Eudicots
Unranked: Rosids
Order: Cucurbitales
Family: Cucurbitaceae
Subfamily: Cucurbitoideae
Genus: From Thrix, which is Ancient Greek for a hair or like and ántha/ánthos, which are Ancient Greek for the male reproductive organs on a flower or the flower. It refers to plants, which have hairy flowers or anthers.
Specie: From Sub, which is Ancient Greek/Latin for below or lower and Velutinus, which is Latin for velvet. It refers to a plant structure or organs, which are somewhat velvety to touch.
Sub specie:
Common Name: Southern Cucumber or Southern Luffa.
Distribution:
Trichosanthes subvelutina is found on and east of the Great Dividing Range south from near Childers in Queensland to the Richmond River in north eastern New South Wales.
https://avh.ala.org.au/occurrences/search?taxa=Trichoanthes+subvelutina#tab_mapView
Habitat Aspect Climate:
Trichosanthes subvelutina prefers dappled light shade to full sun. It grows adjacent to the margins of well-developed warm subtropical rainforests, gallery forests or riparian zones. The altitude ranges from 35 meters ASL to 650 meters ASL.
The temperatures range from 2 degrees in July to 34 degrees in January.
The rainfall ranges from lows of 900mm to 2000mm average per annum.
Soil Requirements:
Trichosanthes subvelutina prefers better quality light clays to medium clays. The soils are usually derived from decomposed brown or black basalts. The soils pH ranges from 4pH to 6.5pH. It does not tolerate waterlogged soils. Non saline soils to moderately saline soils are tolerated.
Height & Spread:
Wild Plants: 3m to 5m by 3m to 5m.
Characteristics:
Trichosanthes subvelutina grows as a small creeper with twinning, pale blue-green, scabrous stems that are covered in white puberulent hairs. The younger stems are densely covered in white puberulent hairs. The tendrils are twice branched with poorly formed haustorium type apex of each branch and measure 90mm to 200mm in length.
The alternate, ovate, elliptical or obovate leaves of Trichosanthes subvelutina often have 3 or 5 shallow to deeply divided lobes. The leaves measure 40mm to 120mm in length by 50mm to 170mm in width. The bases are narrowly rounded close to the petiole extending to 2 deeply sagittate lobes while the apexes are acute. The discolourous laminas are blue-green, dull and are densely covered in short, white velutinous hairs on the upper laminas while the lower laminas are paler and covered in short, pale brown velutinous hairs on the lower lamina. The leaf margins are entire and slightly to deeply lobed. The mid vein and 4 to 6 laterals are slightly prominent on the lower laminas. The petiole measures 20mm to 100mm in length.
Inflorescences of Trichosanthes subvelutina female flowers are usually born singularly while the male flowers are produced on small loose racemes of 4 to 8 individual flowers from the leaf axils. The pale blue-green peduncles, rachises and pedicels are sparsely covered in white puberulent hairs. The peduncles and rachises measure 100mm to 180mm in length while the pedicels measure 12mm to 20mm in length.
The pale blue-green calyxes and 5 calyx lobes are glabrous. The calyx tubes measure 30mm to 45mm in length while the narrowly linear lobes measure 2mm to 2.5mm in length. The white petals turn cream to pale creamy yellow after anthesis. The 5 spathulate petals are fimbriate with a divided obtuse apex. The petals measure 20mm to 25mm in length including the 10mm to 12mm fimbriate margin. Trichosanthes subvelutina flowers appear from early December through to early May.
Trichosanthes subvelutina fruits are globose to obovoid gourds. The gourds are glabrous or sparsely and measure 80mm to 120mm in length by 30mm to 50mm in diameter. The green capsules turn yellow-orange when ripe. The style is persistent on the ripe fruit.
Wildlife:
Trichosanthes subvelutina seeds are eaten by native rats and mice.
I would suspect like other Cucurbitaceae that there could well be an opening to a commercial market with this specie and it would be worthwhile testing it at home in the home garden.
Cultivation:
Trichosanthes subvelutina is an interesting native worthwhile trying as far south as Melbourne in frost free zones. In cultivation it will grow from 4 meters to 6 meters in height by 5 meters to 8 meters in across when grown in the open on a trellis.
It grows exceptionally well on better quality sandy loams to medium clays where deep leaf litter keeps the soil cool and moisture at an even level. If these requirements are met they can cope with temperatures as low as minus 5 degrees and up to 36 degrees.
Add to the above, if it is given an adequate supply of water and some native fertilizer on a regular basis the plants could produce good quantities of edible fruits. The young fruits and shoots can be cooked and eaten like other vegetables. The mature fruits, which can be quite large, have a bright red pulp around the seeds that can be used in cooking, similar to tomatoes. It is not known whether the seeds need to be removed first or are soft enough to eat once cooked
Propagation:
Seeds: The seeds of Trichosanthes subvelutina can be removed easily from the fruits.
Sow fresh seeds sparingly directly into a seed raising mix, keeping them moist not wet. Do not over water as the seeds will rot off before germination takes place. Place the trays in a warm sunny position. Alternatively place 3 or 4 seeds in a 75mm native tube and treat as above.
When the seedlings are 20mm to 25mm tall, prick them and plant out or transplant them directly into some prepared soil that has had well-rotted manure or composted incorporated a week earlier. The holes are best at 3 meter centers with a height which can be easily managed for harvesting the fruits.
Cull to 2 plants leaving the 2 stronger plants per hole when they reach 100mm to 150mm in height.
Fertilize using seaweed, fish emulsion or organic chicken pellets soaked in water on an alternate basis. Fertilize every two months until the plants are established then annually in early September to October to maintain better colour, health, vitality and flowering.
Further Comments from Readers:
“Hi reader, it seems you use The Bible of Botany a lot. That’s great as we have great pleasure in bringing it to you! It’s a little awkward for us to ask, but our first aim is to purchase land approximately 1,600 hectares to link several parcels of N.P. into one at The Pinnacles NSW Australia, but we need your help. We’re not salespeople. We’re amateur botanists who have dedicated over 30 years to saving the environment in a practical way. We depend on donations to reach our goal. If you donate just $5, the price of your coffee this Sunday, We can help to keep the planet alive in a real way and continue to bring you regular updates and features on Australian plants all in one Botanical Bible. Any support is greatly appreciated. Thank you.”
In the spirit of reconciliation we acknowledge the Bundjalung, Gumbaynggirr and Yaegl and all aboriginal nations throughout Australia and their connections to land, sea and community. We pay our respect to their Elders past, present and future for the pleasures we have gained.
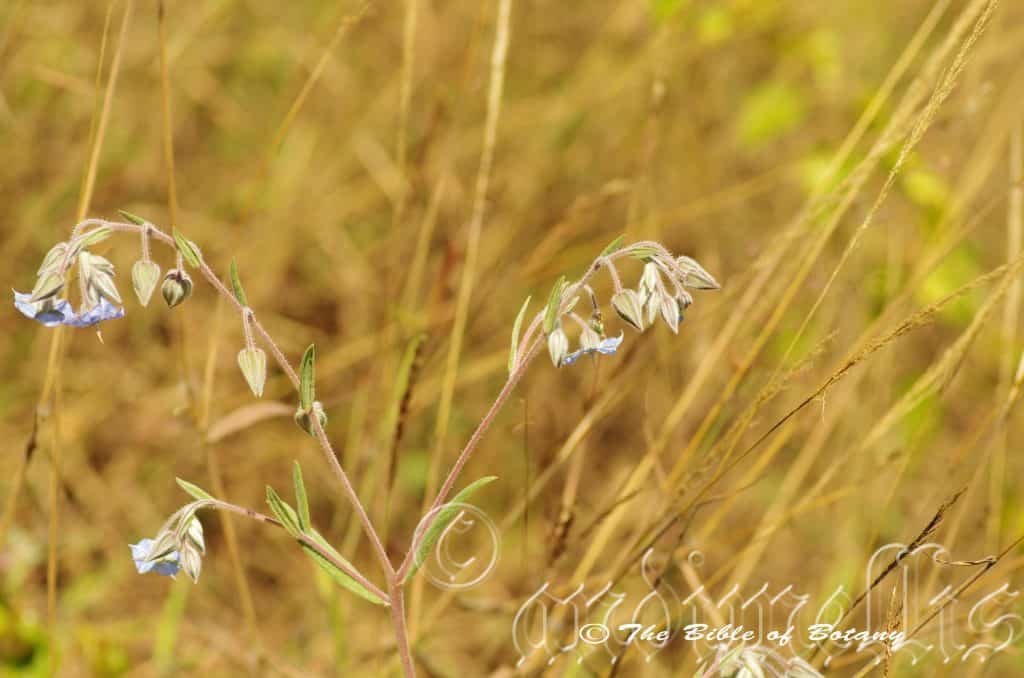
Castle Hill Townsville Qld.
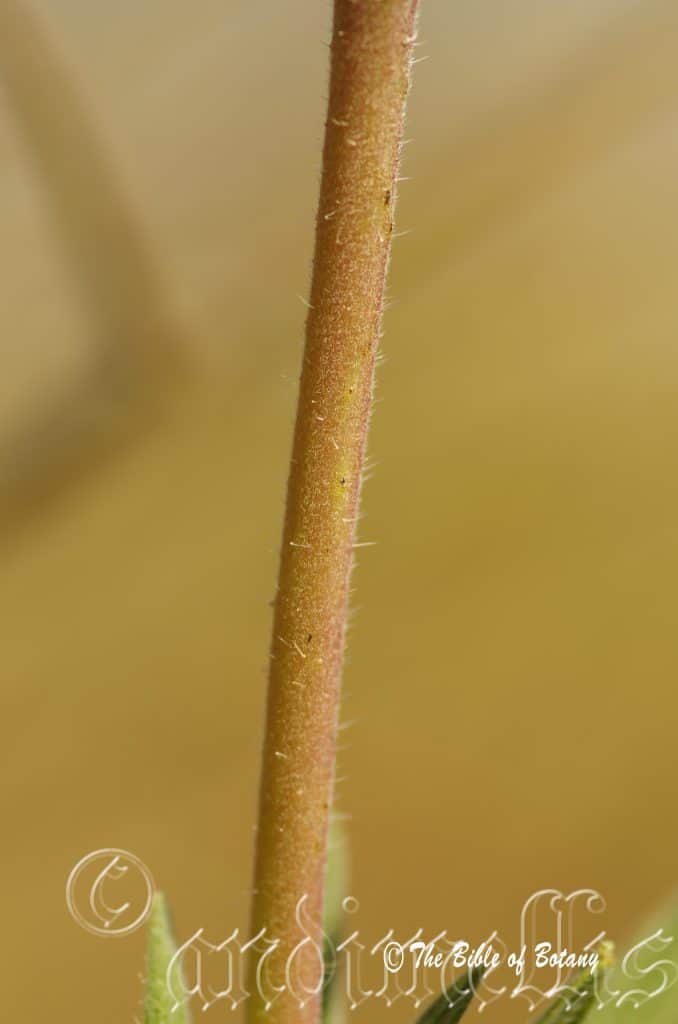
Castle Hill Townsville Qld.
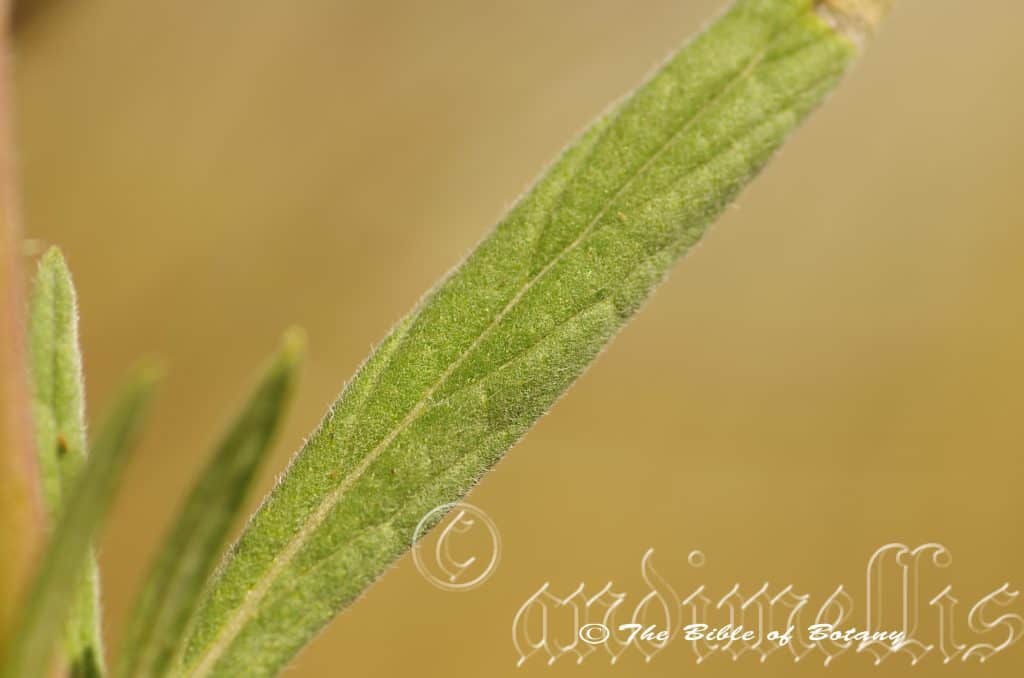
Castle Hill Townsville Qld.
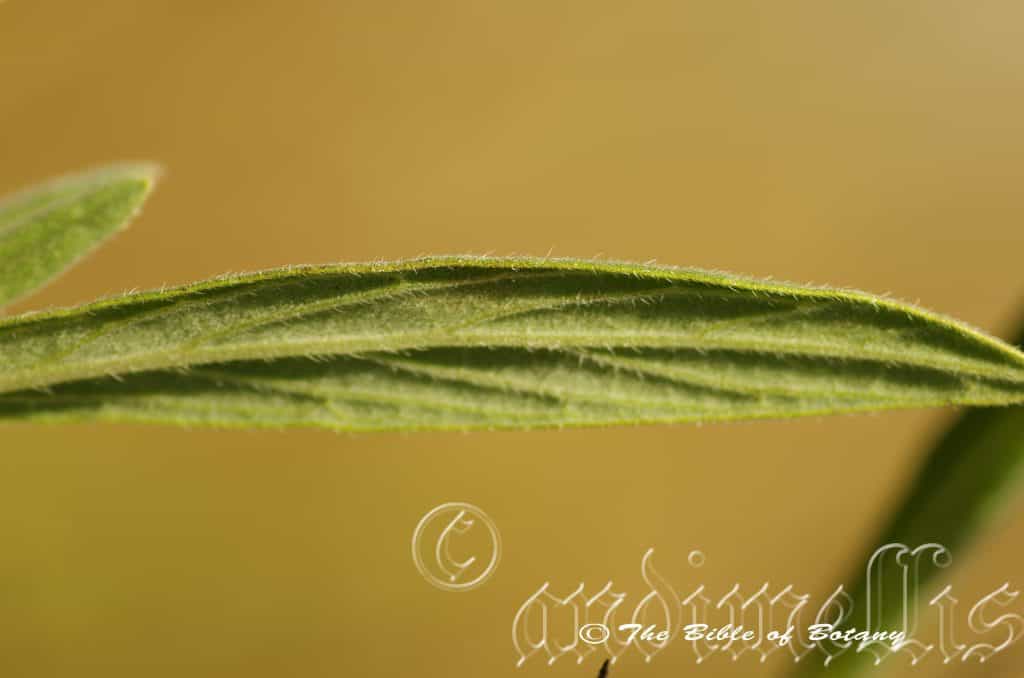
Castle Hill Townsville Qld.
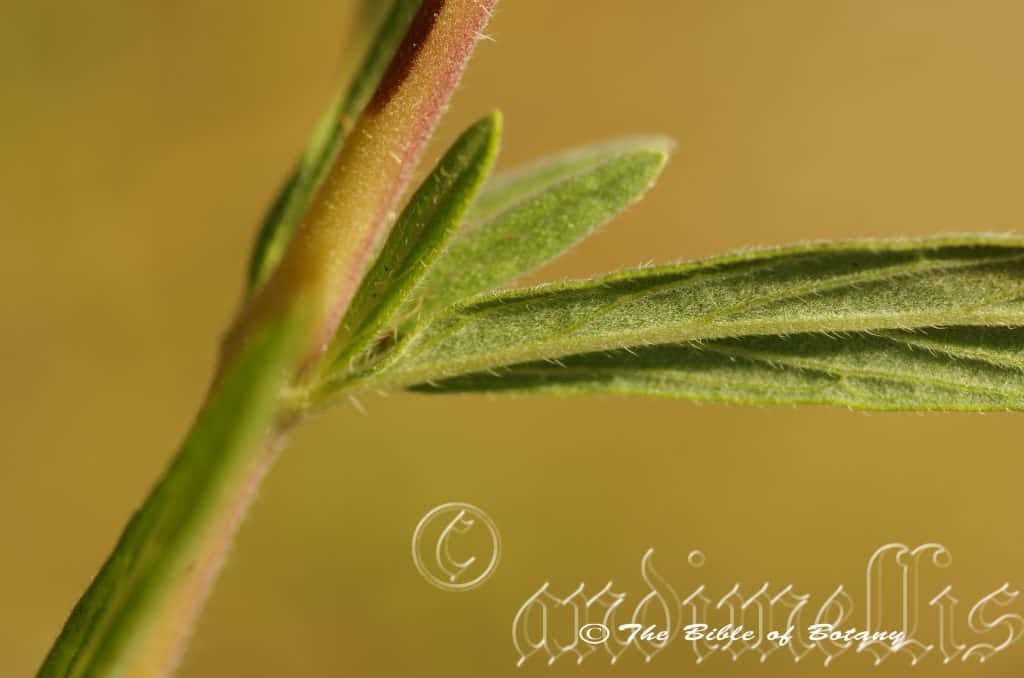
Castle Hill Townsville Qld.
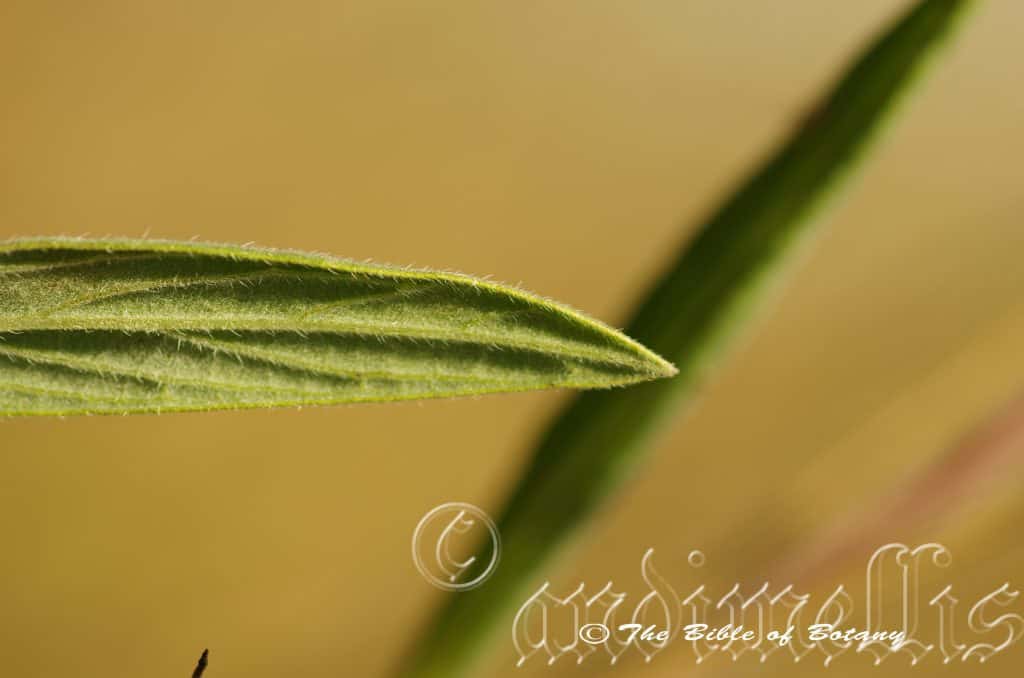
Castle Hill Townsville Qld.
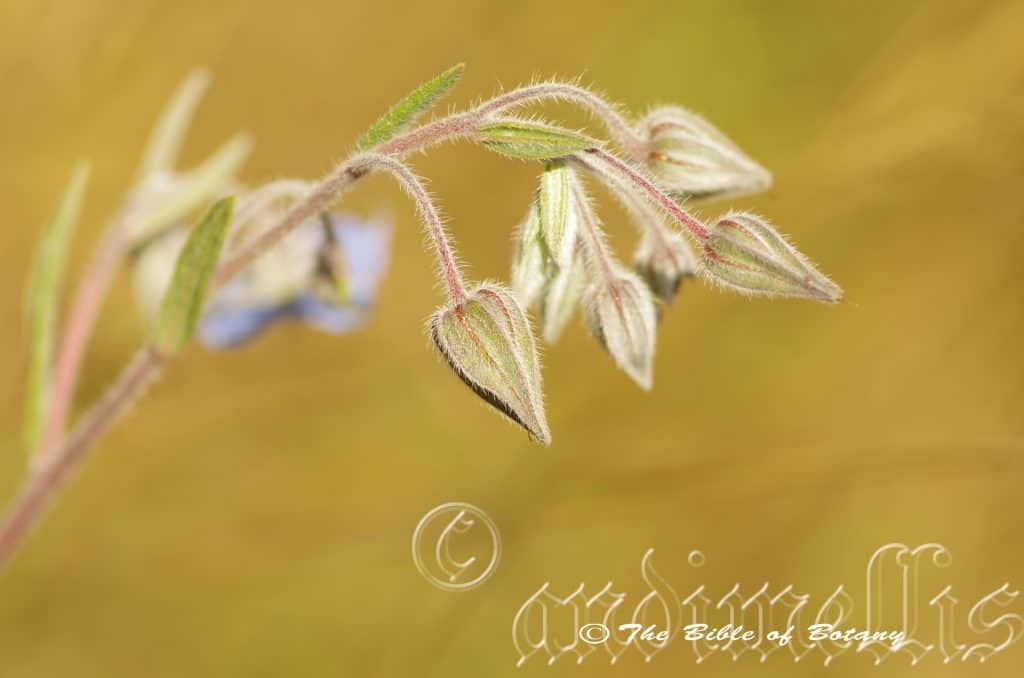
Castle Hill Townsville Qld.
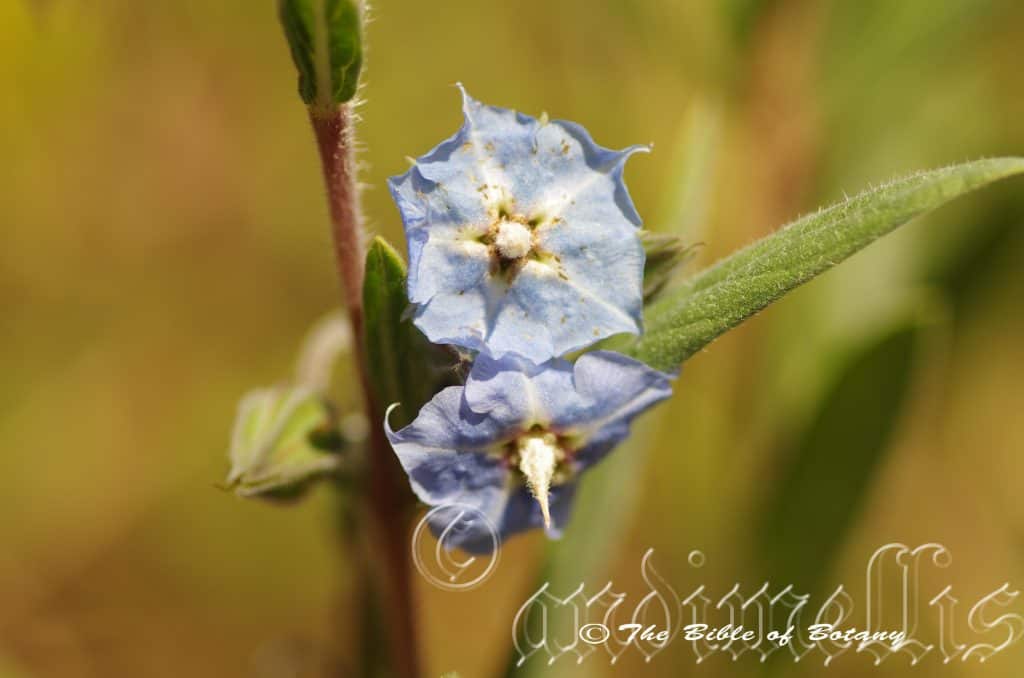
Castle Hill Townsville Qld.
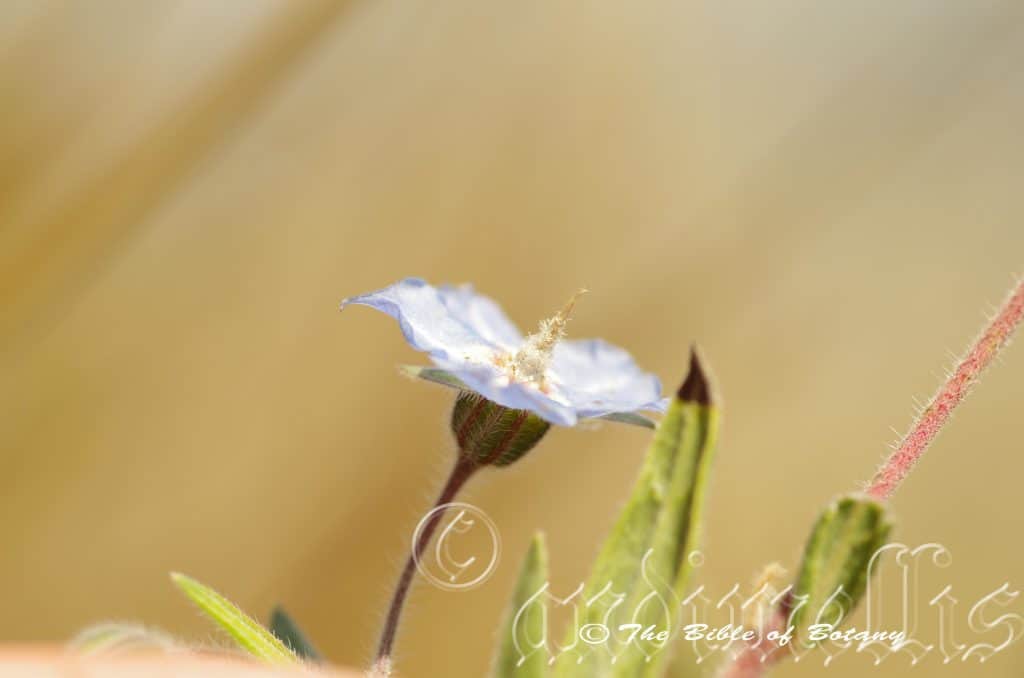
Castle Hill Townsville Qld.
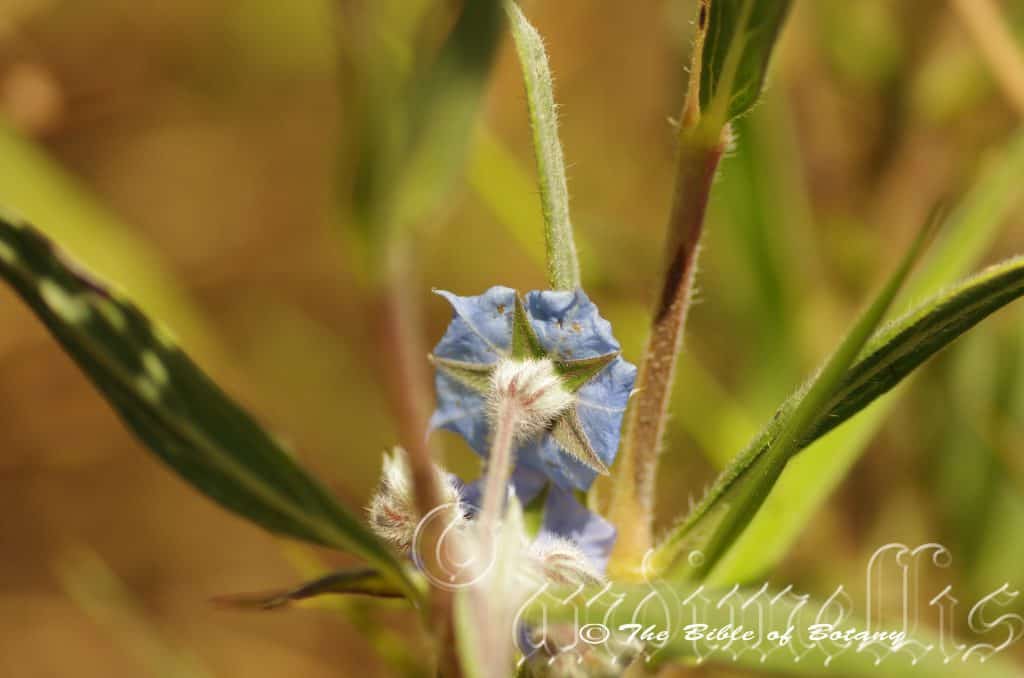
Castle Hill Townsville Qld.
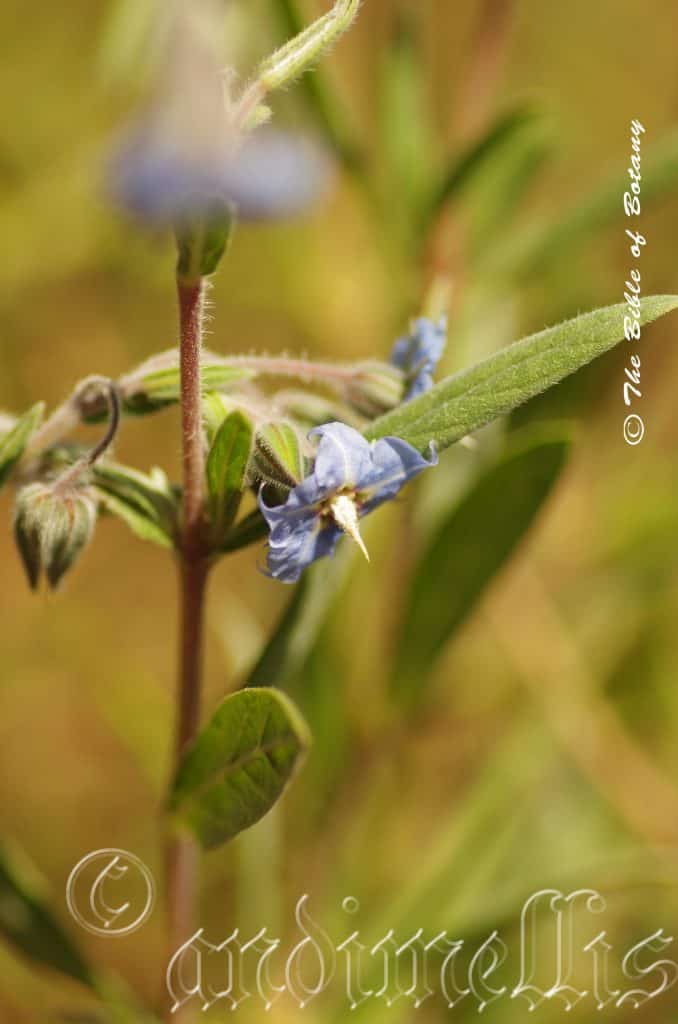
Castle Hill Townsville Qld.
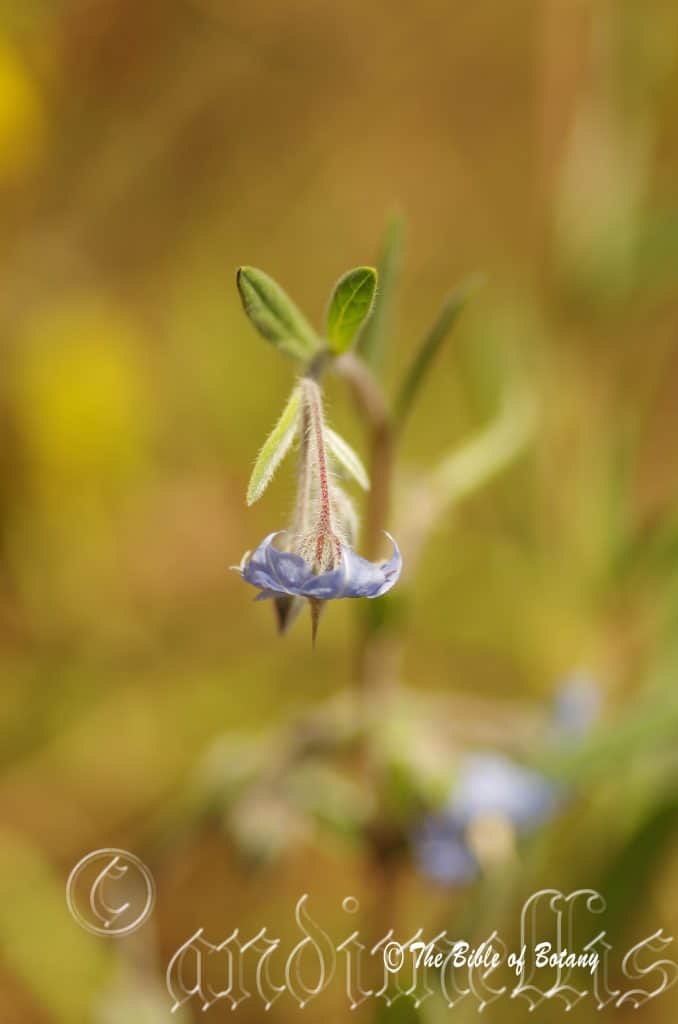
Castle Hill Townsville Qld.
Trichodesma zeylanicum
Classification:
Unranked: Eudicots
Unranked: Asterids
Order: Boraginales
Family: Boraginaceae
Subfamily: Boraginoideae
Genus: From Thrix, which is Ancient Greek for a hair or hair or hair like and Desma, which is Ancient Greek for a bundle. It refers to anthers, which appear in hairy like bundles.
Specie: From Zeylanca, which is Latin for Sri Lanca. It refers to the halotype specimens originating from Sri Lanca formally known as Ceylon.
Sub specie: Trichodesma zeylanicum subsp. euzeylanicum. From Eû which is Ancient Greek for well, Zeylanca, which is Latin for Sri Lanca. It refers to the halotype specimens originating from Sri Lanca formally known as Ceylon. A good example is Trichodesma zeylanicum subsp. euzeylanicum.
Variety: Trichodesma zeylanicum var. latisepalum. From Latus, which is Latin for broad and Sképē, which is Ancient Greek or much later Sepalum, which is Latin for a covering or roof. It refers to the specialized leaves known as sepals, which cover and protect the petals and sexual organs in the bud stage separating prior to anthesis that are rather broad compared to other species in the genus.
Variety: Trichodesma zeylanicum subsp. zeylanicum. From Zeylanca, which is Latin for Sri Lanca. It refers to the halotype specimens originating from Sri Lanca formally known as Ceylon.
Variety: Trichodesma zeylanicum var. angustifolium. From Angusta, which is Latin for narrow and Folium, which is Latin for foliage. It refers to leaves, which are rather narrow or much narrower than other species in the genus.
Variety: Trichodesma zeylanicum var. australe. From Terra Australis, which is Latin for land of the south. It refers to plants, which were first discovered from the land down under.
Variety: Trichodesma zeylanicum var. commune. From Comunis which is Latin for gregarious or of a community. It refers to plants, which can form dense thickets.
Variety: Trichodesma zeylanicum var. grandiflorum. From Grandis, which is Latin for large and Flōris, which is Latin for a flower or Flōs, which is the Roman goddess of spring and flowers. It refers to plants, which produce larger flowers than most other species in the genus.
Variety: Trichodesma zeylanicum var. sericeum. From Sêres, which is Ancient Greek or Sēricum, which is Old Latin for silky and derived from the Ancient Chinese word Si/Ser 絲 or the modern script Si/Ser 丝 for silk as Sêres also has the meaning from Ancient Greek for the land of the Chinese referring to China as the land of silk. It refers to an organ, which is covered in soft silky hairs.
Common Name: Cattle Bush.
Distribution:
Trichodesma zeylanicum subsp. euzeylanicum is found throughout the northern three quarters of Australia in drier locations.
Trichodesma zeylanicum var. angustifolium is found throughout the northern three quarters of Australia in drier locations.
Trichodesma zeylanicum var. australe is found throughout the northern three quarters of Australia in drier locations.
Trichodesma zeylanicum var. commune is found throughout the northern three quarters of Australia in drier locations.
Trichodesma zeylanicum var. grandiflorum is probably found throughout an area bounded by Broome in the north west south to Port Dennison in the south along the coast of Western Australia to Bloods Range and the Mann Range in the south west corner of the Northern Territory.
Trichodesma zeylanicum var. latisepalum is found in a line north from Broome to Rockhampton with an isolated populations in the east Hamersley region.
Trichodesma zeylanicum var. sericeum is found throughout the northern three quarters of Australia in drier locations.
Trichodesma zeylanicum var. zeylanicum is found throughout the northern three quarters of Australia in drier locations.
https://avh.ala.org.au/occurrences/search?taxa=Trichodesma+zeylanicum#tab_mapView
Habitat Aspect Climate:
Trichodesma zeylanicum prefers dappled light shade to full sun. It grows in open sclerophyll dry forests, grasslands, open Acacia woodlands on sandy plains, dunes or rocky hills. The altitude ranges from 5 meters ASL to 650 meters ASL.
The temperatures range from 2 degrees in July to 40 degrees in January.
The rainfall ranges from lows of 200mm to 3000mm average per annum.
Soil Requirements:
Trichodesma zeylanicum prefers better quality loams to medium clays. The soils are usually derived from partially decomposed to decomposed sandstones, granites and accumulated windblown sands. The soils pH ranges from 4.5pH to 6 pH. It does not tolerate waterlogged soils. Non saline soils to moderately saline soils are tolerated.
Height & Spread:
Wild Plants: 0.5m to 1.2m by 0.6m to 1.2m.
Characteristics:
Trichodesma zeylanicum grows as an erect perennial with straight green pinkish tinged stems. The stems are moderately covered in white hirsute hairs. The younger stems are pale grey-green to pale blue-green and are moderately covered in white hirsute hairs.
The basal leaves are opposite while the apex leave are alternate. The narrowly ovate to linear oblong leaves of Trichodesma zeylanicum measure 35mm to 105mm in length by 7mm to 20mm in width. The petiole measures 0.5mm to 2.5mm in length. The bases are truncate while the apexes are acute. The discolourous laminas are pale blue-green, dull and covered in long white hirsute hairs on the upper lamina while the lower lamina is slightly paler. The laminas are flat while the margins are entire and retrorse. The mid vein is strongly prominent while the lateral veins are prominent on the lower laminas and are distinctly visible on the upper laminas.
Inflorescences of Trichodesma zeylanicum are born singularly or a few in loose clusters from the leaf axils. The flowers measure 15mm to 20mm in diameter. The blue-green to purple-green pedicels are sparsely to moderately covered in white hirsute hairs and measure 18mm to 30mm in length. The 5 pale blue-green to purplish sepals are narrow ovate to lanceolate and are covered in long white hirsute hairs externally. The sepals measure 10mm to 15mm in length by 3mm to 4mm in width. The white, pale blue to sky blue corollas tubes measure 5mm to 6mm in length. The 5 divaricate lobes apexes are obtuse with a caudate tip and measure 5mm to 8mm in length.
The 5 exserted anthers are white and covered in white pilose hairs. They measure 6mm to 7mm in length.
The white style and stigma are glabrous and extend another 3mm to 5mm beyond the anthers. The flowers appear from May to October however flowering will continue through to December in good seasons.
The fruits of Trichodesma zeylanicum are globose to obovoidal mericarps which split into 4 small nutlets. The mericarps are glabrous externally and rugose internally. The green capsules turn deep fawn to pale grey-fawn when ripe. The sepals are persistent on the ripe fruit.
Wildlife:
Trichodesma zeylanicum wildlife is unknown to the author.
Cultivation:
Trichodesma zeylanicum is a magnificent small perennial herb that can be easily grown in association with other semi arid species or in a bed of annuals. It is most suitable to warm temperate, semi tropical, tropical and arid areas of Australia. In cultivation it grows from 0.6 meters to 1 meter in height by 1 meter to 1.8 meters in diameter when grown in the open.
It grows well on most soils that have a high sand content where deep leaf litter keeps the soil cool and moisture at an even level. If these requirements are met it can cope with temperatures as low as 2 degrees and up to 45 degrees. It is drought resistant once established.
Add to the above, if it is given an adequate supply of water and a little native fertilizer on a regular basis the plants will respond with good flowering and fruit over a long period. It is advisable to remove the spent flowers to increase the flowering period, size and number of blooms.
Trichodesma zeylanicum would make good contribution to a dry heath garden or desert scene. Here it can be used for splashes of sky blue scattered throughout the heath scene. When you design a flat heath garden which Trichodesma zeylanicum is well suited don’t use contours to display the plants as heath lands have the species scattered throughout the scene or have small pockets of the species. Plants must be planted close together and be short so you can see over the tallest ones with the exception of one or two plants at the most. These will be feature plants. Give Trichodesma zeylanicum a little extra room so air can flow freely around the plants. The idea is to achieve a feeling of expansive flatness. Use a lot of procumbent plants like Hibbertia specie mixed with strap leaf plants like Anigozanthos specie for contrast and balance. Mix them with other smaller shrubs so none of them dominate the scene but blend in to give a mosaic of foliage colours that you oversee. Hakea florulenta, Boronia ledifolia, Actinotis helianthi or Grevillea aspera are just a few great contrasting foliage plants.
Trichodesma zeylanicum would make a good contribution to a sandy or rocky terrain rock garden as this is their natural habitat. Here it can be used as the feature plant when scattered amongst the boulders. When you use them in an area that is strewn with large boulders or on a small dry ridge do not over crowd the scene as the boulders and ridge face are a formidable part of the scene.
Propagation:
Seeds: The seeds of Trichodesma zeylanicum can be removed easily from the fruits.
Sow freshly treated seeds directly into a seed raising mix, keeping them moist not wet. Do not over water as the seeds will rot off before germination takes place. Place the trays in a cool shaded area with 50mm shade cloth in the bush house. When the seedlings are 20mm to 25mm tall, prick them out and plant them into 50mm native tubes using a good organic mix.
As the seedlings roots reach the bottom of the tubes plant them out into their permanent position. Do not delay.
Fertilize using seaweed, fish emulsion or organic chicken pellets soaked in water on an alternate basis. Fertilize every two months until the plants are established then annually in early September to October to maintain better colour, health, vitality and flowering.
Further Comments from Readers:
“Hi reader, it seems you use The Bible of Botany a lot. That’s great as we have great pleasure in bringing it to you! It’s a little awkward for us to ask, but our first aim is to purchase land approximately 1,600 hectares to link several parcels of N.P. into one at The Pinnacles NSW Australia, but we need your help. We’re not salespeople. We’re amateur botanists who have dedicated over 30 years to saving the environment in a practical way. We depend on donations to reach our goal. If you donate just $5, the price of your coffee this Sunday, We can help to keep the planet alive in a real way and continue to bring you regular updates and features on Australian plants all in one Botanical Bible. Any support is greatly appreciated. Thank you.”
In the spirit of reconciliation we acknowledge the Bundjalung, Gumbaynggirr and Yaegl and all aboriginal nations throughout Australia and their connections to land, sea and community. We pay our respect to their Elders past, present and future for the pleasures we have gained.
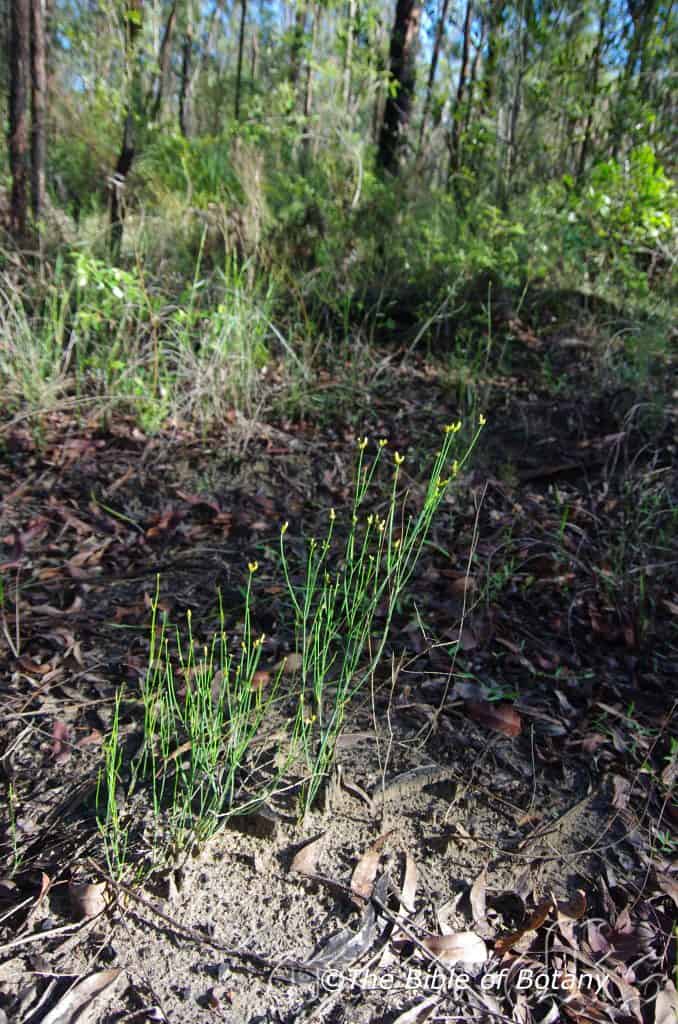
Fortis Creek National Park NSW
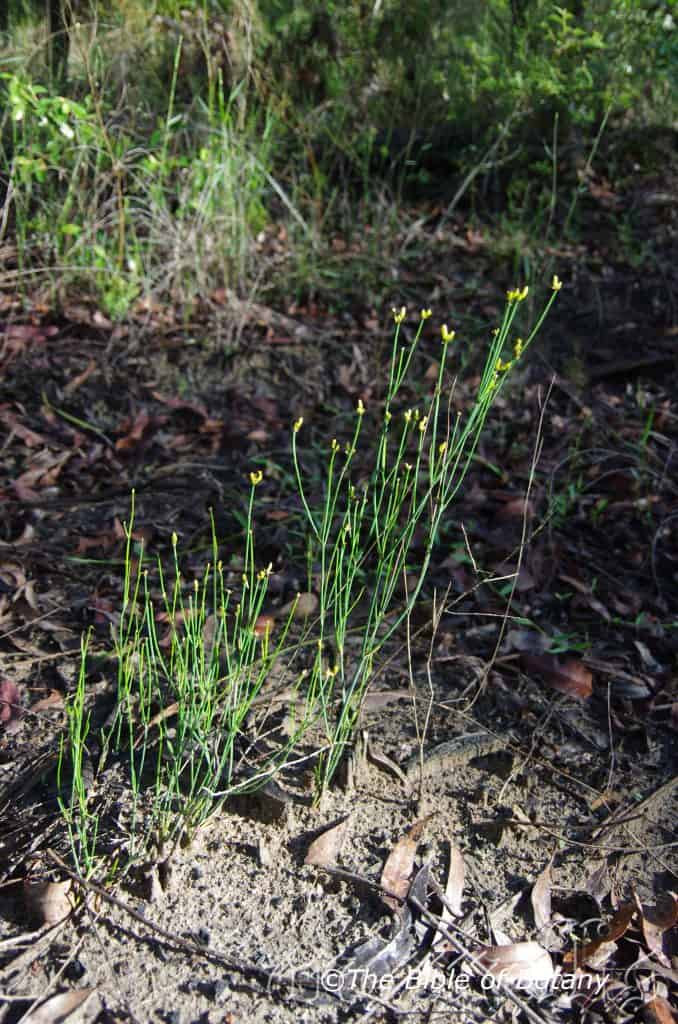
Fortis Creek National Park NSW
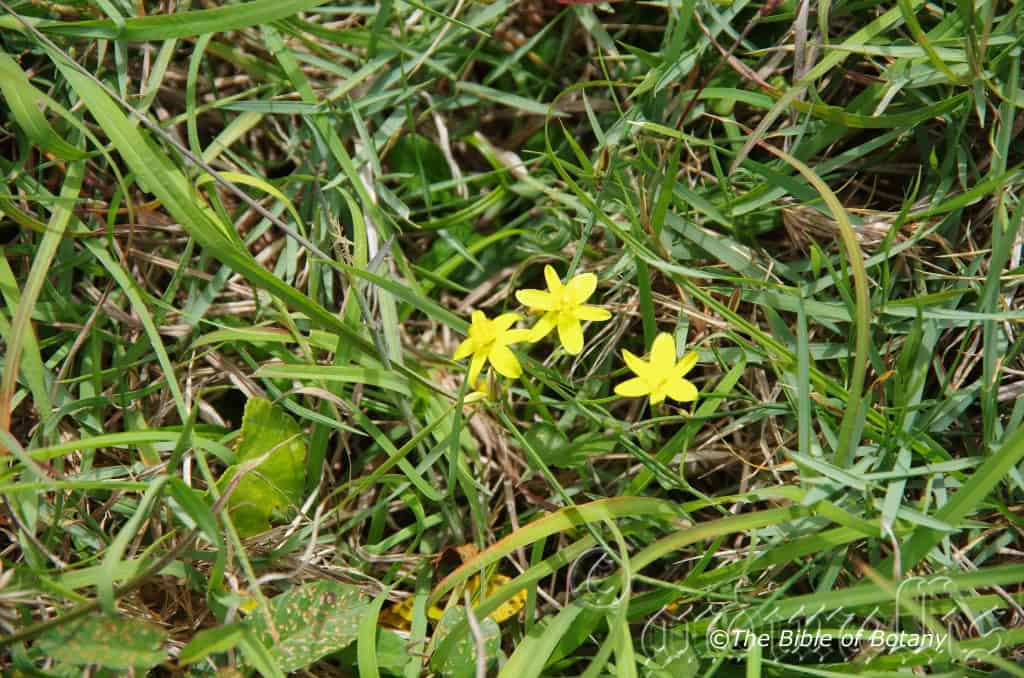
Boorkoom Yuraigir National Park NSW
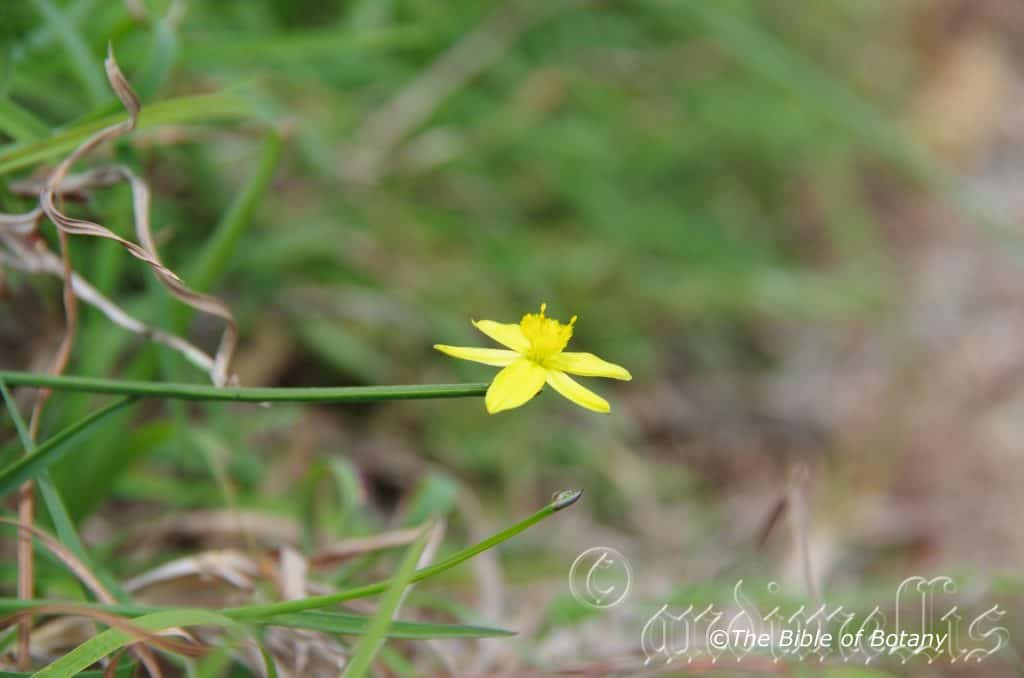
Boorkoom Yuraigir National Park NSW
Boorkoom Yuraigir National Park NSW
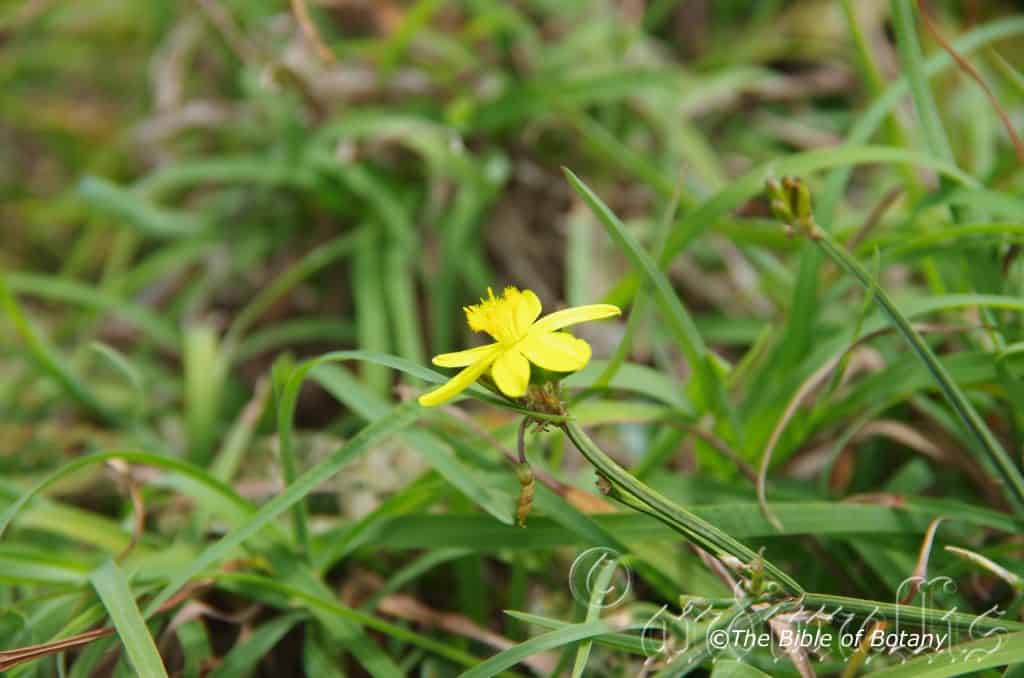
Tricoryne anceps
Classification:
Clade: Monocots
Order: Asparagales
Family: Hemerocallidaceae
Family: Hemerocallidoideae
Genus: From Treîs/Tría, which are Ancient Greek or Tri, which is Latin for three and Koryne, which is Ancient Greek for a club. It refers to lilies, which have six, hairy, club or horn shaped filaments.
Specie: From Ambo, which is Latin for both sides and Ceps, which is Latin for a head. It refers to plants, which often have 2 flowers that are back to back.
Sub specie: Tricoryne anceps subsp. anceps. From Ambo, which is Latin for both sides and Ceps, which is Latin for a head. It refers to plants, which often have 2 flowers that are back to back.
Tricoryne anceps subsp. pterocaulon. From Pterón, which is Ancient Greek for a wing and Kaulós, which is Ancient Greek for a stem or branch. It refers to stems, which have 2 or more usually 4 wings.
Tricoryne anceps var. muricata From Mūricāta, which is Latin for to be rough with short, hard points. It refers to organs or structures, which have are rough and have short, hard points or a short sharp apex.
Tricoryne anceps var. typica From Tupikós, which is Ancient Greek for being very typical to the type species or figuratively very similar to the type specimen. It refers to plants, which are typical in all aspects to the type specimen.
Common Name: Yellow Autumn Lily or Yellow Rush Lily.
Distribution:
Tricoryne anceps subsp. anceps is found south from Cape York Peninsula to near Mackay in far north eastern Queensland.
Tricoryne anceps subsp. pterocaulon is found south from the tip of Cape York Peninsula in far north eastern coastal Queensland to the Conglomerate trail in Sherwood Forest near Gleanreagh in central eastern New South Wales.
Tricoryne anceps var. muricata is found between Torrens Creek, Shoalwater Bay, Salvator Rosa National Park and Maroochy Sire in central and southern Queensland.
Tricoryne anceps var. typica is found south from Cape York Peninsula to near Mackay in far north eastern Queensland.
https://avh.ala.org.au/occurrences/search?taxa=Tricoryne+anceps#tab_mapView
Habitat Aspect Climate:
Tricoryne anceps prefer dappled light shade to full sun. It grows in in scrubby low woodlands dry eucalyptus forests. The altitude ranges from 5 meters ASL to 1000 meters ASL.
The temperatures range from 6 degrees in July to 40 degrees in January.
The rainfall ranges from lows of 900mm to 3000mm average per annum.
Soil Requirements:
Tricoryne anceps prefers white gravelly sands often with granite boulders, on the upper slopes of hill. The soils are usually derived from decomposed black basalts, metamorphic rocks, shales, sandstones, granites or laterites. The soils pH ranges from 4pH to 7pH. It does not tolerate waterlogged. Non saline soils to moderately saline soils are tolerated.
Height & Spread:
Wild Plants: 0.1m to 1m by 0.2m to 0.5m when in flower.
Characteristics:
Tricoryne anceps grows as an erect, open to moderately tuft, Lax to rigid perennial herb.
The basal and alternate cauline leaves of Tricoryne anceps are only present only at seedling stage, where subsequently the flattened stems function as the leaves. The bases are cauline while the apexes are acute to broad acute. The glabrous, linear laminas measure 20mm to 30mm in length by 2mm to 4mm in width.
The inflorescences of Tricoryne anceps are born on several flattened or winged, striated, stems are dichotomous and measure 1mm to 5mm in width. The umbels have 3 to 24 individual flowers. The scarious bracts are subulate and measure 1.5mm to 20mm in length by 0.5 to 2mm in width. The terete pedicels measure 1.5mm to 10mm in length. The 3 outer, oblong tepals have narrow acute apexes and measure 6.5mm to 12mm in length by 2.5mm to 3mm in width. There are 3 to 7 prominent veins. The 3 inner obovate tepals have obtuse apexes and measure 6mm to 11mm in length by 3mm to 3.5mm in width and have 3 prominent veins.
The yellow filaments are densely covered in long, soft tomentose hairs and measure 4mm to 5mm in length, while the yellow, oblong anthers are basifixed and measure 1mm to 1.5mm in length.
The erect slender, yellow style measures 5mm to 6mm in length.
Tricoryne anceps fruits are ovoidal mericarps that measure 5mm to 7mm in length by 2.5mm to 3mm in diameter. The green mericarps turn deep grey when ripe. The mericarps have 3 to 6 very prominent ribs when dry.
Wildlife:
Tricoryne anceps’ leaves are eaten by most macropods.
Cultivation:
I think Tricoryne anceps is magnificent small native lily that should be more widely grown in cultivation. It is ideal in almost every setting near small, medium or large fish ponds, on the northern edge of a sunny rain forest garden, in sunny courtyards, around swimming pools or small to large moist rockeries. It mixes exceptionally well with low growing fine leaf ground covers to give height and contrast in foliage. Mass plantings even of small numbers will brighten the area and gain a lot of attraction especially in flower. The bold erect stems, helps to break up plain walls when it is the only herb being grown. It has the ability to add greatly to most architectural designs in confined spaces. Try planting it in small clusters to large clusters at different centers and at different depths within the garden bed. Even when planted around pools or confined areas plant some to the front and others towards the rear. This gives depth and more flowing lines of interest rather than the straight line that has become so mundane and popular. Straight lines are not natural in nature or to the eyes movement.
It is best suited to areas that are moisture retentive but well drained or have poor drainage like in small depressions and at the bottom of sullage trenches. Place it at the bottom of slopes or retaining walls where moisture lies or seeps out.
It is surprisingly versatile and can be planted amongst other small moist to wet heath plants to contrast the foliages. Here its strap like stems with the flower scapes can really take on a really strong dimension. Try it with small plants with white flowers like Calocephalus brownii to enhance the bright yellow flowers. Here it may have to be planted in small clumps or 3 or more so that it is not overpowered by the beautiful greyish–white foliage. Deep blue flowers like those on Lechenaultia biloba or even the various pascal shades found in Wahlenbergia stricta will also create a great affect.
Propagation:
Seeds: The seeds of Tricoryne anceps can be removed easily from the fruits. The seeds are highly erratic in germination and germination is usually exceptionally low despite the seeds having a high viability so do not blame the seed supplier, or yourself if the results are not good. Try and enhance germination; and these are only recommendations as we have not personally tried them, on this specie. First try stratifying the seeds over winter by placing the seeds in a paper bag in the vegetable crisper. Secondly scarify the seeds before sowing.
Another method is to try the dry heat method. This is where seeds are placed in the oven at 50°C – 60°C for 40 to 45 minutes or at much higher temperatures (up to 80°C) for short durations (25 to 30 minutes) for hard-coated native plant seeds like arid Acacia species.
Caution: This process requires careful temperature and time control, as excessive heat can easily damage or kill the seeds
If you try either of these methods and have some success like over 50% germination let us and your fellow members know.
Stratification: This is the most frequently used treatment for seeds which need a period of dormancy. The plants are usually associated with alpine or semi-alpine habitats. A requirement is the seeds need a period of cold conditions prior to germination. Here the seeds are placed in a closed container with moist vermiculite which has had all the excess water wrung out. The container is then placed in the vegetable crisper of the refrigerator for 30 to 90 days.
Abrasion/Scarification: Alternatively the abrasion method has proven very successful for us. This involves rubbing the seeds gently between two sheets of very fine sandpaper to reduce the thickness of the seed coat. What we did if there are large numbers of seeds to do is glue sheet of medium corundum to the inside surfaces of a small disposable container. Place the seeds into the container and shake the container vigorously for several minutes. Check to see if the coating has been partially removed.
Division: First select a healthy plant. Secondly it is best to divide plants just prior to the onset of new growth. Prior to removing the plant from the ground plants should be given a deep watering a few days before removal, then again about 2 hours before removing them from the ground. It is best to soak potted plants in water for a couple of hours prior to removing the plant from the pot.
Use a spade and cut down each side about 100mm out from the base of the plant. Dig back on one side so that the spade can be wedged below the plant. Now lift the plant out trying not to damage the roots.
Wash the roots gently but thoroughly to remove all the soil.
Divide the clumps so that there is a crown or tuff with roots and leaves on each division. This is best done using secateurs, a large knife or spade in very large clumps.
Remove any unwanted or dead roots.
Remove half the foliage leaving those leaves that surround the growing point.
Spread the remaining roots outwards and downwards to allow the plants the maximum room to develop new roots.
Water thoroughly but do not fertilize. Place the containers beneath 30mm shade cloth and keep moist. After a fortnight or after the signs of new roots or shoots fertilize with our recommended fertilizer and repeat after about a month.
Once the plants have re-established themselves plant out and fertilize as before.
Fertilize using seaweed, fish emulsion or organic chicken pellets soaked in water on an alternate basis. Fertilize every two months until the plants are established then annually in early September to October to maintain better colour, health, vitality and flowering.
Further Comments from Readers:
“Hi reader, it seems you use The Bible of Botany a lot. That’s great as we have great pleasure in bringing it to you! It’s a little awkward for us to ask, but our first aim is to purchase land approximately 1,600 hectares to link several parcels of N.P. into one at The Pinnacles NSW Australia, but we need your help. We’re not salespeople. We’re amateur botanists who have dedicated over 30 years to saving the environment in a practical way. We depend on donations to reach our goal. If you donate just $5, the price of your coffee this Sunday, We can help to keep the planet alive in a real way and continue to bring you regular updates and features on Australian plants all in one Botanical Bible. Any support is greatly appreciated. Thank you.”
In the spirit of reconciliation we acknowledge the Bundjalung, Gumbaynggirr and Yaegl and all aboriginal nations throughout Australia and their connections to land, sea and community. We pay our respect to their Elders past, present and future for the pleasures we have gained.
Tricoryne elatior
Classification:
Unranked: Monocots
Order: Asparagales
Family: Hemerocallidaceae
Subfamily: Hemerocallidaceae
Genus: From Treîs/Tría, which are Ancient Greek or Tri, which is Latin for three and Koryne, which is Ancient Greek for a club. It refers to lilies, which have six, hairy, club or horn shaped filaments.
Specie: From ēlātius, which is Latin for taller. It refers to plants, which are taller than other species in the genus.
Sub specie:
Common Name: Yellow Autumn Lily or Yellow Rush Lily.
Distribution:
Tricoryne elatior is found west of a line from Sharks Bay to Cape Arid national Park in south western, Western Australia.
It is also found in central Australia and central lowlands of Tasmania.
In the east it is found east of a line from near Cooktown in far north Queensland south to Eyre Peninsula in southern South Australia.
https://avh.ala.org.au/occurrences/search?taxa=Tricoryne+elatior#tab_mapView
Habitat Aspect Climate:
Tricoryne elatior prefer dappled light shade to full sun. It grows in oist areas within dry sclerophyll forests, moist sclerophyll forests, adjacent to moist rainforests in dry Rainforests, monsoonal forests, vine forests, moist heaths and wallums, along seasonal creeks, seasonal streams in open woodlands or shallow depressions in savannah woodlands. The altitude ranges from 5 meters ASL to 1400 meters ASL.
The temperatures range from minus 4 degrees in July to 40 degrees in January.
The rainfall ranges from lows of 200mm to 3000mm average per annum.
Soil Requirements:
Tricoryne elatior prefers better quality sandy loams, light clays to medium clays or medium to heavy silts. The soils are usually derived from decomposed brown basalts, black basalts, metamorphic rocks, shales, sandstones, granites, laterites, alluvial deposits or accumulated peaty beach sands. The soils pH ranges from 4pH to 7pH. It does not tolerate waterlogged soils however prefers constant moisture. Non saline soils to moderately saline soils are tolerated.
Height & Spread:
Wild Plants: 0.1m to 1m by 0.2m to 0.5m when in flower.
Characteristics:
Tricoryne elatior grows as an erect, open to densely tuft, perennial herb.
The basal and alternate, cauline, linear leaves measure 10mm to 100mm in length by 1.5mm to 5mm in width and are reduced to bract like on the upper flowering stems. The bases are cauline while the apexes are acute to broad acute. The concolourous laminas are grass-green to mid green dull and glabrous. The laminas are conduplicate at the base and flat at the apex. The margins are entire. The obtuse mid vein is strongly prominent on the lower lamina and distinctly visible from the upper lamina while the parallel veins are very faintly visible from the lower lamina.
The inflorescences are born on several loose umbels from a central peduncle which rises from the base of the tuft of leaves. There are 2 to 16 individual flowers on an umbel. The grass-green to mid green peduncles, rachises and pedicels are slightly striated and glabrous. The glabrous peduncle is often scabrous near the base. The peduncles and rachises usually measure 200mm to 600mm in length but can reach 900mm under ideal conditions while the pedicels measure 2mm to 12mm in length. The scarious usually triangular or at times subulate bracts measure 3mm to 8mm length by 1mm to 2mm in width.
The outer tepals are narrow oblong with acute apexes. It is greenish with a reddish tinge to greenish-yellow externally and bright yellow internally. The outer tepals measure 6mm to 15mm in length by 1.5mm to 4mm in width. The margins are entire while the lower lamina has 3 distinct veins. The inner tepals are broad oblong with obtuse or rarely shallow emarginate apexes. The bright yellow inner tepals measure 5mm to 14mm in length by 2mm to 5mm in width. The margins are entire and slightly crisped while the lower lamina has 3 distinct veins.
The 6 filaments are free for their entire length and measure 3.5mm to 7mm in length. The pastel yellow filaments have a tuft of long yellow velutinous hairs between 1mm to 2mm from the base to within 0.6mm to 1.5mm from the base of the anther. The hemi ovate, basifixed anthers are bright yellow to dull mid orange. The anthers measure 0.6mm by 0.8mm in length by 0.3mm to 0.4mm in width.
The cream to pastel yellow style tapers to the stigma from the pale green ovary. The glabrous ovary is inferior and measures 0.9mm to 1.2mm in diameter. The pistil measures 2.8mm to 5.5mm in length. The flowers appear to be weather induced rather than seasonally induced and appear at most times of the year under favourable conditions. Under normal conditions around Grafton flowering occurs from October to March.
The fruits are ovoidal mericarps. The mericarps measure 3mm to 7mm in length by 1.5mm to 4mm in diameter. The green mericarps turn deep grey when ripe. The faintly reticulate nutlets apexes are obtuse with an irregularly ovate hilum.
Wildlife:
Tricoryne elatior’s leaves are eaten by most macropods.
Cultivation:
I think Tricoryne anceps is magnificent small native lily that should be more widely grown in cultivation. It is ideal in almost every setting near small, medium or large fish ponds, on the northern edge of a sunny rain forest garden, in sunny courtyards, around swimming pools or small to large moist rockeries. It mixes exceptionally well with low growing fine leaf ground covers to give height and contrast in foliage. Mass plantings even of small numbers will brighten the area and gain a lot of attraction especially in flower. The bold erect stems, helps to break up plain walls when it is the only herb being grown. It has the ability to add greatly to most architectural designs in confined spaces. Try planting it in small clusters to large clusters at different centers and at different depths within the garden bed. Even when planted around pools or confined areas plant some to the front and others towards the rear. This gives depth and more flowing lines of interest rather than the straight line that has become so mundane and popular. Straight lines are not natural in nature or to the eyes movement.
It is best suited to areas that are moisture retentive but well drained or have poor drainage like in small depressions and at the bottom of sullage trenches. Place it at the bottom of slopes or retaining walls where moisture lies or seeps out.
It is surprisingly versatile and can be planted amongst other small moist to wet heath plants to contrast the foliages. Here its strap like stems with the flower scapes can really take on a really strong dimension. Try it with small plants with white flowers like Calocephalus brownii to enhance the bright yellow flowers. Here it may have to be planted in small clumps or 3 or more so that it is not overpowered by the beautiful greyish–white foliage. Deep blue flowers like those on Lechenaultia biloba or even the various pascal shades found in Wahlenbergia stricta will also create a great affect.
It often reaches its full potential in just 18 months and flower from the first year. Cultivated plants will grow from 0.3 meter to 0.5 meters in height by 0.2 meter to 0.3 meters in diameter when not in flower and look much better when planted in mass. Placing closer to walls will limit their growth in diameter but it may have a tendency to lean forward. It is suitable for light sandy soils right through to heavy clays in cool temperate to subtropical gardens provided adequate moisture is available. It can survive on high calcium and high iron bore water provided it is not saline. It is best suited to areas that are moisture retentive but well drained or have poor drainage like in small depressions and at the bottom of sullage trenches. Place them at the bottom of slopes or retaining walls where moisture lies or seeps out.
Propagation:
Seeds: The seeds can be removed easily from the fruits. The seeds are highly erratic in germination and germination is usually exceptionally low despite the seeds having a high viability so do not blame the seed supplier if the results are not good. Try and enhance germination; and these are only recommendations as we have not personally tried them, on this specie. First try stratifying the seeds over winter. Secondly scarify the seeds before sowing.
Another method is to try the dry heat method. This is where seeds are placed in the oven at 50°C – 60°C for 40 to 45 minutes or at much higher temperatures (up to 80°C) for short durations (25 to 30 minutes) for hard-coated native plant seeds like arid Acacia species.
If you try either of these methods and have some success like over 5mm germination let us and your fellow members know.
Stratification: This is the most frequently used treatment for seeds which need a period of dormancy. The plants are usually associated with alpine or semi-alpine habitats. A requirement is the seeds need a period of cold conditions prior to germination. Here the seeds are placed in a closed container with moist vermiculite which has had all the excess water wrung out. The container is then placed in the vegetable crisper of the refrigerator for 30 to 90 days.
Abrasion/Scarification: Alternatively the abrasion method has proven very successful for us. This involves rubbing the seeds gently between two sheets of very fine sandpaper to reduce the thickness of the seed coat. What we did if there are large numbers of seeds to do is glue sheet of medium corundum to the inside surfaces of a small disposable container. Place the seeds into the container and shake the container vigorously for several minutes. Check to see if the coating has been partially removed.
Division: First select a healthy plant. Secondly it is best to divide plants just prior to the onset of new growth. Prior to removing the plant from the ground plants should be given a deep watering a few days before removal, then again about 2 hours before removing them from the ground. It is best to soak potted plants in water for a couple of hours prior to removing the plant from the pot.
Use a spade and cut down each side about 100mm out from the base of the plant. Dig back on one side so that the spade can be wedged below the plant. Now lift the plant out trying not to damage the roots.
Wash the roots gently but thoroughly to remove all the soil.
Divide the clumps so that there is a crown or tuff with roots and leaves on each division. This is best done using secateurs, a large knife or spade in very large clumps.
Remove any unwanted or dead roots.
Remove half the foliage leaving those leaves that surround the growing point.
Spread the remaining roots outwards and downwards to allow the plants the maximum room to develop new roots.
Water thoroughly but do not fertilize. Place the containers beneath 30mm shade cloth and keep moist. After a fortnight or after the signs of new roots or shoots fertilize with our recommended fertilizer and repeat after about a month.
Once the plants have re-established themselves plant out and fertilize as before.
Fertilize using seaweed, fish emulsion or organic chicken pellets soaked in water on an alternate basis. Fertilize every two months until the plants are established then annually in early September to October to maintain better colour, health, vitality and flowering.
Further Comments from Readers:
“Hi reader, it seems you use The Bible of Botany a lot. That’s great as we have great pleasure in bringing it to you! It’s a little awkward for us to ask, but our first aim is to purchase land approximately 1,600 hectares to link several parcels of N.P. into one at The Pinnacles NSW Australia, but we need your help. We’re not salespeople. We’re amateur botanists who have dedicated over 30 years to saving the environment in a practical way. We depend on donations to reach our goal. If you donate just $5, the price of your coffee this Sunday, We can help to keep the planet alive in a real way and continue to bring you regular updates and features on Australian plants all in one Botanical Bible. Any support is greatly appreciated. Thank you.”
In the spirit of reconciliation we acknowledge the Bundjalung, Gumbaynggirr and Yaegl and all aboriginal nations throughout Australia and their connections to land, sea and community. We pay our respect to their Elders past, present and future for the pleasures we have gained.
Tricostularia pauciflora
Classification:
Unranked: Monocots
Class: Commelinids
Order: Poales
Family: Cyperaceae
Genus: From Treîs/Tría, which are Ancient Greek or Tri, which is Latin for three and Kostular, which is Ancient Greek for a rib. It refers to nuts, which have three vertical ribs.
Specie: From Paucī, which is Latin for a few and Flōris, which is Latin for a flower or Flōs, which is the Roman goddess of spring and flowers. It refers to plants, which produce fewer flowers or which are poorer bloomers than other species in the genus.
Sub specie:
Common Name:
Distribution:
Tricostularia pauciflora is found south from the Clarence River in north eastern New South Wales to Kangaroo Island in southern South Australia. It is found on and east of the Great Dividing Range to the coast.
It is found on Flinders Island in Bass Strait and eastern Tasmania.
https://avh.ala.org.au/occurrences/search?taxa=Tricostularia+pauciflora#tab_mapView
Habitat Aspect Climate:
Tricostularia pauciflora prefers dappled light shade to full sun. It grows in moist coastal woodland heaths and on the coastal range swampy heaths. The altitude ranges from 5 meters ASL to 1000 meters ASL.
The temperatures range from minus 4 degrees in July to 34 degrees in January.
The rainfall ranges from lows of 400mm to 1600mm average per annum.
Soil Requirements:
Tricostularia pauciflora prefers course sands, fine sands to light fatty clays. The soils are usually derived from decomposed granites or sandstones. The soils pH ranges from 4pH to 6pH. It does not tolerate waterlogged soils however the soils are continually moist through capillary action. Non saline soils to moderately saline soils are tolerated.
Height & Spread:
Wild Plants: 0.1m to 0.5m by 0.2m to 0.25m.
Characteristics:
Tricostularia pauciflora grows as a small tufted reed with single node or without nodes on the culms. The terete, glabrous culms are pale grass-green to yellow-green. The culms measure 10omm to 450mm in height by 0.5mm to 1.5mm in diameter.
The linear leaves are often reduced to extensions of the sheath and measure 20mm to 60mm in length. The bases are clasping sheaths while the apexes are acute. The glabrous sheaths are deep ochre to deep red-brown and dull. The concolourous laminas are pale grass-green to yellow-green, glabrous and dull. The laminas are concave on the adaxial surface while the margins are entire.
The inflorescences are solitary or 2 or 3 clusters from the terminals.
The terete spikelets measure 4mm to 6mm in length. The lower 1 or 2 spikelets are usually male or can be barren or at times bisexual while the upper spikelets are bisexual. The involucral bract is shorter than inflorescence.
The similar glumes are sub distichous and long acute to acute. The keels are more prominent near the apex and are glabrous sparsely covered in white hirsute hairs. The keels are pale red-brown to deep red-brown. The glumes measure 3.5mm to 4.5mm in length. The 3 anthers measure 1.5mm in length. The flowers appear from September to February.
The fruits are trigonous, ovoidal or obpyriform nuts. The nuts are sparsely covered in white puberulent hairs and measure 2.2mm to 2.5mm in length by 1.2mm to 1.5mm in diameter. The dull green capsules turn dull, mid brown to deep mid brown when ripe.
Wildlife:
Tricostularia pauciflora seeds are eaten by native rats like Rattus fuscipes and mice like the little smoky mouse Pseudomys fumeus and the new Holland mouse Pseudomys novaehollandiae.
Cultivation:
Tricostularia pauciflora is a clean small native rushes that is frequently overlooked by gardeners because of their slow creeping growth habit. It is suitable for small, medium and large sunny gardens close to the coast or inland in temperate subtropical areas, tropical or semi-arid zones especially where the soils have poor drainage or are continually waterlogged. As a garden subject it grows more erect and rigid, from 0.4 meter to 0.5 meters high by 0.25 meters to 0.3 meters in diameter when grown in the open.
It is cold tolerant to temperatures as low as minus 4 degrees once established though some burning will occur. If this were to happen cut it back to just above the rhizomes and fertilize. It is quick to recover.
It is most suitable for use around swimming pools, bright courtyards, besides pathways, rockeries, along sandy clay banks or along drive ways or adjacent to natural heath gardens where water is a problem. Mass plantings of 5 or more plants even in small areas; really do the plants justification especially when it is in flower. Medium to large fish or frog ponds will benefit from Tricostularia pauciflora.
If it is placed around a pool, sunny courtyards or other confined spaces then plant it in small groups or scatter plant them for a more informal natural look against walls to help soften them. Using rocks and small boulders can make the pool or any water feature appear like an oasis. The leaves and flowers can make a good start for the miniature wallum, mangrove or swamp setting.
In the right position and grown correctly Tricostularia pauciflora is well suited to being the base plant in a medium to large heath garden. Heath lands are almost always flat or have a slight rise. Taller heaths are better placed on the lower side of a path so that you can still look over the tallest plants. Place it close to the path as it is rather short and will be lost amongst the other plants if placed in the background. Make the heath garden path narrow so you have to feel the plants as you walk through the garden bed. This gives an extra dimension which many people forget about when designing heath gardens. Plants must be planted close together and be short so you can see over the tallest ones with the exception of one or two plants at the most. These will be feature plants. The idea is to achieve a feeling of expansive flatness. This can be achieved with using Tricostularia pauciflora vertical lines against the smaller horizontal growth of other heath plants. Mix them with other smaller shrubs so none of them dominate the scene but blend in to give a mosaic of foliage colours that you oversee. Actinotis helianthi, Melaleuca pearsoni or other sub shrubs like Cloanthes parviflora, Pelargonium australe, Pelargonium inodorum or even Hibiscus diversifolia could be pruned and used in the mid ground. Glycyrrhiza acanthocarpa would be something entirely different next to a path where you can walk by and pick a leaf to crush and enjoy the aroma of licorice.
Propagation:
Seeds: The seeds can be removed easily from the fruits as they begin to dehisce.
Sow fresh seeds sparingly directly into a seed raising mix, keeping them moist not wet. Do not over water as the seeds will rot off before germination takes place. Place the trays in a warm sunny position. Alternatively place 3 or 4 seeds in a 75mm native tube and treat as above.
When the seedlings are 20mm to 25mm tall, prick them and plant out or transplant them directly into some prepared soil that has had well-rotted manure or composted incorporated a week earlier. The holes are best at 3 meter centers with a height which can be easily managed for harvesting the fruits.
Cull to 2 plants leaving the 2 stronger plants per hole when they reach 100mm to 150mm in height.
Fertilize using seaweed, fish emulsion or organic chicken pellets soaked in water on an alternate basis. Fertilize every two months until the plants are established then annually in early September to October to maintain better colour, health, vitality and flowering.
Further Comments from Readers:
“Hi reader, it seems you use The Bible of Botany a lot. That’s great as we have great pleasure in bringing it to you! It’s a little awkward for us to ask, but our first aim is to purchase land approximately 1,600 hectares to link several parcels of N.P. into one at The Pinnacles NSW Australia, but we need your help. We’re not salespeople. We’re amateur botanists who have dedicated over 30 years to saving the environment in a practical way. We depend on donations to reach our goal. If you donate just $5, the price of your coffee this Sunday, We can help to keep the planet alive in a real way and continue to bring you regular updates and features on Australian plants all in one Botanical Bible. Any support is greatly appreciated. Thank you.”
In the spirit of reconciliation we acknowledge the Bundjalung, Gumbaynggirr and Yaegl and all aboriginal nations throughout Australia and their connections to land, sea and community. We pay our respect to their Elders past, present and future for the pleasures we have gained.
Triglochin striata
Classification:
Unranked: Monocots
Class: Lilianae
Order: Alismatales
Family: Juncaginaceae
Genus: From Treîs/Tría, which are Ancient Greek or Tri, which is Latin for three and Glochis, which is Ancient Greek for pointed. It refers to the carpels, which have three distinct points.
Specie: From Striātum, which is Latin for striped or fluted. It refers to longitudinal grooves or stripes on the trunks and or branches, which is beautifully personified with the bark stripping off the trunks on some species.
Sub specie: Triglochin striata var. filifolia. From Fīlum, which is Latin for a thread or string and Folia, which is Latin for foliage. It refers to leaves, which have a much narrower form than other species in the genus or sub species or varieties.
Triglochin striata var. striata From Striātum, which is Latin for to be furrowed, grooved, fluted or striated. It refers to organs or structures, which have prominent furrows or grooves.
Triglochin striata var. triandra. From Tri, which is Ancient Greek for three and Andra, which is Ancient Greek for a man or male. It refers to the stamens, filaments or anthers which have three prominent furrows or grooves.
Common Name: In the Gumbaynggirr Aboriginal language it is known as Nulun.
Distribution:
Triglochin striata var. filifolia. In the west it is found along the southern coast of Western Australia south from Jurien Bay to Israelite Bay.
Is found south from Mackay in central coastal Queensland around the coast east of the Great Dividing Range to Pillana lagoon and north to Port Augusta in coastal South Australia. It is also found on all the Bass Strait islands and mainland Tasmania.
It is also found on Lord Howe island, New Zealand and the Catham Islands.
https://avh.ala.org.au/occurrences/search?taxa=Triglochin+striata#tab_mapView
Habitat Aspect Climate:
Triglochin striata prefers dappled light shade to full sun. It grows in and adjacent to Mangrove forests, salt marshes or shallow saline aquatic drainage lines where fresh water frequently flows in and are seasonally inundated on tidal surges or king tides. The altitude ranges from 10 meters ASL to 650 meters ASL.
The air temperatures range from 2 degrees in July to 38 degrees in January.
The rainfall ranges from lows of 200mm to 2600mm average per annum.
Soil Requirements:
Triglochin striata prefer soils that are sandy loams, medium clays, sight silts to heavy silts or mud suspended in water. The soils are usually derived from alluvial deposits, decomposed brown basalts, black basalts, granites, sandstones, metamorphic rocks, shale, or accumulated beach sands and silts. The soils pH ranges from 4pH to 8pH. It tolerates waterlogged soils growing in water. Non saline soils to extremely saline soils are tolerated.
Height & Spread:
Wild Plants: 0.2m to 0.35m by 0.5m to several meters.
Characteristics:
Triglochin striata grows as an emergent perennial aquatic herb. The thick, creamy rhizomes are usually stained reddish or black from oxides in the surrounding soils. The rhizomes measure 4mm to 6mm in diameter. The tufts develop from nodes along the rhizome. The pale tan to pale reddish-brown sheath has a distinct obtuse, membranous ligule.
The long, broad linear leaves measure 100mm to 300mm in length by 1mm to 3mm in width. The semi erect leaves of those plants growing in shallow water are usually replaced by floating leaves of those plants growing in shallow water. The bases are sheathing while the apexes are broad acute. The concolourous laminas are deep grass-green to deep green and glabrous. The fleshy laminas are flat externally and finely honeycombed internal. The flat mid vein is very slightly prominent to visible only on the lower lamina.
The inflorescences are born on long scapes. The scape, infructescence and pedicels are usually grass-green to deep green or at times grass-green to deep green with a reddish or maroon tinge. The scapes measure 100mm to 200mm in length by 2.5mm to 3.5mm in diameter while the spikes measure 20mm to 150mm in length by 7mm to 10mm in diameter. The pedicels measure 0.5mm to 1.5mm in length. The 6 pale greenish stamens are exserted and are covered in long, stiff, white ciliate hairs. The perianth segments measure 1mm to 2mm in length. The flowers appear from late October to early April.
The fruits are fleshy globose to broad trigonous carpels. The 30 to 200 individual carpels measure 1.5mm to 2.5mm in length by 2mm to 3mm in diameter. The 6 locule carpels are often alternating with one fertile and one sterile.
Wildlife:
Triglochin striata’s leaves are a favourite food source amongst the many species of macropods during drought. (Kangaroos and wallabies)
The plants are an important breeding ground for frogs and most likely play an important role in fresh water fish habitats and breeding grounds as well as the stabilization of banks and reduce the flow in the rivers during storms.
Cultivation:
Triglochin striata is a fast growing emergent lily often with floating leaves. It is suitable for shallow or medium depth frog ponds or edge plants in deeper fish ponds in warmer zones where the water does not freeze over. It is particularly striking when in flower.
Propagation:
Seeds: The seeds can be removed easily from the plants.
Seed can be sown directly over a wet mix, comprising of 50mm peat and 505 perlite or fine sand. Place the trays in a deep tray of water so that the mix does not dry out. Place the trays in a warm sunny position. Place the trays in a warm sheltered position beneath 20mm shade cloth.
When the seedlings are 20mm to 25mm tall, prick them out and plant them into “Instant border strips.” using a good organic mix. Replace the strips in long trays that are full of water or in a position where it is continually wet.
As the seedlings roots reach the bottom of the strips plant them out into their permanent positions.
Fertilize using Seaweed, fish emulsion or organic chicken pellets soaked in water and apply the liquid as the seedlings are planted out to maintain better health and vigour. This is especially important when planting the seedlings into “Instant border strips.” Here the seedlings are able to develop a strong rhizome system that will assist the plants once planted out into the environment.
Further Comments from Readers:
“Hi reader, it seems you use The Bible of Botany a lot. That’s great as we have great pleasure in bringing it to you! It’s a little awkward for us to ask, but our first aim is to purchase land approximately 1,600 hectares to link several parcels of N.P. into one at The Pinnacles NSW Australia, but we need your help. We’re not salespeople. We’re amateur botanists who have dedicated over 30 years to saving the environment in a practical way. We depend on donations to reach our goal. If you donate just $5, the price of your coffee this Sunday, We can help to keep the planet alive in a real way and continue to bring you regular updates and features on Australian plants all in one Botanical Bible. Any support is greatly appreciated. Thank you.”
In the spirit of reconciliation we acknowledge the Bundjalung, Gumbaynggirr and Yaegl and all aboriginal nations throughout Australia and their connections to land, sea and community. We pay our respect to their Elders past, present and future for the pleasures we have gained.
Trimenia moorei
Classification:
Superorder: Austrobaileyanae
Order: Austrobaileyales
Family: Trimeniaceae
Genus: Treîs/Tría, which are Ancient Greek or Tri, which is Latin for three, Mēn, which is Ancient Greek for a month as in a menstrual cycle. Its reference to tri monthly is unclear.
Specie: Is named in honour of Moore but which Moore cannot be substantiated.
Sub specie:
Common Name: Bitter Vine.
Distribution:
Trimenia moorei is restricted to a small area on and east of the Great Dividing range south from Rathdowney in far south east Queensland to the Great Lakes Region in central coastal New South Wales.
https://avh.ala.org.au/occurrences/search?taxa=Trimenia+moorei#tab_mapView
Habitat Aspect Climate:
Trimenia moorei prefers medium shade to light dappled shade. It grows in and adjacent to cool moist ancient, temperate rainforests. The altitude ranges from 35 meters ASL to 1350 meters ASL.
The temperatures range from minus 4 degrees in July to 34 degrees in January.
The rainfall ranges from lows of 1000mm to 2100mm average per annum. The areas often receive additional moisture from orographic precipitation.
Soil Requirements:
Trimenia moorei prefers better quality light clays to medium clays. The soils are usually derived from decomposed brown basalts or black basalts or at times granites. The soils pH ranges from 4.5pH to 5.5pH. It does not tolerate waterlogged soils though the soils are generally moisture retentive. Non saline soils to moderately saline soils are tolerated.
Height & Spread:
Wild Plants: 4m to 8m by 4m to 6m.
Characteristics:
Trimenia moorei grows as a slender scrambling, twinning woody climber. The stems are red-brown and glabrous. The new growth is moderately to densely covered in short, rusty-brown pubescent hairs.
The opposite or sub opposite, ovate, broad lanceolate leaves measure 50mm to 120mm in length by 17mm to 50mm in width. The petioles are moderately to densely covered in short, rusty-brown pubescent hairs and measures 4mm to 15mm in length. The bases are rounded while the apexes are long acuminate. The discolourous laminas are deep sea-green, dull to semi glossy and glabrous on the upper lamina while the lower laminas are paler and covered in rusty–brown hairs. The laminas are flat and decurve slightly close to the apex. The margins are entire to finely crenate. The mid vein is slightly prominent on the lower lamina while the pinnate lateral veins are very slightly prominent on the lower lamina. The mid vein and lateral veins are slightly sunken on the upper surface. The numerous, minute oil glands are barely visible with the naked eye.
The inflorescences are racemes born from the terminals or the upper leaf axils. The lower flowers are usually male while the upper flowers are usually bisexual. The 2 to 11 caducous sepals usually 6, measure 2mm to 4mm in length.
The male flowers 6 to 15 stamens measure 3mm to 4.5mm in length. The bisexual flowers 6 to 15 stamens measure 3mm to 4.5mm in length. The mid grass-green superior ovary measures 2mm to 3mm in length by 2mm to 3mm in diameter. There is a single ovule in each carpel. The tufted stigma is sessile.
The fruits are globose to ovoidal berries. The berry is glabrous and measures 5mm to 8mm in length by 3.5mm to 6mm in diameter. The green berries turn black when ripe. The single black, ovoidal seed measures 2.5mm to 4mm in length by 3mm to 4mm in width.
Wildlife:
Trimenia moorei wildlife; according to Jeremy J Buhl found 15 different species of insects, which were attracted to the flowers. These included Aporocea specie, Melangyna specie, Sapromyza specie, Triglyphus fulvicornus, Amphylaeus specie, Exoneura bicolor, Exoneura specie, Lassioglossum rufficollare, Lassioglossum speculatum, Lassioglossum specie, Leioproctus specie, Merogloss itamuca, Perrgid specie and the European bee Apis mellifera.
http//www.researchgate.net
Cultivation:
Trimenia moorei is a useful scrambling sub shrub or small creeper. It is ideal at the edge of a rainforest or deep in the center where it is protected from harsh sunlight. It makes an ideal ground cover in dense shade where there is continual ground moisture. In cultivation it grows much smaller than their forest cousins attaining a height of from 4 meters to 6 meters by 2 meters to 3 meters when grown in the open on a trellis or 1.5 meters to 2 meters by 1.5 meters to 2 meters when grown as a sub shrub.
It grows better well on better quality light sandy loams to medium clays especially where deep leaf litter keeps the soil cool and moisture at an even level. If these requirements are met it would probably cope with temperatures as low as minus 5 degrees outside the forest and up to 36 degrees. It is moderately drought resistant once established.
Add to the above, if it is given an adequate supply of water and a little native fertilizer on a regular basis the plants should respond with good flowering and fruit over a long period.
Try using it in a courtyard where the only other feature is a large rock, stump or formal or informal frog or fish pond. Next to such features their large deep green leaves, small flowers and small fruit are never overpowering but certainly noticed.
The plant is of interest as it is among the oldest flowering plants in the world and certainly the oldest in southern Australia.
Propagation:
Seeds: The seeds can be removed easily from the carpels but are likely to be difficult to come by as it is not on the market at the present time.
Sow fresh seeds after thoroughly washing directly into a seed raising mix covering them with 2mm of clean mix. Place the trays in a warm area beneath 50mm to 70mm shade cloth. Keep the seeds moist but not wet and do not allow them to dry out. When the seedlings are 30mm to 50mm tall, prick them out and plant them into 50mm native tubes using a good organic mix.
As the seedlings roots reach the bottom of the tubes plant them out into their permanent position.
Cuttings: I have not grown this species but would treat the cuttings similar to Pandorea pandorana. Cutting material may also be very difficult to come by but if you are fortunate enough to know someone who has the plants growing begging for a cutting would be appropriately acceptable.
Fortunately cuttings strike easily. Use 70mm to 100mm long tip cuttings or lateral shoots from the present season’s growth. Take them in warmer months of the year. Remove half the leaves from the bottom section being careful not to tear the bark.
1 Prepare the cutting mix by adding two thirds sharp clean river sand, one third peat or one third perlite. These ingredients must be sterilized,
2 Select good material from non diseased plants,
3 Select semi green stems for cuttings. Look for a three nodes,
4 Place the cutting on a flat, hard surface, and make a clean cut down one side of the cutting at the base for 10mm with a sharp sterile knife or razor blade. – This scarification of the node will increase the chances of roots emerging from this spot. Now remove all but one or two the leaves, leaving the apex leaves in tact. If the leaves are very large in proportion to the stem, cut off the apical halves.
5 Fill a saucer with water, and place a little medium strength rooting hormone into another container like a milk bottle top. Dip the node end of the cutting into the water and then into the rooting hormone. Tap off any excess hormone,
6 Use a small dipple stick or old pencil to poke a hole into the soilless potting mix. Ensure the hole is slightly larger than the stem diameter and be careful not to wipe the rooting hormone off the cuttings base. Place 2 to 4 cuttings in each of the 50mm native tubes,
7 I like to place the tubes in bucket with holes drilled in the bottom to allow excess water to drain out. A plastic bag that fits over the bucket is ideal to help maintain temperature and moisture. Place in a semi shaded, warm position like under 50mm shade cloth.
8 When the cuttings have struck, open the bag to allow air circulation for a few days to a week,
9 Once hardened off remove the cuttings from the bag and allow to further hardening for a few more days to a week,
10 Transplant into a good potting mix to grow on.
Fertilize using seaweed, fish emulsion or organic chicken pellets soaked in water on an alternate basis. Fertilize every two months until the plants are established then twice annually in early September or March to maintain health, vitality and better flowering.
Layering: Remove leaves at a node. Bury the node and secure it firmly with a wire loop just below the surface. Allow the internodes to rise to the surface or even allow the following node to surface. Repeat the method all the way along the stem. The nodes will shoot and develop roots. Carefully snip the stem below the node with the roots and pot in a 100mm squat pot using a good quality mix and thoroughly water in. Place the new plant in the bush house beneath 50mm shade cloth and keep moist.
This method can be used with plants in pots. Take the pot to the location where you want to grow the new plant and pin the stem to the ground as above. When the plant has rooted and the new shoots are thriving prune half the new growth off. Carefully sever the stem below the rooted node and water thoroughly. After a week fertilize with our recommended fertilizer at half strength.
Fertilize using seaweed, fish emulsion or organic chicken pellets soaked in water on an alternate basis. Fertilize every two months until the plants are established then annually in early September to October to maintain better colour, health, vitality and flowering.
Further Comments from Readers:
“Hi reader, it seems you use The Bible of Botany a lot. That’s great as we have great pleasure in bringing it to you! It’s a little awkward for us to ask, but our first aim is to purchase land approximately 1,600 hectares to link several parcels of N.P. into one at The Pinnacles NSW Australia, but we need your help. We’re not salespeople. We’re amateur botanists who have dedicated over 30 years to saving the environment in a practical way. We depend on donations to reach our goal. If you donate just $5, the price of your coffee this Sunday, We can help to keep the planet alive in a real way and continue to bring you regular updates and features on Australian plants all in one Botanical Bible. Any support is greatly appreciated. Thank you.”
In the spirit of reconciliation we acknowledge the Bundjalung, Gumbaynggirr and Yaegl and all aboriginal nations throughout Australia and their connections to land, sea and community. We pay our respect to their Elders past, present and future for the pleasures we have gained.
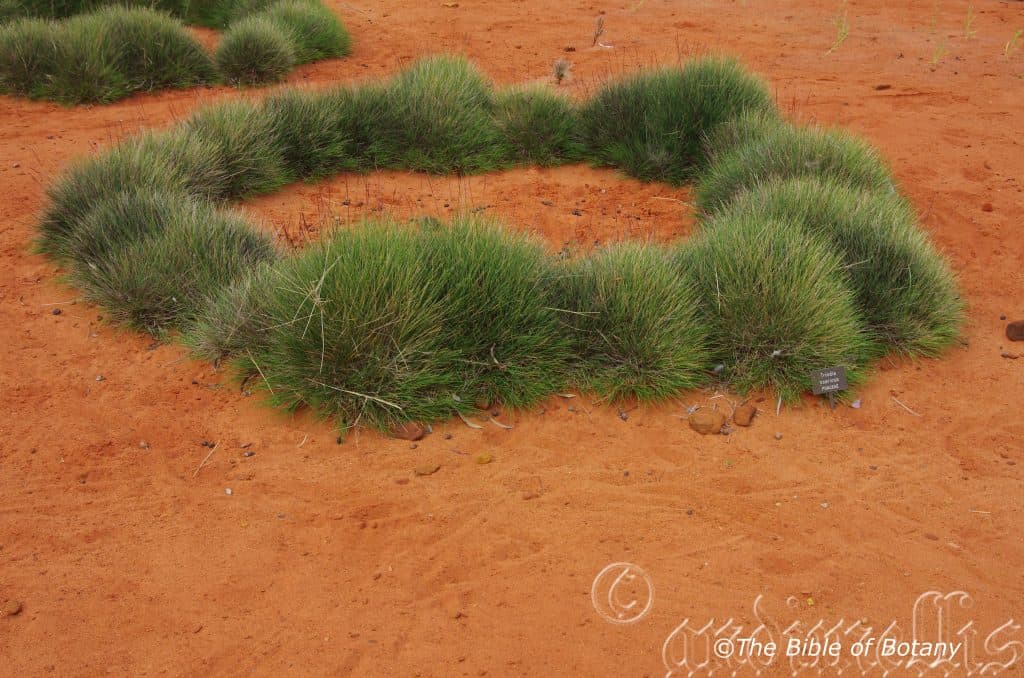
National Botanic Gardens ACT
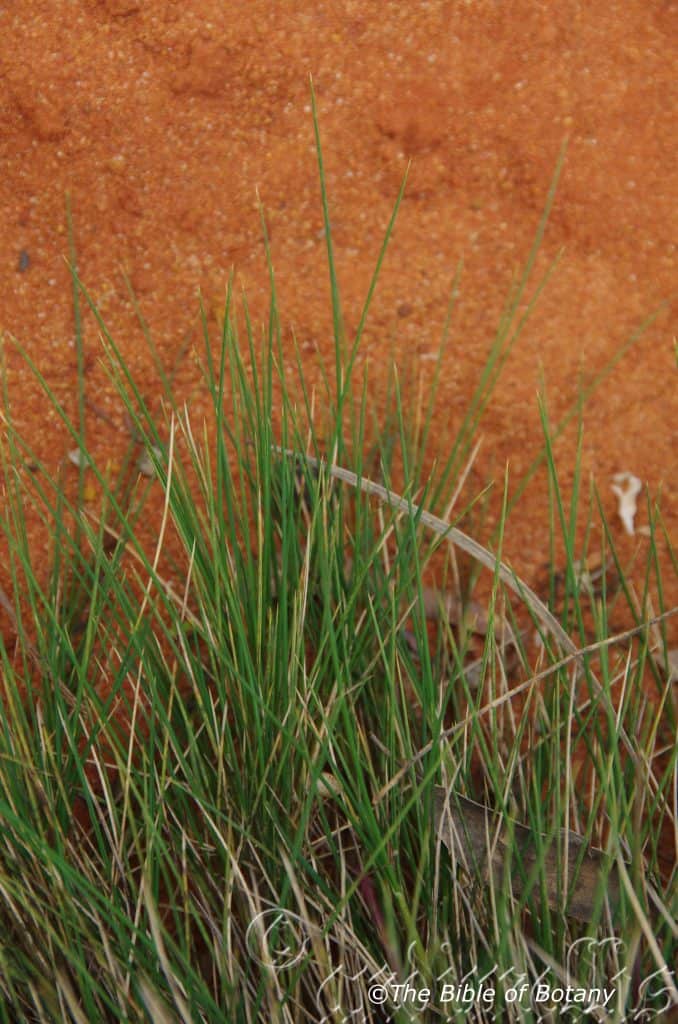
National Botanic Gardens ACT
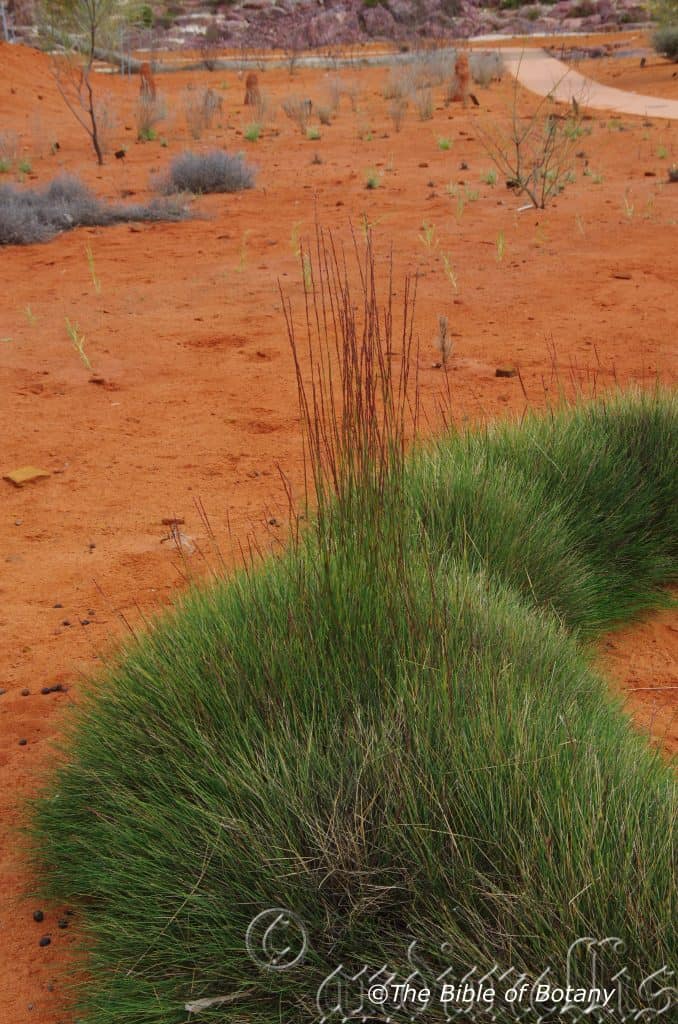
National Botanic Gardens ACT
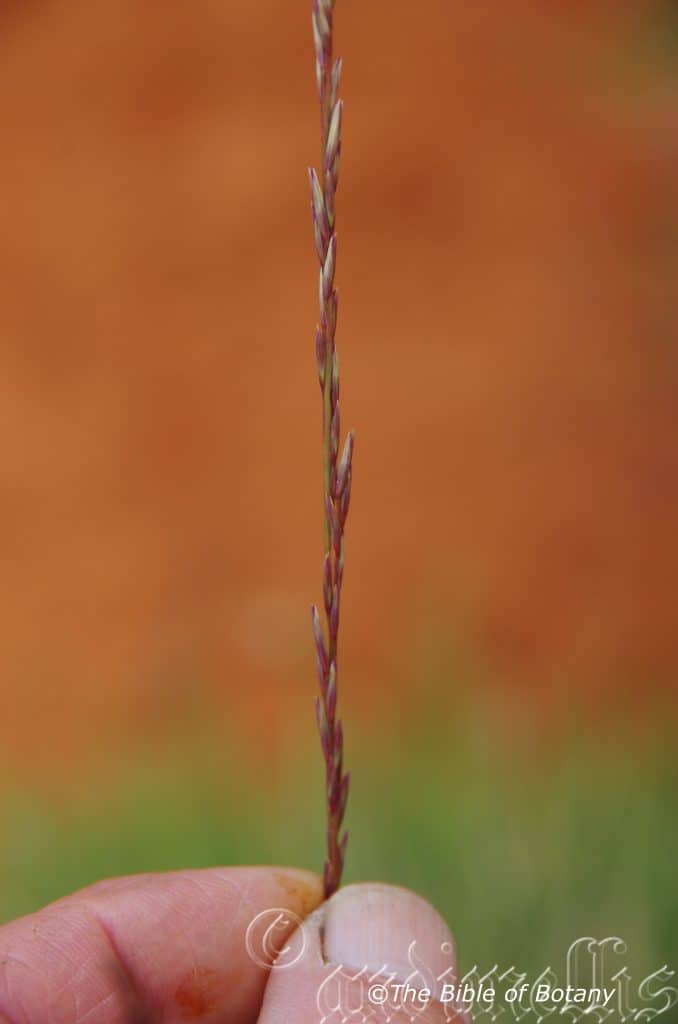
National Botanic Gardens ACT
Triodia scariosa
Classification:
Unranked: Monocots
Class: Commelinids
Order: Poales
Family: Poaceae
Subfamily: Chloridoideae
Tribe: Cynodonteae
Subtribe: Triodiiae
Genus: From Tri or Treis, which is Ancient Greek for three or triple and Odous, which is Ancient Greek for a tooth. It refers to the lemmas, which have three rigid, pungent teeth on pointed apexes.
Specie: From Scariosa, which is Latin for thin and membranous. It refers to organs or structures, usually the glumes, which are thin and membranous.
Sub specie: Triodia scariosa subsp. bunicola From bund, which is Latin for a levee or earthen wall or causeway and Cola, which is Latin for to live at or reside. It refers to plants which prefer to grow on levee banks or causeways.
Triodia scariosa subsp. scariosa. From Scariosa, which is Latin for thin and membranous. It refers to organs or structures, usually the glumes, which are thin and membranous.
Triodia scariosa subsp. yelarbonensis From Yelarbon, which is Latinised for Yelarbon, a rural town in the Goondiwindi region in Queensland and –ēnsis, which is Latin for to originate from. It refers to plants, which were originally found around Yelarbon.
Common Name: Spinifex, Spinifex Grass, Porcupine Grass or Echidna Grass.
Distribution:
Triodia scariosa subsp. bunicola and Triodia scariosa subsp. scariosa are found in the lower half of Western Australia, the north western to south eastern half of South Australia, the southern half of New South Wales and into the western third of Victoria.
Triodia scariosa subsp. yelarbonensis is found in far north eastern New south Wales and far south eastern Queensland on the western side of the Great Dividing Range.
https://avh.ala.org.au/occurrences/search?q=taxamm3Amm22Triodia+scariosa22#tab_mapView
Habitat Aspect Climate:
Triodia scariosa prefers dappled light dappled shade to full sun. It grows on plateau, flats, ridges, gravelly rises, sandplains, dunes, interdunes, swales, or sandhills. The altitude ranges from 10 meters ASL to 600 meters ASL.
The temperatures range from minus 3 degrees in July to 45 degrees in January.
The rainfall ranges from lows of 150mm to 950mm average per annum however permanent ground water is more important.
Soil Requirements:
Triodia scariosa prefer poorer quality red, yellow or brown, calcareous or clayey or siliceous sands or loams. The soils are associated with decomposed sandstone, limestone, laterite and at times granite. They are usually shallow soils on stony hillslopes and screes. The soils pH ranges from 4pH to 8pH. It does not tolerate waterlogged soils. Non saline soils to very saline soils are tolerated.
Height & Spread:
Wild Plants: 0.5m to 2m by 2m to 3.5m.
Characteristics:
Triodia scariosa grows as a robust, tussock and hummock forming perennial clumps or rings. They measure 400mm to 1000mm rarely taller in height by 1000mm to 3000mm or rarely more in diameter.
The erect, glabrous flowering culms measure 0.5m to 2m in height. The rigid leaves are glabrous or very slightly scabrous with a closely inrolled lamina except near base and spreading from axis to a needle like point. The leaves measure 200mm in length by 1mm to 1.5mm in diameter. The stem clasping sheath is green or at times slightly glaucous with a ciliate ligule that measures 0.5mm in length.
The inflorescence are rather open to compact narrow oblong panicles have 4 to 14 individual flowers and that measure 90mm to 300mm in length by 25mm in diameter. The scabrous or glabrous rachis have spikelets that measure 10mm to 18mm in length. The upper florets are often reduced. The pedicels measure 1mm to 12mm in length.
The sub equal glumes have acute or obtuse apexes and measure 5mm to 12mmin length. The keels are often slightly scabrous or glabrous.
The oblong to narrowly ovate lemmas have an emarginate, erose apex often with a short mucro and are sparsely covered in hirsute hairs on the lower quarter.
The oblong palea are subequal to the lemma, are narrow acute to truncate, with 2 keels. The lower 50mm of the lemma is sparsely covered in white silky or pilose hairs to 1mm in length. The keels are moderately covered in white ciliolate hairs.
The flowers appear throughout the year when good rainfalls occur.
Wildlife:
Triodia scariosa is very diverse and it is a crucial plant in its environment for bird and insect habitats as well as a major soil binder against erosion in arid locations.
Cultivation:
Triodia scariosa is a beautiful unusual grass when grown in the open yet where it is protected from influencing winds. When this occurs older plants will develop the well known ring growth. Thus it is suitable for larger, hot sunny gardens close to the coast or inland in temperate, subtropical areas or semi-arid zones especially where the soils are of a very sandy nature. As garden subjects it initially grows very erect and rigid.
It is fast growing and is cold tolerant to temperatures as low as minus 4 degrees once established though some burning will occur in the early stages.
It is not suitable for use around swimming pools, bright courtyards, because of the pollen, seeding habits where large amounts of pollen are produced along with large quantities of white floccose hairs not to mention the pungent lemmas and glumes.
Imagine a large flat area of land with a dam or creek dotted with Triodia scariosa. Between them, covering the ground; are smaller ground hugging Hibbertia scandens and Grevillea masonii on the bank with their different textured leaves, yellow, red and orange flowers. This would give a horizontal landscape a look of greater expansiveness. Other Hibbertia like Hibbertia diffusa, Hibbertia linearis or Hibbertia vestita would also add the the scene of expansiveness.
Propagation:
Seeds: The seeds of Triodia scariosa are easy to collect as soon as the female inflorescences begin to break down and display the floccose hairs. The seeds can be sown with the hairs directly into a seed raising mix. Pat them down on the surface and keep them moist by placing the trays into a larger tray full of water. Place the tray in a warm sunny position. When the seedlings are 20mm to 30mm tall, prick them out and plant them into 50mm native tubes using a good organic mix. Again place the tubes into a tray of water so they do not dry out.
Once the seedlings reach 100mm to 150mm in height they can be planted out into their permanent position.
Further Comments from Readers:
“Hi reader, it seems you use The Bible of Botany a lot. That’s great as we have great pleasure in bringing it to you! It’s a little awkward for us to ask, but our first aim is to purchase land approximately 1,600 hectares to link several parcels of N.P. into one at The Pinnacles NSW Australia, but we need your help. We’re not salespeople. We’re amateur botanists who have dedicated over 30 years to saving the environment in a practical way. We depend on donations to reach our goal. If you donate just $5, the price of your coffee this Sunday, We can help to keep the planet alive in a real way and continue to bring you regular updates and features on Australian plants all in one Botanical Bible. Any support is greatly appreciated. Thank you.”
In the spirit of reconciliation we acknowledge the Bundjalung, Gumbaynggirr and Yaegl and all aboriginal nations throughout Australia and their connections to land, sea and community. We pay our respect to their Elders past, present and future for the pleasures we have gained.
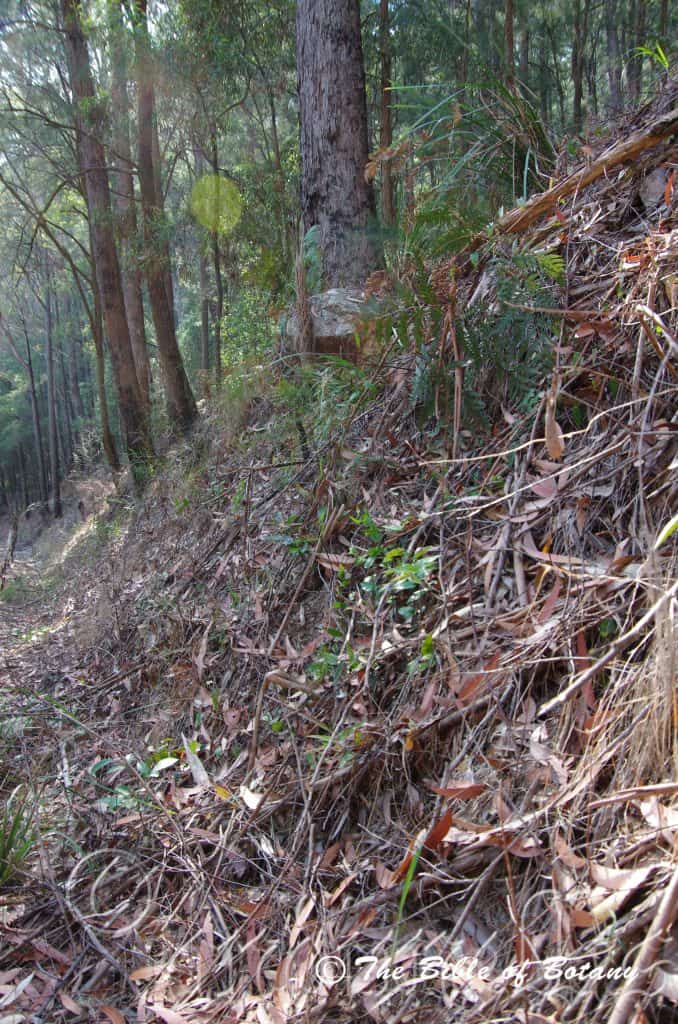
North Brother National Park NSW
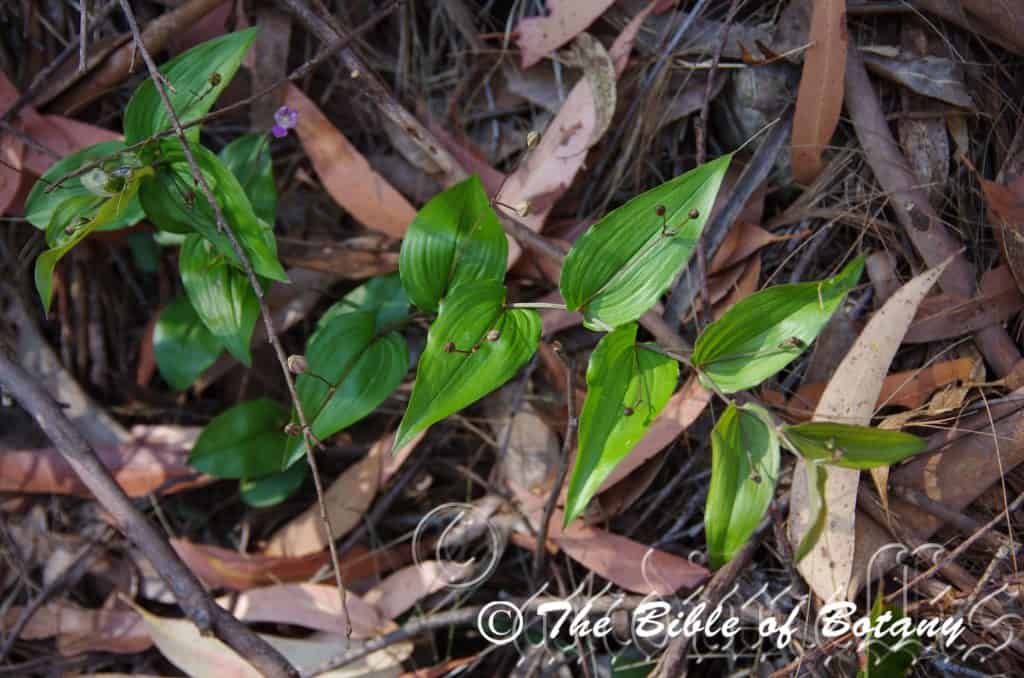
Ebor NSW
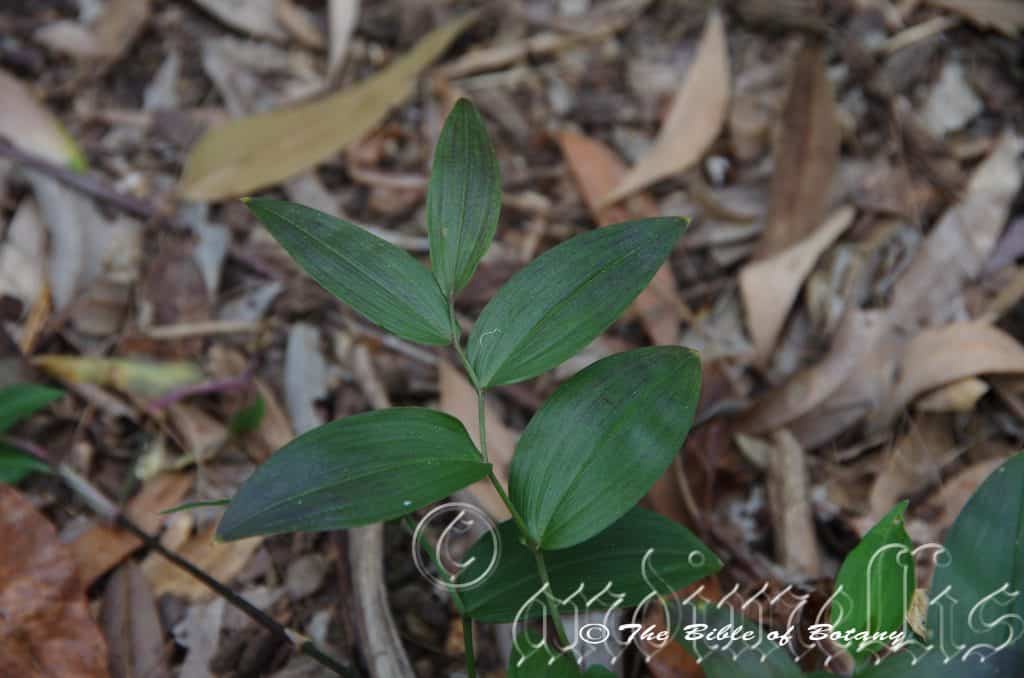
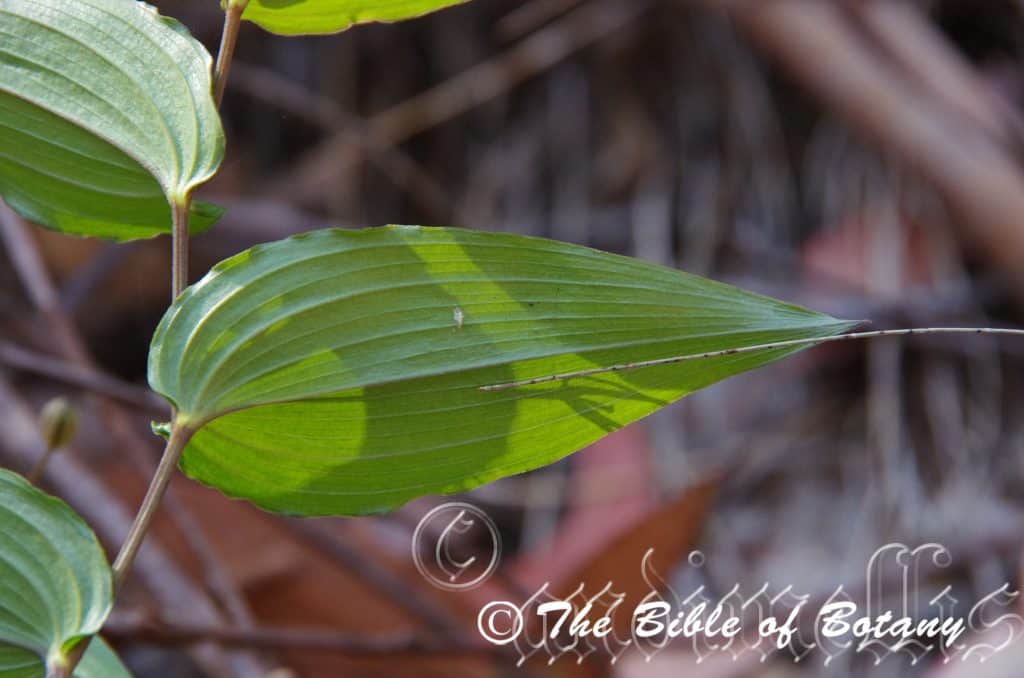
North Brother National Park NSW
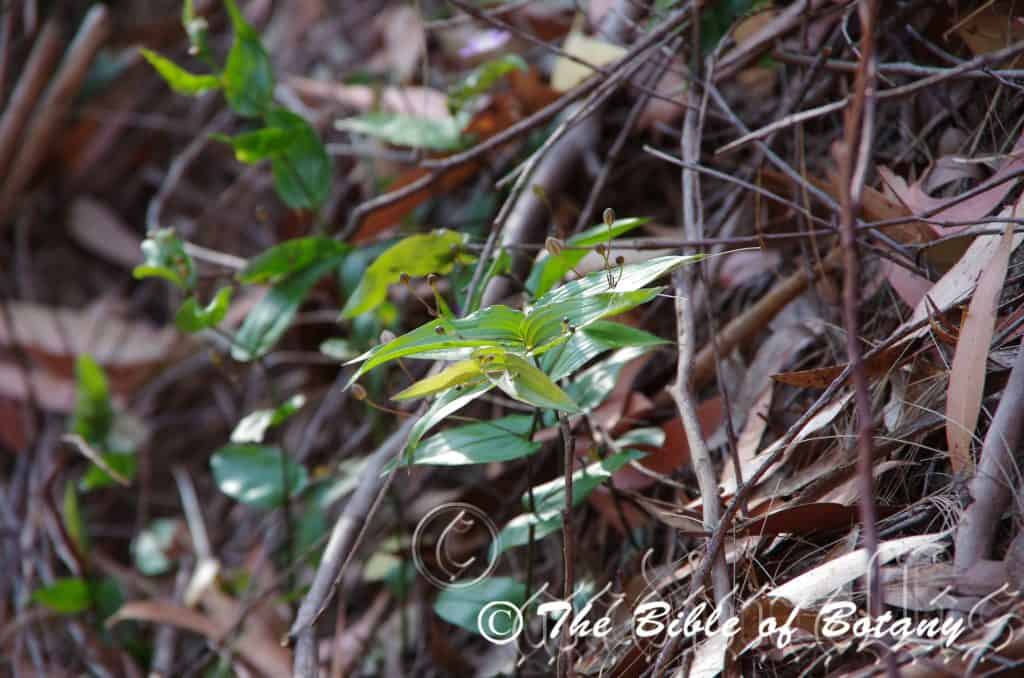
North Brother National Park NSW
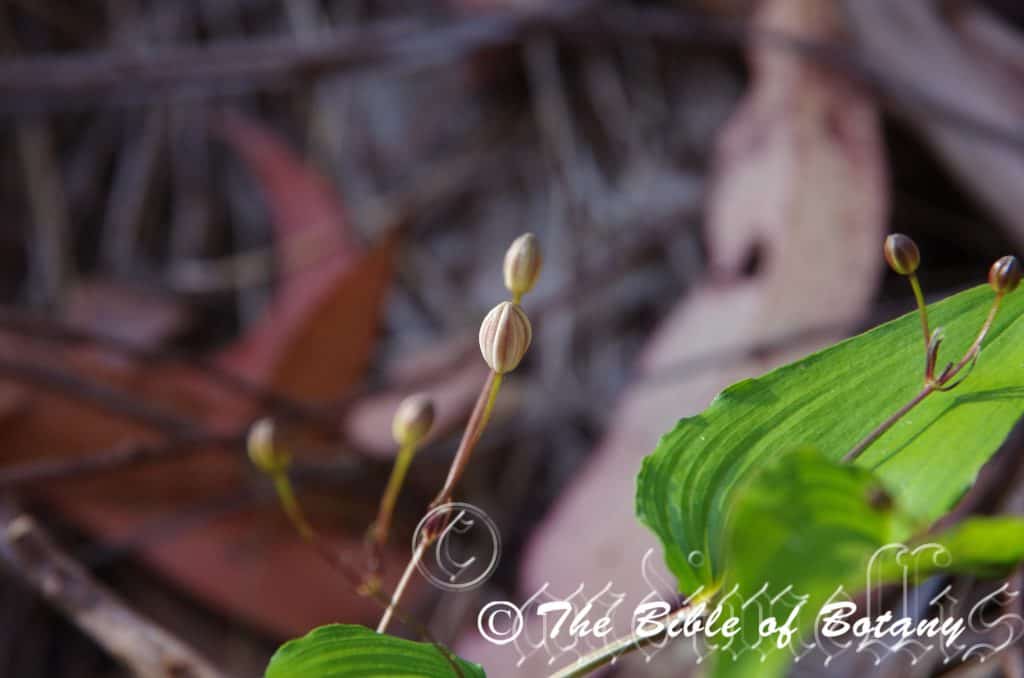
North Brother National Park NSW
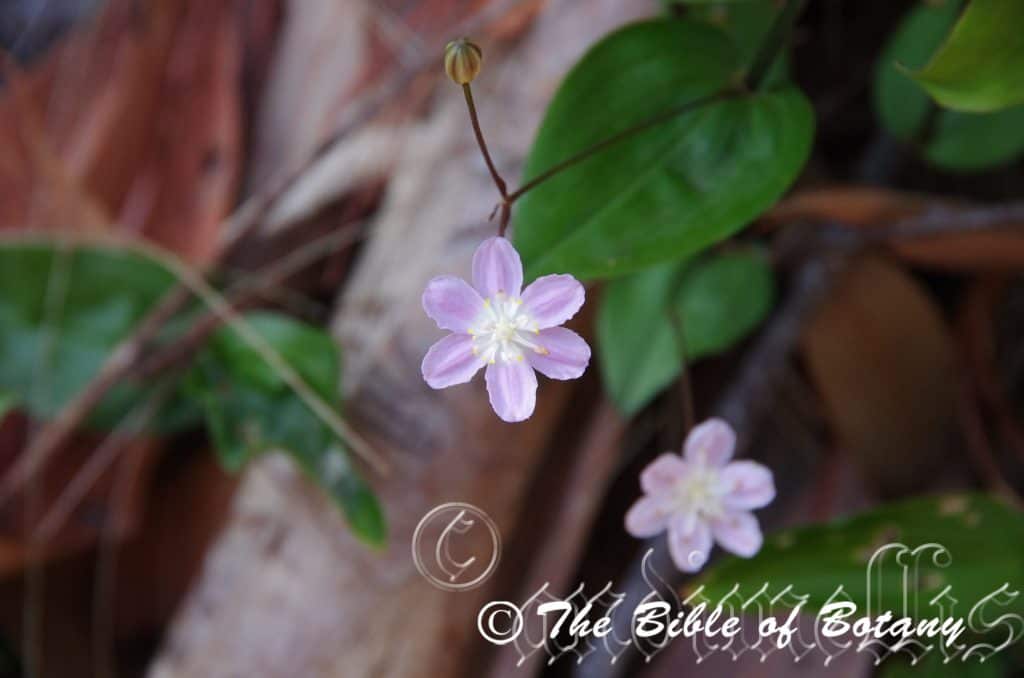
North Brother National Park NSW
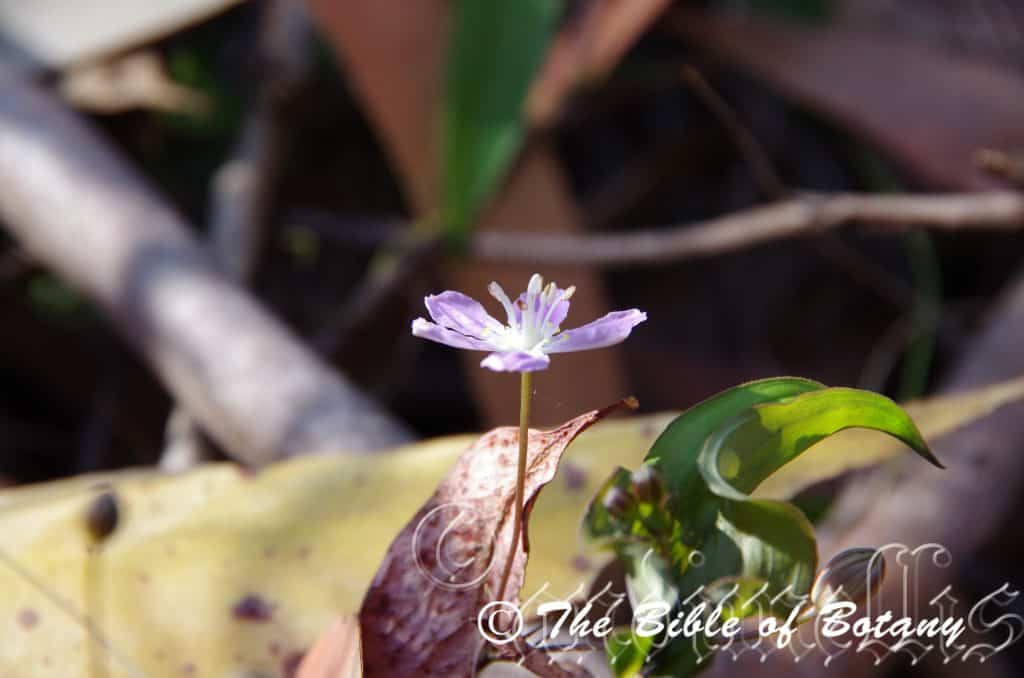
North Brother National Park NSW
Tripladenia cunninghamii
Classification:
Unranked: Monocots
Order: Liliales
Family: Colchicaceae
Genus: From Triplus, which is Ancient Greek or Triplaris, which is Latin for three fold and Adēn, which is Ancient Greek for a gland. It refers to the broad basal almost stipule like appendages at the base of the perianth.
Specie: Is named in honour of Allan Cunningham; 1791-1839, who was an Australian explorer, botanist and collector of plants.
Sub specie:
Common Name:
Distribution:
Tripladenia cunninghamii is found on and east of the Great Dividing Range south from the upper Brisbane River catchment in far south eastern Queensland to the Hunter River in central coastal New South Wales.
There are 2 disjunct populations further north on Cape York Peninsula and near Cairns.
https://avh.ala.org.au/occurrences/search?taxa=Tripladenia+cunninghamii#tab_mapView
Habitat Aspect Climate:
Tripladenia cunninghamii prefers medium shade to light dappled shade. It grows adjacent to and on the margins of well-developed warm subtropical rainforests, gallery forests, riparian zones or moist eucalyptus forests in moist situations. The altitude ranges from 5 meters ASL to 550 meters ASL.
The temperatures range from 1 degree in July to 36 degrees in January.
The rainfall ranges from lows of 600mm to 1800mm average per annum.
Soil Requirements:
Tripladenia cunninghamii prefers better quality loams to medium clays. The soils are usually derived from decomposed brown basalts, black basalts, metamorphic rocks or shales. The soils pH ranges from 5pH to 6.5pH. It does not tolerate waterlogged soils though the soils are generally moisture retentive. Non saline soils to moderately saline soils are tolerated.
Height & Spread:
Wild Plants: 0.2m to 0.4m by 0.2m to 0.3m.
Characteristics:
Tripladenia cunninghamii grows as a perennial herb with angulated stems. The stems are glabrous and scabrous along the ridged angles.
The alternate, ovate to lanceolate leaves measure 40mm to 90mm in length by 10mm to 45mm in width. The bases are cordate while the apexes are acute. The discolourous laminas are deep green to sea-green, semi glossy and glabrous on the upper lamina while the lower laminas are paler and dull. The laminas recurve slightly from the mid vein to the margins near the base and twist slight towards the apex. The margins are entire and undulate. The mid vein and 4 main parallel lateral veins are strongly prominent on the lower lamina and slightly sunken on the upper lamina while the other 20 to 26 parallel veins are very slightly to moderately prominent on the lower lamina and are slightly to very slightly prominent on the upper lamina.
The new growth is bright green or reddish purple to deep purple-burgundy.
The inflorescences are born singularly or in simple cymes of 2 or at times 3 individual flowers from the leaf axils. The 4 deep purple-maroon to deep red-green petiole bracts are narrow linear and measure 6mm to 18mm in length by 0.4mm to 0.6mm in width. The deep purple-maroon to deep red-green peduncles and pedicels are glabrous. The peduncles measure 30mm to 60mm in length while the pedicels measure 10mm to 30mm in length. There are 3 small appendages at the base of the perianth that measure 2mm to 3mm in length. The 6 mauve to deep pink to petal like tepals are oblong with a broad mucronate apex and undulating margins. The cochleate or contorted often both together tepals are flat or recurve upwards near the margins. They measure 7mm to 13mm in length by 4mm to 7mm in width.
The usually 6 or at times 5 obclavate stamens are free and measure 5mm to 6mm in overall length. The filaments are white while the white anthers turn brown after dehiscing. There are 6 to 12 white staminodes with bright yellow pseudo/sterile anthers. The dimorphic staminodes measure 1.5mm to 2.5mm in length while the hemispherical anthers measure 1mm in diameter. The dorsifixed, sagittate anthers measure 2mm to 2.5mm in length by 1mm to 1.5mm in diameter. The pollen is pastel pink.
The white style and stigma are glabrous while the ovary is pastel yellow. The pistil measures 4.2mm to 5mm in length. The flowers appear from October to January.
The fruits are ovoidal capsules. The capsules are strongly rugose and measure 6mm to 8mm in length by 3mm to 6mm in diameter. The green capsules turn reddish externally and yellowish-tan internally when ripe. The calyx and calyx lobes are persistent on the ripe fruit. The seeds are yellow-brown and measure 5mm to 6mm in length by 2.5mm to 3mm in width.
Wildlife:
Tripladenia cunninghamii wildlife is unknown to the author.
Cultivation:
Tripladenia cunninghamii is a small, annual, sub creeper that is suitable for growing in most suburban gardens. It is better placed at the edge of a rainforest or moist bush garden. It makes a great display offering quick growth and colour where there is continual ground moisture. In cultivation it grows from 0.4 meters to 0.5 meters in height by 0.5 meters to 0.8 meters in diameter when grown in an open semi shaded position.
It performs better on light sandy loams to medium open clays especially where deep leaf litter keeps the soil cool and moisture at an even level. If these requirements are met it can cope with temperatures as low as minus 3 degrees and up to 36 degrees.
Add to the above, if it is given an adequate supply of water and a little native fertilizer on a regular basis the plants will respond with excellent flowering and fruit over a long period.
Try using it in a courtyard where the only other feature is a large rock, stump or formal or informal frog or fish pond. Next to such features their leaves, small flowers and small fruit are never overpowering but certainly noticed.
Propagation:
Seeds: The seeds are rather small and difficult to collect. Use a paper bag inside a plastic bag and attach around the ripening fruits.
Sow fresh seeds or seeds that have been stored in the vegetable crisper of the refrigerator directly into a seed raising mix covering them with 2mm of fine sand. Keep the seeds moist and do not allow them to dry out. Place the trays in a warm shaded area with 50mm shade cloth in the bush house. When the seedlings are 30mm to 50mm tall, prick them out and plant them into 50mm native tubes using a good organic mix.
As the seedlings roots reach the bottom of the tubes plant them out into their permanent position. Do not delay.
Fertilize using seaweed, fish emulsion or organic chicken pellets soaked in water on an alternate basis. Fertilize every two months until the plants are established then annually in early September to October to maintain better colour, health, vitality and flowering.
Further Comments from Readers:
“Hi reader, it seems you use The Bible of Botany a lot. That’s great as we have great pleasure in bringing it to you! It’s a little awkward for us to ask, but our first aim is to purchase land approximately 1,600 hectares to link several parcels of N.P. into one at The Pinnacles NSW Australia, but we need your help. We’re not salespeople. We’re amateur botanists who have dedicated over 30 years to saving the environment in a practical way. We depend on donations to reach our goal. If you donate just $5, the price of your coffee this Sunday, We can help to keep the planet alive in a real way and continue to bring you regular updates and features on Australian plants all in one Botanical Bible. Any support is greatly appreciated. Thank you.”
In the spirit of reconciliation we acknowledge the Bundjalung, Gumbaynggirr and Yaegl and all aboriginal nations throughout Australia and their connections to land, sea and community. We pay our respect to their Elders past, present and future for the pleasures we have gained.
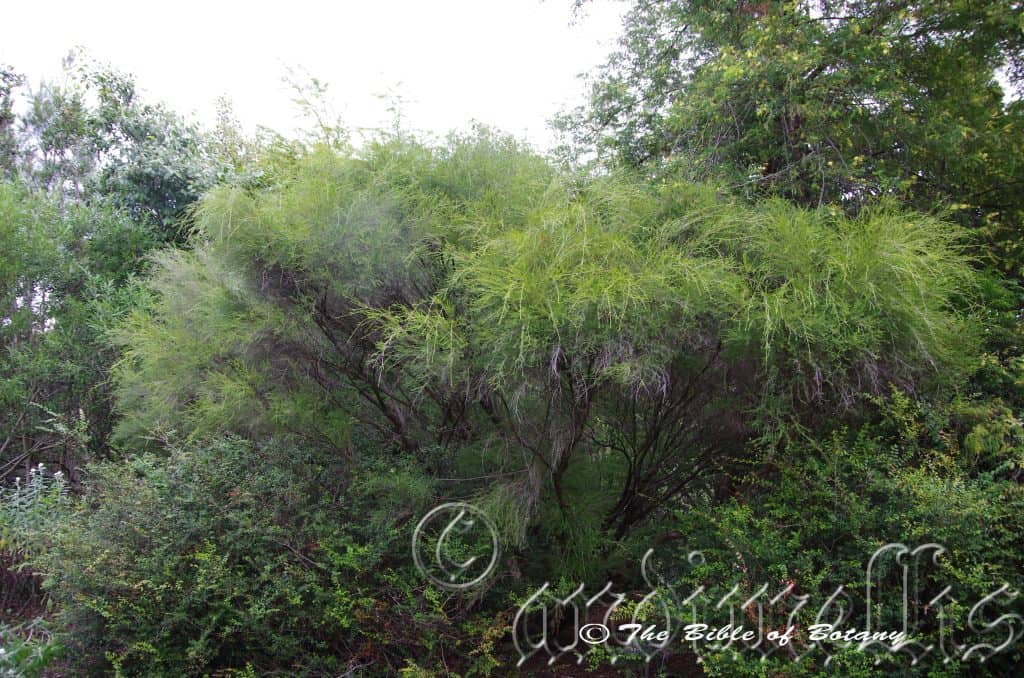
NCBG Coffs Harbour NSW.
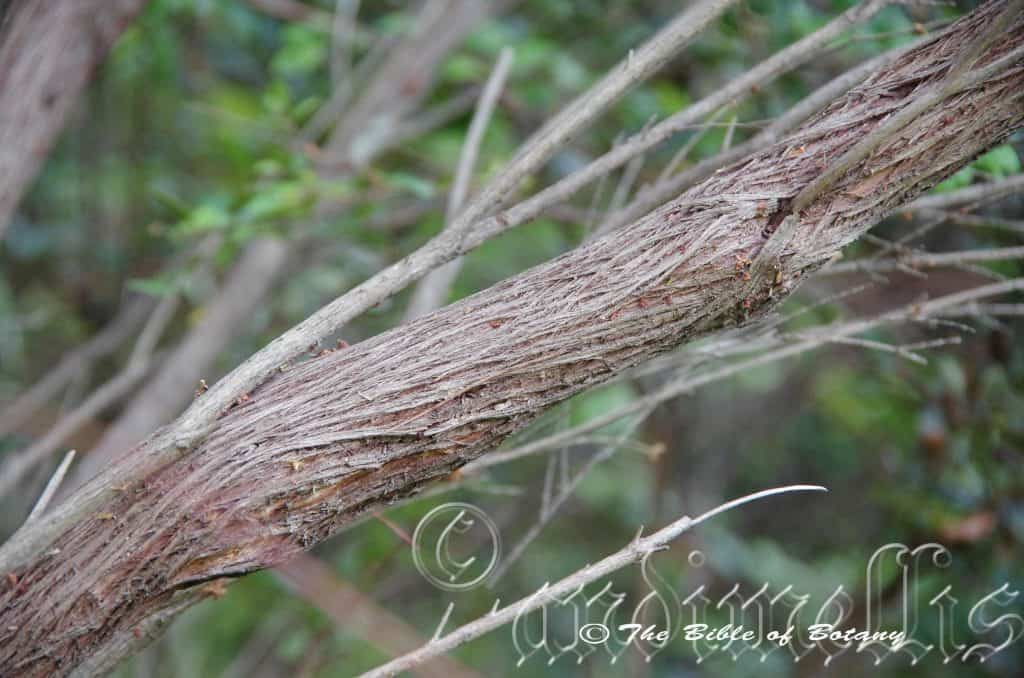
NCBG Coffs Harbour NSW.
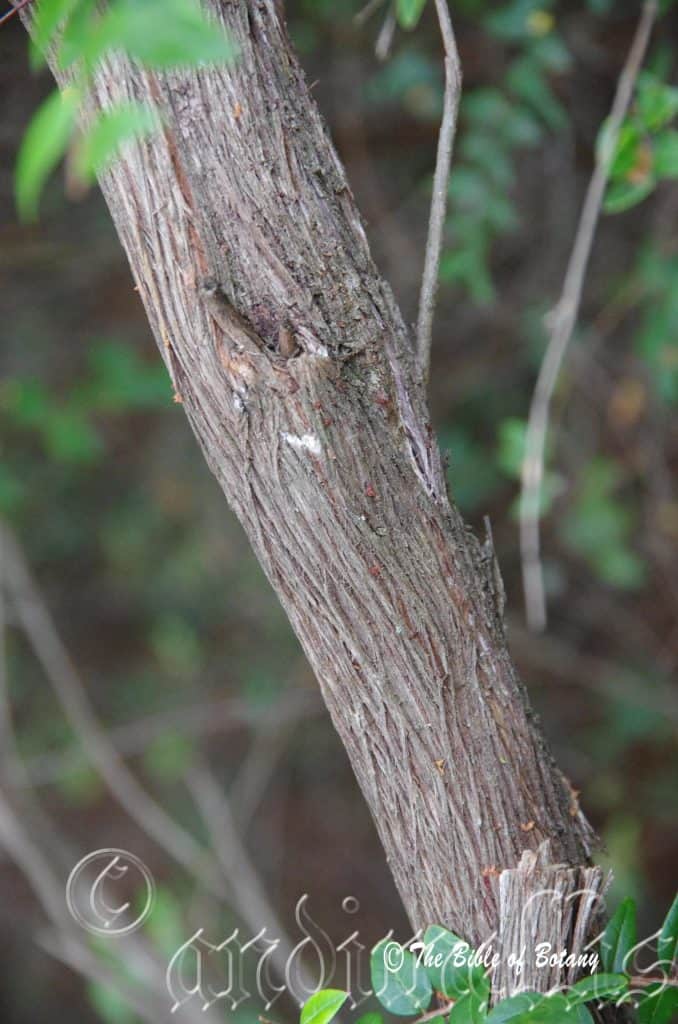
NCBG Coffs Harbour NSW.
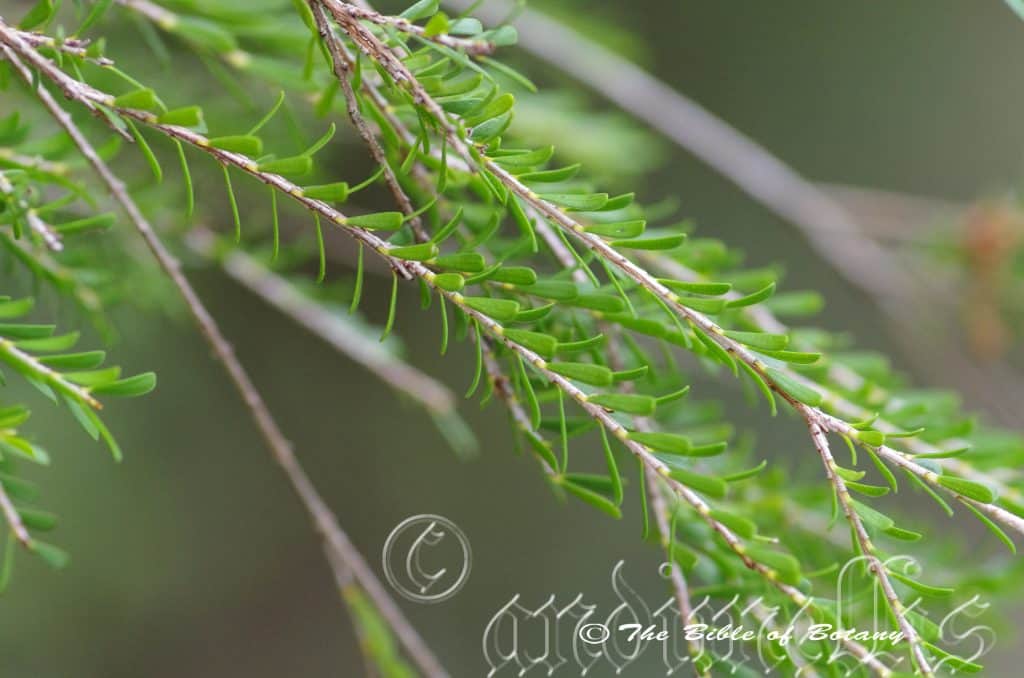
Dorrigo to Ebor Roadside NSW
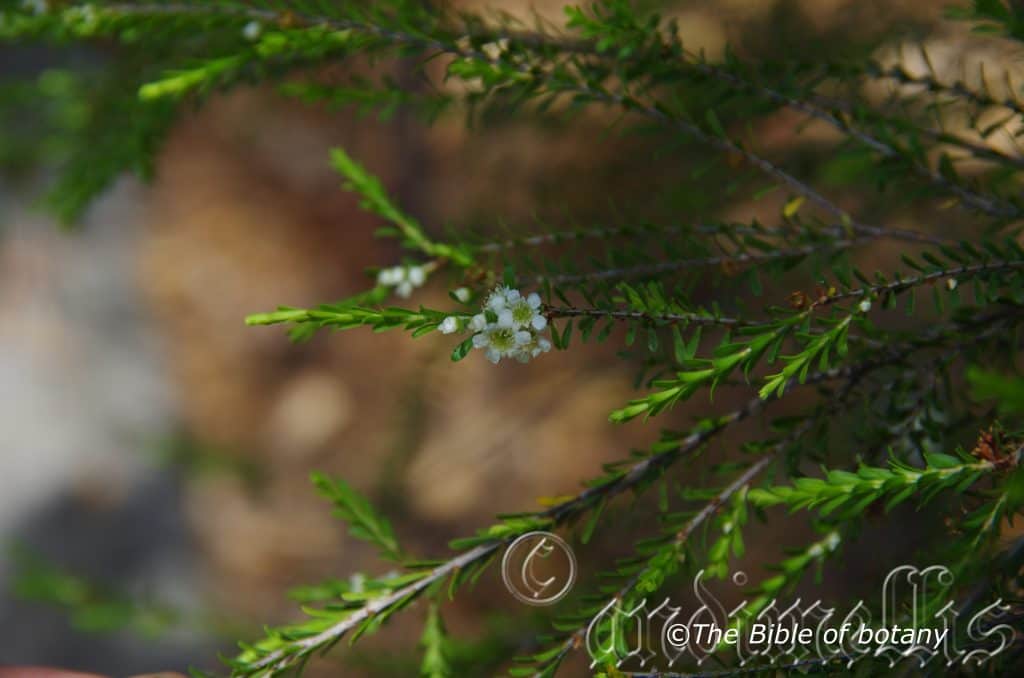
NCBG Coffs Harbour NSW.
Triplarina imbricata
Classification:
Class: Equisetopsida
Subclass: Magnoliidae
Superorder: Rosanae
Order: Myrtales
Family: Myrtaceae
Subfamily: Myrtoideae
Tribe: Chamelaucieae
Genus: From Triplaris, which is Latin for to triple. It refers to calyx, stamens, and styles, which are in groups of three. It is still known widely as Baeckea camphorata.
Specie: From Imbricātum, which is Latin for shaped like a tile. It refers to an organ, which overlaps another organ or series of organs, which resemble laid roof tiles or fish scales. Both margins of a petal overlap the adjacent petal compared to contort where one margin overlaps the adjacent petal.
Sub specie:
Common Name:
Distribution:
Triplarina imbricata is close to the coast in widely disjunct populations from Brisbane in far south eastern Queensland to Orbost in far north eastern Victoria.
https://avh.ala.org.au/occurrences/search?taxa=Triplarina+imbricata#tab_mapView
Habitat Aspect Climate:
Triplarina imbricata prefer medium shade to full sun. It grows adjacent to and on the margins of well-developed warm subtropical rainforests, gallery forests, riparian zones, moist eucalyptus forests in moist situations. It is rarely found growing along rivers, streams, creeks or close to permanent water. The altitude ranges from 50 meters ASL to 250 meters ASL.
The temperatures range from minus 2 degrees in July to 36 degrees in January.
The rainfall ranges from lows of 1000mm to 1800mm average per annum.
Soil Requirements:
Triplarina imbricata prefer better quality loams to medium clays. The soils are usually derived from decomposed black basalts, sandstones or metamorphic rocks. The soils pH ranges from 4.5pH to 6.5pH. It tolerates waterlogged soils. Non saline soils to moderately saline soils are tolerated.
Height & Spread:
Wild Plants: 2m to 3m by 2m to 3m.
Characteristics:
Triplarina imbricata grows as a dense, small semi weeping shrub with silvery grey glabrous stems.
The alternate, narrowly ovate leaves measure 2.6mm to 3.9mm in length by 1mm to 1.5mm in width. The petiole measures 0mm to 1mm in length. The bases are cuneate while the apexes are obtuse. The discolourous laminas are grass-green to sea-green, semi glossy and glabrous on the upper lamina while the lower laminas are paler and dull. The laminas are flat or decurve downwards slightly near the margins. The laminas are covered in minute translucent oil glands. The margins are entire. The mid vein and main laterals are slightly prominent on the lower laminas while the mid veins are visible on the upper laminas.
The inflorescences are born in pairs from the leaf axils. The green pedicels are glabrous and measure 0.2mm to 1.5mm in length. The 5 pale green-grass hypanthium measure 2.5mm to 3mm in length by 4mm to 4.5mm in diameter. The white, orbicular petals measure 2mm to 2.5mm in length by 2mm to 2.5mm in width.
The 14 to 17 white stamens are free and form a ring around the hypanthium. The stamens measure 0.5mm to 0.6mm length.
The pinkish style and pale greenish stigma are glabrous while the ovary is green turning pinkish shortly after anthesis. The pistil measures 0.5mm to 0.6mm in length. The honey scented flowers appear from November to December.
The fruits are conical capsules. The capsules are glabrous and measure 2.4mm to 3mm in length by 3mm to 4mm in diameter. The green capsules turn burgundy-red before turning greyish-brown when ripe. The brown seeds are flattened ellipsoidal and chaff like.
Wildlife:
Triplarina imbricata supports a large number of butterflies, native beetles, pollen flies, stingless wasps and native colony bees like Tetragonula carbonaria when in flower.
Cultivation:
Triplarina imbricata is a beautiful semi weeping to weeping shrub that looks great in full sun light with its deep green foliage and consistent heavy flowering every summer. It grows from 2.5 meter to 3 meters in height by 2.5 meter to 3 meters in diameter when grown in the garden in an open sunny situation. Once established it is moderately frost hardy and drought resistant though leaf drop will occur.
Triplarina imbricata would make good contribution to a tall, moist heath garden. Here it can be used as the taller growing plant scattered throughout the heath scene. When you design a flat heath garden which Triplarina imbricata is well suited don’t use contours to display the plants as heath lands are almost always flat or have a slight rise. Plants must be planted close together and be short so you can see over the tallest ones with the exception of one or two plants at the most. These will be feature plants. The idea is to achieve a feeling of expansive flatness. This can be achieved with using Triplarina imbricata deep green ovate or oblong leaves and having them contrasting with finer pale green or soft grey to glaucous coloured foliages. Use a lot of procumbent plants like Carpobrotus edulis or Hibbertia specie. Mix it with other smaller shrubs so none of them dominate the scene but blend in to give a mosaic of foliage colours that you oversee.
A single shrub planted in the corner with a few scattered small perennials like Dampier, Leschenaultia specie, Hibbertia species or Actinotis helianthi would be far more effective than a crowded garden.
This shrub makes an excellent study for bonsai and is fast to establish from seed. The trunks and branches are easily trained and will form the gnarled appearance early in life.
Propagation:
Seeds: Collecting seeds from mature trees of Triplarina imbricata is not the easiest as it is dispersed very quickly once ripe. Seeds can be collected by placing a sheet at the base of a tree when seeds are falling from the trees or placing brown paper bags around the ends of the branchlets as the capsules start turning brown. You should collect enough in a day for personal use. The fresh seeds can be sown directly into a seed raising mix with the sepals still attached covering them to a depth of 1mm. Seeds usually germinate quickly if fresh with a strike rate of over 80mm usually being attained.
When the seedlings are 20mm to 30mm tall, prick them out and plant them into 50mm native tubes using a good quality mix.
Once the seedlings reach 100mm to 150mm in height nip the tips out and plant them out into their permanent position.
For mass plantings for a feature plant them at 0.8 meters to 1 meter centers for hedges.
Cuttings: Fortunately cuttings strike easy. Use 100mm to 150mm long tip cuttings or lateral shoots from the present season’s growth. Take them in warmer months of the year. Remove half the leaves from the bottom section being careful not to tear the bark.
1 Prepare the cutting mix by adding two thirds sharp clean river sand, one third peat or one third perlite. These ingredients must be sterilized,
2 Select good material from non diseased plants,
3 Select semi green stems for cuttings. Look for a several nodes,
4 Place the cutting on a flat, hard surface, and make a clean cut down one side of the cutting at the base for 10mm with a sharp sterile knife or razor blade. – This scarification of the node will increase the chances of roots emerging from this spot. Now remove all but one or two the leaves, leaving the apex leaves in tact. If the leaves are very large in proportion to the stem, cut off the apical halves.
5 Fill a saucer with water, and place a little medium strength rooting hormone into another container like a milk bottle top. Dip the node end of the cutting into the water and then into the rooting hormone. Tap off any excess hormone,
6 Use a small dipple stick or old pencil to poke a hole into the soilless potting mix. Ensure the hole is slightly larger than the stem diameter and be careful not to wipe the rooting hormone off the cuttings base. Place 2 to 4 cuttings in each of the 50mm native tubes,
7 I like to place the tubes in bucket with holes drilled in the bottom to allow excess water to drain out. A plastic bag that fits over the bucket is ideal to help maintain temperature and moisture. Place in a semi shaded, warm position like under 50mm shade cloth.
8 When the cuttings have struck, open the bag to allow air circulation for a few days to a week,
9 Once hardened off remove the cuttings from the bag and allow to further hardening for a few more days to a week,
10 Transplant into a good potting mix to grow on.
Fertilize using seaweed, fish emulsion or organic chicken pellets soaked in water on an alternate basis. Fertilize every two months until the plants are established then annually in early September to October to maintain health, vitality and better flowering.
Further Comments from Readers:
“Hi reader, it seems you use The Bible of Botany a lot. That’s great as we have great pleasure in bringing it to you! It’s a little awkward for us to ask, but our first aim is to purchase land approximately 1,600 hectares to link several parcels of N.P. into one at The Pinnacles NSW Australia, but we need your help. We’re not salespeople. We’re amateur botanists who have dedicated over 30 years to saving the environment in a practical way. We depend on donations to reach our goal. If you donate just $5, the price of your coffee this Sunday, We can help to keep the planet alive in a real way and continue to bring you regular updates and features on Australian plants all in one Botanical Bible. Any support is greatly appreciated. Thank you.”
In the spirit of reconciliation we acknowledge the Bundjalung, Gumbaynggirr and Yaegl and all aboriginal nations throughout Australia and their connections to land, sea and community. We pay our respect to their Elders past, present and future for the pleasures we have gained.
Tristaniopsis collina
Classification:
Unranked: Eudicots
Class: Rosids
Order: Myrtales
Family: Myrtaceae
Genus: Is named in honour of Jules M. C. Tristan, who was a French botanist and ópsis which is Ancient Greek for to appear like or to have the appearance of. It refers to plants which very closely resemble the Tristania genus.
Specie: From Collīnum/Collīnī, which are Latin for hills. It refers to plants, which prefer to grow on hilly terrains.
Sub specie:
Common Name: Mountain Water Gum.
Distribution:
Tristaniopsis collina is mainly found on or east of the Great Dividing Range to the coast. It is found south from the Macpherson ranges in southern Queensland Narooma in southern New South Wales.
https://avh.ala.org.au/occurrences/search?taxa=Tristaniopsis+collina#tab_mapView
Habitat Aspect Climate:
Tristaniopsis collina prefers medium shade to full sun. It grows adjacent to and on the margins of well-developed warm subtropical rainforests, gallery forests, riparian zones or moist eucalyptus forests. It is rarely found growing along rivers, streams, creeks or close to permanent water. The altitude ranges from 20 meters ASL to 1200 meters ASL.
The temperatures range from minus 4 degrees in July to 34 degrees in January.
The rainfall ranges from lows of 600mm to 1800mm average per annum but this is not as important as the trees are found in areas where permanent moisture is present in the soil.
Soil Requirements:
Tristaniopsis collina prefers better quality sands to medium clays. The soils are usually derived from decomposed brown or black basalts, sandstones or metamorphic rocks. The soils pH ranges from 4pH to 6pH. It does not tolerate waterlogged soils though the soils are generally moisture retentive. Non saline soils to moderately saline soils are tolerated.
Height & Spread:
Wild Plants: 20m to 33m by 6m to 10m.
Characteristics:
Tristaniopsis collina grows as a medium to tall tree with a bent, or crooked trunk. The pinkish-brown, persistent fibrous bark on the trunk which is often covered with mosses near the ground and lichens higher up. The trunk is slightly flanged near the base. The branchlets are pale grey and only becoming reddish-maroon before turning reddish-green near the apex where the newer leaf growth occurs. The branchlets are glabrous.
The alternate, narrowly elliptical to elliptical leaves of Tristaniopsis collina measure 45mm to 95mm in length by 10mm to 25mm in width. The petiole measures 2mm to 6mm in length. The bases are broad tapering-cuneate while the apexes are acuminate. The discolourous laminas are deep sea-green, semi glossy and glabrous on the upper lamina while the lower lamina is yellow-green and dull. The leaf margins are entire, flat and decurve close to the margin and the apex. The mid vein and main laterals are slightly prominent on the lower laminas while the mid veins are visible on the upper laminas. Oil glands are numerous and conspicuous.
Inflorescences of Tristaniopsis collina are born in triads or dichasia corymbs from the leaf axils. There are 3 to 7 individual flowers to a corymb. The deep green peduncles and pedicels are glabrous. The peduncles measure 3mm to 8mm in length while the pedicels measure 2mm to 7mm in length. The 5 green ovate calyx lobes are divaricate, glabrous and measure 4mm to 8mm in length. The bright yellow, orbicular petals measure 2.5mm to 3mm in length by 2mm to 2.5mm in width. The petals are shortly stalked to 0.3mm in length.
The 5 exserted stamens are free for their entire length and have 10 to 18 filaments to a fascicle. The stamens measure 2.5mm to 3.2mm in overall length. The filaments are deep yellow while the anthers are deep yellow and bear white pollen.
The deep golden-yellow style and stigma are glabrous while the ovary is green. The pistil measures 2.5mm to 3mm in length. Tristaniopsis collina honey scented flowers appear throughout the year.
The fruits of Tristaniopsis collina are globose to obovoidal capsules. The capsules are glabrous and measure 6mm to 8mm in length by 3mm to 6mm in diameter. The green capsules turn burgundy-red before turning grey when ripe. The calyx and calyx lobes are persistent on the ripe fruit. The brown seeds are flattened ellipsoidal and chaff like. The winged seeds measure 5mm to 6mm in length by 3mm to 4mm in width overall.
Wildlife:
Tristaniopsis collina’s supports a large number of small and medium honeyeaters, butterflies, native beetles and bees when in flower.
Cultivation:
Tristaniopsis collina is a magnificent large well shaped tree that is suitable for growing in most larger suburban gardens. It is ideal at the edge of a rainforest or deep in the center of the rainforest. It also makes a great park tree offering quick growth, and good shade where there is continual ground moisture. In cultivation it will grow much smaller than its forest cousins attaining a height of from 12 meters to 18 meters with a diameter of 6 meters to 10 meters when grown in the open or taller and narrower if grown closer together as a rainforest tree.
It grows exceptionally well on light sandy loams to medium clays especially where deep leaf litter keeps the soil cool and moisture at an even level. If these requirements are met it can cope with temperatures as low as minus 5 degrees and up to 36 degrees. It is moderately drought resistant once established.
Add to the above, if it is given an adequate supply of water and a little native fertilizer on a regular basis it should respond with good flowering and fruit in the next flower season.
The tree would make a very good accent trees in front of low set commercial, school buildings or industrial sheds where they will break up hard rigid architectural lines and give warmth and breadth to a building. In front of high rise buildings it gives balance especially where they could be grown in curves meandering to the entry doors or for something different used from the front of the path and meander back to the far corners with shrubs or flowers planted between the trees and the building and the trees and the nature strip.
It makes an excellent street tree forming small avenues or border lines on properties forming corridors for wildlife.
Propagation:
Seeds: The seeds of Tristaniopsis collina can be removed easily from the capsules.
Sow fresh seeds or seeds that have been stored in the vegetable crisper of the refrigerator directly into a seed raising mix covering them with 2mm of fine sand. Keep the seeds moist and do not allow them to dry out. Place the trays in a warm shaded area with 50mm shade cloth in the bush house. When the seedlings are 30mm to 50mm tall, prick them out and plant them into 50mm native tubes using a good organic mix.
As the seedlings roots reach the bottom of the tubes plant them out into their permanent position. Do not delay.
Fertilize using seaweed, fish emulsion or organic chicken pellets soaked in water on an alternate basis. Fertilize every two months until the plants are established then annually in early September to October to maintain better colour, health, vitality and flowering.
Further Comments from Readers:
“Hi reader, it seems you use The Bible of Botany a lot. That’s great as we have great pleasure in bringing it to you! It’s a little awkward for us to ask, but our first aim is to purchase land approximately 1,600 hectares to link several parcels of N.P. into one at The Pinnacles NSW Australia, but we need your help. We’re not salespeople. We’re amateur botanists who have dedicated over 30 years to saving the environment in a practical way. We depend on donations to reach our goal. If you donate just $5, the price of your coffee this Sunday, We can help to keep the planet alive in a real way and continue to bring you regular updates and features on Australian plants all in one Botanical Bible. Any support is greatly appreciated. Thank you.”
In the spirit of reconciliation we acknowledge the Bundjalung, Gumbaynggirr and Yaegl and all aboriginal nations throughout Australia and their connections to land, sea and community. We pay our respect to their Elders past, present and future for the pleasures we have gained.
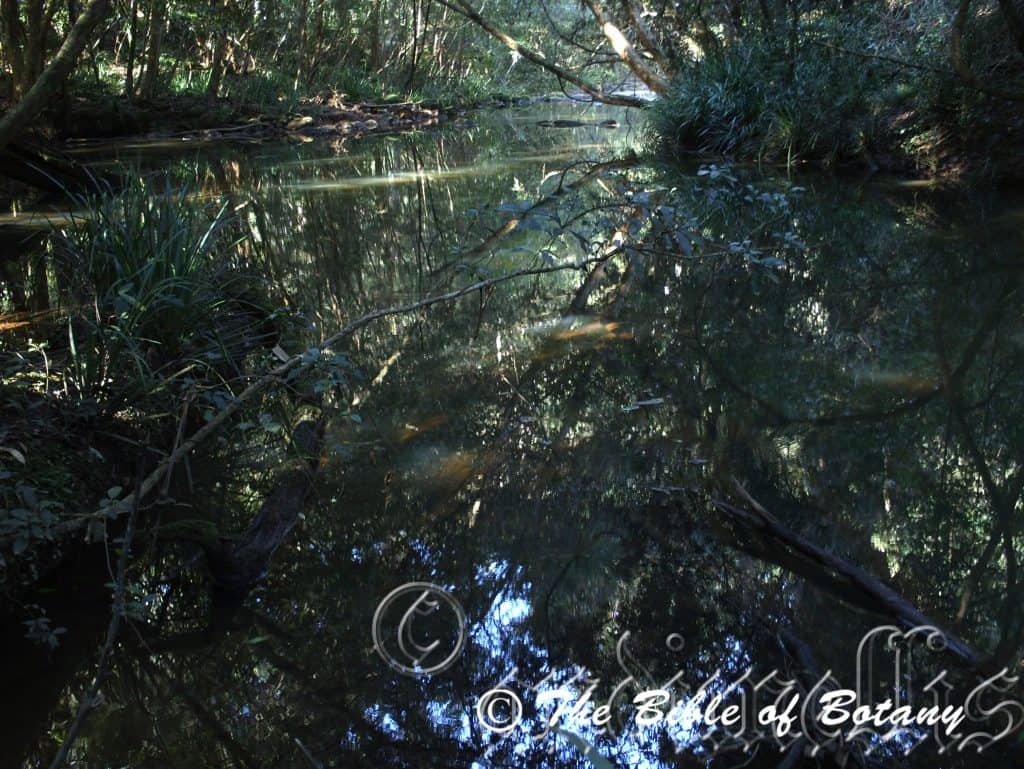
Swans Crossing Kendall NSW
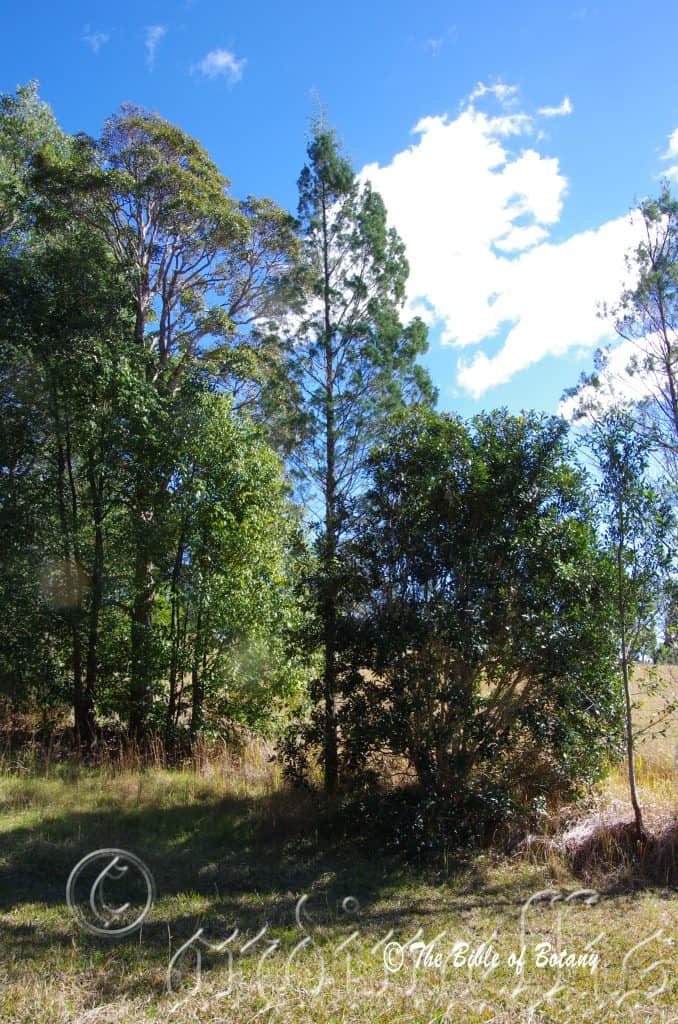
Nana Glen NSW
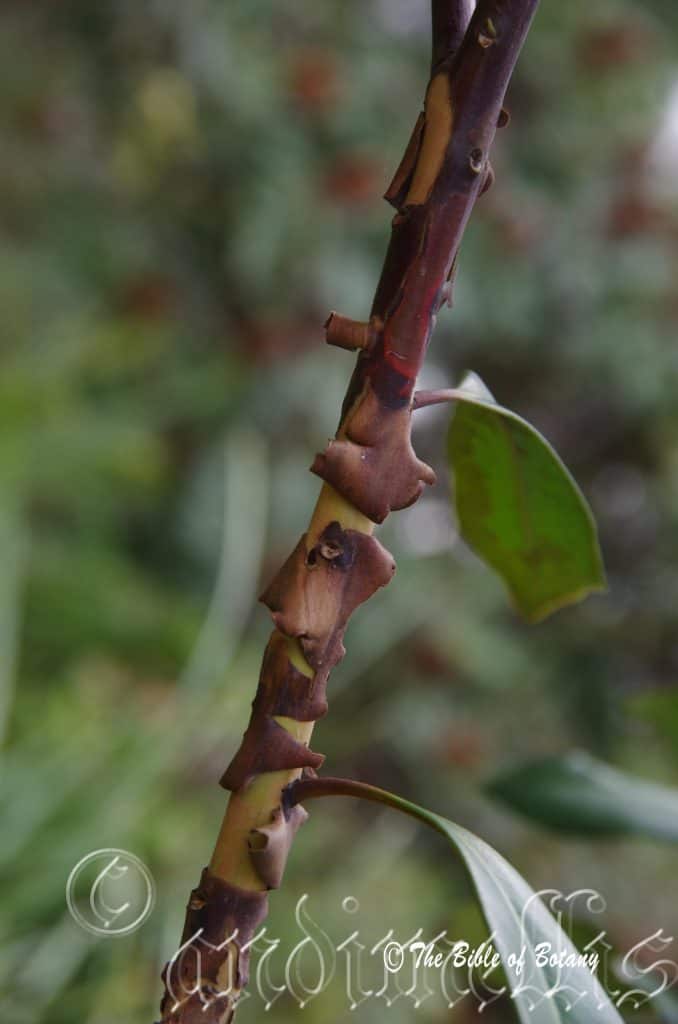
Rosser Park Botanic Gardens Qld.
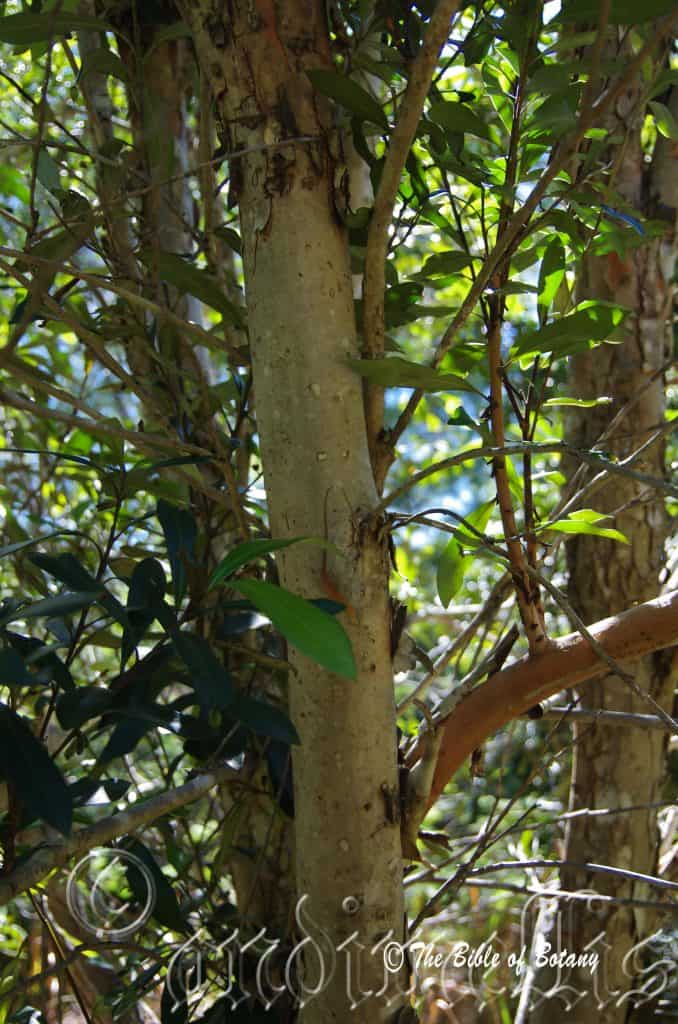
Nana Glen NSW
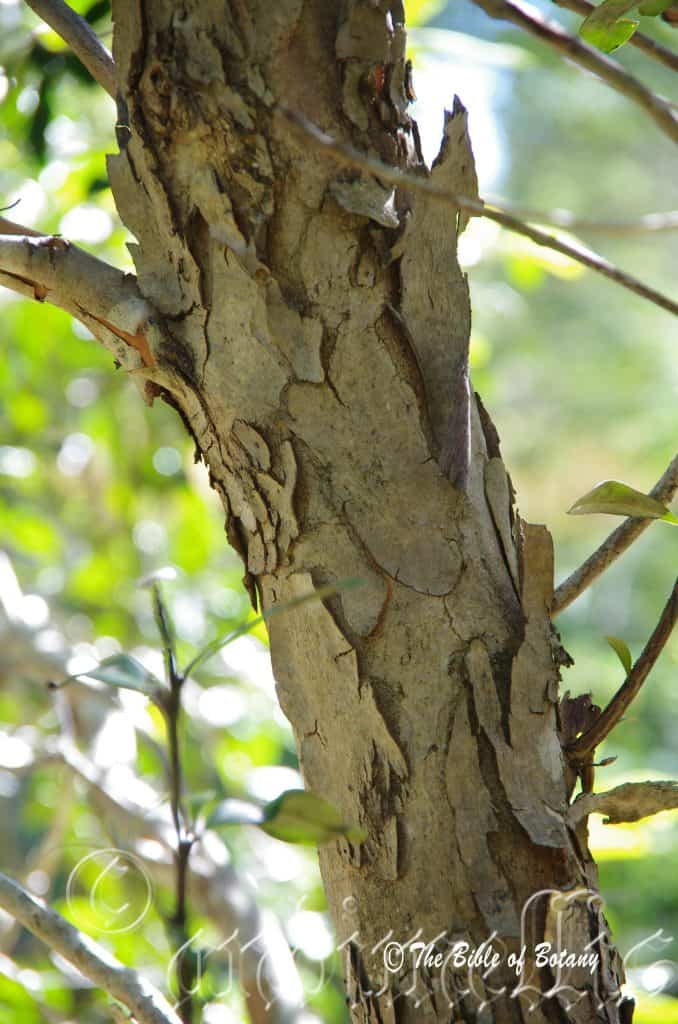
Nana Glen NSW
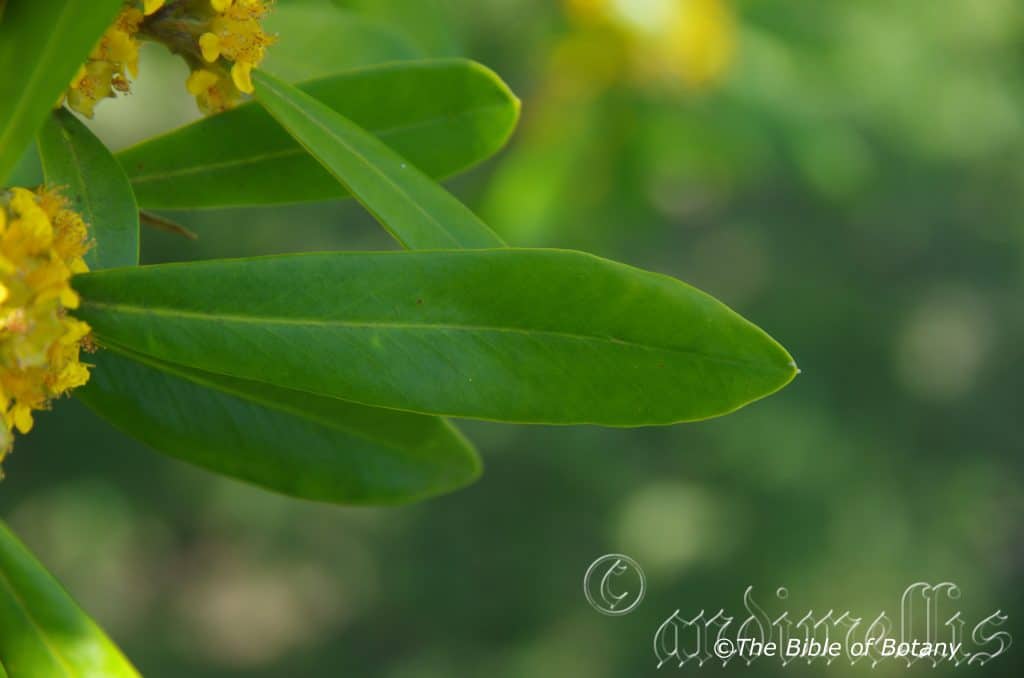
Grafton NSW
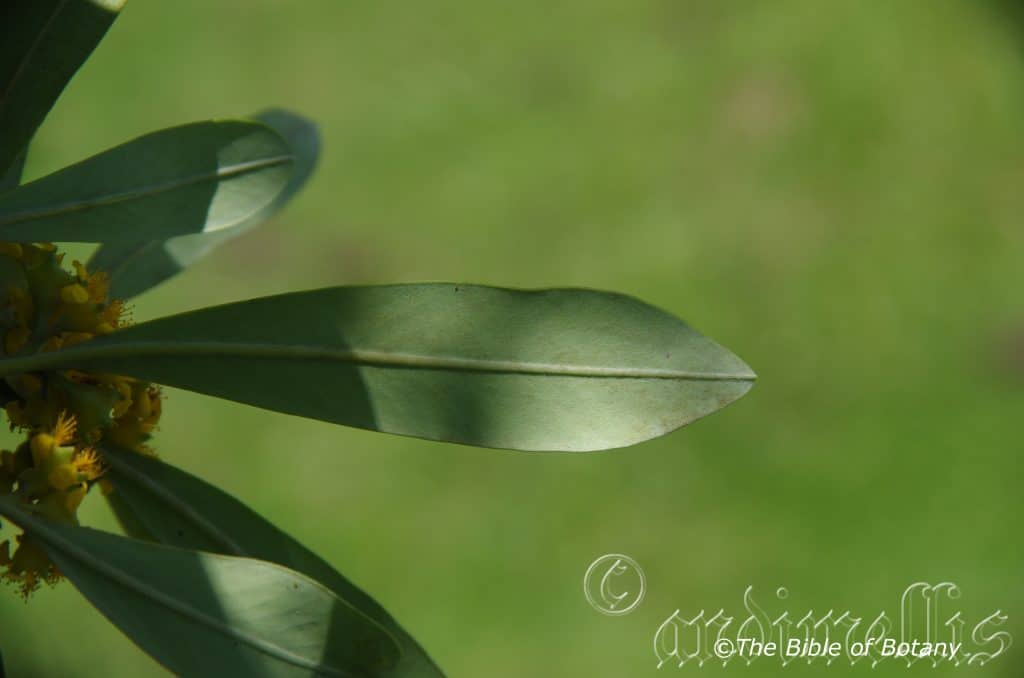
Grafton NSW
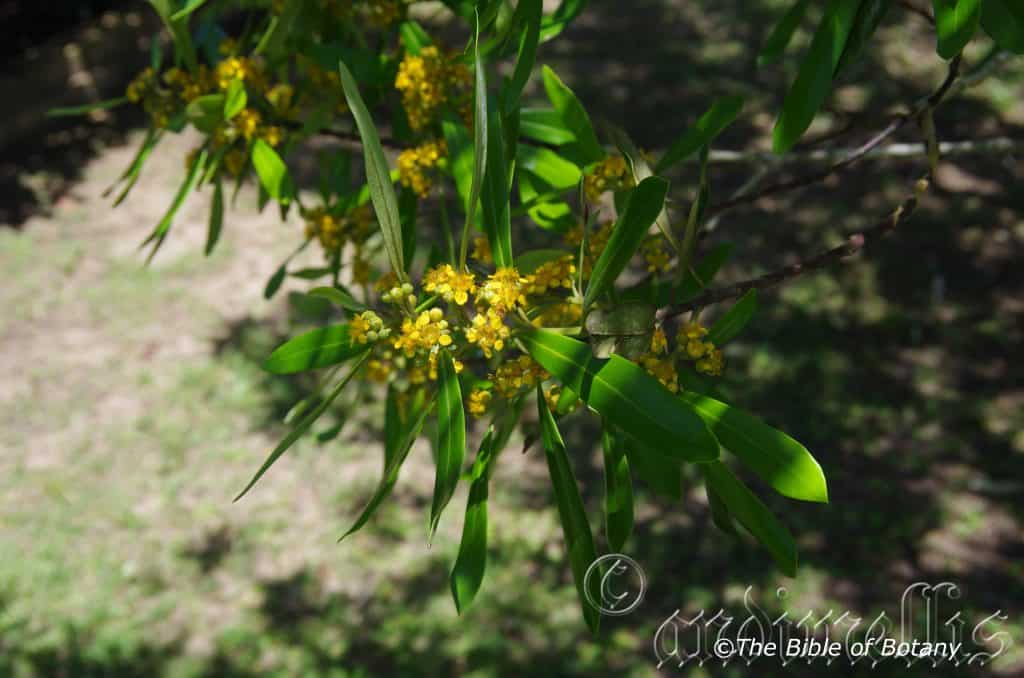
Grafton NSW
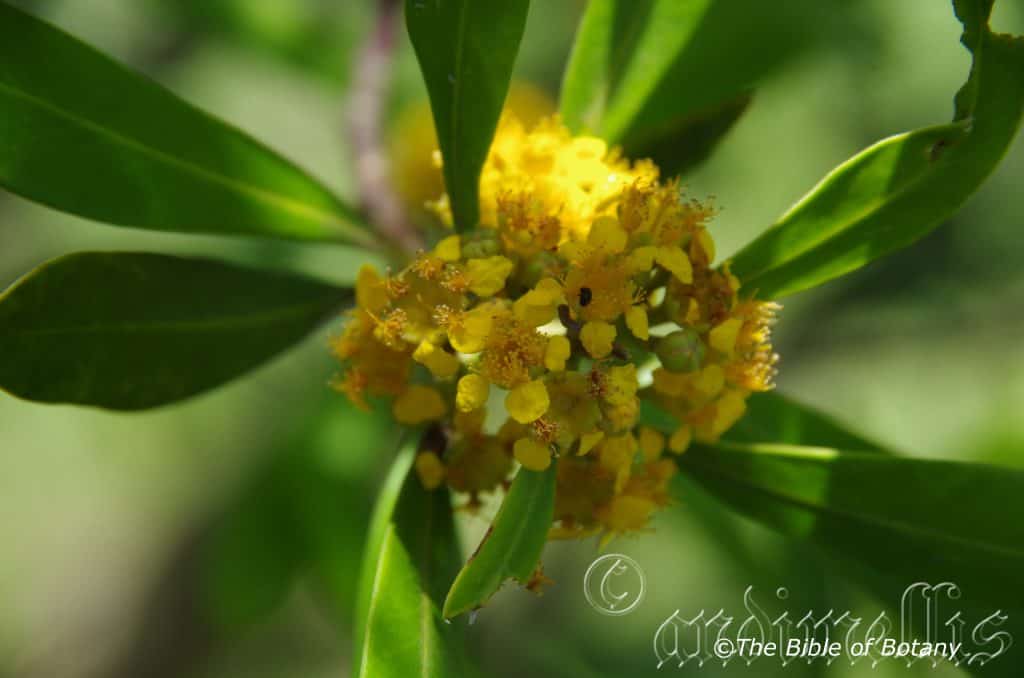
Grafton NSW
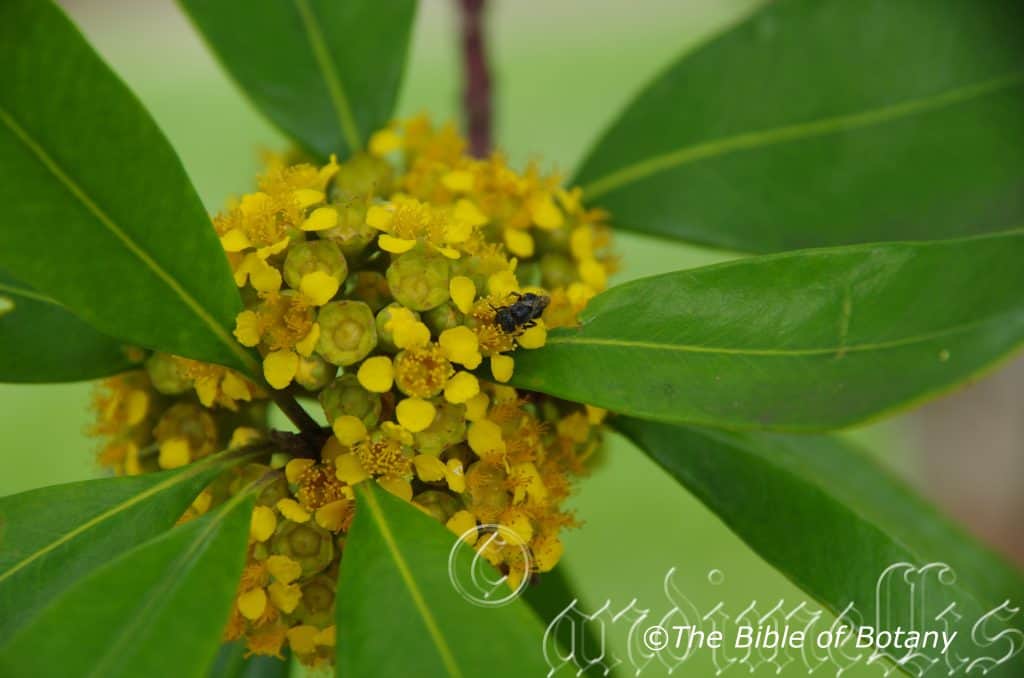
Grafton NSW
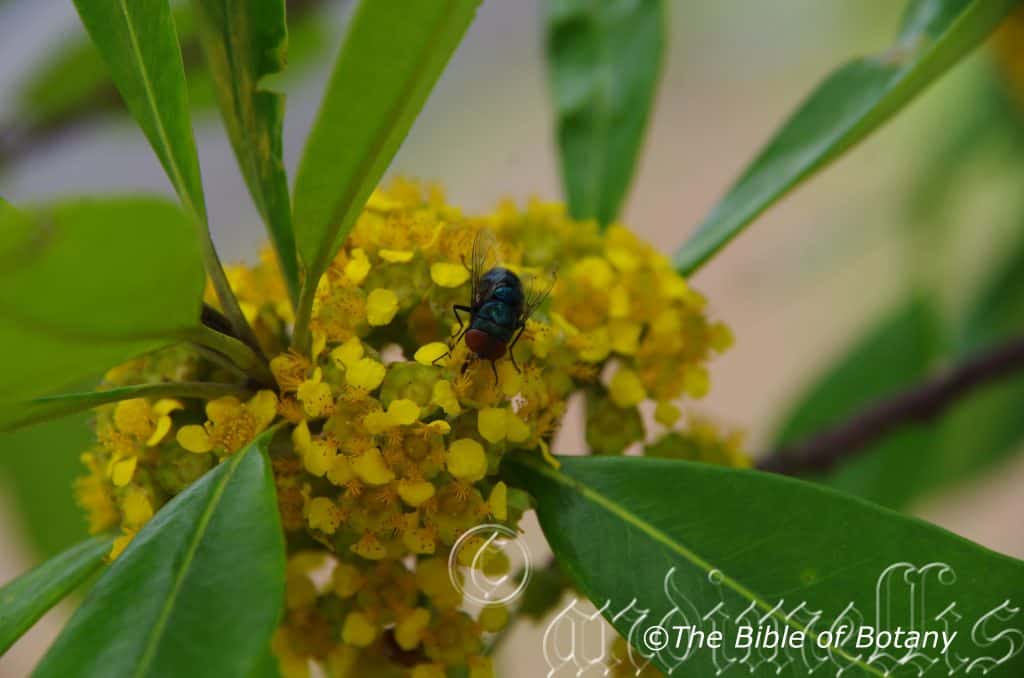
Grafton NSW
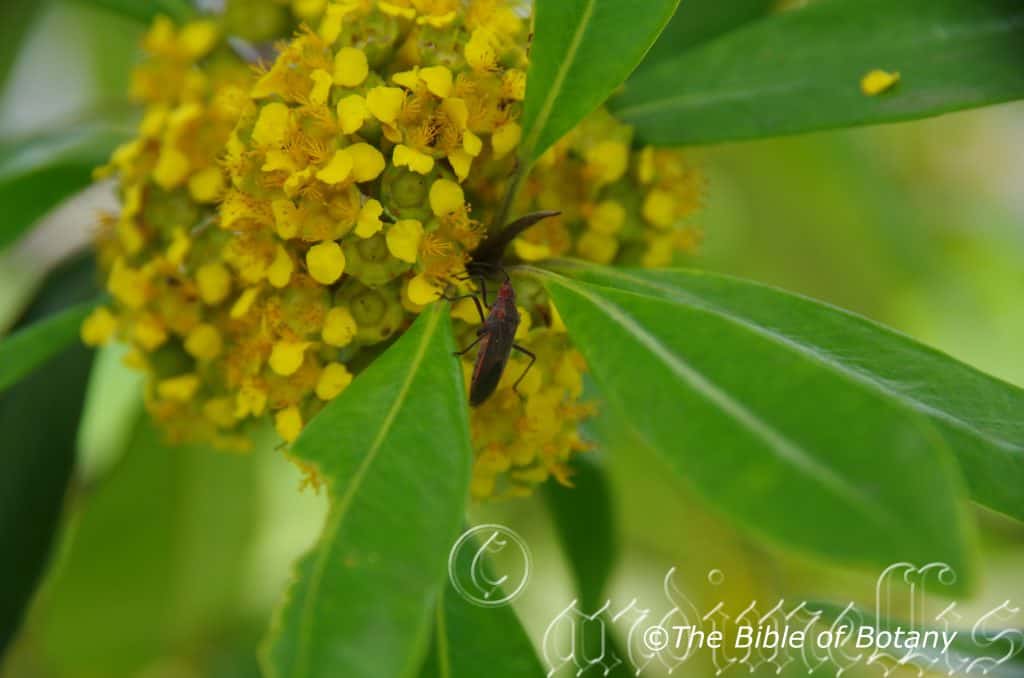
Grafton NSW
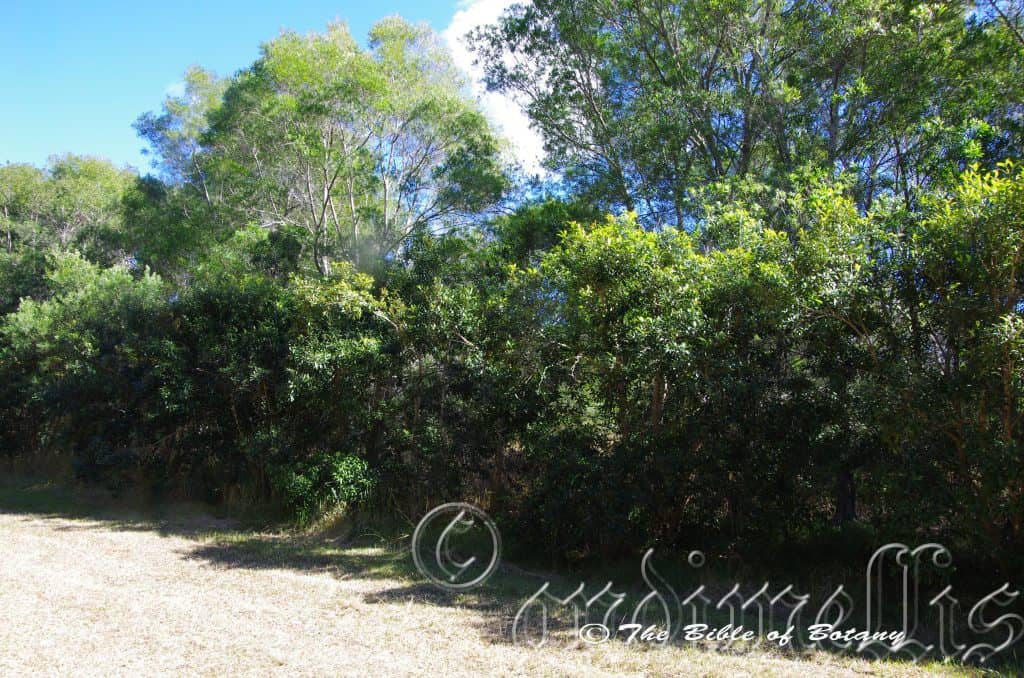
Used as a Hedge Row Along Power Easment Nana Glen NSW
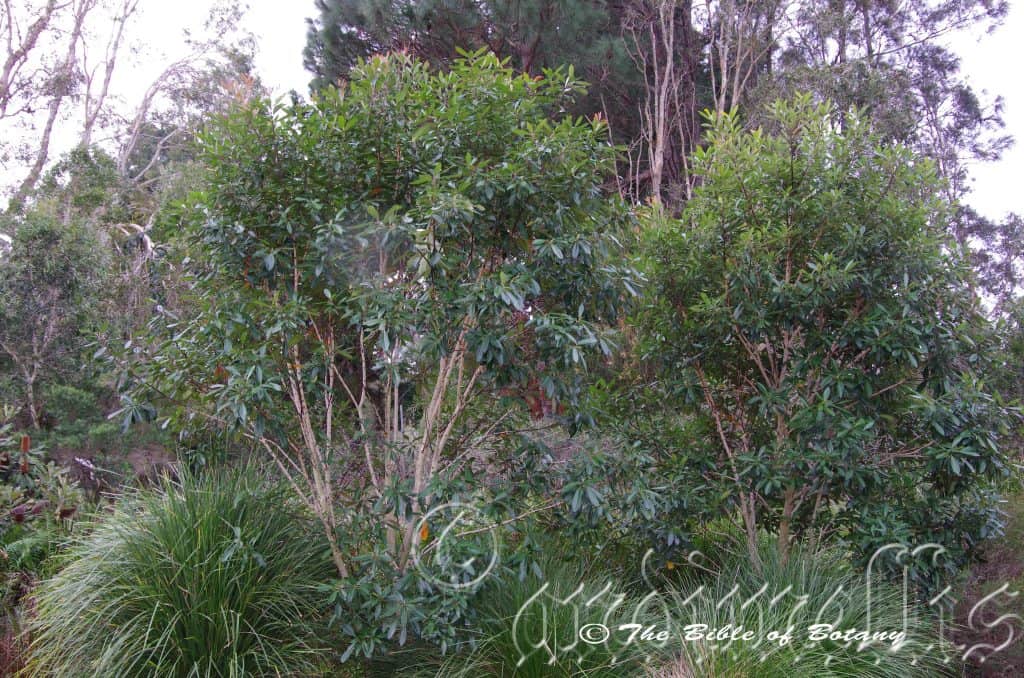
Rosser Botanic Gardens Qld.
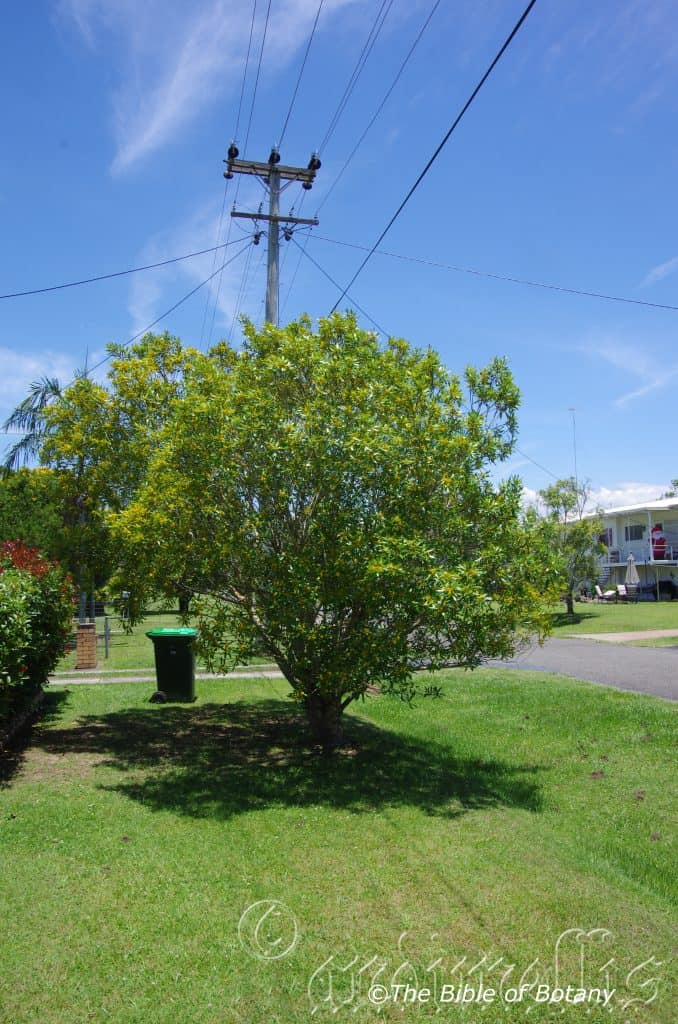
Grafton NSW
Tristaniopsis laurina
Classification:
Class: Equisetopsida
Subclass: Magnoliidae
Superorder: Rosanae
Order: Myrtales
Family: Myrtaceae
Genus: Is named in honour of Jules M. C. Tristan, who was a French botanist and ópsis which is Ancient Greek for to appear like or to have the appearance of. It refers to plants which very closely resemble the Tristania genus.
Specie: From Laurus, which is Latin for praise or commendation thus praise for the Laurel or Bay tree or a small crown or wreath made from Laurel leaves. It refers to leaves, which resemble those of the Bay tree.
Sub specie:
Common Name: Water Gum.
Distribution:
Tristaniopsis laurina is mainly found on and east of the Great Dividing Range south from to Bundaberg in southern Queensland to Bairnsdale in eastern Victoria.
https://avh.ala.org.au/occurrences/search?taxa=Tristaniopsis+laurina#tab_mapView
Habitat Aspect Climate:
Tristaniopsis laurina prefers dappled light shade to full sun. It grows adjacent to and on the margins of well-developed warm subtropical rainforests, gallery forests, riparian zones, moist eucalyptus forests or occasionally along streams behind the frontal dunes. It usually grows along rivers, streams or creeks close to permanent water. The altitude ranges from 5 meters ASL to 950 meters ASL.
The temperatures range from minus 4 degrees in July to 34 degrees in January.
The rainfall ranges from lows of 600mm to 2000mm average per annum but this is not as important as the trees are found in areas of permanent water.
Soil Requirements:
Tristaniopsis laurina prefer better quality sands to medium clays. The soils are usually derived from decomposed brown basalts, black basalts, sandstones, metamorphic rocks or accumulated peaty beach behind the frontal dunes. The soils pH ranges from 4pH to 6.5pH. It does not tolerate stagnant waterlogged soils though the soils where it grows have good moisture retention with its roots often are submerged in clean flowing water or find their way down to high water tables. Non saline soils to moderately saline soils are tolerated.
Height & Spread:
Wild Plants: 23m to 30m by 6m to 10m.
Characteristics:
Tristaniopsis laurina grows as a small to medium tree tall, straight or leaning out over the water pinkish-brown, scabrous, scaly and is shed in strips. The bark is often covered with mosses near the ground and lichens higher up. The trunk is slightly flanged near the base. The branchlets are pale grey and only becoming deep maroon-red before turning reddish-green near the apex where the newer leaf growth occurs. The angular branchlets are glabrous.
The alternate, oblanceolate to narrowly oblanceolate leaves of Tristaniopsis laurina measure 65mm to 120mm in length by 15mm to 30mm in width. The bases are broad tapering-cuneate while the apexes are obtuse-acute. The discolourous laminas are deep sea-green, semi glossy and glabrous on the upper lamina while the lower lamina is grey-green to pale grey or even off white and dull. The leaf margins are entire, flat and decurve close to the margin and the apex. The mid vein and main laterals are prominent on the lower laminas while the mid vein is visible on the upper lamina. Oil glands are scattered and conspicuous. The petiole measures 3mm to 8mm in length.
Inflorescences of Tristaniopsis laurina are born in dichasia corymbs from the leaf axils. There are 8 to 16 individual flowers in the corymbs. The deep green peduncles and pedicels are glabrous. The peduncles measure 3mm to 8mm in length while the pedicels measure 2mm to 7mm in length. The 5 green triangular calyx lobes are divaricate, glabrous and measure 4mm to 8mm in length. The bright yellow, orbicular petals measure 4mm to 5mm in length by 3mm to 4mm in width. The petals are shortly stalked to 0.5mm in length.
The 5 exserted stamens are free for their entire length and have 12 to 20 filaments to a fascicle. The stamens measure 3mm to 4.5mm in overall length. The filaments are deep yellow while the anthers are deep yellow and bear white pollen.
The deep golden-yellow style and stigma are glabrous while the ovary is green. The pistil measures 2.5mm to 3mm in length. Tristaniopsis collina’s honey scented flowers appear throughout the year.
The fruits of Tristaniopsis laurina are globose to obovoidal capsules. The capsules are glabrous and measure 6mm to 10mm in length by 4mm to 6mm in diameter. The green capsules turn burgundy-red before turning grey-brown when ripe. The calyx and calyx lobes are persistent on the ripe fruit. The brown seeds are flattened ellipsoidal and chaff like. The winged seeds measure 5mm to 6mm in length by 3mm to 4mm in width overall.
Wildlife:
Tristaniopsis laurina supports a large number of small and medium honeyeaters, butterflies, native beetles and bees when in flower.
Cultivation:
Tristaniopsis laurina is a magnificent small well shaped tree that is suitable for growing in most suburban gardens or nature strip below power lines. It is ideal at the edge of a rainforest or deep in the center of a dwarf rainforest. It also makes a great park tree offering quick growth, and good shade where there is continual ground moisture. In cultivation it will grow much smaller than its forest cousins attaining a height of from 6 meters to 8 meters with a diameter of 6 meters to 8 meters when grown in the open or taller and narrower if grown closer together as a rainforest tree.
It grows exceptionally well on moist light sandy loams to medium clays especially where deep leaf litter keeps the soil cool and moisture at an even level. It requires more moisture than Tristaniopsis collina. If these requirements are met it can cope with temperatures as low as minus 5 degrees and up to 36 degrees. It is moderately drought resistant once established.
Add to the above, if it is given an adequate supply of water and a little native fertilizer on a regular basis the plants should respond with good flowering and fruit over a long period.
The trees would make very good accent trees in front of low set commercial, school buildings or industrial sheds where it will break up hard rigid architectural lines and give warmth and breadth to a building. In front of high rise buildings they give balance especially where they could be grown in curves meandering to the entry doors or for something different used from the front of the path and meander back to the far corners with shrubs or flowers planted between the trees and the building and the trees and the nature strip.
Try using it in a court yard where the only other feature is a large rock, stump or formal or informal frog or fish pond. Next to such features their leaves, small flowers and small fruit are never overpowering but certainly noticed. I am surprised that it has never been used in commercial entrances and foyers to break the ice and give a feeling of business as usual but somehow make the business more relaxing.
It makes an excellent street tree forming small avenues or border lines on properties forming corridors for wildlife.
We grew it as a large hedge row adjacent to a power easement on our block at Nana Glen.
This small tree makes an interesting Bonsai plant and it is easy to work and very hardy.
Propagation:
Seeds: The seeds of Tristaniopsis laurina can be removed easily from the capsules.
Sow fresh seeds or seeds that have been stored in the vegetable crisper of the refrigerator directly into a seed raising mix covering them with 2mm of fine sand. Keep the seeds moist and do not allow them to dry out. Place the trays in a warm shaded area with 50mm shade cloth in the bush house. When the seedlings are 30mm to 50mm tall, prick them out and plant them into 50mm native tubes using a good organic mix.
As the seedlings roots reach the bottom of the tubes plant them out into their permanent position. Do not delay.
Fertilize using seaweed, fish emulsion or organic chicken pellets soaked in water on an alternate basis. Fertilize every two months until the plants are established then annually in early September to October to maintain better colour, health, vitality and flowering.
Further Comments from Readers:
“Hi reader, it seems you use The Bible of Botany a lot. That’s great as we have great pleasure in bringing it to you! It’s a little awkward for us to ask, but our first aim is to purchase land approximately 1,600 hectares to link several parcels of N.P. into one at The Pinnacles NSW Australia, but we need your help. We’re not salespeople. We’re amateur botanists who have dedicated over 30 years to saving the environment in a practical way. We depend on donations to reach our goal. If you donate just $5, the price of your coffee this Sunday, We can help to keep the planet alive in a real way and continue to bring you regular updates and features on Australian plants all in one Botanical Bible. Any support is greatly appreciated. Thank you.”
In the spirit of reconciliation we acknowledge the Bundjalung, Gumbaynggirr and Yaegl and all aboriginal nations throughout Australia and their connections to land, sea and community. We pay our respect to their Elders past, present and future for the pleasures we have gained.
Triunia youngiana
Classification:
Clade: Eudicots
Order: Proteales
Family: Proteaceae
Subfamily: Grevilleoideae
Tribe: Roupaleae
Genus: From Treîs/Tría, which are Ancient Greek or Tri, which is Latin for three and Oîos which is Ancient Greek or Oinos which is Latin for a single unit. It refers to a structure which has three components that are both separate and united.
Specie: Is named in honour of Young Jess Young, who was an explorer and amateur botanist who collected the type specimen namely Eucalyptus youngiana during Ernest Giles’s fourth expedition across Australia in 1875.
Sub specie:
Common Name: Red Nut or Native Honeysuckle.
Distribution:
Triunia youngiana is found south from the Macpherson Ranges in southern Queensland to near Kempsey in northern coastal New South Wales. It is found on and east of the Great Dividing Range.
https://avh.ala.org.au/occurrences/search?taxa=Triunia+youngiana#tab_mapView
Habitat Aspect Climate:
Triunia youngiana prefers dappled light shade to full sun. It grows adjacent to and on the margins of well-developed warm subtropical rainforests, gallery forests, riparian rainforests or moist eucalyptus forests. The altitude ranges from 5 meters ASL to 732 meters ASL.
The temperatures range from minus 2 degrees in July to 30 degrees in January.
The rainfall ranges from lows of 850mm to 2000mm average per annum.
Soil Requirements:
Triunia youngiana prefers better quality light clays to medium clays. The soils are usually derived from decomposed brown or black basalts. The soils pH ranges from 5pH to 5.5pH. It does not tolerate waterlogged soils though the soils have good moisture retention. Non saline soils to moderately saline soils are tolerated.
Height & Spread:
Wild Plants: 2m to 5m by 2m to 4m.
Characteristics:
Triunia youngiana grows as a medium to large shrub with erect or divaricate, deep grey-brown to deep grey-black, scabrous, scaly bark that is usually covered in lichens. The branches are deep grey and only becoming green near the apex where the newer leaf growth occurs. The branchlets are covered in lighter coloured to off white lenticels.
The opposite, nearly opposite or whirls of 3, lanceolate to elliptical leaves of Triunia youngiana measure 50mm to 130mm in length by 15mm to 30mm in width. The petiole measures 1mm to 5mm in length. The bases are cuneate while the apexes are long acuminate to broadly acuminate. The discolourous laminas are deep grass-green, semi glossy and glabrous on the upper laminas while the lower laminas are paler and dull. The leaf margins are entire or with a few small teeth on the apex half. The margins are flat or slightly undulating. The upper laminas are convex between the lateral veins and recurve slightly from the mid vein to the margin and decurve near the apex. The mid vein and main laterals are prominent on both laminas.
Inflorescences of Triunia youngiana are born on a conflorescence from the terminals. The fawn peduncules, rachises and pedicels are glabrous to sparsely covered in fawn hirsute hairs and measure 50mm to 100mm in overall length. The peduncles measure 3mm to 5mm in length while the rachises measure 48 to 82mm in length and the pedicels measure 2mm to 5mm in length.
The perianths and styles are the most prominent parts of the flower. The individual perianths are pale pink in bud with the perianths splitting white to cream from the base through to the lobes which are very irregular. The perianth is covered in fawn hirsute hairs externally and is glabrous internally. The perianth and lobes measure 15mm to 20mm in length. The lobes are strongly decurve and are free for their entire length.
The style is pink near the base turning a lime green as it approaches the white stigma. The conical pollen presenter is white or cream. The erect style and ovary measure 18mm to 22mm in length. The style is covered in fawn to reddish-maroon hirsute hairs on the basal half and is glabrous on the apex half. The ovary is green. Triunia youngiana sweetly scented flowers appear from early September to early February however some flowers may appear as late as early march in good seasons.
The fruits of Triunia youngiana are obovoidal nuts with a prominent longitudinal. The nuts are glabrous and measure 12mm to 15mm in length by 12mm to 15mm in diameter. The green nuts turn crimson red externally and pale creamy yellow to creamy yellow and red or deep burgundy internally when ripe. The calyx lobes and the style are not persistent on the ripe fruit. The single glossy brown seeds are ovoidal, fleshy and measure 6mm to 7mm in diameter.
Wildlife:
Triunia youngiana is affected by Mahogany tip borer, Hypspyla robusta especially when grown in the open.
Cultivation:
Triunia youngiana is a medium shrub that should be grown in association with other rainforest specie. It is ideal at the edge of a rainforest or deep in the center of the rainforest where its flower’s scent can linger for hours when in flower. It also makes great hedge row for shady locations. In cultivation it grows from 2 meters to 3.5 meters in height by 2 meters to 3.5 meters in diameter when grown in the open or taller and narrower if grown closer together as a small rainforest tree.
It grows exceptionally well on lighter soils where deep leaf litter keeps the soil cool and moisture at an even level. If these requirements are met they can cope with temperatures as low as minus 5 degrees and up to 36 degrees. It is moderately drought resistant.
Add to the above, if it is given an adequate supply of water and a little native fertilizer on a regular basis the plants should respond with good flowering and fruit over a long period.
This is a slow growing shrub that has great potential around swimming pools, in court yards along shaded fence lines and as a backdrop to a medium water garden or fish pond.
Garden beds would need to be open with plenty of space between plants to allow air flow as well as to give the branchlets a chance to spread and be appreciated for their unique beauty. Crowding this type of foliage with other plants will see them lose all the effectiveness of the colour and form you require or want. Correct spacing will contrast the foliages of all the plants in the bed better without one overpowering the other. For mass planting space the plants with at least 5 meters to 6 meters centers if you are considering it for a shrub. If you are using them to highlight other plants use plants that are rounded and more upright in habit. They look good against Cordyline specie and native gingers like Alpinia specie or Tapeinochilos ananassae. Plant them sparingly to attain a more open scene, or the area will look cluttered or detract from the other features. 4 or 5 in an area of 120 square meters would be ample. 4 plants separately planted or plant 2 close together and separate the other 3 to give width and depth where you want it. The use of annuals helps to attract the viewer to the permanent plants foliage as it is the predominant foliage you want people to notice in the patch. In the case of Triunia youngiana you could substitute the above plants with Viola banksii to give small gardens depth and make them look larger than what they really are.
Propagation:
Seeds: The seeds of Triunia youngiana can be removed easily from the fruits.
Sow fresh seeds directly into a seed raising mix, barely covering the seeds. Keep them moist not wet as over water the seeds will cause them to rot off before germination takes place. Place the trays in a cool shaded area with 50mm shade cloth in the bush house. When the seedlings are 30mm to 50mm tall, prick them out and plant them into 50mm native tubes using a good organic mix.
As the seedlings roots reach the bottom of the tubes plant them out into their permanent position. Do not delay.
Fertilize using seaweed, fish emulsion or organic chicken pellets soaked in water on an alternate basis. Fertilize every two months until the plants are established then annually in early September to Octoberto maintain better colour, health, vitality and flowering.
Further Comments from Readers:
“Hi reader, it seems you use The Bible of Botany a lot. That’s great as we have great pleasure in bringing it to you! It’s a little awkward for us to ask, but our first aim is to purchase land approximately 1,600 hectares to link several parcels of N.P. into one at The Pinnacles NSW Australia, but we need your help. We’re not salespeople. We’re amateur botanists who have dedicated over 30 years to saving the environment in a practical way. We depend on donations to reach our goal. If you donate just $5, the price of your coffee this Sunday, We can help to keep the planet alive in a real way and continue to bring you regular updates and features on Australian plants all in one Botanical Bible. Any support is greatly appreciated. Thank you.”
In the spirit of reconciliation we acknowledge the Bundjalung, Gumbaynggirr and Yaegl and all aboriginal nations throughout Australia and their connections to land, sea and community. We pay our respect to their Elders past, present and future for the pleasures we have gained.
Trochocarpa laurina
Classification:
Unranked: Eudicots
Class: Asterids
Order: Ericales
Family: Ericaceae
Genus: From Trokhós/Trochī, which is Ancient Greek for an iron hoop or hoop like shape and Karpós, which is Greek for a fruit. It refers to fruits, which are more hoop like than round.
Specie: From Laurus, which is Latin for praise or commendation thus praise for the Laurel or Bay tree or a small crown or wreath made from Laurel leaves. It refers to leaves, which resemble those of the Bay tree.
Sub specie:
Common Name: Axe Breaker.
Distribution:
Trochocarpa laurina is found on and east of the Great Dividing Range to the coast. It is found south from Burrum Coastal National Park north of Maryborough in southern Queensland to near Bermagui in central coastal New South Wales. It is found in several disjunct populations further north south from the Daintree National Park to Marion and Lethebrook in far north Queensland.
https://avh.ala.org.au/occurrences/search?taxa=Trochocarpa+laurina#tab_mapView
Habitat Aspect Climate:
Trochocarpa laurina prefers dappled shade to full sun, growing adjacent to and on the margins of well-developed warm subtropical rainforests, cool tropical rainforests, littoral rainforests or wet Eucalyptus forests. It is particularly common near creeks boulders and sheltered positions within forest openings. The altitude ranges from 10 meters ASL to 1410 meters ASL.
The temperatures range from minus 2 degrees in July to 30 degrees in January.
The rainfall ranges from lows of 850mm to 3200mm average per annum.
Soil Requirements:
Trochocarpa laurina prefers better quality light gritty clays to medium clays. The soils are usually derived from decomposed brown basalts, black basalts, sandstones, metamorphic rocks or shale. The soils pH ranges from 4.5pH to 6pH. It does not tolerate waterlogged soils. Non saline soils to moderately saline soils are tolerated.
Height & Spread:
Wild Plants: 4m to 12m by 4m to 6m.
Characteristics:
Trochocarpa laurina grows as a small tree often with a pinkish-brown to grey-brown, corky, finely longitudinally furrowed or fissured bark. The trunk and branches are often covered with lichens and small orchids on larger trees. The branchlets are brown or rusty-brown and only becoming green near the apex where the newer leaf growth occurs. The branchlets are sparsely covered in lighter coloured lenticels.
The alternate to near opposite or at times form pseudo whirled leaves are coriaceous. The elliptical, broadly elliptical or ovate-elliptical leaves of Trochocarpa laurina measure 50mm to 70mm in length by 20mm to 32mm in width. The bases are broad cuneate to cuneate while the apexes are acuminate. The discolourous laminas are sea-green to deep sea-green, semi glossy to glossy and glabrous on the upper lamina while the lower lamina is paler and dull. The new growth is glossy rusty-brown to glossy pinkish-brown. The leaf margins are entire, flat to slightly recurved from the mid vein to the margins and recurve as they approach the apex. The laminas are flat to slightly undulating. The mid vein and 4 to 6 parallel longitudinal lateral veins are slightly prominent on the lower laminas and are visible from the upper laminas. The petiole measures 3mm to 6mm in length.
Inflorescences of Trochocarpa laurina are born on slender racemes from the upper leaf axils or terminals. There are 12 to 24 individual flowers on a raceme. The fawn pedicels are glabrous to sparsely covered in fawn pulverulent hairs and measure 20mm to 40mm in length. The white bracteoles measure 0.4mm to 0.6mm in length. The white sepals measure 0.8mm to 1.2mm in length while the white corollas measure 2mm to 3mm in length overall while the 5 lobes measure less than 0.6mm in length. The corolla and lobes are glabrous externally and covered in white hirtellous hairs internally
The 5 inserted filaments are free for their entire length and measure 2mm to 3mm in length. The filaments are white while the creamy yellow, oblong anthers are exserted.
The white style and stigma are glabrous while the ovary is green. The pistil measures 1.5mm to 2.5mm in length. Trochocarpa laurina’s flowers appear from late November to late January.
Trochocarpa laurina’s fruits are finely ribbed, obovoidal berries. The glabrous berries measure 5mm to 7mm in length by 6mm to 8mm in diameter. The green berries turn deep glaucous, rose pink then to deep glaucous purple black externally, deep glaucous red or deep glaucous burgundy when ripe. It is not unusual to find green, pink and deep purple-black fruits on the same raceme. The calyx lobes are persistent on the ripe fruit. The 3 to 5 glossy brown seeds are flattened ellipsoidal and woody. The fruits ripen from June to early September.
Wildlife:
Trochocarpa laurina’s fruits are eaten by most fruit eating birds including Lewin’s Honeyeater, Satin Bower Bird, Silver eyes and Brown honey eaters.
The fruits are edible but personally one has to be exceptionally hungry before wanting to make a meal of them. There is little flesh around the seeds which is reminiscent of dry green apricots without the bitterness.
Cultivation:
Trochocarpa laurina is a magnificent medium shrub that could be grown in association with other moist forest plant species. It is ideal at the edge of a rainforest, deep in the center of the rainforest or along riverine slopes and flats. It also makes good small park tree offering good shade but are rather slow to establish and even then growth is a lot slower than most small trees. In cultivation it grows from 5 meters to 8 meters in height by 4 meters to 6 meters in diameter when grown in the open or taller and narrower if grown closer together as a forest tree.
It adapts to most acid soils provided a deep layer of leaf litter is maintained to keep the soil cool and moisture at an even level. If these requirements are met it can cope with temperatures as low as minus 5 degrees and up to 36 degrees. It is moderately drought resistant once established.
Add to the above, if it is given an adequate supply of water and a little native fertilizer on a regular basis the plants will maintain good foliage and flower and fruit over a long period which keeps the birds happy over the winter months when food is a little scarcer.
This tree would make a good bonsai plants and would be easy to work.
The tree should be much fancied by orchid growers as once it is established is excellent for growing orchids which have a fine root system.
The down side of growing Trochocarpa laurina is that it is slow to establish and slow in growth even after many years of nurturing.
Propagation:
Seeds: The seeds of Trochocarpa laurina can be removed easily from the fruits.
Sow fresh seeds directly into a seed raising mix, keeping them moist not wet. Do not over water as the seeds will rot off before germination takes place. Place the trays in a cool shaded area with 50mm shade cloth in the bush house. When the seedlings are 30mm to 50mm tall, prick them out and plant them into 50mm native tubes using a good organic mix.
As the seedlings roots reach the bottom of the tubes plant them out into their permanent position. Do not delay.
Fertilize using seaweed, fish emulsion or organic chicken pellets soaked in water on an alternate basis. Fertilize every two months until the plants are established then annually in early September to October to maintain better colour, health, vitality and flowering.
Further Comments from Readers:
“Hi reader, it seems you use The Bible of Botany a lot. That’s great as we have great pleasure in bringing it to you! It’s a little awkward for us to ask, but our first aim is to purchase land approximately 1,600 hectares to link several parcels of N.P. into one at The Pinnacles NSW Australia, but we need your help. We’re not salespeople. We’re amateur botanists who have dedicated over 30 years to saving the environment in a practical way. We depend on donations to reach our goal. If you donate just $5, the price of your coffee this Sunday, We can help to keep the planet alive in a real way and continue to bring you regular updates and features on Australian plants all in one Botanical Bible. Any support is greatly appreciated. Thank you.”
In the spirit of reconciliation we acknowledge the Bundjalung, Gumbaynggirr and Yaegl and all aboriginal nations throughout Australia and their connections to land, sea and community. We pay our respect to their Elders past, present and future for the pleasures we have gained.
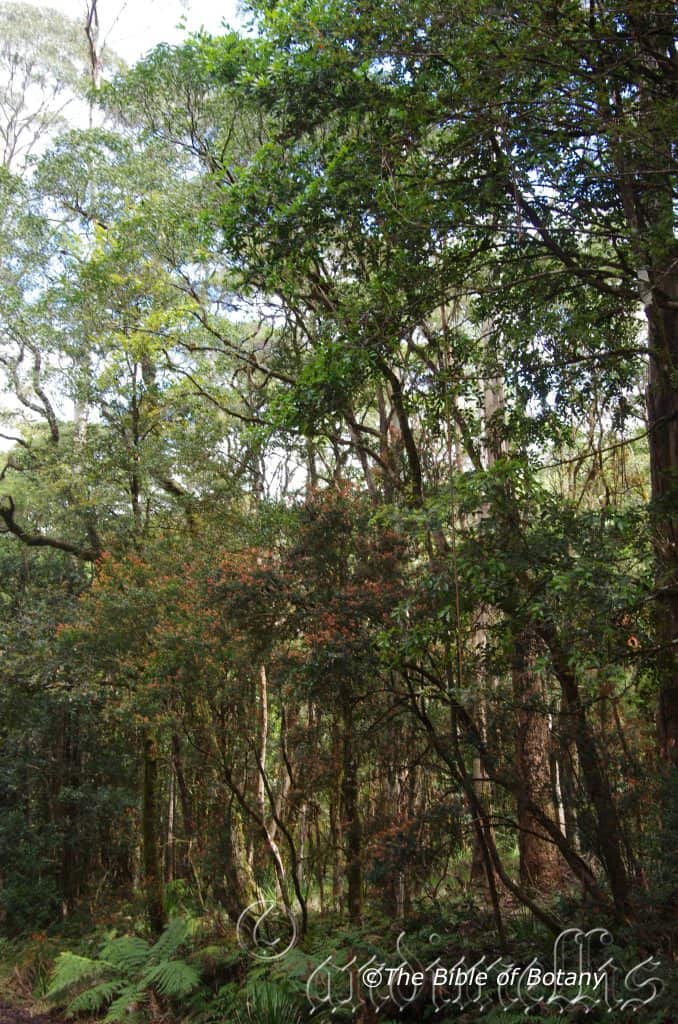
Ebor NSW
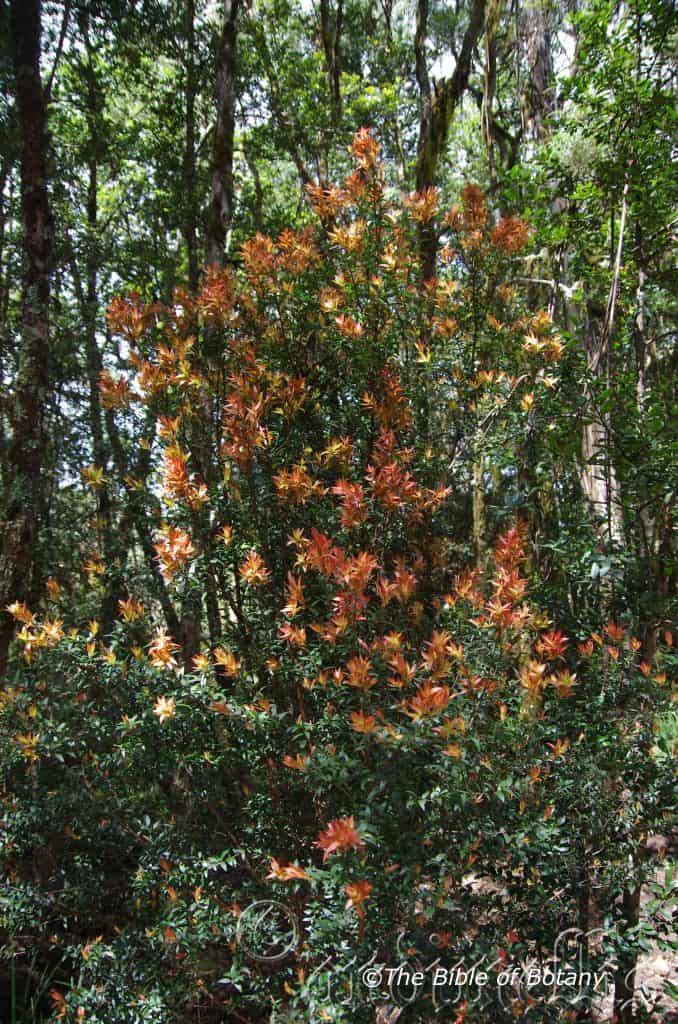
Ebor NSW
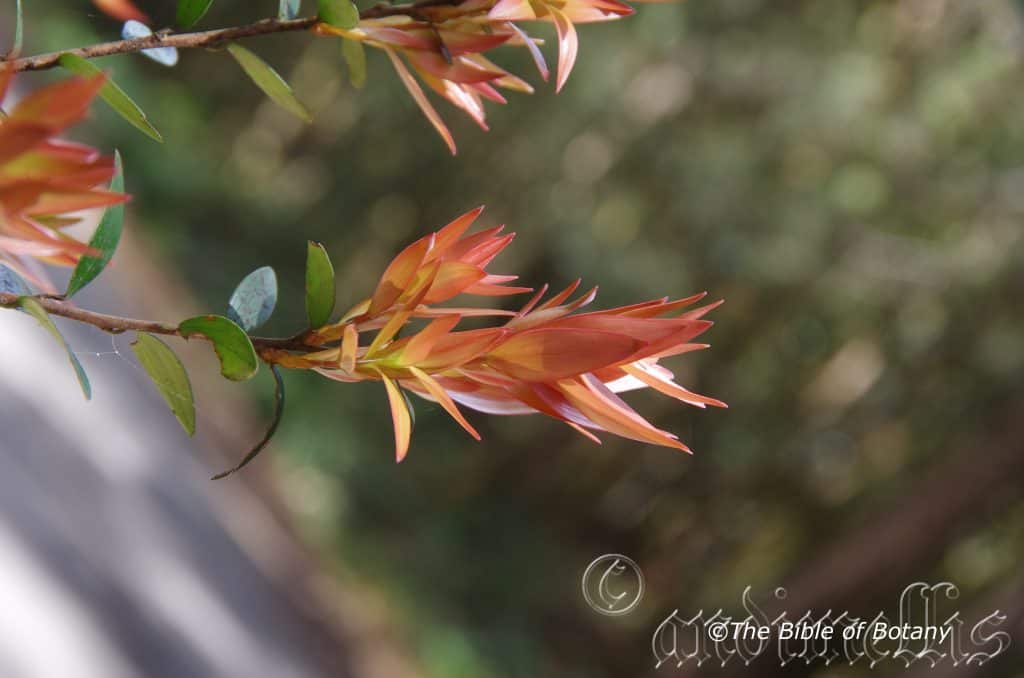
Ebor NSW
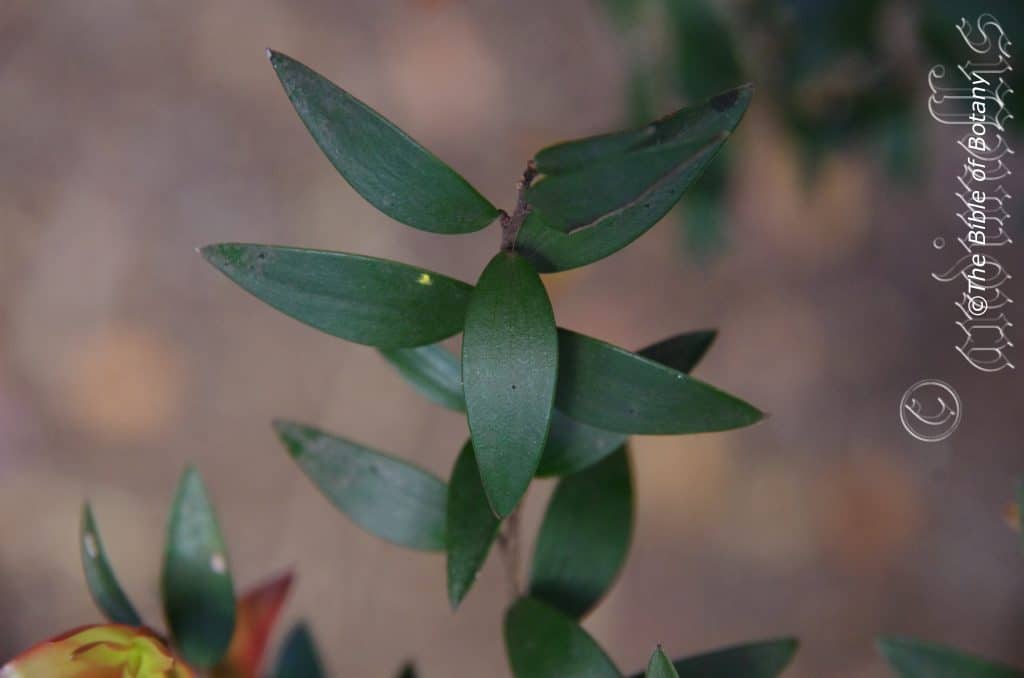
Ebor NSW
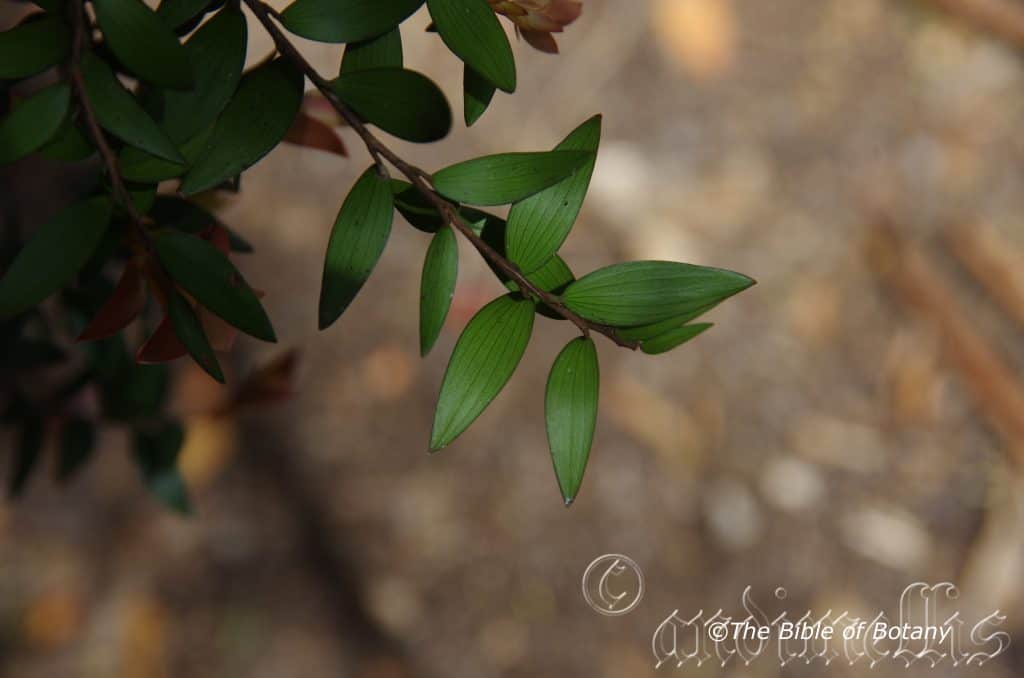
Ebor NSW
Trochocarpa montana
Classification:
Unranked: Eudicots
Class: Asterids
Order: Ericales
Family: Ericaceae
Genus: From Trokhós/Trochī, which is Ancient Greek for an iron hoop or hoop like shape and Karpós, which is Greek for a fruit. It refers to fruits, which are more hoop like than round.
Specie: From Montana, which is Latinized from the Spanish word for a mountain. It refers to plants, which prefer mountainous habitats.
Sub specie:
Common Name:
Distribution:
Trochocarpa montana is restricted to a very small area around my old favourite camping grounds as a child of Ebor in north eastern New South Wales.
https://avh.ala.org.au/occurrences/search?taxa=Trochocarpa+montana#tab_mapView
Habitat Aspect Climate:
Trochocarpa montana prefers dappled shade to full sun. It grows in open woodlands to closed cool temperate rainforests and adjacent to swampy heaths on slopes. The altitude ranges from 1000 meters ASL to 1400 meters ASL.
The temperatures range from minus 3 degrees in July to 32 degrees in January.
The rainfall ranges from lows of 1200mm to 1400mm average per annum. Additional moisture is derived from orographic precipitation.
Soil Requirements:
Trochocarpa montana prefers coarse sands, fine sands and light fatty clays. The soils are usually derived from decomposed granites. The soils pH ranges from 4.5pH to 5pH. It does not tolerate waterlogged soils. Non saline soils to moderately saline soils are tolerated.
Height & Spread:
Wild Plants: 2m to 10m by 4m to 6m.
Characteristics:
Trochocarpa montana grows as a small tree with long, deep grey-brown, corky but finely longitudinally furrowed or fissured trunk. The branches are usually covered with lichens and small orchids on larger trees. The fawns to grey branchlets only become green near the apex where the newer leaf growth occurs. The new growth is covered in white, puberulent hairs or is scabrous.
The alternate narrowly ovate, narrow elliptic to broadly ovate coriaceous leaves of Trochocarpa montana measure 14mm to 50mm in length by 5mm to 25mm in width. The caducous bracts are glabrous on the upper surface while the lower surfaces are sparsely covered in white puberulent hairs. The bracts measure 4mm to 4.2mm in length. The petiole measures 2mm to 4mm in length. The bases are cuneate while the apexes are acute. The discolourous laminas are deep grass-green to sea-green, glossy and glabrous on the upper lamina while the lower lamina is paler and dull. The laminas are flat while the margins are entire and slightly thickened. The mid vein and usually 6 or at times 4 parallel lateral veins are slightly prominent on the lower laminas and are usually clearly visible from the upper laminas. The new growth is a brilliant, glossy pinkish-red and covered in soft white puberulent hairs.
The inflorescences of Trochocarpa montana are short, slender racemes born from the upper leaf axils and terminals. There are 16 to 24 individual flowers on a raceme. The fawnish-red pedicels are sparsely covered in white puberulent hairs and measure 0.2mm to 0.6mm in length. The ovate to elliptic, brownish bracts measure 1.1mm to 1.6mm in length while the ovate to elliptic bracteoles measure 1mm in length.
The corolla and lobes are glabrous externally and are densely covered in short, soft, white puberulent hairs internally on the apical half. The obtuse, green calyxes measure 1.2mm to 2mm in length by 0.6mm to 1.1mm in width. The white corollas measure 2mm to 3mm in length overall while the 5 lobes measure less than 0.6mm in length. The white, broad fusiform corolla tube measures 1.6mm to 2.1mm in length by 1.4mm to 2.1mm wide at the mouth. The 5 thick, white lobes are erect to arching and measure 1.2mm to 1.6mm long.
The 5 white, inserted filaments measure 0.6mm to 0.8mm in length. The oblong, brown dorsifixed anthers measure 0.7mm to 1.1mm in length.
The glabrous ovary measures 0.7mm to 1mm in length by 0.7mm to 0.9mm in diameter. The glabrous, conical, white style measures 0.4mm to 0.7mm in length. The flowers appear from late September to October.
Trochocarpa montana’s fruits are finely ribbed, depressed globose berries. The berries are finely ribbed, obovoidal berries. The glabrous berries measure 4.5mm to 6mm in length by 5.5mm to 7mm in diameter. The green berries turn deep glaucous purple or glaucous black when ripe. It is not unusual to find green, purple and black fruits on the same raceme. The calyx lobes are persistent on the ripe fruit. The seeds are flattened ellipsoidal and woody. The seeds measure 2.5mm to 3.5mm in length by 1.5mm to 2.5mm in width. The fruits ripen from February to April.
Wildlife:
Trochocarpa montana’s fruits are eaten by most fruit eating birds including Lewin’s Honeyeater, Satin Bower Bird, Silver eyes and Brown honey eaters.
The fruits are edible but personally one has to be exceptionally hungry before wanting to make a meal of them. There is little flesh around the seeds which is reminiscent of dry green apricots without the bitterness.
Cultivation:
I would expect Trochocarpa montana to be similar to Trochocarpa laurina in its habits in the garden. It is a magnificent small tree that could be grown in association with other moist forest plant species. It is ideal at the edge of a rainforest or along riverine slopes and flats. It also makes a great park trees offering good shade but is rather slow to establish and even then growth is a lot slower than most small trees. In cultivation it will grow from 5 meters to 7 meters in height by 4 meters to 5 meters in diameter when grown in the open or taller and narrower if grown closer together as a forest tree.
It adapts to most acid loams to medium fertile clays provided a deep layer of leaf litter is maintained to keep the soil cool and moisture at an even level. If these requirements are met it can cope with temperatures as low as minus 5 degrees and up to 36 degrees. It is moderately drought resistant once established.
Add to the above, if it is given an adequate supply of water and a little native fertilizer on a regular basis the plants will maintain good foliage and flower and fruit over a long period which keeps the birds happy.
This tree would make excellent bonsai plants and would be easy to work.
It should be much fancied by orchid growers as once it is established is excellent for growing small orchids which have a fine root system.
The down side of growing Trochocarpa montana is that it is slow to establish and slow in growth even after many years of nurturing.
Propagation:
Seeds: The seeds of Trochocarpa montana can be removed easily from the fruits.
Sow fresh seeds directly into a seed raising mix, keeping them moist not wet. Do not over water as the seeds will rot off before germination takes place. Place the trays in a cool shaded area with 50mm shade cloth in the bush house. When the seedlings are 30mm to 50mm tall, prick them out and plant them into 50mm native tubes using a good organic mix.
As the seedlings roots reach the bottom of the tubes plant them out into their permanent position. Do not delay.
Fertilize using seaweed, fish emulsion or organic chicken pellets soaked in water on an alternate basis. Fertilize every two months until the plants are established then annually in early September and March to maintain better colour, health, vitality and flowering.
Further Comments from Readers:
“Hi reader, it seems you use The Bible of Botany a lot. That’s great as we have great pleasure in bringing it to you! It’s a little awkward for us to ask, but our first aim is to purchase land approximately 1,600 hectares to link several parcels of N.P. into one at The Pinnacles NSW Australia, but we need your help. We’re not salespeople. We’re amateur botanists who have dedicated over 30 years to saving the environment in a practical way. We depend on donations to reach our goal. If you donate just $5, the price of your coffee this Sunday, We can help to keep the planet alive in a real way and continue to bring you regular updates and features on Australian plants all in one Botanical Bible. Any support is greatly appreciated. Thank you.”
In the spirit of reconciliation we acknowledge the Bundjalung, Gumbaynggirr and Yaegl and all aboriginal nations throughout Australia and their connections to land, sea and community. We pay our respect to their Elders past, present and future for the pleasures we have gained.
Trophis scandens
Classification:
Unranked: Eudicots
Unranked: Rosids
Order: Rosales
Family: Moraceae
Tribe: Moreae
Genus: From Trophis, which is Ancient Greek for large and stout. It refers to structures or organs, which are rather large and stout or bulky.
Specie: From Scandere, which is Latin for the people who love to climb. It refers to plants, which are very strong climbers.
Sub specie: Trophis scandens subsp. megacarpa. From Mega, which is Ancient Greek for large and Karpos, which is Ancient Greek for a fruit or seed. It refers to plants which have very large fruits compared to other species in the genus
Sub specie: Trophis scandens subsp. scandens. From Scandens, which is Latin for for people who love to climb. It refers to plants, which are strong climbers.
Common Name: Burny Vine or Smarty.
Distribution:
Trophis scandens subsp. scandens is found along the Kimberley coast in north western, Western Australia.
It is also found east from Darwin and the Daly River to Kakadu and Groote Eyelandt in the Northern Territory.
In the east it is found south from the Iron Range National Park on Cape York Peninsula in Queensland to near Narooma in southern coastal New South Wales. It is mainly found on the western side, on and east of the Great Dividing Range to the coast including the off shore Islands.
The subspecies Trophis scandens subsp. megacarpa is found on Lord Howe Island.
https://avh.ala.org.au/occurrences/search?taxa=Trophis+scandens#tab_mapView
Habitat Aspect Climate:
Trophis scandens prefers dappled shade to full sun. It grows adjacent to and on the margins of well-developed warm subtropical rainforests, tropical rainforests, littoral rainforests, monsoonal rainforests, seasonal rainforests or wet Eucalyptus forests. It is particularly common near creeks boulders and sheltered positions within forest openings. It can be found on cliffs, hills slopes flats or cliff tops or along creek beds in more arid areas. The altitude ranges from 10meters ASL to 1100 meters ASL.
The temperatures range from minus 2 degrees in July to 38 degrees in January.
The rainfall ranges from lows of 850mm to 3200mm average per annum.
Soil Requirements:
Trophis scandens prefer soils that are better quality light sandy clays to medium clays or screes below cliffs. The soils are usually derived from decomposed brown basalts, sandstones, metamorphic rocks, shale laterites and bauxites. The soils pH ranges from 4pH to 6pH. It does not tolerant of waterlogged soils though the soils have good moisture retention. Non saline soils to moderately saline soils are tolerated.
Height & Spread:
Wild Plants: 4m to 12m by 4m to 6m.
Characteristics:
Trophis scandens are woody climbers with rusty-brown, scabrous, bark that are densely covered in paler lenticels and fine ridges. The stems are pale brown-green turning grey green or off white-green and are densely covered in paler or off white lenticels which are scabrous. The small stems are olive-green to sea-green and are densely covered white scabrous lenticels. The leaves, petioles and green stems exude a milky sap when damaged.
The alternate, coriaceous, ovate to narrowly ovate or broadly elliptical leaves of Trophis scandens measures 50mm to 110mm in length by 30mm to 60mm in width. The caducous stipules sheath the terminal bud and measure 1.5mm to 2.2mm in length. The petiole measures 3mm to 12mm in length. The bases are broad cuneate to rounded while the apexes are long acuminate to caudate. The discolourous laminas are deep sea-green, dull to semi glossy and glabrous on the upper lamina while the lower lamina is paler, dull and scabrous. The new growth is glossy green-brown. The leaf margins are entire and flat. The laminas recurve slightly from the mid vein to the margins decurve slightly from the petiole to the apex. The mid vein and the 15 to 22 main laterals are prominent on the lower laminas and are much paler being pastel green to off white. They form distinct loops inside the margin and are distinctly visible from the upper laminas.
The dioecious inflorescences of Trophis scandens are born on racemes from the leaf axils for the male flowers while the female flowers are born in globular heads from the leaf axils.
The male inflorescences’ peduncles are green to brown and are covered in fine lenticels while the rachises are glabrous. The peduncles measure 5mm to 7mm in length while the rachises measure 15mm to 23mm in length. The individual pale creamy green, globose flowers measure 1mm to 1.5mm in diameter. The tepals measure 1.4mm to 1.6mm in length by 1mm in width. The outer surface is covered in white hirsute hairs while the inner surface is glabrous.
The exserted filaments measure 3.2mm to 3.6mm in length. The filaments are white while the white anthers measure 1mm to 1.2mm in length by 1mm to 1.2mm in width.
The globular heads or short racemes of the female inflorescences’ measure 4mm to 4.5mm in diameter with the individual flowers measuring 1mm to 1.2mm in diameter. The peduncles are green, glabrous or sparsely covered in fine white puberulent hairs while the rachises are glabrous. The peduncles measure 2.5mm to 4mm in length while the rachises measure 3.5mm to 4mm in length. There are 2 to 4 fertile individual flowers in a head. The pale creamy green, urceolate perianths completely enclose the perianths.
The white style is enclosed within the perianth with the long, maroon-red glabrous stigmas extending 5mm to 7mm beyond the lips of the perianth. Trophis scandens flowers appear from late September through to late November however flowers may occur sporadically at any time under favourable conditions especially the closer the plants are to the equator.
The fruits of Trophis scandens are ovoidal to ellipsoidal drupes are attached to a tuberculate receptacle. The drupes are glabrous and measure 12mm to 15mm in length by 9mm to 14mm in diameter. The green capsules turn deep orange-red, scarlet-red or crimson-red when ripe. The styles are persistent on the ripe fruit. The single glossy brown seeds are fleshy with one cotyledon being larger than the other. The seeds measure 6.5mm to 7.5mm in length by 5.5mm to 6mm in diameter.
Wildlife:
Trophis scandens fruits and receptacle are eaten by most fruit eating birds and mammals.
The plants are the host for several butterfly specie including the Eastern Brown Euploea tulliolus and Darwin’s Brown Euploea darchia.
The fruits are edible and have taste reminiscent of dry cherries but not as sweet. The receptacles are dry with a slight aspen taste.
Cultivation:
Trophis scandens is a magnificent creeper which has largely been ignored by the home gardener. It is suitable in any frost free, warm temperate, sub-tropical, tropical monsoonal or semi-arid garden where adequate moisture can be maintained. It is ideal at the edge of a rain forest or deep in the center of the rainforest though in the later the display of fruits would go missing as the plants will climb tall to reach the sunlight. In cultivation on a suburban fence or a small pergola it grows from 3 meters to 6 meters in height by 3 meters to 5 meters in width when grown in the open or much taller and narrower if grown closer together as a rainforest tree.
It makes very good trellis and fence creeper covering the structures quickly once it has established itself
Planted at the corners of a pergola it will ascend to the top in a few years then cover the structure with a dense canopy. It makes a good display when mixed with other vigorous creepers like Tecmanthe hillii or Cissus species where the fruits can be the feature over a long period of the year. Here they could be planted at the diagonals and the other two creepers on the opposite diagonal supports.
It grows exceptionally well on most soils except the heaviest clays especially where the soils are covered in a deep layer of leaf litter which helps to keeps the soil cool and moisture at an even level. If these requirements are met they can cope with temperatures as low as 1 degree and up to 38 degrees. It is moderately drought resistant once established.
Add to the above, if it is given an adequate supply of water and a little native fertilizer on a regular basis the plants should respond with good flowering and fruit over a long period.
Trophis scandens also makes a good ground cover and can be pruned to encourage a medium size sub shrub. Care should be taken to minimize the chance of the plants reaching other plants or structures to climb on as once established can smother small shrubs very quickly. It is ideal for shady situations on the southern side of buildings. As a ground cover plant them at 4 meter centers and at least 5 meters from other plants.
Propagation:
Seeds: The seeds of Trophis scandens can be removed easily from the fruits.
Sow fresh seeds directly into a seed raising mix, keeping them moist not wet. Do not over water as the seeds will rot off before germination takes place. Place the trays in a cool shaded area with 50mm shade cloth in the bush house. When the seedlings are 30mm to 50mm tall, prick them out and plant them into 50mm native tubes using a good organic mix.
As the seedlings roots reach the bottom of the tubes plant them out into their permanent position. Do not delay.
Fertilize using Seaweed, fish emulsion or organic chicken pellets soaked in water and apply the liquid on an alternate basis. Fertilize every 2 months until the plants are well established then on an annual basis in September to October to maintain good health and vigour.
Further Comments from Readers:
“Hi reader, it seems you use The Bible of Botany a lot. That’s great as we have great pleasure in bringing it to you! It’s a little awkward for us to ask, but our first aim is to purchase land approximately 1,600 hectares to link several parcels of N.P. into one at The Pinnacles NSW Australia, but we need your help. We’re not salespeople. We’re amateur botanists who have dedicated over 30 years to saving the environment in a practical way. We depend on donations to reach our goal. If you donate just $5, the price of your coffee this Sunday, We can help to keep the planet alive in a real way and continue to bring you regular updates and features on Australian plants all in one Botanical Bible. Any support is greatly appreciated. Thank you.”
In the spirit of reconciliation we acknowledge the Bundjalung, Gumbaynggirr and Yaegl and all aboriginal nations throughout Australia and their connections to land, sea and community. We pay our respect to their Elders past, present and future for the pleasures we have gained.
Turraea pubescens
Classification:
Unranked: Eudicots
Unranked: Rosids
Order: Sapindales
Family: Meliaceae
Genus: There is some confusion as to whom the name honours but it is most likely Antonio Turra; 1730-1796, who was an Italian botanist and physician or less likely to be Giorgio Dalla Torre; 1607-1688, who was an Italian naturalist and professor of botany.
Specie: From Pūbēscēns, which is Latin for short, very soft hairs. It refers to structures or organs, which are covered in soft, white or pale grey hairs.
Sub specie:
Common Name: Native Honeysuckle.
Distribution:
Turraea pubescens is found along the Kimberley coast in far north western, Western Australia.
It is found near Nuhlunbuy, south east of Kakadu National Park and along the Gregory River in the Northern Territory.
On the east coast it is found in several disjunct populations on the western Plains, Western Slopes, on and east of the Great Dividing Range to the coast. It is found south from to the Torres Strait Islands and the tip of Cape York Peninsula in Queensland to Gradys Creek and the Border Ranges National Park in far north eastern New South Wales.
https://avh.ala.org.au/occurrences/search?taxa=Turraea+pubescens#tab_mapView
Habitat Aspect Climate:
Turraea pubescens prefer dappled shade to full sun, growing adjacent to and on the margins of well-developed warm subtropical rainforests, tropical rainforests, littoral rainforests, monsoonal rainforests, seasonal rainforests or wet Eucalyptus forests. It is particularly common near creeks boulders and sheltered positions within forest openings. It is found on cliffs, hills slopes flats or cliff tops or along creek beds in more arid areas. The altitude ranges from 5 meters ASL to 900 meters ASL.
The temperatures range from 2 degrees in July to 38 degrees in January.
The rainfall ranges from lows of 850mm to 3200mm average per annum.
Soil Requirements:
Turraea pubescens prefers better quality light sandy clays to medium clays. The soils are usually derived from decomposed brown and black basalts, sandstones, metamorphic rocks or laterites. The soils pH ranges from 4pH to 7.5pH. It is not tolerant of waterlogged soils though most soils have good moisture retention. Non saline soils to moderately saline soils are tolerated.
Height & Spread:
Wild Plants: 1m to 10m by 1.5m to 4m.
Characteristics:
Turraea pubescens grows as a partially deciduous, multi trunked tree, medium shrub or sub shrub. The pendulant, brown trunk is covered in paler lenticels. The stems are semi glossy, rusty brown, glabrous and only becoming green near the apex where the newer leaf growth occurs. The new growth is sparsely to moderately covered in white sericeous or pubescent hairs.
The alternate, ovate to elliptical leaves of Turraea pubescens measure 35mm to 110mm in length by 20mm to 50mm in width. The petiole measures 3mm to 10mm in length. The bases are broad cuneate to rounded while the apexes are acuminate. The concolourous laminas are deep grass-green, dull to semi glossy and glabrous on the upper lamina while the lower lamina is dull and sparsely to moderately covered in white pubescent hairs. The leaf margins are entire, flat and undulating. The domatia if present are tuft with white hairs at the vein axils. The laminas decurve close to the apex and are convex between the lateral veins. The yellow-green mid veins are prominent on the lower laminas and are distinctly visible from the upper laminas.
Inflorescences of Turraea pubescens are born singularly or a few in loose clusters from the leaf axils. The grass-green pedicels are glabrous and measure 8mm to 12mm in length. The grass-green calyx lobes are erect and glabrous to moderately covered in white pubescent hairs. The calyx tubes measure 1.2mm to 1.5mm in length while the calyx lobes measure 1mm to 1.5mm in length. The silky white glabrous corolla buds split longitudinally into 5 narrow spathulate to linear petals which then turn pale cream to mid cream after anthesis. The petals measure 25mm to 33mm in length by 3mm to 4mm in width.
The 10 or 12 exserted filaments are united to from a staminal tube which measure 20mm to 24mm in length. The filaments are white, divaricate at the apex into a fimbriate fringe while the yellow anthers are sessile on the staminal tube.
The white style and stigma are glabrous while the ovary is green. The styles measures 22mm to 26mm in length while the stigmas measure 2.5mm to 3.5mm in length. The 5 to 10 locular ovaries measure 1mm in length and are glabrous. Turraea pubescens’s flowers appear from mid-September to mid-November when the plants are deciduous.
The fruits of Turraea pubescens are globose to obovoidal capsules. The capsules are glabrous and measure 12mm to 16mm in length by 10mm to 12mm in diameter. The green capsules pale brown externally and pale creamy yellow internally when ripe and split into 5 divaricate to decurve sections. The calyx lobes are persistent on the ripe fruit.
The 4 or 5 glossy black globose to oblong seeds are fleshy and surrounded by an orange–red aril. The seeds measure 5.5mm to 7mm in length by 4mm to 6.5mm in diameter.
Wildlife:
Turraea pubescens’s are particularly attractive to small and medium size honey eaters when in flower.
Cultivation:
Turraea pubescens is a magnificent medium to large shrub or small tree that deserves a place in most gardens because when it is in flower the strongly fragrant flowers are extremely beautiful. It is ideal at the edge of wet rainforest or dry sclerophyll forest gardens from warm temperate areas to the tropics and monsoonal gardens. It also makes a great multi trunk small tree offering quick growth, and a dense barrier. In cultivation it will grow from 3 meters to 10 meters in height by 3 meters to 6 meters in diameter when grown in the open but this depends on the way it is grown and the soil to which it is being grown on.
It grows exceptionally well on better soils where deep leaf litter keeps the soil cool and moisture at an even level. If these requirements are met it can cope with temperatures as low as minus 1 degree and up to 42 degrees. It is moderately drought resistant once established losing their leaves on the onset of drought or at the end of the dry season. A drier than normal dry season coupled with early rains often sees them at their best in flower.
Add to the above, if it is given an adequate supply of water and some native fertilizer on a regular basis following flowering, during the growing season and then withholding watering during the dry season, the plants will respond with excellent displays of flowering and fruit set over a long period.
The trees are a good foundation plant for starting a fragrant bush garden or an old English style garden. It can be mass planted below with red or deep pink flowers to great affect and are very compatible with most small flowering Grevillea including Grevillea robin gordon, Grevillea rosmarinifolia, Grevillea nudiflora, Grevillea paradoxa or Grevillea sericea to mention a few. Conversely used as shrub with taller growing species like Grevillea banksii or Grevillea pteridifolia have great contrasting foliage and strong flowering colours. Mass plantings can be achieved with 4 meter to 5 meter centers for shrubs or 5 meters to 6 meters for hedge rows and 10 meters for specimen trees.
Turraea pubescens would make a very good accent tree in front of low set commercial, school buildings or industrial sheds where it will break up hard rigid architectural lines especially if planted between taller trees with a single trunk. Here they give warmth and breadth to a building.
Propagation:
Seeds: The seeds of Turraea pubescens can be removed easily from the fruits.
Sow fresh seeds are best planted as soon as they ripen and planted directly into a deep seed raising mix, keeping them moist not wet. Another method is to place the seeds directly into the 50mm native tubes. Do not over water as the seeds will rot off before germination takes place. Place the trays in a cool shaded area with 50mm shade cloth in the bush house. When the seedlings are 35mm to 55mm tall, prick them out and plant them into 50mm native tubes using a good organic mix.
As the seedlings roots reach the bottom of the tubes plant them out into their permanent position. Do not delay as the trees may begin to drop leaves and remain in a dormant state until the following season.
Fertilize using seaweed, fish emulsion or organic chicken pellets soaked in water on an alternate basis. Fertilize every two months until the plants are established then annually in early September to October to maintain better colour, health, vitality and flowering.
Further Comments from Readers:
“Hi reader, it seems you use The Bible of Botany a lot. That’s great as we have great pleasure in bringing it to you! It’s a little awkward for us to ask, but our first aim is to purchase land approximately 1,600 hectares to link several parcels of N.P. into one at The Pinnacles NSW Australia, but we need your help. We’re not salespeople. We’re amateur botanists who have dedicated over 30 years to saving the environment in a practical way. We depend on donations to reach our goal. If you donate just $5, the price of your coffee this Sunday, We can help to keep the planet alive in a real way and continue to bring you regular updates and features on Australian plants all in one Botanical Bible. Any support is greatly appreciated. Thank you.”
In the spirit of reconciliation we acknowledge the Bundjalung, Gumbaynggirr and Yaegl and all aboriginal nations throughout Australia and their connections to land, sea and community. We pay our respect to their Elders past, present and future for the pleasures we have gained.
Tylophora barbata
Classification:
Unranked: Eudicots
Unranked: Asterids
Order: Gentianales
Family: Apocynaceae
Subfamily: Asclepiadoideae
Genus: From Tylos, which is Ancient Greek for a knob and Phoros, which is Ancient Greek for to bear or to carry. It refers to the to the shape of the staminal coronal lobes.
Specie: From Barbātum, which is Latin for a beard or a barbed hair. It refers to tufts of hairs, which are barbed.
Sub specie:
Common Name: Bearded Tylophora.
Distribution:
Tylophora barbata is found on the Western Slopes, on and east of the Great Dividing Range south from Bulahdelah National Park in central coastal central New South Wales to Lakes Entrance in Victoria. It is also found on Wilson’s Promontory west to Wanthagi and Cowes Island.
https://avh.ala.org.au/occurrences/search?taxa=Tylophora+barbata#tab_mapView
Habitat Aspect Climate:
Tylophora barbata prefers dappled shade to full sun, growing adjacent to and in moist warm temperate rainforests or moist Eucalyptus forests. The altitude ranges from 5 meters ASL to 650 meters ASL.
The temperatures range from minus 5 degrees in July to 36 degrees in January.
The rainfall ranges from lows of 600mm to 1600mm average per annum.
Soil Requirements:
Tylophora barbata prefers better quality sandy loams to medium clays. The soils are usually derived from decomposed sandstones brown basalts, black basalts, metamorphic rocks or granites. The soils pH ranges from 5pH to 6.5pH. It does not tolerate waterlogged soils. Non saline soils to moderately saline soils are tolerated.
Height & Spread:
Wild Plants: 1m to 3m by 1m to 2m.
Characteristics:
Tylophora barbata grows as a small wiry stemmed twiner with slender, pale green, glabrous stems. The young stems are pale grass-green. The stems, petioles and leaves exude a clear or milky latex when damaged. The new growth is glabrous or sparsely covered in white, caducous hirtellous hairs.
The opposite, broad lanceolate to ovate leaves of Tylophora barbata measure 25mm to 60mm in length by 10mm to 35mm in width. The petioles are glabrous to sparsely covered in white, caduceus, hirtellous hairs measures 7mm to 20mm in length. The bases are broadly cuneate to rounded while the apexes are broadly acuminate. The discolourous laminas are grass-green, dull to semi glossy, thin and glabrous on the upper laminas while the lower laminas are much paler. The leaf margins are entire, flat and curve downwards near the apex. The mid vein and main laterals are prominent on the lower laminas and are visible from the upper laminas.
Inflorescences of Tylophora barbata are born on simple or compound cymes from the leaf axils. There are 3 to 5 individual flowers in each simple cyme. The pale green peduncles and pedicels are glabrous. The peduncles measure 15mm to 25mm in length while the pedicels measure 7mm to 10mm in length. The grass-green calyxes measure 0.2mm to 0.4mm in length while the calyx lobes measure 0.6mm to 1mm in length. The maroon to maroon-red petals are elliptical with an acuminate apex. The divaricate petals are glabrous externally and covered in white tomentose hairs internally especially along the margins. The petals measure 2.5mm to 3.5mm in length.
The 10 anthers are sessile on the rim of the deep maroon-red to deep purple ovary.
The white stigma is sessile on the ovary. Tylophora grandiflora’s flowers appear from late November to early February.
The fruits of Tylophora barbata are slender follicles which rarely developed. The follicles measure 50mm to 70mm in length by 12mm to 16mm in diameter. The green capsules turn deep grey when ripe. The fine, black seeds have a white to pale grey plume attached to one end.
Wildlife:
Tylophora barbata’s is unknown to the author.
Cultivation:
Tylophora barbata is an unusual small twining creeper that can add interest especially when in flower, around the garden or courtyard, small pools and ponds, swimming pool or moist rock garden where there is some shade during the day. It is the unusual coloured flowers that draw attention. It is ideal at the edge of a rainforest garden. In cultivation it will grow from 1 meters to 3 meters in height by 1 meter to 1.5 meters in diameter when grown in the open or around 3 meters in diameter as a ground cover.
It is best grown where smaller logs or structures are lying around for them to clamber over. It can be easily tip pruned to enhance bushiness and a compact habit.
It is best suited to areas where water lies or have poor drainage like in depressions and around sullage trenches but don’t plant them in the water. Place them at the bottom of slopes or retaining walls where moisture lies or seeps out after rain for short or prolonged wet periods.
If it is placed around a pool, courtyards or other confined spaces then plant it in small groups or scatter plant them for a more informal natural look against walls to help soften them. Using rocks and small boulders can make the pool or any water feature appear like an oasis. The leaves and flowers can make a great starter plant whether planted in straight lines along the edge or randomly planted. Use strap leaf plants like Lomandra leucocephala, Lomandra Longifolia or Dianella species to give height to the bed or edge. This is especially true if palms are used along the path as this breaks up the hard vertical hand hard horizontal look giving better balance. Mix it with the other Tylophora species to extend the flowering period and to give some variation in foliage.
It grows exceptionally well on lighter soils where deep leaf litter keeps the soil cool and moisture at an even level. If these requirements are met it can cope with temperatures as low as minus 5 degrees and up to 36 degrees. It is moderately drought resistant once established.
Add to the above, if it is given an adequate supply of water and a little native fertilizer on a regular basis the plants should respond with good flowering and fruit over a long period.
Propagation:
Seeds: The seeds of Tylophora barbata can be removed easily from the fruits.
Sow fresh seeds directly into a seed raising mix, keeping them moist not wet. Do not over water as the seeds will rot off before germination takes place. Place the trays in a cool shaded area with 50mm shade cloth in the bush house. When the seedlings are 20mm to 25mm tall, prick them out and plant them into 50mm native tubes using a good organic mix.
As the seedlings roots reach the bottom of the tubes plant them out into their permanent position. Do not delay.
Fertilize using seaweed, fish emulsion or organic chicken pellets soaked in water on an alternate basis. Fertilize every two months until the plants are established then twice annually in early September to March to maintain better colour, health, vitality and flowering.
Further Comments from Readers:
“Hi reader, it seems you use The Bible of Botany a lot. That’s great as we have great pleasure in bringing it to you! It’s a little awkward for us to ask, but our first aim is to purchase land approximately 1,600 hectares to link several parcels of N.P. into one at The Pinnacles NSW Australia, but we need your help. We’re not salespeople. We’re amateur botanists who have dedicated over 30 years to saving the environment in a practical way. We depend on donations to reach our goal. If you donate just $5, the price of your coffee this Sunday, We can help to keep the planet alive in a real way and continue to bring you regular updates and features on Australian plants all in one Botanical Bible. Any support is greatly appreciated. Thank you.”
In the spirit of reconciliation we acknowledge the Bundjalung, Gumbaynggirr and Yaegl and all aboriginal nations throughout Australia and their connections to land, sea and community. We pay our respect to their Elders past, present and future for the pleasures we have gained.
Tylophora benthamii
Classification:
Unranked: Eudicots
Unranked: Asterids
Order: Gentianales
Family: Apocynaceae
Subfamily: Asclepiadoideae
Genus: From Tylos, which is Ancient Greek for a knob and Phoros, which is Ancient Greek for to bear or to carry. It refers to the to the shape of the staminal coronal lobes.
Specie: Is named in honour of George Bentham; 1800-1884, who was an English botanist who undertook the reclassification of seed plants into families.
Sub specie:
Common Name: Coastal Tylophora or Tsiang.
Distribution:
Tylophora benthamii is found close to the Kimberley coast just south of Prince Regent National Park in far north western, Western Australia.
It is found in the Northern Territory east Gurig National Park, north east Kakadu National Park and east of Groote Eylandt.
On the east coast it is found in several disjunct populations on and east of the Great Dividing Range. It is found south from the tip of Cape York Peninsula and coastal Islands adjacent to MacKay in Queensland to Sawtell in coastal north eastern New South Wales.
https://avh.ala.org.au/occurrences/search?taxa=Tylophora+benthamii#tab_mapView
Habitat Aspect Climate:
Tylophora benthamii prefers dappled shade to full sun. It grows adjacent to and in the margins of littoral rainforests. The altitude ranges from 5 meters ASL to 950 meters ASL.
The temperatures range from 2 degrees in July to 36 degrees in January.
The rainfall ranges from lows of 850mm to 3000mm average per annum.
Soil Requirements:
Tylophora benthamii prefers better quality light sands to light sandy clays or peaty sands. The soils are usually derived from decomposed sandstones or accumulated calcareous sands. The soils pH ranges from 5pH to 6.5pH. It does not tolerate waterlogged soils. Non saline soils to moderately saline soils are tolerated.
Height & Spread:
Wild Plants: 1m to 4m by 2m to 3m.
Characteristics:
Tylophora benthamii grows a small wiry stemmed twinning creeper. The stems are pale creamy grey to creamy fawn, furrowed and corky. The young stems are pale grass-green. The stems, petioles and leaves exude an opaque to clear creamy yellow latex when damaged. The new growth and stems are covered in fawn, pulverulent hairs.
The opposite, broad ovate leaves of Tylophora benthamii measure 60mm to 120mm in length by 30mm to 80mm in width. The petioles are sparsely covered in white, pulverulent hairs and measures 15mm to 50mm in length. The bases are broadly strongly cordate while the apexes are obtuse with a mucronate tip to shortly acuminate. The discolourous laminas are grass-green to mid blue-green, dull, thin and sparsely covered in white puberulent hairs on the upper laminas while the lower laminas are much paler and densely covered in white pulverulent hairs. The leaf margins are entire, flat to slightly undulating. The laminas are flat. The mid vein and main laterals are prominent on the lower laminas, are sunken and distinctly visible from the upper laminas.
Inflorescences of Tylophora benthamii are born on simple or compound umbels from the leaf axils. There are 2 to 5 umbels to a compound umbel and 4 to 7 individual flowers in each simple umbel. The purple-red peduncles and pedicels are covered in white pulverulent hairs. The peduncles measure 10mm to 20mm in length while the pedicels measure 5mm to 12mm in length.
The purple-red calyxes measure 0.6mm to 0.8mm in length while the calyx lobes measure 1.2mm to 1.8mm in length. The maroon to deep purple petals are oblong-elliptical with an obtuse-acute decurve apex. The divaricate petals are sparsely covered in white pulverulent hairs externally and covered in white pulverulent hairs internally especially along the margins and apex. The petals measure 3mm to 5mm in length.
The 10 anthers are sessile on the rim of the deep maroon-red to deep purple ovary.
The white stigma is sessile on the ovary. Tylophora grandiflora’s flowers appear from late November to early February, where as Tylophora benthamii’s flowers appear from late September to early March.
The fruits of Tylophora benthamii are slender follicles which rarely developed. The follicles measure 70mm to 120mm in length by 10mm to 18mm in diameter. The green capsules turn deep grey when ripe. The fine, black seeds are narrowly winged and have 25mm to 30mm long, white to pale grey plumes attached to one end.
Wildlife:
Tylophora benthamii’s is unknown to the author.
Cultivation:
Tylophora benthamii is an unusual small twining creeper that can add interest especially when in flower, around the garden or courtyard, small pools and ponds, swimming pool or moist rock garden where there is some shade during the day. It is the unusual coloured flowers that draw attention. It is ideal at the edge of a rainforest garden. In cultivation it will grow from 1 meters to 3 meters in height by 1 meter to 1.5 meters in diameter when grown in the open or around 3 meters in diameter as a ground cover.
It is best grown where smaller logs or structures are lying around for them to clamber over. It can be easily tip pruned to enhance bushiness and a compact habit.
It is best suited to areas where water lies or have poor drainage like in depressions and around sullage trenches but don’t plant them in the water. Place them at the bottom of slopes or retaining walls where moisture lies or seeps out after rain for short or prolonged wet periods.
If it is placed around a pool, courtyards or other confined spaces then plant it in small groups or scatter plant them for a more informal natural look against walls to help soften them. Using rocks and small boulders can make the pool or any water feature appear like an oasis. The leaves and flowers can make a great starter plant whether planted in straight lines along the edge or randomly planted. Use strap leaf plants like Lomandra leucocephala, Lomandra Longifolia or Dianella species to give height to the bed or edge. This is especially true if palms are used along the path as this breaks up the hard vertical hand hard horizontal look giving better balance. Mix it with the other Tylophora species to extend the flowering period and to give some variation in foliage.
It grows exceptionally well on lighter soils where deep leaf litter keeps the soil cool and moisture at an even level. If these requirements are met it can cope with temperatures as low as minus 5 degrees and up to 36 degrees. It is moderately drought resistant once established.
Add to the above, if it is given an adequate supply of water and a little native fertilizer on a regular basis the plants should respond with good flowering and fruit over a long period.
Propagation:
Seeds: The seeds of Tylophora benthamii can be removed easily from the fruits.
Sow fresh seeds directly into a seed raising mix, keeping them moist not wet. Do not over water as the seeds will rot off before germination takes place. Place the trays in a cool shaded area with 50mm shade cloth in the bush house. When the seedlings are 20 to 25 mm tall, prick them out and plant them into 50mm native tubes using a good organic mix.
As the seedlings roots reach the bottom of the tubes plant them out into their permanent position. Do not delay.
Fertilize using Seaweed, fish emulsion or organic chicken pellets soaked in water and apply the liquid on an alternate basis. Fertilize every 2 months until the plants are well established then on an annual basis in September to October to maintain good health, vigour and better flowering.
Further Comments from Readers:
“Hi reader, it seems you use The Bible of Botany a lot. That’s great as we have great pleasure in bringing it to you! It’s a little awkward for us to ask, but our first aim is to purchase land approximately 1,600 hectares to link several parcels of N.P. into one at The Pinnacles NSW Australia, but we need your help. We’re not salespeople. We’re amateur botanists who have dedicated over 30 years to saving the environment in a practical way. We depend on donations to reach our goal. If you donate just $5, the price of your coffee this Sunday, We can help to keep the planet alive in a real way and continue to bring you regular updates and features on Australian plants all in one Botanical Bible. Any support is greatly appreciated. Thank you.”
In the spirit of reconciliation we acknowledge the Bundjalung, Gumbaynggirr and Yaegl and all aboriginal nations throughout Australia and their connections to land, sea and community. We pay our respect to their Elders past, present and future for the pleasures we have gained.
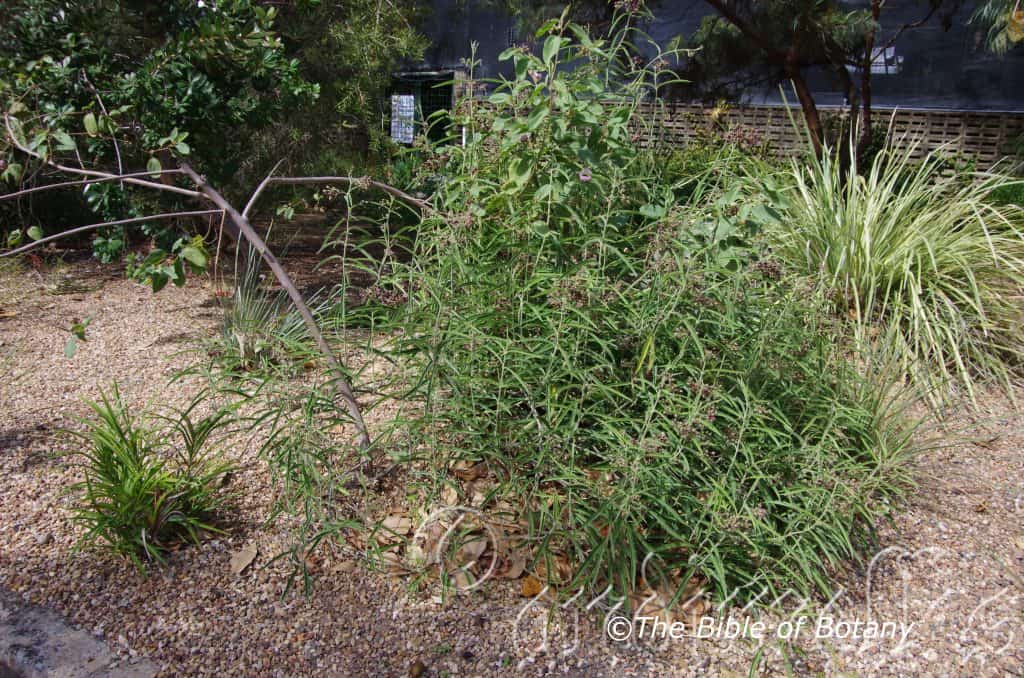
Anderson Gardens Townsville Qld.
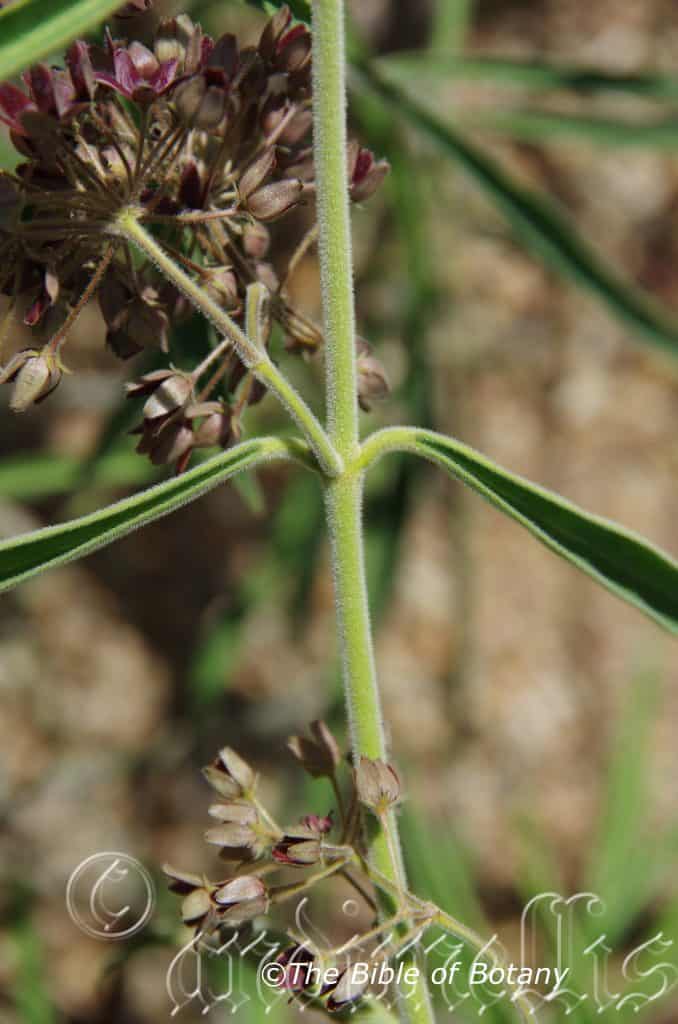
Anderson Gardens Townsville Qld.
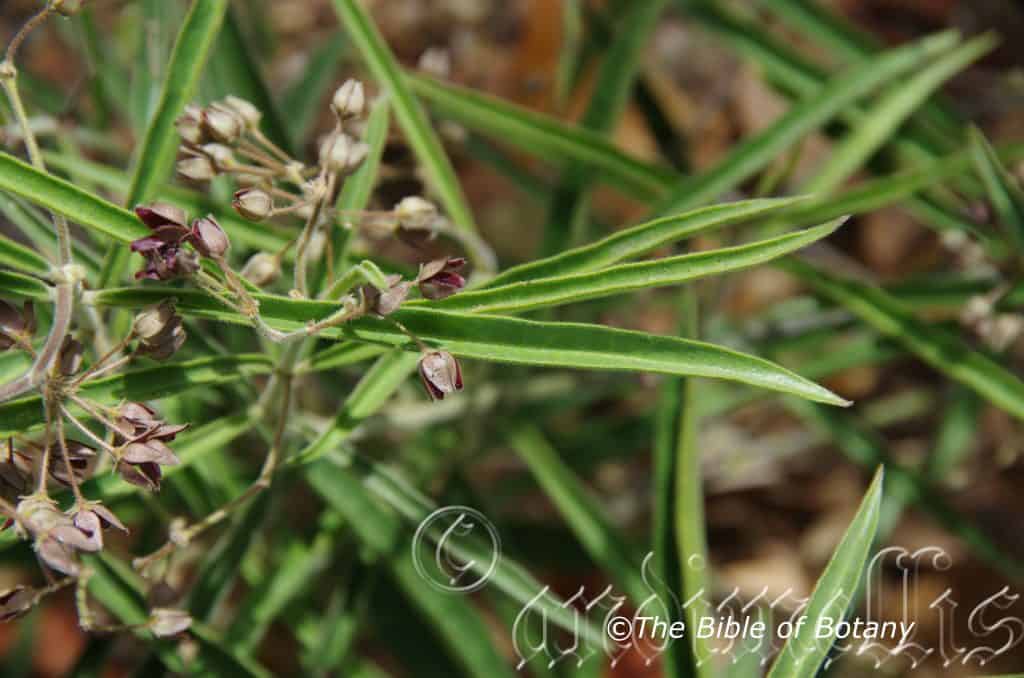
Anderson Gardens Townsville Qld.
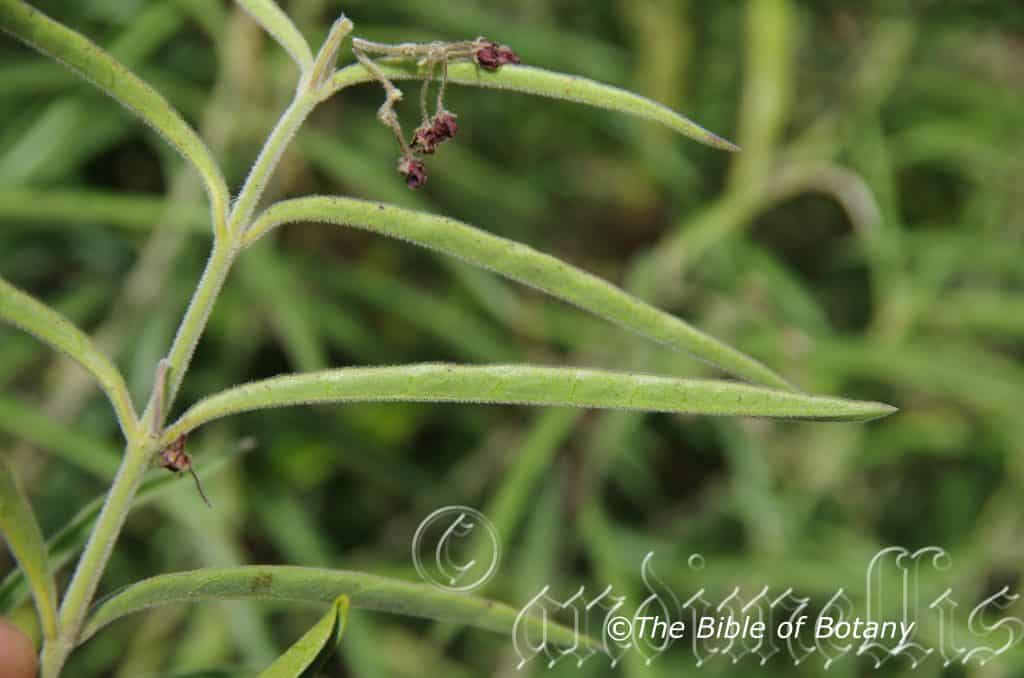
Anderson Gardens Townsville Qld.
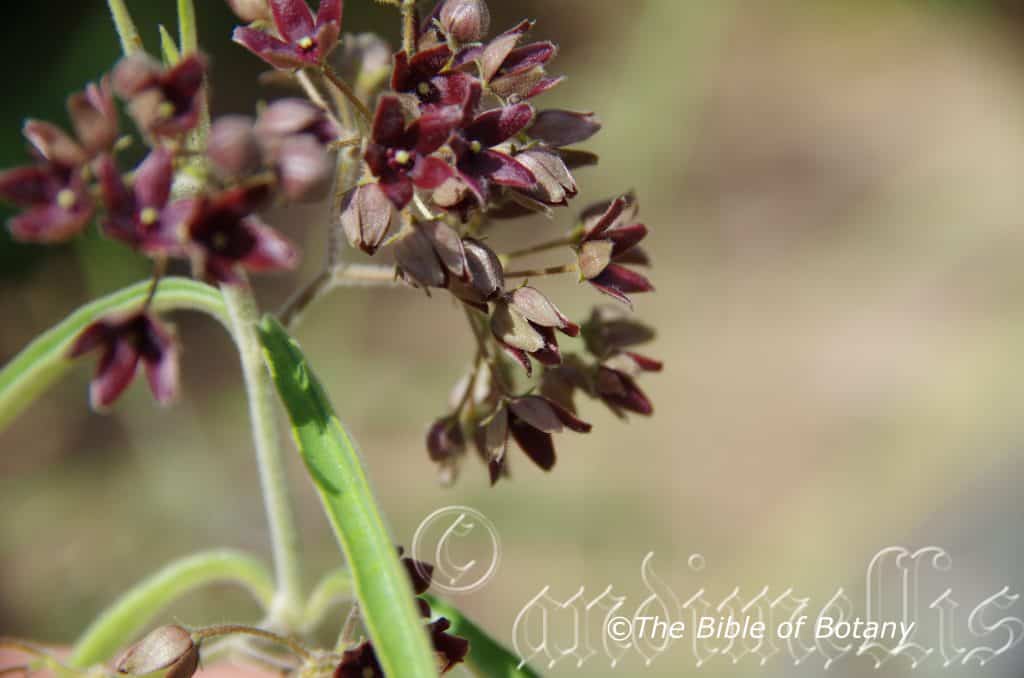
Anderson Gardens Townsville Qld.
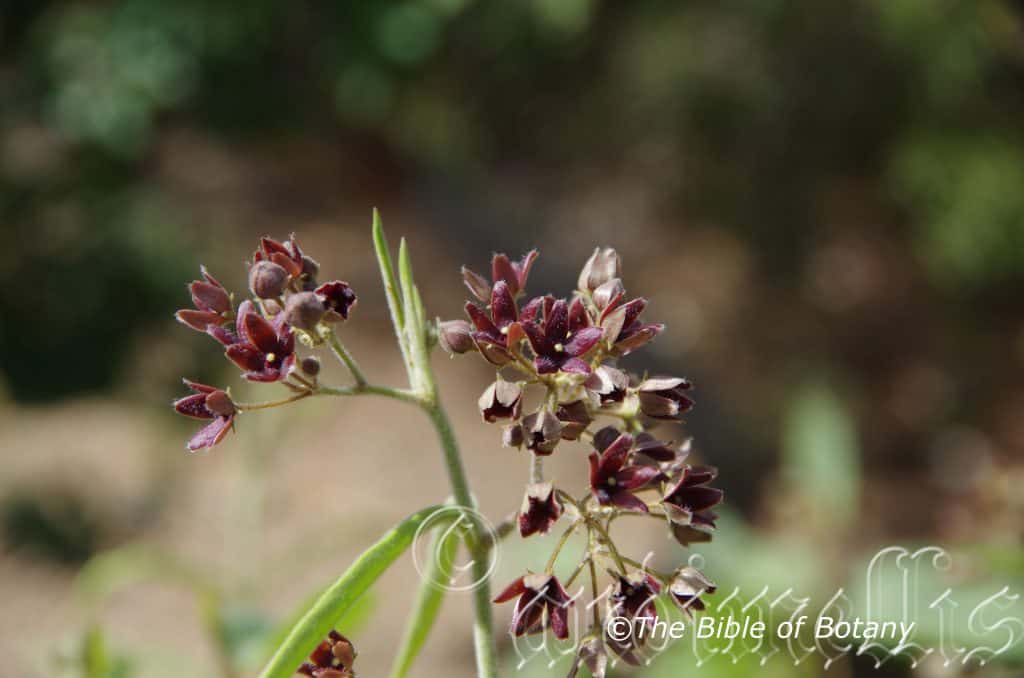
Anderson Gardens Townsville Qld.
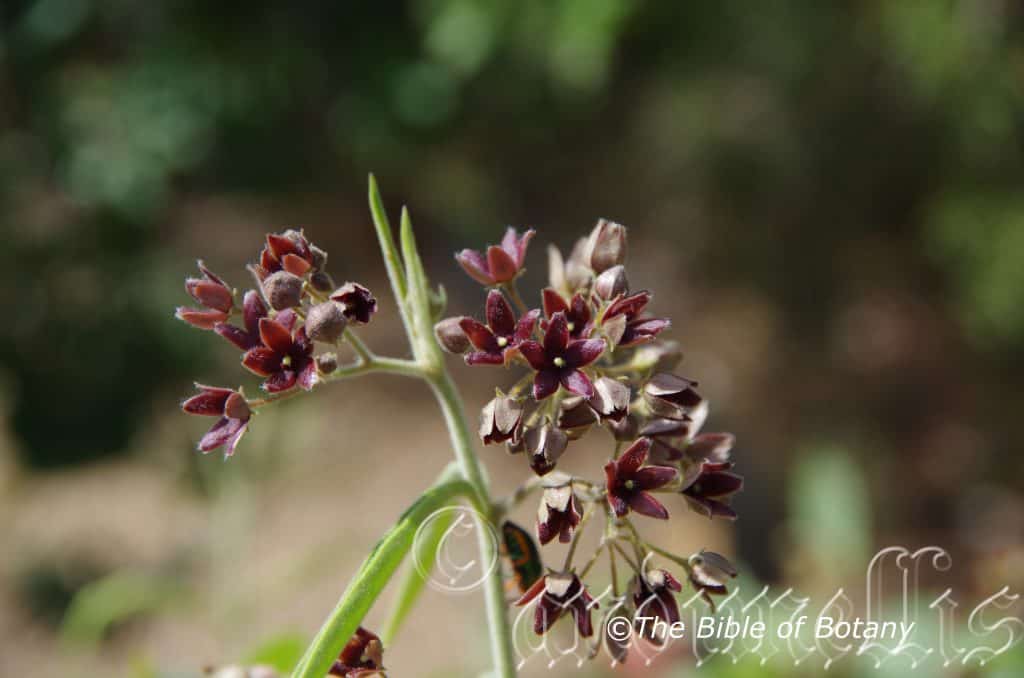
Anderson Gardens Townsville Qld.
Tylophora erecta
Classification:
Unranked: Eudicots
Unranked: Asterids
Order: Gentianales
Family: Apocynaceae
Subfamily: Asclepiadoideae
Genus: From Tylos, which is Ancient Greek for a knob and Phoros, which is Ancient Greek for to bear. It refers to the to the shape of the staminal coronal lobes.
Specie: From ērēctum, which is Latin for to be erect or upright. It refers to plants, which have an upright habit of growth especially when compared to other species in the genus.
Sub specie:
Common Name:
Distribution:
Tylophora erecta is found in two main disjunct populations. The Northern Territory plants are found east fro Melville Island to Murgenella and south to 11 mile Creek near Katherine.
The eastern population is found south from the tip of Cape York Peninsula to rollestone in north eastern Queensland with a couple fond near Mount Isa along the Leichardt River.
https://avh.ala.org.au/occurrences/search?taxa=Tylophora+erecta#tab_mapView
Habitat Aspect Climate:
Tylophora erecta prefers dappled shade to full sun. It usually grows adjacent to moist rainforests, dry rainforests or at times moist Eucalyptus forests. The altitude ranges from 5 meters ASL to 350 meters ASL.
The temperatures range from 2 degrees in July to 44 degrees in January.
The rainfall ranges from lows of 650mm to 3200mm average per annum.
Soil Requirements:
Tylophora erecta prefers better quality light sandy clays to medium clays. The soils are usually derived from decomposed sandstones brown basalts, black basalts, metamorphic rocks or granites. The soils pH ranges from 5pH to 6pH. It does not tolerate waterlogged soils. Non saline soils to moderately saline soils are tolerated.
Height & Spread:
Wild Plants: 1m to 2m by 1m to 2m.
Characteristics:
Note measurements are from a single plant from near Townsville.
Tylophora erecta is a small erect stemmed shrub. The older stems are pale creamy grey to creamy fawn, and densely covered in ragged greyish pubescent hairs. The young stems are pale green and densely covered in long white pubescent hairs. The stems, petioles and leaves exude a clear yellowy sap when damaged.
The opposite, narrow elliptical to broad linear leaves of Tylophora erecta measure 100mm to 150mm in length by 12mm to 16mm in width. The terete petioles are densely covered in long, white, pubescent hairs and measures 10mm to 20mm in length. The bases taper to the petioles, while the apexes taper to a point. The discolourous laminas are mid green, dull, thick and sparsely covered in white pubescent hairs on the upper lamina, while the lower lamina is paler and moderately to densely covered in long, white pubescent hairs. The leaf blade is in the form a deep “U”, while the margins are entire and moderately to densely covered in long white ciliate hairs. The mid vein is strongly prominent on the lower lamina, and distinctly visible from the upper laminas. The mid vein is densely covered in long, white pubescent hairs. The lateral veins are noticeable on the lower lamina, are glabrous and loop well inside the margin.
Inflorescences of Tylophora erecta are born on simple umbels from the upper leaf axils. There are 12 to 20 individual flowers in each umbel. The terete peduncles are pale green, densely covered in long, white, pubescent hairs and measures 10mm to 20mm in length, while the terete pedicels are tan to pale orange-brown, densely covered in long, white, pubescent hairs and measures 10mm to 20mm in length.
The 5 yellow-green, elliptical calyxes are moderately covered in white pubescent hairs and measure 1.5mm to 3mm in length. The 5 deep maroon, divaricate, oblong to elliptical petals are sparsely covered in long, white pubescent hairs and measure 12mm to 15mm in length. The apexes are broad acute and decurve backwards near the apex.
The 5 deep maroon anthers are glabrous and sessile surrounding the creamy yellow, sessile stigma. Tylophora erecta’s flowers appear in August.
Tylophora erecta’s fruits are long, slender follicles which are broadest at the base and taper to a point at the apex. The follicles measure 40mm to 120mm in length by 6mm to 9mm in diameter. The green capsules turn deep grey when ripe.
Wildlife:
Tylophora erecta’s is unknown to the author.
Cultivation:
Tylophora erecta is an unusual small scrambly shrub that can add interest around the courtyard, small pools, ponds, swimming pool or moist rock gardens where there is some shade during the day. It is ideal at the edge of a rainforest on the sunny side. In cultivation it will grow from 1.5 meters to 2 meters in height by 1.5 meter to 2 meters in diameter when grown in the open.
It can be easily tip pruned to enhance bushiness and a compact habit or cut back hard in the dry season followed with an annual application of a native organic fertilizer and a drenching, where it will increase the number of stems and flowering heads.
If it is placed around a pool, courtyards or other confined spaces then plant it as a single plant so it becomes the feature.
Planted in small groups or scattered across a broad flat area will become a strong feature especially if yellow flowered glabrous plants like the different Hibbertia species are used. Using rocks and small boulders can make any water feature appear like an oasis.
The leaves and flowers can make a great starter plant whether planted in straight lines along the edge or randomly planted using strap leaf plants like Lomandra hystrix, Lomandra Longifolia or Dianella caerulea planted between in small clumps of three. Mix it with the other Tylophora species to extend the flowering period and to give some variation in foliage.
It grows exceptionally well on lighter soils where deep leaf litter keeps the soil cool and moisture at an even level. If these requirements are met it can cope with temperatures as low as 2 degrees and up to 44 degrees. It is moderately drought resistant once established but if it is affected then cut it back hard, followed with an annual application of a native organic fertilizer and a drenching.
Propagation:
Seeds: The seeds of Tylophora erecta can be removed easily from the fruits.
Sow fresh seeds directly into a seed raising mix, keeping them moist not wet. Do not over water as the seeds will rot off before germination takes place. Place the trays in a cool shaded area with 50mm shade cloth in the bush house. When the seedlings are 20 to 25 mm tall, prick them out and plant them into 50mm native tubes using a good organic mix.
As the seedlings roots reach the bottom of the tubes plant them out into their permanent position. Do not delay.
Fertilize using Seaweed, fish emulsion or organic chicken pellets soaked in water and apply the liquid on an alternate basis. Fertilize every 2 months until the plants are well established then on an annual basis in September or March to maintain good health, vigour and better flowering.
Cuttings:
Fortunately Tylophora erecta cuttings strike easy. Use 100mm to 150mm long tip cuttings or lateral shoots from the present season’s growth. Take them in warmer months of the year. Remove half the leaves from the bottom section being careful not to tear the bark.
1 Prepare the cutting mix by adding two thirds sharp clean river sand, one third peat or one third perlite. These ingredients must be sterilized,
2 Select good material from non diseased plants,
3 Select semi green stems for cuttings,
4 Place the cutting on a flat, hard surface, and make a clean cut down one side of the cutting at the base for 10mm with a sharp sterile knife or razor blade. – This scarification of the node will increase the chances of roots emerging from this spot. Now remove all but one or two the leaves, leaving the apex leaves in tact. If the leaves are very large in proportion to the stem, cut off the apical halves.
5 Fill a saucer with water, and place a little medium strength rooting hormone into another container like a milk bottle top. Dip the node end of the cutting into the water and then into the rooting hormone. Tap off any excess hormone,
6 Use a small dipple stick or old pencil to poke a hole into the soilless potting mix. Ensure the hole is slightly larger than the stem diameter and be careful not to wipe the rooting hormone off the cuttings base. Place 2 to 4 cuttings in each of the 50mm native tubes,
7 I like to place the tubes in bucket with holes drilled in the bottom to allow excess water to drain out. A plastic bag that fits over the bucket is ideal to help maintain temperature and moisture. Place in a semi shaded, warm position like under 50mm shade cloth.
8 When the cuttings have struck, open the bag to allow air circulation for a few days to a week,
9 Once hardened off remove the cuttings from the bag and allow to further hardening for a few more days to a week,
10 Transplant into a good potting mix to grow on.
Fertilize using seaweed, fish emulsion or organic chicken pellets soaked in water on an alternate basis. Fertilize every two months during the growing season then annually in early September to October to maintain health, vitality and better flowering.
Further Comments from Readers:
“Hi reader, it seems you use The Bible of Botany a lot. That’s great as we have great pleasure in bringing it to you! It’s a little awkward for us to ask, but our first aim is to purchase land approximately 1,600 hectares to link several parcels of N.P. into one at The Pinnacles NSW Australia, but we need your help. We’re not salespeople. We’re amateur botanists who have dedicated over 30 years to saving the environment in a practical way. We depend on donations to reach our goal. If you donate just $5, the price of your coffee this Sunday, We can help to keep the planet alive in a real way and continue to bring you regular updates and features on Australian plants all in one Botanical Bible. Any support is greatly appreciated. Thank you.”
In the spirit of reconciliation we acknowledge the Bundjalung, Gumbaynggirr and Yaegl and all aboriginal nations throughout Australia and their connections to land, sea and community. We pay our respect to their Elders past, present and future for the pleasures we have gained.
Tylophora grandiflora
Classification:
Unranked: Eudicots
Unranked: Asterids
Order: Gentianales
Family: Apocynaceae
Subfamily: Asclepiadoideae
Genus: From Tylos, which is Ancient Greek for a knob and Phoros, which is Ancient Greek for to bear or to carry. It refers to the to the shape of the staminal coronal lobes.
Specie: From Grandis which is Latin for grand or large and Flōris, which is Latin for a flower or Flōs, which is the Roman goddess of spring and flowers. It refers to plants, which produce larger flowers than most other species in the genus.
Sub specie:
Common Name: Small Leaf Tylophora.
Distribution:
Tylophora grandiflora is found in several disjunct populations on and east of the Great Dividing Range south from the Daintree National Park and Hinchinbrook Island National Park in far north eastern Queensland to the Hunter River in coastal central New South Wales.
https://avh.ala.org.au/occurrences/search?taxa=Tylophora+grandiflora#tab_mapView
Habitat Aspect Climate:
Tylophora grandiflora prefers dappled shade to full sun. It usually grows adjacent to moist and moist rainforests, dry rainforests or at times moist Eucalyptus forests. The altitude ranges from 5 meters ASL to 950 meters ASL.
The temperatures range from minus 2 degrees in July to 36 degrees in January.
The rainfall ranges from lows of 850mm to 3200mm average per annum.
Soil Requirements:
Tylophora grandiflora prefers better quality light sandy clays to medium clays. The soils are usually derived from decomposed sandstones brown basalts, black basalts, metamorphic rocks or granites. The altitude ranges from 11 meters ASL to 11 meters ASL.
The soils pH ranges from 5pH to 6pH. It does not tolerate waterlogged soils. Non saline soils to moderately saline soils are tolerated.
Height & Spread:
Wild Plants: 1m to 3m by 1m to 3m.
Characteristics:
Tylophora grandiflora is a small wiry stemmed twinning creeper. The stems are pale creamy grey to creamy fawn, finely furrowed and corky. The young stems are pale grass-green. The stems, petioles and leaves exude a clear watery latex when damaged. The new growth and stems are densely covered in white hirtellus hairs.
The opposite, ovate to oblong-ovate to oblong-triangular leaves of Tylophora grandiflora measure 25mm to 65mm in length by 10mm to 40mm in width. The petioles are covered in white, hirtellous or course puberulent hairs and measures 10mm to 20mm in length. The bases are truncate to cordate while the apexes are acute, acuminate or aristate. The discolourous laminas are pale sea-green to mid blue-green, dull, thin and sparsely covered in white hirtellous to course puberulent hairs on the upper laminas while the lower laminas are paler and densely covered in white hirtellous or course pubescent hairs. The leaf margins are entire. The laminas are flat to slightly recurve from the mid vein to the margins. The mid vein and main laterals are prominent on the lower laminas, are slightly sunken and distinctly visible from the upper laminas.
Inflorescences of Tylophora grandiflora are born on simple umbels from the leaf axils. There are 2 to 5 individual flowers in each simple umbel. The pinkish-green to pale yellow-pink peduncles and pedicels are glabrous. The peduncles measure 5mm to 15mm in length while the pedicels measure 20mm to 35mm in length.
The yellow-green calyxes measure 0.6mm to 0.8mm in length while the calyx lobes measure 4mm to 6mm in length. The narrowly oblong petals are pale maroon-red to deep purple externally and deeper shades internally. The apexes are obtuse to narrowly acute and decurve to revolute at the apex. The divaricate petals are covered in white pulverulent hairs externally and covered in white puberulent hairs internally. The petals measure 7mm to 12mm in length.
The 10 anthers are sessile on the rim of the maroon-pink to maroon-red to deep purple ovary.
The creamy green stigma is sessile on the ovary. Tylophora grandiflora’s flowers appear from December to through to early May.
Tylophora grandiflora’s fruits are long, slender follicles which are broadest at the base and taper to a point at the apex. The follicles measure 90mm to 110mm in length by 6.5mm to 9mm in diameter. The green capsules turn deep grey when ripe.
Wildlife:
Tylophora grandiflora’s is unknown to the author.
Cultivation:
Tylophora grandiflora is an unusual small twinning creeper that can add interest around the courtyard, small pools and ponds, swimming pool or moist rock garden where there is some shade during the day because of its unusual flowers. It is ideal at the edge of a rainforest. In cultivation it will grow from 1.5 meters to 2 meters in height by 2 meter to 3 meters in width when grown in the open on a trellis or fence or around 2.5 to 3 meters in diameter as a ground cover.
It is best grown where smaller logs or structures are lying around for so it can clamber over them. It can be easily tip pruned to enhance bushiness and a more compact habit.
It is best suited to areas where water lies or have poor drainage like in depressions and around sullage trenches but don’t plant them in the water. Place it at the bottom of slopes or retaining walls where moisture lies or seeps out after rain or prolonged wet periods.
If it is placed around a pool, courtyards or other confined spaces then plant it in small groups or scatter plant them for a more informal natural look against walls to help soften them. Using rocks and small boulders can make the pool or any water feature appear like an oasis. The leaves and flowers can make a great starter plant whether planted in straight lines along the edge or randomly planted. Use strap leaf plants like Lomandra leucocephala, Lomandra Longifolia or Dianella species to give height to the bed or edge. This is especially true if palms are used along the path as this breaks up the hard vertical hand hard horizontal look giving better balance. Mix them with the other Tylophora species to extend the flowering period and to give some variation in foliage.
It grows exceptionally well on lighter soils where deep leaf litter keeps the soil cool and moisture at an even level. If these requirements are met it can cope with temperatures as low as minus 5 degrees and up to 36 degrees. It is moderately drought resistant once established.
Add to the above, if it is given an adequate supply of water and a little native fertilizer on a regular basis the plants should respond with good flowering and fruit over a long period and it is the flowers that are the main draw card.
Propagation:
Seeds: The seeds of Tylophora grandiflora can be removed easily from the fruits.
Sow fresh seeds directly into a seed raising mix, keeping them moist not wet. Do not over water as the seeds will rot off before germination takes place. Place the trays in a cool shaded area with 50mm shade cloth in the bush house. When the seedlings are 20 to 25 mm tall, prick them out and plant them into 50mm native tubes using a good organic mix.
As the seedlings roots reach the bottom of the tubes plant them out into their permanent position. Do not delay.
Fertilize using Seaweed, fish emulsion or organic chicken pellets soaked in water and apply the liquid on an alternate basis. Fertilize every 2 months until the plants are well established then on an annual basis in September or March to maintain good health, vigour and better flowering.
Cuttings:
Fortunately Tylophora grandiflora cuttings strike easy. Use 100mm to 150mm long tip cuttings or lateral shoots from the present season’s growth. Take them in warmer months of the year. Remove half the leaves from the bottom section being careful not to tear the bark.
1 Prepare the cutting mix by adding two thirds sharp clean river sand, one third peat or one third perlite. These ingredients must be sterilized,
2 Select good material from non diseased plants,
3 Select semi green stems for cuttings.
4 Place the cutting on a flat, hard surface, and make a clean cut down one side of the cutting at the base for 10mm with a sharp sterile knife or razor blade. – This scarification of the node will increase the chances of roots emerging from this spot. Now remove all but one or two the leaves, leaving the apex leaves in tact. If the leaves are very large in proportion to the stem, cut off the apical halves.
5 Fill a saucer with water, and place a little medium strength rooting hormone into another container like a milk bottle top. Dip the node end of the cutting into the water and then into the rooting hormone. Tap off any excess hormone,
6 Use a small dipple stick or old pencil to poke a hole into the soilless potting mix. Ensure the hole is slightly larger than the stem diameter and be careful not to wipe the rooting hormone off the cuttings base. Place 2 to 4 cuttings in each of the 50mm native tubes,
7 I like to place the tubes in bucket with holes drilled in the bottom to allow excess water to drain out. A plastic bag that fits over the bucket is ideal to help maintain temperature and moisture. Place in a semi shaded, warm position like under 50mm shade cloth.
8 When the cuttings have struck, open the bag to allow air circulation for a few days to a week,
9 Once hardened off remove the cuttings from the bag and allow to further hardening for a few more days to a week,
10 Transplant into a good potting mix to grow on.to October to maintain health, vitality and better flowering.
Further Comments from Readers:
“Hi reader, it seems you use The Bible of Botany a lot. That’s great as we have great pleasure in bringing it to you! It’s a little awkward for us to ask, but our first aim is to purchase land approximately 1,600 hectares to link several parcels of N.P. into one at The Pinnacles NSW Australia, but we need your help. We’re not salespeople. We’re amateur botanists who have dedicated over 30 years to saving the environment in a practical way. We depend on donations to reach our goal. If you donate just $5, the price of your coffee this Sunday, We can help to keep the planet alive in a real way and continue to bring you regular updates and features on Australian plants all in one Botanical Bible. Any support is greatly appreciated. Thank you.”
In the spirit of reconciliation we acknowledge the Bundjalung, Gumbaynggirr and Yaegl and all aboriginal nations throughout Australia and their connections to land, sea and community. We pay our respect to their Elders past, present and future for the pleasures we have gained.
Tylophora woollsii
Classification:
Unranked: Eudicots
Unranked: Asterids
Order: Gentianales
Family: Apocynaceae
Subfamily: Asclepiadoideae
Genus: From Tylos, which is Ancient Greek for a knob and Phoros, which is Ancient Greek for to bear or to carry. It refers to the to the shape of the staminal coronal lobes.
Specie: Is named in honour of the Reverend William Wools; 1814-1893, who was a clergyman and botanist.
Sub specie:
Common Name:
Distribution:
Tylophora woollsii is found in several disjunct populations near on the lower reaches of the Daly River, the West Alligator River, the East Alligator River and Nhulunbuy in the far north of the Northern Territory.
In New South Wales it is found south from the top of the Border Ranges National Park to along the Nymboida River and its tributaries with a further population further south around Parramatta.
https://avh.ala.org.au/occurrences/search?taxa=Tylophora+woollsii#tab_mapView
Habitat Aspect Climate:
Tylophora woollsii prefers dappled shade to full sun. It is extremely unusual in that its habitats are almost totally opposed yet it is not found in localities between the two types. In the south it grows adjacent to and in the margins of cool wet sclerophyll forests or cool moist rainforests while the northern plants grow in hot humid monsoonal forests. The altitude ranges from 5 meters ASL to 980 meters ASL.
The temperatures range from 3 degrees in July to 40 degrees in January.
The rainfall ranges from lows of 850mm to 3000mm average per annum.
Soil Requirements:
Tylophora woollsii prefers better quality light sandy loams to medium clays. The soils in the north are usually derived from decomposed sandstones while the southern plants soils are usually derived from granites or black basalts. The soils pH ranges from 4pH to 6.5pH. It does not tolerate waterlogged soils. Non saline soils to moderately saline soils are tolerated.
Height & Spread:
Wild Plants: 1m to 4m by 2m to 4m.
Characteristics:
Tylophora woollsii grows as a small wiry stemmed twinning creeper. The stems are pale creamy grey to creamy fawn, furrowed and corky. The young stems are pale grass-green. The stems, petioles and leaves exude a clear watery latex when damaged. The new growth and stems are covered in white, puberulent hairs.
The opposite, ovate to broad ovate leaves of Tylophora woollsii measure 35mm to 80mm in length by 20mm to 55mm in width. The petioles are glabrous and measures 7mm to 20mm in length. The bases are slightly to strongly cordate while the apexes are acuminate with a mucronate tip or acute with a mucronate tip. The discolourous laminas are grass-green to mid blue-green, dull, thin and glabrous on the upper laminas while the lower laminas are paler. The leaf margins are entire, flat to slightly undulating. The laminas are flat but are strongly convex between the main vein and lateral veins. The mid vein and main laterals are prominent on the lower laminas, are sunken and distinctly visible from the upper laminas.
Inflorescences of Tylophora woollsii are born on simple, divaricate umbels from the leaf axils. There are 3 to 8 individual flowers in each umbel. The glabrous peduncles and zig zagging rachises are pale grass-green. The glabrous pedicels are purple to purple-green. The peduncles measure 1mm to 2mm in length while the rachises measure 8mm to 12mm in length and the pedicels measure 2mm to 4mm in length.
The purple-green to maroon-red calyx measures 0.6mm to 0.8mm in length while the calyx lobes measure 1.2mm to 1.6mm in length. The maroon-red to deep purple petals are lanceolate with a narrowly acute apex. The divaricate petals are glabrous. The petals measure 2.5mm to 3mm in length.
The 10 anthers are sessile on the rim of the deep maroon-red to deep purple ovary.
The pale lime green stigma is sessile on the ovary. Tylophora woollsii’s flowers appear from late November through to late April.
The fruits of Tylophora woollsii are slender follicles that are broadest near the base and taper to a fine point at the apex. The have a broad longitudinal furrow running from the base to near the apex. The follicles measure 50mm to 80mm in length by 7mm to 9mm in diameter. The green capsules turn pale grey when ripe.
Wildlife:
Tylophora woollsii’s is unknown to the author.
Cultivation:
Tylophora woollsii is an unusual small twinning creeper that can add interest around the courtyard, small pools and ponds, swimming pool or moist rock garden where there is some shade during the day because of its unusual flowers. It is ideal at the edge of a rainforest. In cultivation it will grow from 1.5 meters to 2 meters in height by 2 meter to 3 meters in width when grown in the open on a trellis or fence or around 2.5 to 3 meters in diameter as a ground cover.
It is best grown where smaller logs or structures are lying around for so it can clamber over them. It can be easily tip pruned to enhance bushiness and a more compact habit.
It is best suited to dryer locations in the garden avoiding areas where water lies or have poor drainage like in depressions and around sullage trenches but don’t plant them in the water. Place it on the upper sections of slopes or on retaining walls.
If it is placed around a pool, courtyards or other confined spaces then plant it in small groups or scatter plant them for a more informal natural look against walls to help soften them. Using rocks and small boulders can make the pool or any water feature appear like an oasis. The leaves and flowers can make a great starter plant whether planted in straight lines along the edge or randomly planted. Use strap leaf plants like Lomandra leucocephala, Lomandra Longifolia or Dianella species to give height to the bed or edge. This is especially true if palms are used along the path as this breaks up the hard vertical hand hard horizontal look giving better balance. Mix them with the other Tylophora species to extend the flowering period and to give some variation in foliage.
It grows exceptionally well on lighter soils where deep leaf litter keeps the soil cool and moisture at an even level. If these requirements are met it can cope with temperatures as low as minus 5 degrees and up to 36 degrees. It is moderately drought resistant once established.
Add to the above, if it is given an adequate supply of water and a little native fertilizer on a regular basis the plants should respond with good flowering and fruit over a long period and it is the flowers that are the main draw card.
Propagation:
Seeds: The seeds of Tylophora woollsii can be removed easily from the fruits.
Sow fresh seeds directly into a seed raising mix, keeping them moist not wet. Do not over water as the seeds will rot off before germination takes place. Place the trays in a cool shaded area with 50mm shade cloth in the bush house. When the seedlings are 20 to 25 mm tall, prick them out and plant them into 50mm native tubes using a good organic mix.
As the seedlings roots reach the bottom of the tubes plant them out into their permanent position. Do not delay.
Fertilize using Seaweed, fish emulsion or organic chicken pellets soaked in water and apply the liquid on an alternate basis. Fertilize every 2 months until the plants are well established then on an annual basis in September or March to maintain good health, vigour and better flowering.
Cuttings:
Fortunately Tylophora woollsii cuttings strike easy. Use 100mm to 150mm long tip cuttings or lateral shoots from the present season’s growth. Take them in warmer months of the year. Remove half the leaves from the bottom section being careful not to tear the bark.
1 Prepare the cutting mix by adding two thirds sharp clean river sand, one third peat or one third perlite. These ingredients must be sterilized,
2 Select good material from non diseased plants,
3 Select semi green stems for cuttings,
4 Place the cutting on a flat, hard surface, and make a clean cut down one side of the cutting at the base for 10mm with a sharp sterile knife or razor blade. – This scarification of the node will increase the chances of roots emerging from this spot. Now remove all but one or two the leaves, leaving the apex leaves in tact. If the leaves are very large in proportion to the stem, cut off the apical halves.
5 Fill a saucer with water, and place a little medium strength rooting hormone into another container like a milk bottle top. Dip the node end of the cutting into the water and then into the rooting hormone. Tap off any excess hormone,
6 Use a small dipple stick or old pencil to poke a hole into the soilless potting mix. Ensure the hole is slightly larger than the stem diameter and be careful not to wipe the rooting hormone off the cuttings base. Place 2 to 4 cuttings in each of the 50mm native tubes,
7 I like to place the tubes in bucket with holes drilled in the bottom to allow excess water to drain out. A plastic bag that fits over the bucket is ideal to help maintain temperature and moisture. Place in a semi shaded, warm position like under 50mm shade cloth.
8 When the cuttings have struck, open the bag to allow air circulation for a few days to a week,
9 Once hardened off remove the cuttings from the bag and allow to further hardening for a few more days to a week,
10 Transplant into a good potting mix to grow on.
Fertilize using seaweed, fish emulsion or organic chicken pellets soaked in water on an alternate basis. Fertilize every two months until the plants are established then twice annually in early September to October to maintain health, vitality and better flowering.
Further Comments from Readers:
“Hi reader, it seems you use The Bible of Botany a lot. That’s great as we have great pleasure in bringing it to you! It’s a little awkward for us to ask, but our first aim is to purchase land approximately 1,600 hectares to link several parcels of N.P. into one at The Pinnacles NSW Australia, but we need your help. We’re not salespeople. We’re amateur botanists who have dedicated over 30 years to saving the environment in a practical way. We depend on donations to reach our goal. If you donate just $5, the price of your coffee this Sunday, We can help to keep the planet alive in a real way and continue to bring you regular updates and features on Australian plants all in one Botanical Bible. Any support is greatly appreciated. Thank you.”
In the spirit of reconciliation we acknowledge the Bundjalung, Gumbaynggirr and Yaegl and all aboriginal nations throughout Australia and their connections to land, sea and community. We pay our respect to their Elders past, present and future for the pleasures we have gained.
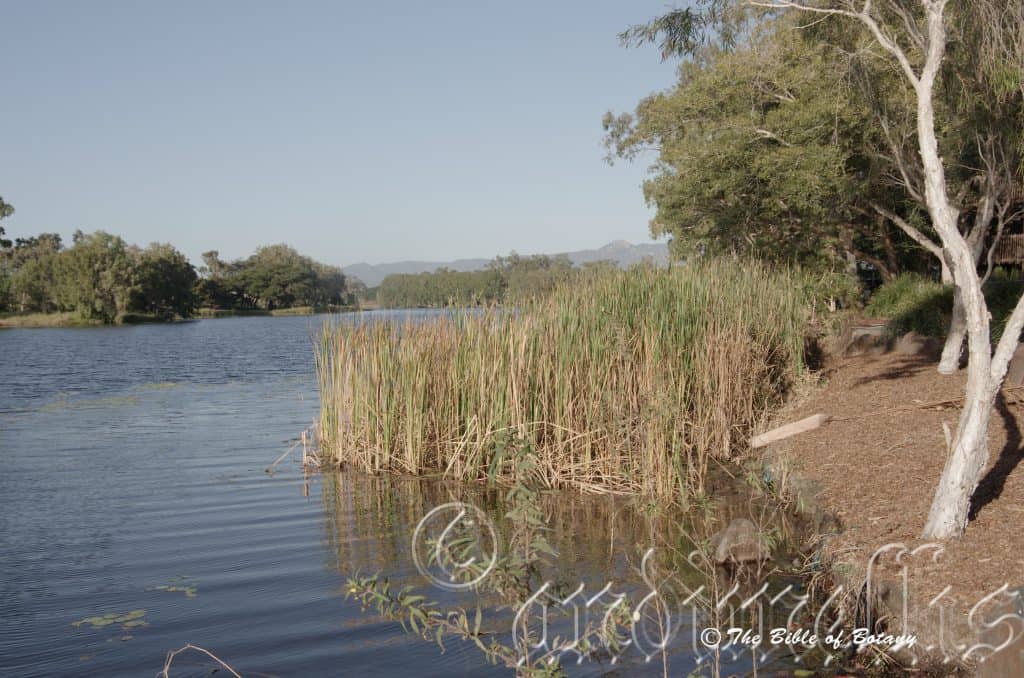
Ross River Thuringowa Qld.
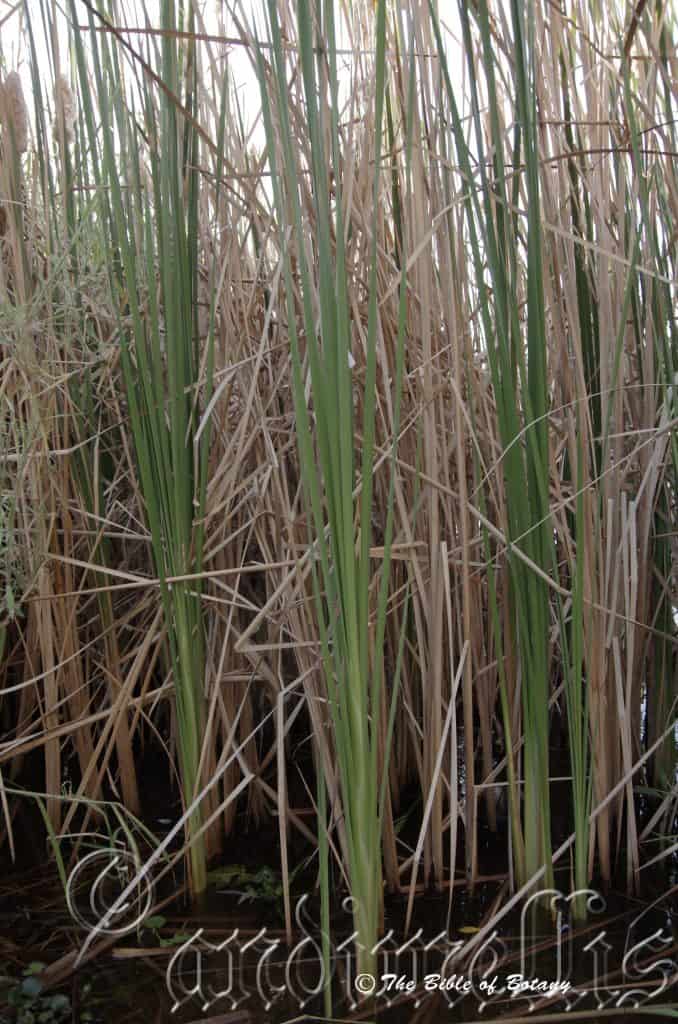
Ross River Thuringowa Qld.
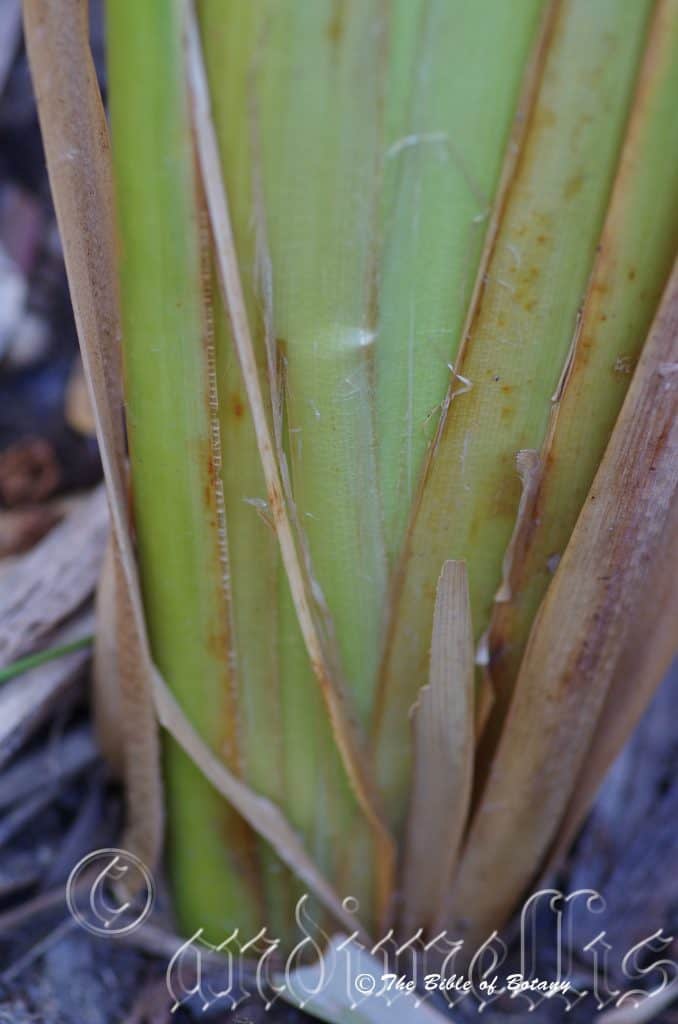
Ross River Thuringowa Qld.
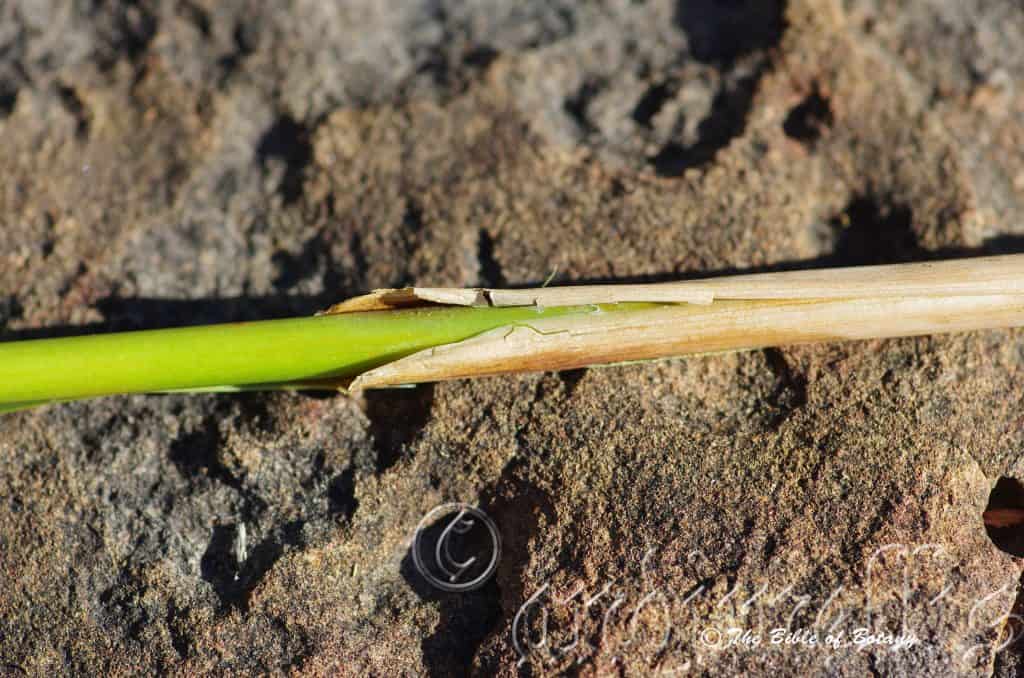
Ross River Thuringowa Qld.
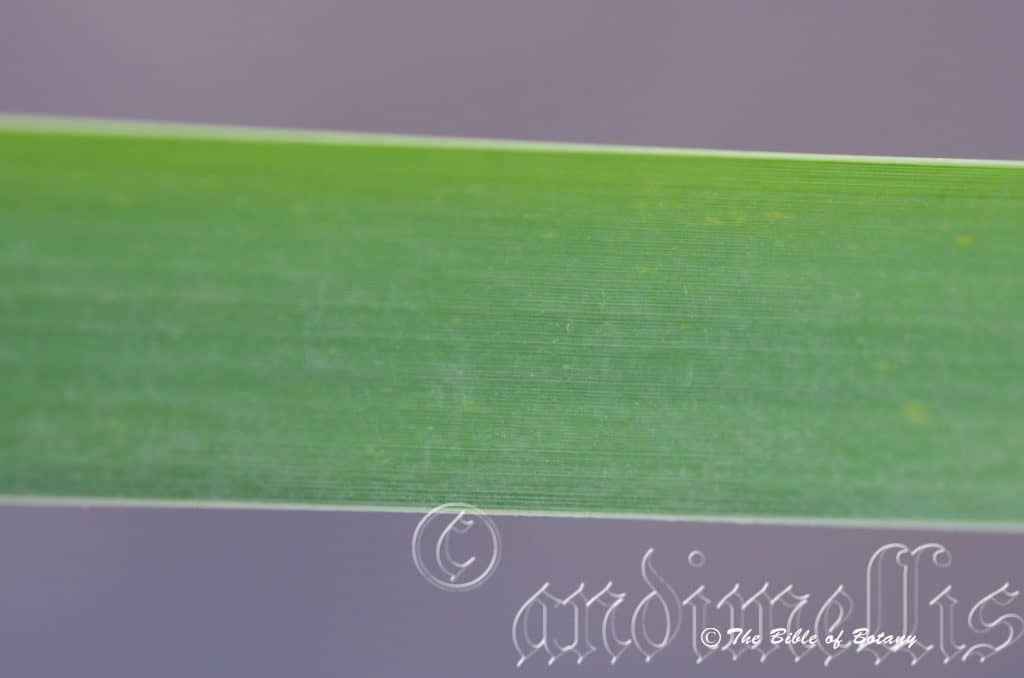
Ross River Thuringowa Qld.
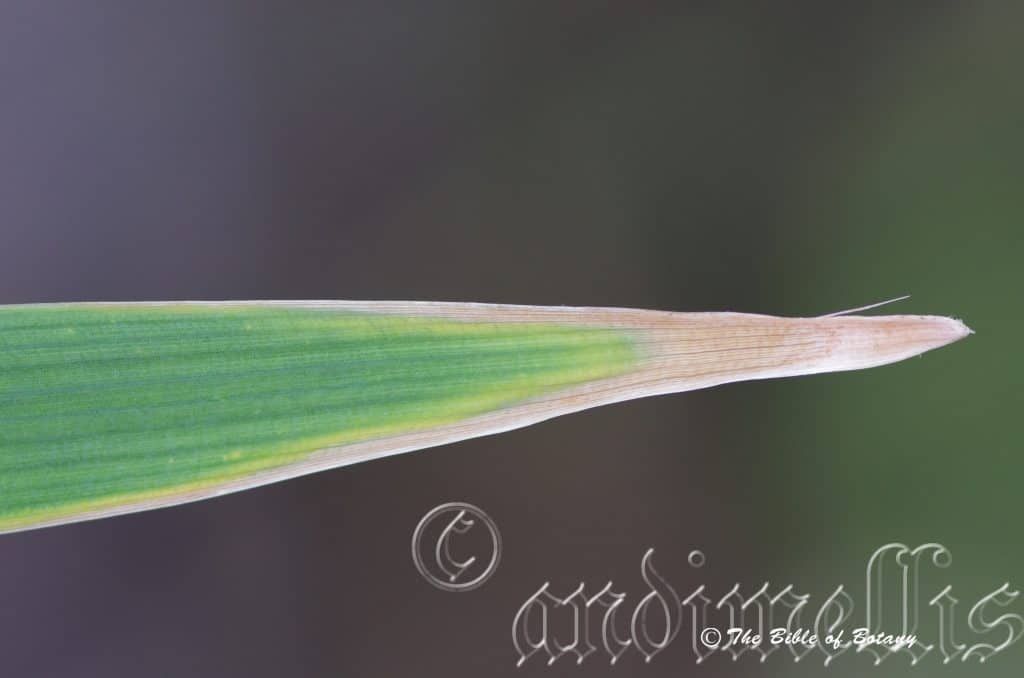
Ross River Thuringowa Qld.
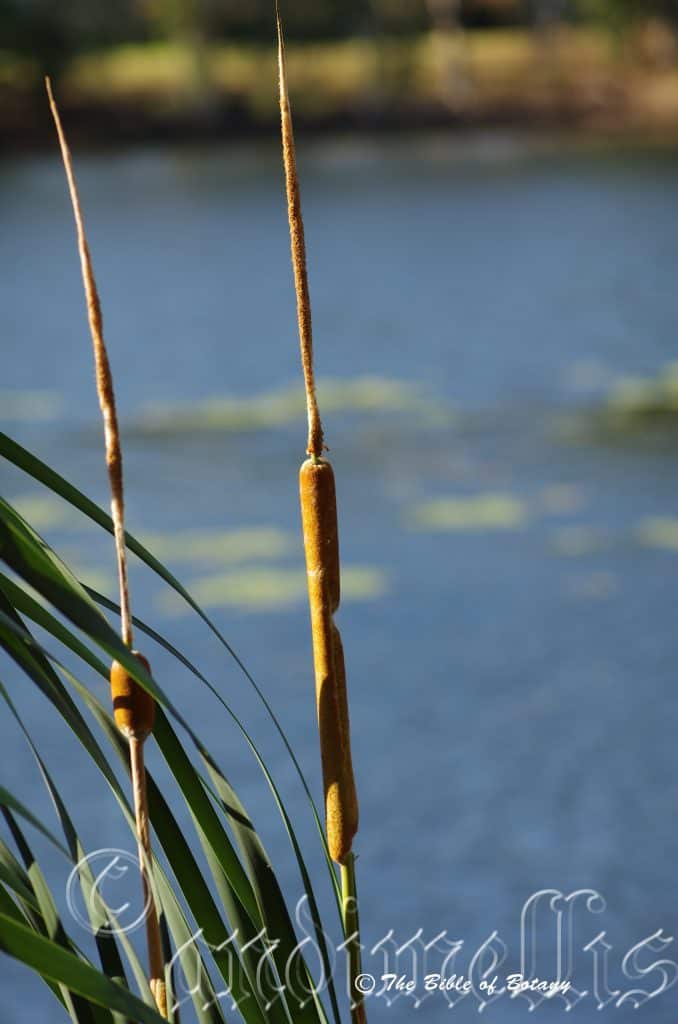
Ross River Thuringowa Qld.
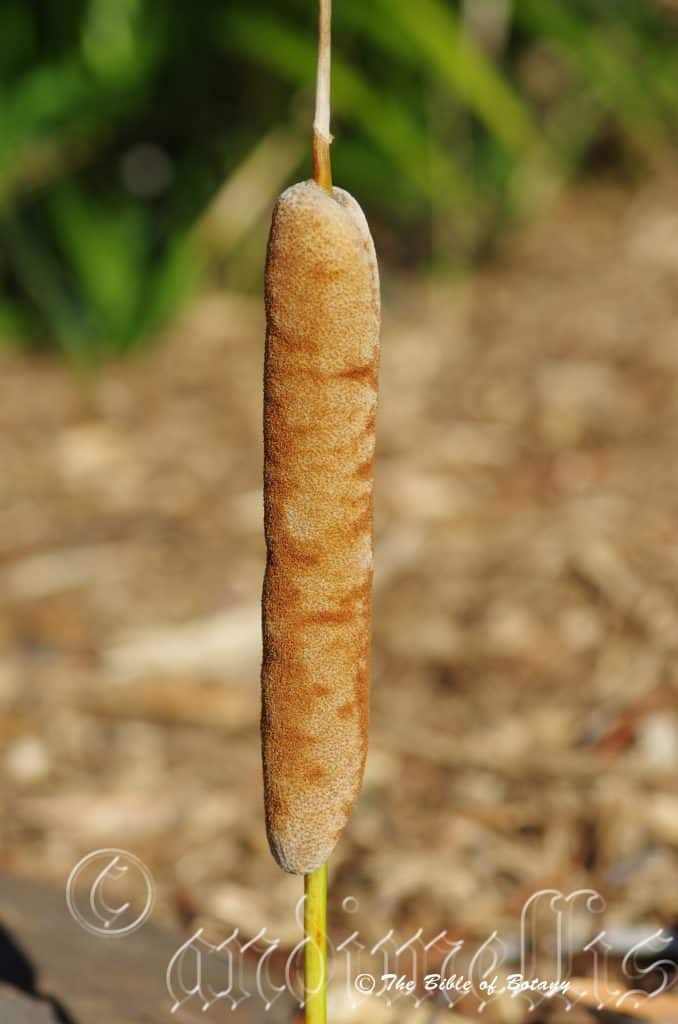
Ross River Thuringowa Qld.
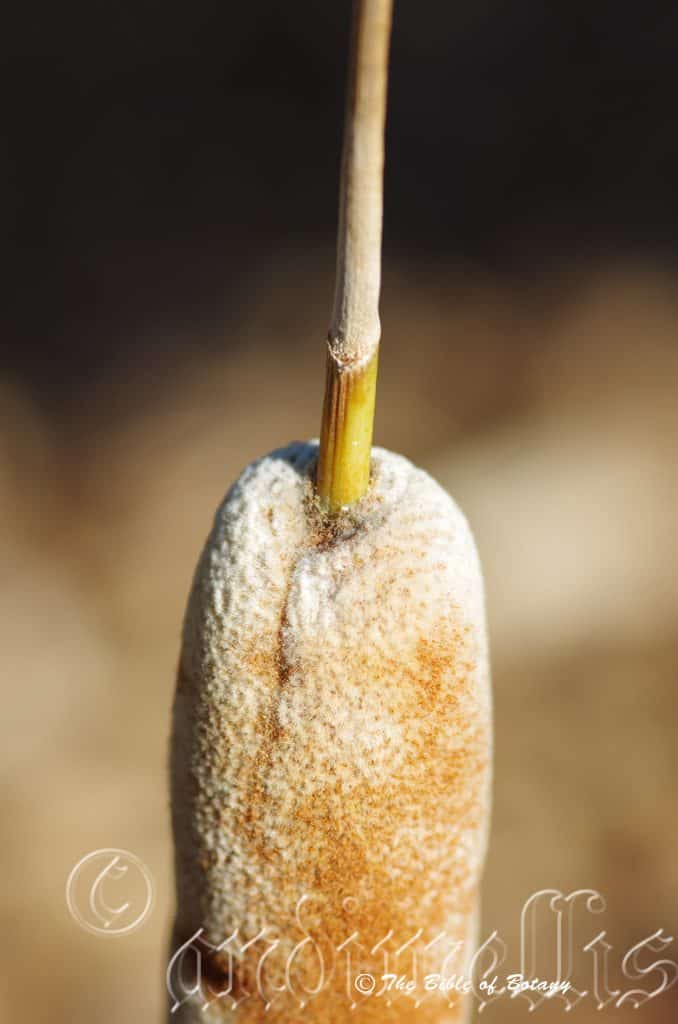
Ross River Thuringowa Qld.
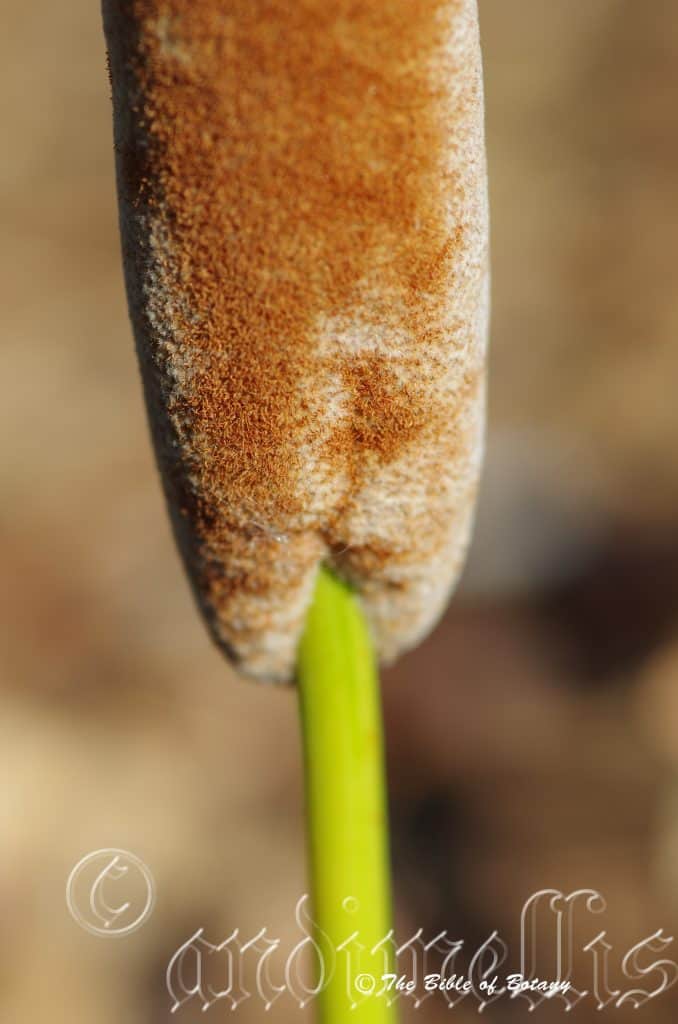
Ross River Thuringowa Qld.
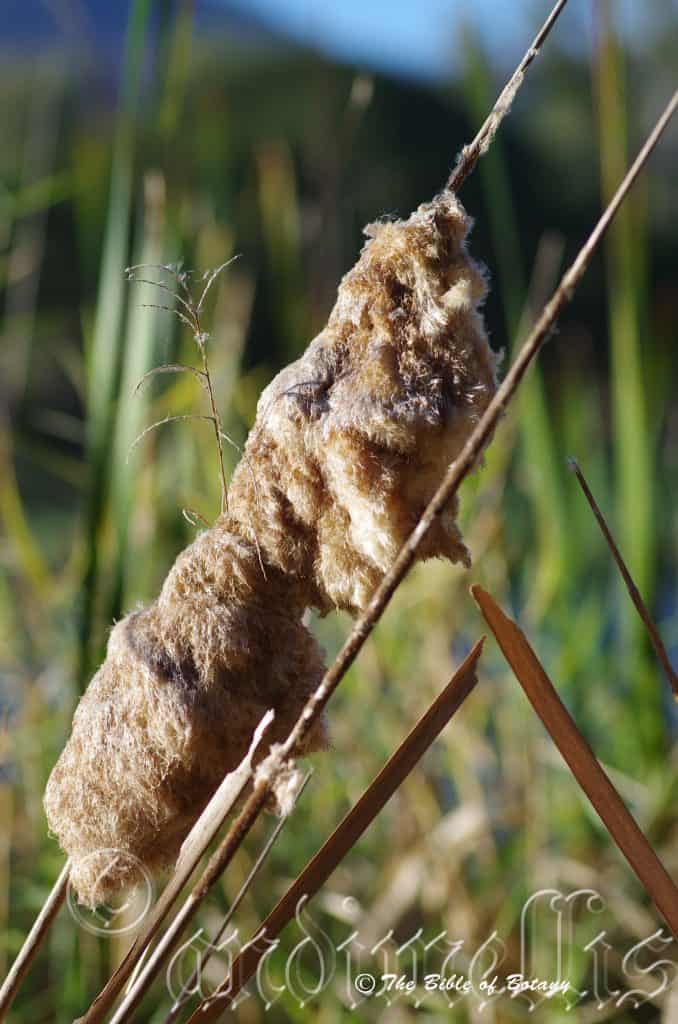
Ross River Thuringowa Qld.
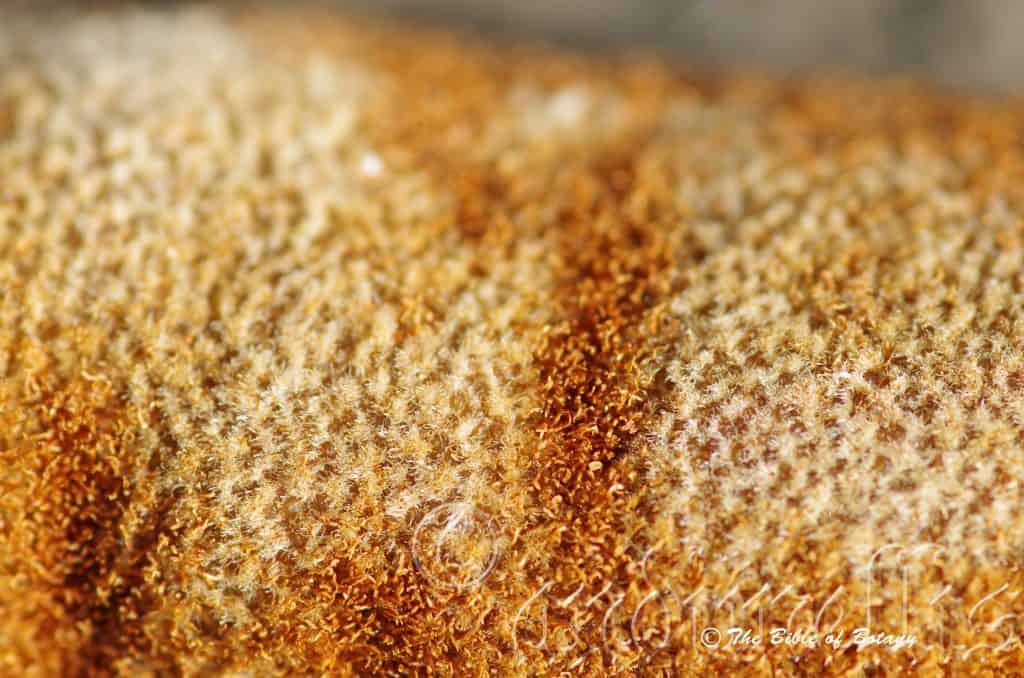
Ross River Thuringowa Qld.
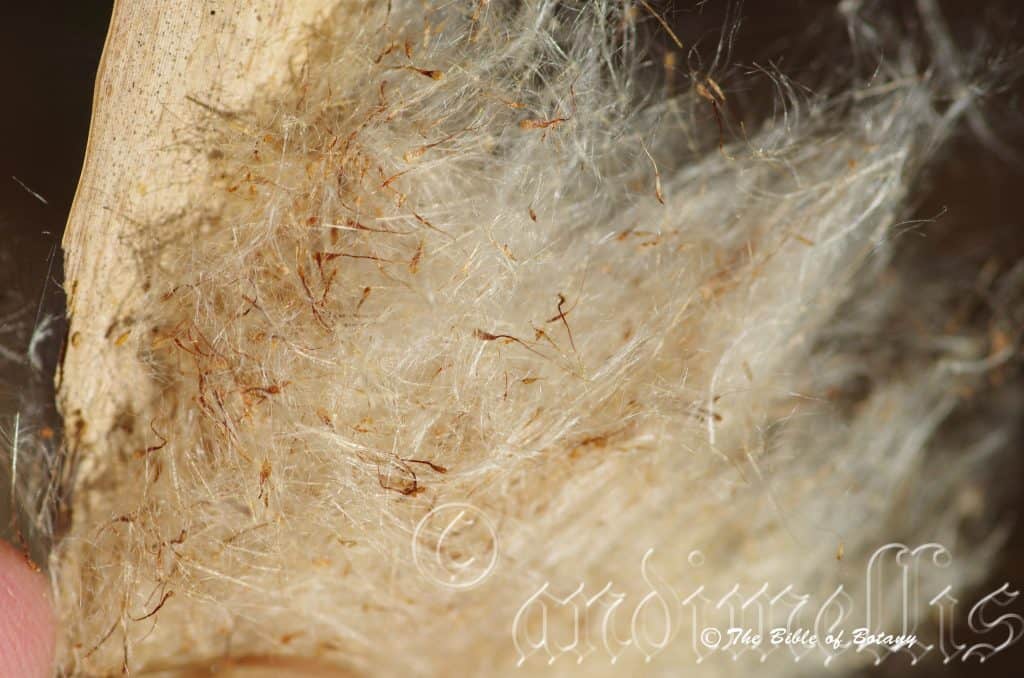
Ross River Thuringowa Qld.
Typha domingensis
Classification:
Unranked: Monocots
Class: Commelinids
Order: Poales
Family: Typhaceae
Genus: From Typha, which is the Ancient Greek name for this plant. It refers to the similarity of the native reeds to those found in Europe.
Specie: From Santo Domingo, which is Latinized for the region in the Carribean Sea and –ēnsis, which is Latin for to originate from. It refers to plants, which were first discovered in the Dominic Republic of Santo Domingo.
Sub specie:
Common Name: Broad Leaf Cumbungi.
In the Wemba Wemba Aboriginal language it is known as Baranyjin, Gumkbung, Cumbunji. In the Cumbungeri nation or Bourt Deet. In the Wurundjer language, or Bunday or Bundulin. In the Gumbaynggirr language around Broom it is known as Yand-yett or yun-jid.
Distribution:
Typha domingensis is found throughout Australia, where ample water exists except the true deserts .
In Tasmania it occurs on the eastern half.
It is also found in Afghanistan, Alabama, Albania, Algeria, Andaman Island, Angola, Argentina Northeast, Argentina Northwest, Argentina South, Arizona, Arkansas, Assam, Azores, Bahamas, Baleares, Bangladesh, Belize, Benin, Bermuda, Bolivia, Botswana, Brazil North, Brazil West-Central, Bulgaria, Burkina, Burundi, California, Canary Island, Cape Verde, Cayman Island, Central African Republic, Chad, China North-Central, China South-Central, China Southeast, Colombia, Colorado, Congo, Corse, Costa Rica, Cuba, Cyprus, Delaware, Djibouti, Dominican Republic, East Aegean Island, Ecuador, Egypt, Eritrea, Ethiopia, Fiji, Florida, France, French Guiana, Gabon, Gambia, Georgia, Ghana, Greece, Guinea, Guinea-Bissau, Guyana, Haiti, Honduras, Illinois, India, Inner Mongolia, Iran, Iraq, Italy, Ivory Coast, Jamaica, Japan, Jawa, Kansas, Kazakhstan, Kentucky, Kenya, Kirgizstan, Korea, Kriti, Krym, Lebanon-Syria, Leeward Island, Lesser Sunda Island, Libya, Louisiana, Malawi, Malaya, Mali, Manchuria, Maryland, Mauritania, Mauritius, Mexico Central, Mexico Gulf, Mexico Northeast, Mexico Northwest, Mexico Southeast, Mexico Southwest, Mississippi, Missouri, Mongolia, Morocco, Mozambique, Myanmar, Nansei-shoto, Nebraska, Nepal, Netherlands Antilles, Nevada, New Caledonia, New Guinea, New MexicoNiger, Nigeria, Norfolk Island, North Carolina, North Caucasus, Oklahoma, Oman, Pakistan, Palestine, Papua, Paraguay, Peru, Philippines, Philippines, Portugal, Primorye, Puerto Rico, Romania, Rwanda, Réunion, Sardegna, Saudi Arabia, Senegal, Seychelles, Sicilia, Sinai, Society Island, Somalia, South Carolina, South European Russi, Southwest Caribbean, Spain, Sri Lanka, Sudan, Sumatera, Suriname, Tadzhikistan, Taiwan, Tanzania, Texas, Thailand, Togo, Transcaucasus, Trinidad-Tobago, Tunisia, Turkey, Turkey-in-Europe, Uganda, Ukraine, Uruguay, Utah, Uzbekistan, Venezuela, Venezuelan Antilles, Vietnam, Virginia, Wyoming, Xinjiang, Yemen, Yugoslavia, Zambia and Zaïre.
https://avh.ala.org.au/occurrences/search?taxa=Typha+domingensis#tab_mapView
Habitat Aspect Climate:
Typha domingensis prefers dappled light dappled shade to full sun. It; grows in and adjacent to swamps, lakes, billabongs, creeks, streams drainage channels and soaks. It has become a source of frustration for many farmers in many irrigation channels. The altitude ranges from 5 meters ASL to 1000 meters ASL.
The temperatures range from minus 2 degrees in July to 42 degrees in January.
The rainfall ranges from lows of 400mm to 3200mm average per annum however permanent ground water is more important.
Soil Requirements:
Typha domingensis prefer poor to better quality light sands, loams to medium clays. The soils are usually derived from decomposed sandstones, granites, basalts, alluvial deposits or accumulated beach sands. The soils pH ranges from 4pH to 7.5pH. It tolerates waterlogged soils. Non saline soils to very saline soils are tolerated.
Using my father’s refinery litmus test papers; without his knowledge of course, I was always intrigued and disappointed to note that the papers colour never changed significantly as it did on toothpaste, apple juice or vinegar from mums kitchen cupboards. To me now, it has a significant meaning as it means the water and soil within the swamp where I once played was only slightly acidic.
Height & Spread:
Wild Plants: 1m to 2.5m by 0.3m to 0.4m.
Characteristics:
Typha domingensis grows as a robust, emergent aquatic perennial with rhizomes to20mm in diameter. The stems are multi nodded to 20mm in diameter. The leaf sheaths measure 300mm to 400mm in length. The upper leaf sheaths are auriculate.
The long linear leaves measure 1200mm to 2000mm in length by 8mm to 20mm in width. The bases sheathed while the apexes are acute. The concolourous laminas are mid blue-green to mid grey-green, dull, thin and glabrous. The laminas are flat while the margins are entire. The mid vein and 2 to 4 parallel veins are faintly prominent or faintly visible from the lower lamina. The laminas are separated by a thin honeycombed network. The upper leaves with sheath not auriculate except for the apical 1 or 2 leaves that may be distinctly auriculate.
The monoecious inflorescences are born on long crowded racemes. The male and female inflorescences are usually segregated on the spike with a gap ranging from 2mm to 30mm in length. The male flowers are on the apical section while the female flowers being on the basal section. The inflorescences measure 300mm to 500mm in length.
The male spikes measure 150mm to 350mm in length by 6mm to 10mm in diameter. The 1 to 3 anthers shed their pale yellow pollen in massive creamy clouds.
The female spikes measure 120mm to 400mm in length by 15mm to 20mm in diameter. The deep chestnut-brown inflorescence split to release white floccose covered seeds. The flowers appear from late November to March.
The fruits are slender fusiform grains. The grains bases are cuneate while the apexes are truncate. The pale yellow pollen grains are shed singularly.
Confusing Species:
The only accurate differentiation between these two species requires microscopic examination of female flowers. The differences below are to be taken as a guide only.
Typha orientalis has inflorescences with male and female spikes separated by 0–50mm. Inflorescences are chestnut brown. The plants grow 2 to 4 meters in height, while the female spike is generally not separated from the males spike and have few bracts. The stigmas narrowly ovate; leaves blueish-green and measure 10mm to 32mm in width.
Typha domingensis has inflorescences, which are cinnamon brown and separated between 5mm and 50mm. It is found in more hostile environments including semi desert areas and where more saline conditions prevail. The plants grow 1 to 2.5 meters in height, while the female spike has numerous bracts chestnut-brown with few bracts. The stigmas are linear, while the green leaves measure 8mm to 20mm in width.
Wildlife:
Typha domingensis is very diverse and it is a crucial plant in its environment for bird, frog, fish and insect habitat as well as a major soil binder against erosion.
The seeds are eaten by waterfowl and the roots are eaten by many native rats. The edges are used for nesting by ducks and grebes while the interior is favourite nesting habitats for reed warblers and wrens.
To me as a child the now Seaford Wetlands were a menagerie to behold on my doorstep, for here I found the nests, eggs and young of the Australian reed Warbler (Acrocephalus australis), the Black Duck (Anas superciliosa), the Black Swan (Cygnus atratus), the Blue Wren (Malurus cyaneus), the Royal Spoonbill (Platalea regia), the Yellow-billed Spoonbill (Platalea flavipes) in surrounding trees, the Little Grebe (Tachybaptus ruficollis), the Purple Swamphen (Porphyrio porphyrio), and the Spur–winged Plover (Vanellus spinosus) on drier ground were just a few of the treasures that awaited me on a seasonal basis.
The rushes provide nesting material for birds like the Black Swan (Cygnus atratus), nesting sites for many swamp inhabiting birds like the Australian Reed Warbler (Acrocephalus australis) and Black Duck (Anas superciliosa)
Typha domingensis roots were eaten by aborigines and have a sweet taste a little reminiscent of bamboo and sugar cane. I would be reluctant to eat a lot these days with water pollution as the roots may cause accumulated toxicities especially those plants grown around the cities.
It has been found in several studies worldwide that Typha domingensis and Sorghum Arundinaceum planted together are excellent Phytoremediaters and can remove up to 95mm of nitrates, Phosphates, potassium, copper, chrome, lead, cadmium and zinc from water, mud and silts. This makes the two plants very good photochemical accumulators which has a future in sewerage treatment plants, water purification plants associated with factories and waterways. The interesting aspect in nature is that the plants collect the heavy metals and store them in their roots and rhizomes more than in the leaves. As it is the leaves and stems that are consumed by most insects fish, birds and frogs meaning that once the chemicals have been concentrated it is less likely to be available for bio transport through the food chain. It was further shown by http://www.irjaes.com/pdf/V3N1Y17-IRJAES/IRJAES-V3N1P644Y18.pdf that lead increased in the leaves when the lead was at very high levels in laboratory experiments.
Cultivation:
Typha domingensis is a large native rush that is frequently overlooked by gardeners, with large wet areas in larger gardens, because of its strong form and their is a preconception that it looks weedy and will outgrow everything else in the garden. It is suitable for large sunny gardens close to the coast or inland in temperate subtropical areas, tropical or semi-arid zones especially where the soils have poor drainage or are continually waterlogged. As garden subjects it grows very erect and rigid. It grows from 2 meter to 4 meters in height by 0.6 meters to 1 meter in diameter when grown in the open. Typha domingensis has a tendency to send out more ramets (daughter culms) at an earlier stage of development when the plants are less than a meter in height thus securing a larger diameter in the first year then consolidating in the second year.
It is fast growing and is cold tolerant to temperatures as low as minus 4 degrees once established though some burning will occur. If this were to happen, cut the plants back to just above the rhizomes. Fertilize with a full strength fertilizer in early spring following the last frosts if it is not standing in permanent water. It recovers very quickly to their former beauty.
It is not suitable for use around swimming pools, bright courtyards, because of the pollen and seeding habits where large amounts of pollen are produced along with large quantities of white floccose hairs.
Imagine a large flat area of land with a dam or creek dotted with Typha domingensis on the edges. Between them, covering the ground; are smaller Juncus specie, ground hugging Hibbertia scandens and Grevillea masonii on the bank with their different textured leaves, yellow, red and orange flowers. This would give a horizontal landscape a look of greater expansiveness.
Propagation:
Seeds: The seeds are easy to collect as soon as the female inflorescences begin to break down and display the floccose hairs. The seeds can be sown with the hairs directly into a seed raising mix. Pat them down on the surface and keep them moist by placing the trays into a larger tray full of water. Place the tray in a warm sunny position. When the seedlings are 20mm to 30mm tall, prick them out and plant them into 50mm native tubes using a good organic mix. Again place the tubes into a tray of water so they do not dry out.
Once the seedlings reach 100mm to 150mm in height they can be planted out into their permanent position.
Division: When growing from divisions remove the plant from the pot and just cut it into 3 or 4 equal parts, first down the middle then halve those sections again. If the plants are growing in the open take the shovel and dig it in behind the last cane and 100mm in front of the new cane and lift it from the mud or silt. Remove unwanted dead leaves and any old small clumps that look weak or dead. Plants can be divided further but ensure each division has 1 or 2 growing shoots or eyes and healthy roots attached to the tuff. Replant ensuring the soil is at the same level as before. Water and fertilize. New shoots will appear within two weeks.
Fertilize using seaweed, fish emulsion or organic chicken pellets soaked in water on an alternate basis. Fertilize plants on planting out then annually in the warmer months to maintain better colour, health, vitality and flowering.
Further Comments from Readers:
“Hi reader, it seems you use The Bible of Botany a lot. That’s great as we have great pleasure in bringing it to you! It’s a little awkward for us to ask, but our first aim is to purchase land approximately 1,600 hectares to link several parcels of N.P. into one at The Pinnacles NSW Australia, but we need your help. We’re not salespeople. We’re amateur botanists who have dedicated over 30 years to saving the environment in a practical way. We depend on donations to reach our goal. If you donate just $5, the price of your coffee this Sunday, We can help to keep the planet alive in a real way and continue to bring you regular updates and features on Australian plants all in one Botanical Bible. Any support is greatly appreciated. Thank you.”
In the spirit of reconciliation we acknowledge the Bundjalung, Gumbaynggirr and Yaegl and all aboriginal nations throughout Australia and their connections to land, sea and community. We pay our respect to their Elders past, present and future for the pleasures we have gained.
Typha orientalis
Classification:
Unranked: Monocots
Class: Commelinids
Order: Poales
Family: Typhaceae
Genus: From Typha, which is the Ancient Greek name for this plant. It refers to the similar reeds in Europe.
Specie: From Orientalis, which is Latin for the oriental or eastern. It refers to plants, which were first discovered in the east or the orient.
Sub specie:
Common Name: Broad Leaf Cumbungi.
In the Wemba Wemba Aboriginal language it is known as Baranyjin, Gumkbung, Cumbunji in the Cumbungeri nation or Bourt Deet in the Wurundjer language, or Bunday or Bundulin in the Gumbaynggirr language around Broom it is known as Yand-yett or yun-jid.
Distribution:
Typha orientalis is found along the coast and off shore islands across the top end of Australia and down the east coast to Maryborough.
Further south it is found east of a line to near Mildura and along the Murray River into South Australia to Kangaroo Island and southern Eyre Peninsula.
It is also found on King Island and the eastern side of Tasmania.
In Western Australia it is found in the south west corner from the Swan River Plain to near Albany.
It is also found throughout China, Inner Mongolia, Japan, Kermadec Islands, Korea, Manchuria, Mongolia, Myanmar, throughout New Zealand, Norfolk Island, Papua, Philippines, Sakhalin and Taiwan. It is interesting that it is not found in the areas and island between Asia and Australia.
https://avh.ala.org.au/occurrences/search?taxa=Typha+orientalis#tab_mapView
Habitat Aspect Climate:
Typha orientalis prefers dappled light dappled shade to full sun. It; grows in and adjacent to swamps, lakes, billabongs, creeks, streams drainage channels and has become a source of frustration for many farmers in many irrigation channels. The altitude ranges from 5 meters ASL to 1000 meters ASL.
The temperatures range from minus 2 degrees in July to 40 degrees in January.
The rainfall ranges from lows of 400mm to 3200mm average per annum.
Soil Requirements:
Typha orientalis prefer poor to better quality light sands, loams to medium clays and fine to course silts. The soils are usually derived from decomposed sandstones, granites, basalts, alluvial deposits or accumulated beach sands. The soils pH ranges from 6pH to 7.5pH. It tolerates waterlogged soils. Non saline soils to very saline soils are tolerated.
Using my father’s refinery litmus test papers; without his knowledge of course, I was always intrigued and disappointed to note that the papers colour never changed significantly in the marshes and pulp from the culms, as it did on toothpaste, apple juice or vinegar from mums kitchen cupboards. To me now, it has a significant meaning as it means the water and soil within the swamp where I once played as a child was only very slightly acid (Now protected as the Seaford Wetlands).
Height & Spread:
Wild Plants: 2m to 4m by 0.3m to 0.4m.
Characteristics:
It grows as a robust, emergent aquatic perennial with rhizomes to 20mm in diameter. The stems are multi nodded to 20mm in diameter. The leaf sheaths measure 300mm to 400mm in length. The upper leaf sheaths are auriculate.
The long, linear leaves measure 1200mm to 2000mm in length by 20mm to 32mm in width. The bases sheathed while the apexes are acute. The concolourous laminas are mid blue-green to mid grey-green, dull, thin and glabrous. The laminas are flat while the margins are entire. The mid vein and 2 to 4 parallel veins are faintly prominent or faintly visible from the lower lamina. The laminas are separated by a thin honeycombed network.
The monoecious inflorescences are born on long crowded racemes. The male and female inflorescences are usually segregated on the spike with a gap ranging from 2mm to 30mm in length. The male flowers are on the apical section while the female flowers being on the basal section. The inflorescences measure 300mm to 500mm in length.
The male spikes measure 100mm to 300mm in length by 5mm to 15mm in diameter. The 1 to 3 anthers shed their pale yellow pollen in massive creamy clouds.
The female spikes measure 80mm to 280mm in length by 15mm to 28mm in diameter. The deep chestnut-brown inflorescence split to release white floccose covered seeds. The flowers appear from late November to March.
The fruits are slender fusiform grains. The grains bases are cuneate while the apexes are truncate. The pale yellow grains measure 1mm to 1.2mm in length.
Confusing Species:
The only accurate differentiation between these two species requires microscopic examination of female flowers. The differences below are to be taken as a guide only.
Typha orientalis has inflorescences with male and female spikes separated by 0–50mm space. Inflorescences are chestnut brown. The plants grow 2 to 4 meters in height, while the female spike is generally not separated from the males spike and have few bracts. The stigmas narrowly ovate; leaves bluish-green and measure 10mm to 32mm in width.
Typha domingensis has inflorescences, which are cinnamon brown and separated between 5mm and 50mm. It is found in more hostile environments including semi desert areas and where more saline conditions prevail. The plants grow 1 to 2.5 meters in height, while the female spike has numerous bracts chestnut-brown with few bracts. The stigmas are linear while the green leaves measure 8mm to 20mm in width.
Wildlife:
Typha orientalis’s is very diverse and it is a crucial plant in its environment for bird, frog, fish and insect habitat as well as a major soil binder against erosion.
The seeds are eaten by waterfowl and the roots are eaten by many native rats. The edges are used for nesting by ducks and grebes while the interior is favourite nesting habitats for reed warblers and wrens.
To me as a child the now Seaford Wetlands were a menagerie to behold on my doorstep, for here I found the nests, eggs and young of the Australian reed Warbler Acrocephalus australis, the Black Duck Anas superciliosa, the Black Swan Cygnus atratus, the Blue Wren Malurus cyaneus, the Royal Spoonbill Platalea regia, the Yellow-billed Spoonbill Platalea flavipes in surrounding trees, the Little Grebe Tachybaptus ruficollis, the Purple Swamphen Porphyrio porphyrio, and the Spur–winged Plover Vanellus spinosus) on drier ground were just a few of the treasures that awaited me on a seasonal basis.
The rushes provide nesting material for birds like the Black Swan Cygnus atratus, nesting sites for many swamp inhabiting birds like the Australian Reed Warbler Acrocephalus australis nests were lined with the soft down surrounding the seeds and Black Duck Anas superciliosa.
Typha orientalis roots were eaten by aborigines and have a sweet taste a little reminiscent of bamboo and sugar cane without the sweetness. I would be reluctant to eat a lot these days with water pollution as the roots may cause accumulated toxicities especially those plants grown around the cities.
It has been found in several studies worldwide that Typha Orientalis and Sorghum Arundinaceum planted together are excellent Phytoremediaters and can remove up to 95mm of nitrates, Phosphates, potassium, copper, chrome, lead, cadmium and zinc from water, mud and silts. This makes the two plants very good photochemical accumulators which has a future in sewerage treatment plants, water purification plants associated with factories and waterways. The interesting aspect in nature is that the plants collect the heavy metals and store them in their roots and rhizomes more than in the leaves. As it is the leaves and stems that are consumed by most insects fish, birds and frogs means that once the chemicals have been concentrated it is less likely to be available for bio transport through the food chain. It was further shown by http://www.irjaes.com/pdf/V3N1Y17-IRJAES/IRJAES-V3N1P644Y18.pdf that lead increased in the leaves when the lead was at very high levels in laboratory experiments.
Cultivation:
Typha orientalis is a large native rush that is frequently overlooked by gardeners because of its strong form and preconception that it looks weedy and will outgrow everything else in the garden. It is suitable for large sunny gardens close to the coast or inland in temperate subtropical areas, tropical or semi-arid zones especially where the soils have poor drainage and are continually waterlogged. As garden subjects it grows very erect and rigid. It grows from 2 meter to 4 meters in height by 0.6 meters to 1 meter in diameter when grown in the open. Typha orientalis has a tendency to send out more ramets (daughter culms) at an earlier stage of development when the plants are less than a meter in height thus securing a larger diameter in the first year then consolidating in the second year.
It is fast growing and is cold tolerant to temperatures as low as minus 4 degrees once established though some burning will occur. If this was to happen, cut the plants back to just above the rhizomes. Fertilize with a full strength fertilizer in early spring following the last frosts if it is not standing in permanent water. It recovers very quickly to their former beauty.
It is not suitable for use around swimming pools, bright courtyards, because of the pollen and seeding habits where large amounts of pollen are produced along with large quantities of white floccose hairs. Mass plantings of 5 or more plants really do the plants justification in large areas especially when it is in flower and pre seed dispersal.
Imagine a large flat area of land with a dam or creek dotted with Typha orientalis. Between them, covering the ground; are smaller Juncus specie, ground hugging Hibbertia scandens and Grevillea masonii on the bank with their different textured leaves, yellow, red and orange flowers. This would give a horizontal landscape a look of greater expansiveness.
Propagation:
Seeds: The seeds are easy to collect as soon as the female inflorescences begin to break down and display the floccose hairs. The seeds can be sown with the hairs directly into a seed raising mix. Pat them down on the surface and keep them moist by placing the trays into a larger tray full of water. Place the tray in a warm sunny position. When the seedlings are 20mm to 30mm tall, prick them out and plant them into 50mm native tubes using a good organic mix. Again place the tubes into a tray of water so they do not dry out.
Once the seedlings reach 100mm to 150mm in height they can be planted out into their permanent position.
Division: When growing from divisions remove the plant from the pot and just cut it into 3 or 4 equal parts, first down the middle then halve those sections again. If the plants are growing in the open take the shovel and dig it in behind the last cane and 100mm in front of the new cane and lift it from the mud or silt. Remove unwanted dead leaves and any old small clumps that look weak or dead. Plants can be divided further but ensure each division has 1 or 2 growing shoots or eyes and healthy roots attached to the tuff. Replant ensuring the soil is at the same level as before. Water and fertilize. New shoots will appear within two weeks.
Fertilize using seaweed, fish emulsion or organic chicken pellets soaked in water on an alternate basis. Fertilize on planting out then in the warmer months to maintain better colour, health, vitality and flowering.
Further Comments from Readers:
“Hi reader, it seems you use The Bible of Botany a lot. That’s great as we have great pleasure in bringing it to you! It’s a little awkward for us to ask, but our first aim is to purchase land approximately 1,600 hectares to link several parcels of N.P. into one at The Pinnacles NSW Australia, but we need your help. We’re not salespeople. We’re amateur botanists who have dedicated over 30 years to saving the environment in a practical way. We depend on donations to reach our goal. If you donate just $5, the price of your coffee this Sunday, We can help to keep the planet alive in a real way and continue to bring you regular updates and features on Australian plants all in one Botanical Bible. Any support is greatly appreciated. Thank you.”
In the spirit of reconciliation we acknowledge the Bundjalung, Gumbaynggirr and Yaegl and all aboriginal nations throughout Australia and their connections to land, sea and community. We pay our respect to their Elders past, present and future for the pleasures we have gained.
Typhonium brownii
Classification:
Class: Monocots
Order: Alismatales
Family: Araceae
Subfamily: Aroideae
Tribe: Areae
Genus: From Typhonium, which is the Latin for smoky and dull. It refers to the flowers of some species, which are a dull smoky colour.
Specie: Is named in honour of Robert Brown; 1773-1858, who was a naturalist who sailed with Mathew Flinders when he circumnavigated Australia and became South Australia’s first botanical collector.
Sub specie:
Common Name: Black Lily.
Distribution:
Typhonium brownii is found south from the Torres Strait Islands in far north Queensland to near Menangle in central coastal New South Wales. It is found on and east of the Great Dividing Range to the coast.
https://avh.ala.org.au/occurrences/search?taxa=Tylphonium+brownii#tab_mapView
Habitat Aspect Climate:
Typhonium brownii prefers dense shade to dappled shade. It grows in cool moist tropical rainforest margins, cool moist tropical subtropical rainforest margins, warm, moist, temperate rainforest margins in moist gallery forests or along creek and stream riparian zones. The altitude ranges from 20 meters ASL to 900 meters ASL.
The temperatures range from 2 degrees in July to 36 degrees in January.
The rainfall ranges from lows of 950mm to 3200mm average per annum.
Soil Requirements:
Typhonium brownii prefers better quality light sandy loams, light fatty clays, light silts to heavy silts. The soils are usually derived from decomposed sandstones, granites, black basalts, accumulated creek or stream sediments or at times alluvial deposits. The soils pH ranges from 4.5pH to 6.5pH. It does not tolerate waterlogged soils however seasonal inundations or flooding for short periods are tolerated. Non saline soils to moderately saline soils are tolerated.
Height & Spread:
Wild Plants: 0.3m to 0.6m by 0.3m to 0.6m.
Characteristics:
Typhonium brownii grows as a perennial herb with deciduous leaves and stems. The creeping, brownish rhizomes proliferate to form many quiescence buds and new rhizomes. The rhizomes measure 25mm to 150mm in length by 20mm to 30mm in diameter.
The hastate or ternatifid leaves have anterior lobes. The juvenile leaves are cordate and measure 30mm to 40mm in length by 25mm to 35mm in width and quickly develop into the adult leaves. The leaves of Typhonia brownii measure 100mm to 230mm in length by 60mm to 130mm in width. The narrow oblong posterior lobes measure 100mm to 120mm in length by 40mm to 50mm in width. The glabrous, grass-green to deep green, fleshy petioles usually measure 100mm to 300mm in length but can reach 700mm in length by 7mm to 15mm in diameter. The bases are slightly to strongly cordate while the apexes are long acuminate to caudate-acuminate. The discolourous laminas are grass-green to deep green, dull to semi glossy, thin and glabrous on the upper laminas while the lower laminas are slightly paler. The laminas recurve upwards from the mid vein to the margins and decurve downwards near the apex. The margins are entire and strongly undulate. The laminas are flat but are strongly convex between the main vein and lateral veins. The obtuse mid vein on each leaflet is strongly prominent on the lower lamina while the 4 to 8 lateral veins are sunken and distinctly visible from the upper lamina as is the mid vein.
The inflorescence or inflorescences rise directly from the underground rhizomes one at a time. The glabrous, slender, grass green to mid green peduncle is erect and measure 10mm to 40mm in length above the ground. The broad ovate spathe is convolute and measures 100mm to 200mm in length by 30mm to 40mm in diameter. The deep maroon spathe gradually turns to grass-green on the basal section where it is constricted before it forms an ovoidal to globose, sterile interstice area that surrounds the placenta. The chamber measures 16mm to 18mm in length by 18mm to 20mm in diameter. The apex of the spathe is long acuminate often forming a long tapering appendage.
The spadix is shorter than the spathe and measures 50mm to 80mm in length. Thebasal gynoecium measures 10mm to 20mm in length by 6.5mm to 8mm in diameter followed by a 5mm to 8mm long by 20mm to 24mm wide filiform sterile organs. Above this is a bare part of the raceme that measures 20mm to 30mm in length by 1.5mm to 2mm in diameter while the androecium measures 10mm to 15mm by 4mm to 5.5mm in diameter then a deep maroon conical, truncate base appendage. This appendage is presently being tested for insect attracting pheromones by the author. The fecal smelling flowers appear from late December to late February.
The fruits are produced along the spadix as berries. The spathe is persistent around the ripe fruits. The berries measure 11mm to 13mm in length by 9mm to 11mm in diameter. The berries turn reddish when ripe.
Confusing Species:
Typhonium brownii’s posterior leaflets measure 100mm to 120mm in length by 40mm to 60mm in width. The spathe measures 120mm to 135mm in length while the chamber below measures 16mm to 18mm in length by 18mm to 20mm in diameter.
Typhonium sp. aff. brownii is a rare plant only found in the Glenreagh area. It has suffered massively from over development, habitat destruction and poaching. Its posterior leaflets measure 50mm to 60mm in length by 15mm to 18mm in width. The spathe measures 120mm to 135mm in length while the chamber below measures 30mm to 35mm in length by 30mm to 35mm in diameter.
The spadix is as long as the spathe and measures 120mm to 135mm in length. The basal gynoecium measures about 7mm in length followed by a 5mm long filiform sterile organs. Above this is a bare part of the raceme that measure about 20mm while the androecium measures about 20mm by about 8mm in diameter. The appendage is not mentioned.
The above figures for Typhonium sp. aff. Brownii have been secured from the following web site as I have not found the plant in the wild despite living in the area for the past 20 years.
www.environment.nsw.gov.au
Wildlife:
Typhonium brownii’s is unknown to the author but is assumed to be specialized thrips or other insects.
Cultivation:
Typhonium brownii is a beautiful plant for that special tropical look as it is fast growing and the large hastate or ternatifid leaves give a real tropical feel. It does exceptionally well in wet or moist shaded or areas with light dappled sunlight locations around pools, shady courtyards or on the south side of a home where many plants just won’t grow.
It is a beautiful feature plant when mass planted creating a real tropical look and feel beneath tall trees in a very short time.
Do not plant Typhonium brownii where wind damage can occur or where it is too exposed as the leaf petioles will break.
Another downside to the plant is that all parts of the plant are poisonous if eaten raw. Typhonium brownii will cause severe irritation and pain to the throat if chewed and swallowed. To my knowledge no deaths have been recorded. The poison is calcium oxalate.
On the positive side, there is probably no other native plant that can offer the magnificent deep maroon flowers which are on display for several months.
The plants need transplanting or lifting and replanting every couple of years to ensure an abundance of flowers and to retain vigour.
Where mass plantings of Typhonium brownii is required, as a feature; plant them at 0.5 meter centers.
INDOORS OR POTTED ON:
Typhonium brownii is a good subject for humid indoor areas like the bathroom and on patios but will need repotting every year. When grown indoors plants should have a good quality indoor mix and kept moist 24/7.
Sawdust or sand mixes are too well draining unless the sawdust has completely composted down where it exhibits a texture like plasticine to the touch. Moisture can be squeezed out between the fingers yet it remains moist. I find this a great basis to start with.
Mix equal parts of the well decomposed saw dust with the above feel with perlite and vermiculite. To this add two part sharp clean sand and one part compost. Make sure the sand comes from a source that does not have salt.
The Saw dust in this condition creates the moisture retention and holds nutrient in. The perlite and vermiculite make the mix neutral and both have great water holding capacity without shrinkage with age. The sand creates good drainage and is good for good healthy root development.
Fertilize the plants on a monthly basis with the above formula on a rotation basis.
Propagation:
Seeds: The seeds of Typhonium brownii can be removed easily from the dried fruits. Allow the seed heads to fully dry on plants. Remove the fruits and thoroughly wash the fleshy coating from the seeds before storing in a cool, dry place over winter. Wear gloves to protect the hands when handling the seeds. Most Arum lilies; and this one may not be an exception so better to be safe than sorry, contain calcium oxalic acid.
Properly cleaned, seed can be successfully stored for several years in the vegetable crisper.
Sow the seeds directly into a seed raising mix as soon as the last frosts have subsided or in early October at around 50mm apart or a single healthy seed into a squat nursery tube. Keep the seeds moist not wet. Do not over water as the seeds will rot off before germination takes place. Place the trays in a cool shaded area beneath 50mm to 70mm shade cloth. When the seedlings are 20mm to 25mm tall, prick them out and plant them into 50mm native tubes using a good organic mix.
As the seedlings roots reach the bottom of the tubes plant them out into their permanent position.
Division: If you are growing Typhonium brownii in containers, repot it as soon as the last frosts have subsided or in early late September. Remove the root ball from the pot and remove all the old potting mix. Now cut any new rhizomes that have developed from the previous season using a sharp sterile knife. Ensure each rhizome section has several quiescence buds. Replant the original arum lily in fresh potting mix making sure the mix is at the same level as before. Pot up the rhizomes separately in 200mm squat pots.
Fertilize using Seaweed, fish emulsion or organic chicken pellets soaked in water and apply the liquid on an alternate basis. Fertilize every 2 months until the plants become established then on an annual basis in September to October to maintain good health, vigour and better flowering.
Further Comments from Readers:
“Hi reader, it seems you use The Bible of Botany a lot. That’s great as we have great pleasure in bringing it to you! It’s a little awkward for us to ask, but our first aim is to purchase land approximately 1,600 hectares to link several parcels of N.P. into one at The Pinnacles NSW Australia, but we need your help. We’re not salespeople. We’re amateur botanists who have dedicated over 30 years to saving the environment in a practical way. We depend on donations to reach our goal. If you donate just $5, the price of your coffee this Sunday, We can help to keep the planet alive in a real way and continue to bring you regular updates and features on Australian plants all in one Botanical Bible. Any support is greatly appreciated. Thank you.”
In the spirit of reconciliation we acknowledge the Bundjalung, Gumbaynggirr and Yaegl and all aboriginal nations throughout Australia and their connections to land, sea and community. We pay our respect to their Elders past, present and future for the pleasures we have gained.