Plant Descriptions – Entada rheedii – Erythrorchis cassythoides
Entada rheedii
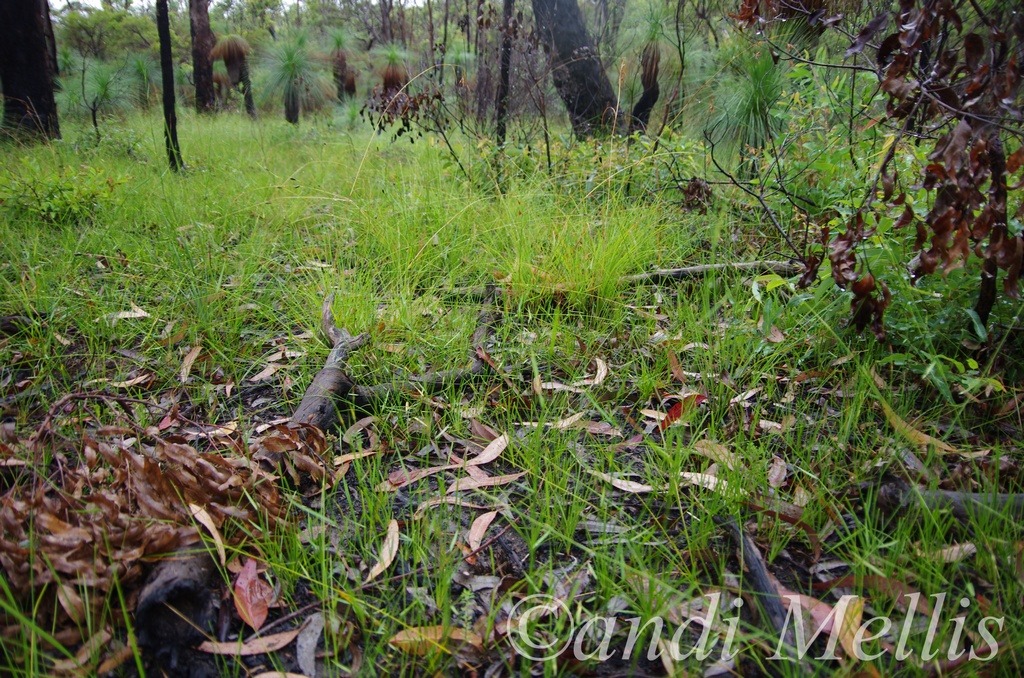
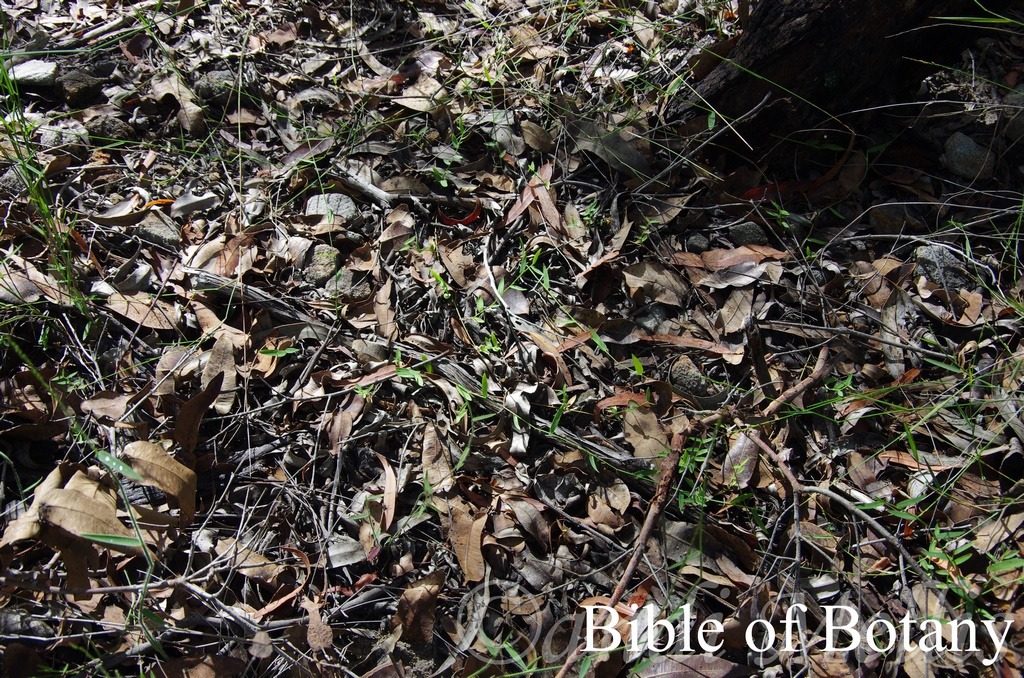
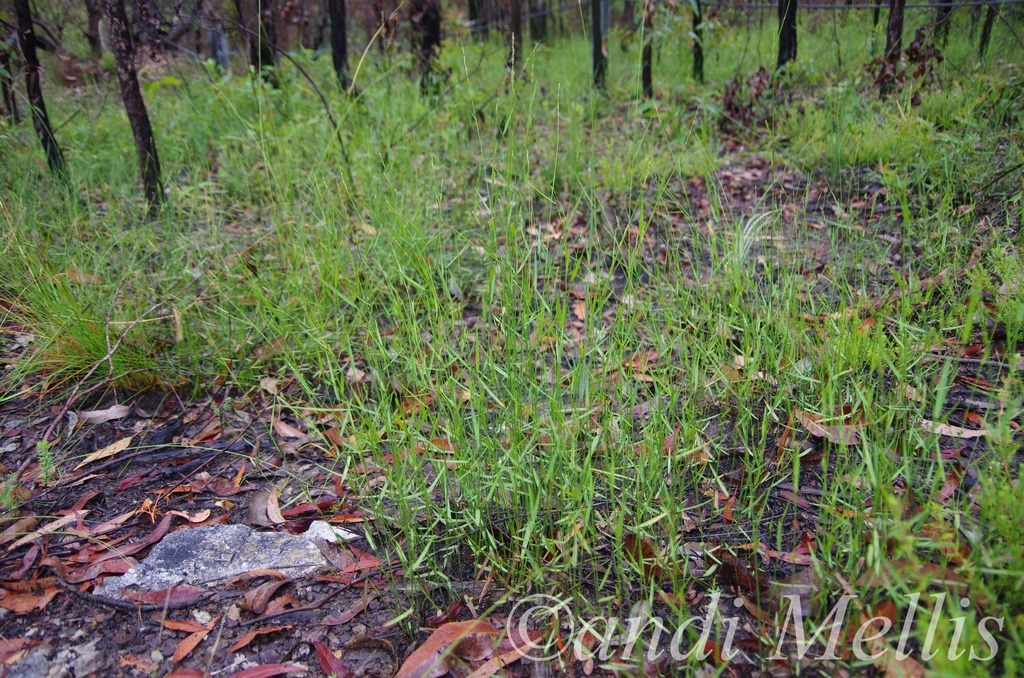
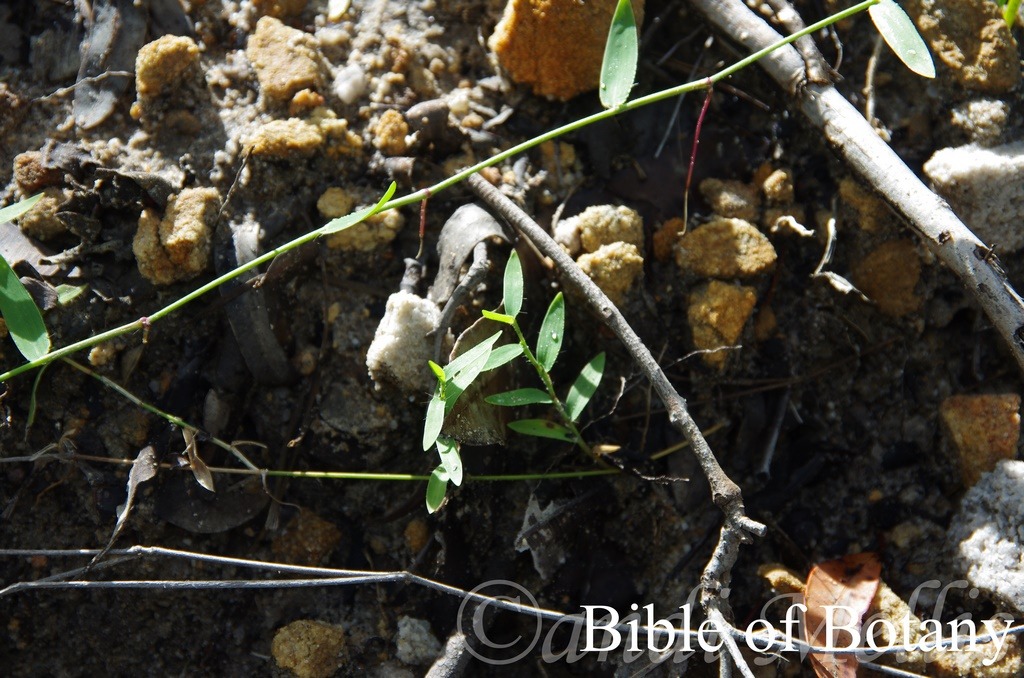
Enteropogon unispiceus
Entolasia marginata
Entolasia stricta
Entolasia whiteana
Enydra fluctans
Epacris breviflora
Epacris impressa
Epacris longiflora
Epacris microphylla
Epacris obtusifolia
Epacris pulchella
Epacris rhombifolia
Epaltes australis (Some botanists still describe it as Sphaeromorphaea australis
Epipogium roseum
Eragrostis brownii/brownie
Eragrostis elongata
Eragrostis interrupta
Eragrostis leptostachya
Eragrostis parviflora
Eragrostis pubescens
Eragrostis sororia
Eragrostis spartinoides
Eragrostis trachycarpa
Eremochloa bimaculata
Eremophila bignoniiflora
Eremophila brevifolia
Eremophila debilis
Eremophila duttonii
Eremophila forrestii subsp. forrestii
Eremophila forrestii subsp. hasteana
Eremophila glabra subsp. glabra
Eremophila glabra subsp. murray
Eremophila longifolia
Eremophila maculata subsp. brevifolia
Eremophila maculata subsp. maculata
Eremophila nivea
Eriachne glabrata
Eriachne rara
Eriachne pallescens
Eriocaulon australe
Eriocaulon scariosum
Eriochilus cucullatus
Eriochloa procera
Eriostemon australasius
Eriostemon myoporoides
Eryngium expansum
Erythrina numerosa
Erythrina vespertilio
Erythrophleum chlorostachys
Erythrorchis cassythoides
Entada rheedii
Classification
Class: Magnoliophyta
Order: Fabalis
Family: Fabaceae
Genus: From Entada, which is Latinized from the vernacular, Malabar name for a genus that has floating seeds. It refers to the seeds floating long distances on the ocean currents before finding land and germinating.
Species: Is named in honour of Hendrik Adriaan van Rheede tot Drakenstein; 1636-1691, who was a Dutch military officer and a colonial administrator of the Dutch East India Company and naturalist. Between 1669 and 1676 he served as a governor of Dutch Malabar and employed twenty-five people on his book Hortus Malabaricus, described 740 plants in the region.
Common Name: Sea Bean.
Distribution:
Entada rheedii is found east from Bathurst Island and Coburg Peninsula to Howard Island, Elcho Island and Marchinbar Island in the far north of the Northern Territory. It probably has a wider distribution across the top end of Australia and the Gulf of Carpentaria as it is found from tropical Africa through to New Guinea.
In the east it is found from the Torres Strait Islands to Mackay in central Queensland.
https://avh.ala.org.au/occurrences/search?taxa=Entada+rheedii#tab_mapView
Habitat Aspect Climate:
Entada rheedii prefers full sun to dappled light. It is found adjacent to mangroves along river banks, near ponds, lakes and adjacent to estuaries on a variety of soils close to the coast. The altitude ranges from 1 meter ASL to 120 meters ASL.
The temperatures range from 8 degrees in July to 40 degrees in January.
The rainfall ranges from lows of 1600mm to an average of 3200mm annually.
Soil Requirements:
Despite having a limited distribution Entada rheedii grows on a wide variety of soils including sandy loams, good quality loams, light clays, gravelly clays, laterites and mixtures of the above. The soils pH ranges from 4pH to 7.5pH are preferred. It tolerates waterlogged soils. Non saline soils to very saline soils are tolerated. Its altitude ranges from 1 meters ASL to 120 meters ASL.
Height & Spread:
Wild Plants: 8m to 45m by 1.5m to 4m.
Characteristics:
Entada rheedii’s vine stem is a contact climber. Like all climbers in the southern hemisphere it twines in an anticlockwise direction. The bark is pale to deep grey and fibrous on old lianas. Stems near the apex tend to be a pink-brown or brown and glabrous while new shoots are a pale lime green.
Entada rheedii’s leaves are bipinnate with the apex ending in a tendril. The 3 to 9 usually 5 ovate to obovate leaflets measure 30mm to 85mm in length by 20mm to 40mm in width. The margins are entire, undulating and are flat or have a slight curve upwards from the midvein. The midvein is prominent on the lower lamina and is not clearly visible on the upper lamina. The glabrous petioles measure 1mm to 5mm in length. The bases are oblique while the apexes are broad acuminate. The discolourous laminas are glossy, deep sea green on the upper lamina and a paler green on the lower lamina.
The inflorescence of Entada rheedii is long, erect narrow racemes which are born from the leaf axils. The racemes measure 120mm to 150mm in length by 20mm in diameter. The strongly perfumed flowers are white. The pale green cup shape calyx measures less than 1mm in length while the translucent white triangular petals measure 2.5mm to 3mm in length.
The 10 white stamens measure 6mm to 7mm in length and are thicker at the apex compared to the base. They surround the white style. The style measures 7mm to 8mm which includes the 2mm long ovary. Flowering occurs from July to October or probably throughout the year.
Entada rheedii fruits are very large, long pods. The pods measure an extraordinary 600mm to 800mm in length by 60mm to 90mm wide. It is strongly constricted between the seeds with each section measuring 70mm to 90mm. The green coriaceous green pods eventually turn woody and deep chocolate brown to black on ripening. A seam splits away from the pod sides at the time of ripening before the pods break loose from the elongated peduncles.
The flattened round seeds have a hard brown endocarp. They measure 40mm to 55mm in diameter by 30mm to 36mm in depth.
Wildlife:
Endiandra sieberi‘s wildlife is unknown to the author
Cultivation:
Entada rheedii is a beautiful large liana that can be grown over pergolas or gazebos in subtropical or tropical gardens. I would be tempted to grow it in semi-arid areas where water is not a problem. It is fast growing in the tropics and semi tropics however it is not tolerant of cold periods even for a short few weeks. They need constant moisture and a cool root run to grow successfully. It needs to be pruned regularly to enhance their bushiness and to promote flowering otherwise it will attempt to grow as a single shoot and only branch near the apex. The pods are the unusual parts of the plants and the seeds demand good prices as jewellery and good luck charms especially for travellers traveling to Africa. The dry pods can be used in floral arrangements.
It would make great accent vines against buildings where the walls are devoid of windows or other features. The vine would makes a very good accent features in front of low set commercial or industrial sheds where they will break up hard rigid architectural lines and give warmth and breadth to a building.
Propagation:
Seeds: Entada rheedii‘s seeds are best sown directly into their permanent position. Clear a sight and prepare the surrounding soil using mulch and a drenching of our recommended fertilizer mix. (Use a half mix of each for best results) Plant the seed and covering the seed with 20mm of a light friable sand and water. Cover the site with 10mm with fine mulch.
One plant will cover a 4 meter gazebo in around 4 years given plenty of moisture and fertilized on a regular basis.
Fertilize using seaweed, fish emulsion or organic chicken pellets soaked in water on an alternate basis. Fertilize every two months until the plants are established then annually in early September to October to maintain health, vitality and better flowering.
Further Comments from Readers:
Hi reader, it seems you use The Bible of Botany a lot. That’s great as we have great pleasure in bringing it to you! It’s a little awkward for us to ask, but our first aim is to purchase land approximately 1,600 hectares to link several parcels of N.P. into one at The Pinnacles NSW Australia, but we need your help. We’re not salespeople. We’re amateur botanists who have dedicated over 30 years to saving the environment in a practical way. We depend on donations to reach our goal. If you donate just $5, the price of your coffee this Sunday, We can help to keep the planet alive in a real way and continue to bring you regular updates and features on Australian plants all in one Botanical Bible. Any support is greatly appreciated. Thank you.
In the spirit of reconciliation we acknowledge the Bundjalung, Gumbaynggirr and Yaegl and all aboriginal nations throughout Australia and their connections to land, sea and community. We pay our respect to their Elders past, present and future for the pleasures we have gained.
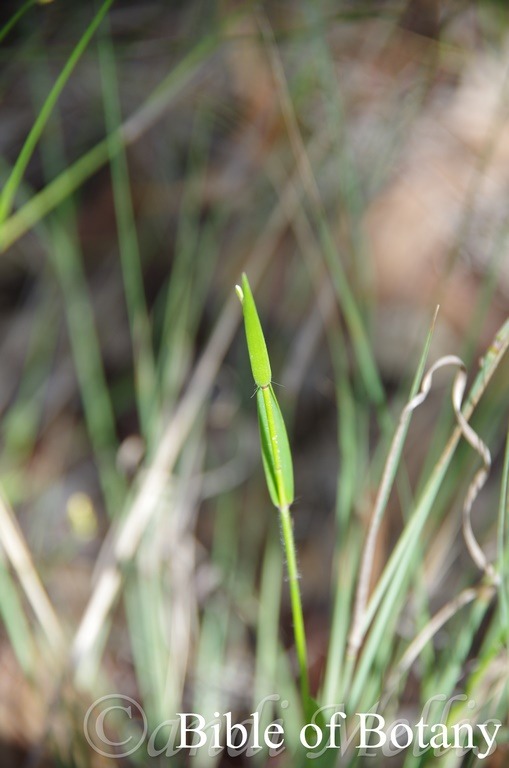
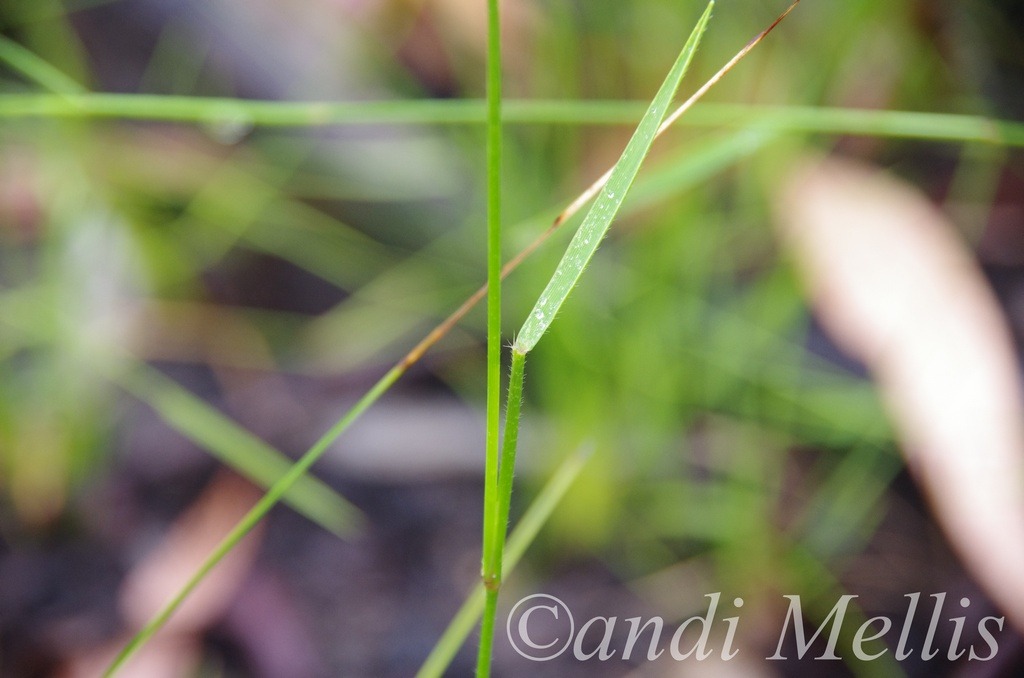
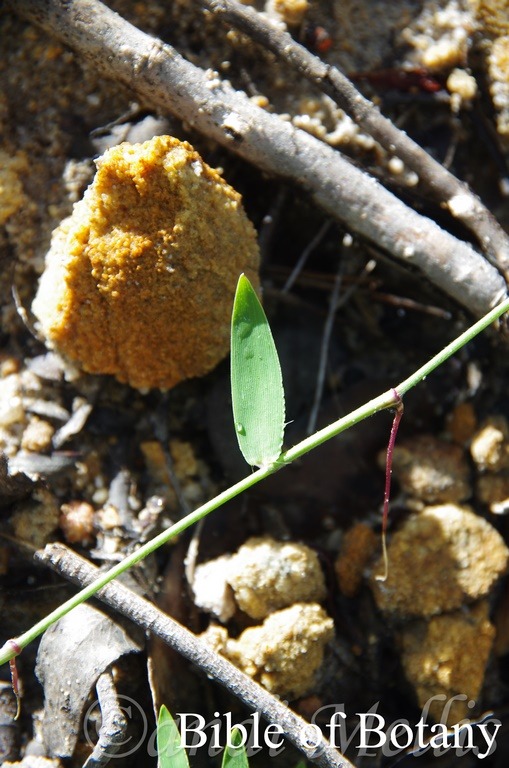
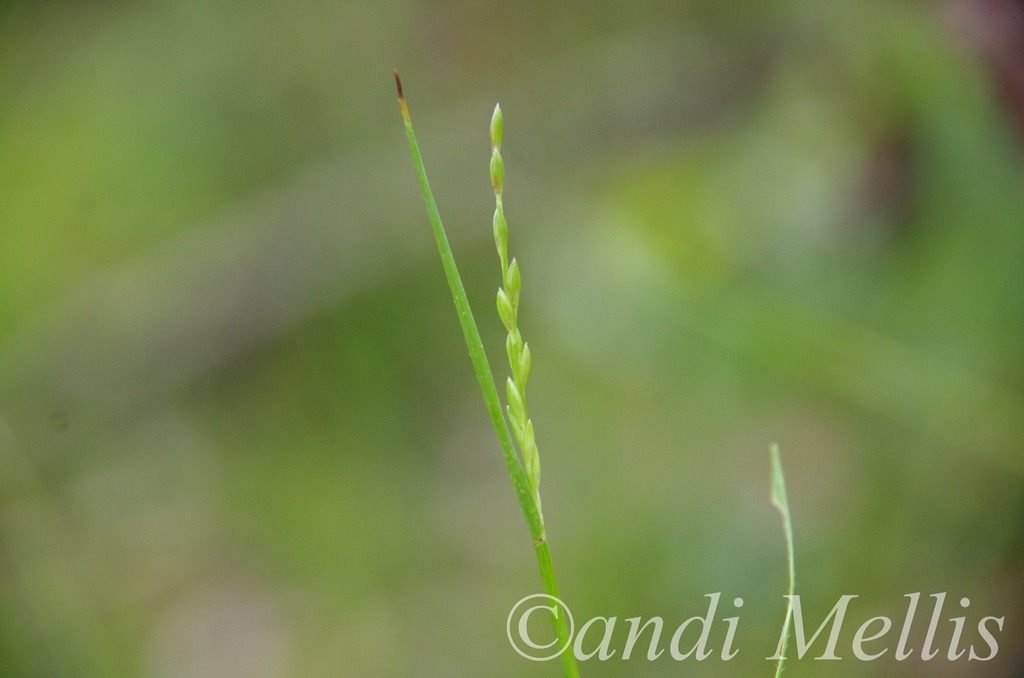
Enteropogon unispiceus
Classification
Unranked: Apogonia
Unranked: Commelinids
Order: Poales
Family: Poaceae
Subfamily: Chloridoideae
Genus: From Enteron, which is Greek for an intestine and Pogon, which is Ancient Greek for a beard. It refers to the flowers, which twist around the spikes and the awns which have the appearance of having long hairs thus having a curly hairy appearance.
Species: From Oîos, which is Ancient Greek or ūnum, which is Latin for one or a single unit and Spiculum, which is Latin for a long, needle-like crystalline structures. It refers to plants, which produce a single, long needle like awn.
Common Name:
Distribution:
Enteropogon unispiceus is found south from Cairns on Cape York Peninsula in far north Queensland to Braemar State Forest south of Casino in far northern New South Wales. It is found on the Western Plains, Western Slopes, on and east of the Great Dividing Range to the coast.
https://avh.ala.org.au/occurrences/search?taxa=Enteropogon+unispiceus#tab_mapView
Habitat Aspect Climate:
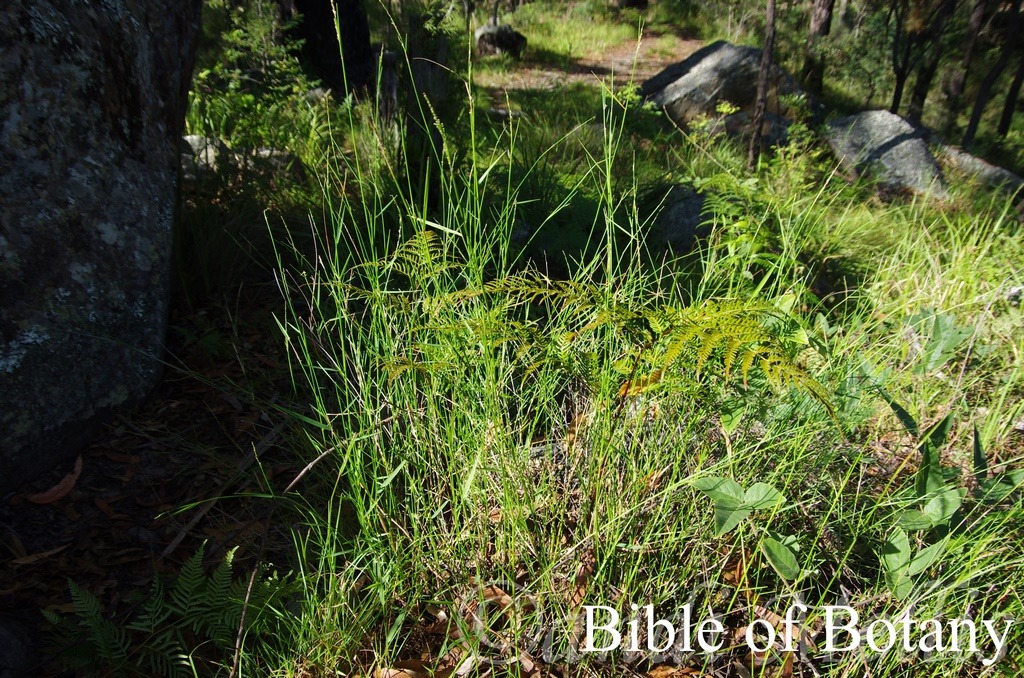
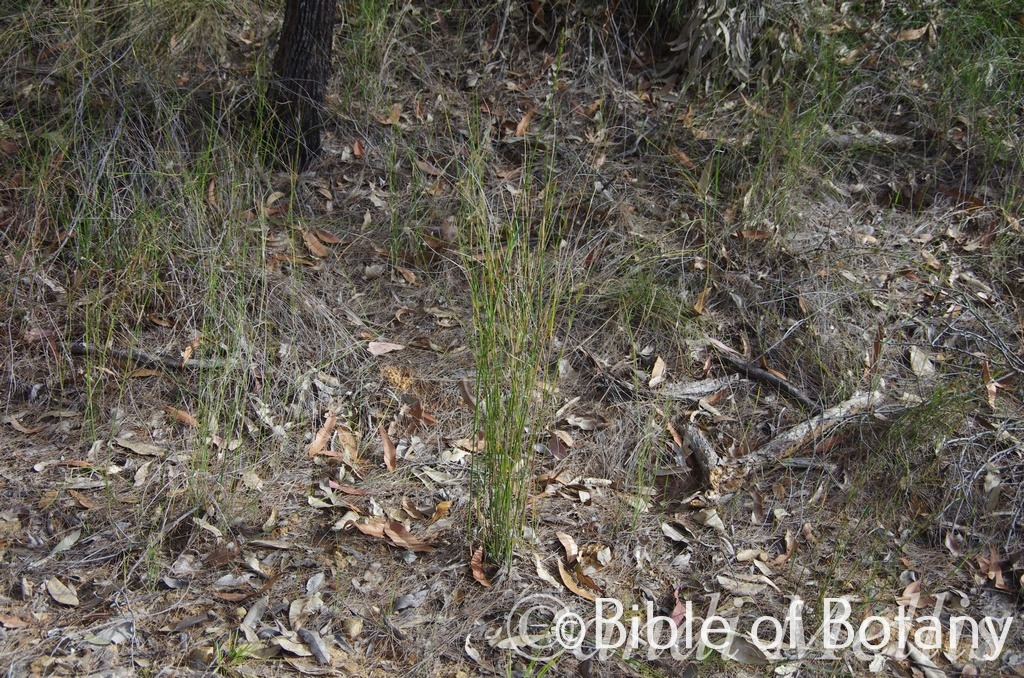
Enteropogon unispiceus prefers full sun to light dappled shade. It grows in depressions or on small islands where the surrounding land is often inundated with flood water in dry open forests, dry open woodlands on flat plains, river, stream and creek riparian zones, around billabongs, lagoons and in ephemeral pools. The altitude ranges from n3 meters ASL to around 650 meters ASL.
The temperatures range from minus 3 degrees in August to 40 degrees in January.
The rainfall ranges from lows of 400mm to 1800mm average per annum.
Soil Requirements:
Enteropogon unispiceus prefers sandy loams, light gritty clays to heavy clays or podsolic soils. The soils are derived from decomposed brown basalt, black basalt, shale metamorphic rocks, sandstone, granite and alluvial deposits and at times accumulated peaty sands. The soils pH ranges from 4.5pH to 6pH. It tolerates waterlogged soils, seasonal inundations and rising water tables. Non saline soils to moderately saline soils are tolerated.
Height & Spread:
Wild Plants: 0.2m to 0.5m by 0.2m to 0.35m
Characteristics:
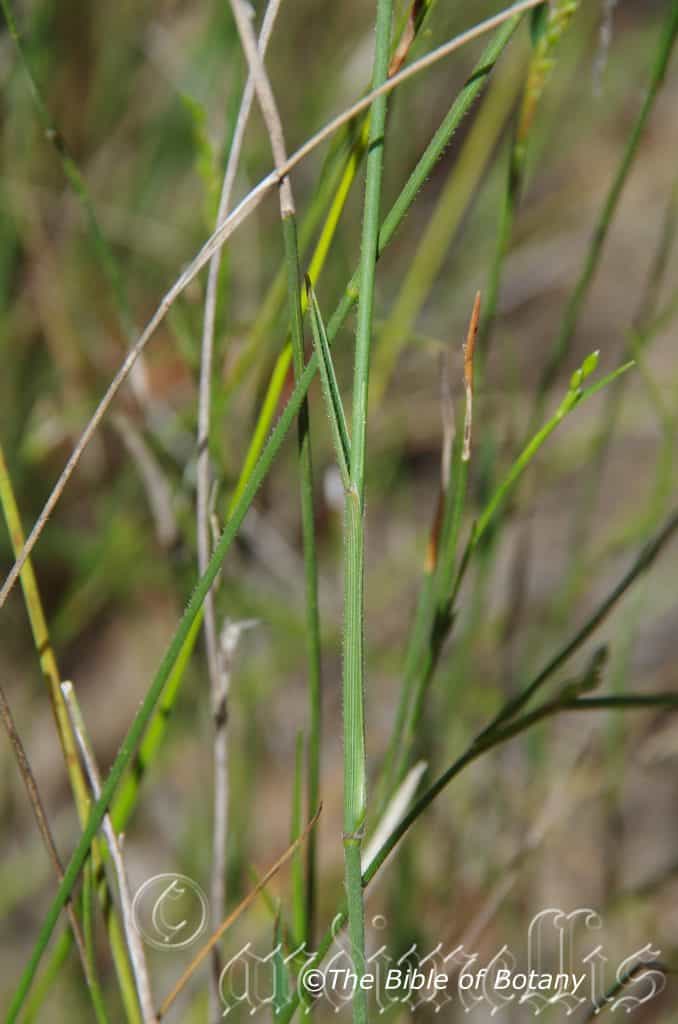
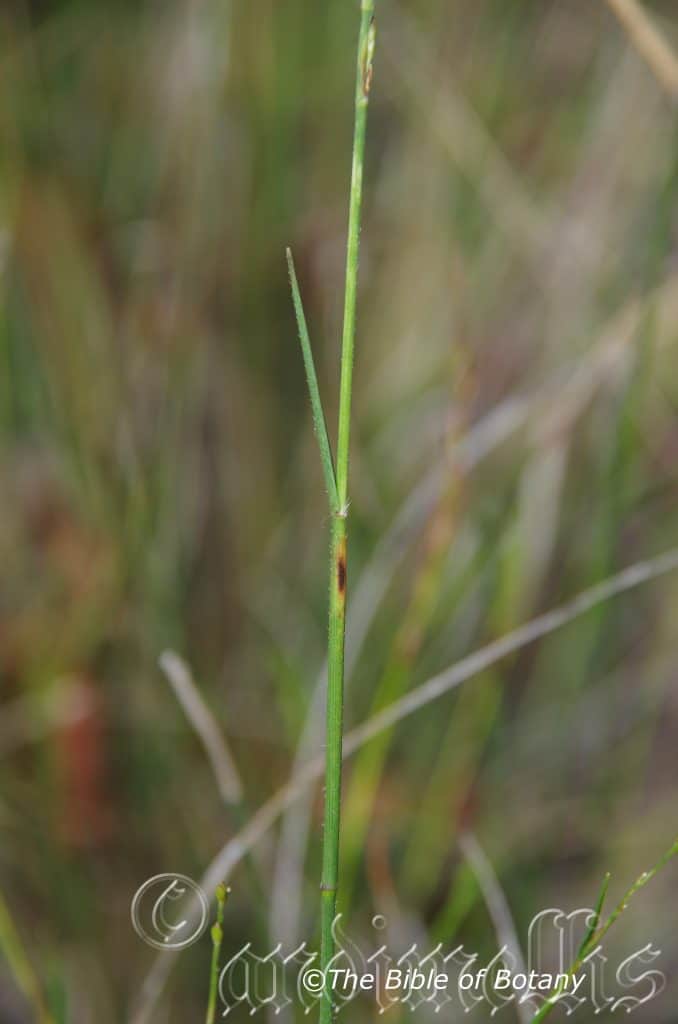
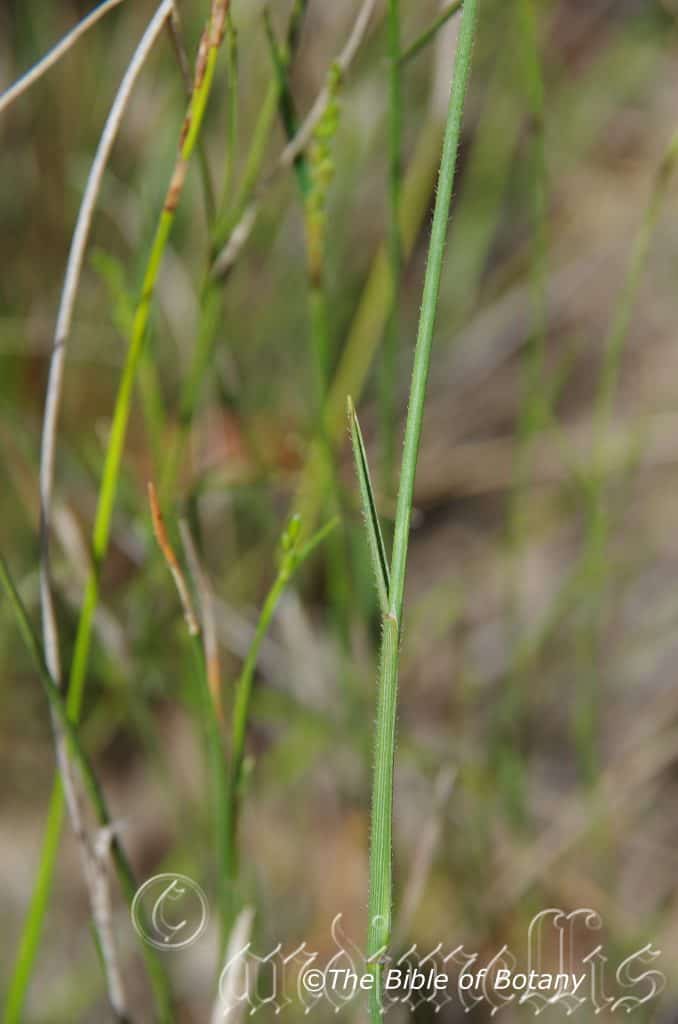
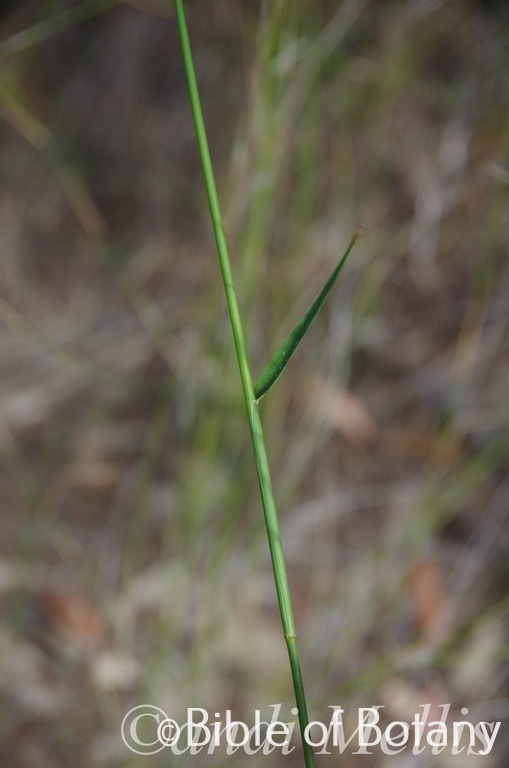
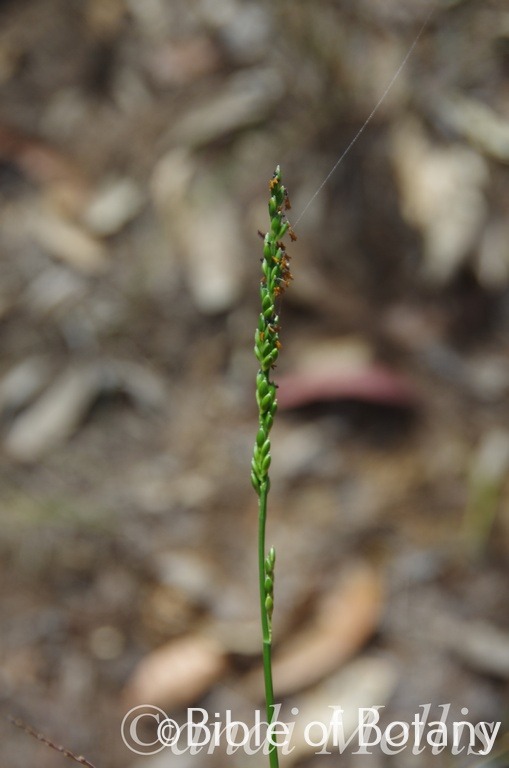
Enteropogon unispiceus grows as a perennial grass with semi pendulant to pendulant, terete, tufted culms. The slender culms are densely tufted on the slender rhizome. The culms usually measure 200mm to 500mm in height by 1mm to 1.5mm in diameter. The culms are grass-green and glabrous.
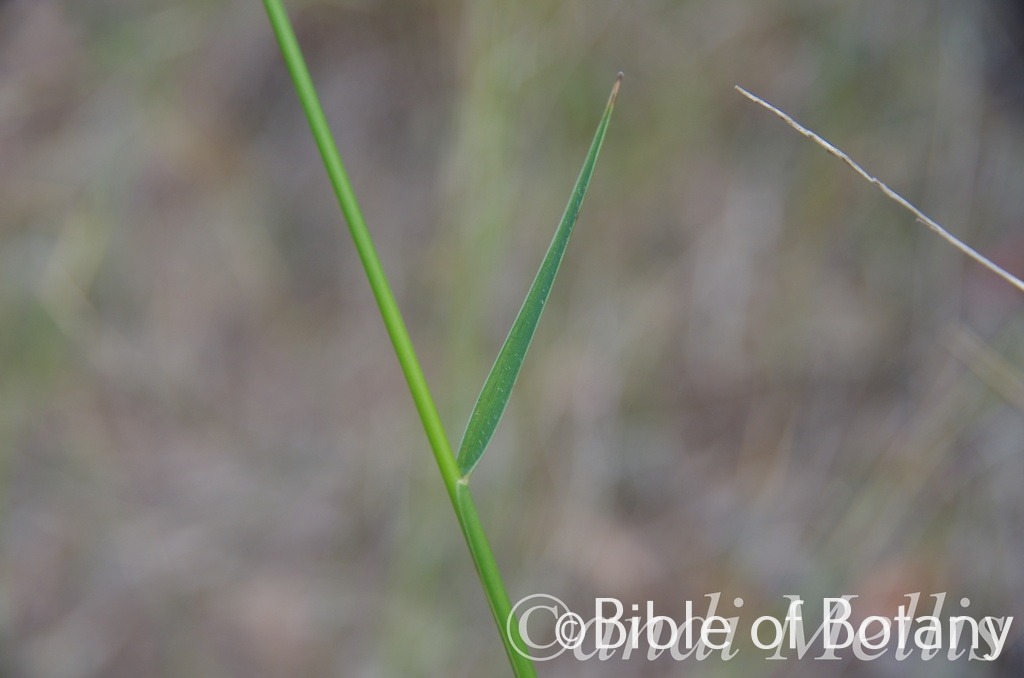
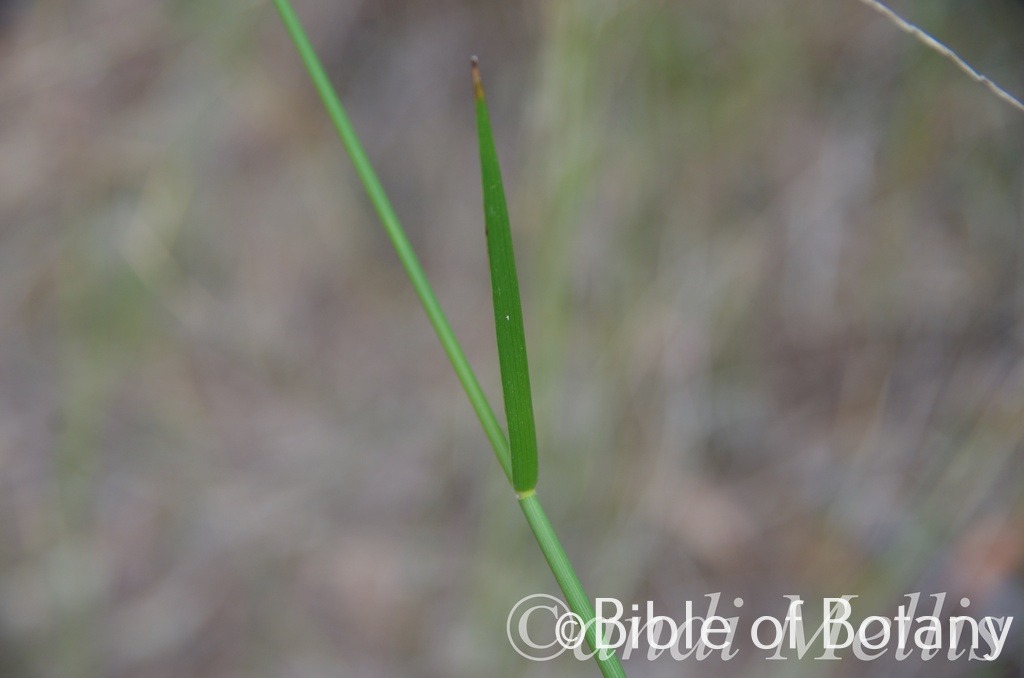
Enteropogon unispiceus’s linear leaves are mostly basal. The sheath’s margins are covered in white ciliate hairs. The ligules margins are covered in white ciliate hairs. The concolourous lamina is pale grass-green and scabrous. The laminas are flat and either involute or convolute at the margins. The leaves measure 30mm to 100mm in length by 0.5mm to 1.5mm in width. The mid vein is slightly prominent on the lower lamina. The margins are scabrous.
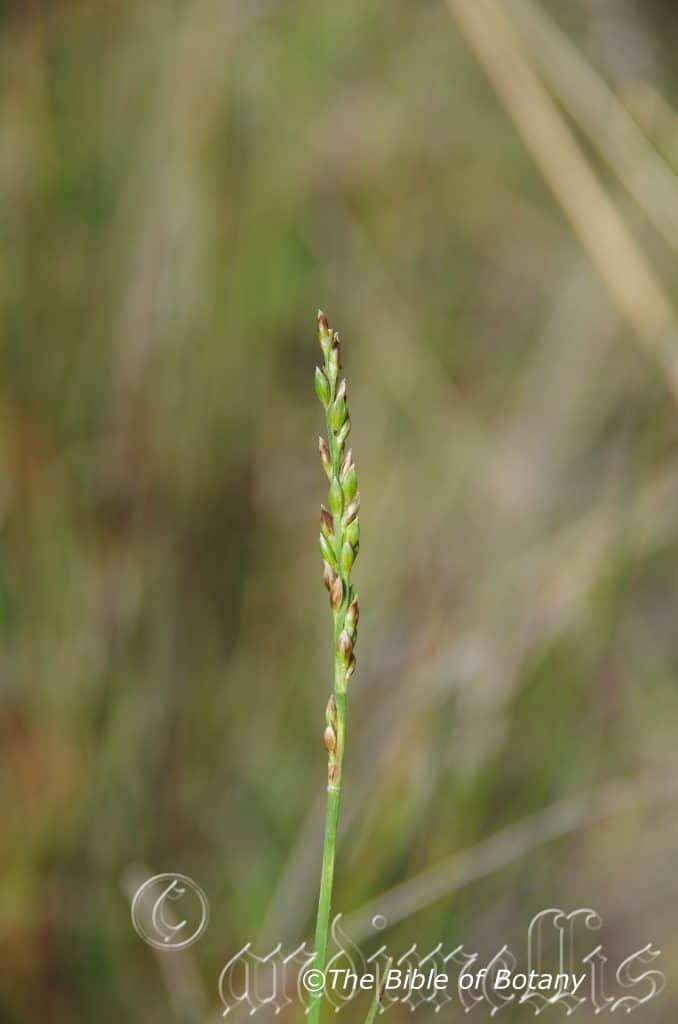
The inflorescences of Enteropogon unispiceus are solitary or digitate with 1 to 4 unilateral spicate branches which measure 20mm to 95mm in length by 2mm to 2.5mm in diameter near the base.
The spikelets are tightly packed and regularly arranged along the sides of the rachis. The spikelets measure 4mm to 5mm in length. The spikelet’s callus measures 0.4mm to 0.6mm in length.
The glumes are persistent, similar but thinner than fertile lemma. The lower glume is lanceolate and measures 1.5mm to 3.5mm in length. The upper glume is membranous with a single nerve. The apex is acuminate, muticus or mucronate and measures 3.1mm to 5.5mm in length. The adjacent fertile lemma is membranous, with a single nerve. The apex is acuminate, mucronate or awned with the awn measuring 0mm to 1mm in length.
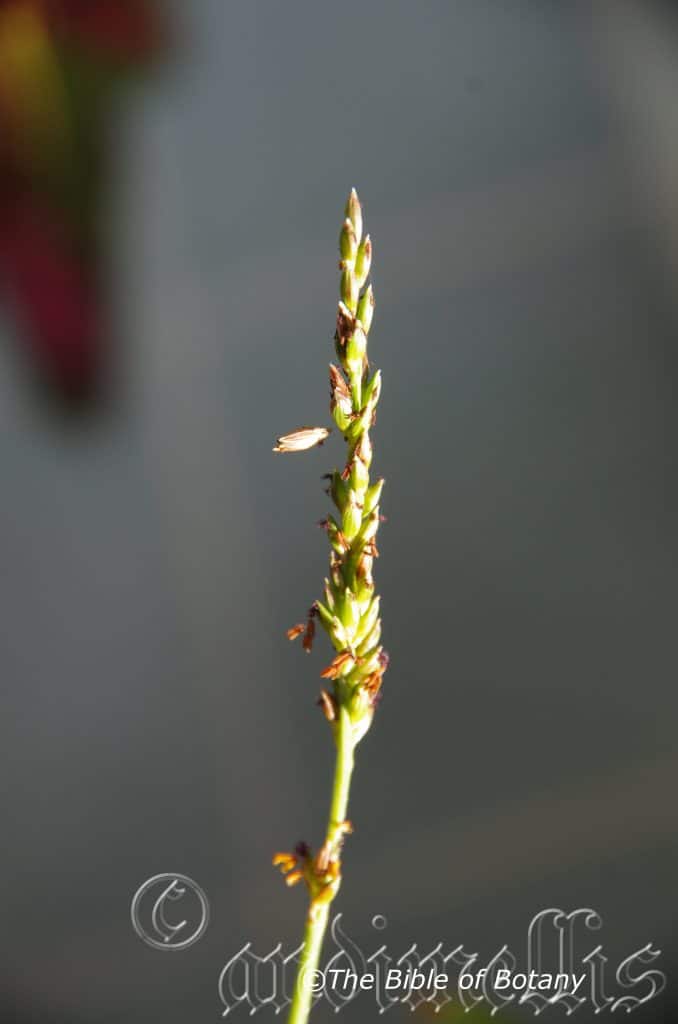
The fertile lemma is lanceolate, elliptic or oblong and is dorsally compressed. The fertile lemma measures 4mm to 5.2mm in length. It is cartilaginous or coriaceous and has 3-nerves. The apex is entire and acuminate with a single awn that measures 6mm to 10mm in length overall. The palea is 2-nerved with an acuminate apex. The 1 or 2 apical sterile florets are linear or lanceolate and measure 1.5mm to 3mm in length. The sterile lemmas acute apex has a single awn that measures 3mm to 4mm in length.
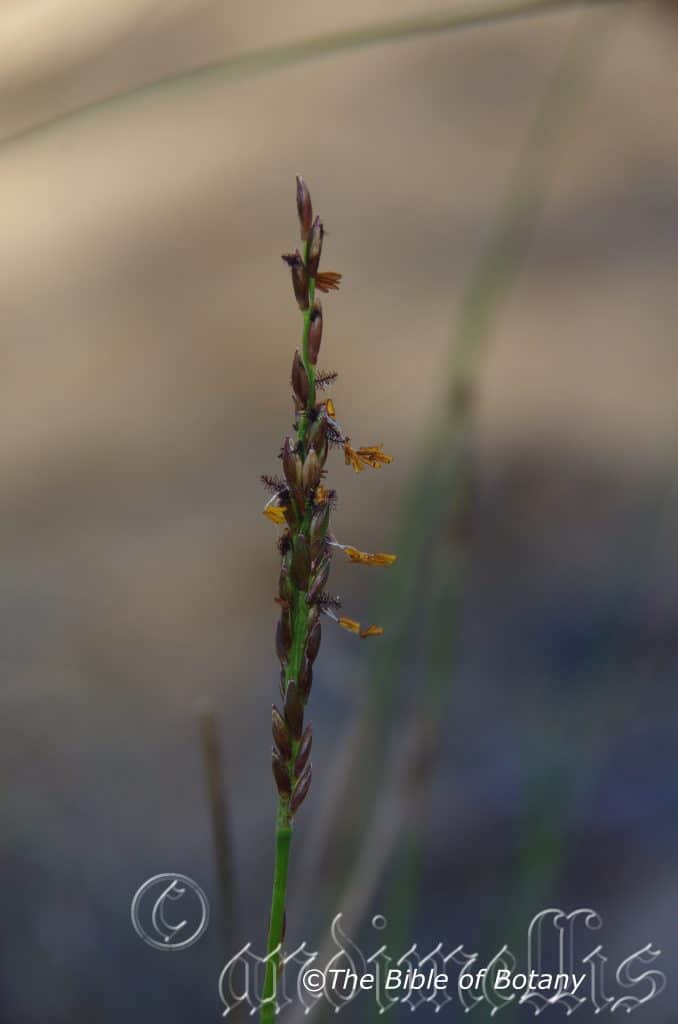
There are 3 white filiform filaments on each spikelet which measure 0.8mm to 1.1mm in length. The pale yellow anthers measure 1mm to 1.2mm in length.
The bifid feathery maroon styles open from the base to the apex and appear at the same time as the stamens. The pistils measures 0.8mm to 1mm in length. The flowers appear from late December to February.
The fruits of Enteropogon unispiceus are elliptical to lanceolate biconvex nuts. The nuts measure 4mm to 5mm in length by 1.1mm to 1.3mm in width. The grass-green nuts turn pale golden-brown to honey coloured when ripe.
Wildlife:
Enteropogon unispiceus‘s seeds have been eaten by King Quail (Coturnix chinensis) and the swamp quail (Coturnix australis). The green seeds are much sought after by aviary birds.
Cultivation:
Enteropogon unispiceus is an excellent fodder crop. The leaves and stems are eaten along with other pasture crops when growing in the pasture to the extent it will soon be eliminated from the pastures. It is not known whether good pasture management is too competitive for Enteropogon unispiceus or whether the foraging animals favour it to the extent that it struggles to survive in a pasture in any great quantity. It has a rapid growth rate from mid spring after the spring rains to late autumn. It recovers well from moderate grazing and is best managed by allowing a free period between grazing.
Enteropogon unispiceus is classified as a weed by gardeners without considering its potential in a small wet rockery or bog garden. It gives good quantities of trash for mulch but like many swamp plants is slow to break down in the compost heap. It has good potential as a landscaping grass in small gardens. It recovers quickly when cut back to ground level.
In cultivation it can be grown on most types of soil even heavy clay with a skeletal covering of sand. It requires full sun for best results with added compost, moisture or native fertilizer once a year to sustain maximum colour and vigour.
In cultivation the plants usually grow from 350mm to 500mm in height by 350mm to 500mm in diameter. It is a very striking in informal beds along walls when planted in small groups, beside swimming pools, small moist rockeries or bog gardens. In a bog gardens, swamps and heaths it can easily become the centre of attraction giving depth and breadth to the garden especially if all the other plants are smaller with clump or horizontal growth habits. To be the centre of attraction plants need to be more thinly planted than in the traditional heath garden otherwise the thin pendulant culms will be overpowered by the larger leaves.
Bog gardens can be made with a minimum of 6 square meters plus the area for a pond. A large area with sandy clay to medium clay base can be used. If the soil is heavy clay then add some washed salt free course sand to the whole area and turn it over to a depth of 300mm. The sand may sound like an expensive additive but will be worth it in the long term. First mark out the area required. Secondly dig the area out, down to a depth of around 300 mm in depth at the center with shallower areas near the sides. Lay the black plastic down using 2 or 3 layers. Now taper the sides up so that the edges are about 100mm to 150mm above the center section. Ensure that there is a drainage point on the lower side of the plain so that when the water fills up it will flow out and away along the natural drainage line. Doing this will act like a natural wallum where water will collect in times of rain below the surface to a depth of 100mm to 150mm. Use a nail or screw driver make several holes in the bottom of the plastic so that the water drains out slowly over a period of time otherwise they can become rancid after several years. Similar to what occurs naturally in a small shallow dam or depression.
Ensure the sides are 50mm to 100mm above the surrounding land to minimize mulch entering the bog area and pond. Place the edge of the plastic over the rise around the edges and use rocks to securely fasten the plastic. Directing a small amount of the roof water from the house will save water and watering. Gravel mulches can be used safely on the surface of the bog area.
If a pond is wanted it can be made inexpensively by performing the earth following the above steps. Allow the pond to have a variable depth from 150mm to 400mm in depth with your desired shape.
Now pack the earth down on the bottom and the sides. Make sure there are no sharp objects like stones or sticks poking through. Place good quality thick black plastic down along the bottom and up the sides making sure that the plastic sits flat and up the sides over hanging the top by at least 300mm. Lay a second and if necessary a third sheet over the top in the same manner. Place a pipe at the low spot so that rain water will drain out into your bog garden or wallum. Make sure that the pipe is below the level of the wallum ground and it is large enough to drain the water.
5 square meters needs a 32mm water pipe.
12 square meters will need a 50mm water pipe.
50 square meter pond will need 100mm pipe.
180 square meters will need 4 by 100mm water pipes or 1 by 200mm pipe.
Place rocks around the edge on the black plastic.
Fill the pond with water.
Plant the small shrubs and herbs.
Cover the surrounding ground with your favourite mulch.
All the carnivorous plants as well as Mazus pumillio, Scaevola aemula, Goodenia grandiflora, Goodenia glabra or Lobelia anceps, Lobelia andrewsii, Lobelia membranacea or Lobelia trigonocaulis will give the desired affect and look very spectacular on a small or large scale.
Propagation:
Seeds: Enteropogon unispiceus‘s seeds can be sown directly into a seed raising mix. Cover the seeds with 2mm to 5mm of the mix. Place the tray or pot with the seeds into another tray and fill the lower tray with water. Place the trays in a warm position under 20mm or 30mm shade. When the seedlings reach 20mm to 40mm tall, prick them out and plant them into 50mm native tubes using a seed raising mix. Place the 50mm native tubes into a tray of water and return them to the bush house.
Once the seedlings reach 150mm to 200mm in height plant them out into their permanent position. Mass plantings can be achieved by planting them at a minimum of 0.8 meters to 1 meter centers.
Division: Water the plants well a day or 2 before the operation is to be done if the plants are not growing in water. Avoid very hot weather. Cut around the clump and out on one side so that the shovel can be placed under the root ball. (Or remove it from its pot.)
Remove the plant from the soil. Cut it into 3 or 4 equal parts, first down the middle then halve those sections again ensuring that each section has some roots and, rhizome and culms or shoots. The rhizomes should have at least several eyes or growing shoots. Remove unwanted dead leaves and any old small sections that look weak or dead. Plants can be divided further but ensure each division has a several strong shoots and healthy roots attached to the tuff. Replant or pot ensuring the soil is at the same level as before. Water and fertilize with a half strength solution of fish emulsion. New shoots will appear within two weeks. Once the potted plants have new shoots and the roots treat them as seedlings.
Fertilize using seaweed, fish emulsion or organic chicken pellets soaked in water on an alternate basis. Fertilize every two months until the plants are established then annually in early September to October to maintain health, vitality and better flowering.
Further Comments from Readers:
Hi reader, it seems you use The Bible of Botany a lot. That’s great as we have great pleasure in bringing it to you! It’s a little awkward for us to ask, but our first aim is to purchase land approximately 1,600 hectares to link several parcels of N.P. into one at The Pinnacles NSW Australia, but we need your help. We’re not salespeople. We’re amateur botanists who have dedicated over 30 years to saving the environment in a practical way. We depend on donations to reach our goal. If you donate just $5, the price of your coffee this Sunday, We can help to keep the planet alive in a real way and continue to bring you regular updates and features on Australian plants all in one Botanical Bible. Any support is greatly appreciated. Thank you.
In the spirit of reconciliation we acknowledge the Bundjalung, Gumbaynggirr and Yaegl and all aboriginal nations throughout Australia and their connections to land, sea and community. We pay our respect to their Elders past, present and future for the pleasures we have gained.
The Pinnacles NSW
The Pinnacles NSW
The Pinnacles NSW
The Pinnacles NSW
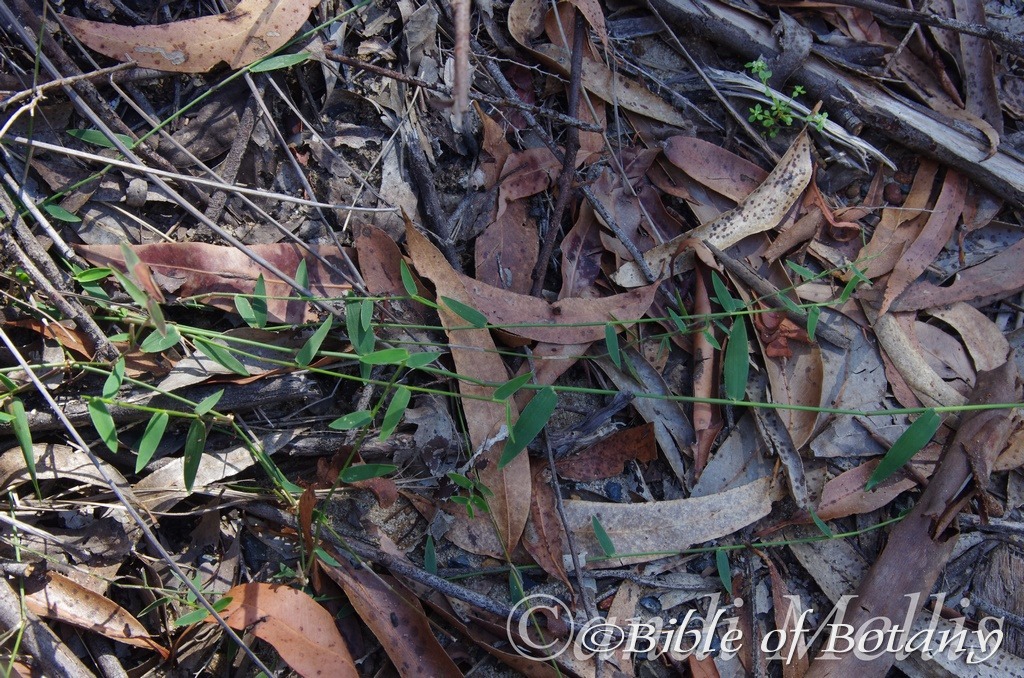
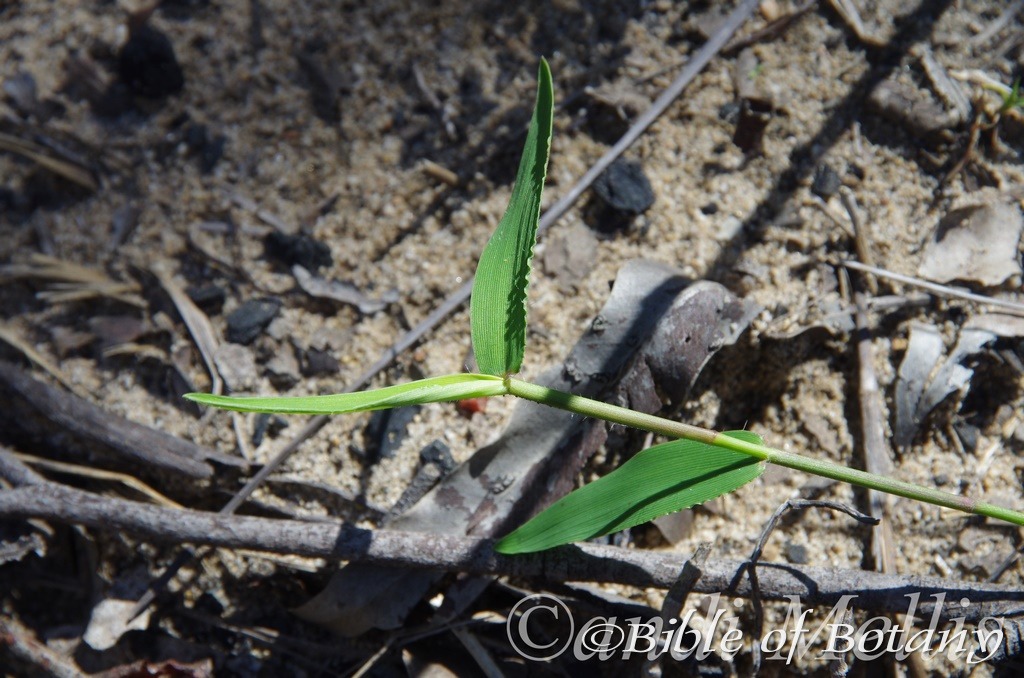
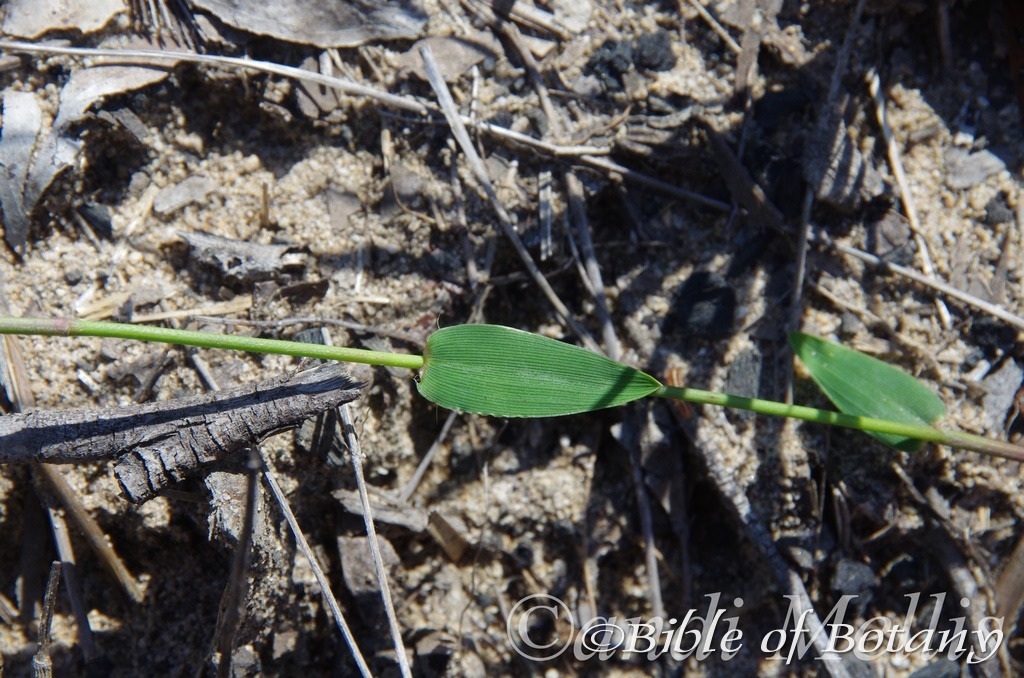
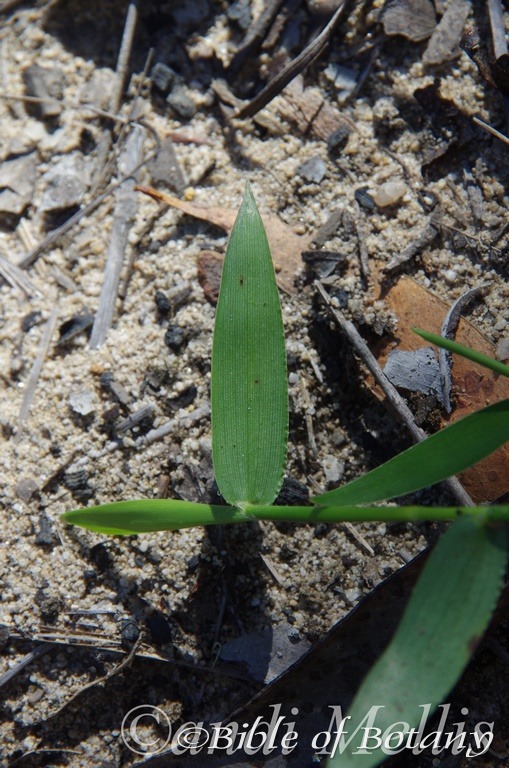
Entolasia marginata
Classification
Unranked: Monocots
Unranked: Commelinids
Order: Poales
Family: Poaceae
Genus: From Entos, which is Ancient Greek for within and Lassios, which is Ancient Greek for hairy. It refers to the hairy fertile lemmas, which are covered by the upper glume.
Species: From Margin or Margo, which is Latin for a border or edge. It refers to the specific epithet as classified by Smith that has leaf margins that are very similar to those of another species.
Common Name:
Distribution:
Entolasia marginata is found south from the Byfield National Park in central coastal Queensland to Melbourne in Victoria. It is mainly found on the Western Slopes, on and east of the Great Dividing Range to the coast.
It is also found between Shepparton, Wangaratta and south of Euroa, north of Lake Dartmouth to Burrowa Pine National Park in central and western Victoria. In Queensland it is found in a few isolated populations from near Innisfail, Eungella National Park, The Blackdown Tablelands National Park and between the Expedition National Park and Isla Gorge National Park.
https://avh.ala.org.au/occurrences/search?taxa=Entolasia+marginata#tab_mapView
Habitat Aspect Climate:
Entolasia marginata prefers full sun to light dappled shade. It grows in marshy places, damp savannah grassland depressions within drier woodlands or open Eucalyptus forests. The altitude ranges from 5 meters ASL to 1650 meters ASL.
The temperatures range from minus 4 degrees in August to 40 degrees in January.
The rainfall ranges from lows of 400mm to 3200mm average per annum.
Soil Requirements:
Entolasia marginata prefers sandy loams to fatty, light, sandy clays. The soils are usually derived from decomposed sandstone or at times granite or sandy alluvial deposits. The soils pH ranges from 4.5pH to 6.5pH. It tolerates seasonal waterlogged soils or seasonal high water tables for short periods. Non saline soils to moderately saline soils are tolerated.
Height & Spread:
Wild Plants: 0.5m to 0.8m by 0.3m to 1m or more in diameter.
Characteristics:
Entolasia marginata grows as a straggling or shrubby wiry perennial grass with spreading, geniculate ascending or decumbent culms. The culms are densely tufted on the slender rhizome. The culms usually measure 200mm to 600mm in length by 1mm to 3mm in diameter. The culms are blue-green and glabrous. The internodes culms are glabrous or sparsely covered in white hirsute hairs while the nodes are covered in white puberulent hairs.
Entolasia marginata‘s linear to narrow lanceolate leaves measure 30mm to 200mm by 2mm to 15mm in width. The sheath is glabrous or sparsely covered in white hirsute hairs. The ligule measures 0.5mm to 1mm in length and is covered in long white hirsute hairs which measure 0.5mm to 1mm in length. The concolourous laminas are usually pale blue-green or at times pale grass-green, glabrous, scabrous or covered in white hirsute hairs.
The inflorescences of Entolasia marginata are narrow compound panicle of racemes from the terminal leaf axil. The panicles measure 40mm to 200mm in length while the 3 to 10 cylindrical racemes measure 2mm to 15mm in length. There are 2 to 12 fertile spikelets on each raceme.
The spikelets are loosely and irregularly arranged along the raceme. The spikelets measure 2.5mm to 3.8mm in length. The pedicelled spikelets are 2-flowered with the lower floret barren or rarely male while the upper one is fertile. The basal sterile floret comprises of 1 fertile floret without a rachilla extension. The floret is lanceolate or elliptic, dorsally compressed and measures 2.4mm to 3.8mm in length.
The dissimilar glumes are thinner than fertile lemma. The lower glume is ovate, membranous and usually without a keel or nerve or at times with a single nerve. The upper glume is elliptic or ovate and measures 2.4mm to 3.8mm in length. It is herbaceous, without a keel and has 5 nerves. The upper glume apex is muticus or mucronate.
The basal sterile floret has 1 barren floret without a significant palea. The sterile lemma on the lower floret is herbaceous with 5 nerves and measures 2.4mm to 3.8mm in length. The fertile lemma is without a keel and has 5 nerves measures 2mm to 3mm in length. The lemmas are covered in white pulverulent hairs.
There are 2 or 3 white filaments on each spikelet which have pale yellow anthers. The flowers appear throughout the year under favourable conditions.
The fruits of Entolasia marginata are obovoid to globose or turgidly biconvex nuts. The nuts measure 2.4mm to 3.6mm in length by 1.1mm to 1.6mm in width. The green seeds turn pale golden-brown to glossy honey coloured when ripe.
Wildlife:
Entolasia marginata‘s seeds are eaten by most finches and quails.
Cultivation:
It is not known as to the value of Entolasia marginata as a fodder crop. The leaves and stems are eaten along with other pasture crops when growing in the pasture to the extent it will soon be eliminated from the pastures.
Entolasia marginata is classified as a weed by gardeners. It gives small quantities of trash for mulch. It recovers quickly when cut back to ground level and is easy to remove by pulling the culms and small fibrous root system by hand.
In cultivation it can be grown on most types of soil apart from heavy clay. It requires full sun to light dappled shade for best results. It is particularly useful under trees in paddocks where light grazing takes place. It would be best grown in a mixed pasture. High nitrogenous fertilizers will increase the length of the internodes on the culms.
Propagation:
Seeds: Entolasia marginata seeds can be sown directly into a seed raising mix. Cover the seeds with 2mm to 5mm of the mix. Place the tray or pot with the seeds into another tray and fill the lower tray with water. Place the trays in a warm position under 20mm or 30mm shade. When the seedlings reach 20mm to 40mm tall, prick them out and plant them into 50mm native tubes using a seed raising mix. Place the 50mm native tubes into a tray of water and return them to the bush house.
Once the seedlings reach 150mm to 200mm in height plant them out into their permanent position. Mass plantings can be achieved by planting them at a minimum of 0.8 meters to 1 meter centers or closer if quicker coverage is required.
Division: Water the plants well a day or 2 before the operation is to be done if it is not growing in water at the time of transplanting. Avoid very hot weather. Cut around the clump and out on one side so that the shovel can be placed under the root ball. (Or remove it from its pot.)
Remove the plant from the soil. Cut it into 3 or 4 equal parts, first down the middle then halve those sections again ensuring that each section has some roots and, rhizome and culms or shoots. The rhizomes should have at least several eyes or growing shoots. Remove unwanted dead leaves and any old small sections that look weak or dead. Plants can be divided further but ensure each division has a several strong shoots and healthy roots attached to the tuff. Replant or pot ensuring the soil is at the same level as before. Water and fertilize with a half strength solution of fish emulsion. New shoots will appear within two weeks. Once the potted plants have new shoots and the roots treat them as seedlings.
Fertilize using seaweed, fish emulsion or organic chicken pellets soaked in water on an alternate basis. Fertilize every two months until the plants are established then annually in early September to October to maintain health, vitality and better flowering.
Further Comments from Readers:
Hi reader, it seems you use The Bible of Botany a lot. That’s great as we have great pleasure in bringing it to you! It’s a little awkward for us to ask, but our first aim is to purchase land approximately 1,600 hectares to link several parcels of N.P. into one at The Pinnacles NSW Australia, but we need your help. We’re not salespeople. We’re amateur botanists who have dedicated over 30 years to saving the environment in a practical way. We depend on donations to reach our goal. If you donate just $5, the price of your coffee this Sunday, We can help to keep the planet alive in a real way and continue to bring you regular updates and features on Australian plants all in one Botanical Bible. Any support is greatly appreciated. Thank you.
In the spirit of reconciliation we acknowledge the Bundjalung, Gumbaynggirr and Yaegl and all aboriginal nations throughout Australia and their connections to land, sea and community. We pay our respect to their Elders past, present and future for the pleasures we have gained.
Fortis Creek National Park NSW
Sherwood Nature Reserve NSW
Fortis Creek National Park NSW
Sherwood Nature Reserve NSW
Sherwood Nature Reserve NSW
Fortis Creek National Park NSW
Sherwood Nature Reserve NSW

Sherwood Nature Reserve NSW
Fortis Creek National Park NSW
Entolasia stricta
Classification
Unranked: Monocots
Unranked: Commelinids
Order: Poales
Family: Poaceae
Genus: From Entos, which is Ancient Greek for within and Lassios, which is Ancient Greek for hairy. It refers to the hairy fertile lemmas, which are covered by the upper glume.
Species: From Stricta, which is Latin for to draw tight. It refers to organs, which are stiff and rigid.
Common Name:
Distribution:
Entolasia stricta is found south from Cairns in far northern coastal Queensland to Melbourne in Victoria. It is mainly found on the Western Slopes, on and east of the Great Dividing Range. There is one isolated population in northern Victoria just north of Wagnerite.
https://avh.ala.org.au/occurrences/search?taxa=Entolasia+stricta#tab_mapView
Habitat Aspect Climate:
Entolasia stricta prefers full sun to light dappled shade. It grows in scrub land, open Eucalyptus forests or open dry rainforests. The altitude ranges from near sea level to around 850 meters ASL.
The temperatures range from minus 4 degrees in August to 40 degrees in January.
The rainfall ranges from lows of 550mm to 3200mm average per annum.
Soil Requirements:
Entolasia stricta prefers sandy loams to fatty light clays or light silts. The soils are usually derived from decomposed sandstone or at times granite or sandy alluvial deposits. The soils pH ranges from 4.5pH to 6.5pH. It tolerates waterlogged soils for short periods on a seasonal basis. Non saline soils to moderately saline soils are tolerated.
Height & Spread:
Wild Plants: 0.1m to 0.6m by 0.3m to 1m or more in diameter.
Characteristics:
Entolasia stricta grows as a straggling or shrubby wiry perennial grass with spreading, geniculately ascending or decumbent culms. The culms are densely tufted on the slender rhizome. The culms usually measure 200mm to 600mm in length by 1mm to 3mm in diameter. The culms are blue-green and glabrous. The internodes culms are glabrous or sparsely covered in white hirsute hairs while the nodes are covered in white puberulent hairs.
Entolasia stricta‘s linear to narrow lanceolate leaves measure 5mm to 100mm by 1mm to 7mm in width. The sheath is glabrous, usually sparsely or rarely covered covered in white hairs. The ligule measures 0.2mm to 0.4mm in length by 1mm to 7mm in width and is covered in long white ciliate hairs which measure 0.2mm to 0.6mm in length. The concolourous laminas are usually pale blue-green or at times pale grass-green and are usually scaberulous or at times scabrous, glabrous or covered in white pulverulent hairs. The mid vein is slightly prominent on the lower lamina.
The inflorescences of Entolasia stricta are narrow compound panicle of racemes from the terminal leaf axil. The panicles measure 20mm to 100mm in length while the 2 to 9 cylindrical racemes measure 20mm to 70mm in length.
The spikelets are loosely and irregularly arranged along the raceme. The spikelets measure 2.2mm to 3.5mm in length. The pedicelled spikelets are 2-flowered with the lower floret barren or rarely male while the upper one is fertile. The basal sterile floret comprises of 1 fertile floret without a rachilla extension. The floret is elliptic or oblanceolate, dorsally compressed and measures 2.2mm to 3.7mm in length.
The dissimilar glumes are thinner than fertile lemma. The lower glume is ovate, membranous, without a keel and usually without a nerve or at times with a single nerve. It measures 0.75mm to 1mm in length. The upper glume is elliptic or ovate, glabrous or asperulous and measures 2.25mm to 3.6mm in length. It is herbaceous, without a keel and has 5 nerves. The upper glumes apexes are mucronate.
The basal sterile floret has 1 barren floret without a significant palae. The sterile lemma on the lower floret is herbaceous with 5 nerves and measures 2.2mm to 3.5mm in length. The fertile lemma is without a keel and has 5 nerves measures 2mm to3mm in length. The lemmas are covered in white pulverulent hairs while the palae is 2 nerved.
The 2 or 3 white filaments on each spikelet which measure 1mm to 1.5mm in length. The pale yellow anthers measure 2mm to 2.5mm in length.
The reddish-maroon, feathery styles open from the apex and appear before the stamens. The pistils measures 3mm to 3.5mm in length. The flowers appear throughout the year under favourable conditions.
The fruits of Entolasia stricta are obovoid to globose or turgidly biconvex nuts. The nuts measure 2.4mm to 3.6mm in length by 1.1mm to 1.6mm in width. The green seeds turn pale golden-brown to glossy honey coloured when ripe.
Wildlife:
Entolasia stricta’s seeds are eaten by most finches and quails.
Cultivation:
It is not known as to the value of Entolasia stricta as a fodder crop. The leaves and stems are eaten along with other pasture crops when growing in the pasture to the extent it will soon be eliminated from the pastures.
Entolasia marginata is classified as a weed by gardeners. It gives small quantities of trash for mulch. It recovers quickly when cut back to ground level and is easy to remove by pulling the culms and small fibrous root system by hand.
In cultivation it can be grown on most types of soil even heavy clay. It requires full sun to light dappled shade for best results. It is particularly useful under trees in paddocks where light grazing takes place. It would be best grown in a mixed pasture. High nitrogenous fertilizers will increase the length of the internodes on the culms.
Propagation:
Seeds: Entolasia stricta‘s seeds can be sown directly into a seed raising mix. Cover the seeds with 2mm to 5mm of the mix. Place the tray or pot with the seeds into another tray and fill the lower tray with water. Place the trays in a warm position under 20mm or 30mm shade. When the seedlings reach 20mm to 40mm tall, prick them out and plant them into 50mm native tubes using a seed raising mix. Place the 50mm native tubes into a tray of water and return them to the bush house.
Once the seedlings reach 150mm to 200mm in height plant them out into their permanent position. Mass plantings can be achieved by planting them at a minimum of 0.8 meters to 1 meter centers or closer if quicker coverage is required.
Fertilize using seaweed, fish emulsion or organic chicken pellets soaked in water on an alternate basis. Fertilize every two months until the plants are established then annually in early September to October to maintain health, vitality and better flowering.
Further Comments from Readers:
Hi reader, it seems you use The Bible of Botany a lot. That’s great as we have great pleasure in bringing it to you! It’s a little awkward for us to ask, but our first aim is to purchase land approximately 1,600 hectares to link several parcels of N.P. into one at The Pinnacles NSW Australia, but we need your help. We’re not salespeople. We’re amateur botanists who have dedicated over 30 years to saving the environment in a practical way. We depend on donations to reach our goal. If you donate just $5, the price of your coffee this Sunday, We can help to keep the planet alive in a real way and continue to bring you regular updates and features on Australian plants all in one Botanical Bible. Any support is greatly appreciated. Thank you.
In the spirit of reconciliation we acknowledge the Bundjalung, Gumbaynggirr and Yaegl and all aboriginal nations throughout Australia and their connections to land, sea and community. We pay our respect to their Elders past, present and future for the pleasures we have gained.
Wombat Creek State Conservation Area NSW
Wombat Creek State Conservation Area NSW
Sherwood Nature Reserve NSW
Sherwood Nature Reserve NSW
Sherwood Nature Reserve NSW
Wombat Creek State Conservation Area NSW
Wombat Creek State Conservation Area NSW
Wombat Creek State Conservation Area NSW
Wombat Creek State Conservation Area NSW
Sherwood Nature Reserve NSW
Sherwood Nature Reserve NSW
Sherwood Nature Reserve NSW
Entolasia whiteana
Classification
Unranked: Monocots
Unranked: Commelinids
Order: Poales
Family: Poaceae
Genus: From Entos, which is Ancient Greek for within and Lassios, which is Ancient Greek for hairy. It refers to the hairy fertile lemmas, which are covered by the upper glume.
Species: Is probably named in honour of Cyril Tennison White; 1890-1950, who was a Queensland botanist for 35 years.
Common Name:
Distribution:
Entolasia whiteana is found in several disjunct populations south from Innisfail in far northern coastal Queensland to Hilltop south east of Sydney in central coastal New South Wales. It is mainly found on the Western Slopes, on and east of the Great Dividing Range. It is found as far west as the Blackdown Tablelands and Isla Gorge.
https://avh.ala.org.au/occurrences/search?taxa=Entolasia+whiteana#tab_mapView
Habitat:
Aspect / Climate:
Entolasia whiteana prefers full sun to light dappled shade. It is found growing in scrub land, open forests or open dry rainforests. The altitude ranges from 5 meters ASL to around 850 meters ASL.
The temperatures range from minus 4 degrees in August to 40 degrees in January.
The rainfall ranges from lows of 400mm to 3200mm average per annum.
Soil Requirements:
Entolasia whiteana prefers sandy loams to fatty light clays or light to medium silts. The soils are usually derived from decomposed sandstone or at times granites or sandy alluvial deposits. The soils pH ranges from 4.5pH to 6.5pH. It tolerates waterlogged soils for short periods on a seasonal basis. Non saline soils to moderately saline soils are tolerated.
Height & Spread:
Wild Plants: 0.2m to 0.8m by 0.3m to 1m or more in diameter.
Characteristics:
Entolasia whiteana grows as a straggling or shrubby wiry perennial grass with spreading, geniculately ascending or decumbent culms. The culms are densely tufted on the slender rhizome. The culms are 4 to 9 node and usually measure 200mm to 600mm in length by 1mm to 3mm in diameter. The culms are blue-green and glabrous. The internodes culms are glabrous or sparsely covered in white hirsute hairs while the nodes are covered in white puberulent hairs
Entolasia whiteana‘s leaves linear to narrow lanceolate leaves measure 10mm to 100mm by 1mm to 5mm in width. The sheath is glabrous to moderately covered in white pubescent hairs. The ligule measures 0.6mm to 1.2mm in length and is covered in long white ciliate hairs which measure 0.2mm to 0.6mm in length. The concolourous laminas are usually pale blue-green or at times pale grass-green and are usually glabrous or covered in tuberculate based, white puberulent hairs. The laminas are involute. The mid vein is slightly prominent on the lower lamina.
The inflorescences of Entolasia whiteana are narrow compound panicle of racemes from the terminal leaf axil. The panicles measure 20mm to 100mm in length while the 2 to 9 cylindrical racemes measure 15mm to 30mm in length. There are 2 to14 fertile spikelets on each raceme.
The solitary spikelets are loosely and irregularly arranged along the raceme. The spikelets measure 4mm to 6mm in length. The pedicelled spikelets are 2-flowered with the lower floret barren or rarely male while the upper one is fertile. The basal sterile floret comprises of 1 fertile floret without a rachilla extension. The floret is lanceolate to elliptical, dorsally compressed and measures 2.2mm to 3.7mm in length.
The dissimilar glumes are slightly shorter than fertile lemma. The lower glume is ovate, membranous, without a keel and has 1 to 3 nerves. It measures 1.8mm to 2.8mm in length. The upper glume is lanceolate to elliptic, glabrous or asperulous and measures 3.8mm to 6mm in length. It is herbaceous, without a keel and has 5 nerves. The upper glumes apexes are muticus.
The basal sterile florets have as single barren floret without a significant palae. The lemma of the lower sterile floret measures 2.2mm to 3.7mm.Tthe fertile lemma is herbaceous, has 5 nerve and measures 3.5mm to 5.5mm in length.
There are 2 or 3 white filaments on each spikelet which have pale yellow anthers.
The reddish-maroon, feathery styles open from the apex and appear before the stamens. The flowers appear throughout the year under favourable conditions.
The fruits of Entolasia whiteana are obovoid to globose or turgidly biconvex seeds. The seeds measure 2.5mm to 3mm in length by 1.1mm to 1.6mm in width. The green seeds turn pale golden-brown to glossy honey coloured when ripe.
Wildlife:
Entolasia whiteana‘s seeds are eaten by most finches and quail.
Cultivation:
It is not known as to the value of Entolasia whiteana as a fodder crop. The leaves and stems are eaten along with other pasture crops when growing in the pasture to the extent it will soon be eliminated from the pastures.
Entolasia marginata is classified as a weed by gardeners. It gives small quantities of trash for mulch. It recovers quickly when cut back to ground level and is easy to remove by pulling the culms and small fibrous root system by hand.
In cultivation it can be grown on most types of soil even heavy clay. It requires full sun to light dappled shade for best results. It is particularly useful under trees in paddocks where light grazing takes place. It would be best grown in a mixed pasture. High nitrogenous fertilizers will increase the length of the internodes on the culms but at the same time will soften them making them susceptible to insect attack.
Propagation:
Seeds: Entolasia whiteana‘s seeds can be sown directly into a seed raising mix. Cover the seeds with 2mm to 5mm of the mix. Place the tray or pot with the seeds into another tray and fill the lower tray with water. Place the trays in a warm position under 20mm or 30mm shade. When the seedlings reach 20mm to 40mm tall, prick them out and plant them into 50mm native tubes using a seed raising mix. Place the 50mm native tubes into a tray of water and return them to the bush house.
Once the seedlings reach 150mm to 200mm in height plant them out into their permanent position. Mass plantings can be achieved by planting them at a minimum of 0.8 meters to 1 meter centers or closer if quicker coverage is required.
Division: Water the plants well a day or 2 before the operation is to be done if it is not growing in water at the time of transplanting. Avoid very hot weather. Cut around the clump and out on one side so that the shovel can be placed under the root ball. (Or remove it from its pot.)
Remove the plant from the soil. Cut it into 3 or 4 equal parts, first down the middle then halve those sections again ensuring that each section has some roots and, rhizome and culms or shoots. The rhizomes should have at least several eyes or growing shoots. Remove unwanted dead leaves and any old small sections that look weak or dead. Plants can be divided further but ensure each division has a several strong shoots and healthy roots attached to the tuff. Replant or pot ensuring the soil is at the same level as before. Water and fertilize with a half strength solution of fish emulsion. New shoots will appear within two weeks. Once the potted plants have new shoots and the roots treat them as seedlings.
Fertilize using seaweed, fish emulsion or organic chicken pellets soaked in water on an alternate basis. Fertilize every two months until the plants are established then annually in early September to October to maintain health, vitality and better flowering.
Further Comments from Readers:
Hi reader, it seems you use The Bible of Botany a lot. That’s great as we have great pleasure in bringing it to you! It’s a little awkward for us to ask, but our first aim is to purchase land approximately 1,600 hectares to link several parcels of N.P. into one at The Pinnacles NSW Australia, but we need your help. We’re not salespeople. We’re amateur botanists who have dedicated over 30 years to saving the environment in a practical way. We depend on donations to reach our goal. If you donate just $5, the price of your coffee this Sunday, We can help to keep the planet alive in a real way and continue to bring you regular updates and features on Australian plants all in one Botanical Bible. Any support is greatly appreciated. Thank you.
In the spirit of reconciliation we acknowledge the Bundjalung, Gumbaynggirr and Yaegl and all aboriginal nations throughout Australia and their connections to land, sea and community. We pay our respect to their Elders past, present and future for the pleasures we have gained.
Enydra woollsii
Classification
Unranked: Eudicots
Unranked: Asterids
Order: Asterales
Family: Asteraceae
Genus: From Enhydros, which is Ancient Greek or later Hydra, which is Greek for living in water. It refers to plants, which grow in water or perpetually wet, muddy situations.
Species: Is named in honour of the Reverend William Wools; 1814-1893, who was a clergyman and botanist.
Common Name: Buffulo Spinach.
Distribution:
Enydra woollsii is found south from Fraser Island in southern coastal Queensland to Haslam’s Creek just south of Sydney in New South Wales. It is found on and east of the Great Dividing Range.
There is an isolated population along the coast near Darwin in the Northern Territory and near Eurimbula National Park, near Seventeen Seventy in coastal central Queensland.
https://avh.ala.org.au/occurrences/search?taxa=Enydra+woollsii#tab_mapView
Habitat Aspect Climate:
Enydra woollsii prefers full sun to dappled light. The plants are hydrophytic and can be found adjacent to wet wallums, in swampy heaths, drainage lines, dams, along water courses, fish breeding ponds and rice paddies. It is found from 5 meters ASL to 56 meters ASL and close to the coast in Australia but has been recorded at 1800 meters ASL and well inland in Asia.
The temperatures range from 3 degrees in July to 32 degrees in January.
The rainfall ranges from lows of 600mm to an average of 1200mm annually, however the rainfall is not as important as the consistent moisture derived from seepages and ground depressions.
Soil Requirements:
Enydra woollsii prefers silty loams to medium clays. In Australia the soils are usually derived from decomposed sandstone laid down as alluvial deposits or accumulated peaty sands. The soils pH ranges from 5pH to 6.5pH. It does tolerate waterlogged soils. Non saline soils to moderately saline soils are tolerated.
Height & Spread:
Wild Plants: 0.1m to 0.2m by 0.5m to 2m.
Characteristics:
Enydra woollsii ‘s is a small perennial with decumbent, stems which carry the leaf scars of discarded leaves. The branchlets and juvenile new growth is soft, pale blue-green and are sparsely covered in fine white pilose hairs. The plants root from each node that is in water or where ever they touch the ground out of water.
Enydra woollsii is leaves are oblong to lanceolate and usually measure 25mm to 80mm in length by 6mm to 10mm in width but can be up to 20mm in width. The bases are truncate while the apexes are acute to acute-obtuse. The concolourous laminas are mid grass-green, dull and glabrous. The laminas are flat or very slightly recurve upwards from the mid-vein to the margins and near the apex. The margins are entire, sinuate or toothed. The midvein is prominent on the lower lamina and is clearly visible on the upper lamina. The petioles are stem clasping, covered in white pilose hairs and measures 0mm to 1mm in length.
The inflorescence of Enydra woollsii are born in clusters within a tightly packed head from the terminals or leaf axils. The involucral bracts are ovate with many parallel veins originating from the base. The margins are undulating and fringed. The outer 2 bracts measure 6mm to 7mm in length while the 2 inner bracts 3mm to 5mm in length. The ray and disc florets are usually white or at times are cream to pastel yellow. The individual flowers are sessile.
The 6 deep brown anthers are attached to the inside of the corolla tube near the mouth adjacent to the lobes. The yellow pistils are exserted. The flowers appear from September to March.
Enydra woollsii fruits are small flat achenes. The achenes are without a pappus and measure 3mm to 4mm in length. The green heads turn pale brown to fawn.
Wildlife:
Enydra fluctans are eaten by most aquatic birds, and offer good protection for water born insects as well as a food source for many insects.
The plants are an excellent source of vitamin A and b-sitosterol which is a naturally occurring steroid which prevents the uptake of cholesterol as it passes through the intestines. It has a mild spinach flavour and can be used as a green vegetable substitute for the evening meal. This plant needs further investigation for its anticholesterolemic benefits and steroid factors which could help solve many premature heart attacks, the need for expensive medicines and medical operation procedures.
Warning: High consumption of Enydra woollsii as a vegetable may lead to positive anabolic steroid intake, though athletes who have proven their intake was from this vegetable in the past have been cleared of any wrong doing. This may not be the case in the future so be careful and check with the proper authorities before consuming more than one meal a week or on a regular basis.
Cultivation:
Enydra woollsii is a magnificent small perennial for subtropical to temperate gardens. It can fill that hard spot that is consistently wet.
They can be pruned to shape or allowed to do their own thing, either way they make very interesting plants.
Enydra woollsii looks particularly stunning placed amongst large boulders where they soften the rocks. Here pruning is beneficial in order to persuade them to grow around them rather than up and over them. The boulders assist in keeping the root zone cool and help to retain moisture in the lower strata of the soil of a bog garden.
Enydra woollsii can be grown adjacent to taps or at the lower side of a vegetable garden where it can help soak up excess water and be used as a green vegetable.
If grown in a vegetable bed it is best used in a sunken bed where moisture lies or placed in furrows. Moisture run off and nutrients leached from the vegetable patch is all it requires to grow at a rapid rate. Too much nitrogen will yield soft growth which lacks vitamins and minerals.
Propagation:
Seeds: Enydra woollsii‘s seeds can be sown into a seed raising mix without treatment in spring or summer. Cover them in 2mm of fine sand. Place the trays in a sunny warm position and keep wet. When the seedlings are 25mm to 50mm tall, prick them out and plant them into 50mm native tubes using a good organic mix.
Once the seedlings reach 100mm to 150mm in height prick the growing tips out and plant them out into their permanent position. For mass plantings plant them at 1.8 meter to 2 meter centers. Amongst boulders use wider spacing so the beauty of the rocks can still be viewed.
Cuttings: As Enydra woollsii seeds are often difficult to collect cuttings maybe the best method for propagating. Select material from good leafy specimens or those with a better growth habit.
Use 60 to 80mm long half ripened material from the present season’s growth when growing from cuttings. Cuttings can be taken throughout the warmer months that are frost free. Remove half the leaves from the bottom section being careful not to tear the bark. Place the cuttings in 25mm tubes. When the cuttings have obviously struck and have developed good roots gently replant them into 150mm pots or into their permanent positions.
Fertilize using seaweed, fish emulsion or organic chicken pellets soaked in water on an alternate basis. Fertilize every two months until the plants are established then annually in early September to October to maintain health, vitality and better flowering.
Further Comments from Readers:
Hi reader, it seems you use The Bible of Botany a lot. That’s great as we have great pleasure in bringing it to you! It’s a little awkward for us to ask, but our first aim is to purchase land approximately 1,600 hectares to link several parcels of N.P. into one at The Pinnacles NSW Australia, but we need your help. We’re not salespeople. We’re amateur botanists who have dedicated over 30 years to saving the environment in a practical way. We depend on donations to reach our goal. If you donate just $5, the price of your coffee this Sunday, We can help to keep the planet alive in a real way and continue to bring you regular updates and features on Australian plants all in one Botanical Bible. Any support is greatly appreciated. Thank you.
In the spirit of reconciliation we acknowledge the Bundjalung, Gumbaynggirr and Yaegl and all aboriginal nations throughout Australia and their connections to land, sea and community. We pay our respect to their Elders past, present and future for the pleasures we have gained.
Canberra ACT
Canberra ACT
Canberra ACT
Canberra ACT
Canberra ACT
Epacris breviflora
Classification
Unranked: Eudicots
Unranked: Asterids
Order: Ericales
Family: Epacriceae
Genus: From Epi, which is Ancient Greek for upon and Akris, which is Ancient Greek for a summit near the tops of hills or the leaves’ apexes that are sharply pointed. It refers to plants, which prefer to grow on the tops of hills or have pointed leaves somewhat like the apex of hills.
Species: From Brevis, which is Latin for short and Floris which is Latin for a flower or Flos, which is Roman for the goddess of spring and flowers. It refers to the petals which are much shorter than other species in the genus.
Common Name: Long Flowered Heath Bush.
Distribution:
Epacris breviflora is found in several disjunct populations south from Boonoo Boonoo National Park in south eastern Queensland to the Yass Valley west of Canberra in the ACT where it is found continuously to the tributary of the Little River on the Blue Range in Rubicon State Forest. It is mainly found at higher elevations on the Great Dividing Range.
https://avh.ala.org.au/occurrences/search?taxa=Epacris+breviflora#tab_mapView
Habitat:
Epacris breviflora prefer full sun to dappled light. It grows adjacent to wallums or in swampy heaths, on granite cliff seepages and moist depressions. The altitude ranges from 400 meters ASL to 1500 meters ASL.
The temperatures range from minus 6 degrees in July to 28 degrees in January.
The rainfall ranges from lows of 800mm to an average of 1600mm annually, however the rainfall is not as important as the consistent moisture derived from seepages and ground moisture.
Soil Requirements:
Epacris breviflora prefers to grow on sandy loams, better quality loams to light gravelly or gritty clays. The soils are usually derived from decomposed granites. The soils pH ranges from 5pH to 5.5pH. It tolerates waterlogged soils especially those that have higher water tables or soils which are kept moist through capillary action. Non saline soils to moderately saline soils are tolerated.
Height & Spread:
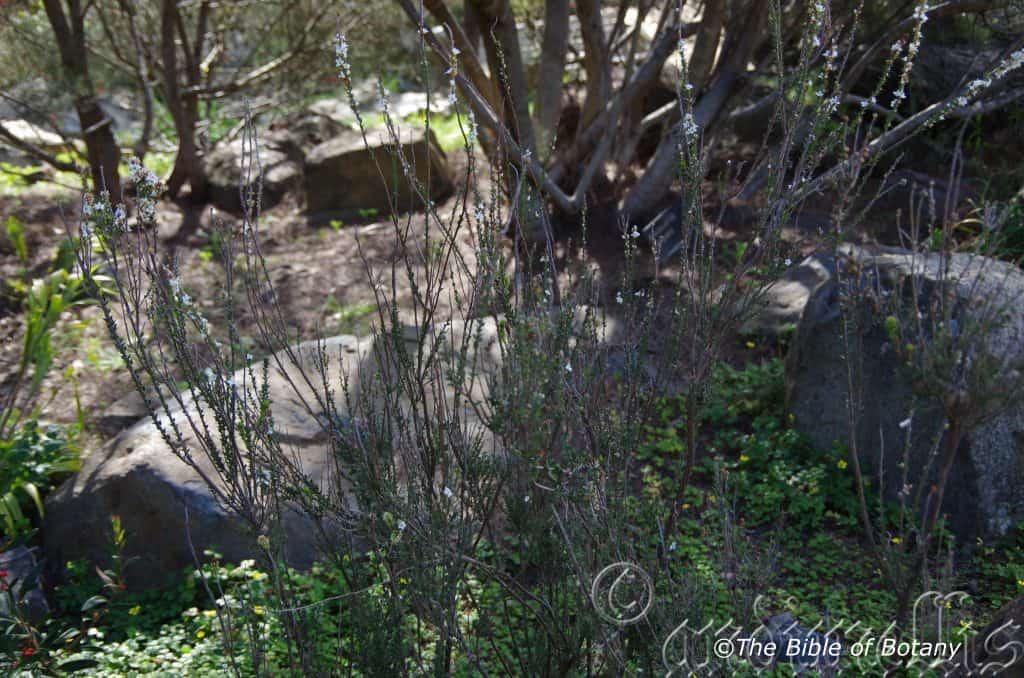
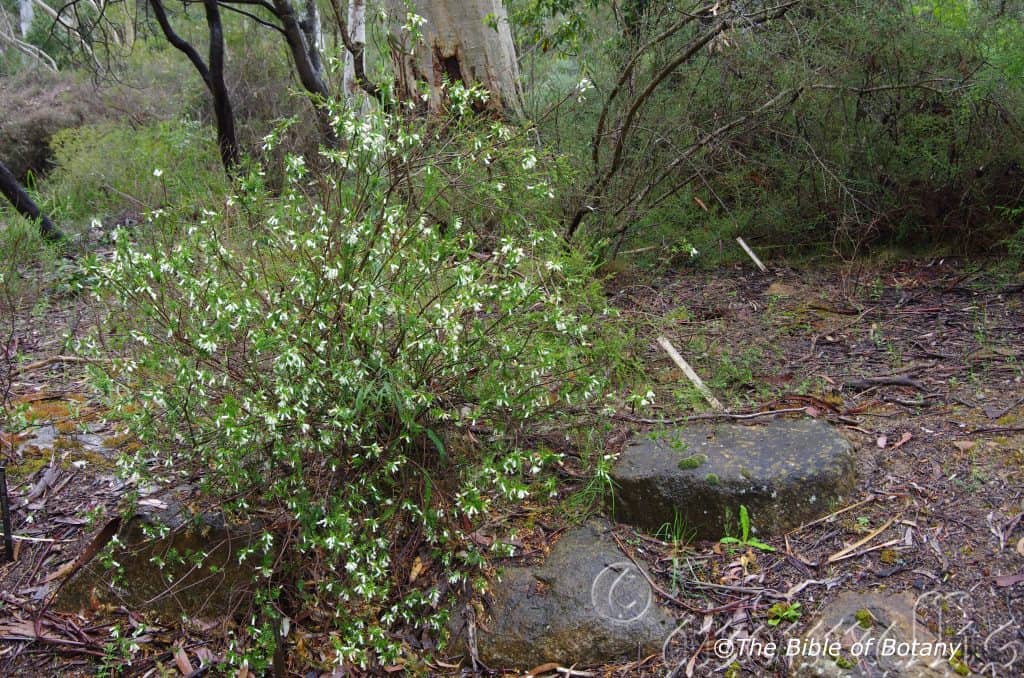
Wild Plants: 0.5m to 1.8m by 0.5m to 1m.
Characteristics:
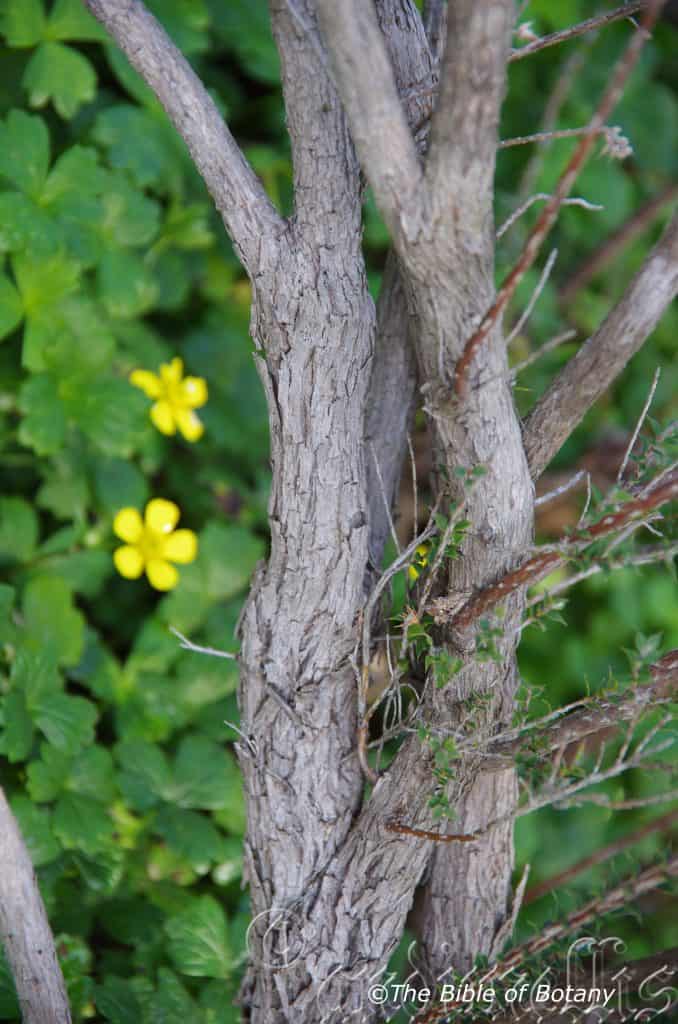
Epacris breviflora’s pale grey stems are erect, glabrous with small inconspicuous leaf scars of discarded leaves. The branchlets and juvenile new growth are deep green and covered in white tomentose hairs.
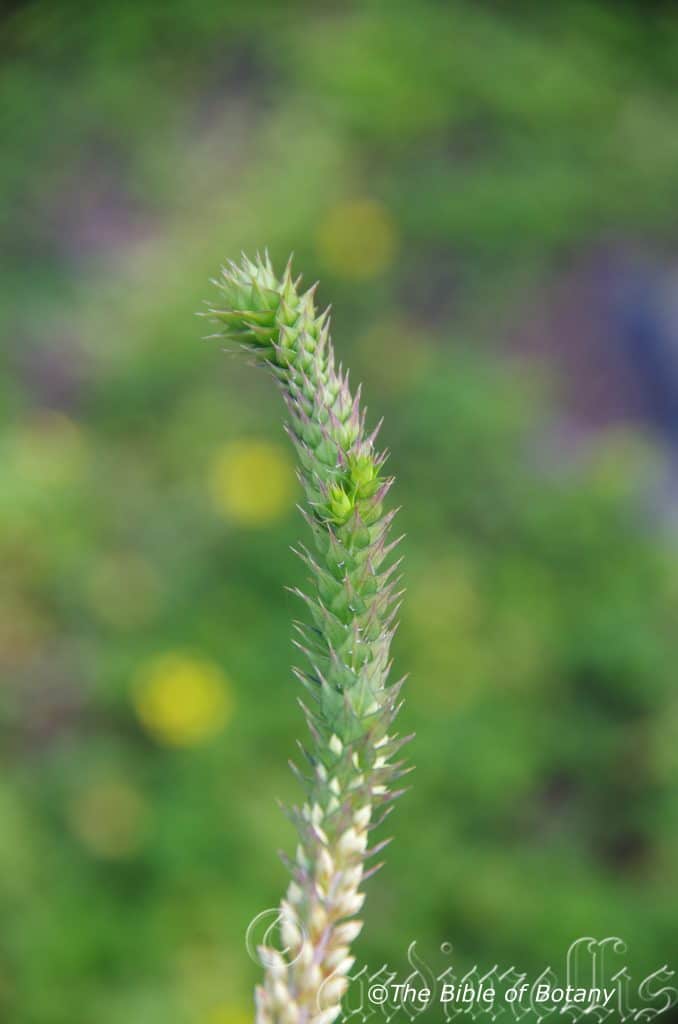
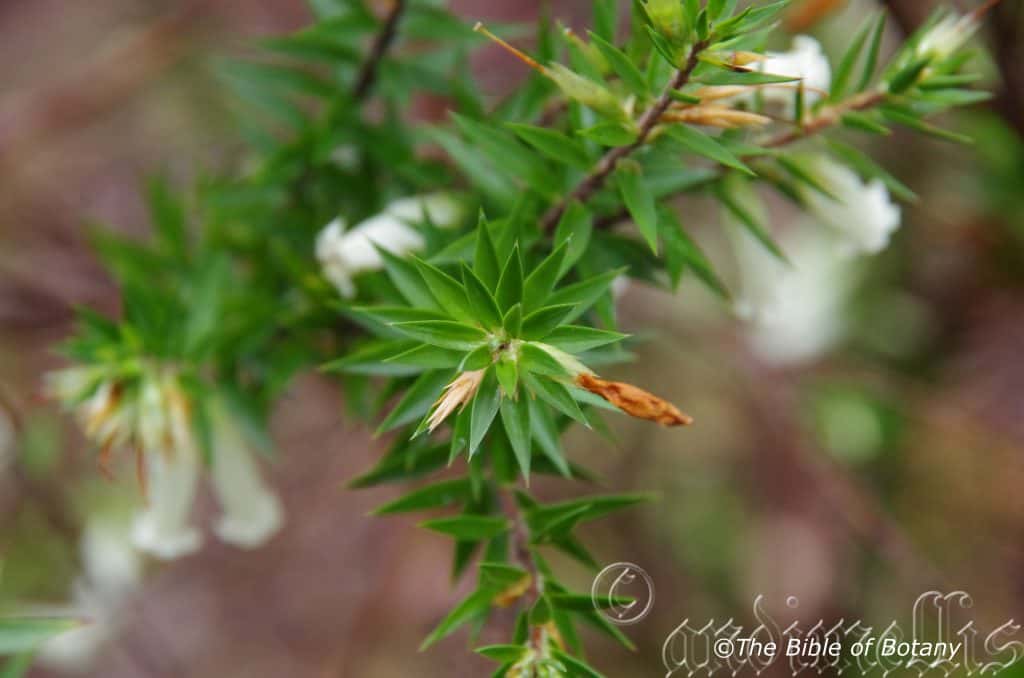
Epacris breviflora’s clustered erect to divaricate leaves are ovate and measure 4mm to 7.5mm in length by 1.6mm to 3.6mm in width. The petiole is sparsely covered in white, caduceus tomentose hairs and measures 0.5mm to 1mm in length. The bases are broad cuneate to rounded while the apexes are sharply acute. The discolourous laminas are mid green, grey-green to sea green, dull and glabrous on the upper laminas while the lower laminas are paler. The laminas are flat while the margins are entire. The midvein is slightly prominent on the lower lamina and is not visible on the upper lamina.
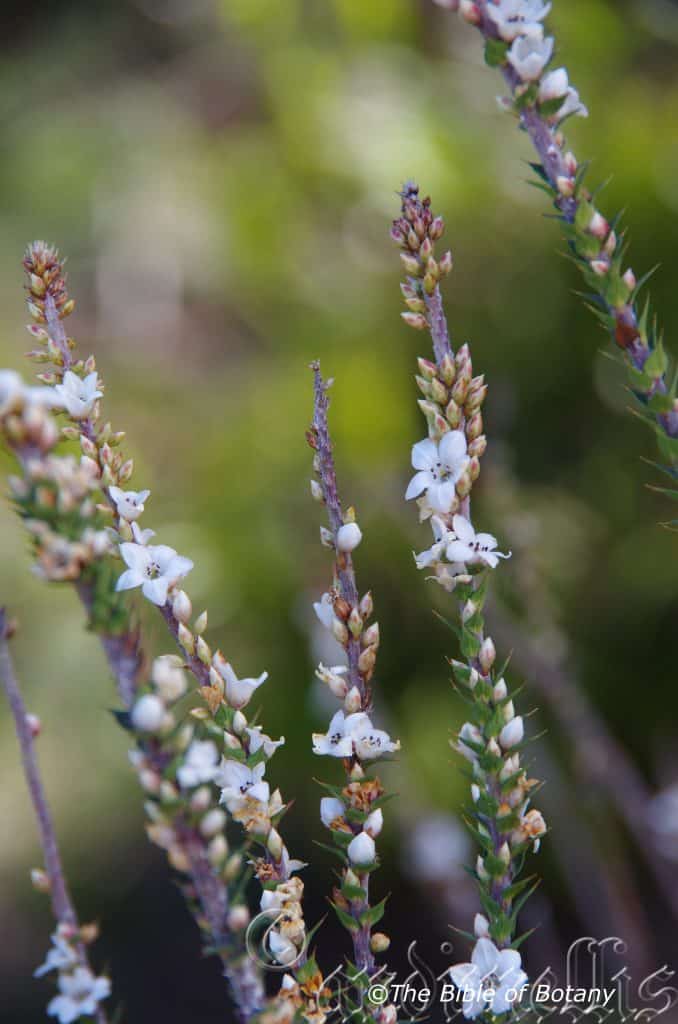
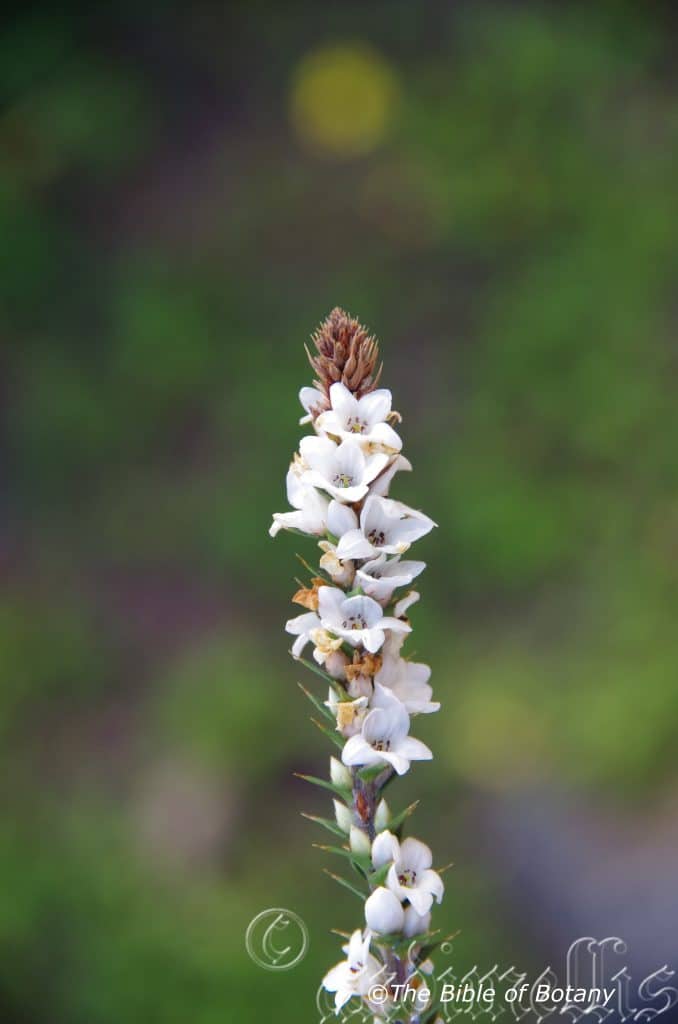
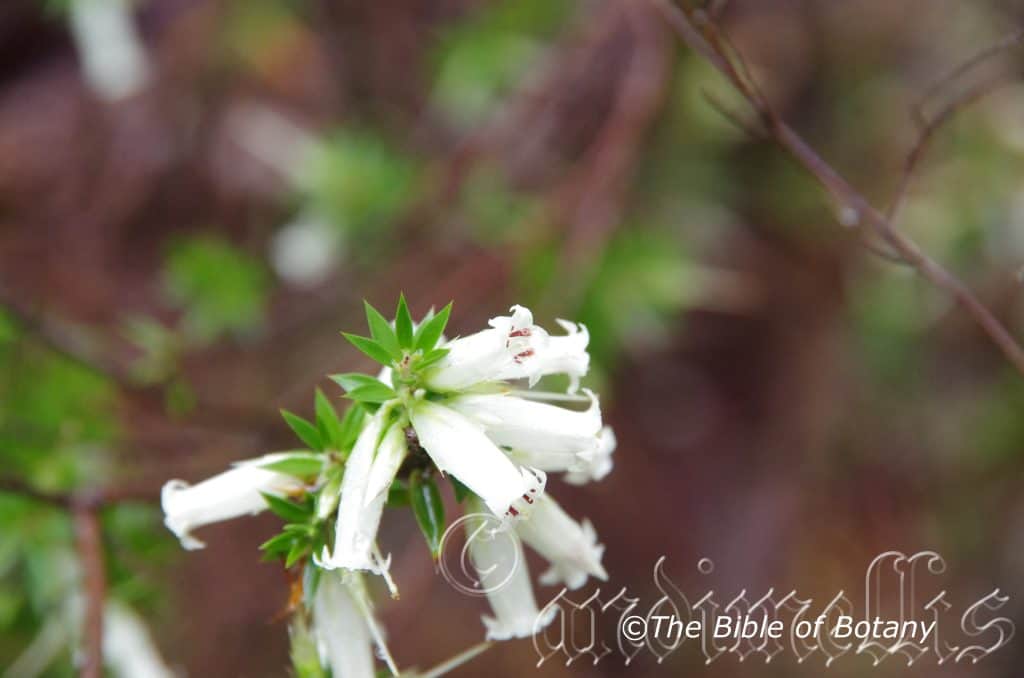
The inflorescences of Epacris breviflora are born singularly from the leaf axils. The white bracts are keeled with an acute apex. The white tinged pink, lanceolate sepals measure 2.9mm to 4mm in length. The pure white corolla measures 3mm to 4.2mm in length by 5mm to 6.5mm in diameter. The pure white corolla lobes are divaricate and measure 2.3mm to 3.3mm in length. The pedicels measure 0.2mm to 0.8mm in length.
The bases of the stamens are attached to the throat of corolla and are angled inwards. The inserted or slightly exserted anthers are deep brown.
The stout, green pistil is exserted. The flowers appear throughout the year with a peak from December to early March.
Epacris breviflora fruits are small flat capsules. The capsules measure 1.6mm to 2mm in length.
Wildlife:
Epacris breviflora are good standby plants for small nectar eating birds like Eastern spine bills, Yellow Faced Honey eaters and New Holland Honey eaters because they flower all year and peak when there are fewer plants in flower. The plants leaves are host to the Mountain Blue Butterfly Neolucia hobartensis, and the Australian Cranberry Moth Poecilasthena pulchraria.
Cultivation:
Epacris breviflora is a magnificent small erect shrub for sub-tropical to temperate gardens. It has a place around swimming pools, in cool sunny courtyards, bush gardens and rockeries. It needs to be mulched and the soil moisture needs to be kept at an even level. In the garden it will grow 0.5 meters to 1 meter in height by 1 meter to 1.2 meters in diameter.
It can be pruned to shape or allowed to do their own thing, either way they make very interesting plants adding colour and feed for small native birds.
Epacris breviflora looks particularly stunning placed amongst large boulders where they soften the rocks. Here pruning is beneficial in order to persuade them to grow around the boulders rather than up and over them. The boulders assist in keeping the root zone cool and help to retain moisture in the lower strata of the soil.
Epacris breviflora add interesting foliage and colour to a heath garden. When you design a flat heath garden which Epacris breviflora is well suited. Try not to use contours or straight lines to display the plants as heath lands are almost always flat or have a slight rise with the plants being found scattered throughout the scene. Plants must be planted close together and be short so you can see over the tallest ones with the exception of one or two plants at the most. These will be feature plants. The idea is to achieve a feeling of expansive flatness. This can be achieved with using the Epacris breviflora’s leaves and having them contrasting finer pale green or soft grey to glaucous coloured foliage. Use a lot of procumbent plants with red or orange flowers like Carpobrotus edulis, Grevillea stenomera, Grevillea rosmarinifolia or even Grevillea sericea for a softer look. Mix it with other smaller shrubs so none of them dominate the scene but blend in to give a mosaic of foliage colours that you oversee.
Propagation:
Seeds: Epacris breviflora seeds can be sown into a seed raising mix without treatment in spring or summer. Cover them in 2mm of fine sand. Place the trays in a sunny warm position and keep moist. When the seedlings are 25m to 50mm tall, prick them out and plant them into 50mm native tubes using a good organic mix.
Once the seedlings reach 150m to 200mm in height prick the growing tips out and plant them out into their permanent position. For mass plantings plant them at 1 meter to 1.5 meter centers. Amongst boulders use wider centers so the beauty of the rocks can still be viewed.
Cuttings: As Epacris breviflora seeds are difficult to collect cuttings maybe the best method for propagating. Select material from good flowering specimens or those with a better growth habit, plants with larger flowers, those that have the colour you desire or the leaves and habit you that you want to foster.
Successful results are have been attained with using 30mm fine gravel, 30mm peat and 40mm coconut fibre. Cuttings are probably best placed into individual small pots or tubes even resorting to peat pots to minimise root disturbance.
Use 70 to 80mm long half ripened material from the present season‘s growth when growing from cuttings. Take them in mid-autumn where frosts are not a problem or early spring where the day temperatures will not exceed 28 degrees. Remove half the leaves from the bottom section being careful not to tear the bark.
1 Prepare the cutting mix by adding one third sharp clean river sand, one third peat and one third perlite. These ingredients are sterilize,
2 Select good material from non diseased plants,
3 Select semi green stems for cuttings. Look for a stem with two or three nodes,
4 Place the cutting on a flat, hard surface, and make a clean down one side of the cutting for 10mm to 15mm with a sharp sterile knife or razor blade. – This scarification of the node will increase the chances of roots emerging from this spot. Now remove all but one or two the leaves, leaving the apex leaves in tact. If the leaves are very large in proportion to the stem, cut off the apical halves.
5 Fill a saucer with water, and place a little mild to medium rooting hormone into another container like a milk bottle top. Dip the node end of the cutting into the water and then into the rooting hormone. Tap off any excess hormone,
6 Use a small dipple stick or old pencil to poke a hole into the soilless potting mix. Ensure the hole is slightly larger than the stem diameter and be careful not to wipe the rooting hormone off the cuttings base, place the cuttings in a pattern ensuring the cuttings are not touching each other,
7 I like to place the pots in Plastic bags to help maintain temperature and moisture. Place in a semi shaded place like under 50mm shade cloth.
8 When the cuttings have struck, open the bag to allow air circulation for a few days to a week,
9 Once hardened off remove the cuttings from the bag and allow to further hardening for a few more days,
10 When the cuttings have obviously struck and have developed good roots; which can take about 8 months gently replant them into 150mm pots or place them into their permanent positions in the garden. The fewer times you repot the better as Epacris breviflora develop a very fine fragile root system and resent repotting and handling.
Fertilize using seaweed, fish emulsion or organic chicken pellets soaked in water on an alternate basis. Fertilize every two months until the plants are established then annually in early September to October to maintain health, vitality and better flowering.
Further Comments from Readers:
Hi reader, it seems you use The Bible of Botany a lot. That’s great as we have great pleasure in bringing it to you! It’s a little awkward for us to ask, but our first aim is to purchase land approximately 1,600 hectares to link several parcels of N.P. into one at The Pinnacles NSW Australia, but we need your help. We’re not salespeople. We’re amateur botanists who have dedicated over 30 years to saving the environment in a practical way. We depend on donations to reach our goal. If you donate just $5, the price of your coffee this Sunday, We can help to keep the planet alive in a real way and continue to bring you regular updates and features on Australian plants all in one Botanical Bible. Any support is greatly appreciated. Thank you.
In the spirit of reconciliation we acknowledge the Bundjalung, Gumbaynggirr and Yaegl and all aboriginal nations throughout Australia and their connections to land, sea and community. We pay our respect to their Elders past, present and future for the pleasures we have gained.
National Botanic Gardens ACT

National Botanic Gardens ACT
National Botanic Gardens ACT
National Botanic Gardens ACT
Epacris calvertiana
Classification
Unranked: Eudicots
Unranked: Asterids
Order: Ericales
Family: Epacriceae
Genus: From Epi, which is Ancient Greek for upon and Akris, which is Ancient Greek for a summit near the tops of hills or the leaves’ apexes that are sharply pointed. It refers to plants, which prefer to grow on the tops of hills or have pointed leaves somewhat like the apex of hills.
Species: Is named in honour of Caroline Louisa Waring Atkinson Calvert; 1834-1872, who was an Australian naturalist, botanical artist and a collector of herbarium samples.
Subspecies: Epacris calvertiana var. calvertiana. Is named in honour of Caroline Louisa Waring Atkinson Calvert; 1834-1872, who was an Australian naturalist, botanical artist and a collector of herbarium samples.
Subspecies: Epacris calvertiana var. versicolor. From Varius, which is Latin for variable to be able to change and Khroma, which is Ancient Greek for the intensity or saturation of colour or density of a hue in refraction of light from a, surface. It refers to structures or organs, which have variable colours.
Common Name:
Distribution:
Epacris calvertiana var. calvertiana is endemic to New South Wales in several disjunct populations south from the Blue Port Macquarrie to the bega Valley. It is mainly occurs on and east of the Great Dividing Range.
Epacris calvertiana var. versicolor is restricted to a small area in New South Wales south from Liverpool to Shoalhaven.
https://avh.ala.org.au/occurrences/search?taxa=Epacris+calvertiana#tab_mapView
Habitat Aspect Climate:
Epacris calvertiana prefers light shade to dappled sunlight. It grows in transitional zones of open sclerophyll forests and temperate rainforests. The altitudes range from 1000 meters ASL to 1500 meters ASL.
The temperatures range from minus 5 degrees in July to 30 degrees in January.
The rainfall ranges from lows of 600mm to an average of 1600mm annually, however the rainfall is not as important as the consistent ground moisture derived from seepages and ground depressions.
Soil Requirements:
Epacris calvertiana prefers skeletal soils of light gritty clays to light fatty gravelly clays. The soils are derived from decomposed sandstones or granites. The soils pH ranges from 5pH to 6pH. It does not tolerate waterlogged soils. Non saline soils to moderately saline soils are tolerated.
Height & Spread:
Wild Plants: 0.2m to 1.8m by 0.5m to 0.7m.
Characteristics:
Epacris calvertiana‘s stems are erect diffuse shrubs. The glabrous stems and carry small inconspicuous cup shaped leaf scars of discarded leaves. The juvenile new growth is pale grey green and covered in white floccose hairs.
Epacris calvertiana‘s crowded usually somewhat appressed to erect leaves on older stems are elliptical to ovate and measure 5.5mm to 15mm in length by 1.5mm to 3mm in width. The petiole measures 0.9mm to 1.5mm in length. The bases are rounded while the apexes are narrow tapering and slightly pungent at the tip. The slightly discolourous laminas are olive-green to mid green, dull and moderately covered in soft, white pubescent hairs. The laminas curve upwards from the mid vein to the margins or are flat and roll upwards near the apex. The margins are entire and covered in white ciliate hairs especially on the basal third. The midvein is slightly prominent on the lower lamina and is not visible on the upper lamina.
The inflorescences of Epacris calvertiana are born long leafy inflorescences. The peduncle measures 1mm 2.5mm in length. The minute obtuse green bracts are acuminate while the green sepals measure 6mm to 10mm in length. The pink to red, white or creamy-green corollas measure 10mm to 16mm in length by 3mm to 7mm in diameter. The lobes are strongly reflexed or in rolled at apex and measure 4mm to 5.5mm in length. The pedicels are covered in white puberulent hairs and measure 1.5mm to 2.5mm in length.
The 5 inserted, white stamens’ bases are attached to the throat of corolla with fawn to brown anthers.
The white or pascal pink style which is as long as the corolla or slightly longer has a white or pascal stigma. The flowers appear throughout the year.
Epacris calvertiana fruits are small flat capsules. The capsules measure 2.5mm to 3.5mm in length. The green capsules turn brown when ripe.
Subspecie Differences:
Epacris calvertiana var. calvertiana young leaves are covered in short, fine white fimbriate hairs on the margins. The flowers usually measure 3mm to 5mm in diameter. The tube is white, cream or pale creamy-green throughout. The flowers appear throughout the year with a peak in August to December.
Epacris calvertiana var. versicolor young leaves are more sparsely covered in longer, white ciliate hairs on the margins. The flowers usually measure 5mm to 7mm in diameter. The tube is pink to red with white or cream lobes. The flowers appear from June to October.
Wildlife:
These are good stand by plants for small nectar eating birds like Eastern spinebills, Yellow Faced Honey eaters and New Holland Honey eaters because they flower over a long period and peak when there are fewer plants in flower especially in the case of Epacris calvertiana subsp. calvertiana.
Cultivation:
Epacris calvertiana is a magnificent small shrub for cool subtropical to temperate gardens. It has a place around swimming pools, in cool sunny courtyards, bush gardens and rockeries where the soils are poor or skeletal in nature. It needs to be mulched and the soil moisture needs to be kept at an even level but not wet. In the garden it will grow 200mm to 2000mm by 500mm to 800mm when grown in the open. It can be pruned to shape or allowed to do its own thing, either way it makes a very interesting plant adding colour and feed for small native birds.
Epacris calvertiana looks particularly stunning placed amongst or amongst large boulders it will soften the rocks or mass planted with other Epacris spp. at the edge of a bush garden. It can be pruned to induce smaller bushier plants or left alone to create a natural scene of different sizes and shapes.
Epacris calvertiana add interesting foliage and colour to a heath garden. When you design a flat heath garden which this Epacris spp. is well suited. Try not to use contours or straight lines to display the plants as heath lands are almost always flat or have a slight rise with the plants being found scattered throughout the scene. Plants must be planted close together and be short so you can see over the tallest ones with the exception of one or two plants at the most. These will be feature plants. The idea is to achieve a feeling of expansive flatness. This can be achieved with using the Epacris calvertiana‘s leaves and having them contrasting finer pale green or soft grey to glaucous coloured foliage or deeper deep green foliage of plants like those on Epacris longiflora. Use a lot of procumbent plants with yellow, red or blue flowers to accentuate the white or pink and red. Mix it with other smaller shrubs so none of them dominate the scene but blend in to give a mosaic of foliage colours that you oversee.
Propagation:
Seeds: Epacris calvertiana‘s seeds can be sown into a seed raising mix without treatment in spring or summer. Cover them in 2mm of fine sand. Place the trays in a sunny warm position and keep moist. When the seedlings are 25mm to 50mm tall, prick them out and plant them into 50mm native tubes using a good organic mix.
Once the seedlings reach 150mm to 200mm in height prick the growing tips out and plant them out into their permanent position. For mass plantings plant them at 1 meter to 1.2 meter centers. Amongst boulders use wider spacing so the beauty of the rocks can still be viewed.
Cuttings: As Epacris calvertiana cuttings are not easy to propagate from. Select material from good flowering specimens or those with a better growth habit, plants with larger flowers, those that have the colour you desire or the leaves and habit you that you want to foster.
Successful results are have been attained with using 30mm fine gravel, 30mm peat and 40mm coconut fibre. Cuttings are probably best placed into individual small pots or tubes even resorting to peat pots to minimise root disturbance.
Use 70 to 80mm long half ripened material from the present season‘s growth when growing from cuttings. Take them in mid-autumn where frosts are not a problem or early spring where the day temperatures will not exceed 28 degrees. Remove half the leaves from the bottom section being careful not to tear the bark.
1 Prepare the cutting mix by adding one third sharp clean river sand, one third peat and one third perlite. These ingredients are sterilize,
2 Select good material from non diseased plants,
3 Select semi green stems for cuttings. Look for a stem with two or three nodes,
4 Place the cutting on a flat, hard surface, and make a clean down one side of the cutting for 10mm to 15mm with a sharp sterile knife or razor blade. – This scarification of the node will increase the chances of roots emerging from this spot. Now remove all but one or two the leaves, leaving the apex leaves in tact. If the leaves are very large in proportion to the stem, cut off the apical halves.
5 Fill a saucer with water, and place a little mild to medium rooting hormone into another container like a milk bottle top. Dip the node end of the cutting into the water and then into the rooting hormone. Tap off any excess hormone,
6 Use a small dipple stick or old pencil to poke a hole into the soilless potting mix. Ensure the hole is slightly larger than the stem diameter and be careful not to wipe the rooting hormone off the cuttings base, place the cuttings in a pattern ensuring the cuttings are not touching each other,
7 I like to place the pots in Plastic bags to help maintain temperature and moisture. Place in a semi shaded place like under 50mm shade cloth.
8 When the cuttings have struck, open the bag to allow air circulation for a few days to a week,
9 Once hardened off remove the cuttings from the bag and allow to further hardening for a few more days,
10 When the cuttings have obviously struck and have developed good roots; which can take about 8 months gently replant them into 150mm pots or place them into their permanent positions in the garden. The fewer times you repot the better as Epacris calvertiana develop a very fine fragile root system and resent repotting and handling.
Fertilize using seaweed, fish emulsion or organic chicken pellets soaked in water on an alternate basis. Fertilize every two months until the plants are established then annually in early September to October to maintain health, vitality and better flowering.
Further Comments from Readers:
Hi reader, it seems you use The Bible of Botany a lot. That’s great as we have great pleasure in bringing it to you! It’s a little awkward for us to ask, but our first aim is to purchase land approximately 1,600 hectares to link several parcels of N.P. into one at The Pinnacles NSW Australia, but we need your help. We’re not salespeople. We’re amateur botanists who have dedicated over 30 years to saving the environment in a practical way. We depend on donations to reach our goal. If you donate just $5, the price of your coffee this Sunday, We can help to keep the planet alive in a real way and continue to bring you regular updates and features on Australian plants all in one Botanical Bible. Any support is greatly appreciated. Thank you.
In the spirit of reconciliation we acknowledge the Bundjalung, Gumbaynggirr and Yaegl and all aboriginal nations throughout Australia and their connections to land, sea and community. We pay our respect to their Elders past, present and future for the pleasures we have gained.
Epacris impressa
Victoria‘s Floral Emblem
Classification
Unranked: Eudicots
Unranked: Asterids
Order: Ericales
Family: Epacriceae
Genus: From Epi, which is Ancient Greek for upon and Akris, which is Ancient Greek for a summit near the tops of hills or the leaves’ apexes that are sharply pointed. It refers to plants, which prefer to grow on the tops of hills or have pointed leaves somewhat like the apex of hills.
Species: From impressum, which is Latin for a motto or emblem. It refers to flowers, which make a striking impression like an emblem.
Common Name: Common Heath or Common Fuchsia Heath.
Distribution:
Epacris impressa has a disjunct distribution south from Budawang Range in southern coastal New South Wales along the coast to the Victorian border where it is found across the southern half of Victoria to North of Adelaide and Kangaroo Island in South Australia. There is an isolated population on the Murrumbidgee River near Wagga Wagga and a disjunct population in the Blue Mountains.
It is also found on the Bass Strait Islands and mainland Tasmania.
https://avh.ala.org.au/occurrences/search?taxa=Epacris+impressa#tab_mapView
Habitat Aspect Climate:
Epacris impressa prefers full sun to dappled light. It grows in open schlerophyll forests, open woodlands, scrublands or verges on wallums or swampy heaths. The altitude ranges from 15 meters ASL to 1000 meters ASL.
The temperatures range from minus 3 degrees in July to 32 degrees in January.
The rainfall ranges from lows of 600mm to an average of 1200mm annually, however the rainfall is not as important as the consistent ground moisture derived from seepages and ground depressions.
Soil Requirements:
Epacris impressa prefers better quality sandy loams, light gritty clays or gravelly clays. The soils are derived from decomposed sandstones or granites. The soils pH ranges from 5pH to 7pH. It does not tolerate waterlogged soils. Non saline soils to moderately saline soils are tolerated.
Height & Spread:
Wild Plants: 0.5m to 1.2m by 0.5m to 1m.
Characteristics:
Epacris impressa’s pale grey stems are erect, glabrous and carry small cup shape leaf scars of discarded leaves. The branchlets and juvenile new growth are pale grey green and covered in white pulverulent hairs.
Epacris impressa’s crowded leaves are linear-lanceolate to ovate and measure 4mm to 16mm in length by 1mm to 3mm in width. The petiole measures 0.3mm to 0.6mm in length. The bases are truncate while the apexes are sharply, narrow acute pungent tip. The concolourous laminas are deep green to deep sea-green, dull and glabrous or sparsely covered in fine white puberulent hairs. The laminas are flat while the margins are entire. The midvein is slightly prominent on the lower lamina and is not visible on the upper lamina.
The inflorescences of Epacris impressa are born singularly from the leaf axils often opening first at the apex then towards the base of the branchlets. The acute bracts are pink. The red to carmine or deep pink or rarely white sepals measure 2.5mm to 5.5mm in length. The red to carmine or deep pink or rarely white corollas measure 10mm to 18mm in length by 4mm to 8.5mm in diameter. The divaricate corolla lobes measure 2mm to 4mm in length. The pedicels are covered in white puberulent hairs and measure 1.5mm to 2.5mm in length.
The 5 inserted, pink stamens bases are attached to the throat of corolla and are angled inwards.
The pink style which is as long as the corolla has a yellow to pale green stigma. The flowers appear throughout the year with a decline in the summer months.
Epacris impressa fruits are small flat capsules. The capsules measure 3.3mm to 3.5mm in length. The green capsules turn brown when ripe.
Wildlife:
These are good stand by plants for small nectar eating birds like Eastern spinebills, Yellow Faced Honey eaters and New Holland Honey eaters because they flower all year and peak when there are fewer plants in flower.
The plants leaves are also host to the Australian Cranberry Moth (Poecilasthena pulchraria).
Cultivation:
Epacris impressa is a magnificent small shrub for cool subtropical to temperate gardens. It has a place around swimming pools, in cool sunny courtyards, bush gardens and rockeries. It needs to be mulched and the soil moisture needs to be kept at an even level but not wet. In the garden it will grow 500mm to 1200mm by 500mm to 1000mm when planted in the open. It can be regularly tipped pruned to shape or allowed to do its own thing, either way they make very interesting plants adding colour and feed for small native birds.
Epacris impressa looks particularly stunning placed amongst large boulders to soften the rocks or mass planted with other Epacris species at the edge of a bush garden. It can be pruned to induce smaller bushier plants or left alone to create a natural scene of different sizes and shapes.
Epacris impressa add interesting foliage and colour to a heath garden. When you design a flat heath garden which this Epacris is well suited. Try not to use contours or straight lines to display the plants as heath lands are almost always flat or have a slight rise with the plants being found scattered throughout the scene. Plants must be planted close together and be short so you can see over the tallest ones with the exception of one or two plants at the most. These will be feature plants. The idea is to achieve a feeling of expansive flatness. This can be achieved with using the Epacris impressa’s leaves and having them contrasting finer pale green or soft grey to glaucous coloured foliage. Use a lot of procumbent plants with white or yellow flowers to accentuate the pink and red. Mix it with other smaller shrubs so none of them dominate the scene but blend in to give a mosaic of foliage colours that you oversee. Here Actinotis helianthi adds a dash of white, Grevillea masonii or Grevillea paradoxa for red and all have good contrasting foliage.
Propagation:
Seeds: Epacris impressa ‘sseeds can be sown into a seed raising mix without treatment in spring or summer. Cover them in 2mm of fine sand. Place the trays in a sunny warm position and keep moist. When the seedlings are 25mm to 50mm tall, prick them out and plant them into 50mm native tubes using a good organic mix.
Once the seedlings reach 150mm to 200mm in height prick the growing tips out and plant them out into their permanent position. For mass plantings plant them at 1 meter to 1.2 meter centers. Amongst boulders use wider spacing so the beauty of the rocks can still be viewed.
Cuttings: As Epacris impressa seeds are difficult to collect, cuttings maybe the best method for propagating. Select material from good flowering specimens or those with a better growth habit, plants with larger flowers, those that have the colour you desire or the leaves and habit you that you want to foster.
Successful results are have been attained with using 30mm fine gravel, 30mm peat and 40mm coconut fibre. Cuttings are probably best placed into individual small pots or tubes even resorting to peat pots to minimise root disturbance.
Use 70 to 80mm long half ripened material from the present season‘s growth when growing from cuttings. Take them in mid-autumn where frosts are not a problem or early spring where the day temperatures will not exceed 28 degrees. Remove half the leaves from the bottom section being careful not to tear the bark.
1 Prepare the cutting mix by adding one third sharp clean river sand, one third peat and one third perlite. These ingredients are sterilize,
2 Select good material from non diseased plants,
3 Select semi green stems for cuttings. Look for a stem with two or three nodes,
4 Place the cutting on a flat, hard surface, and make a clean down one side of the cutting for 10mm to 15mm with a sharp sterile knife or razor blade. – This scarification of the node will increase the chances of roots emerging from this spot. Now remove all but one or two the leaves, leaving the apex leaves in tact. If the leaves are very large in proportion to the stem, cut off the apical halves.
5 Fill a saucer with water, and place a little mild to medium rooting hormone into another container like a milk bottle top. Dip the node end of the cutting into the water and then into the rooting hormone. Tap off any excess hormone,
6 Use a small dipple stick or old pencil to poke a hole into the soilless potting mix. Ensure the hole is slightly larger than the stem diameter and be careful not to wipe the rooting hormone off the cuttings base, place the cuttings in a pattern ensuring the cuttings are not touching each other,
7 I like to place the pots in Plastic bags to help maintain temperature and moisture. Place in a semi shaded place like under 50mm shade cloth.
8 When the cuttings have struck, open the bag to allow air circulation for a few days to a week,
9 Once hardened off remove the cuttings from the bag and allow to further hardening for a few more days,
10 When the cuttings have obviously struck and have developed good roots; which can take about 8 months gently replant them into 150mm pots or place them into their permanent positions in the garden. The fewer times you repot the better as Epacris impressa develop a very fine fragile root system and resent repotting and handling.
Fertilize using seaweed, fish emulsion or organic chicken pellets soaked in water on an alternate basis. Fertilize every two months until the plants are established then annually in early September to October to maintain health, vitality and better flowering.
Further Comments from Readers:
Hi reader, it seems you use The Bible of Botany a lot. That’s great as we have great pleasure in bringing it to you! It’s a little awkward for us to ask, but our first aim is to purchase land approximately 1,600 hectares to link several parcels of N.P. into one at The Pinnacles NSW Australia, but we need your help. We’re not salespeople. We’re amateur botanists who have dedicated over 30 years to saving the environment in a practical way. We depend on donations to reach our goal. If you donate just $5, the price of your coffee this Sunday, We can help to keep the planet alive in a real way and continue to bring you regular updates and features on Australian plants all in one Botanical Bible. Any support is greatly appreciated. Thank you.
In the spirit of reconciliation we acknowledge the Bundjalung, Gumbaynggirr and Yaegl and all aboriginal nations throughout Australia and their connections to land, sea and community. We pay our respect to their Elders past, present and future for the pleasures we have gained.
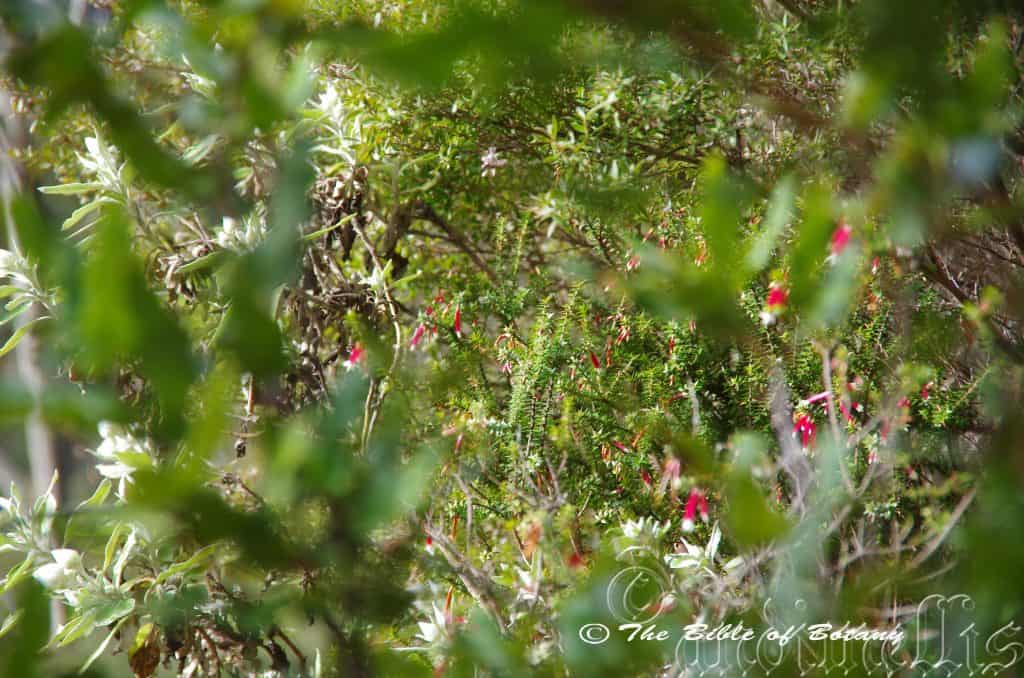
Point Lookout National Park Ebor NSW
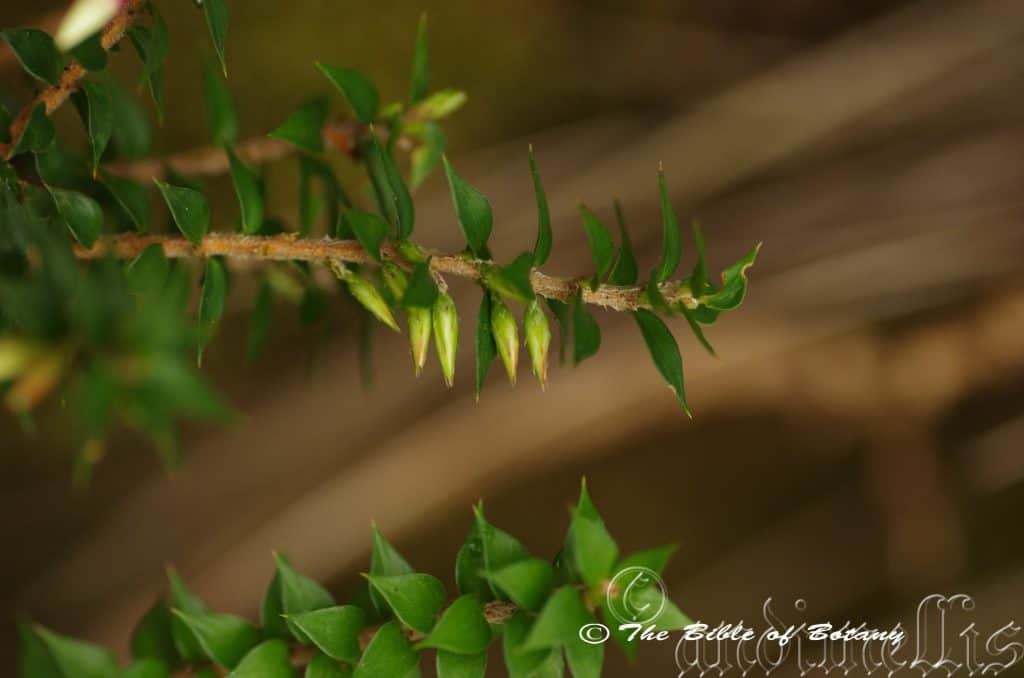
Point Lookout National Park Ebor NSW
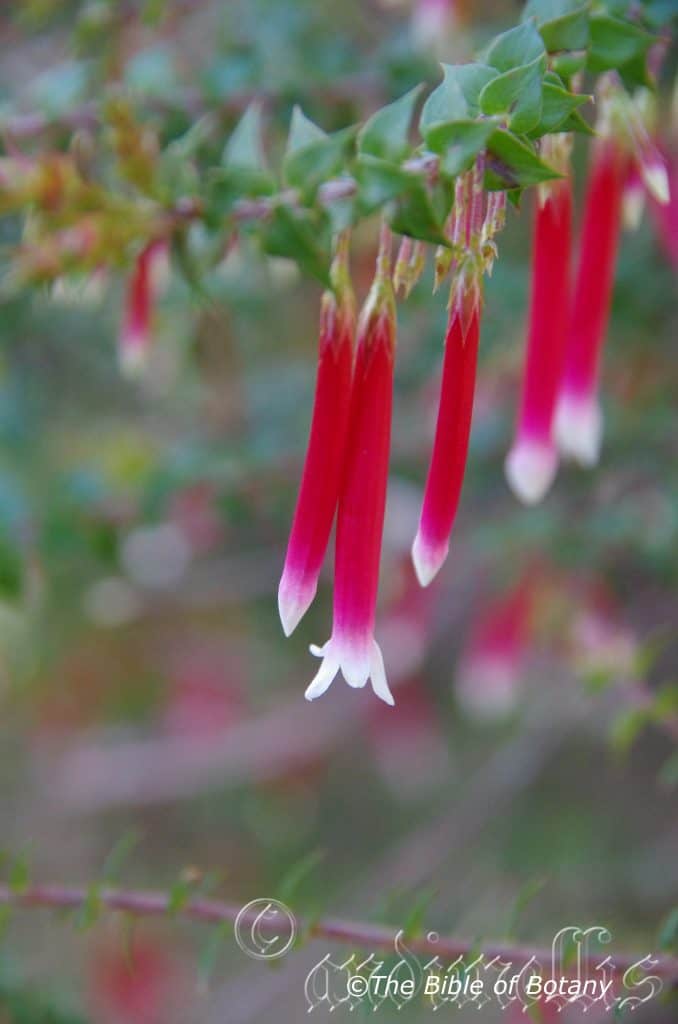
Point Lookout National Park Ebor NSW

Point Lookout National Park Ebor NSW
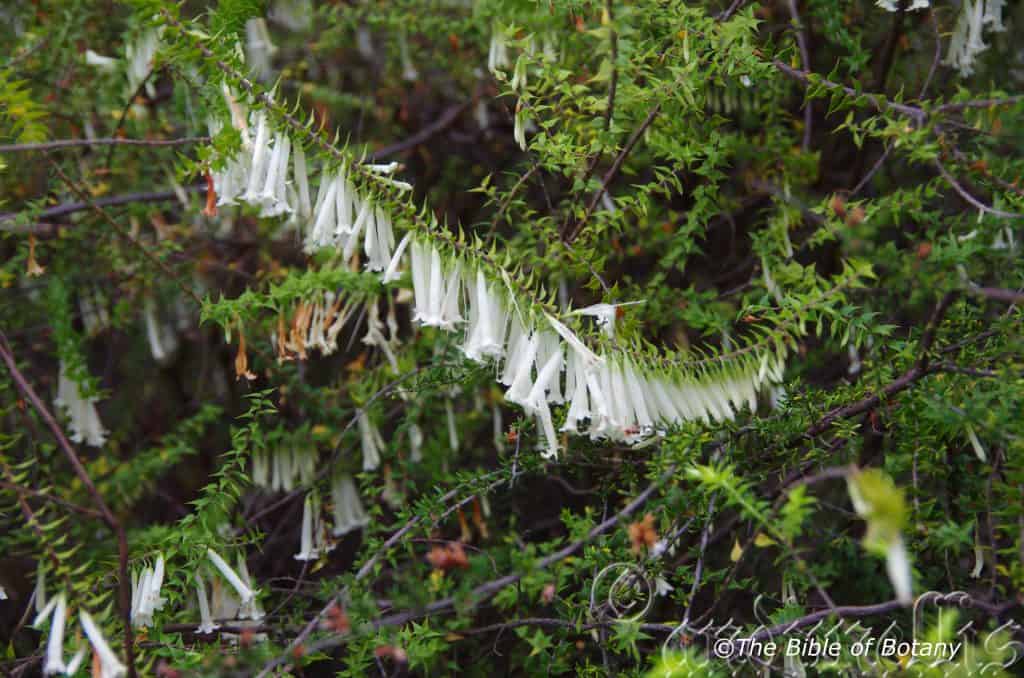
National Botanic Gardens ACT
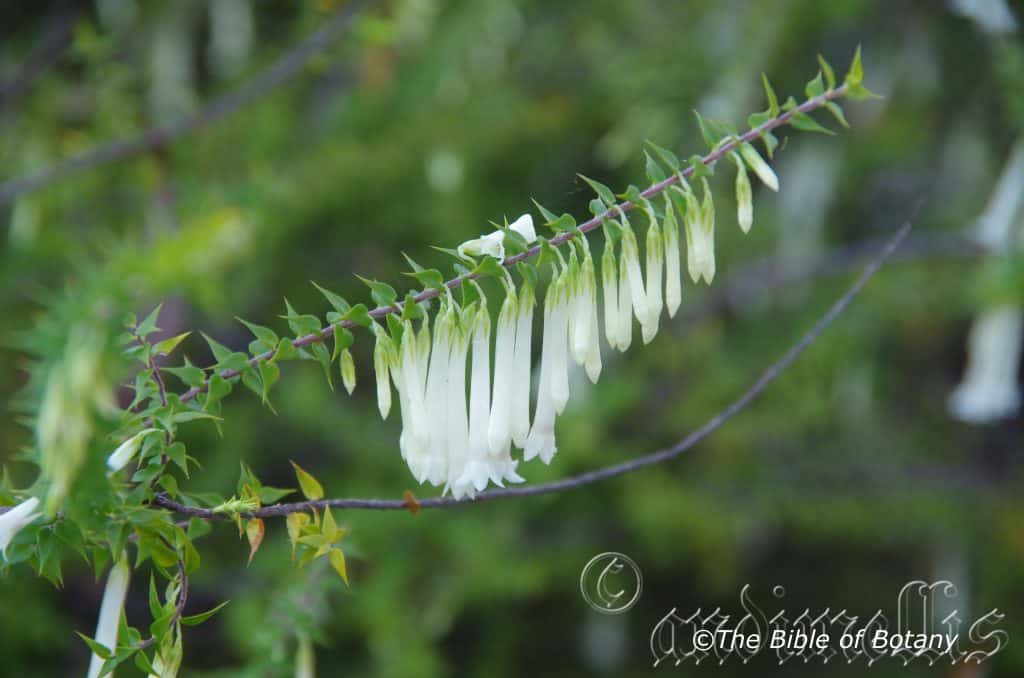
National Botanic Gardens ACT
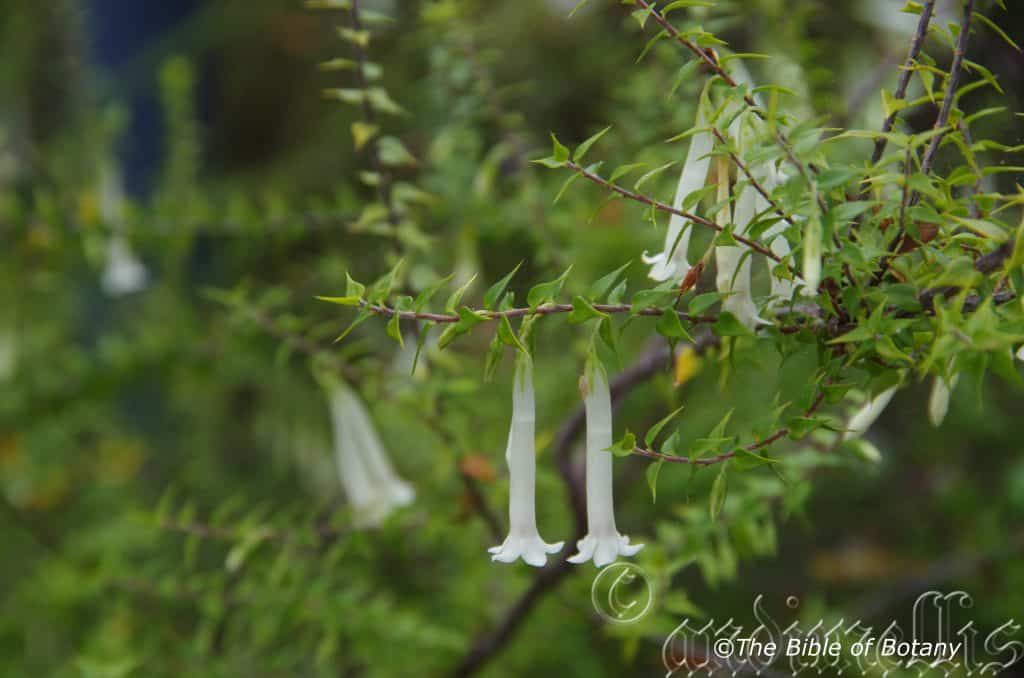
National Botanic Gardens ACT
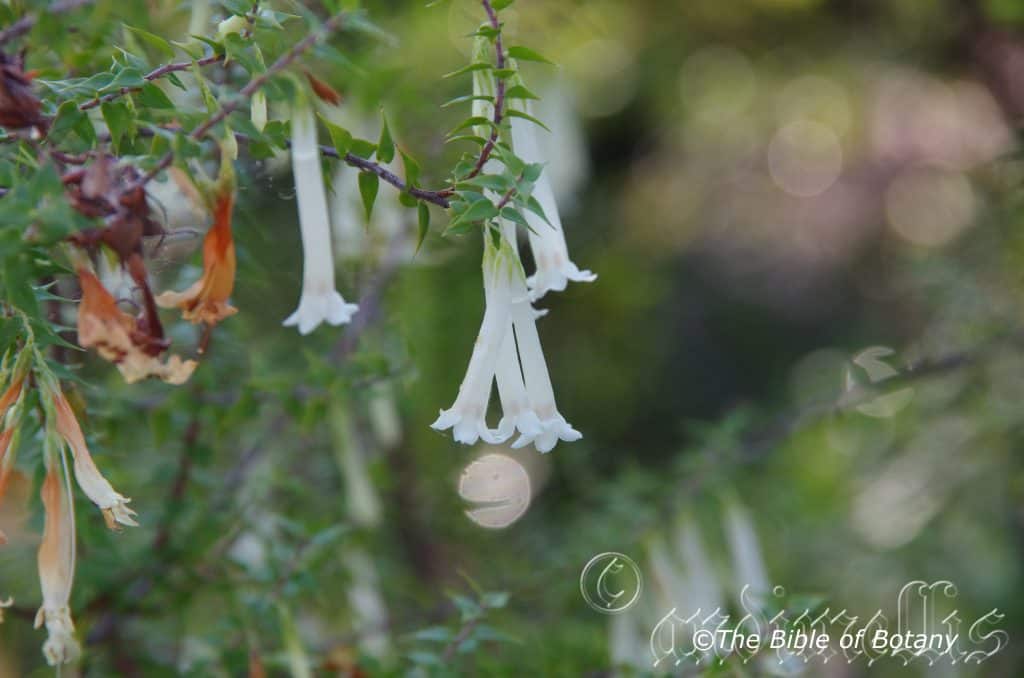
National Botanic Gardens ACT
Epacris longiflora
Classification
Unranked: Eudicots
Unranked: Asterids
Order: Ericales
Family: Epacriceae
Genus: From Epi, which is Ancient Greek for upon and Akris, which is Ancient Greek for a summit near the tops of hills or the leaves’ apexes that are sharply pointed. It refers to plants, which prefer to grow on the tops of hills or have pointed leaves somewhat like the apex of hills.
Species: From Longitia/Longus, which is Latin for long in length and Floris, which is Latin for a flower or Flos, which is the Roman goddess for spring and flowers. It refers to flower spikelets, which are rather long or long corollas on tubular flowers.
Common Name: Fuchsia Heath or Long Flowered Heath Bush.
Distribution:
Epacris longiflora is found south from Mount Barney to the Bega Valley. It is mainly found on the higher elevations along the Great Dividing Range in the north and closer to the coast in the south.
https://avh.ala.org.au/occurrences/search?taxa=Epacris+longifolia#tab_mapView
Habitat Aspect Climate:
Epacris longiflora prefers full sun to dappled light. It grows adjacent to wallum heaths, swampy heaths on sandstone cliffs where there is seepage and in open woodlands in shallow depressions and along drainage lines. The altitude ranges from 10 meters ASL to 1300 meters ASL.
The temperatures range from minus 3 degrees in July to 32 degrees in January.
The rainfall ranges from lows of 600mm to an average of 1200mm annually, however the rainfall is not as important as the consistent moisture derived from seepages and ground depressions.
Soil Requirements:
Epacris longiflora prefers better quality sandy loams to light clays or gravelly medium clays. The soils are derived from decomposed sandstones and granites. The soils pH ranges from 6pH to 7pH. It does not tolerate waterlogged soils however many of the soils have high seasonal water tables which would keep the upper soil moist through capillary action. Non saline soils to slightly saline soils are tolerated.
Height & Spread:
Wild Plants: 0.5m to 2m by 0.5m to 2m.
Characteristics:
Epacris longiflora’s pale grey stems are erect, glabrous and carry the leaf scars of discarded leaves. The branchlets and juvenile new growth are pale grey green and covered in short and long white villose hairs.
Epacris longiflora’s crowded leaves are ovate and measure 6mm to 17mm in length by 3mm to 7mm in width. The petiole measures 0.5mm to 1mm in length. The bases are obtuse to cordate or truncate while the apexes are long acute with a slightly pungent tip. The concolourous laminas are mid olive green to deep sea green, dull and slightly scabrous on the upper lamina while the lower lamina is glabrous. The laminas are flat while the margins are minutely toothed. The midvein is prominent on the lower lamina and is not visible on the upper lamina.
The inflorescences of Epacris longiflora are born singularly from the leaf axils opening first at the apex then opening towards the base of the branchlets. The flowers are initially held erect before becoming pendant when fully opened. The linear bracts are deep green with a reddish or purplish-maroon tinge near the margins. The bracts measure 4.5mm to 6mm in length by 2mm to 3mm in width. The sepals are pale green to mid green at the base turning deep green-pink or greenish-red as they approach their apexes and margins. The sepals measure 4.5mm to 6mm in length by 2mm to 3mm in width. The red to carmine or deep pink corolla tubes measure 12mm to 27mm in length by 4mm to 6mm in diameter. The 6 cream to white divaricate corolla lobes measure 2.4mm to 4.5mm in length. The pedicels measure 1mm to 2mm in length.
The 6 oblong, brown anthers are inserted at the mouth of the corolla.
The white to hot pink style measures 14mm to 28mm in length while the pastel green to p[ale green stigma is orbicular. The pistil is slightly exserted. The flowers appear throughout the year with a decline in the summer months.
Epacris longiflora fruits are small flat capsules. The capsules measure 3mm to 4mm in length.
Wildlife:
This is a good standby plants for small nectar eating birds like Eastern spinebills, Acanthorhynchus tenuirostris, Yellow Faced Honey eaters, Lichenostomus chrysops and New Holland Honey eaters, Phylidonyris novaehollandiae because it flowers all year and peak when there are fewer plants in flower.
The plants leaves are also host to the Australian Cranberry Moth, Poecilasthena pulchraria.
Cultivation:
Epacris longiflora is a stunningly beautiful small shrub for cool subtropical or temperate gardens. It has a place around swimming pools, in cool sunny courtyards, bush gardens and rockeries. It needs to be mulched and the soil moisture needs to be kept at an even level but not wet. In the garden it will grow 500mm to 2000mm by 500mm to 1800mm when planted in the open. It can be pruned to shape or allowed to do their own thing, either way it makes a very interesting plants adding colour and feed for small native birds.
Epacris longiflora looks particularly stunning placed amongst large boulders where they soften the rocks or mass planted with other Epacris species at the edge of a bush garden. Here pruning is beneficial in order to persuade it to grow around them rather than up and over them. The boulders assist in keeping the root zone cool and help to retain moisture in the lower strata of the soil.
Epacris longiflora add interesting foliage and colour to a heath garden. When you design a flat heath garden which this Epacris is well suited. Try not to use contours or straight lines to display the plants as heath lands are almost always flat or have a slight rise as the plants always grow in a random disorder. Plants must be planted close together and be short so you can see over the tallest ones with the exception of one or two plants at the most. These will be feature plants. The idea is to achieve a feeling of expansive flatness. This can be achieved with using the Epacris longiflora’s leaves and having them contrasting finer pale green or soft grey to glaucous coloured foliage. Use a lot of procumbent plants with white or cream flowers to help highlight the flowers. Do not use large flowering plants as these will overpower the garden and they will become boring. Mix it with other smaller shrubs so none of them dominate the scene but blend in to give a mosaic of foliage colours that you oversee. Here think of Actinotis helianthi Grevillea masonii Grevillea paradoxa or native annuals for a colourful addition.
Propagation:
Seeds: Epacris longiflora‘s seeds can be sown into a seed raising mix without treatment in spring or summer. Cover them in 2mm of fine sand. Place the trays in a sunny warm position and keep moist. When the seedlings are 25mm to 50mm tall, prick them out and plant them into 50mm native tubes using a good organic mix.
Once the seedlings reach 200mm to 250mm in height prick the growing tips out and plant them out into their permanent position. For mass plantings plant them at 1.8 meter to 2 meter centers. Amongst boulders use wider centers so the beauty of the rocks can still be viewed.
Cuttings: As Epacris longiflora seeds are difficult to collect cuttings maybe the best method for propagating. Select material from good flowering specimens or those with a better growth habit, plants with larger flowers, those that have the colour you desire or the leaves and habit you that you want to foster.
Successful results are have been attained with using 30mm fine gravel, 30mm peat and 40mm coconut fibre. Cuttings are probably best placed into individual small pots or tubes even resorting to peat pots to minimise root disturbance may be very helpful in attaining a better strike.
Use 70 to 80mm long half ripened material from the present season‘s growth when growing from cuttings. Take them in mid-autumn where frosts are not a problem or early spring where the day temperatures will not exceed 28 degrees. Remove half the leaves from the bottom section being careful not to tear the bark.
1 Prepare the cutting mix by adding one third sharp clean river sand, one third peat and one third perlite. These ingredients are sterilize,
2 Select good material from non diseased plants,
3 Select semi green stems for cuttings. Look for a stem with two or three nodes,
4 Place the cutting on a flat, hard surface, and make a clean down one side of the cutting for 10mm to 15mm with a sharp sterile knife or razor blade. – This scarification of the node will increase the chances of roots emerging from this spot. Now remove all but one or two the leaves, leaving the apex leaves in tact. If the leaves are very large in proportion to the stem, cut off the apical halves.
5 Fill a saucer with water, and place a little mild to medium rooting hormone into another container like a milk bottle top. Dip the node end of the cutting into the water and then into the rooting hormone. Tap off any excess hormone,
6 Use a small dipple stick or old pencil to poke a hole into the soilless potting mix. Ensure the hole is slightly larger than the stem diameter and be careful not to wipe the rooting hormone off the cuttings base, place the cuttings in a pattern ensuring the cuttings are not touching each other,
7 I like to place the pots in Plastic bags to help maintain temperature and moisture. Place in a semi shaded place like under 50mm shade cloth.
8 When the cuttings have struck, open the bag to allow air circulation for a few days to a week,
9 Once hardened off remove the cuttings from the bag and allow to further hardening for a few more days,
10 When the cuttings have obviously struck and have developed good roots; which can take about 8 months gently replant them into 150mm pots or place them into their permanent positions in the garden. The fewer times you repot the better as Epacris longiflora develop a very fine fragile root system and resent repotting and handling. – Good luck.
Fertilize using seaweed, fish emulsion or organic chicken pellets soaked in water on an alternate basis. Fertilize every two months until the plants are established then annually in early September to October to maintain health, vitality and better flowering.
Further Comments from Readers:
Hi reader, it seems you use The Bible of Botany a lot. That’s great as we have great pleasure in bringing it to you! It’s a little awkward for us to ask, but our first aim is to purchase land approximately 1,600 hectares to link several parcels of N.P. into one at The Pinnacles NSW Australia, but we need your help. We’re not salespeople. We’re amateur botanists who have dedicated over 30 years to saving the environment in a practical way. We depend on donations to reach our goal. If you donate just $5, the price of your coffee this Sunday, We can help to keep the planet alive in a real way and continue to bring you regular updates and features on Australian plants all in one Botanical Bible. Any support is greatly appreciated. Thank you.
In the spirit of reconciliation we acknowledge the Bundjalung, Gumbaynggirr and Yaegl and all aboriginal nations throughout Australia and their connections to land, sea and community. We pay our respect to their Elders past, present and future for the pleasures we have gained.
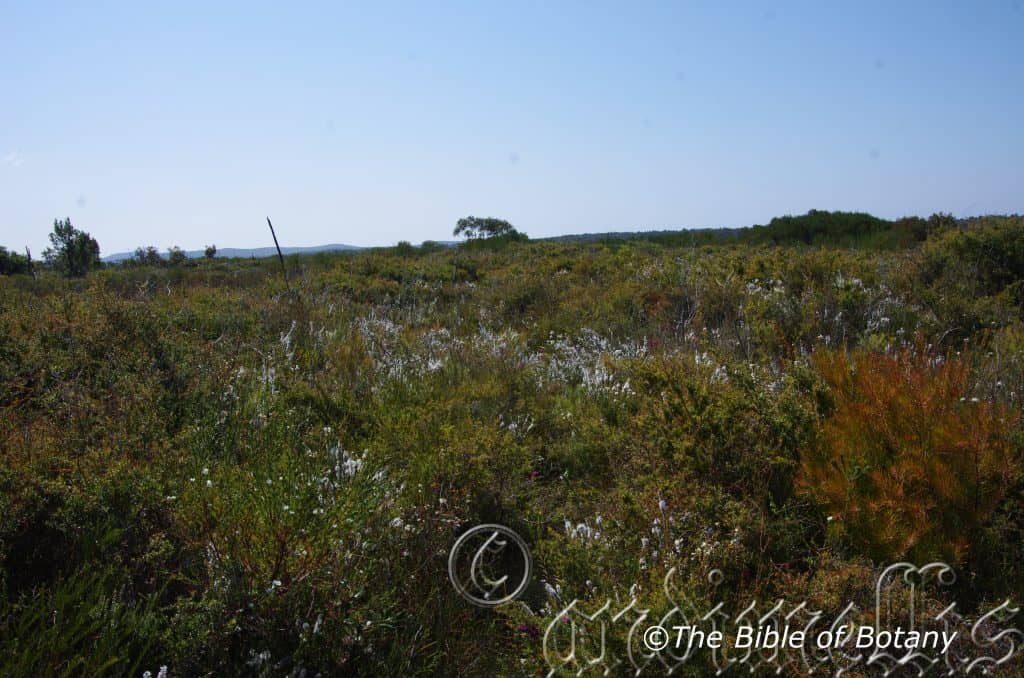
Innes Lake National Park NSW
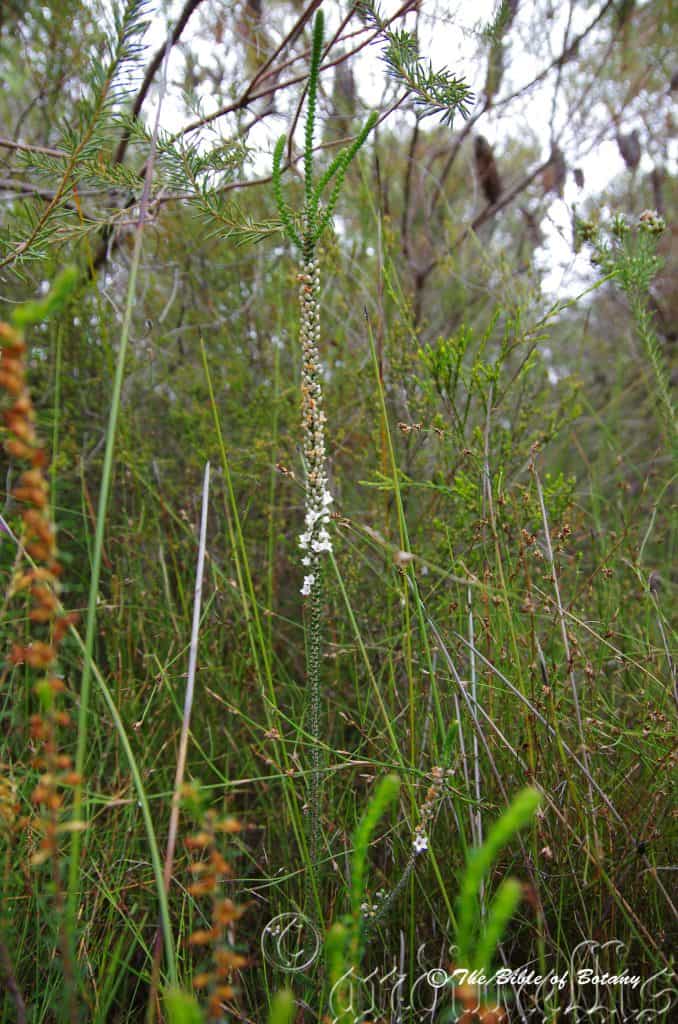
Innes Lake National Park NSW
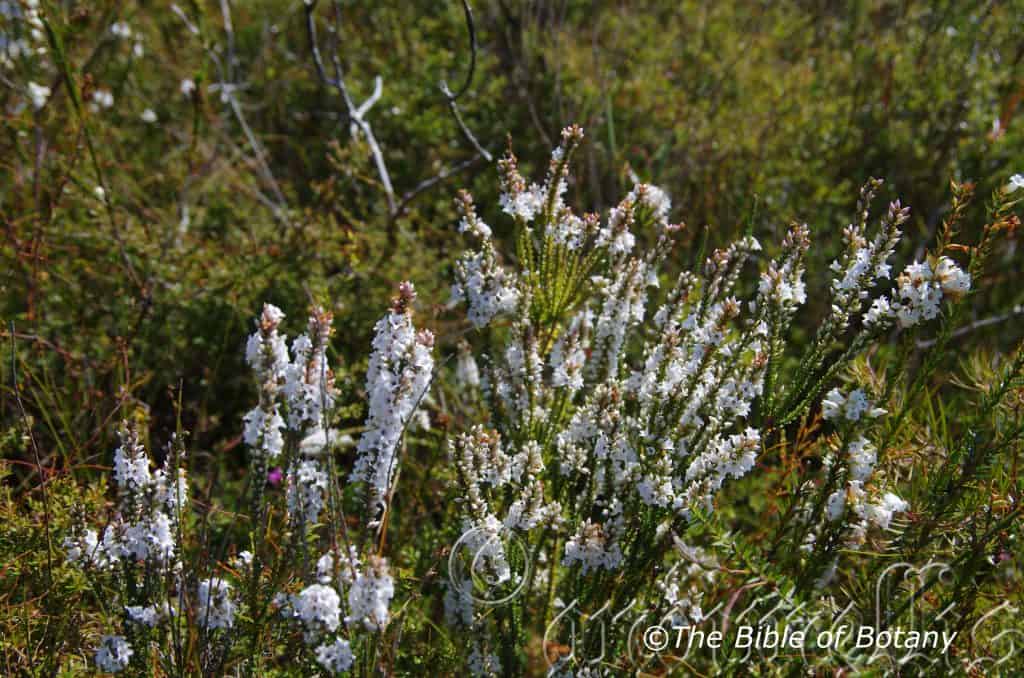
Innes Lake National Park NSW
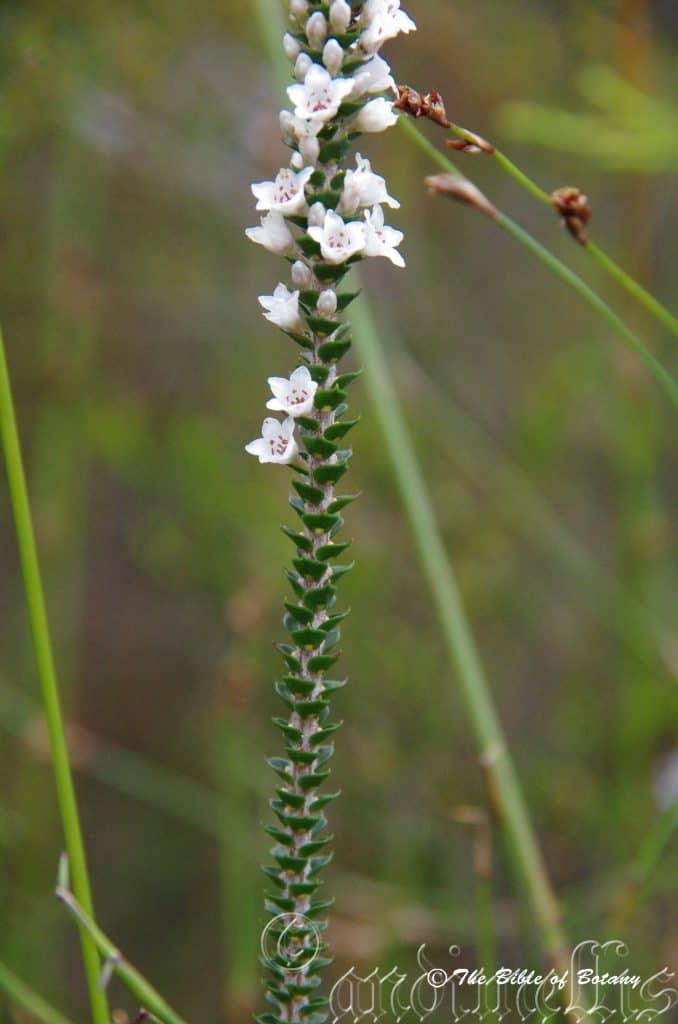
Innes Lake National Park NSW
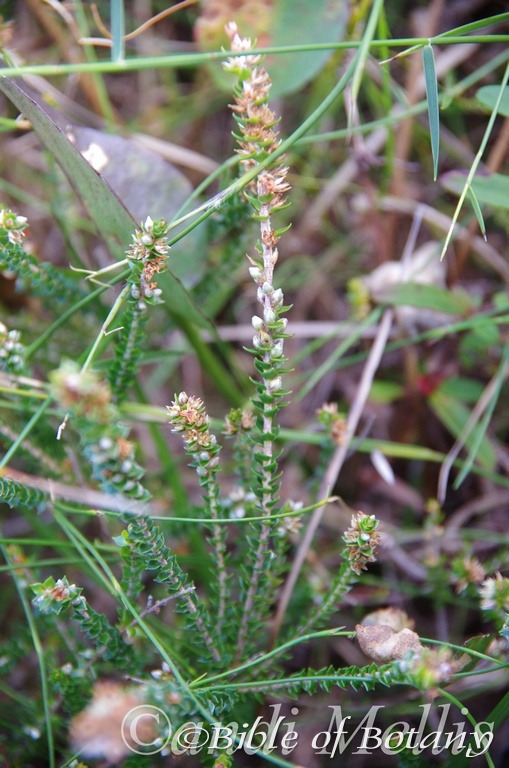
North Yuraygir National Park NSW
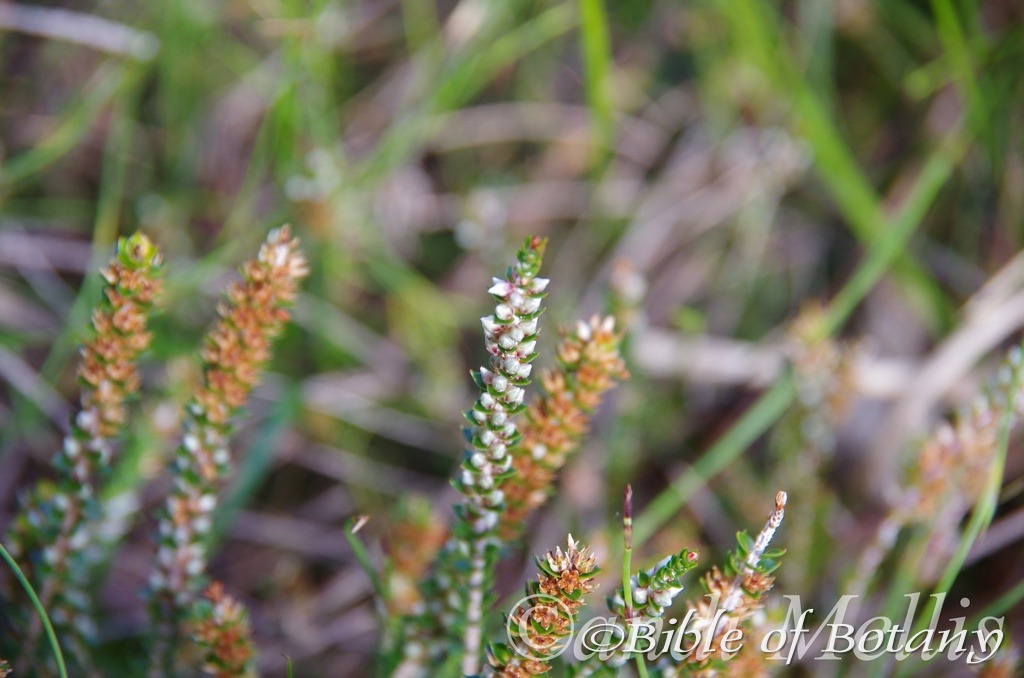
North Yuraygir National Park NSW
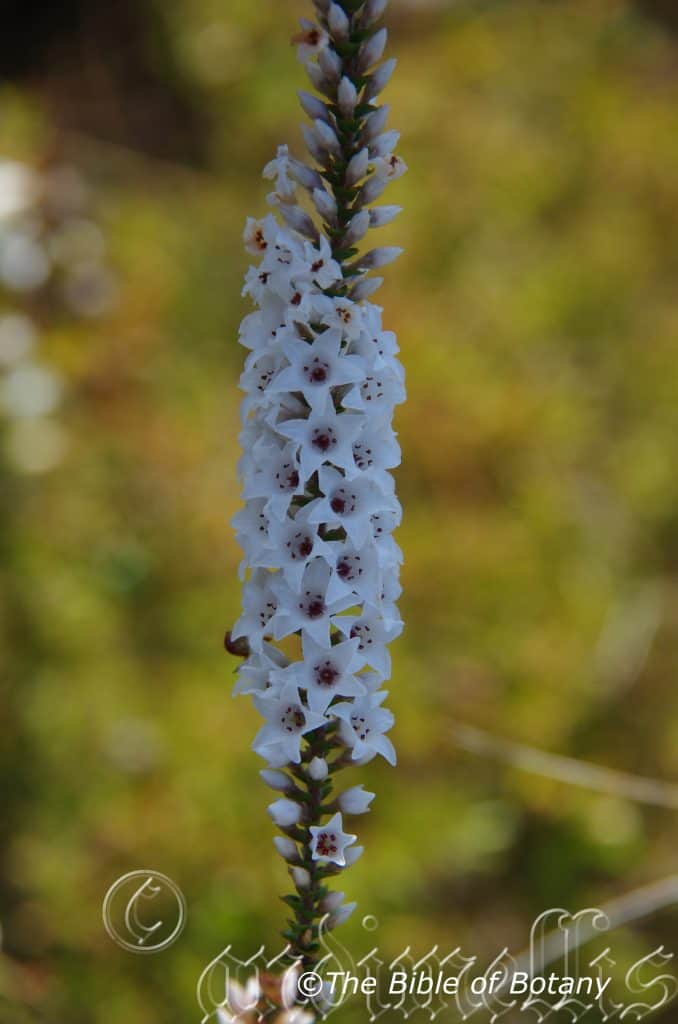
Yuraygir National Park NSW
Epacris microphylla
Classification
Unranked: Eudicots
Unranked: Asterids
Order: Ericales
Family: Epacriceae
Genus: From Epi, which is Ancient Greek for upon and Akris, which is Ancient Greek for a summit near the tops of hills or the leaves’ apexes that are sharply pointed. It refers to plants, which prefer to grow on the tops of hills or have pointed leaves somewhat like the apex of hills.
Species: From Mikros, which is Ancient Greek for small or very small and Phullon/Phyllon, which is Ancient Greek for a leaf. It refers to leaves, phyllodes or fronds, which are notably smaller or finer than other species in the genus.
Common Name: Coastal Coral Heath or Coast Heath.
Distribution:
Epacris microphylla has a disjunct distribution south from the Byfield National Park to Fraser Island with a continuous distribution from Rainbow Beach National Park in coastal south eastern Queensland to Wilsons Promontory in southern Victoria along the coast and from Wallangarra in south eastern Queensland to the Yarra Ranges east of Melbourne. It is mainly found on the Western Slopes or the eastern slopes of the Great Dividing Range.
It is also found from the Central Highlands near Parrawe and Waratah in the north east to Snug Plains south-south east of Hobart.
https://avh.ala.org.au/occurrences/search?taxa=Epacris+microphylla#tab_mapView
Habitat Aspect Climate:
Epacris microphylla prefers full sun to dappled light. It grows in or adjacent to drier wallums, seasonal swampy heaths in drier sclerophyll forests open Eucalyptus woodlands and open mixed woodlands. The altitude ranges from 5meters ASL to 900 meters ASL.
The temperatures range from minus 3 degrees in July to 32 degrees in January.
The rainfall ranges from lows of 600mm to an average of 1200mm annually, however the rainfall is not as important as the consistent moisture derived from seepages and ground depressions.
Soil Requirements:
Epacris microphylla prefers better quality sandy loams, light gravelly clays or gritty light clays. The soils are usually derived from decomposed sandstones, granites or accumulated peaty beach sands. The soils pH ranges from 5pH to 6pH are preferred where the water can drain freely. It does not tolerate waterlogged soils; however, many of the soils have seasonally high water tables which keep the upper soil moist throughout the year through capillary action. Non saline soils to moderately saline soils are tolerated.
Height & Spread:
Wild Plants: 1m to 1.8m by 0.3m to 0.5m.
Characteristics:
Epacris microphylla’s has few deep brown stems which are erect, glabrous and carry the leaf crescent scars of discarded leaves. The branchlets and juvenile new growth are rounded to ribbed, deep green and covered in brown to reddish-brown villose hairs.
Epacris microphylla has 2 distinct leaf forms with several intermediate forms. The leaves are erect to sub erect, ovate to rhombic or almost orbicular and irregularly arranged along the stems. They measure 2mm to 6mm in length by 1.5mm to 4mm in width. The petioles measure 0mm to 1mm in length. The bases are usually always cordate while the apex is sharply acute to acuminate and slightly pungent. The concolourous laminas are sea-green dull and slightly scabrous. The laminas are slightly concave while the margins are minutely toothed. The midvein is prominent on the lower lamina and is not visible on the upper lamina. The keel is faintly visible.
The leaves of the second form are regularly placed along the stems and are semi erect to divaricate and imbricate. The leaves are ovate to rhombic or almost orbicular and measure 2mm to 3.5mm in length by 2mm to 4mm in width. The bases are strongly sagittate to clasping the stem while the apex is obtuse acute to acuminate, not pungent and inflexed. The concolourous laminas are sea-green dull and glabrous. The laminas recurve upwards from the mid vein to the margins while the margins are minutely toothed. The veins are not visible on either lamina. The yellow petioles are flattened and measure 0.3mm to 0.8mm in length.
The inflorescence of Epacris microphylla are born singularly from the leaf axils opening first at the apex then towards the base of the branchlets. The conflorescence often has up to 90 individual flowers and measure 300mm to 400mm in length.
The pastel fawn to white bracts are scarious, ovate and steadily increase in size from base of axis to apex. The glabrous bracts measure 0.5mm to 1.0mm in length. The apexes are obtuse to acute while the margins are covered in fawn ciliolate type hairs. The white Sepals are elliptic and measure 2.0mm to 3.0mm in length. The glabrous sepals’ apexes are acute while the margins are ciliolate. The glabrous, white corolla tubes are campanulate and measure 1.5mm to 2mm in length. The glabrous, white lobes measure 1.6mm to 2.1mm in length. The lobes apexes are obtuse.
The base of the stamens are attached to the throat of corolla and are angled inwards. The reddish-brown anthers measure 0.5mm to 0.7mm in length.
The glabrous ovary is globose and measures 0.5mm to 1mm in length. The cylindrical style is subsessile and measures 0.2mm to 0.3mm in length. The corolla is deciduous after anthesis leaving the pistils still attached to the ovary. The flowers appear throughout the year with a peak from July to January.
Epacris microphylla fruits are small depressed globose capsules. The capsules measure 1.5mm in length by 1.8mm in diameter. The style usually drops before the green capsules turn brown on ripening. The sepals are persistent on the ripe capsules.
Wildlife:
Epacris microphylla is a good standby plants for small nectar eating birds like Eastern spinebills, Acanthorhynchus tenuirostris, Yellow Faced Honey eaters, Lichenostomus chrysops and New Holland Honey eaters, Phylidonyris novaehollandiae because they flower all year and peak when there are fewer plants in flower.
The plants leaves are also host to the Australian Cranberry Moth, Poecilasthena pulchraria.
Cultivation:
Epacris microphylla is a magnificent small shrub for sub-tropical to temperate gardens. It has a place around swimming pools, in cool sunny courtyards, bush gardens and rockeries. It needs to be mulched and the soil moisture needs to be kept at an even level. In the garden it will grow 1 meter to 2 meters by 0.5 meters to 1.8 meters when planted in the open.
It can be pruned to shape or allowed to do its own thing, either way it makes a very interesting plants adding colour and feed for small native birds.
Epacris microphylla looks particularly stunning placed amongst large boulders to help soften the rocks or massed planted with other pink or red flowering Epacris species. Here pruning is beneficial in order to persuade them to grow around them rather than up and over them. The boulders assist in keeping the root zone cool and help to retain moisture in the lower strata of the soil.
Epacris microphylla add interesting foliage and colour to a heath garden. When you design a flat heath garden which this Epacris is well suited. Try not to use contours or lines to display the plants as heath lands are almost always flat or have a slight rise as plants always grow in random chaos. Plants must be planted close together and be short so you can see over the tallest ones with the exception of one or two plants at the most. These will be feature plants. The idea is to achieve a feeling of expansive flatness. This can be achieved with using the Epacris microphylla’s leaves and having them contrasting finer deep green or soft grey to glaucous coloured foliage. Use a lot of procumbent plants like Carpobrotus edulis or any of the Hibbertia aspera or Hibbertia diffusa. Mix it with other smaller shrubs so none of them dominate the scene but blend in to give a mosaic of foliage colours that you oversee.
I can remember one striking display we created once; on beach sand, where we used Grevillea laurifolia as a mass ground cover on a car turning circle with boulders and a few Epacris obtusifolia and Epacris microphylla scattered throughout the bed with a few clumps of Hibbertia linearis planted to break the overall flatness of the Grevillea Laurifolia. The Epacris microphylla was pruned to give smaller plants no more than 800mm in height and to induce more flowering stems. The point here is to be different and don’t be afraid to experiment.
Propagation:
Seeds: Epacris microphylla‘s seeds can be sown into a seed raising mix without treatment in spring or summer. Cover them in 2mm of fine sand. Place the trays in a sunny warm position and keep moist. When the seedlings are 25mm to 50mm tall, prick them out and plant them into 50mm native tubes using a good organic mix.
Once the seedlings reach 150mm to 200mm in height prick the growing tips out and plant them out into their permanent position. For mass plantings plant them at 0.5 meter to 0.7 meter centers.
Cuttings: Epacris microphylla’s seeds are difficult to collect cuttings maybe the best method for propagating. Select material from good flowering specimens or those with a better growth habit, plants with larger flowers, those that have the colour you desire or the leaves and habit you that you want to foster.
Successful results are have been attained with using 30mm fine gravel, 30mm peat and 40mm coconut fibre. Cuttings are probably best placed into individual small pots or tubes even resorting to peat pots to minimise root disturbance may be very helpful in attaining a better strike.
Use 70 to 80mm long half ripened material from the present season‘s growth when growing from cuttings. Take them in mid-autumn where frosts are not a problem or early spring where the day temperatures will not exceed 28 degrees. Remove half the leaves from the bottom section being careful not to tear the bark.
1 Prepare the cutting mix by adding one third sharp clean river sand, one third peat and one third perlite. These ingredients are sterilize,
2 Select good material from non diseased plants,
3 Select semi green stems for cuttings. Look for a stem with two or three nodes,
4 Place the cutting on a flat, hard surface, and make a clean down one side of the cutting for 10mm to 15mm with a sharp sterile knife or razor blade. – This scarification of the node will increase the chances of roots emerging from this spot. Now remove all but one or two the leaves, leaving the apex leaves in tact. If the leaves are very large in proportion to the stem, cut off the apical halves.
5 Fill a saucer with water, and place a little mild to medium rooting hormone into another container like a milk bottle top. Dip the node end of the cutting into the water and then into the rooting hormone. Tap off any excess hormone,
6 Use a small dipple stick or old pencil to poke a hole into the soilless potting mix. Ensure the hole is slightly larger than the stem diameter and be careful not to wipe the rooting hormone off the cuttings base, place the cuttings in a pattern ensuring the cuttings are not touching each other,
7 I like to place the pots in Plastic bags to help maintain temperature and moisture. Place in a semi shaded place like under 50mm shade cloth.
8 When the cuttings have struck, open the bag to allow air circulation for a few days to a week,
9 Once hardened off remove the cuttings from the bag and allow to further hardening for a few more days,
10 When the cuttings have obviously struck and have developed good roots; which can take about 8 months gently replant them into 150mm pots or place them into their permanent positions in the garden. The fewer times you repot the better as Epacris microphylla develop a very fine fragile root system and resent repotting and handling. Good luck.
Fertilize using seaweed, fish emulsion or organic chicken pellets soaked in water on an alternate basis. Fertilize every two months until the plants are established then annually in early September to October to maintain health, vitality and better flowering.
Further Comments from Readers:
Hi reader, it seems you use The Bible of Botany a lot. That’s great as we have great pleasure in bringing it to you! It’s a little awkward for us to ask, but our first aim is to purchase land approximately 1,600 hectares to link several parcels of N.P. into one at The Pinnacles NSW Australia, but we need your help. We’re not salespeople. We’re amateur botanists who have dedicated over 30 years to saving the environment in a practical way. We depend on donations to reach our goal. If you donate just $5, the price of your coffee this Sunday, We can help to keep the planet alive in a real way and continue to bring you regular updates and features on Australian plants all in one Botanical Bible. Any support is greatly appreciated. Thank you.
In the spirit of reconciliation we acknowledge the Bundjalung, Gumbaynggirr and Yaegl and all aboriginal nations throughout Australia and their connections to land, sea and community. We pay our respect to their Elders past, present and future for the pleasures we have gained.
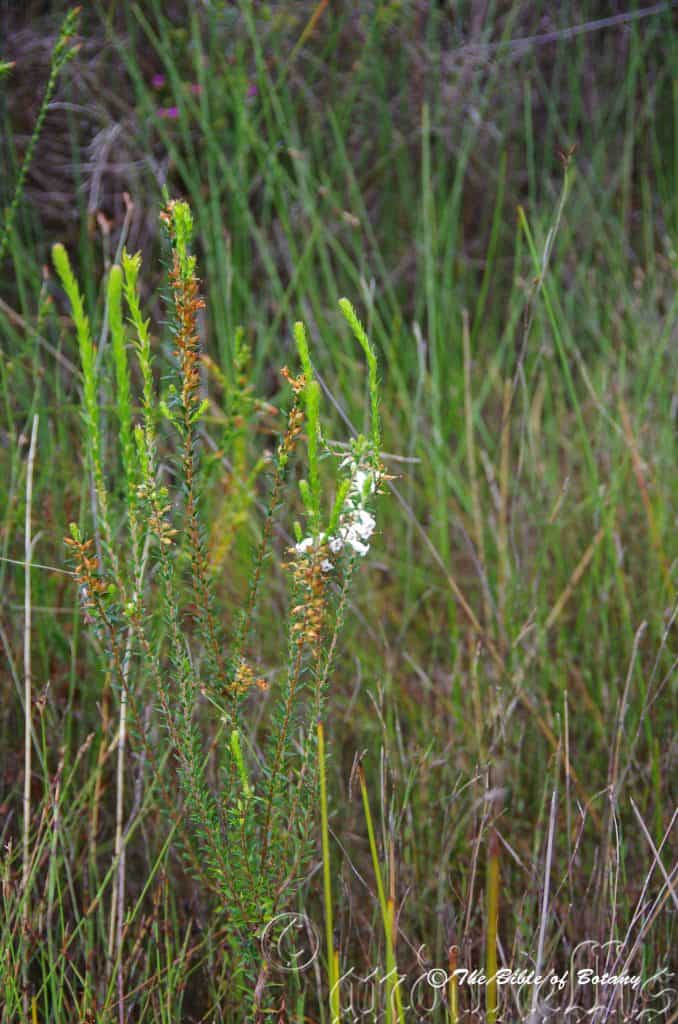
Innes Lake National Park NSW
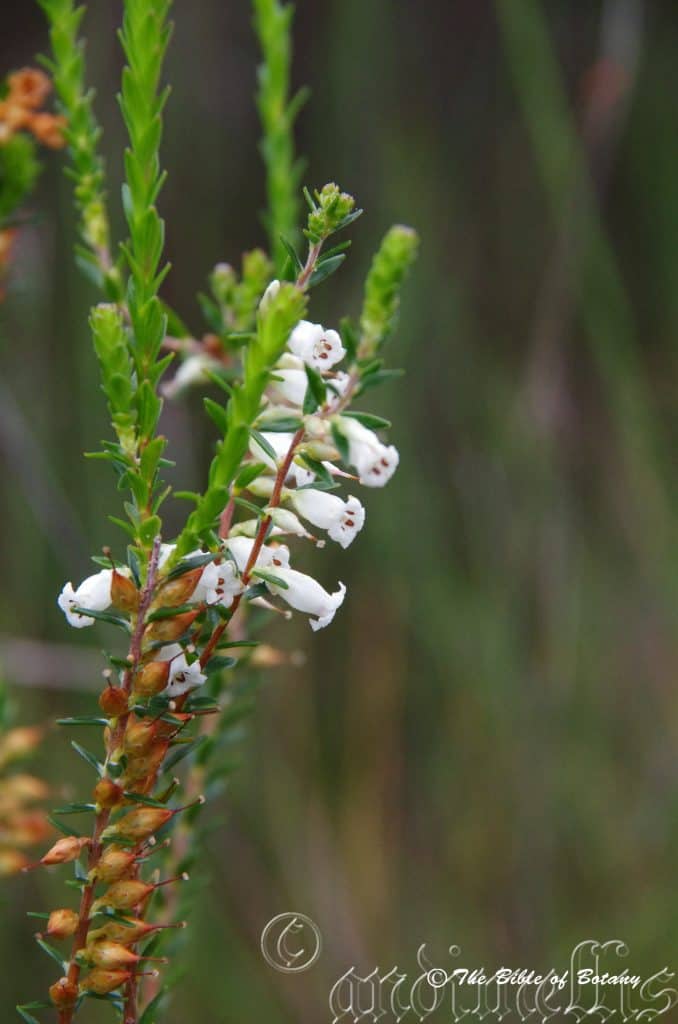
Innes Lake National Park NSW
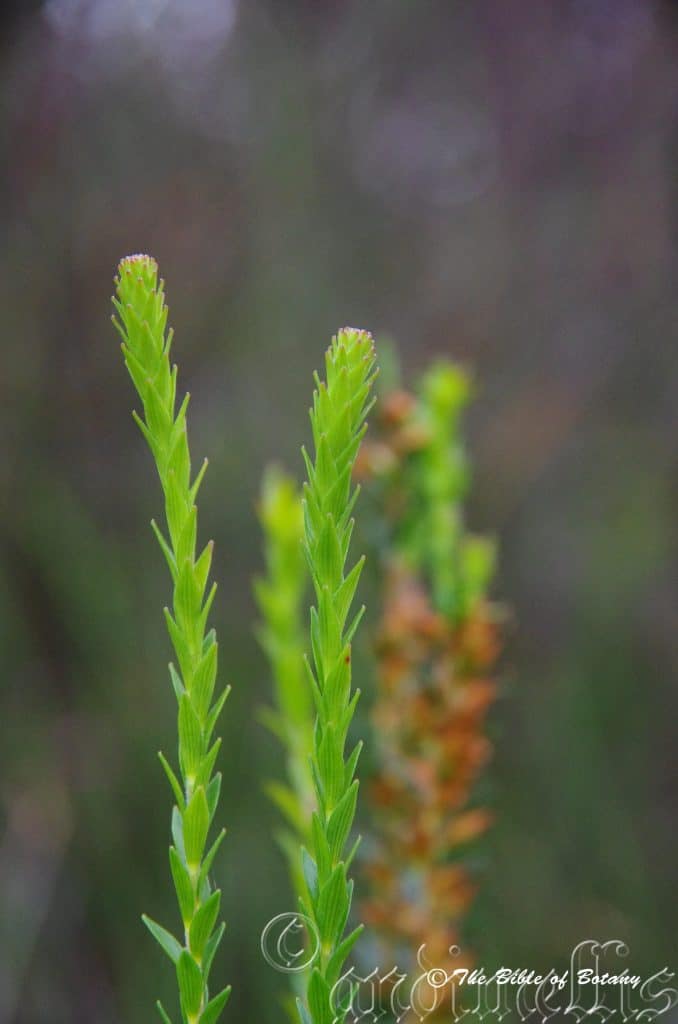
Innes Lake National Park NSW
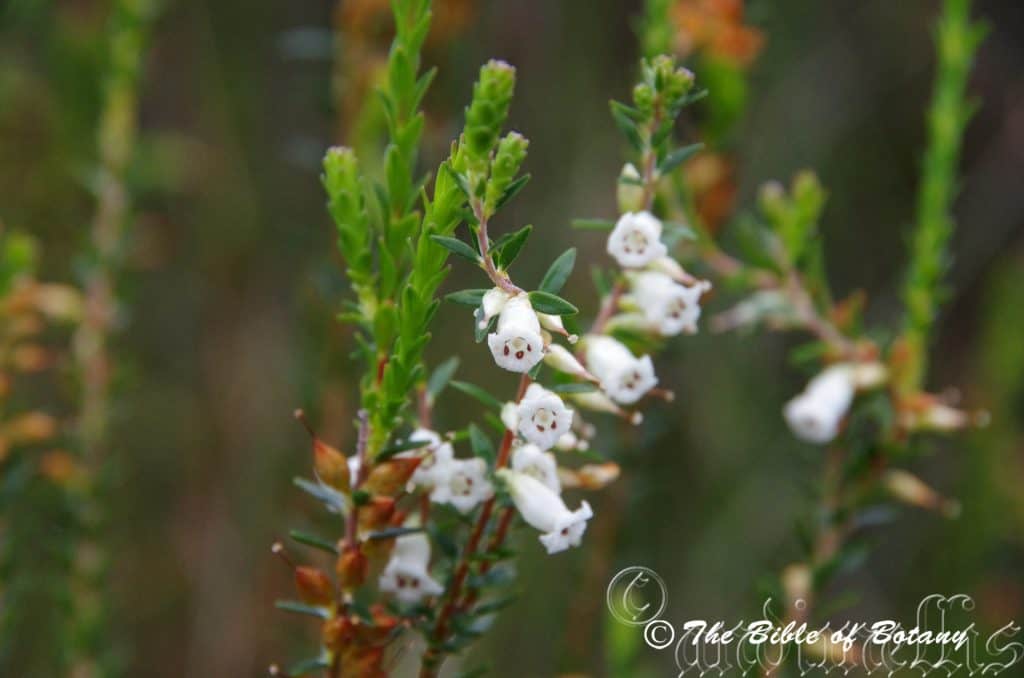
Innes Lake National Park NSW
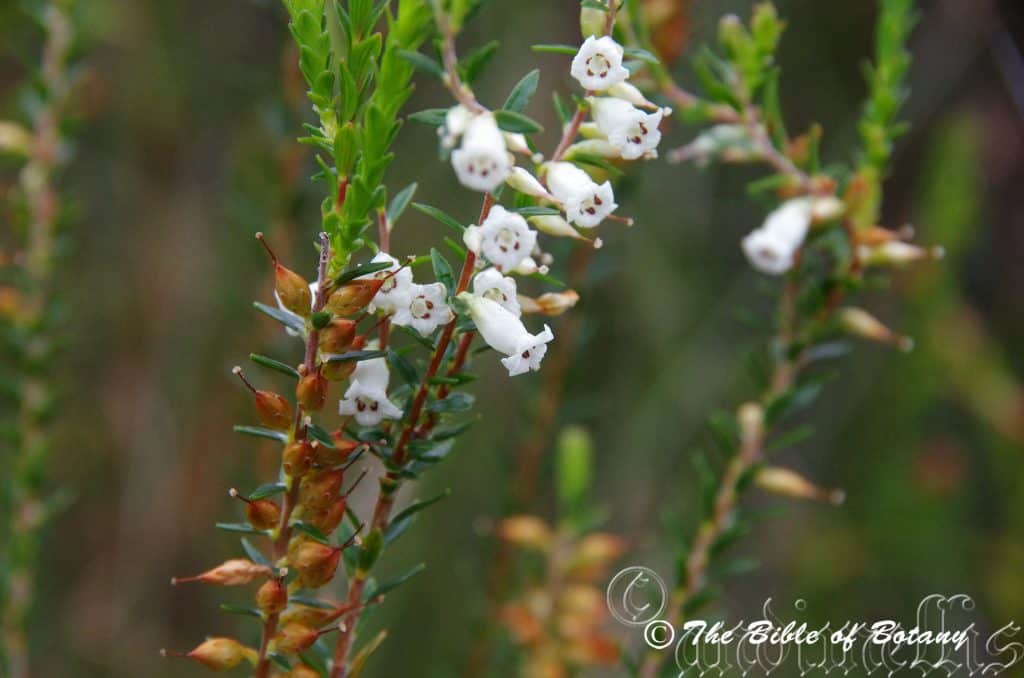
Innes Lake National Park NSW
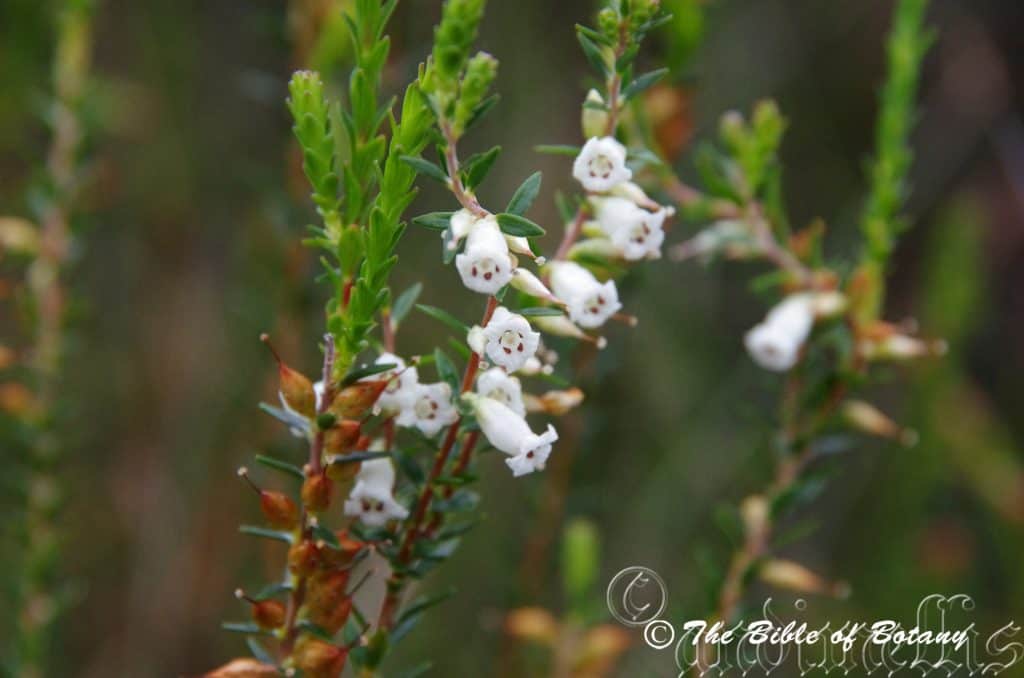
Innes Lake National Park NSW
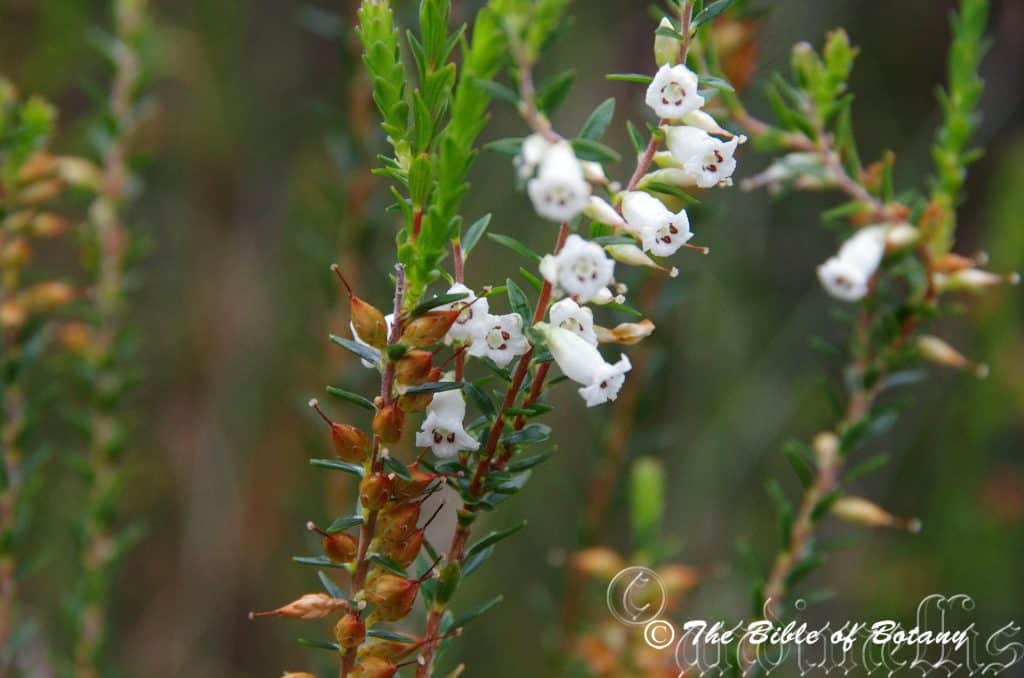
Innes Lake National Park NSW
Epacris obtusifolia
Classification
Unranked: Eudicots
Unranked: Asterids
Order: Ericales
Family: Epacriceae
Genus: From Epi, which is Ancient Greek for upon and Akris, which is Ancient Greek for a summit near the tops of hills or the leaves’ apexes that are sharply pointed. It refers to plants, which prefer to grow on the tops of hills or have pointed leaves somewhat like the apex of hills.
Species: From Obtusum, which is Latin for rounded and Folium, which is Latin for foliage. It refers to leaves, which have round or obtuse apexes.
Common Name: Blunt Leaf Heath.
Distribution:
Epacris obtusifolia is found south from Littabella National Park north of Bundaberg in central coastal Queensland to Melbourne and Mornington Peninsula in southern Victoria. It is mainly found on and east of the Great Dividing Range. There are several disjunct populations in western Victoria including the Great Otway National Park, The Grampians and east of Mount Clay State Forest west to Mount Gambier in south eastern coastal South Australia.
It is also found on the Bass Strait Islands and circumnavigates the coastal areas and coastal ranges of Tasmania.
https://avh.ala.org.au/occurrences/search?taxa=Epacris+obtusifolia#tab_mapView
Habitat Aspect Climate:
Epacris obtusifolia prefers full sun to dappled light. It is particularly common in coastal and coastal ranges wallums and swampy heaths on sandstone cliffs and open woodlands. The altitude ranges from 5 meters ASL to 900 meters ASL.
The temperatures range from minus 5 degrees in July to 36 degrees in January.
The rainfall ranges from lows of 500mm to an average of 3200mm annually, however the rainfall is not as important as the consistent moisture derived from the swamps seepages and capillary action.
Soil Requirements:
Epacris obtusifolia prefers better quality sandy loams, light clays or gravelly clays. The soils are usually derived from decomposed sandstone and granite. The soils pH ranges from 5pH to 6pH. It does not tolerate waterlogged soils, however many of the soils have seasonally high water tables which keep the upper soil moist throughout the year through capillary action. Non saline soils to moderately saline soils are tolerated.
Height & Spread:
Wild Plants: 0.5m to 1.2m by 0.5m to 1m.
Characteristics:
Epacris obtusifolia’s reddish-brown stems are erect, glabrous and carry the leaf scars of discarded leaves. The branchlets and juvenile new growth are reddish-brown and densely covered in short white pulverulent hairs.
Epacris obtusifolia’s erect leaves are elliptical and measure 6mm to 12mm in length by 1.5mm to 3.2mm in width. The yellow-green petioles are appressed to the stem and measure 1.5mm to 2mm in length. The bases are cuneate to tapering while the apexes are obtuse to acute-obtuse. The discolourous laminas are grass-green to deep grass-green and slightly glabrous on the upper lamina while the lower laminas are paler. The laminas are concave on the upper surface and recurve sharply at the apex. The margins are minutely toothed. The 5 parallel veins are clearly visible on the lower lamina and are not visible from the upper lamina.
The inflorescences of Epacris obtusifolia are born singularly from the leaf axils opening first at the apex then towards the base of the branchlets. The conflorescence often has up to 30 individual flowers and measure 70mm to 100mm in length.
The pastel green bracts are scarious, oblong and steadily increase in size from base of axis to apex. The glabrous bracts measure 0.5mm to 1.0mm in length. The margins and broadly acute apexes are covered in white ciliate hairs. The sepals are white or white with a pastel green tinge are oblong with a broadly acute apex. The sepals measure 3.9mm to 7mm in length. The glabrous sepals’ apexes are acute while the margins are ciliolate. The glabrous, white corolla tubes are narrow urceolate and measure 5mm to 14.2mm in length. The glabrous, white lobes measure 1.6mm to 4mm in length. The lobes apexes are obtuse. The pedicels measure 1mm to 3mm in length.
The anthers are attached to the throat of corolla and are angled inwards. The reddish-brown anthers measure 0.9mm to 1.2mm in length.
The glabrous ovary is globose and measures 0.5mm to 1mm in length. The white style and white orbicular stigma measure 5mm to 14mm in length. The corolla is deciduous after anthesis leaving the pistils still attached to the ovary. The flowers appear throughout the year with a peak from July to January.
Epacris obtusifolia fruits are small flat capsules. They measure 3mm to 3.5mm in length. The bracts and sepals enlarge turn deep honey-brown soon after anthesis. The style remains attached but is rarely persistent on the ripe capsules.
Wildlife:
Epacris obtusifolia is a good standby plants for small nectar eating birds like Eastern spinebill, Acanthorhynchus tenuirostris, Yellow Faced Honeyeater, Lichenostomus chrysops and New Holland Honeyeater, Phylidonyris novaehollandiae because it flowers all year and peak when there are fewer plants in flower.
The plants leaves are also host to the Australian Cranberry Moth, Poecilasthena pulchraria.
Cultivation:
Epacris obtusifolia is a magnificent small shrub for cool subtropical to temperate gardens. It has a place around swimming pools, in cool sunny courtyards, bush gardens and rockeries. It needs to be mulched and the soil moisture needs to be kept at an even level. In the garden it will grow 500mm to 1200mm by 500mm to 1000mm when planted in the open. It can be pruned if a smaller shrub is required.
Epacris longifolia looks particularly stunning placed amongst large boulders to soften the rocks. Here pruning is beneficial in order to persuade them to grow around them rather than up and over them. The boulders assist in keeping the root zone cool and help to retain moisture in the lower strata of the soil.
Epacris obtusifolia add interesting foliage and colour to a heath garden. When you design a flat heath garden which this Epacris is well suited. Try not to use contours or straight lines to display the plants as heath lands are almost always flat or have a slight rise with the plants being found scattered throughout the scene. Plants must be planted close together and be short so you can see over the tallest ones with the exception of one or two plants at the most. These will be feature plants. The idea is to achieve a feeling of expansive flatness. This can be achieved with using the Epacris obtusifolia’s leaves and having them contrasting finer pale green or soft grey to glaucous coloured foliage. Use a lot of procumbent plants like Carpobrotus edulis or Hibbertia specie. Mix it with other smaller shrubs so none of them dominate the scene but blend in to give a mosaic of foliage colours that you oversee.
Propagation:
Seeds: Epacris obtusifolia‘s seeds can be sown into a seed raising mix without treatment in spring or summer. Cover them in 2mm of fine sand. Place the trays in a sunny warm position and keep moist. When the seedlings are 25mm to 50mm tall, prick them out and plant them into 50mm native tubes using a good organic mix.
Once the seedlings reach 150mm to 200mm in height prick the growing tips out and plant them out into their permanent position. For mass plantings plant them at 1.8 meter to 2 meter centers. Amongst boulders use wider centers so the beauty of the rocks can still be viewed.
Fertilize using seaweed, fish emulsion or organic chicken pellets soaked in water and apply the liquid on an alternate basis. Fertilize every two months until established and then annually in spring or early autumn for healthy, vigorous and better flowering shrubs.
Cuttings: As Epacris obtusifolia seeds are difficult to collect cuttings maybe the best method for propagating. Select material from good flowering specimens or those with a better growth habit, plants with larger flowers, those that have the colour you desire or the leaves and habit you that you want to foster.
Successful results are have been attained with using 30mm fine gravel, 30mm peat and 40mm coconut fibre. Cuttings are probably best placed into individual small pots or tubes even resorting to peat pots to minimise root disturbance may be very helpful in attaining a better strike.
Use 70 to 80mm long half ripened material from the present season‘s growth when growing from cuttings. Take them in mid-autumn where frosts are not a problem or early spring where the day temperatures will not exceed 28 degrees. Remove half the leaves from the bottom section being careful not to tear the bark.
1 Prepare the cutting mix by adding one third sharp clean river sand, one third peat and one third perlite. These ingredients are sterilize,
2 Select good material from non diseased plants,
3 Select semi green stems for cuttings. Look for a stem with two or three nodes,
4 Place the cutting on a flat, hard surface, and make a clean down one side of the cutting for 10mm to 15mm with a sharp sterile knife or razor blade. – This scarification of the node will increase the chances of roots emerging from this spot. Now remove all but one or two the leaves, leaving the apex leaves in tact. If the leaves are very large in proportion to the stem, cut off the apical halves.
5 Fill a saucer with water, and place a little mild to medium rooting hormone into another container like a milk bottle top. Dip the node end of the cutting into the water and then into the rooting hormone. Tap off any excess hormone,
6 Use a small dipple stick or old pencil to poke a hole into the soilless potting mix. Ensure the hole is slightly larger than the stem diameter and be careful not to wipe the rooting hormone off the cuttings base, place the cuttings in a pattern ensuring the cuttings are not touching each other,
7 I like to place the pots in Plastic bags to help maintain temperature and moisture. Place in a semi shaded place like under 50mm shade cloth.
8 When the cuttings have struck, open the bag to allow air circulation for a few days to a week,
9 Once hardened off remove the cuttings from the bag and allow to further hardening for a few more days,
10 When the cuttings have obviously struck and have developed good roots; which can take about 8 months gently replant them into 150mm pots or place them into their permanent positions in the garden. The fewer times you repot the better as Epacris obtusifolia develop a very fine fragile root system and resent repotting and handling. Good luck.
Fertilize using seaweed, fish emulsion or organic chicken pellets soaked in water on an alternate basis. Fertilize every two months until the plants are established then annually in early September to October to maintain health, vitality and better flowering.
Further Comments from Readers:
Hi reader, it seems you use The Bible of Botany a lot. That’s great as we have great pleasure in bringing it to you! It’s a little awkward for us to ask, but our first aim is to purchase land approximately 1,600 hectares to link several parcels of N.P. into one at The Pinnacles NSW Australia, but we need your help. We’re not salespeople. We’re amateur botanists who have dedicated over 30 years to saving the environment in a practical way. We depend on donations to reach our goal. If you donate just $5, the price of your coffee this Sunday, We can help to keep the planet alive in a real way and continue to bring you regular updates and features on Australian plants all in one Botanical Bible. Any support is greatly appreciated. Thank you.
In the spirit of reconciliation we acknowledge the Bundjalung, Gumbaynggirr and Yaegl and all aboriginal nations throughout Australia and their connections to land, sea and community. We pay our respect to their Elders past, present and future for the pleasures we have gained.
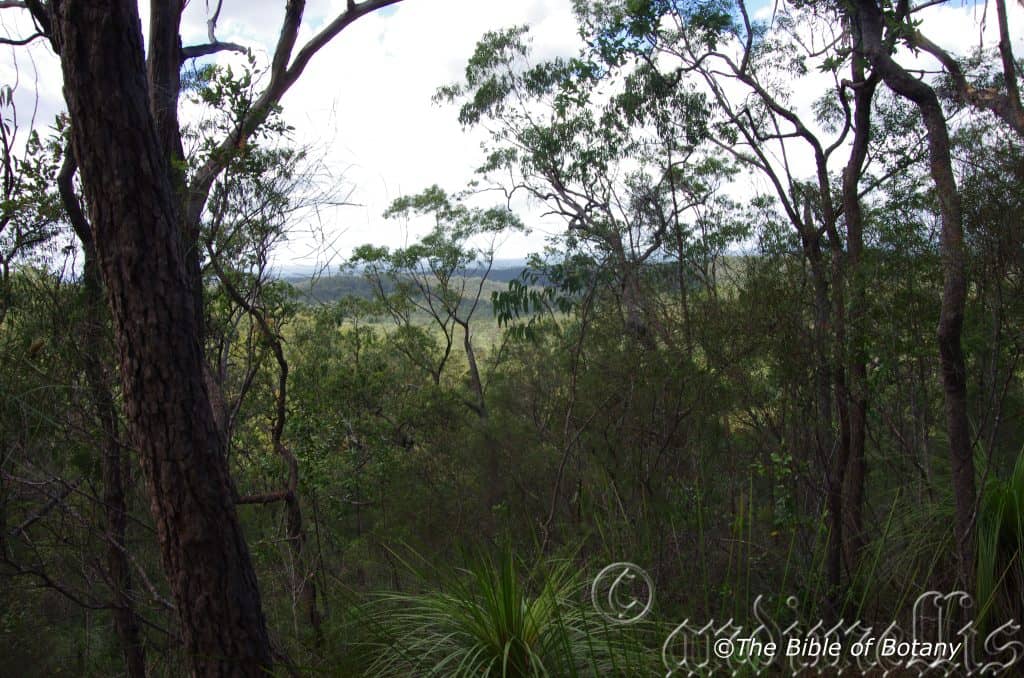
The Pinnacles NSW
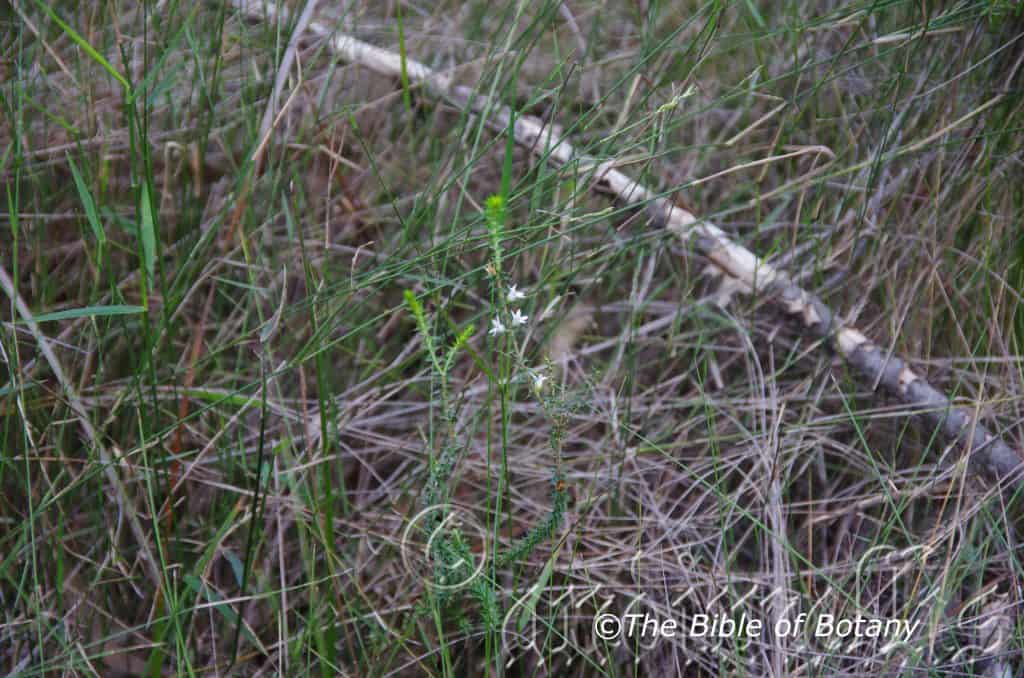
The Pinnacles NSW
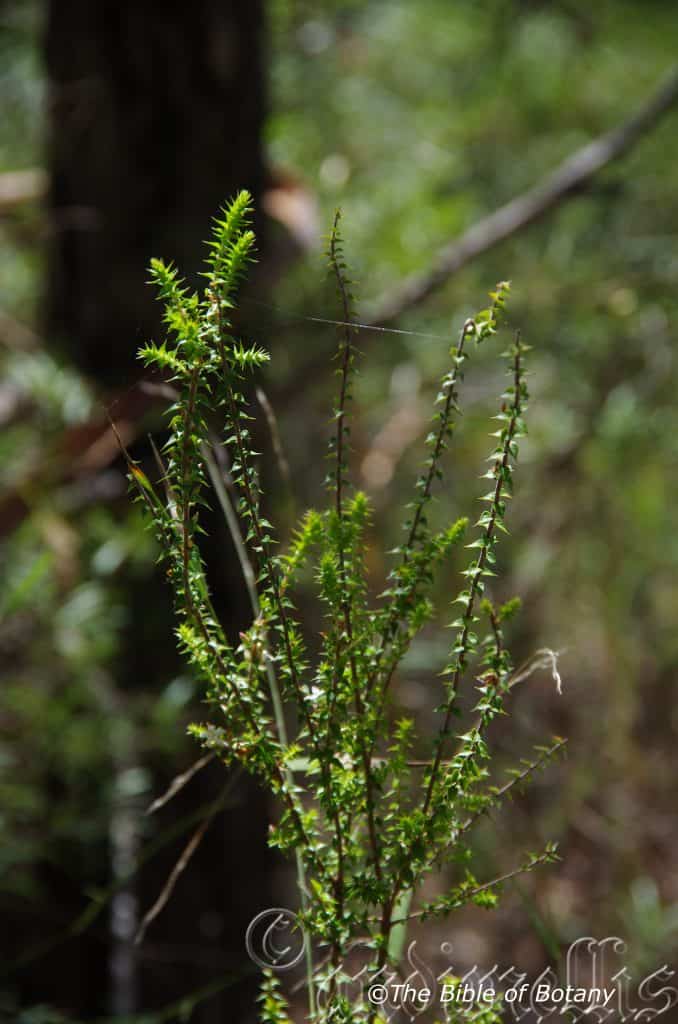
The Pinnacles NSW
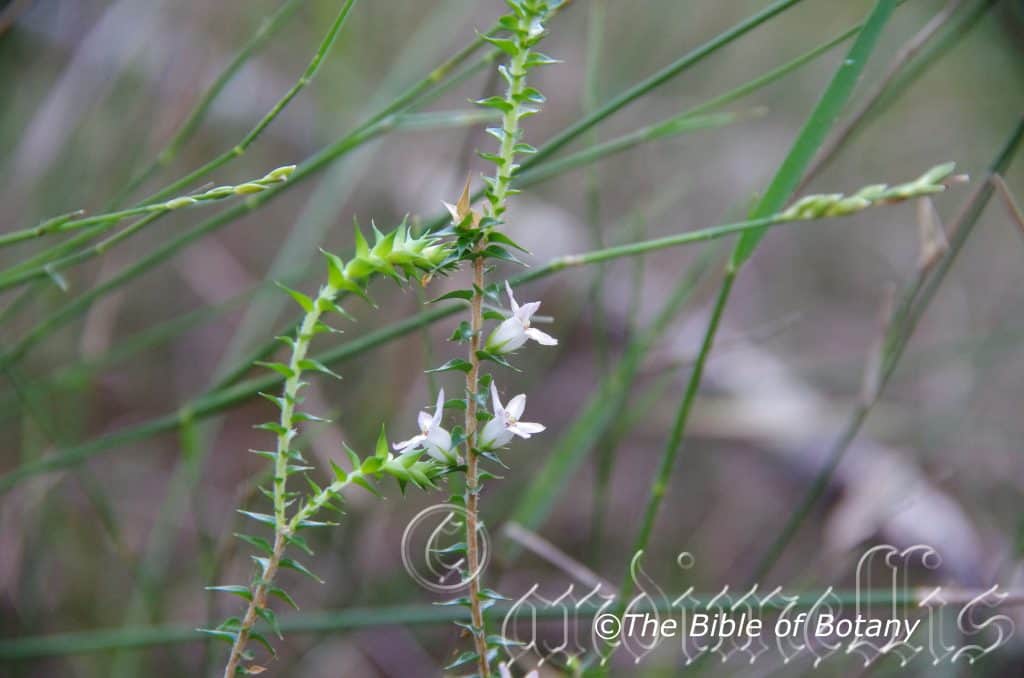
The Pinnacles NSW
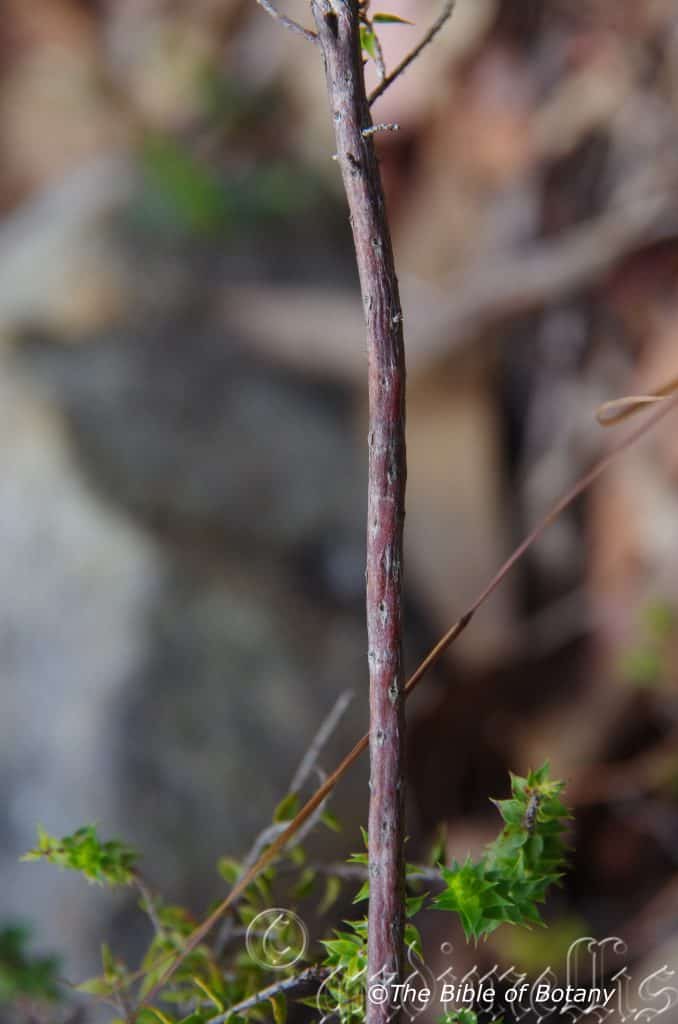
The Pinnacles NSW
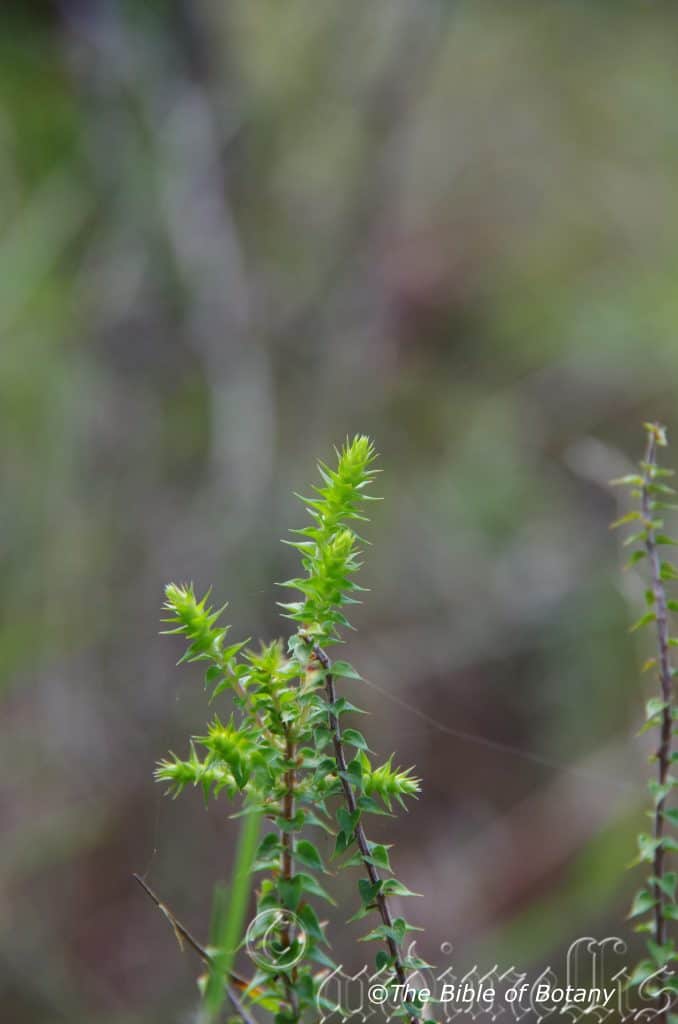
The Pinnacles NSW
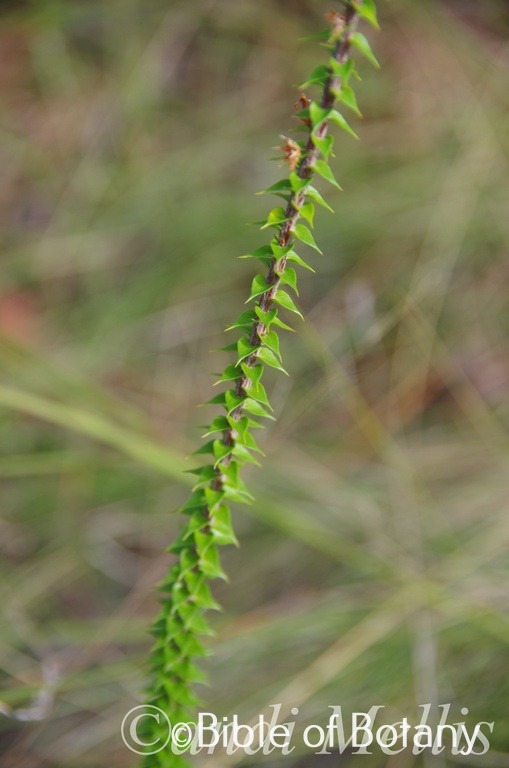
Epacris pulchella Wombat Creek Conservation Area NSW
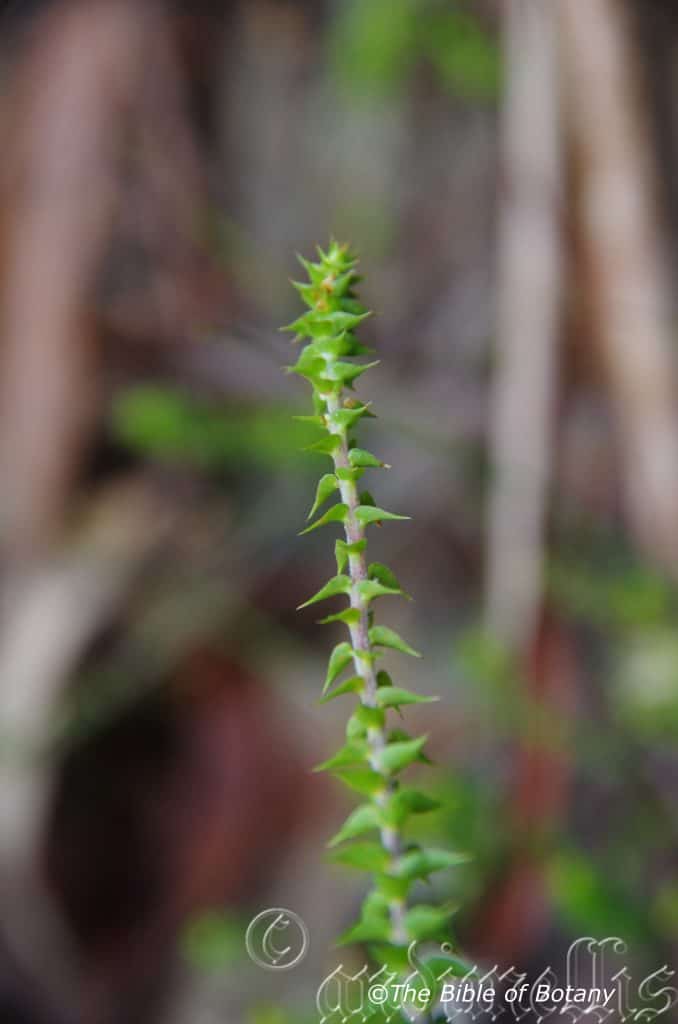
The Pinnacles NSW
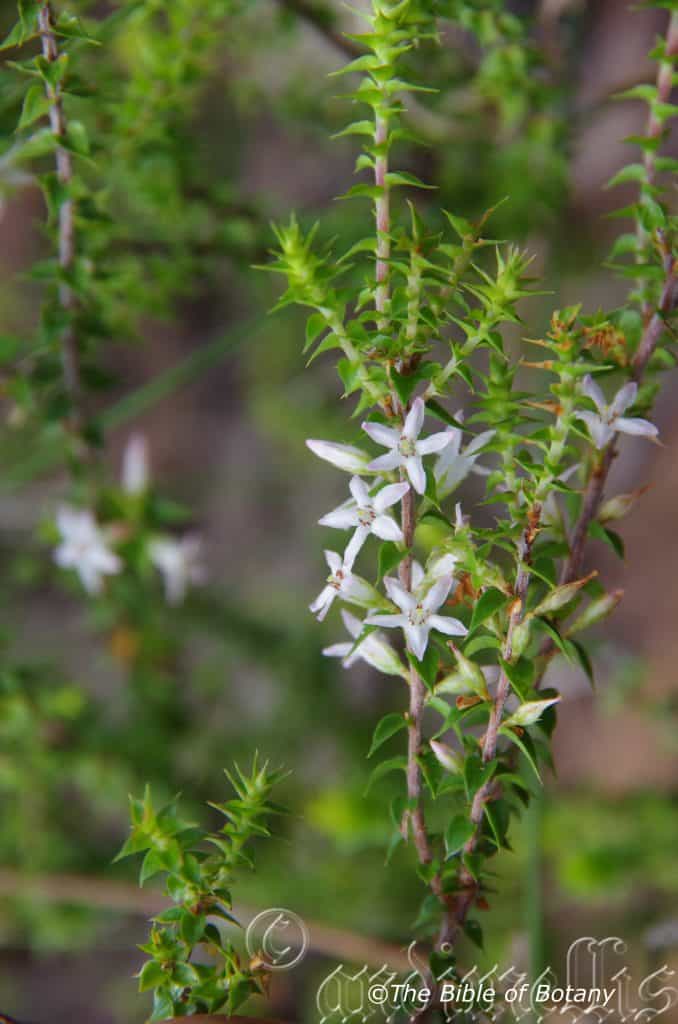
The Pinnacles NSW
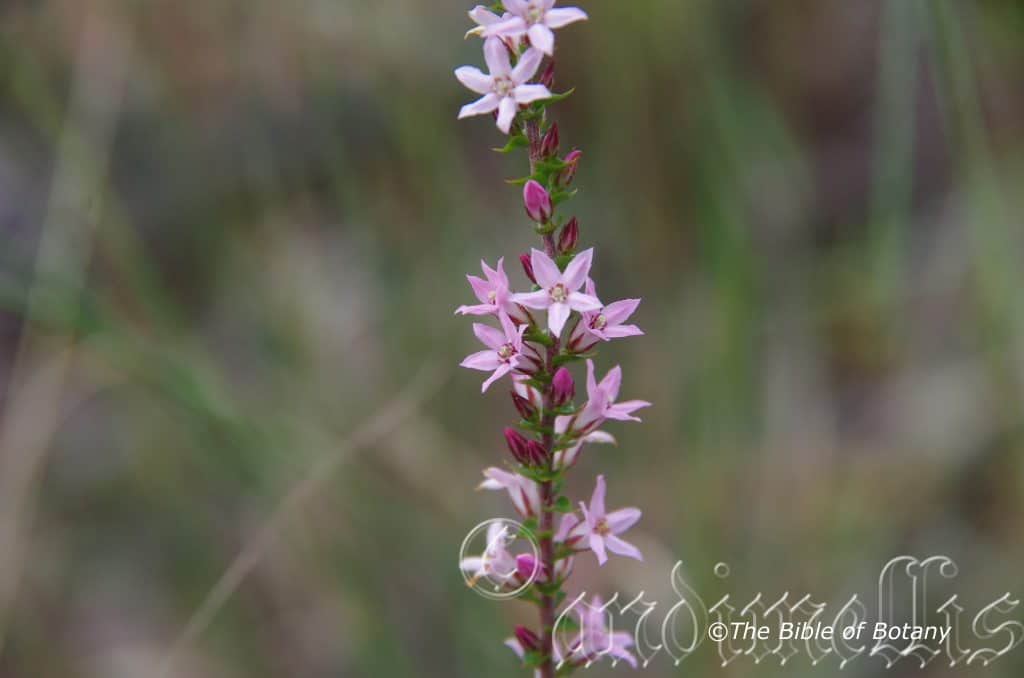
Yuraygir National Park west of Lake Hiawatha NSW
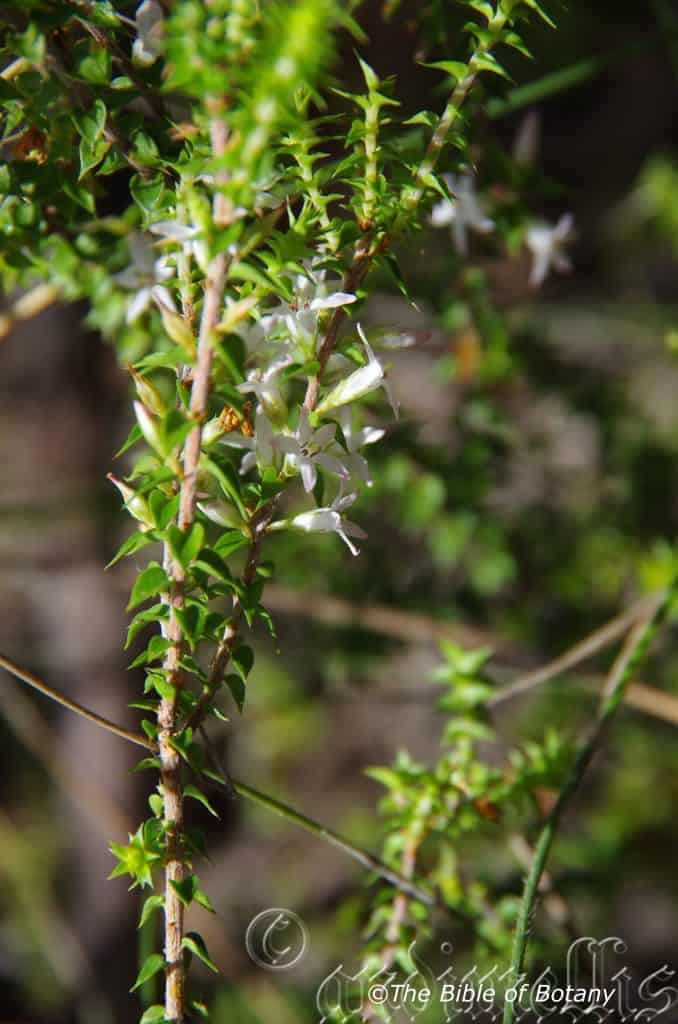
The Pinnacles NSW
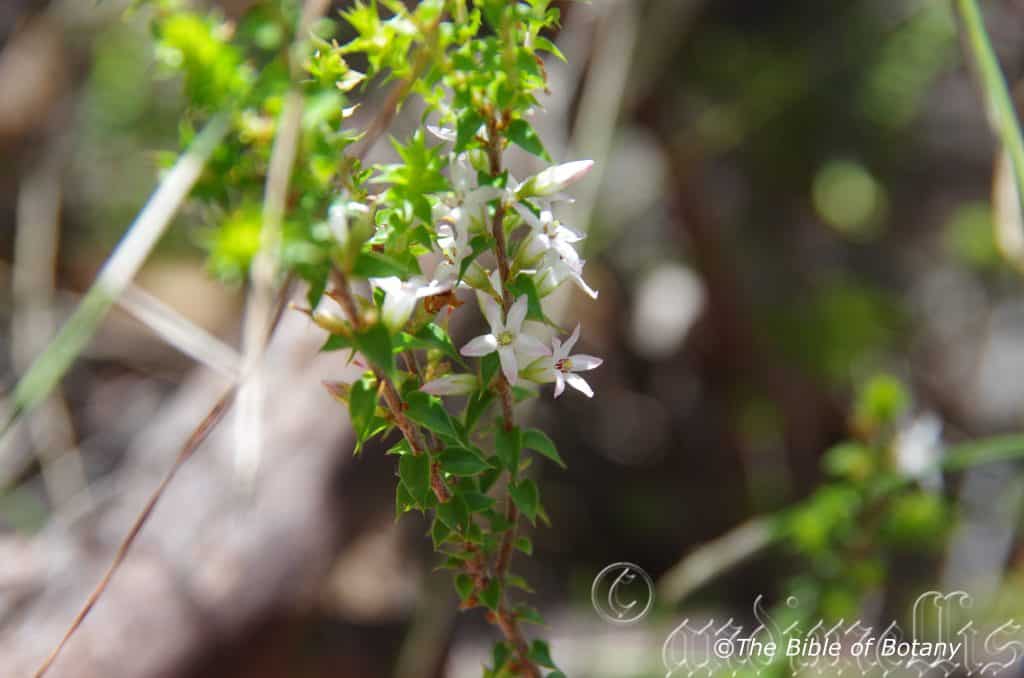
The Pinnacles NSW
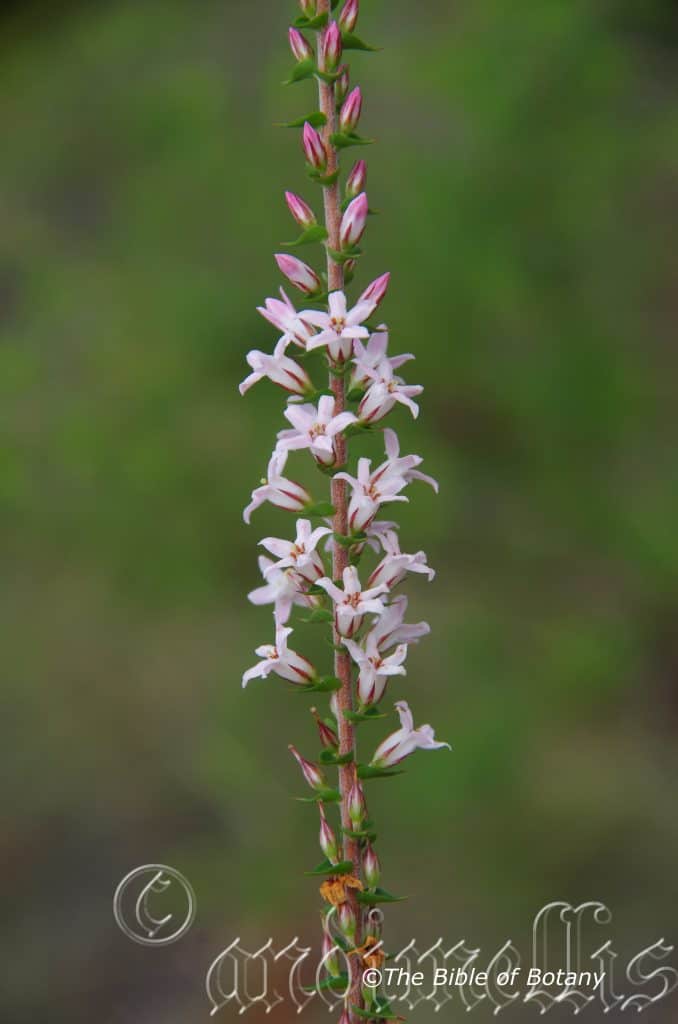
Yuraygir National Park west of Lake Hiawatha NSW
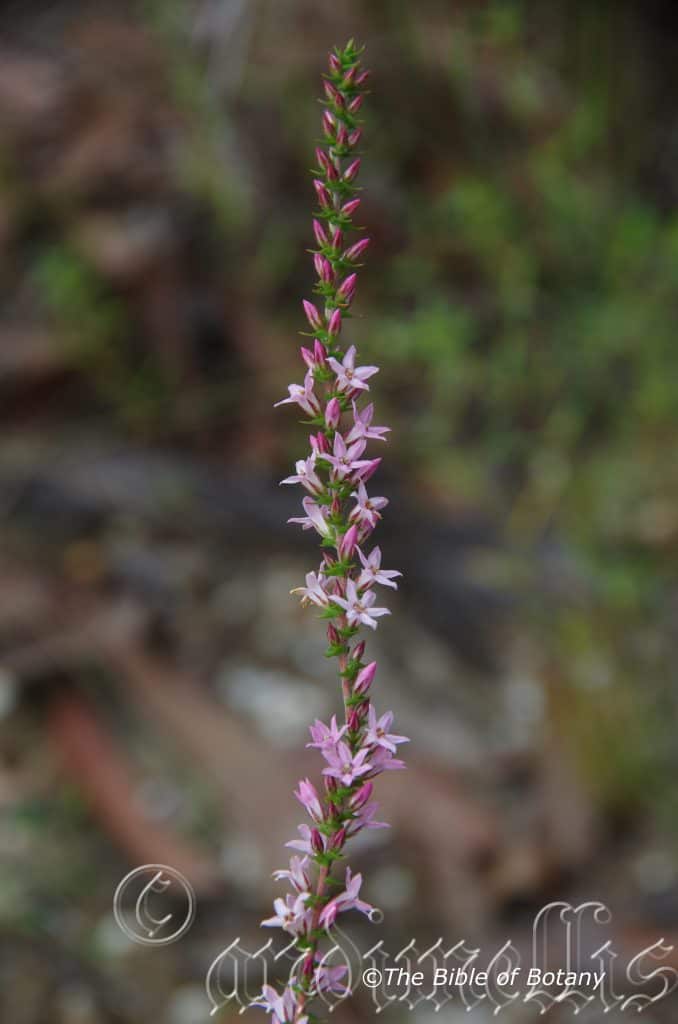
Yuraygir National Park west of Lake Hiawatha NSW
Epacris pulchella
Classification
Unranked: Eudicots
Unranked: Asterids
Order: Ericales
Family: Epacriceae
Genus: From Epi, which is Ancient Greek for upon and Akris, which is Ancient Greek for a summit near the tops of hills or the leaves’ apexes that are sharply pointed. It refers to plants, which prefer to grow on the tops of hills or have pointed leaves somewhat like the apex of hills.
Species: From Pulchella which is Latin for pretty. It usually refers to flowers, which are pink and rather attractive.
Common Name: Wallum Heath.
Distribution:
Epacris pulchella has a disjunct distribution from Fraser Island in coastal central Queensland to Conjola and Ettrema Creek in coastal southern New South Wales. It is mainly found on and east of the Great Dividing Range though there are several isolated populations west of the Range near Belinga on the Ballonne River in Queensland, Mount York near Mount Victoria in New South Wales and Wodonga and Black Mountain near Orbost in Victoria.
https://avh.ala.org.au/occurrences/search?taxa=Epacris+pulchella#tab_mapView
Habitat Aspect Climate:
Epacris pulchella prefers full sun to dappled light. It grows adjacent to moist heaths, swamps and in depressions in dry open schlerophyll forests, especially littoral coastal heath forests. The altitude ranges from 5 meters ASL to 400 meters ASL.
Temperatures range from minus 3 degrees in July to 36 degrees in January.
Rainfall ranges from lows of 600mm to an average of 1800mm annually, however the rainfall is not as important as the consistent moisture derived from seepages and ground depressions.
Soil Requirements:
Epacris pulchella prefers better quality sandy loams. The soils are usually derived from decomposed sandstone or accumulated peaty sands or at times granite. The soils pH ranges from 5pH to 6pH. It does tolerate waterlogged soils but prefers to grow adjacent to the real wet soils. Non saline soils to moderately saline soils are tolerated.
Height & Spread:
Wild Plants: 0.4m to 1.5m by 0.3m to 0.6m.
Characteristics:
Epacris pulchella‘s red-brown stems are erect, glabrous and carry the inconspicuous leaf scars of the discarded leaves. The branchlets and juvenile new growth are reddish-brown and are densely covered in short and long white pubescent hairs.
Epacris pulchella‘s divaricate leaves are ovate and measure 2.1mm to6.5mm in length by 1.6mm to 4mm in width. The petiole is densely covered in short or long white pubescent hairs and measure 0.5mm to 0.8mm in length. The bases are cordate while the apexes are long acuminate with a pungent tip. The concolourous laminas are mid olive-green to sea green, slightly scabrous on the upper lamina while the lower lamina is glabrous. The coriaceous laminas are concave on the upper surface. The margins are minutely toothed.
The inflorescence of Epacris pulchella are born singularly from the leaf axils opening first at the apex then towards the base of the branchlets. The linear to linear-lanceolate bracts are pale green at the base and pink at the apex and measure 2.5mm to 4.5mm in length. The linear to linear-lanceolate sepals are pale green at the base and pink at the apex and measure 2.8mm to 5mm in length.
The usually white or at times pink corollas measure 3.5mm to 5.5mm in length by 4mm to 6mm in diameter. The elliptical corolla lobes are usually white or at times pink, divaricate and measure 3mm to 4mm in length. The white to pale pink pedicels measure 1mm to 2mm in length.
The 5 deep brown anthers are exserted and are attached to the inside of the corolla tube near the mouth adjacent to the lobes. The anthers measure 0.5mm to 0.6mm in length.
The white style measures 4mm to 6mm in length including the spherical, pastel green stigma. The flowers appear throughout the year with a peak from January to May.
Epacris pulchella fruits are small flat capsules. They measure 2mm to 2.5mm in length.
Wildlife:
Epacris pulchella is a good standby plants for small nectar eating birds like Eastern spinebills, Acanthorhynchus tenuirostris, Yellow Faced Honey eaters, Lichenostomus chrysops and New Holland Honey eaters, Phylidonyris novaehollandiae because they flower all year and peak when there are fewer plants in flower.
The plants leaves are also host to the Australian Cranberry Moth (Poecilasthena pulchraria).
Cultivation:
Epacris pulchella is a magnificent small shrub for cool sub-tropical to temperate gardens. It has a place around swimming pools, in cool sunny courtyards, bush gardens and rockeries. It needs to be mulched and the soil moisture needs to be kept at an even level. In the garden it will grow 400mm to 1500mm by 300mm to 600mm when planted in the open. It can be tip pruned to increase its bushiness and feed for small native birds.
Epacris pulchella looks particularly stunning placed amongst large boulders to soften the rocks. Here pruning is beneficial in order to persuade them to grow around them rather than up and over them. The boulders assist in keeping the root zone cool and help to retain moisture in the lower strata of the soil.
Epacris pulchella add interesting foliage and colour to a heath garden. When you design a flat heath garden which this Epacris is well suited. Try not to use contours or straight lines to display the plants as heath lands are almost always flat or have a slight rise with the plants being found scattered throughout the scene. Plants must be planted close together and be short so you can see over the tallest ones with the exception of one or two plants at the most. These will be feature plants. The idea is to achieve a feeling of expansive flatness. This can be achieved with using the Epacris pulchella’s leaves and having them contrasting finer pale green or soft grey to glaucous coloured foliage. Use a lot of procumbent plants like Carpobrotus edulis or Hibbertia specie. Mix them with other smaller shrubs so none of them dominate the scene but blend in to give a mosaic of foliage colours that you oversee. Here I immediately think of Actinotis helianthi Grevillea masonii or Grevillea paradoxa for three great contrasting foliage.
I can remember one striking display we created once; on beach sand, where we used Grevillea laurifolia as a mass ground cover on a car turning circle with boulders and a few Epacris obtusifolia and Epacris microphylla scattered throughout the bed with a few clumps of Hibbertia linearis planted in clumps to break the overall flatness of the Grevillea Laurifolia. The Epacris specie can be pruned to give smaller plants no more than 800mm in height and to induce more flowering stems. The point here is to be different and don’t be afraid to experiment.
Propagation:
Seeds: Epacris pulchella‘s seeds can be sown into a seed raising mix without treatment in spring or summer. Cover them in 2mm of fine sand. Place the trays in a sunny warm position and keep moist. When the seedlings are 25mm to 50mm tall, prick them out and plant them into 50mm native tubes using a good organic mix.
Once the seedlings reach 200m to 250mm in height prick the growing tips out and plant them out into their permanent position. For mass plantings plant them at 1.8 meter to 2 meter centers. Amongst boulders use wider centers so the beauty of the rocks can still be viewed.
Fertilize using seaweed, fish emulsion or organic chicken pellets soaked in water and apply the liquid on an alternate basis. Fertilize every two months until established and then annually in spring or early autumn for healthy, vigorous and better flowering shrubs.
Cuttings: As Epacris pulchella seeds are difficult to collect cuttings maybe the best method for propagating. Select material from good flowering specimens or those with a better growth habit, plants with larger flowers, those that have the colour you desire or the leaves and habit you that you want to foster.
Successful results are have been attained with using 30mm fine gravel, 30mm peat and 40mm coconut fibre. Cuttings are probably best placed into individual small pots or tubes even resorting to peat pots to minimise root disturbance may be very helpful in attaining a better strike.
Use 70 to 80mm long half ripened material from the present season‘s growth when growing from cuttings. Take them in mid-autumn where frosts are not a problem or early spring where the day temperatures will not exceed 28 degrees. Remove half the leaves from the bottom section being careful not to tear the bark.
1 Prepare the cutting mix by adding one third sharp clean river sand, one third peat and one third perlite. These ingredients are sterilize,
2 Select good material from non diseased plants,
3 Select semi green stems for cuttings. Look for a stem with two or three nodes,
4 Place the cutting on a flat, hard surface, and make a clean down one side of the cutting for 10mm to 15mm with a sharp sterile knife or razor blade. – This scarification of the node will increase the chances of roots emerging from this spot. Now remove all but one or two the leaves, leaving the apex leaves in tact. If the leaves are very large in proportion to the stem, cut off the apical halves.
5 Fill a saucer with water, and place a little mild to medium rooting hormone into another container like a milk bottle top. Dip the node end of the cutting into the water and then into the rooting hormone. Tap off any excess hormone,
6 Use a small dipple stick or old pencil to poke a hole into the soilless potting mix. Ensure the hole is slightly larger than the stem diameter and be careful not to wipe the rooting hormone off the cuttings base, place the cuttings in a pattern ensuring the cuttings are not touching each other,
7 I like to place the pots in Plastic bags to help maintain temperature and moisture. Place in a semi shaded place like under 50mm shade cloth.
8 When the cuttings have struck, open the bag to allow air circulation for a few days to a week,
9 Once hardened off remove the cuttings from the bag and allow to further hardening for a few more days,
10 When the cuttings have obviously struck and have developed good roots; which can take about 8 months gently replant them into 150mm pots or place them into their permanent positions in the garden. The fewer times you repot the better as Epacris pulchella develop a very fine fragile root system and resent repotting and handling. Good luck.
Fertilize using seaweed, fish emulsion or organic chicken pellets soaked in water on an alternate basis. Fertilize every two months until the plants are established then annually in early September to October to maintain health, vitality and better flowering.
Further Comments from Readers:
Hi reader, it seems you use The Bible of Botany a lot. That’s great as we have great pleasure in bringing it to you! It’s a little awkward for us to ask, but our first aim is to purchase land approximately 1,600 hectares to link several parcels of N.P. into one at The Pinnacles NSW Australia, but we need your help. We’re not salespeople. We’re amateur botanists who have dedicated over 30 years to saving the environment in a practical way. We depend on donations to reach our goal. If you donate just $5, the price of your coffee this Sunday, We can help to keep the planet alive in a real way and continue to bring you regular updates and features on Australian plants all in one Botanical Bible. Any support is greatly appreciated. Thank you.
In the spirit of reconciliation we acknowledge the Bundjalung, Gumbaynggirr and Yaegl and all aboriginal nations throughout Australia and their connections to land, sea and community. We pay our respect to their Elders past, present and future for the pleasures we have gained.
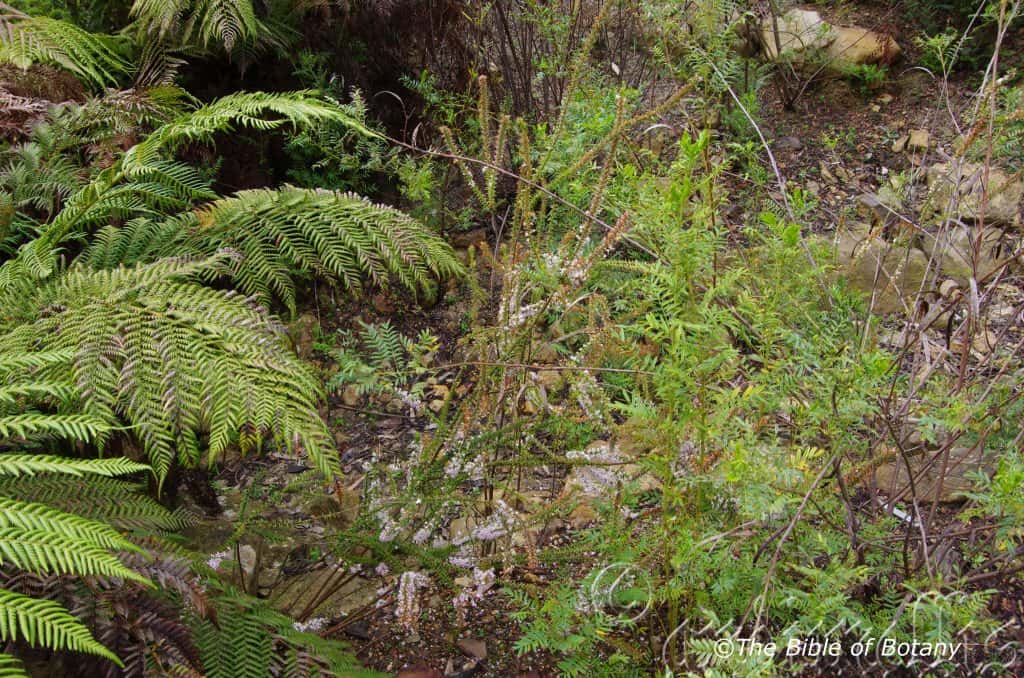
National Botanic Gardens ACT
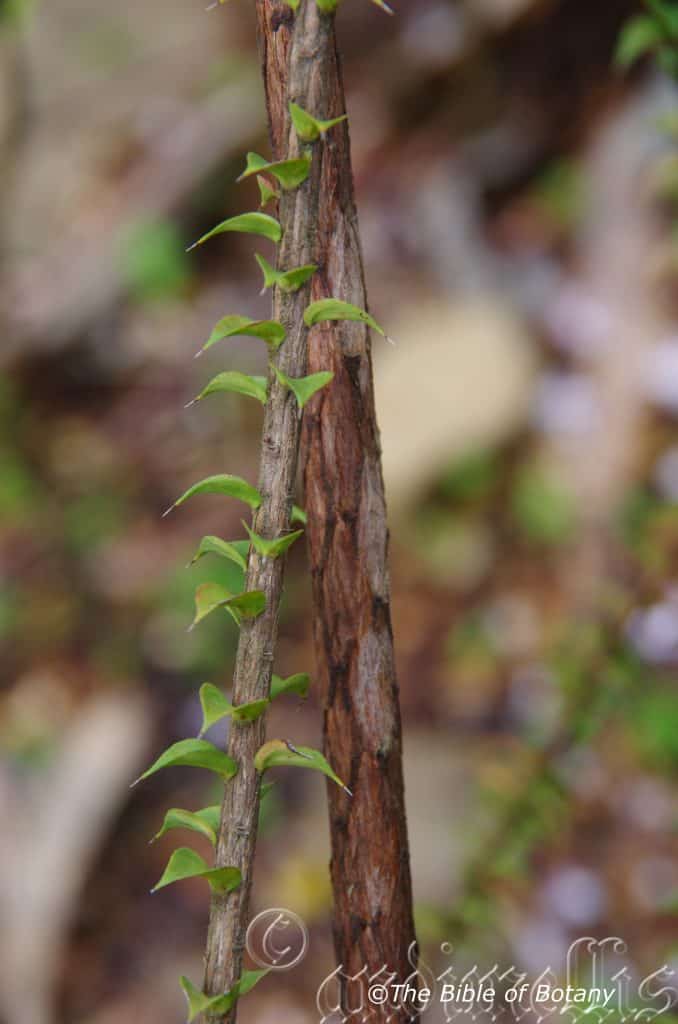
National Botanic Gardens ACT
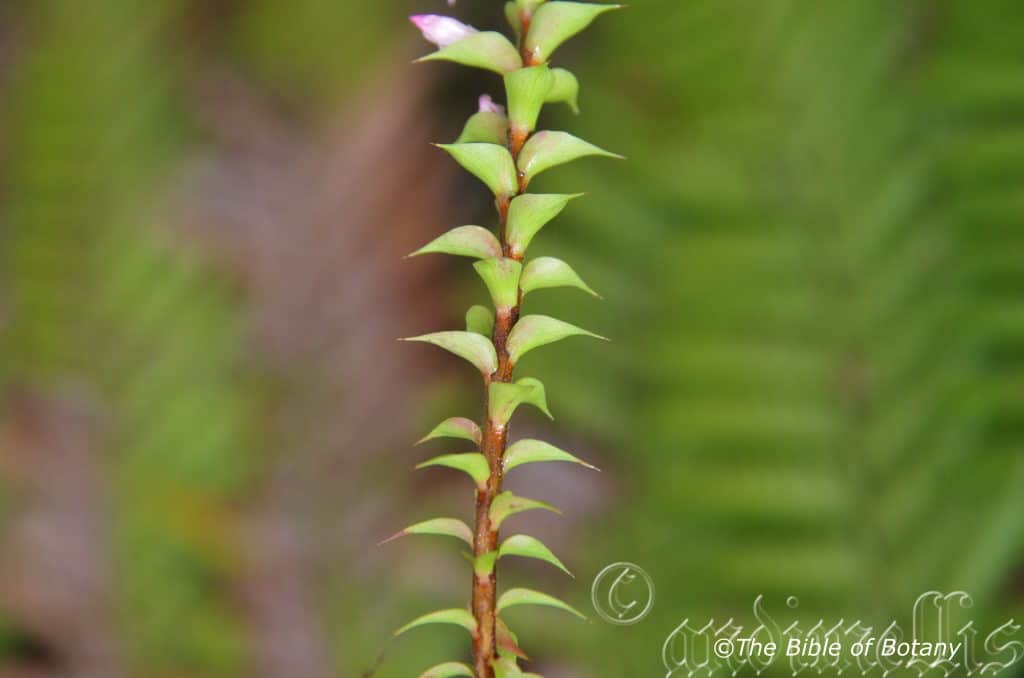
National Botanic Gardens ACT
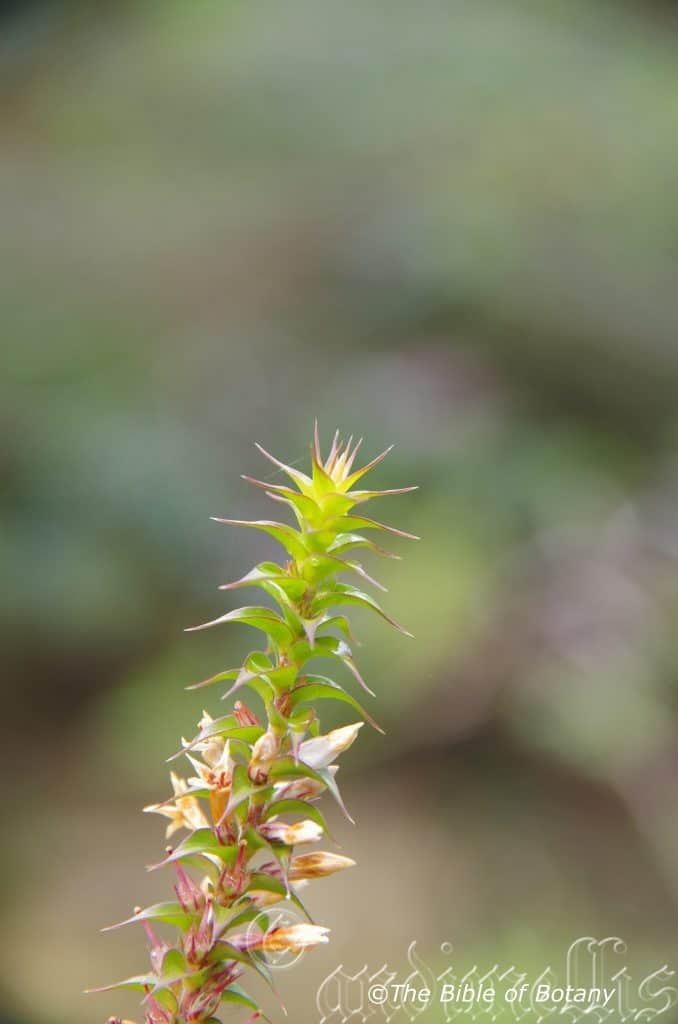
National Botanic Gardens ACT
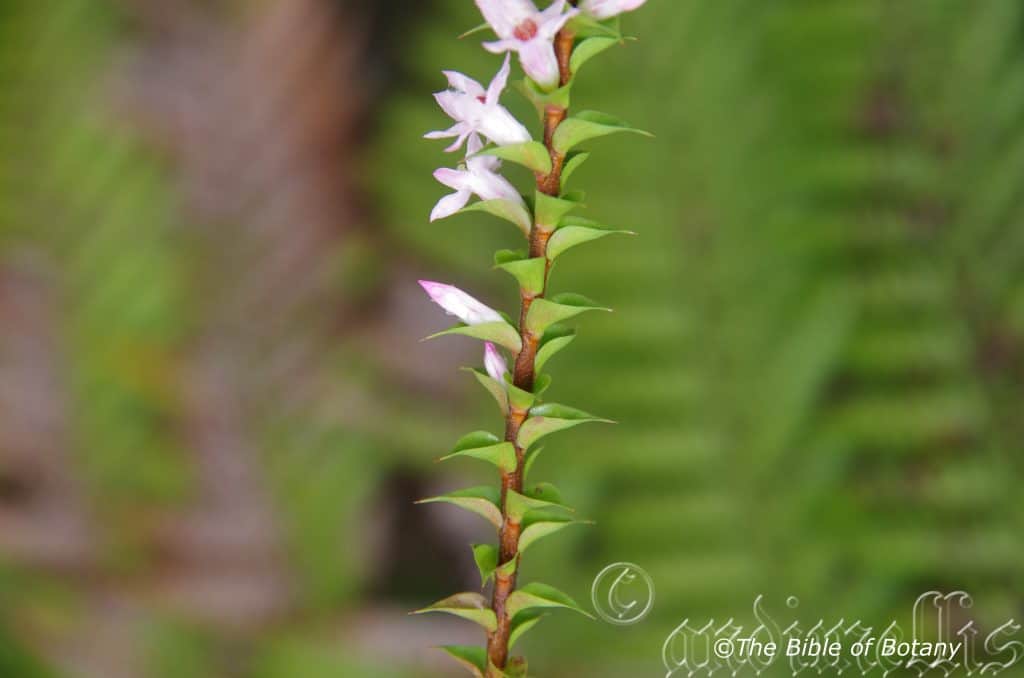
National Botanic Gardens ACT
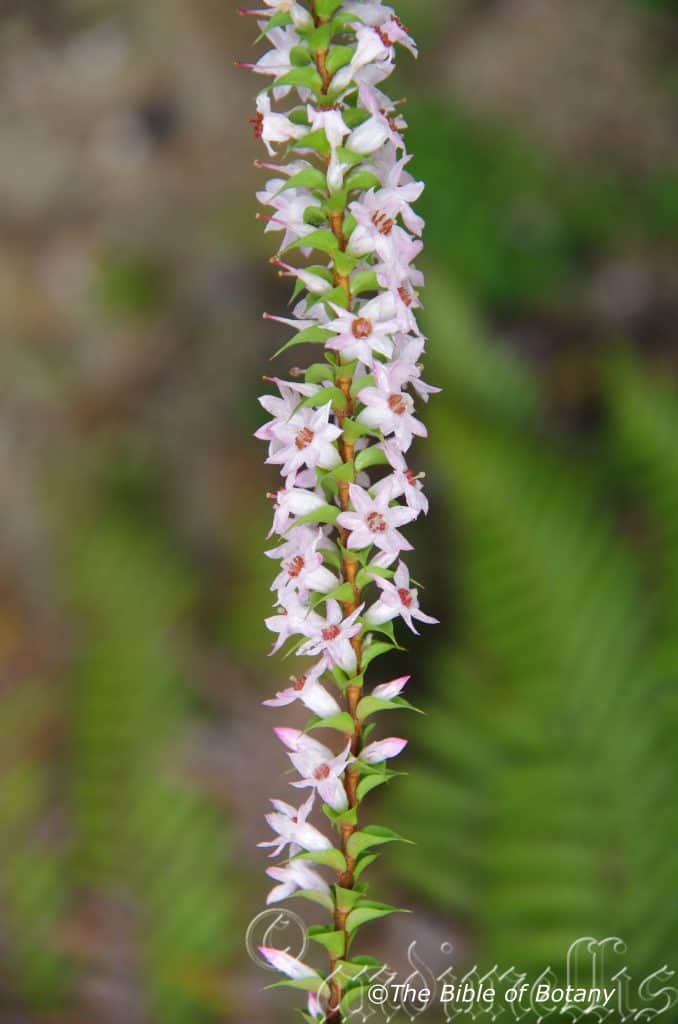
National Botanic Gardens ACT

National Botanic Gardens ACT
Epacris purpurascens
Classification
Unranked: Eudicots
Unranked: Asterids
Order: Ericales
Family: Epacriceae
Genus: From Epi, which is Ancient Greek for upon and Akris, which is Ancient Greek for a summit near the tops of hills or the leaves’ apexes that are sharply pointed. It refers to plants, which prefer to grow on the tops of hills or have pointed leaves somewhat like the apex of hills.
Species: From Purpurea, which is Latin for purple. It refers to organs, which have a distinct purplish, deep reddish-purple or purple colour or sheen.
Variety: Epacris purpurascens var. onosmiflora. From Onosma, which is Ancient Greek for to smell like a donkey and Floris, which is Latin for a flower or Flos, which is the Roman goddess for spring and flowers. It refers to flowers which smell like donkeys.
Variety: Epacris purpurascens var. purparescens. From Purpurea, which is Latin for purple. It refers to organs, which have a distinct purplish, deep reddish-purple or purple colour or sheen.
Common Name:
Distribution:
Epacris purpurascens var. onosmiflora has a limited distribution in New South Wales Lithgow to Wingecarribee.
Epacris purpurascens var. purparescens is found south from Gosford to Wollongong in central coastal New South Wales.
They grow in dry sclerophyll forest and scrub, adjacent to creeks and swamps on sandstone.
https://avh.ala.org.au/occurrences/search?taxa=Epacris+purpurascens#tab_mapView
Habitat Aspect Climate:
Epacris purpurascens prefers full sun to dappled light. It grows in dry sclerophyll forest and scrubs near creeks, swamps and wallums. The altitude ranges from 5 meters ASL to 1100 meters ASL.
Temperatures range from minus 3 degrees in July to 40 degrees in January.
Rainfall ranges from lows of 650mm to an average of 1600mm annually, however the rainfall is not as important as the consistent moisture derived from seepages, ground depressions and seasonally high water tables.
Soil Requirements:
Epacris purpurascens prefers acidic fine sands to sandy loams. The soils are usually derived from decomposed sandstone or accumulated peaty sands. The soils pH ranges from 4.5pH to 5.5pH. It tolerates seasonally waterloggedsoils but prefers to grow adjacent to the real wet soils. Non saline soils to moderately saline soils are tolerated.
Height & Spread:
Wild Plants: 0.4m to 1.5m by 0.3m to 0.6m.
Characteristics:
Epacris purpurascens‘s grows as erect shrub with reddish-brown, glabrous stems that carry the leaf scars of the discarded leaves. The branchlets and juvenile new growth are densely covered in white villous hairs.
Epacris purpurascens‘s leaves are appressed to stem on the basal half, spreading and recurving strongly on the apical half. The ovate or cordate leaves measure 7mm to 21mm in length by 4.5mm to 9mm in width. The petiole measures 0.8mm to 1.5mm in length. The bases are cordate while the apexes are acuminate with a pungent tip. The concolourous laminas are mid olive-green and glabrous. The coriaceous laminas are strongly concave on the upper surface while the margins are entire or sparsely covered in short fimbriate hairs.
The inflorescence of Epacris purpurascens are born from the leaf axils along most of the branchlets. The peduncle measures 1mm to 2mm in length. The acuminate bracts are olive green while the sepals measure 4.5mm to 6.5mm in length. The white tinged pink, red or purple corolla tubes measure 4.3mm to 7.7mm in length while the divaricate oblong lobes have a broad acute apex and measure 3.6mm to 5mm in length.
The 5 deep brown anthers are half exserted and are attached to the inside of the corolla tube near the mouth adjacent to the lobes. The anthers measure 0.7mm to 0.9mm in length.
The white style measures 4mm to 6mm in length including the spherical, pastel green stigma. The flowers appear from July to September along the coast and mainly from October to November on the tablelands.
Epacris purpurascens fruits are small flat capsules. They measure 2mm or 2.5mm in length.
Subspecie Differences:
Epacris purpurascens var. onosmiflora leaves have an aristate tip which measure 1mm to 2.2mm in length. The margins are often fimbriate or at times fimbriate near the base. The petiole is sparsely covered in white pubescent hairs. The corolla tube is longer than the sepals and measure 6.2mm to 7.7mm in length while the lobes measure 3.6mm to 4mm in length. The style measures 7.7mm to 8mm in length. The capsule measures 2.5mm in length.
Epacris purpurascens var. purparescens leaves have an aristate tip which measure 0.8mm to 1.4mm in length. The margins are entire. The petiole is glabrous. The corolla tube is shorter or equal in length to the sepals and measure 4.3mm to 6mm in length while the lobes measure 4.6mm to 5mm in length. The style measures 5.5mm to 6.8mm in length. The capsule measures 2mm in length.
Wildlife:
Epacris purpurascens is a good standby plants for small nectar eating birds like Eastern spinebills, Acanthorhynchus tenuirostris, Yellow Faced Honeyeaters, Lichenostomus chrysops and New Holland Honeyeaters, Phylidonyris novaehollandiae because they flower all year and peak when there are fewer plants in flower.
Cultivation:
Epacris purpurascens is a magnificent small shrub for sub-tropical to temperate gardens. It has a place around swimming pools, in cool sunny courtyards, bush gardens and rockeries. It needs to be mulched and the soil moisture needs to be kept at an even level. In the garden it will grow 400mm to 1600mm by 300mm to 600mm when planted in the open.
It can be pruned to shape or allowed to do their own thing, either way it makes very interesting plants adding colour and feed for small native birds.
Epacris purpurascens looks particularly stunning placed amongst large boulders where it softens the scene. Here pruning is beneficial in order to persuade them to grow around them rather than up and over them. The boulders assist in keeping the root zone cool and help to retain moisture in the lower strata of the soil.
Epacris purpurascens add interesting foliage and colour to a heath garden. When you design a flat heath garden which this Epacris spp. is well suited. Try not to use contours or straight lines to display the plants as heath lands are almost always flat or have a slight rise with the plants being found scattered throughout the scene. Plants must be planted close together and be short so you can see over the tallest ones with the exception of one or two plants at the most. These will be feature plants. The idea is to achieve a feeling of expansive flatness. This can be achieved with using the Epacris purpurascea’s leaves and having them contrasting finer pale green or soft grey to glaucous coloured foliage. Use a lot of procumbent plants like Carpobrotus edulis or Hibbertia aspera or Hibbertia diffusa. Mix it with other smaller shrubs so none of them dominate the scene but blend in to give a mosaic of foliage colours and shapes that you oversee.
Propagation:
Seeds: Epacris purpurascens‘s seeds can be sown into a seed raising mix without treatment in spring or summer. Cover them in 2mm of fine sand. Place the trays in a sunny warm position and keep moist. When the seedlings are 25mm to 50mm tall, prick them out and plant them into 50mm native tubes using a good organic mix.
Once the seedlings reach 200mm to 250mm in height prick the growing tips out and plant them out into their permanent position. For mass plantings plant them at 1.8 meter to 2 meter centers. Amongst boulders use wider centers so the beauty of the rocks can still be viewed.
Fertilize using seaweed, fish emulsion or organic chicken pellets soaked in water and apply the liquid on an alternate basis. Fertilize every two months until established and then annually in spring or early autumn for healthy, vigorous and better flowering shrubs.
Cuttings: Epacris purpurascens seeds are difficult to collect, therefore cuttings maybe the best method for propagating. Select material from good flowering specimens or those with a better growth habit, plants with larger flowers, those that have the colour you desire or the leaves and habit you that you want to foster.
Successful results are have been attained with using 30mm fine gravel, 30mm peat and 40mm coconut fibre. Cuttings are probably best placed into individual small pots or tubes even resorting to peat pots to minimise root disturbance may be very helpful in attaining a better strike.
Use 70 to 80mm long half ripened material from the present season’s growth when growing from cuttings. Take them in mid-autumn where frosts are not a problem or early spring where the day temperatures will not exceed 28 degrees. Remove half the leaves from the bottom section being careful not to tear the bark.
1 Prepare the cutting mix by adding one third sharp clean river sand, one third peat and one third perlite. These ingredients are sterilize,
2 Select good material from non diseased plants,
3 Select semi green stems for cuttings. Look for a stem with two or three nodes,
4 Place the cutting on a flat, hard surface, and make a clean down one side of the cutting for 10mm to 15mm with a sharp sterile knife or razor blade. – This scarification of the node will increase the chances of roots emerging from this spot. Now remove all but one or two the leaves, leaving the apex leaves in tact. If the leaves are very large in proportion to the stem, cut off the apical halves.
5 Fill a saucer with water, and place a little mild to medium rooting hormone into another container like a milk bottle top. Dip the node end of the cutting into the water and then into the rooting hormone. Tap off any excess hormone,
6 Use a small dipple stick or old pencil to poke a hole into the soilless potting mix. Ensure the hole is slightly larger than the stem diameter and be careful not to wipe the rooting hormone off the cuttings base, place the cuttings in a pattern ensuring the cuttings are not touching each other,
7 I like to place the pots in Plastic bags to help maintain temperature and moisture. Place in a semi shaded place like under 50mm shade cloth.
8 When the cuttings have struck, open the bag to allow air circulation for a few days to a week,
9 Once hardened off remove the cuttings from the bag and allow to further hardening for a few more days,
10 When the cuttings have obviously struck and have developed good roots; which can take about 8 months gently replant them into 150mm pots or place them into their permanent positions in the garden. The fewer times you repot the better as Epacris purpurascens develop a very fine fragile root system and resent repotting and handling. Good luck.
Fertilize using seaweed, fish emulsion or organic chicken pellets soaked in water on an alternate basis. Fertilize every two months until the plants are established then annually in early September to October to maintain health, vitality and better flowering.
Further Comments from Readers:
Hi reader, it seems you use The Bible of Botany a lot. That’s great as we have great pleasure in bringing it to you! It’s a little awkward for us to ask, but our first aim is to purchase land approximately 1,600 hectares to link several parcels of N.P. into one at The Pinnacles NSW Australia, but we need your help. We’re not salespeople. We’re amateur botanists who have dedicated over 30 years to saving the environment in a practical way. We depend on donations to reach our goal. If you donate just $5, the price of your coffee this Sunday, We can help to keep the planet alive in a real way and continue to bring you regular updates and features on Australian plants all in one Botanical Bible. Any support is greatly appreciated. Thank you.
In the spirit of reconciliation we acknowledge the Bundjalung, Gumbaynggirr and Yaegl and all aboriginal nations throughout Australia and their connections to land, sea and community. We pay our respect to their Elders past, present and future for the pleasures we have gained.
Epacris rhombifolia
Classification
Unranked: Eudicots
Unranked: Asterids
Order: Ericales
Family: Epacriceae
Genus: From Epi, which is Ancient Greek for upon and Akris, which is Ancient Greek for a summit near the tops of hills or the leaves’ apexes that are sharply pointed. It refers to plants, which prefer to grow on the tops of hills or have pointed leaves somewhat like the apex of hills.
Species: From Rhombos, which is Ancient Greek for to spin around or diamond shape and Folium which is Latin for foliage. It refers to leaves or phyllodes, which have a diamond shape.
Common Name:
Distribution:
Epacris rhombifolia has a restricted distribution along the higher, cooler areas of the Great Dividing Range south from Caledonia Swamp, in the upper catchment of the East Caledonia River to Jensens Swamp on the Boyd Plateau West of Kanangra Walls in New South Wales.
https://avh.ala.org.au/occurrences/search?taxa=Epacris+rhombifolia#tab_mapView
Habitat Aspect Climate:
Epacris rhombifolia prefers full sun to dappled light. It grows adjacent to wallums and in highland swampy heaths, seepages and drainage lines in open woodlands. It is found from 5 meters ASL to 700 meters ASL.
The temperatures range from minus 5 degrees in July to 32 degrees in January.
The rainfall ranges from lows of 1000mm to an average of 1600mm annually, however the rainfall is not as important as the consistent moisture derived from seepages and ground depressions.
Soil Requirements:
Epacris rhombifolia prefers sandy loams to gritty sandy light fatty clays. The soils are derived from decomposed sandstones or granites. The soils pH ranges from 5pH to a 5.5pH. It tolerates waterlogged soils, especially those where the soils have high water tables which keep the upper soil moist through capillary action all year. Non saline soils to slightly saline soils are tolerated.
Height & Spread:
Wild Plants: 0.5m to 2m by 0.5m to 2m.
Characteristics:
Epacris rhombifolia‘s mid brown stems are erect, glabrous to slightly flaky and carry raised cuspid leaf scars of discarded leaves. The branchlets and juvenile new growth are pale grey-brown and are sparsely covered in short white puberulent hairs.
Epacris rhombifolia’s crowded leaves are imbricate and semi appressed on the new growth slowly becoming divaricate on the mature stems at around 150mm from the apexes. The broad rhombic leaves measure 2.2mm to 4.5mm in length by 1.6mm to 3.3mm in width. The appressed to semi appressed petioles measure 0.3mm to 0.6mm in length. The bases are obtuse to truncate while the apexes are blunt acuminate with a mucronate tip. The leaves are not pungent. The concolourous laminas are sea-green, glabrous or slightly scabrous. The margins are entire, slightly hyaline. The lamina is flat or slightly recurves upwards from the midvein to the margin and slightly recurves upwards at the apex. The midvein is slightly prominent on the lower lamina and is not visible on the upper lamina.
The inflorescence of Epacris rhombifolia are born singularly from the leaf axils opening first at the base then towards the apex of the branchlets. The broad lanceolate bracts are white to pastel green with a reddish tinge are at times have reddish-brown streak down the midvein. The bracts measure 0.3mm to 0.4mm in length. The broad lanceolate sepals measure 1.5mm to 2mm in length by 0.7mm to 1mm in width. The sepal margins are covered in white ciliolate hairs. The white, campanulate corollas measure 1.7mm to 2.1mm in length by 1.6mm to 2mm in diameter. The white corolla lobes are divaricate with an obtuse apex and measure 1.2mm to 1.8mm in length. The pedicels measure 1.8mm to 2.6mm in length.
The 5 deep white filiform filaments are attached to the inside of the corolla tube near the mouth and adjacent to the lobes. The filaments measure 0.6mm to 0.7mm in length. The reddish-brown oblong, anthers are slightly inserted to slightly exserted and measure 0.4mm to 0.5mm in length.
The mid green ovary is depressed globose and glabrous and measures 0.8mm to 1mm in length. The short, mid green style measures 0.5mm in length while the flattened orbicular stigma is pastel green. The flowers appear from December to early March.
Epacris rhombifolia fruits are small depressed globular capsules. The capsules measure 1.4mm to 1.8mm in length by 1.6mm to 2mm in diameter. The style is persistent on the capsules which turn pale brown on ripening.
Wildlife:
Epacris rhombifolia is a good standby plants for small nectar eating birds like Eastern spinebills, Acanthorhynchus tenuirostris, Yellow Faced Honeyeaters, Lichenostomus chrysops and New Holland Honeyeaters, Phylidonyris novaehollandiae because they flower all year and peak when there are fewer plants in flower.
Cultivation:
Epacris rhombifolia is a magnificent small shrub for subtropical to temperate gardens. It has a place around swimming pools, in cool sunny courtyards, bush gardens and rockeries. It needs to be mulched and the soil moisture needs to be kept at an even level throughout the year.
In cultivation it will grow from 0.8 meters to 1.2 meters in height by 0.8 meters to 1 meter in diameter when grown in the open. It can be regularly tip pruned can be pruned to form smaller bushier shrubs or allowed to do their own thing, either way they make very interesting plants adding interest and feed for small native birds.
Epacris rhombifolia looks particularly stunning placed amongst large boulders where they soften the rocks. Here pruning is beneficial in order to persuade them to grow around the boulders or rocks rather than up and over them. The boulders assist in keeping the root zone cool and help to retain moisture in the lower strata of the soil.
Epacris rhombifolia add interesting foliage and colour to a heath garden. When you design a flat heath garden which Epacris rhombifolia is well suited. Try not to use contours or straight lines to display the plants as heath lands are almost always flat or have a slight rise with the plants being found scattered throughout the scene. Plants must be planted close together and be short so you can see over the tallest ones with the exception of one or two plants at the most. These will be feature plants. It can be used as the feature plant or trimmed to add all year colour in the garden. The idea is to achieve a feeling of expansive flatness. This can be achieved with using Epacris rhombifolia’s white flowers as patches of white and having them contrasting finer pale green or deep green coloured foliages or deeper coloured flower species in between. Use a lot of procumbent plants like other Epacris specie, mixed Pattersonia specie orDampier specie for a purple contrast or Hibbertia diffusa for a great ground cover that flowers most of the year. Mix it with other smaller shrubs so none of them dominate the scene but blend in to give a mosaic of foliage colours that you oversee. Here I immediately think of Grevillea laurifolia, Grevillea paradoxa or even the smaller forms of Grevillea rosmarinifolia for three great contrasting foliages.
Propagation:
Seeds: Epacris rhombifolia seeds can be sown into a seed raising mix without treatment in spring or summer. Cover them in 2mm of fine sand. Place the trays in a sunny warm position and keep moist. When the seedlings are 25mm to 50mm tall, prick them out and plant them into 50mm native tubes using a good organic mix.
Once the seedlings reach 200mm to 250mm in height prick the growing tips out and plant them out into their permanent position. For mass plantings plant them at 1.8 meter to 2 meter centers. Amongst boulders use wider centers so the beauty of the rocks can still be viewed.
Cuttings: Epacris rhombifolia‘s seeds can be sown into a seed raising mix without treatment in spring or summer. Cover them in 2mm of fine sand. Place the trays in a sunny warm position and keep moist. When the seedlings are 25mm to 50 mm tall, prick them out and plant them into 50mm native tubes using a good organic mix.
Once the seedlings reach 200mm to 250mm in height prick the growing tips out and plant them out into their permanent position. For mass plantings plant them at 1.8 meter to 2 meter centers. Amongst boulders use wider centers so the beauty of the rocks can still be viewed.
Fertilize using seaweed, fish emulsion or organic chicken pellets soaked in water and apply the liquid on an alternate basis. Fertilize every two months until established and then annually in spring or early autumn for healthy, vigorous and better flowering shrubs.
Cuttings: As Epacris rhombifolia seeds are difficult to collect, therefore cuttings maybe the best method for propagating. Select material from good flowering specimens or those with a better growth habit, plants with larger flowers, those that have the colour you desire or the leaves and habit you that you want to foster.
Successful results are have been attained with using 30mm fine gravel, 30mm peat and 40mm coconut fibre. Cuttings are probably best placed into individual small pots or tubes even resorting to peat pots to minimise root disturbance may be very helpful in attaining a better strike.
Use 70 to 80mm long half ripened material from the present season’s growth when growing from cuttings. Take them in mid-autumn where frosts are not a problem or early spring where the day temperatures will not exceed 28 degrees. Remove half the leaves from the bottom section being careful not to tear the bark.
1 Prepare the cutting mix by adding one third sharp clean river sand, one third peat and one third perlite. These ingredients are sterilize,
2 Select good material from non diseased plants,
3 Select semi green stems for cuttings. Look for a stem with two or three nodes,
4 Place the cutting on a flat, hard surface, and make a clean down one side of the cutting for 10mm to 15mm with a sharp sterile knife or razor blade. – This scarification of the node will increase the chances of roots emerging from this spot. Now remove all but one or two the leaves, leaving the apex leaves in tact. If the leaves are very large in proportion to the stem, cut off the apical halves.
5 Fill a saucer with water, and place a little mild to medium rooting hormone into another container like a milk bottle top. Dip the node end of the cutting into the water and then into the rooting hormone. Tap off any excess hormone,
6 Use a small dipple stick or old pencil to poke a hole into the soilless potting mix. Ensure the hole is slightly larger than the stem diameter and be careful not to wipe the rooting hormone off the cuttings base, place the cuttings in a pattern ensuring the cuttings are not touching each other,
7 I like to place the pots in Plastic bags to help maintain temperature and moisture. Place in a semi shaded place like under 50mm shade cloth.
8 When the cuttings have struck, open the bag to allow air circulation for a few days to a week,
9 Once hardened off remove the cuttings from the bag and allow to further hardening for a few more days,
10 When the cuttings have obviously struck and have developed good roots; which can take about 8 months gently replant them into 150mm pots or place them into their permanent positions in the garden. The fewer times you repot the better as Epacris purpurascens develop a very fine fragile root system and resent repotting and handling. Good luck.
Fertilize using seaweed, fish emulsion or organic chicken pellets soaked in water on an alternate basis. Fertilize every two months until the plants are established then annually in early September to October to maintain health, vitality and better flowering.
Further Comments from Readers:
Hi reader, it seems you use The Bible of Botany a lot. That’s great as we have great pleasure in bringing it to you! It’s a little awkward for us to ask, but our first aim is to purchase land approximately 1,600 hectares to link several parcels of N.P. into one at The Pinnacles NSW Australia, but we need your help. We’re not salespeople. We’re amateur botanists who have dedicated over 30 years to saving the environment in a practical way. We depend on donations to reach our goal. If you donate just $5, the price of your coffee this Sunday, We can help to keep the planet alive in a real way and continue to bring you regular updates and features on Australian plants all in one Botanical Bible. Any support is greatly appreciated. Thank you.
In the spirit of reconciliation we acknowledge the Bundjalung, Gumbaynggirr and Yaegl and all aboriginal nations throughout Australia and their connections to land, sea and community. We pay our respect to their Elders past, present and future for the pleasures we have gained.
Epipogium roseum
Classification
Class: Monocots
Order: Asparagales
Family: Orcidaceae
Genus: From Epi, which is Ancient Greek for upon, above or over and Pogon, which is Ancient Greek for a beard. It refers to the turned up labellum appearing like a beard.
Species: From Rhodon, which is Ancient Greek or Rosa, which is Latin for to have a rose colour. It refers to flowers, which have a pale to deep rose pink colour of a rose. It refers to flowers which have pastel pink shades like a rose.
Common Name: Drooping Orchid.
Distribution:
Epipogium roseum is found in several disjunct populations south from the Iron Range Resource Reserve to the Macleay River in northern coastal New South Wales. It is found from the coast to the low coastal ranges of the Great Dividing Range.
https://avh.ala.org.au/occurrences/search?taxa=Epipogium+australis#tab_mapView
Habitat:
Aspect / Climate:
Epipogium roseum prefers dappled shade to full shade. It grows as an understory terrestrial orchid in open forests, usually on grassland. Savannah woodlands to dry rainforest margins. It is also found in low lying areas close to the coast adjacent to coastal heaths. The altitude ranges from 5 meters ASL to 850 meters ASL.
The temperatures range from 2 degrees in August to 39 degrees in January.
The rainfall ranges from lows of 900mm to 3200mm average per annum. The rainfall is seasonal mainly summer and autumn with dry winters and springs and humid to dry atmospheric conditions between these periods.
Soil Requirements:
Epipogium roseum prefers better quality sandy loams to light gravelly clays. The soils are usually derived from decomposed brown basalt, black basalt and accumulated peaty sands behind the back dunes. The soils pH ranges from 5pH to 6.5pH. It does not tolerate waterlogged soils but moisture is a strong requirement for good growth. Non saline soils to moderately saline soils are tolerated.
Height & Spread:
Wild Plants: 0.15m to 0.3m by 0.03m to 0.05m.
Characteristics:
Epipogium roseum grows as a terrestrial orchid with short horizontal tuberous, unbranched rhizomes. The plants grow rapidly with the onset of the wet season to produce leaves, flowers and seeds dying back completely during the drier months of the year.
Epipogium roseum‘s 5 to 12 bracts sheath the stem and measure 5mm to 13mm in length in length by 7mm to 20mm in width. The orchids lack chlorophyll growing as saprophytes on decomposing vegetable matter.
The inflorescences of Epipogium roseum is a long stiff, erect raceme. The racemes usually have 4 to 19 flowers. The erect, soft, hollow rachises measure 130mm to 500mm in length while the pedicel measure 3mm to 5mm in length. The ovary which appears to be part of the pedicel but is slightly swollen at the base measures 5mm to 8mm in length. The racemes are pastel yellow.
The nodding pastel yellow flowers measure 10mm to 12mm by 5mm to 6mm. The sepals and petals are narrow, decurve or deflexed.
The white linear to lanceolate sepals measure 7mm to 12mm by 1mm to 2.5mm in width. The margins are entire.
The lateral petals are linear, falcate with acute apexes. The lateral petals measure 8mm to 9mm in length by 2.5mm to 3mm in width. The lateral petals margins are entire.
The white to pastel yellow concave labellum’s are unlobed have deep pink to purple-pink spots and decurve strongly to 90 degrees at their apexes. The oblong to obovate labellum measure 12mm to 13mm in length by 9mm to 10mm in width with an obtuse, longitudinal ridge on the upper surface. The margins are papillose are crenulate and have an almost square obtuse apex with an emarginate to mucronate tip. The cylindrical to obtuse spurs measure 2mm to 4mm length.
The anthers are larger than the columns which measure 2mm to 2.5mm in length. The flowering cycle is very short with seed dispersal is completed only a few days after the inflorescence has emerged from the ground. The flowers appear from December to March.
Epipogium roseum‘s capsules are erect when they dehisc.
Wildlife:
Epipogium roseum‘s wildlife is unknown to the author.
Cultivation:
Epipogium roseum is an unusual terrestrial orchid to grow in the garden. If you are lucky enough to have them growing it is worthwhile preserving in situation. Not much is known about their cultivation outside their natural habitat. The best method to establish a colony is to mark the area with stakes where plants are known to occur. Use local mulch to top the area up on an annual basis.
Propagation:
Seeds: Epipogium roseum‘s seeds require treatment before sowing. Really Orchid seeds are meant for professionals with time, equipment and space. However if you wish to persevere then here are the basics and you are learning from an amateur. Once the orchids are large enough to handle treat them similarly to the genre Liparis.
1. Obtain relevant materials
The first step in growing orchid from seed will be sourcing and having at the ready all materials that will be required in the propagation process.
This includes all of the following:
Unripe orchid seed capsule. If there are 2 capsules secure the second capsule immediately after the first capsule splits or if only one capsule as soon as it changes colour.
Orchid gelling medium with agar which can be purchased from an orchid society or a specialist nursery.
Distilled water
Cooking pot
Spoon
Oven-safe glass or polypropylene containers with lids
Sealable bags
Clean, sterilized cutting board
Rubber gloves
Paper towels
Tweezers or forceps
70 percent ethanol
Bleach
Scalpel or sharp knife
Planting pot
Orchid compost
Length of wire metal
Plastic spray bottle.
deep petri dishes or sterile jars.
2. Prepare agar medium
The agar medium is a special orchid gelling mixture that distilled water will be added to distilled water.
To prepare the medium, mix equal parts of orchid gelling medium with distilled water in a cooking pot.
Place the pot on a stove and bring the mixture to boil for while stirring continuously for two minutes.
Pour the mixture into the petri dishes glass or propylene containers while ensuring not to fill the containers above 20 percent of their volume.
Loosely replace the lids to the containers. Sterilize the containers by heating them up in a microwave oven for between 2 to 3 minutes.
Spray 70 percent ethanol into a sealable bag to create a sterile environment. Transfer the heated containers into the sealable bag.
Allow the containers to cool a bit before tightening their lids and then sealing the bag. Leave the containers to stand for a few days until the mixture solidifies.
3. Prepare seed capsule and work surface
Place an open pot of water on a stove and bring to boil. Place the cutting board in the oven and sterilize.
Put on rubber gloves and sterilize the forceps, and scalpel with 70 percent ethanol.
Insert the seed capsule into a bowel filled with bleach for about fifteen minutes.
Sterilize seed capsule again with 70 percent ethanol and place on grill.
Using the sterilized scalpel, cut open the seed capsule to reveal the seeds. Using a scalpel or sharp knife, scrape out the seeds from the capsule unto an ethanol soaked paper towel.
4. Flasking of the seed
Take out the petri dishes or glass jars containers holding the agar medium. Over the steam, open up the containers and transfer seeds from the ethanol soaked paper towel into the individual containers using the sterilized forceps.
The amount of seeds will determine the number of containers required. Replace the lid of the containers and place them on a window sill that receives indirect sunlight.
5. Wait and exercise patience
All that can be done at this point is to wait until the seeds germinate. The amount of time that this might take varies and is dependent on the particular species.
Generally, the time can range from a few months to a few years. During this period of waiting, ensure the containers are free from contamination to ensure that germination is not disrupted.
6. Emergence of protocorms
Protocorms are tuber-shaped bodies with rhizoids that are produced by the young seedlings of various orchids. Protocorms represent the embryonic form of the orchid plant.
Their emergence after the period of waiting at an affirmation that everything in the propagation process is on track.
7. Transflask orchid seedlings is done after they have developed roots
Upon the emergence of the protocorms, consistently observe the growth of the seedlings. At the point when the seedlings appear to overcrowd the flask, transflasking should be carried out, typically within 30 and 60 days.
* This is done by removing individual seedlings using sterilized tweezers from the original containers and placing them in new containers also filled, in a proportion similar to the original, with agar medium. 6 to 8 in a standard petri dish or 1or 2 to a test tube
8. Transplant seedlings into planting pots
On the presumption that there are no disruptions to the plant growth, the seedlings will eventually outgrow the containers.
At this point, it is to be transplanted into planting pots. A good rule of thumb to determine when it is ready to be transplanted is when the seedlings have developed roots that have grown up to the length of one-quarter of an inch.
To transplant, prepare a planting pot or other container for receiving the seedling by majorly filling it up with coarse fir bark and possibly some slightly moist orchid compost mixture containing perlite, fine charcoal, redwood bark shavings, etc.
To extract the seedlings, submerge the containers in warm water to help loosen the agar gel.
Once the agar medium is softened, twist a piece of metal to form a loop and in turn, use it to carefully pull out the seedlings from the container. It is best done if the agar and seedling can be removed together.
The seedlings can be further rinsed in lukewarm water to remove any excess agar mixture still stuck to them.
Following this, the seedlings can now be planted into the prepared pot with at least 50mm of space between each individual seedling.
9. Positioning the orchid
The seedling once fully transplanted should be placed in a location that is warm with good indirect sun light.
Slowly position the pots into an area that closely assimilates the conditions it will be growing under.
The choice as to whether the plant should be exposed to full sun or in direct sunlight will be dependent on the particular orchid specie.
10. Subsequent care of the plant
After the first week, the seedling can be misted several times a day and watered just once a week.
A guide in watering the plant will be using the dryness of the fir back that is, water the plant until the fir back is completely moistened and wait till it has completely dried out before watering again.
Fertilize using seaweed, fish emulsion or organic chicken pellets soaked in water on an alternate basis. Fertilize every two months until the plants are established then annually in early September to October to maintain health, vitality and better flowering.
Further Comments from Readers:
Hi reader, it seems you use The Bible of Botany a lot. That’s great as we have great pleasure in bringing it to you! It’s a little awkward for us to ask, but our first aim is to purchase land approximately 1,600 hectares to link several parcels of N.P. into one at The Pinnacles NSW Australia, but we need your help. We’re not salespeople. We’re amateur botanists who have dedicated over 30 years to saving the environment in a practical way. We depend on donations to reach our goal. If you donate just $5, the price of your coffee this Sunday, We can help to keep the planet alive in a real way and continue to bring you regular updates and features on Australian plants all in one Botanical Bible. Any support is greatly appreciated. Thank you.
In the spirit of reconciliation we acknowledge the Bundjalung, Gumbaynggirr and Yaegl and all aboriginal nations throughout Australia and their connections to land, sea and community. We pay our respect to their Elders past, present and future for the pleasures we have gained.
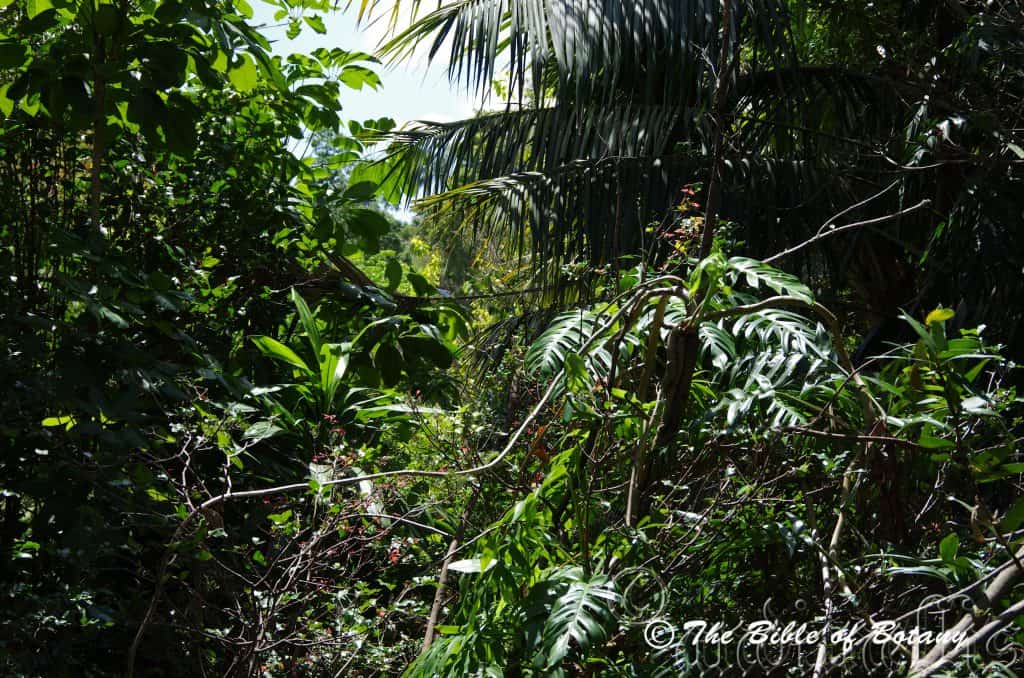
Little Crystal Creek Paluma Range National Park Qld.
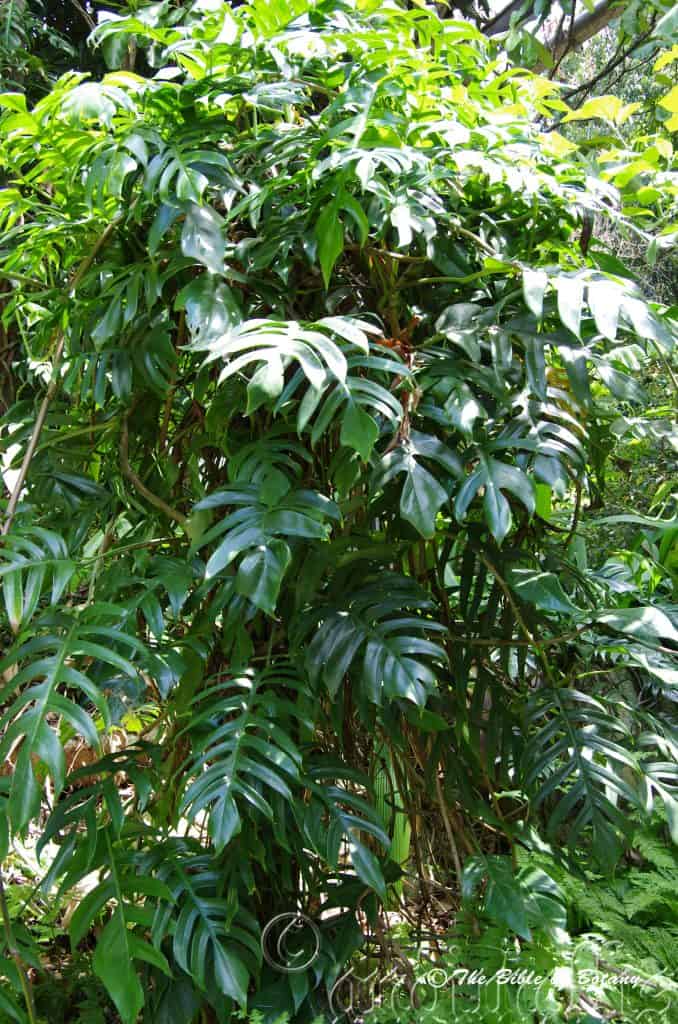
Little Crystal Creek Paluma Range National Park Qld.
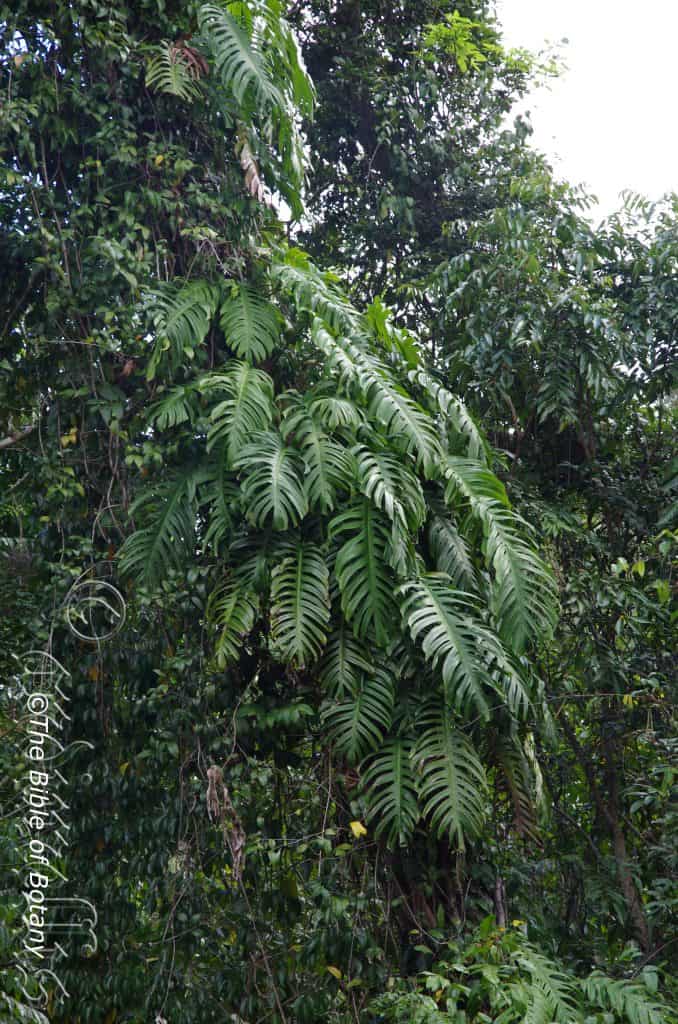
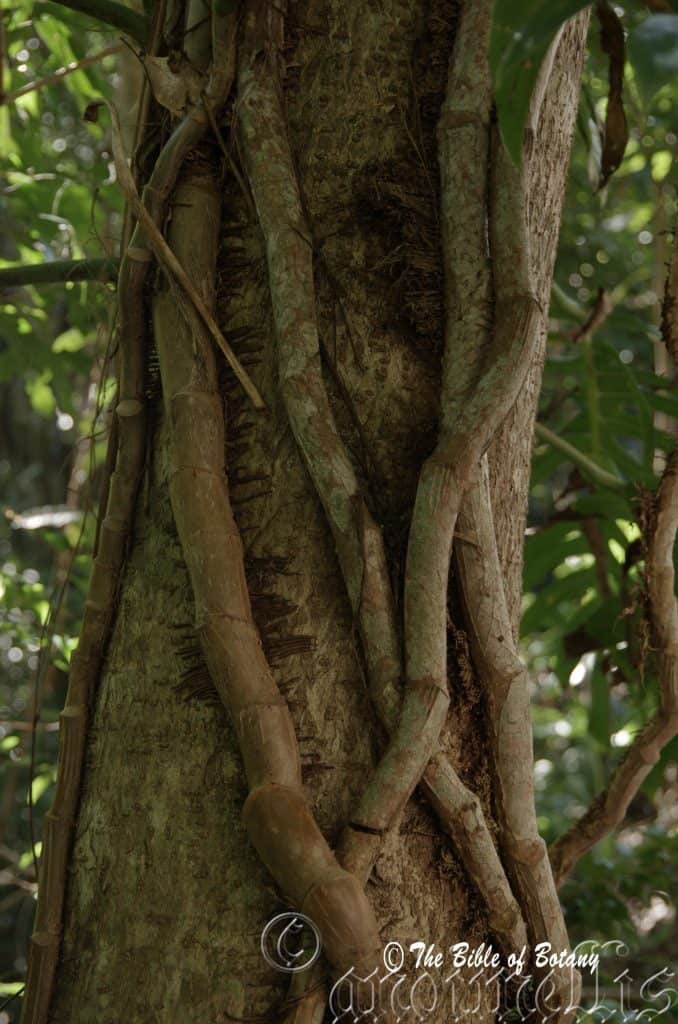
Little Crystal Creek Paluma Range National Park Qld.
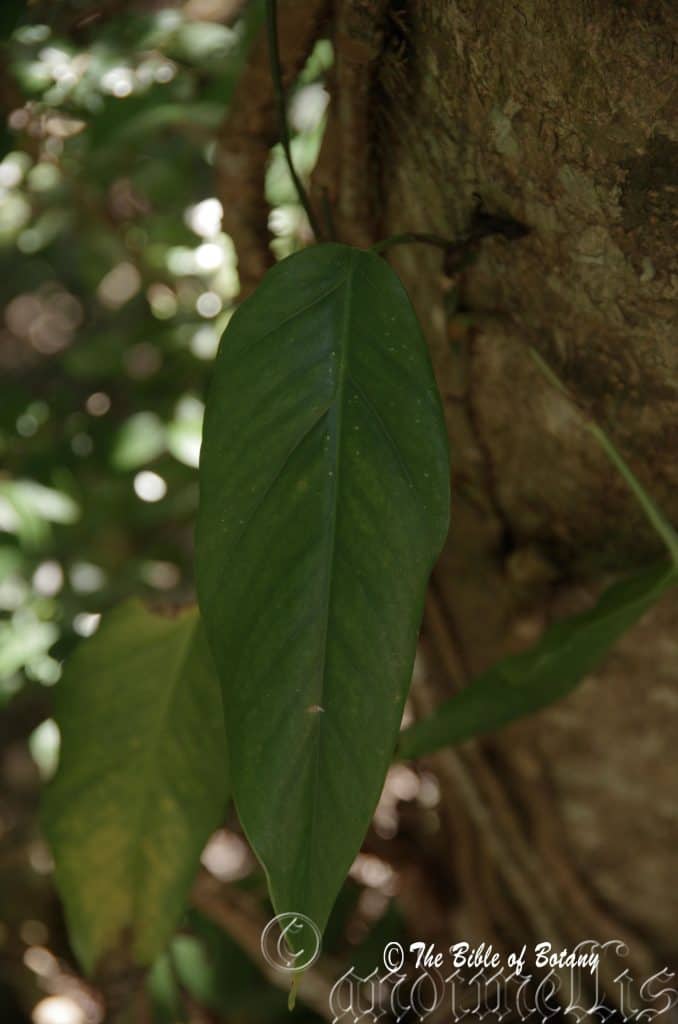
Little Crystal Creek Paluma Range National Park Qld.
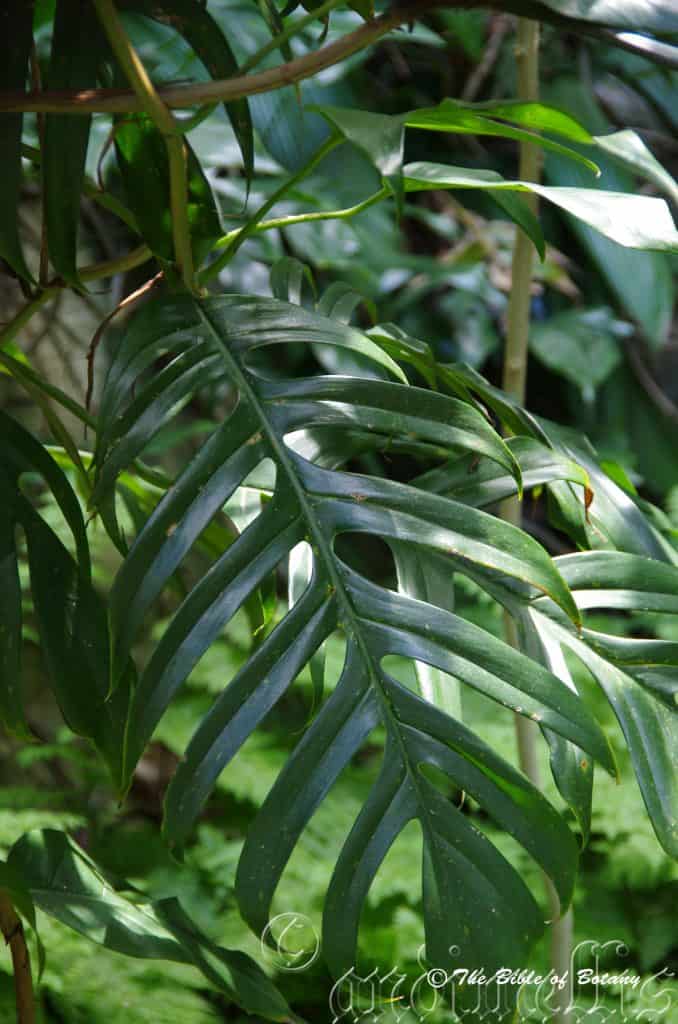
Little Crystal Creek Paluma Range National Park Qld.
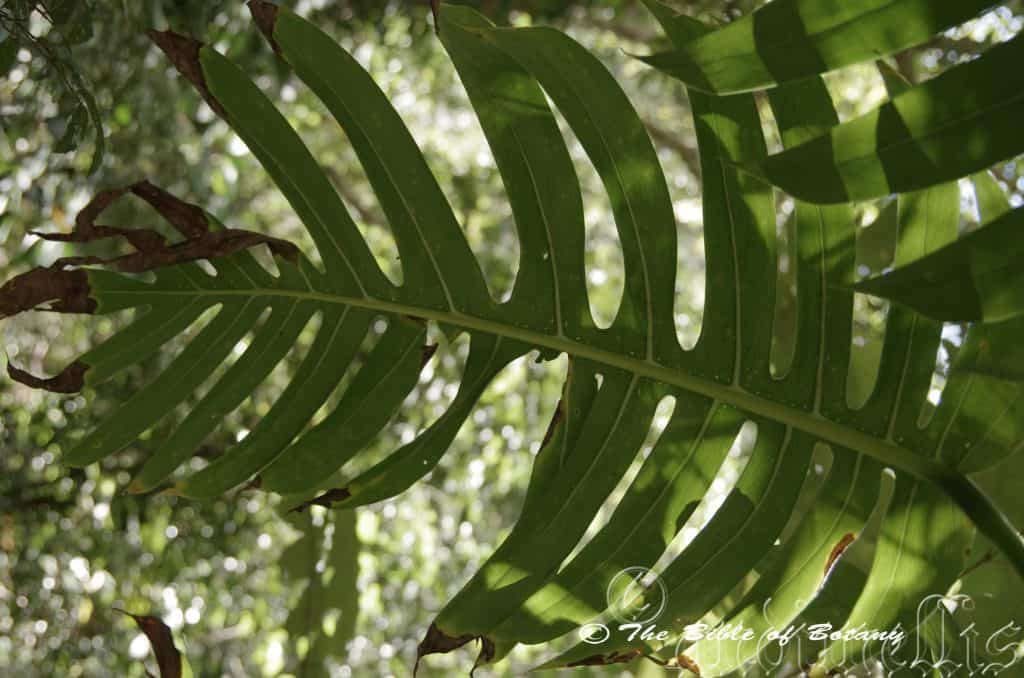
Little Crystal Creek Paluma Range National Park Qld.
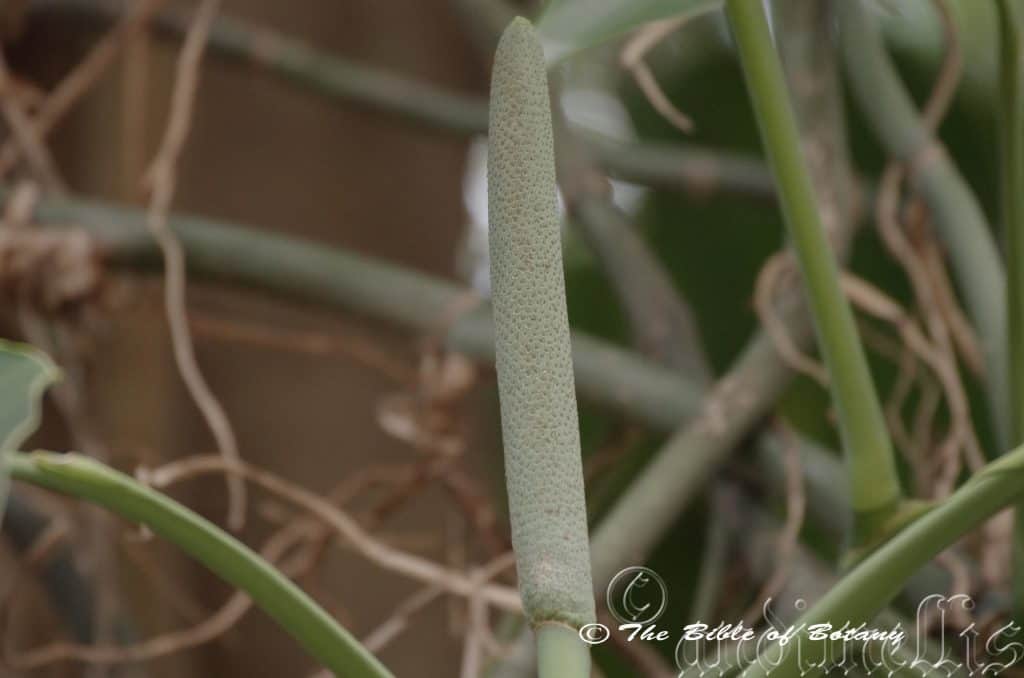
Little Crystal Creek Paluma Range National Park Qld.
Epipremnum pinnata
Classification
Phylum: Charophyta
Class: Equisetopsida
Order: Alismatales
Family: Araceae
Genus: From Epi, which is Ancient Greek for upon, above or over and Premnum, which is Latin for a tree stump. It refers to plants, which prefer to grow on stumps and trunks.
Species: From Pinula, which is Latin for a pinna. It refers to one leaflet of a pinnate leaf.
Common Name: Monstera or Native Monstera.
Distribution:
Epipremnum pinnata is found south from the Torres Strait Islands in far north east Queensland to Mackay. There is a disjunct population further south from Shoalwater Bay to Rockhampton in central coastal Queensland. It is found east of the Great Dividing Range.
https://avh.ala.org.au/occurrences/search?taxa=Epipremnum+pinnata#tab_mapView
Habitat Aspect Climate:
Epipremnum pinnata prefers full shade to light dappled sunlight. It grows in well-developed lowland rainforest, better quality monsoonal rainforests and better quality gallery forests. The altitude ranges from 5 meters ASL to 350 meters ASL.
The temperatures range from 6 degrees in August to 36 degrees in January.
The rainfall ranges from lows of 800mm to 3200mm average per annum.
Soil Requirements:
Epipremnum pinnata prefers better quality loams, light gritty clays to heavy silts and light clays. The soils are usually derived from decomposed brown basalt, black basalt, shale, metamorphic rocks, and river deposits or accumulated peaty sands. The soils pH ranges from 4.5pH to 6pH. It does not tolerate waterlogged soils. Non saline soils to slightly saline soils are tolerated. As Epipremnum pinnata is an epiphyte the soils do not play an important role in the plant’s growth but is more indicative to the the host plant’s requirements.
Height & Spread:
Wild Plants: 0.6m to 80m by 0.8m to 1.2m
Characteristics:
Epipremnum pinnata grows as a heavy vine where the stems are strongly scared from the bases of old leaves. The vine‘s stems are deep sea-green and measure 30mm to 50mm in diameter.
Epipremnum pinnata’s leaves are elongated ovate in outline and measure 400mm to 550mm in length by 210mm to 300mm in width.
The leaf blades are deeply pinnately lobed. The petioles are deeply grooved or channelled on the upper surface and measure 250mm to 30omm in length. The section of the petiole which sheaths the stem when young disintegrates into fibres as they age.
Juvenile leaves are broad lanceolate before changing to the mature leaves. In this transitional period the leaves develop elongated slits prior the pinnate leaves of mature plants.
The bases are rounded while the apexes are acuminate. The deep-green to deep sea-green discolourous leaves are glabrous and glossy on the upper laminas while the lower laminas are similar or slightly paler and dull. The margins are entire and undulating. The mid vein is strongly prominent on the lower lamina while the lateral veins are slightly prominent and distinctly visible on the upper lamina. There are numerous elongated glands or nectaries visible on the underside of the leaf blade which resemble oil dots when viewed from above.
The inflorescences of Epipremnum pinnata is a Spathe. The spathe measures 130mm to 180mm in length by 90mm to 100mm in width at anthesis. The spadix measures 130mm to 180mm in length by 30 to 35mm in diameter. Flowers near the base of the spadix lack stamens. The staminal filaments are about as wide as the anthers. The pollen is translucent or white while the stigmas are deep brown almost black and are aligned vertically. The faint scent of the flowers is similar to a rose without the sweetness attached yet it is still floristic. The flowers appear throughout the year but are more prolific during the warmer months of the year.
The infructescence of Epipremnum pinnata is cylindrical in shape. The cylinders measure 250mm to 300mm in length by 40mm to 55mm in diameter. The outer surface is deep green to deep sea-green, segmented while the inner surface is pure white soon oxidizing to brown and black. When it is peals it reveals a fleshy mass of individual orange fruits. The seeds measure 3.5mm to 4.5mm in diameter. The testa is cream while the embryos curve about 3mm in length
Wildlife:
Epipremnum pinnata‘s wildlife is unknown to the author but is most likely eaten by several rainforest birds and tree kangaroos in the norther parts of its range.
Cultivation:
Epipremnum pinnata has several variegated forms which are all exotic in origin. The native species is just as ideal around the home. It is a relative fast grower that needs a bole with non-decorticating bark to grow on which eliminates our Eucalyptus trees for a natural support. It does not tolerate frosts and does better in warm to hot humid locations with just a little sun.
It makes an excellent hanging basket plant during the early years or where its roots are restricted, as it will rapidly form a cascade of deep green leaves. It is easy to maintain either as an outdoor specimen or indoors.
It can also be trained to climb wooden mounts or moss covered sticks, although it’s unlikely they will form the large pinnate leaves of their mature counterparts. It accepts pruning of untidy branches or where an adventurous shoot grows out.
It is occasionally susceptible to attack from scale insects more often when grown indoors in less humid conditions. Mealy bugs and red spider mites are the main culprits. These can be easily eliminated indoors by following the tips in the chapter for insect problems.
Propagation:
Seeds: Epipremnum pinnata‘s seeds can be sown directly into a seed raising mix. Cover the seeds with 2mm of the mix. Place the trays in a warm position under 50mm or 70mm shade. When the seedlings reach 20mm to 40mm tall, prick them out and plant them into 50mm native tubes using a seed raising mix. Place the 50mm native tubes into a tray of water and return them to the bush house.
Once the seedlings reach 150mm to 200mm in height plant them out into their permanent position.
Cuttings: As Epipremnum pinnata seeds are at times difficult to collect cuttings maybe the best method for propagating. Select material from healthy specimens or those with a better growth habit or the characteristics you desire and want to foster.
Successful results are easy especially if smaller numbers are required. Use 30mm fine gravel, 30mm peat and 40mm coconut fibre. Cuttings are probably best placed into individual pots.
Use 70mm to 150mm long half ripened material from the present season’s growth when growing from cuttings. Take them in mid spring after the last frosts where frosts are a problem where the day temperatures do not exceed 28 degrees. Place 1 or 2 cuttings in the pots with at least one leaf node below the surface. When the cuttings have obviously struck and have developed good roots; which is about 8 weeks or the roots are appearing at the bottom of the pots replant them into larger pots or place them into their permanent positions in the garden.
Larger cuttings or plants can be easily taken and planted directly into the soil outdoors.
Fertilize using seaweed, fish emulsion or organic chicken pellets soaked in water on an alternate basis. Fertilize every two months until the plants are established then annually in early September to October to maintain health, vitality and better flowering.
Further Comments from Readers:
Hi reader, it seems you use The Bible of Botany a lot. That’s great as we have great pleasure in bringing it to you! It’s a little awkward for us to ask, but our first aim is to purchase land approximately 1,600 hectares to link several parcels of N.P. into one at The Pinnacles NSW Australia, but we need your help. We’re not salespeople. We’re amateur botanists who have dedicated over 30 years to saving the environment in a practical way. We depend on donations to reach our goal. If you donate just $5, the price of your coffee this Sunday, We can help to keep the planet alive in a real way and continue to bring you regular updates and features on Australian plants all in one Botanical Bible. Any support is greatly appreciated. Thank you.
In the spirit of reconciliation we acknowledge the Bundjalung, Gumbaynggirr and Yaegl and all aboriginal nations throughout Australia and their connections to land, sea and community. We pay our respect to their Elders past, present and future for the pleasures we have gained.
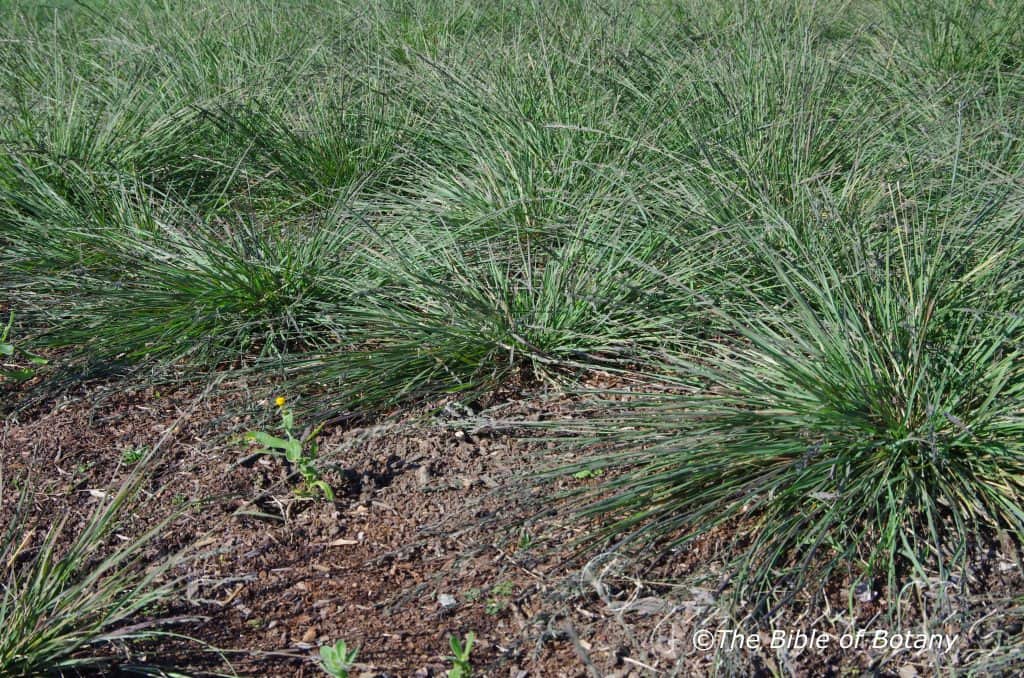
Beenleigh Qld.
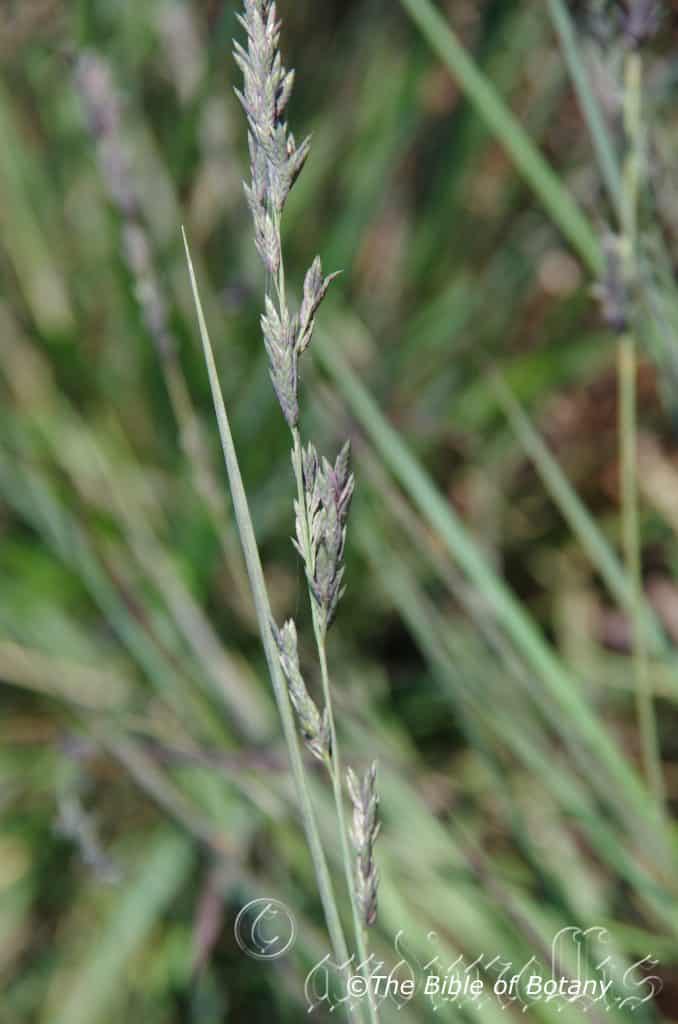
Beenleigh Qld.
Eragrostis brownii
Classification
Unranked: Monocots
Unranked: Commelinids
Order: Poales
Family: Poaceae
Subfamily: Chloridoideae
Tribe: Eragrostidae
Genus: From Eros, which is Ancient Greek for love or erotic and Agrostis, which is Ancient Greek for a fine grass. It refers to the appearance of the elegant flower heads and fine foliage of this grass.
Species: Is named in honour of Robert Brown; 1773-1858, who was a naturalist who sailed with Mathew Flinders when he circumnavigated Australia and became South Australia‘s first botanical collector.
Common Name: Love Grass.
Distribution:
Eragrostis brownii is widespread around Australia. It is found south from and from the old Second World War airbase of Truscott to the Dampier Archipelago and Derby west on the Kimberley coast of north western, Western Australia and the Swan River Plain to Albany in the south east corner of Western Australia.
In the Northern Territory it is found east from Darwin to Alligator Springs in the north west to Kakadu National Park and the Red Kangaroo River and Gabulaguna Spring in the far north east. In the south it is found around Alice Springs.
In the east it is found south from the Torres Strait Islands and Cape York Peninsula to Adelaide.
It is also found in the north east corner of Tasmania.
https://avh.ala.org.au/occurrences/search?taxa=Eragrostis+brownii#tab_mapView
Habitat Aspect Climate:
Eragrostis brownii prefers full sun to light dappled shade. It grows in open woodlands, open Eucalyptus forests, mallee scrub lands or native savannah woodlands. The altitude ranges from near sea level to around 650 meters ASL.
The temperatures range from minus 3 degrees in August to 40 degrees in January.
The rainfall ranges from lows of 400mm to 1800mm average per annum.
Soil Requirements:
Eragrostis brownii prefers sandy loams, light gritty clays to heavy clays. The soils are derived from decomposed brown basalt, black basalt, shale metamorphic rocks, sandstones, granites, alluvial deposits or accumulated peaty sands. The soils pH ranges from 4.5pH to 6pH. It does not tolerate waterlogged soils however plants are usually associated adjacent to areas that suffer seasonal inundations, swamps and rising water tables. Non saline soils to moderately saline soils are tolerated.
Height & Spread:
Wild Plants: 0.2m to 0.6m by 0.3m to 0.5m
Characteristics:
Eragrostis brownii grows as a perennial grass with erect or geniculately ascending culms. The culms are slender from a tufted the slender rhizome. The culms usually measure 200mm to 500mm in height by 1mm to 3mm in diameter.
Eragrostis brownii’s linear leaves measure 100mm to 250mm by 1mm to 3mm in width. The ligule is covered in white ciliate hairs to 0.25mm long. The concolourous laminas are grass-green to deep grass-green, smooth and glabrous. The leaf has an orifice sometimes with rigid hairs to 1.5mm in length. The lamina’s margins are involute and/or convolute.
The inflorescences of Eragrostis brownii are compound panicles. The panicles are ovate, contracted about primary branches. The panicles usually measure 50mm to 200mm in length but have been recorded at 300mm in length while the rachises measure 15mm to 30mm in length. The rachises are glabrous to scabrous.
The spikelets are tight and regularly arranged along the spike. The spikelets measure 1.5mm to 1.8mm in length. The spikelet‘s pedicels measure 0mm to 1.5mm in length. The fertile spikelets are many flowered, with at least 2 fertile florets, usually 6 to 14 but up to 24 comprise of 8 to 24 fertile florets. The elliptic, oblong or ovate, laterally compressed florets are contorted and measure 4mm to 12.5mm in length. The apex florets are linear and shorter than the base florets. The rachillae and lemmas are persistent while the lemmas are deciduous.
The upper and lower glumes are similar and scabrous. The lower glumes are ovate, membranous with a single keel and a single nerve. The rachilla is persistent until the lemmas fall then become tardily deciduous. The lower glumes measure 1.4mm to 2.5mm in length. The upper glumes are ovate, membranous with a single keel and a single 1 nerve. The upper glumes measure 1.5mm to 2.8mm in length. The keels are scabrous to finely tooth.
The fertile lemmas have a single keel with 3 nerves and a muticus apex. The lemmas measure 1.7mm to 3mm in length muticus.
There are 2 or 3 white filaments on each spikelet. The flowers appear from late December to February.
The fruits of Eragrostis brownii are obovoid to globose or turgidly biconvex caryopses. The caryopses measure 0.6mm to 0.7mm in length by 0.4 mm to 0.5mm in width. The green seeds turn pale golden-brown to straw coloured when ripe.
Wildlife:
Eragrostis brownii‘s wildlife is unknown to the author.
Cultivation:
Eragrostis brownii is considered to be a good fodder crop. The leaves and stems are eaten along with other pasture crops when growing in the pasture to the extent it will soon be eliminated from the pastures. It is not known whether cattle and sheep seek it out, good pasture management is too competitive or whether the foraging animals favour it. It has a rapid growth rate from mid spring after the spring rains to late autumn. It recovers well from moderate grazing and is best managed by allowing a free period between grazing.
Eragrostis brownii is classified as a weed by gardeners without considering its potential in a small rockery or bog garden. It gives good quantities of trash for mulch. It has good potential as a landscaping grass in small gardens. It recovers quickly when cut back to ground level.
In cultivation it can be grown on most types of soil even heavy clay with a skeletal covering of sand. It requires full sun for best results with a little added moisture or native fertilizer once a year to sustain maximum colour and vigour. High nitrogenous fertilizers will reduce the strength of the culms resulting in them being easily bent and broken which is displeasing to the eye.
The plant usually grows from 400mm to 500mm in height by 500mm to 600mm in diameter. In a bog gardens, swamps and heaths it can easily become the centre of attraction giving depth and breadth to the garden especially if all the other plants are smaller with clump or horizontal growth habits. To be the centre of attraction plants needs to be more thinly planted than in the traditional heath garden otherwise the thin vertical culms will be overpowered by the larger leaves.
Propagation:
Seeds: Eragrostis brownii’s seeds can be sown directly into a seed raising mix. Cover the seeds with 2mm of the mix. Place the trays in a warm position under 20mm or 30mm shade. When the seedlings reach 20mm to 40mm tall, prick them out and plant them into 50mm native tubes using a seed raising mix. Place the 50mm native tubes into a tray of water and return them to the bush house.
Once the seedlings reach 150mm to 200mm in height plant them out into their permanent position. Mass plantings can be achieved by planting them at a minimum of 0.6 meters to 1 meter centers.
Division: Water the plants well a day or 2 before the operation is to be done. Avoid very hot weather. Cut around the clump and out on one side so that the shovel can be placed under the root ball. (Or remove it from its pot.)
Remove the plant from the soil. Cut it into 3 or 4 equal parts, first down the middle then halve those sections again ensuring that each section has some roots and, rhizome and culms or shoots. The rhizomes should have at least several eyes or growing shoots. Remove unwanted dead leaves and any old small sections that look weak or dead. Plants can be divided further but ensure each division has a several strong shoots and healthy roots attached to the tuff. Replant or pot ensuring the soil is at the same level as before. Water and fertilize with a half strength solution of fish emulsion. New shoots will appear within two weeks. Once the potted plants have new shoots and the roots treat them as seedlings.
Fertilize using seaweed, fish emulsion or organic chicken pellets soaked in water on an alternate basis. Fertilize every two months until the plants are established then annually in early September to October to maintain health, vitality and better flowering.
Further Comments from Readers:
Hi reader, it seems you use The Bible of Botany a lot. That’s great as we have great pleasure in bringing it to you! It’s a little awkward for us to ask, but our first aim is to purchase land approximately 1,600 hectares to link several parcels of N.P. into one at The Pinnacles NSW Australia, but we need your help. We’re not salespeople. We’re amateur botanists who have dedicated over 30 years to saving the environment in a practical way. We depend on donations to reach our goal. If you donate just $5, the price of your coffee this Sunday, We can help to keep the planet alive in a real way and continue to bring you regular updates and features on Australian plants all in one Botanical Bible. Any support is greatly appreciated. Thank you.
In the spirit of reconciliation we acknowledge the Bundjalung, Gumbaynggirr and Yaegl and all aboriginal nations throughout Australia and their connections to land, sea and community. We pay our respect to their Elders past, present and future for the pleasures we have gained.
Eragrostis elongata
Classification
Unranked: Monocots
Unranked: Commelinidis
Order: Poales
Family: Poaceae
Subfamily: Chloridoideae
Tribe: Eragrostidae
Genus: From Eros, which is Ancient Greek for love or erotic and Agrostis, which is Ancient Greek for a fine grass. It refers to the appearance of the elegant flower heads and fine foliage of this grass.
Species: From Elongatus, which is Latin for to draw out or lengthen. It usually refers to the shape or form of the plants leaves being somewhat linear.
Common Name: Clustered Love Grass.
Distribution:
Eragrostis elongata is found east from the Northern Territory, Western Australian border on the Ord River, and south to the South Australian border then to Port Augusta.
In the far west of Western Australia it is found from Port Headland south to Wiluna then to the Swan River and south to the Walpole-Nornalup National Park. It is not found in the true deserts or along the Great Dividing Range.
In the east it is found south from the Clarence River Catchment to Melbourne. There is also a vacant area from Ulludulla to Lakes Entrance and to the western slopes.
https://avh.ala.org.au/occurrences/search?taxa=Eragrostis+elongata#tab_mapView
Habitat Aspect Climate:
Eragrostis elongata prefers full sun to light dappled shade. It grows on plains in open woodlands, mulga scrubs, mallee and savannah grasslands. The altitude ranges from 5 meters ASL to around 650 meters ASL.
The temperatures range from minus 2 degrees in August to 40 degrees in January.
The rainfall ranges from lows of 100mm to 3000mm average per annum.
Soil Requirements:
Eragrostis elongata prefers sandy loams to light gritty clays. The soils are usually derived from decomposed sandstones, granites, alluvial deposits or at times accumulated peaty sands along the coast. The soils pH ranges from 4.5pH to 6pH. It does not tolerate waterlogged soils however seasonal inundation as are tolerated for short periods. Non saline soils to moderately saline soils are tolerated.
Height & Spread:
Wild Plants: 0.2m to 0.8m by 0.2m to 0.35m
Characteristics:
Eragrostis elongata grows as an annual or perennial grass with erect culms. The 2 to 4 nodded culms are slender and are branched at the lower nodes. The culms measure 250mm to 900mm in height by 1mm to 2mm in diameter.
Eragrostis elongata‘s linear leaves measure 100mm to 210mm by 2mm to 4mm in width. The ligule is covered in white ciliate hairs to 0.3mm to 4mm in length. The concolourous laminas are dull grass-green to deep grass-green, smooth and glabrous. The laminas are flat with the margins are involute or convolute.
The inflorescences of Eragrostis elongata are compound panicles. The panicles are broad linear, contracted about primary branches. The panicles usually measure 50mm to 230mm in length but have been recorded at 30mm and 340mm in length while the rachises measure 15mm to 30mm in length. The rachises are glabrous to scabrous.
The spikelets are tight and regularly arranged along the spike. The spikelets measure 3.5mm to 10mm in length. The spikelet‘s pedicels measure 0mm to 2.5mm in length. The fertile spikelets are many flowered, with at least 2 fertile florets, usually 8 to 14 but up to 27 comprise of 6 to 27 fertile florets. The lanceolate, oblong or ovate, laterally compressed florets are contorted and usually measure 3mm to 12mm in length but have been recorded at 20mm in length. The apex florets are linear and shorter than the base florets. The rachilla is persistent until the lemmas fall then become tardily deciduous.
The upper and lower glumes are similar and scabrous. The lower glumes are ovate, membranous with a single keel and a single nerve. The lower glumes measure 1.6mm to 2mm in length. The upper glumes are ovate, membranous with a single keel and a single 1 nerve. The upper glumes measure 1.6mm to 2mm in length. The keels are scabrous to finely tooth.
The fertile lemmas have 2 keels with 3 nerves and a muticus apex. The lemmas measure 1.7mm to 3mm in length muticus
The lemmas are acute, glabrous with the upper keel often being scabrous with 3 nerves. The lemmas measure 1.5mm to 2mm in length. The palae have 2 keels and are glabrous. The keels are scabrous or covered in fine teeth.
There are usually 2 or at times 3 white filaments. The flowers appear from late December to February or after good rainfalls.
The fruits of Eragrostis elongata are obovoid to globose or turgidly biconvex caryopses. The caryopses measure 0.6mm to 0.7mm in length by 0.4 mm to 0.5mm in width. The green seeds turn pale golden-brown to straw coloured when ripe.
Wildlife:
Eragrostis elongata‘s wildlife is unknown to the author.
Cultivation:
Eragrostis elongata is considered to be a very good fodder crop. The leaves and stems are eaten along with other pasture crops when growing in the pasture to the extent it will soon be eliminated from the pastures. It is not known whether cattle and sheep seek it out, good pasture management is too competitive or whether the foraging animals favour it. It has a rapid growth rate from mid spring after the spring rains to late autumn. It recovers well from moderate grazing and is best managed by allowing a free period between grazing.
Eragrostis elongata is classified as a weed by almost all gardeners without considering its potential in a small rockery or bog garden. It gives good quantities of trash for mulch.
In cultivation it can be grown on most types of soil even heavy clay with a skeletal covering of sand. It requires full sun for best results with a little added moisture or native fertilizer once a year to sustain maximum colour and vigour. High nitrogenous fertilizers will reduce the strength of the culms resulting in it being easily bent and broken which is displeasing to the eye but supplies more mulch.
In cultivation the plants usually grow from 600mm to 700mm in height by 400mm to 500mm in diameter. In a bog gardens, swamps and heaths.
Propagation:
Seeds: Eragrostis elongata‘s seeds can be sown directly into a seed raising mix. Cover the seeds with 2mm of the mix. Place the trays in a warm position under 20mm or 30mm shade. When the seedlings reach 20mm to 40mm tall, prick them out and plant them into 50mm native tubes using a seed raising mix. Place the 50mm native tubes into a tray of water and return them to the bush house.
Once the seedlings reach 150mm to 200mm in height plant them out into their permanent position. Mass plantings can be achieved by planting them at a minimum of 0.6 meters to 1 meter centers.
Division: Water the plants well a day or 2 before the operation is to be done. Avoid very hot weather. Cut around the clump and out on one side so that the shovel can be placed under the root ball. (Or remove it from its pot.)
Remove the plant from the soil. Cut it into 3 or 4 equal parts, first down the middle then halve those sections again ensuring that each section has some roots and, rhizome and culms or shoots. The rhizomes should have at least several eyes or growing shoots. Remove unwanted dead leaves and any old small sections that look weak or dead. Plants can be divided further but ensure each division has a several strong shoots and healthy roots attached to the tuff. Replant or pot ensuring the soil is at the same level as before. Water and fertilize with a half strength solution of fish emulsion. New shoots will appear within two weeks. Once the potted plants have new shoots and the roots treat them as seedlings.
Fertilize using seaweed, fish emulsion or organic chicken pellets soaked in water on an alternate basis. Fertilize every two months until the plants are established then annually in early September to October to maintain health, vitality and better flowering.
Further Comments from Readers:
Hi reader, it seems you use The Bible of Botany a lot. That’s great as we have great pleasure in bringing it to you! It’s a little awkward for us to ask, but our first aim is to purchase land approximately 1,600 hectares to link several parcels of N.P. into one at The Pinnacles NSW Australia, but we need your help. We’re not salespeople. We’re amateur botanists who have dedicated over 30 years to saving the environment in a practical way. We depend on donations to reach our goal. If you donate just $5, the price of your coffee this Sunday, We can help to keep the planet alive in a real way and continue to bring you regular updates and features on Australian plants all in one Botanical Bible. Any support is greatly appreciated. Thank you.
In the spirit of reconciliation we acknowledge the Bundjalung, Gumbaynggirr and Yaegl and all aboriginal nations throughout Australia and their connections to land, sea and community. We pay our respect to their Elders past, present and future for the pleasures we have gained.
Eragrostis interrupta
Classification
Unranked: Monocots
Unranked: Commelinidis
Order: Poales
Family: Poaceae
Subfamily: Chloridoideae
Tribe: Eragrostidae
Genus: From Eros, which is Ancient Greek for love or erotic and Agrostis, which is Ancient Greek for a fine grass. It refers to the appearance of the elegant flower heads and fine foliage of this grass.
Species: From Inter/Intra, which is Latin for between or among and Ruptera, which is Latin for to break. It refers to where the symmetry of arrangement is disrupted with a lot of uneven lengths between the nodes.
Common Name:
Distribution:
Eragrostis interrupta is found south from Flinders Island in far north east Queensland to Hat Head National Park in northern coastal New South Wales. It is mainly found east on coastal heaths and islands off the east coast. There is a disjunct population on Cape York Peninsula at Lydia Creek and the Wenlock River.
There are several isolated populations which include Mount Norris Bay in northern Kakadu National Park, the Gregory River in the Gulf Country in the Northern Territory and on the Bogong High Plains near Rocky Passage Storage in east Gippsland Victoria.
https://avh.ala.org.au/occurrences/search?taxa=Eragrostis+interrupta#tab_mapView
Habitat Aspect Climate:
Eragrostis interrupta prefers full sun to light dappled shade. It usually grows in coastal heaths, coastal Islands, coastal estuaries and on coastal deltas. It is found in dry open forests or dry open woodlands. The altitude ranges from 5 meters ASL to 50 meters ASL. The noticeable exception is the population found on the Bogong High Plains which is at around 1500 meters ASL.
The temperatures range from 3 degrees in August to 38 degrees in January again with the noticeable exception being the Bogong High Plains specie man which is in an area that receives snow during the winter months.
The rainfall ranges from lows of 1000mm to 3200mm average per annum.
Soil Requirements:
Eragrostis interrupta prefers sandy loams, light gritty clays to medium silts. The soils are usually derived from alluvial deposits or accumulated peaty beach sands behind the sand dunes. The soils pH ranges from 4.5pH to 6.5pH. It does not tolerate waterlogged soils however the soils are usually seasonally inundation while swamps and moist wallums experience seasonal high water tables. Non saline soils to very saline soils are tolerated and this may increase to extremely saline but we have erred on the side of safety.
Height & Spread:
Wild Plants: 0.3m to 1.5m by 0.8m to 1.8m
Characteristics:
Eragrostis interrupta grows as a perennial grass with erect, prostrate, or sprawling tufted culms. The culms measure 300mm to 1500mm in height by 1mm to 2mm in diameter.
Eragrostis interrupta‘s linear leaves measure 100mm to 350mm by 2mm to 6mm in width. The sheath is covered in long white ciliate hairs to 0.25mm in length. The ligule is covered in white ciliate hairs to 0.2mm to 5mm in length. The concolourous laminas are dull blue-green to grass-green, smooth and glabrous. The laminas are flat or convolute.
The inflorescences of Eragrostis interrupta are compound panicles. The panicles are ovate, contracted about primary branches. The panicles usually measure 240mm to 500mm in length but have been recorded at 600mm in length by 30mm to 45mm in width while the rachises measure 15mm to 30mm in length. The rachises are glabrous to scabrous. The rachis is smooth, glabrous with erect scabrous branches. The pedicels measure 0mm to1mm in length.
The spikelets are tight and regularly arranged along the spike. The spikelets measure 6mm to 24mm in length by 1.5mm to 2.5mm in width. The rachilla is persistent even after the lemmas have been shed. The fertile spikelets are many flowered, with at least 2 fertile florets, usually 8 to 40 but up to 50 comprise of 14 to 50 fertile florets. The linear to lanceolate laterally compressed florets are contorted and measure 10mm to 33mm in length. The apex florets are linear and shorter than the base florets. The rachilla is persistent.
The upper and lower glumes are similar and scabrous. The lower glumes are ovate, membranous with a single keel and a single nerve. The lower glumes measure 1.5mm to 2mm in length. The upper glumes are ovate, membranous with a single keel and a single 1 nerve. The upper glumes measure 2mm to 3mm in length. The keels are scabrous to finely tooth.
The fertile lemmas have a single keel with 3 to 5 nerves. The deciduous lemmas measure 2.2mm to 3.5mm in length muticus
The lemmas are acute, glabrous with the upper keel often being scabrous with 3 nerves and a muticus apex. The lemmas measure 1.5mm to 2mm in length. The palae have 2 keels and are glabrous. The keels are scabrous or covered in fine teeth.
There are 3 white filaments. The flowers appear from late December to February or after good rainfalls.
The fruits of Eragrostis interrupta are obovoid caryopses. The caryopses measure 0.5mm to 0.6mm in length by 0.4mm to 0.5mm in width. The green seeds turn pale straw coloured when ripe.
Wildlife:
Eragrostis interrupta‘s wildlife is unknown to the author.
Cultivation:
Eragrostis interrupta is considered to be a very good fodder crop. The leaves and stems are eaten along with other pasture crops when growing in the pasture to the extent it will soon be eliminated from the pastures. It is not known whether cattle and sheep seek it out, good pasture management is too competitive or whether the foraging animals favour it. It has a rapid growth rate from mid spring after the spring rains to late autumn. It recovers well from moderate grazing and is best managed by allowing a free period between grazing.
Eragrostis interrupta is classified as a weed by gardeners without considering its potential in medium rockeries. It gives good quantities of trash for mulch. It has good potential as a landscaping grass in small to medium gardens. It recovers quickly when cut back to ground level.
In cultivation it can be grown on most types of soil even heavy clay with a skeletal covering of sand. It requires full sun for best results with a little added moisture or native fertilizer once a year to sustain maximum colour and vigour. High nitrogenous fertilizers will reduce the strength of the culms resulting in it being easily bent and broken which is displeasing to the eye.
In cultivation the it usually grows from 1000mm to 1200mm in height by 1000mm to 1500mm in diameter. It can be striking in informal beds along walls beside swimming pools, small moist rockeries or bog gardens when planted in small clusters of 2 or 3. In a bog gardens, swamps and heaths it can easily become the centre of attraction giving depth and breadth to the garden especially if all the other plants are smaller with clump or horizontal growth habits. To be the centre of attraction plants needs to be more thinly planted than in the traditional heath garden otherwise the thin vertical culms will be overpowered by the larger leaves.
Propagation:
Seeds: Eragrostis interrupta‘s seeds can be sown directly into a seed raising mix. Cover the seeds with 2mm of the mix. Place the trays in a warm position under 20mm or 30mm shade. When the seedlings reach 20mm to 40mm tall, prick them out and plant them into 50mm native tubes using a seed raising mix. Place the 50mm native tubes into a tray of water and return them to the bush house.
Once the seedlings reach 150mm to 200mm in height plant them out into their permanent position. Mass plantings can be achieved by planting them at a minimum of 0.6 meters to 1 meter centers.
Division: Water the plants well a day or 2 before the operation is to be done. Avoid very hot weather. Cut around the clump and out on one side so that the shovel can be placed under the root ball. (Or remove it from its pot.)
Remove the plant from the soil. Cut it into 3 or 4 equal parts, first down the middle then halve those sections again ensuring that each section has some roots and, rhizome and culms or shoots. The rhizomes should have at least several eyes or growing shoots. Remove unwanted dead leaves and any old small sections that look weak or dead. Plants can be divided further but ensure each division has a several strong shoots and healthy roots attached to the tuff. Replant or pot ensuring the soil is at the same level as before. Water and fertilize with a half strength solution of fish emulsion. New shoots will appear within two weeks. Once the potted plants have new shoots and the roots treat them as seedlings.
Fertilize using seaweed, fish emulsion or organic chicken pellets soaked in water on an alternate basis. Fertilize every two months until the plants are established then annually in early September to October to maintain health, vitality and better flowering.
Further Comments from Readers:
Hi reader, it seems you use The Bible of Botany a lot. That’s great as we have great pleasure in bringing it to you! It’s a little awkward for us to ask, but our first aim is to purchase land approximately 1,600 hectares to link several parcels of N.P. into one at The Pinnacles NSW Australia, but we need your help. We’re not salespeople. We’re amateur botanists who have dedicated over 30 years to saving the environment in a practical way. We depend on donations to reach our goal. If you donate just $5, the price of your coffee this Sunday, We can help to keep the planet alive in a real way and continue to bring you regular updates and features on Australian plants all in one Botanical Bible. Any support is greatly appreciated. Thank you.
In the spirit of reconciliation we acknowledge the Bundjalung, Gumbaynggirr and Yaegl and all aboriginal nations throughout Australia and their connections to land, sea and community. We pay our respect to their Elders past, present and future for the pleasures we have gained.
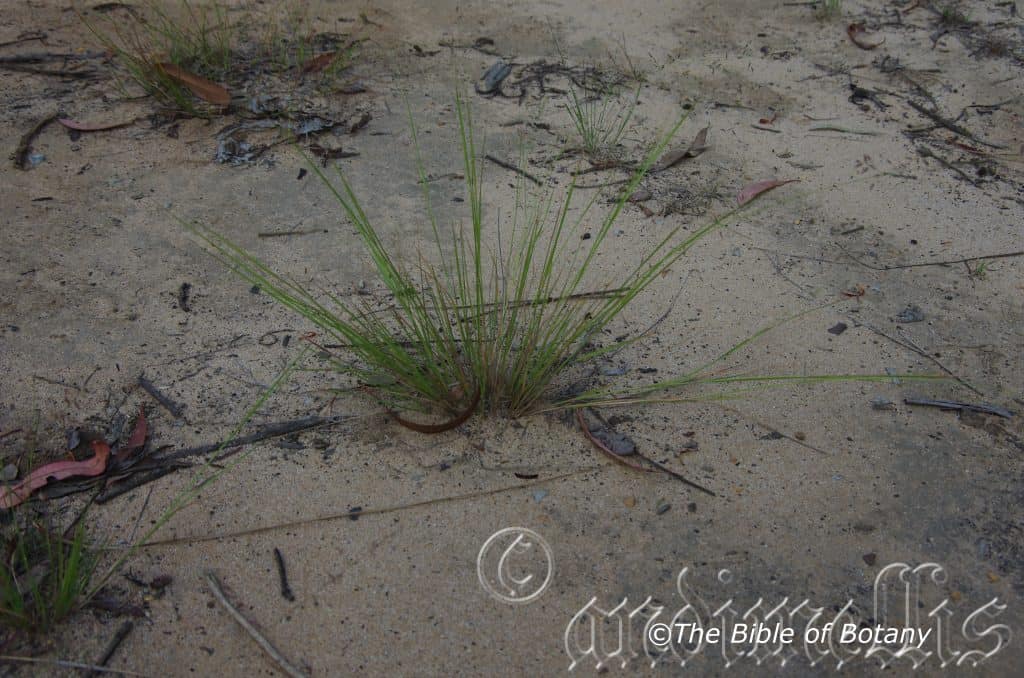
Author’s Garden The Pinnacles NSW
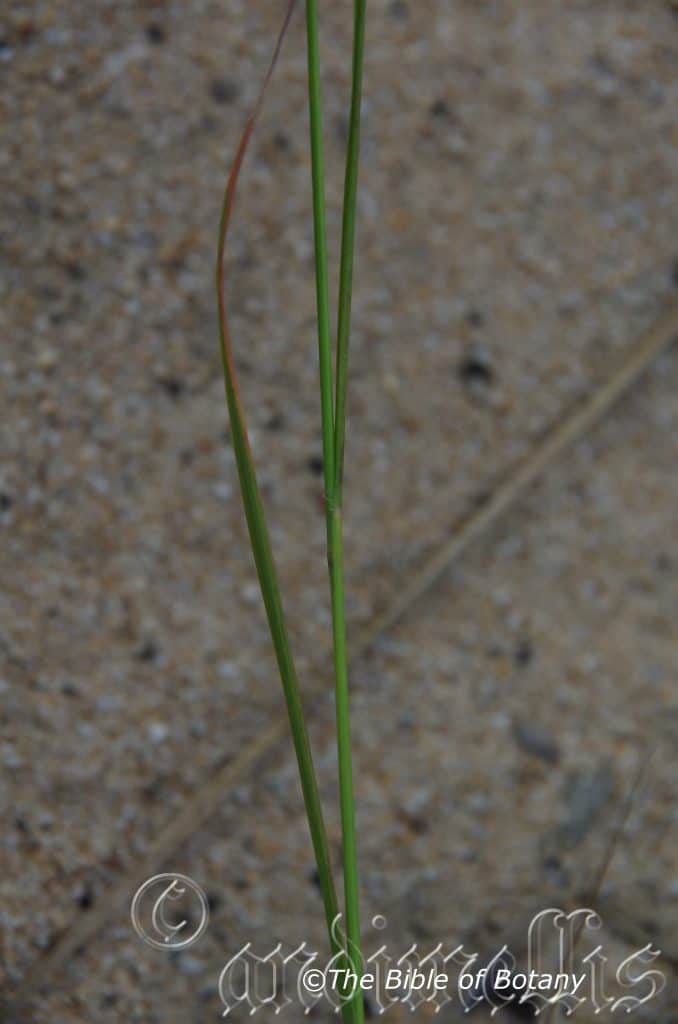
Author’s Garden The Pinnacles NSW
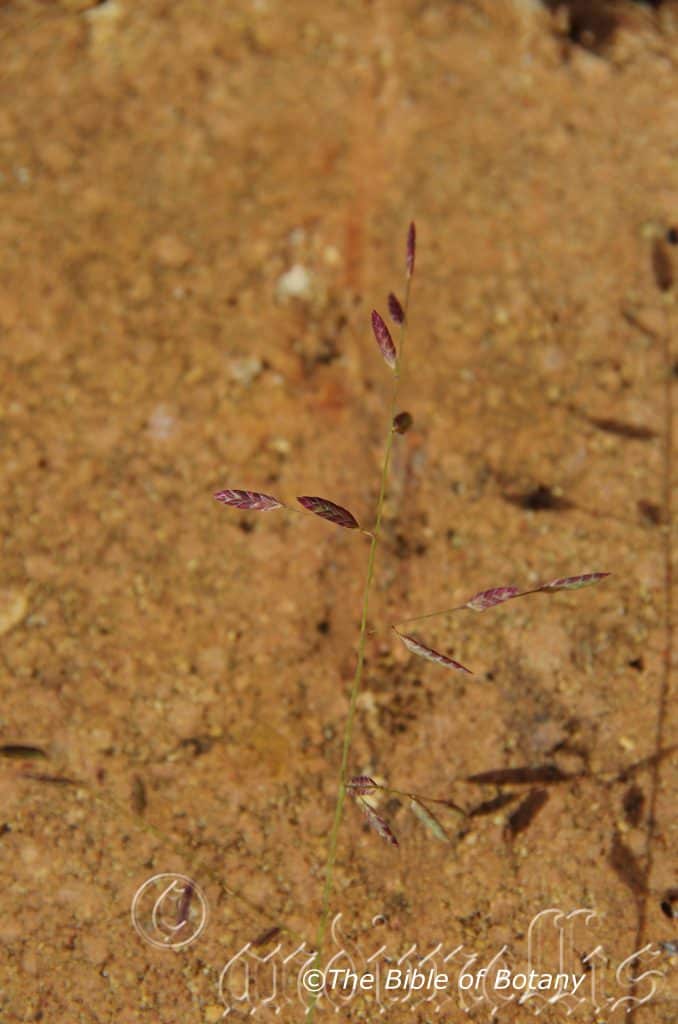
Author’s Garden The Pinnacles NSW
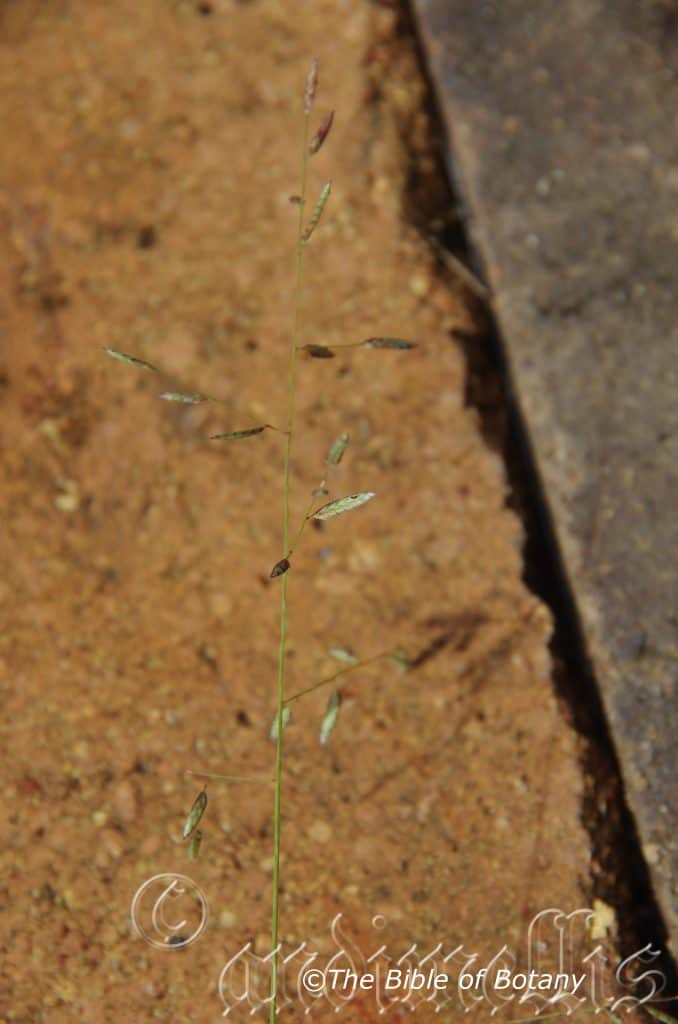
Author’s Garden The Pinnacles NSW
Eragrostis leptostachya
Classification
Unranked: Monocots
Unranked: Commelinidis
Order: Poales
Family: Poaceae
Subfamily: Chloridoideae
Tribe: Eragrostidae
Genus: From Eros, which is Ancient Greek for love or erotic and Agrostis, which is Ancient Greek for a fine grass. It refers to the appearance of the elegant flower heads and fine foliage of this grass.
Species: From Leptos, which is Ancient Greek for delicate, fine or slender and From Stakhus, which is Ancient Greek for a flowering spike. It refers to plants, which have long delicate spikes.
Common Name: Paddock Love Grass.
Distribution:
Eragrostis leptostachya is basically found in a line south and east from Cairns to Lake Mitchell on Cape York Peninsula in far north Queensland to south west of Blackhall in central Queensland then south east to Narrabri and south to south west Melbourne in Victoria. It is found from the coast to the western plains in Queensland and from the Western Slopes of the Great Dividing Range further south. It is not found in the high country south of Newcastle in New South Wales.
https://avh.ala.org.au/occurrences/search?taxa=Eragrostis+leptostachya#tab_mapView
Habitat Aspect Climate:
Eragrostis leptostachya prefers full sun to light dappled shade. It grows in depressions or small islands where the surrounding land is often inundated with flood water. It is found in dry open forests and dry woodlands. The altitude ranges from near sea level to around 650 meters ASL.
The temperatures range from minus 3 degrees in August to 40 degrees in January.
The rainfall ranges from lows of 300mm to 3000mm average per annum.
Soil Requirements:
Eragrostis leptostachya usually prefers deep, black clays, yellow sandy podzolics, brown loams and grey or brown sands. The soils are derived from decomposed brown basalt, black basalt, sandstones, granites, laterites or alluvial deposits. The soils pH ranges from 5pH to 6.5pH. It does not tolerate waterlogged soils however plants are often associated adjacent to areas that are seasonally inundated. Non saline soils to moderately saline soils are tolerated.
Height & Spread:
Wild Plants: 0.6m to 1m by 0.5m to 0.7m
Characteristics:
Eragrostis leptostachya grows as a tufted perennial grass with loosely, erect or geniculately ascending, terete, culms. The culms are glabrous with 2 to 4 nodes. The culms usually measure 200mm to 1000mm in height by 1mm to 3mm in diameter. The culms are sea-green and glabrous.
Eragrostis leptostachya‘s linear leaves measure 150mm to 250mm by 2mm to 3.5mm in width. The sheath margins are covered in long white ciliate hairs to 0.5mm in length. The orifice is glabrous or at times covered in white hirsute hairs to 1mm in length. The ligule is covered in white fimbriate hairs to 0.1mm to 0.5mm in length. The concolourous laminas are dull blue-green to grass-green, smooth and scabrous. The laminas are flat or convolute.
The inflorescences of Eragrostis leptostachya are compound panicles. The panicles are linear to lanceolate and measure 60mm to 400mm in length by 30mm to 90mm in width while the rachises measure 20mm to 40mm in length. The rachises are smooth, glabrous with erect scabrous branches. The blue-green to grass-green peduncles, peduncules and pedicels are glabrous while the peduncules have a ring of yellow glands 0.5mm to 1mm below the glumes. The peduncles measure 5mm to 30mm with the longest being at the base while the peduncules measure 7mm to 10mm in length and the pedicels measure 0mm to 0.4mm in length.
The spikelets are tight and regularly arranged along the spike. The spikelets measure 6mm to 24mm in length by 1.5mm to 2.5mm in width. The rachilla is persistent even after the lemmas have been shed. The fertile spikelets are many flowered, with at least 2 fertile florets, usually 6 to 16 but up to 20 comprise of 3 to 20 fertile florets. The lanceolate to oblong laterally compressed florets are contorted and measure 5mm to 14mm in length by 1mm to 1.5mm in width. The apex florets are lanceolate and shorter than the base florets.
The upper and lower glumes are similar and glabrous. The lower glumes are ovate, membranous with a single keel and a single nerve. The lower glumes measure 0.5mm to 1.4mm in length. The upper glumes are ovate, membranous with a single keel and a single 1 nerve. The upper glumes measure 1.5mm to 2mm in length. The keels are usually glabrous or at times scabrous.
The fertile lemmas have a single keel with 3 nerves. The sub deciduous lemmas measure 1.5mm to 2.4mm in length and have a muticus apex. The palae are slightly shorter than the lemmas. The keels are scabrous or covered in fine teeth.
There are 3 white filaments. The flowers appear throughout the year in favorable seasons, after good rainfalls or from December to February in normal years.
The fruits of Eragrostis leptostachya are obovoid to linear-oblong caryopses. The base is mucronate with a concave depression while the apex is obtuse. The caryopses measure 0.9mm to 1mm in length by 0.3mm to 0.45mm in width. The green seeds turn pale straw colour when ripe.
Wildlife:
Eragrostis leptostachya’swildlife is unknown to the author.
Cultivation:
Eragrostis leptostachya is considered to be a very good fodder crop. The leaves and stems are eaten along with other pasture crops when growing in the pasture to the extent it will soon be eliminated from the pastures. It is not known to the author whether cattle and sheep seek it out, good pasture management is too competitive or degraded land management causes the plant decline. It has a rapid growth rate from mid spring after the spring rains to late autumn. It recovers well from moderate grazing and is best managed by allowing a free period between grazing.
Eragrostis leptostachya is classified as a weed by gardeners. It gives good quantities of trash for mulch. It has good potential as a restoration grass in medium to large gardens. It recovers quickly when cut back to ground level. Well grown plants offer the landscaper a particularly attractive grass with beautiful blue-green culms and leaves that are easy to maintain. It look very delicate when in flower and seed. Do not use high nitrogenous fertilizers as these could turn the leaves green with the loss of the beautiful blue shades.
In cultivation the plants usually grow from 1000mm to 1200mm in height by 800mm to 900mm in diameter.
Propagation:
Seeds: Eragrostis leptostachya seeds can be sown directly into a seed raising mix. Cover the seeds with 2mm of the mix. Place the trays in a warm position under 20mm or 30mm shade. When the seedlings reach 20mm to 40mm tall, prick them out and plant them into 50mm native tubes using a seed raising mix. Place the 50mm native tubes into a tray of water and return them to the bush house.
Once the seedlings reach 150mm to 200mm in height plant them out into their permanent position. Mass plantings can be achieved by planting them at a minimum of 0.6 meters to 1 meter centers.
Division: Water the plants well a day or 2 before the operation is to be done. Avoid very hot weather. Cut around the clump and out on one side so that the shovel can be placed under the root ball. (Or remove it from its pot.)
Remove the plant from the soil. Cut it into 3 or 4 equal parts, first down the middle then halve those sections again ensuring that each section has some roots and, rhizome and culms or shoots. The rhizomes should have at least several eyes or growing shoots. Remove unwanted dead leaves and any old small sections that look weak or dead. Plants can be divided further but ensure each division has a several strong shoots and healthy roots attached to the tuff. Replant or pot ensuring the soil is at the same level as before. Water and fertilize with a half strength solution of fish emulsion. New shoots will appear within two weeks. Once the potted plants have new shoots and the roots treat them as seedlings.
Fertilize using seaweed, fish emulsion or organic chicken pellets soaked in water on an alternate basis. Fertilize every two months until the plants are established then annually in early September to October to maintain health, vitality and better flowering.
Further Comments from Readers:
Hi reader, it seems you use The Bible of Botany a lot. That’s great as we have great pleasure in bringing it to you! It’s a little awkward for us to ask, but our first aim is to purchase land approximately 1,600 hectares to link several parcels of N.P. into one at The Pinnacles NSW Australia, but we need your help. We’re not salespeople. We’re amateur botanists who have dedicated over 30 years to saving the environment in a practical way. We depend on donations to reach our goal. If you donate just $5, the price of your coffee this Sunday, We can help to keep the planet alive in a real way and continue to bring you regular updates and features on Australian plants all in one Botanical Bible. Any support is greatly appreciated. Thank you.
In the spirit of reconciliation we acknowledge the Bundjalung, Gumbaynggirr and Yaegl and all aboriginal nations throughout Australia and their connections to land, sea and community. We pay our respect to their Elders past, present and future for the pleasures we have gained.
Eragrostis parviflora
Classification
Unranked: Monocots
Unranked: Commelinidis
Order: Poales
Family: Poaceae
Subfamily: Chloridoideae
Tribe: Eragrostidae
Genus: From Eros, which is Ancient Greek for love or erotic and Agrostis, which is Ancient Greek for a fine grass. It refers to the appearance of the elegant flower heads and fine foliage of this grass.
Species: From Parvos, which is Ancient Greek or Parvum which is Latin for small and Floris which is Latin for a flower or Flos from the Roman goddess of spring and flowers. It refers to flowers, which are smaller than other species in the genus.
Common Name: Weeping Love Grass.
Distribution:
Eragrostis parviflora is found in the top end in several isolated populations including Kalumburu Mission and Kununurra in Western Australia, the Stuart Plateau and the Daly basin south of Katherine in the Northern Territory and the Gulf Plains near Burke in north western Queensland. In Western Australia collections have been made over a large area south from the De Grey River to Belele, the Dadyune Rockhole and south west to Avon south west of Perth.
In central Australia it is found between the Rawlinson Range in eastern central Western Australia to Bert Plain in the north west and Elkada River in the north east of Alice Springs in the Northern Territory south to the south western corner of Witjira National Park and west to west of Cheeseman’s Peak in South Australia and north to Bert Plain.
In the east it is found east of a line from Lakefield National Park on Cape York Peninsula in far north Queensland to Fowlers Bay in Fowlers Bay Conservation Park South Australia except for the high lands on the Great Dividing Range.
https://avh.ala.org.au/occurrences/search?taxa=Eragrostis+parviflora#tab_mapView
Habitat Aspect Climate:
Eragrostis parviflora prefers full sun to light dappled shade. It grows in a wide variety of habitats except for the true deserts. It is found in dry open forests, dry open woodlands on flat plains, river, stream and creek riparian zones, around billabongs, lagoons, drainage lines and depressions which are subject to seasonal flooding or where permanent water exists. Its altitude ranges from 5 meters ASL to 750 meters ASL.
The temperatures range from minus 3 degrees in August to 40 degrees in January.
The rainfall ranges from lows of 100mm to 3000mm average per annum.
Soil Requirements:
Eragrostis parviflora prefers sandy loams, light gritty clays to heavy clays. The soils are derived from decomposed brown basalt, black basalt, shale metamorphic rocks, laterites, sandstone, granite and alluvial deposits and at times accumulated peaty sands. The soils pH ranges from 4.5pH to 7pH. It does not tolerate waterlogged soils however plants are usually associated adjacent to areas that have seasonally inundated land. Non saline soils to very saline soils are tolerated.
Height & Spread:
Wild Plants: 0.3m to 1.5m by 0.1m to 0.3m
Characteristics:
Eragrostis parviflora grows as a tufted annual or perennial grass with loosely, erect or decumbent culms. The culms are grass-green and glabrous with 3 to 4 nodes. The culms usually measure 300mm to 1350mm in height by 1mm to 3mm in diameter. The lateral branches are simple.
Eragrostis parviflora‘s linear leaves measure 60mm to 300mm by 2mm to 5mm in width. The sheath margins are covered in long white ciliate hairs to 0.5mm in length. The ligule is a hyaline, ciliate rim of white hairs and measure 0.1mm to 0.5mm in length. The concolourous laminas are grass-green to golden-green and scabrous on the upper lamina while the lower lamina is smooth and glabrous. The laminas are flat or convolute.
The inflorescences of Eragrostis parviflora are compound panicles. The panicles are elliptical and measure 150mm to 600mm in length by 100mm to 200mm in width while the branches measure 130mm to 270mm in length. The rachises are initially erect soon becoming pendulant and are smooth, glabrous scabrous. The grass-green peduncles, peduncules and pedicels are glabrous or scabrous.
The spikelets are tight and regularly arranged along the spike. The spikelets measure 5mm to 10mm in length by 1mm to 1.5mm in width. The rachilla is persistent even after the lemmas have been shed. The fertile spikelets are many flowered, with at least 2 fertile florets, usually 6 to 20 but up to 30 comprise of 3 to 30 fertile florets. The linear to linear-oblong laterally compressed florets are contorted and measure 2.5mm to 16mm in length. The apex florets are linear and shorter than the base florets.
The upper and lower glumes are similar and glabrous. The lower glumes are ovate, membranous with a single keel and a single nerve. The lower glumes measure 1.2mm to 1.8mm in length. The upper glumes are ovate, membranous with a single keel and a single 1 nerve. The upper glumes measure 1.2mm to 1.8mm in length. The keels are usually glabrous or at times scabrous.
The fertile lemmas have an acute single keel with 3 nerves. The keel is glabrous on the basal two thirds and scabrous on the apex third. The lemmas measure 1mm to 2mm in length.
The persistent palae are slightly shorter than the lemmas. The 2 keels are scabrous or covered in fine teeth.
There are 3 white filaments. The flowers appear following good rainfalls.
The fruits of Eragrostis parviflora are obovoid to linear-oblong caryopses. The caryopses measure 0.5mm to 0.6mm in length. The green seeds turn pale straw colour when ripe.
Wildlife:
Eragrostis parviflora‘s wildlife is unknown to the author.
Cultivation:
Eragrostis parviflora is considered to be a very good fodder crop. The leaves and stems are eaten along with other pasture crops when growing in the pasture to the extent it will soon be eliminated from the pastures. It is not known to the author whether cattle and sheep seek it out, good pasture management is too competitive or degraded land management causes the plant decline. It has a rapid growth rate from mid spring after the spring rains to late autumn. It recovers well from moderate grazing and is best managed by allowing a free period between grazing.
Eragrostis parviflora is classified as a weed by gardeners because of its open habit of growth and being a grass.
It gives poor quantities of trash for organic mulch. It has good potential as a restoration grass in medium to large gardens. It recovers quickly when cut back to ground level. Do not use high nitrogenous fertilizers as these could make the plants top heavy and more likely to be the victim of strong winds snapping the tall soft culms and flower heads.
In cultivation it can be grown on most types of soil even heavy better quality clay and podzolics sandy loams. It requires full sun for best results but copes very well in light dappled shade. With a little added moisture, mulch or native fertilizer added at the time when it is planted out will maximum colour and vigour. The plants should be cut back hard immediately after flowering leaving one or 2 stems if seeds are required for the following season.
In cultivation the plants usually grow from 1200mm to 1600mm in height including the panicles by 200mm to 300mm in diameter.
Propagation:
Seeds: Eragrostis parviflora‘s seeds can be sown directly into a seed raising mix. Cover the seeds with 2mm of the mix. Place the trays in a warm position under 20mm or 30mm shade. When the seedlings reach 20mm to 40mm tall, prick them out and plant them into 50mm native tubes using a seed raising mix. Place the 50mm native tubes into a tray of water and return them to the bush house.
Once the seedlings reach 150mm to 200mm in height plant them out into their permanent position. Mass plantings can be achieved by planting them at a minimum of 0.2 meters to 1.5 meter centers.
Fertilize using seaweed, fish emulsion or organic chicken pellets soaked in water on an alternate basis. Fertilize every two months until the plants are established then annually in early September to October to maintain health, vitality and better flowering.
Further Comments from Readers:
Hi reader, it seems you use The Bible of Botany a lot. That’s great as we have great pleasure in bringing it to you! It’s a little awkward for us to ask, but our first aim is to purchase land approximately 1,600 hectares to link several parcels of N.P. into one at The Pinnacles NSW Australia, but we need your help. We’re not salespeople. We’re amateur botanists who have dedicated over 30 years to saving the environment in a practical way. We depend on donations to reach our goal. If you donate just $5, the price of your coffee this Sunday, We can help to keep the planet alive in a real way and continue to bring you regular updates and features on Australian plants all in one Botanical Bible. Any support is greatly appreciated. Thank you.
In the spirit of reconciliation we acknowledge the Bundjalung, Gumbaynggirr and Yaegl and all aboriginal nations throughout Australia and their connections to land, sea and community. We pay our respect to their Elders past, present and future for the pleasures we have gained.
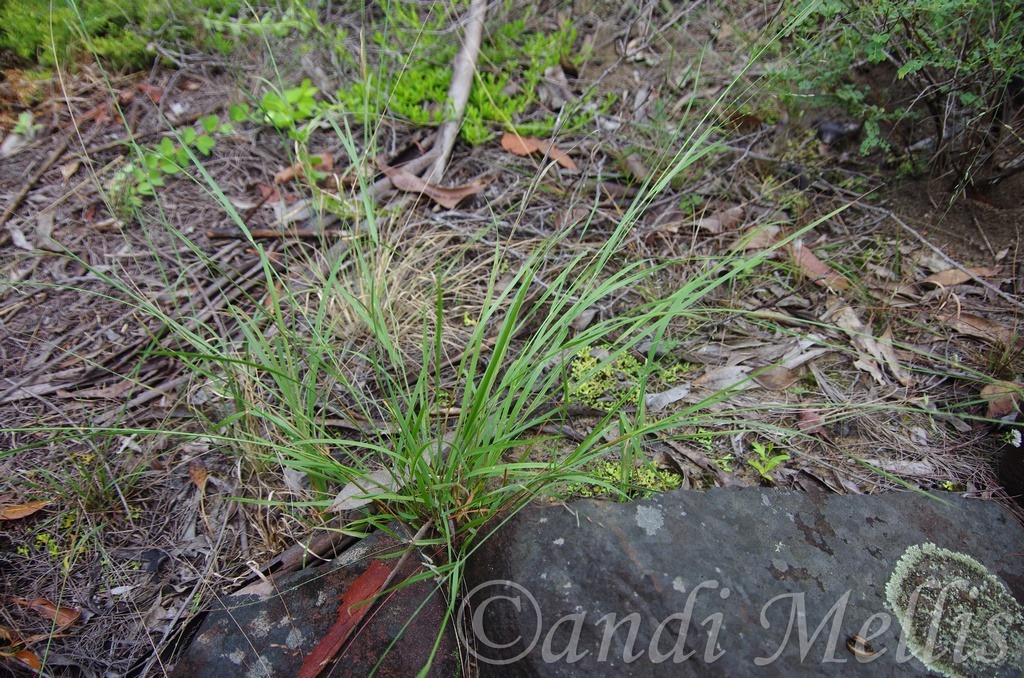
Author’s Garden The Pinnacles NSW
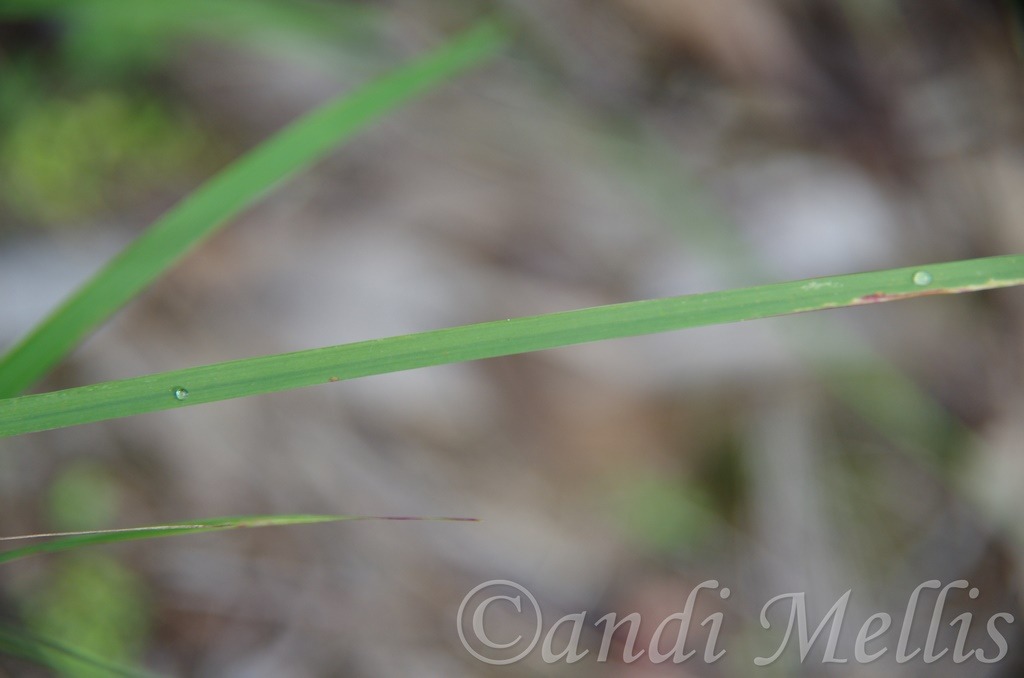
Author’s Garden The Pinnacles NSW

Author’s Garden The Pinnacles NSW
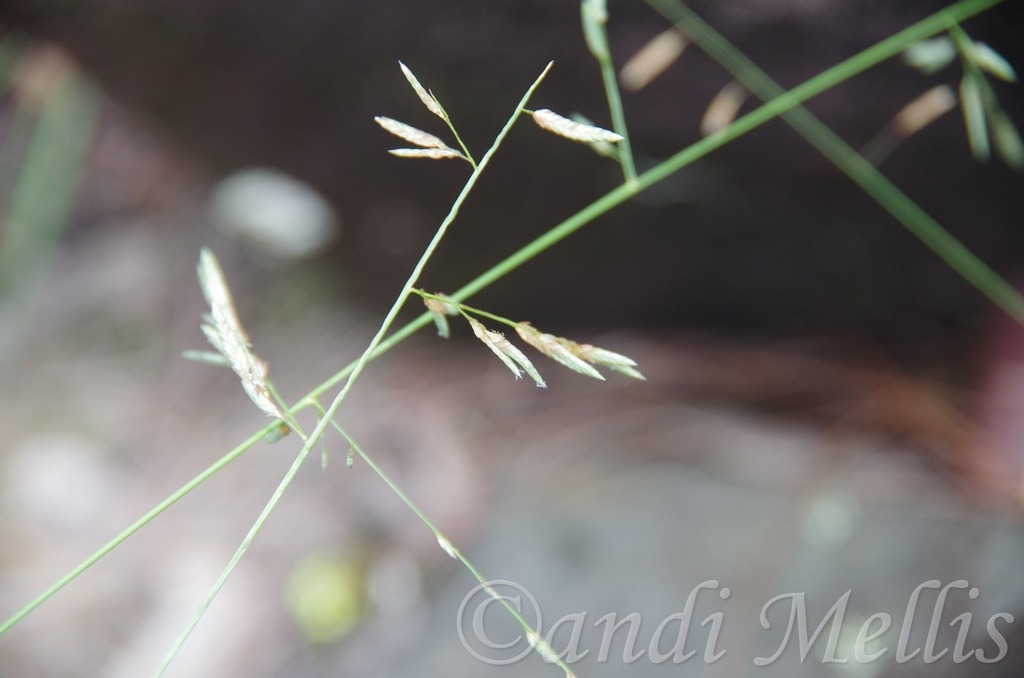
Author’s Garden The Pinnacles NSW
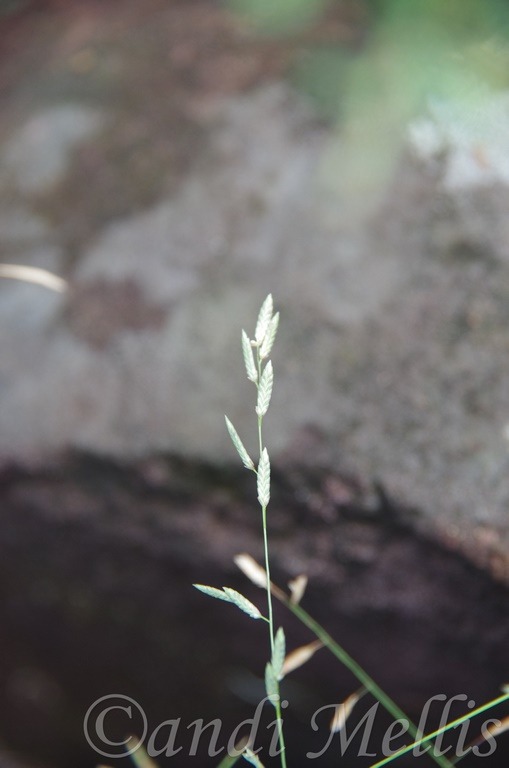
Author’s Garden The Pinnacles NSW
Eragrostis pubescens
Classification
Unranked: Monocots
Unranked: Commelinidis
Order: Poales
Family: Poaceae
Subfamily: Chloridoideae
Tribe: Eragrostidae
Genus: From Eros, which is Ancient Greek for love or erotic and Agrostis, which is Ancient Greek for a fine grass. It refers to the appearance of the elegant flower heads and fine foliage of this grass.
Species: From Pubescens, which is Latin for short, very soft hairs. It refers to structures or organs, which are covered in soft, white or pale grey hairs.
Common Name:
Distribution:
Eragrostis pubescens is found in a line north from the Victoria River in the Northern Territory to Grafton in far northern New South Wales. There is an isolated population in the western Kimberley in far north western Western Australia.
https://avh.ala.org.au/occurrences/search?taxa=Eragrostis+pubescens#tab_mapView
Habitat Aspect Climate:
Eragrostis pubescens prefers full sun to light dappled shade. It grows in dry open forests and dry open woodlands often on alluvial soils, on river levees, margins of swamps, coastal flats and dunes or in broad shallow depressions. The altitude ranges from near sea level to around 650 meters ASL.
The temperatures range from minus 3 degrees in August to 40 degrees in January.
The rainfall ranges from lows of 400mm to 1800mm average per annum.
Soil Requirements:
Eragrostis pubescens prefers sandy loams to light fatty sandy loams. The soils are usually derived from decomposed sandstone, granites, laterites, alluvial deposits or accumulated peaty sands. The soils pH ranges from 4.5pH to 6pH. It tolerates seasonal waterlogged soils and seasonal high water tables. Non saline soils to moderately saline soils are tolerated.
Height & Spread:
Wild Plants: 1m to 1.3m by 0.8m to 1m
Characteristics:
Eragrostis pubescens‘s grows as a tufted perennial grass with loosely, erect, prostrate or decumbent culms. The culms are grass-green and glabrous or sparsely covered in white puberulent hairs. The culms usually measure 400mm to 800mm in height by 1mm to 2mm in diameter.
Eragrostis pubescens‘s linear leaves measure 60mm to 300mm by 2mm to 5mm in width. The glabrous sheaths, margins are covered in long white ciliate hairs that measure 0.2mm to 0.5mm in length. The ligule is a hyaline, ciliate rim of white hairs that measure 0.2mm to 0.25mm in length. The concolourous laminas are grass-green to golden-green and glabrous to moderately covered in long white 1mm long pubescent hairs. The laminas are straight, flat or involute.
The inflorescences of Eragrostis pubescens are compound panicles. The panicles are lanceolate and measure 50mm to 850mm in length by 40mm to 200mm in width while the branches measure 130mm to 270mm in length. The rachises are glabrous to moderately covered in white 1mm long puberulent hairs while the peduncles are scabrous and covered in 1mm long hairs to the second or third spikelet. The pedicels are scabrous. The rachises, peduncules and pedicels are grass-green.
The spikelets are tight and regularly arranged along the spike. The spikes measure 7mm to 50mm in length by 3mm to 6.5mm in width. The rachilla is persistent even after the lemmas have been shed. The fertile spikelets are many flowered, with at least 2 fertile florets, usually 12 to 30 but up to 89 which comprise of 6 to 89 fertile florets. The linear to lanceolate laterally compressed florets are contorted and measure 2.5mm to 3mm in length. The apex florets are linear and shorter than the base florets.
The upper and lower glumes are similar and glabrous. The lower glumes are lanceolate, membranous with a single keel and a single nerve. The lower glumes measure 1.6mm to 2.8mm in length. The upper glumes are lanceolate, membranous with a single keel and a single 1 nerve. The upper glumes measure 1.8mm to 3mm in length. The upper glumes have an acute apex while the keels are usually scabrous or at times glabrous.
The fertile lemmas have an acute single keel with 3 to 5 nerves. The lemmas are densely covered in white pulverulent hairs. The lemmas apexes have a muticus apex while the lemmas measure 1.9mm to 4mm in length. Lodicules are present at the base of the ovaries.
The persistent palae are slightly shorter than the lemmas. The 2 keels are scabrous or covered in fine teeth.
There are 3 white filaments. The flowers appear following good rainfalls.
The fruits of Eragrostis pubescens are obovoid to linear-oblong caryopses. The caryopses measure 4mm to 5mm in length. The green seeds turn pale straw colour when ripe.
Wildlife:
Eragrostis pubescens‘s wildlife is unknown to the author.
Cultivation:
Eragrostis pubescens is considered to be a very good fodder crop. The leaves and stems are eaten along with other pasture crops when growing in the pasture to the extent it will soon be eliminated from the pastures. It is not known to the author whether cattle and sheep seek it out, good pasture management is too competitive or degraded land management causes the plant decline. It has a rapid growth rate from mid spring after the spring rains to late autumn. It recovers well from moderate grazing and is best managed by allowing a free period between grazing.
Eragrostis pubescens is classified as a weed by gardeners because of its open habit of growth and being a grass. It has little potential in as a landscaping plant.
It gives poor quantities of trash for mulch. It recovers quickly when cut back to ground level.
In cultivation the plants usually grow from 1000mm to 1200mm in height including the panicles by 400mm to 700mm in diameter.
In cultivation it can be grown on most types of soil even heavy better quality clay and podzolics sandy loams. It requires full sun for best results but copes very well in light dappled shade. With a little added moisture, mulch or native fertilizer added at the time when it is planted out will maximum colour and vigour. The plants should be cut back hard immediately after flowering leaving one or 2 stems if seeds are required for the following season.
Propagation:
Seeds: Eragrostis pubescens‘s seeds can be sown directly into a seed raising mix. Cover the seeds with 2mm of the mix. Place the trays in a warm position under 20mm or 30mm shade. When the seedlings reach 20mm to 40mm tall, prick them out and plant them into 50mm native tubes using a seed raising mix. Place the 50mm native tubes into a tray of water and return them to the bush house.
Once the seedlings reach 150mm to 200mm in height plant them out into their permanent position. Mass plantings can be achieved by planting them at a minimum of 0.2 meters to 1.5 meter centers.
Fertilize using seaweed, fish emulsion or organic chicken pellets soaked in water on an alternate basis. Fertilize every two months until the plants are established then annually in early September to October to maintain health, vitality and better flowering.
Further Comments from Readers:
Hi reader, it seems you use The Bible of Botany a lot. That’s great as we have great pleasure in bringing it to you! It’s a little awkward for us to ask, but our first aim is to purchase land approximately 1,600 hectares to link several parcels of N.P. into one at The Pinnacles NSW Australia, but we need your help. We’re not salespeople. We’re amateur botanists who have dedicated over 30 years to saving the environment in a practical way. We depend on donations to reach our goal. If you donate just $5, the price of your coffee this Sunday, We can help to keep the planet alive in a real way and continue to bring you regular updates and features on Australian plants all in one Botanical Bible. Any support is greatly appreciated. Thank you.
In the spirit of reconciliation we acknowledge the Bundjalung, Gumbaynggirr and Yaegl and all aboriginal nations throughout Australia and their connections to land, sea and community. We pay our respect to their Elders past, present and future for the pleasures we have gained.
Eragrostis sororia
Classification
Unranked: Monocots
Unranked: Commelinidis
Order: Poales
Family: Poaceae
Subfamily: Chloridoideae
Tribe: Eragrostidae
Genus: From Eros, which is Ancient Greek for love or erotic and Agrostis, which is Ancient Greek for a fine grass. It refers to the appearance of the elegant flower heads and fine foliage of this grass.
Species: From Sororia, which is Latin for sisters or sisterly. It refers to plants, which resemble other plants in the genus.
Common Name:
Distribution:
Eragrostis sororia is found in the eastern third of Queensland and New South Wales from the Iron Range Resource Reserve on Cape York Peninsula in far north Queensland to Young in southern New South Wales.
There are several isolated populations from Southern Kakadu National Park in the Northern Territory, Carlo in south western Queensland, near Deniliquin and along the upper catchment of Murray River.
https://avh.ala.org.au/occurrences/search?taxa=Eragrostis+sororia#tab_mapView
Habitat Aspect Climate:
Eragrostis sororia prefers full sun to light dappled shade. It grows on river levees, flats and banks or disturbed ground in open forests, open woodlands on flat plains and savannah grasslands. Its altitude ranges from 3 meters ASL to around 650 meters ASL.
The temperatures range from minus 3 degrees in August to 40 degrees in January.
The rainfall ranges from lows of 300mm to 1800mm average per annum.
Soil Requirements:
Eragrostis sororia usually prefers deep sands, sandy loams, light clays or podsolics clays. The soils are usually derived from decomposed poor quality shale, metamorphic rocks, sandstones, granites, alluvial deposits or at times accumulated peaty sands. The soils pH ranges from 4.5pH to 6pH. It tolerates seasonal waterlogged soils and seasonal high water tables. Non saline soils to moderately saline soils are tolerated.
Height & Spread:
Wild Plants: 0.3m to 0.7m by 0.2m to 0.5m
Characteristics:
Eragrostis sororia grows as a tufted perennial grass with loosely, erect, scrambly culms which rely on other vegetation for support. The culms are grass-green and glabrous or sparsely covered in white puberulent hairs. The culms usually measure 200mm to 700mm in height by 1mm to 2mm in diameter.
Eragrostis sororia‘s linear leaves measure 100mm to 600mm by 2mm to 3mm in width. The sheaths are glabrous while the margins are covered in white ciliate hairs that measure 0.2mm to 0.5mm in length. The orifice is glabrous or covered in white pulverulent hairs to 1.5 mm in length. The ligule is a ciliate rim of white hairs that measure 0.2mm to 0.25mm in length. The concolourous laminas are grass-green to golden-green and scabrous, glabrous or sparsely covered in long white 1mm long pulverulent hairs. The laminas are straight, flat or involute.
The inflorescences of Eragrostis sororia are contracted or interrupted compound panicles. The panicles are linear to oblong and measure 35mm to 240mm in length by 20mm to 80mm in width. The rachises and peduncles are scabrous. The pedicels are glabrous and measure 0.5mm to 1mm in length. The rachises, peduncules and pedicels are grass-green to mid blue-green.
The spikelets are tight and irregularly arranged along the spike. The spikelets measure 7mm to 12mm in length by 2mm to 2.5mm in width. The rachilla is tardily persistent as the lemmas are shed. The fertile spikelets are many flowered, with at least 2 fertile florets, usually 15 to 38 but up to 64 which comprise of 5 to 64 fertile florets. The linear to lanceolate or oblong to ovate laterally compressed florets are contorted and measure 5mm to 15mm in length. The apex florets are linear and shorter than the base florets.
The upper and lower glumes are similar, glabrous and straw coloured to pale yellow with a pink tinge. The lower glumes are lanceolate, membranous with a single keel and a single nerve. The lower glumes measure 1.5mm to 2.3mm in length. The upper glumes are lanceolate, membranous with a single keel and a single 1 nerve. The upper glumes measure 1.5mm to 2.3mm in length. The upper glumes have an acute apex while the lower keels are glabrous and the upper keels are scabrous. The margins are membranous to hyaline.
The fertile lemmas have an acute single keel with 3 nerves. The lemmas are densely covered in white pulverulent hairs. The lemmas apexes have a muticus apex while the lemmas measure 2mm to 3mm in length. Lodicules are present at the base of the ovaries.
The persistent palae measure 1.6mm to 2.4mm in length.
There are 2 white filaments. The flowers appear following good rainfalls.
The fruits of Eragrostis sororia are obovoid to linear-oblong caryopses. The caryopses measure 0.8mm to 1mm in length by 0.55mm to 0.7mm in diameter. The green seeds turn pale straw colour when ripe.
Wildlife:
Eragrostis sororia‘s wildlife is unknown to the author however small aviary parrots find the green seeds palatable.
Cultivation:
Eragrostis sororia is considered to be a fair fodder crop. The leaves and stems are eaten along with other pasture crops when growing in the pasture to the extent it will soon be eliminated from the pastures. It is not known to the author whether cattle and sheep seek it out, good pasture management is too competitive or degraded land management causes the plant decline. It has a rapid growth rate from mid spring after the spring rains to late autumn. It recovers well from moderate grazing and is best managed by allowing a free period between grazing.
Eragrostis sororia is classified as a weed by gardeners without considering its potential in medium to small rockeries. It gives poor quantities of trash for mulch. It has good potential as a restoration grass in small to medium gardens. It recovers quickly when cut back to ground level. Do not use high nitrogenous fertilizers as these could turn the bright grass-green. Strong fertilizers would also soften the culms which will become pendulant or snap easily in a breeze or if touched making them look untidy in the garden bed. The plants should be cut back hard immediately the first seeds begin to fall.
In cultivation the plants usually grow from 500mm to 600mm in height by 300mm to 370mm in diameter.
Propagation:
Seeds: Eragrostis sororia‘s seeds can be sown directly into a seed raising mix. Cover the seeds with 2mm of the mix. Place the trays in a warm position under 20mm or 30mm shade. When the seedlings reach 40mm to 60mm tall, prick them out and plant them into 50mm native tubes using a seed raising mix. Place the 50mm native tubes into a tray of water and return them to the bush house.
Once the seedlings reach 150mm to 200mm in height plant them out into their permanent position. Mass plantings can be achieved by planting them at a minimum of 0.4 meters to 0.8 meter centers.
Fertilize using seaweed, fish emulsion or organic chicken pellets soaked in water on an alternate basis. Fertilize every two months until the plants are established then annually in early September to October to maintain health, vitality and better flowering.
Further Comments from Readers:
Hi reader, it seems you use The Bible of Botany a lot. That’s great as we have great pleasure in bringing it to you! It’s a little awkward for us to ask, but our first aim is to purchase land approximately 1,600 hectares to link several parcels of N.P. into one at The Pinnacles NSW Australia, but we need your help. We’re not salespeople. We’re amateur botanists who have dedicated over 30 years to saving the environment in a practical way. We depend on donations to reach our goal. If you donate just $5, the price of your coffee this Sunday, We can help to keep the planet alive in a real way and continue to bring you regular updates and features on Australian plants all in one Botanical Bible. Any support is greatly appreciated. Thank you.
In the spirit of reconciliation we acknowledge the Bundjalung, Gumbaynggirr and Yaegl and all aboriginal nations throughout Australia and their connections to land, sea and community. We pay our respect to their Elders past, present and future for the pleasures we have gained.
Eragrostis spartinoides
Classification
Unranked: Monocots
Unranked: Commelinidis
Order: Poales
Family: Poaceae
Subfamily: Chloridoideae
Tribe: Eragrostidae
Genus: From Eros, which is Ancient Greek for love or erotic and Agrostis, which is Ancient Greek for a fine grass. It refers to the appearance of the elegant flower heads and fine foliage of this grass.
Species: From Spartium, which is Ancient Greek for a grass used in weaving such as Spartium junceum and Eidos/Oides, which is Ancient Greek for alike or similar to. It refers to plants, which resemble the ancient grasses used in the manufacture of ropes.
Common Name:
Distribution:
Eragrostis spartinoides is found north and east of a line from the Trent River north of Derby in Western Australia to the MacArther River Station in the Northern Territory to Toowoomba in southern Queensland then south to Sundown National Park and along the Clarence River to the coast in far northern New South Wales. There is an isolated population from Newcastle to the Blue Mountains in central coastal New South Wales.
https://avh.ala.org.au/occurrences/search?taxa=Eragrostis+spartinoides#tab_mapView
Habitat Aspect Climate:
Eragrostis spartinoides prefers full sunlight to light dappled shade. It grows on rocky or stony hills, slopes and ridges, near seasonal streams, lakes, lagoons, springs; coastal sandy wallums, disturbed roadside verges, fallow land and railway enclosures. The altitude ranges from 5 meters ASL to 300 meters but it is also known from altitude levels to 1650 meters ASL in the Gilbralta Range.
The temperatures range from minus 4 degrees in August to 40 degrees in January.
The rainfall ranges from lows of 300mm to 3000mm average per annum.
Soil Requirements:
Eragrostis spartinoides prefers skeletal to shallow sandy loams to light clays. The soils are usually derived from decomposed brown basalt, black basalt, shale, sandstone, granites, quartzites accumulated peaty beach sands or at times metamorphic rocks or alluvial deposits. The soils pH ranges from 4.5pH to 6pH. It tolerates seasonal waterlogged soils and seasonal high water tables for short periods. Non saline soils to moderately saline soils are tolerated.
Height & Spread:
Wild Plants: 0.6m to 0.9m by 0.2m to 0.35m
Characteristics:
Eragrostis spartinoides grows as a tufted perennial grass with loosely, erect culms. The culms are grass-green and glabrous. The culms usually measure 700mm to 850mm in height by 1mm to 2mm in diameter.
Eragrostis spartinoides‘s filiform to linear leaves measure 100mm to 600mm by 1mm to 2.5mm in width. The sheaths are covered in white pilose or ciliate hairs with tuberculate bases. The orifice is covered in white in long pulverulent hairs to 5 mm in length. The ligule is a ciliate rim of white hairs that measure 0.2mm to 0.25mm in length. The concolourous laminas are grass-green to golden-green and glabrous or sparsely covered in white puberulent hairs. The laminas are straight, flat or involute.
The inflorescences of Eragrostis spartinoides are contracted compound panicles. The panicles are linear to lanceolate and measure 50mm to 640mm in length by 40mm to 60mm in width. The rachises, peduncles and pedicels are glabrous. The peduncles measure 25mm to 90mm in length while the pedicels measure 0.5mm to 1.5mm in length. The rachises, peduncules and pedicels are grass-green.
The spikelets are loose and irregularly arranged along the spike. The spikelets measure 7mm to 25mm in length by 2mm to 2.5mm in width. The zig-zag rachilla is persistent until the lemmas fall then become tardily deciduous. The fertile spikelets are many flowered, with at least 2 fertile florets, usually 15 to 40 but up to 56 which comprise of 8 to 56 fertile florets. The linear, laterally compressed florets are contorted and measure 5mm to 28mm in length. The apex florets are linear and shorter than the base florets.
The upper and lower glumes are unequal in length. The lower glumes are acute to acuminate, membranous with a single keel and a single nerve. The lower glumes measure 1mm to 2.6mm in length. The upper glumes are acute to acuminate, membranous with a single keel and a single 1 nerve. The upper glumes measure 1.3mm to 2.8mm in length. The upper glumes have an acute apex while the keels are scabrous.
The fertile lemmas have an acute single keel with 3 nerves. The lemmas measure 2mm to 3mm in length. Lodicules are present at the base of the ovaries.
The persistent palae measure 1.6mm to 2.4mm in length.
There are 2 or 3 white filaments. The flowers appear following good rainfalls.
The fruits of Eragrostis pubescens are obovoid to linear compressed caryopses. The caryopses measure 0.5mm to 0.6mm in length. The green seeds turn pale straw colour when ripe.
Wildlife:
Eragrostis spartinoides’s wildlife is unknown to the author however small aviary parrots find the green seeds palatable.
Cultivation:
Eragrostis spartinoides is considered to be a very good fodder crop. The leaves and stems are eaten along with other pasture crops when growing in the pasture to the extent it will soon be eliminated from the pastures. It is not known to the author whether cattle and sheep seek it out, good pasture management is too competitive or degraded land management causes the plant decline. It has a rapid growth rate from mid spring after the spring rains to late autumn. It recovers well from moderate grazing and is best managed by allowing a free period between grazing.
Eragrostis spartinoides is classified as a weed by gardeners because of its open habit of growth and being a grass. It has little potential in as a landscaping plant.
It gives poor quantities of trash for mulch. It recovers quickly when cut back to ground level.
In cultivation it can be grown on most types of soil even heavy better quality clay and podsolics sandy loams. It requires full sun for best results but copes very well in light dappled shade. With a little added moisture, mulch or native fertilizer added at the time when it is planted out will maximum colour and vigour. The plants should be cut back hard immediately after flowering leaving one or 2 stems if seeds are required for the following season.
In cultivation the plants usually grow from 700mm to 850mm in height including the panicles by 300mm to 500mm in diameter.
Propagation:
Seeds: Eragrostis spartinoides‘s seeds can be sown directly into a seed raising mix. Cover the seeds with 2mm of the mix. Place the trays in a warm position under 20mm or 30mm shade. When the seedlings reach 20mm to 40mm tall, prick them out and plant them into 50mm native tubes using a seed raising mix. Place the 50mm native tubes into a tray of water and return them to the bush house.
Once the seedlings reach 150mm to 200mm in height plant them out into their permanent position. Mass plantings can be achieved by planting them at a minimum of 0.4 meters to 0.8 meter centers.
Fertilize using seaweed, fish emulsion or organic chicken pellets soaked in water on an alternate basis. Fertilize every two months until the plants are established then annually in early September to October to maintain health, vitality and better flowering.
Further Comments from Readers:
Hi reader, it seems you use The Bible of Botany a lot. That’s great as we have great pleasure in bringing it to you! It’s a little awkward for us to ask, but our first aim is to purchase land approximately 1,600 hectares to link several parcels of N.P. into one at The Pinnacles NSW Australia, but we need your help. We’re not salespeople. We’re amateur botanists who have dedicated over 30 years to saving the environment in a practical way. We depend on donations to reach our goal. If you donate just $5, the price of your coffee this Sunday, We can help to keep the planet alive in a real way and continue to bring you regular updates and features on Australian plants all in one Botanical Bible. Any support is greatly appreciated. Thank you.
In the spirit of reconciliation we acknowledge the Bundjalung, Gumbaynggirr and Yaegl and all aboriginal nations throughout Australia and their connections to land, sea and community. We pay our respect to their Elders past, present and future for the pleasures we have gained.
Eragrostis trachycarpa
Classification
Unranked: Monocots
Unranked: Commelinidis
Order: Poales
Family: Poaceae
Subfamily: Chloridoideae
Tribe: Eragrostidae
Genus: From Eros, which is Ancient Greek for love or erotic and Agrostis, which is Ancient Greek for a fine grass. It refers to the appearance of the elegant flower heads and fine foliage of this grass.
Species: From Trikhos which is Ancient Greek for rough and Karpos which is Ancient Greek for a fruit. It refers to the fruits having a rough textured surface.
Common Name: Rough Grained Love Grass.
Distribution:
Eragrostis trachycarpa is found mainly on the Great Dividing Range south from Toowoomba to west of Maffra and Sale in Victoria. It is mainly found on the Western Slopes in the north while the southern populations are found on the coastal plains.
https://avh.ala.org.au/occurrences/search?taxa=Eragrostis+trachycarpa#tab_mapView
Habitat Aspect Climate:
Eragrostis trachycarpa prefers full sun to light dappled shade. It grows in shallow depressions in dry open forests, dry open woodlands, open savannah woodlands, dry open Eucalyptus forests, and dry heaths on flat plains, rivers, creeks, surrounding billabongs or dams. The altitude ranges from5 meters ASL to around 1250 meters ASL.
The temperatures range from minus 5 degrees in August to 37 degrees in January.
The rainfall ranges from lows of 400mm to 1800mm average per annum.
Soil Requirements:
Eragrostis trachycarpa prefers moist sandy loams, moist light gritty clays to moist medium clays. The soils are usually podsolic, brown clays often associated with granite. The soils are usually derived from decomposed granites. The soils pH ranges from 4.5pH to 5.5pH. It does not tolerate waterlogged soils. Non saline soils to moderately saline soils are tolerated.
Height & Spread:
Wild Plants: 0.15m to 0.8m by 0.2m to 0.5m
Characteristics:
Eragrostis trachycarpa grows as a tufted perennial grass with erect, tufted culms. The culms are tufted on the slender rhizome. The culms usually measure 140mm to 800mm in height by 1mm to 3mm in diameter. The culms are sea-green and glabrous. The individual culms are transversely septate. Closely related to the water Chestnut but rarely forms sizeable chestnuts.
Eragrostis trachycarpa‘s linear leaves glabrous measure 100mm to 600mm by 1mm to 3mm in width. The orifice is usually glabrous or at times covered in white in puberulent hairs to 2mm in length. The ligule is a ciliate rim of white hairs that measure 0.2mm to 0.25mm in length. The concolourous laminas are grass-green and smooth or scabrous. The laminas are straight, flat or involute or convolute.
The inflorescences of Eragrostis trachycarpa are contracted compound panicles. The panicles are linear to lanceolate and measure 150mm to 450mm in length by 80mm to 250mm in width. The rachises, peduncles and pedicels are glabrous and filiform. The peduncles measure 25mm to 90mm in length while the pedicels measure 5mm to 25mm in length. The rachises, peduncules and pedicels are grass-green with the lower axils of the rachises and peduncles covered in long 2.5mm to 3mm white pilose hairs. The peduncles are appressed as they first open soon becoming divaricate.
The spikelets are very loose and irregularly arranged along the spikes. The spikelets measure 1.5mm to 5.5mm in length. The zig-zag rachilla is persistent until the lemmas are shed. The fertile spikelets are many flowered, with at least 1 fertile floret, usually 1 to 5 but up to 7 which comprise of 1 to 7 fertile florets. The linear, laterally compressed florets are contorted and measure 1.5mm to 5.5mm in length.
The upper and lower glumes are similar. The lower glumes are lanceolate, membranous with a single keel and a single nerve. The lower glumes measure 1mm to 2mm in length. The upper glumes are lanceolate, membranous with a single keel and a single 1 nerve. The upper glumes measure 1mm to 2mm in length. The glumes surfaces are smooth to asperulous. The acute keels are scabrous.
The fertile lemmas have an acute single keel with 3 nerves and a muticus apex. The lemmas measure 1.5mm to 1.7mm in length. Lodicules are present at the base of the ovaries.
The persistent palae have 2 keels and measure 1.3mm to 1.5mm in length.
There are 3 white filaments. The flowers appear following good rainfalls.
The fruits of Eragrostis trachycarpa are obovoid to linear compressed caryopses. The caryopses measure 0.5mm to 0.6mm in length. The green seeds turn pale straw colour when ripe.
Wildlife: Eragrostis trachycarpa‘s wildlife is unknown to the author however small aviary parrots find the green seeds palatable.
Cultivation:
Eragrostis trachycarpa is considered to be a fair fodder crop. The leaves and stems are eaten along with other pasture crops when growing in the pasture to the extent it will soon be eliminated from the pastures. It is not known to the author whether cattle and sheep seek it out, good pasture management is too competitive or degraded land management causes the plant decline. It has a rapid growth rate from mid spring after the spring rains to late autumn. It recovers well from moderate grazing and is best managed by allowing a free period between grazing.
Eragrostis trachycarpa is classified as a weed by gardeners because of its open habit of growth and being a grass. It has little potential in as a landscaping plant.
It gives poor quantities of trash for mulch. It recovers quickly when cut back to ground level.
In cultivation it can be grown on most types of soil even heavy better quality clay and podzolics sandy loams. It requires full sun for best results but copes very well in light dappled shade. With a little added moisture, mulch or native fertilizer added at the time when it is planted out will maximum colour and vigour. The plants should be cut back hard immediately after flowering leaving one or 2 stems if seeds are required for the following season.
In cultivation the plants usually grow from 700mm to 850mm in height including the panicles by 300mm to 500mm in diameter.
Propagation:
Seeds: Eragrostis trachycarpa‘s seeds can be sown directly into a seed raising mix. Cover the seeds with 2mm of the mix. Place the trays in a warm position under 20mm or 30mm shade. When the seedlings reach 20mm to 40mm tall, prick them out and plant them into 50mm native tubes using a seed raising mix. Place the 50mm native tubes into a tray of water and return them to the bush house.
Once the seedlings reach 150mm to 200mm in height plant them out into their permanent position. Mass plantings can be achieved by planting them at a minimum of 0.4 meters to 0.8 meter centers.
Fertilize using seaweed, fish emulsion or organic chicken pellets soaked in water on an alternate basis. Fertilize every two months until the plants are established then annually in early September to October to maintain health, vitality and better flowering.
Further Comments from Readers:
Hi reader, it seems you use The Bible of Botany a lot. That’s great as we have great pleasure in bringing it to you! It’s a little awkward for us to ask, but our first aim is to purchase land approximately 1,600 hectares to link several parcels of N.P. into one at The Pinnacles NSW Australia, but we need your help. We’re not salespeople. We’re amateur botanists who have dedicated over 30 years to saving the environment in a practical way. We depend on donations to reach our goal. If you donate just $5, the price of your coffee this Sunday, We can help to keep the planet alive in a real way and continue to bring you regular updates and features on Australian plants all in one Botanical Bible. Any support is greatly appreciated. Thank you.
In the spirit of reconciliation we acknowledge the Bundjalung, Gumbaynggirr and Yaegl and all aboriginal nations throughout Australia and their connections to land, sea and community. We pay our respect to their Elders past, present and future for the pleasures we have gained.
Eremochloa bimaculata
Classification
Unranked: Monocots
Unranked: Commelinidis
Order: Poales
Family: Poaceae
Subfamily: Panicoideae/Andropogoneae.
Genus: From Eremos/Eremaeios, which is Ancient Greek for a desert, arid or wasteland and Khloa, which is Ancient Greek for a grass. It refers to plants, which prefer habitats that are drier open desert plains.
Species: From Bi/Bis, which is Greek/Latin for two and Maculatus, which is Latin for to stain of spotted. It refers to lemmas and glumes, which have two maroon spots at the apexes.
Common Name: Poverty Grass.
Distribution:
Eremochloa bimaculata is found south from the Iron Range Resource Reserve on Cape York Peninsula in far north Queensland to Warialda in far northern New South Wales. It is found on the Western Plains, Western Slopes, on and east of the Great Dividing Range to the coast. There are several isolated populations including Poison Creek north of Hughendon in Queensland, Gilgai south of Inverell, on the foreshore near Foster in New South Wales and the northern end of Baranduda Range.
https://avh.ala.org.au/occurrences/search?taxa=Eremochloa+bimaculata#tab_mapView
Habitat Aspect Climate:
Eremochloa bimaculata prefers full sun to light dappled shade. It grows in open Eucalyptus forests, open woodlands on flat plains, creek riparian zones, surrounding billabongs, lagoons and depressions which are subject to seasonal flooding or where permanent water exists. Its altitude ranges from 5 meters ASL to around 950 meters ASL.
The temperatures range from minus 2 degrees in August to 42 degrees in January.
The rainfall ranges from lows of 300mm to 3200mm average per annum.
Soil Requirements:
Eremochloa bimaculata prefers sandy loams, light gritty clays to heavy black clays. The soils are derived from decomposed brown basalt, black basalt, shale, metamorphic rocks, sandstones, granites, alluvial deposits or at times accumulated peaty beach sands. The soils pH ranges from 4.5pH to 6.5pH. It does not tolerates waterlogged soils however plants can be found adjacent to areas that suffer seasonal inundations, swamps and rising water tables. Non saline soils to very saline soils are tolerated.
Height & Spread:
Wild Plants: 0.15m to 0.8m by 0.2m to 0.35m
Characteristics:
Eremochloa bimaculata grows as a perennial grass with stout rootstock and roots. The flattened culms are erect or geniculately ascending. The culms usually measure 150mm to 450mm in height but can attain up to 800 mm in length by 4mm to 8mm in width. The culms have 2 or 3 nodes, are sea-green and glabrous. The individual mid culms are glabrous or sparsely covered in soft, white puberulent hairs. The lateral branches are simple.
Eremochloa bimaculata‘s linear, leaves measure 100mm to 120mm by 2mm to 5mm in width. The eciliate membrane of the ligule measures 0.4mm to 1mm in length and is covered in a tuft of long, white hirsute hairs that measure 0.8mm to 1mm in length. The concolourous laminas are grass-green to deep grass-green with a purplish tinge and are smooth or glabrous. The laminas are straight, flat or involute or convolute. Conduplicate leaves are folded in bud. The midvein is prominent on the lower lamina. The margins are entire.
The inflorescences of Eremochloa bimaculata are simple racemes. The racemes are linear and measure 50mm to 100mm in length by 4mm to 4.5mm in diameter. The slightly zig-zag rachises are fragile especially after anthesis. The rachises are grass-green and glabrous.
The sessile spikelets are very tightly appressed and regularly arranged along the spikes. The spikelets measure 4mm to 5mm in length. The zig-zag rachilla is persistent until the lemmas are shed. The spikelets are arranged with 1 bisexual floret above a sterile floret. The sterile pedicillate floret is much reduced rarely male or at times absent. The fertile spikelets are many flowered, with at least 1 fertile floret, usually 1 to 5 but up to 7 which comprise of 1 to 7 fertile florets. The linear, laterally compressed florets are contorted and measure 1.5mm to 5.5mm in length.
The upper and lower glumes are dissimilar. The lower glumes are elliptical to oblong, chartaceous with 2 keels. The wings have 5 to 7 narrow nerves while the glumes’ surface is glabrous. The keels have a row of curved spines on the lower two thirds. The lower glumes have a flat back and measure 3.5mm to 4mm in length. The upper glumes are elliptical to oblong and is membranous or chartaceous with a single winged keel and a 3 nerves. The upper glumes measure 3.5mm to 4mm in length. The upper glumes surface is glabrous while the keels are without spines.
The translucent lower sterile lemmas have 2 faint nerves with infolded margins while the upper fertile lemmas are nerveless. The lemmas measure 3mm to 4mm in length.
There are 3 white filiform filaments. The anthers are oblong and deep purple. The flowers appear from late November to February.
The fruits of Eremochloa bimaculata are obovoid to linear compressed caryopses. The caryopses measure 0.2mm to 0.3mm in length. The green seeds turn pale straw colour when ripe.
Wildlife:
Eremochloa bimaculata‘s wildlife is unknown to the author.
Cultivation:
Eremochloa bimaculata is considered to be a good fodder crop but is slow to recover compared to other grasses. The leaves and stems are eaten along with other pasture crops when growing in the pasture to the extent it will soon be eliminated from the pastures. Cattle and sheep will seek it out, good pasture management is too competitive and degraded land management causes the plant decline. It has a rapid slow growth rate and will take 20 months to recover once eaten down to ground level. It recovers well from moderate grazing and is best managed by allowing a free period between grazing.
Eremochloa bimaculata is classified as a weed by gardeners and a course lawn grass. It has some potential as a lawn grass where foot wear is moderate and is better suited to drier warmer areas. It remains greener longer compared to other lawn grasses being moderately drought tolerant.
It gives good quantities of good quality trash for mulch.
In cultivation it can be grown on most types of soil even heavy better quality clay and podzolics sandy loams. It requires full sun for best results but copes very well in light dappled shade. With a little added moisture, mulch or native fertilizer added at the time when it is planted out will maximum colour and vigour. The plants should be cut back to about 50mm to 60mm in height and allowed to flower at least once a year to maximize health and vigour.
Propagation:
Seeds: Eremochloa bimaculata‘s seeds can be sown directly into a seed raising mix. Cover the seeds with 2mm of the mix. Place the trays in a warm position under 20mm or 30mm shade. When the seedlings reach 20mm to 40mm tall, prick them out and plant them into 50mm native tubes using a seed raising mix. Place the 50mm native tubes into a tray of water and return them to the bush house.
Once the seedlings reach 150mm to 200mm in height plant them out into their permanent position. Mass plantings can be achieved by planting them at a minimum of 0.4 meters to 0.8 meter centers.
Fertilize using seaweed, fish emulsion or organic chicken pellets soaked in water on an alternate basis. Fertilize every two months until the plants are established then annually in early September to October to maintain health, vitality and better flowering.
Further Comments from Readers:
Hi reader, it seems you use The Bible of Botany a lot. That’s great as we have great pleasure in bringing it to you! It’s a little awkward for us to ask, but our first aim is to purchase land approximately 1,600 hectares to link several parcels of N.P. into one at The Pinnacles NSW Australia, but we need your help. We’re not salespeople. We’re amateur botanists who have dedicated over 30 years to saving the environment in a practical way. We depend on donations to reach our goal. If you donate just $5, the price of your coffee this Sunday, We can help to keep the planet alive in a real way and continue to bring you regular updates and features on Australian plants all in one Botanical Bible. Any support is greatly appreciated. Thank you.
In the spirit of reconciliation we acknowledge the Bundjalung, Gumbaynggirr and Yaegl and all aboriginal nations throughout Australia and their connections to land, sea and community. We pay our respect to their Elders past, present and future for the pleasures we have gained.
Eremophila bignoniiflora
Classification
Unranked: Eudicots
Unranked: Asterids
Order: Lamiales
Family: Scrophuliaceae
Genus: From Eromos/Eremaeios, which is Ancient Greek for a desert, arid or wasteland and from Philos, which is Ancient Greek for loving or to be loved. It refers to the shrubs, which have a love of dry, open desert plains.
Species: Is named in honour of Abbe Jean Paul Bignon; 1662-1743, who was a French New Latin Librarian for King Louis the XIV and Floris which is Latin for a flower or Flos which was the Roman goddess for spring and flowers.
Common Name: Emu Bush.
Distribution:
Eremophila bignoniiflora is a wide spread specie from north western, Western Australia through the center down to the Darling-Murray River catchments. It is mainly found along seasonal water courses.
https://avh.ala.org.au/occurrences/search?taxa=Eremophila+bignoniiflora#tab_mapView
Habitat Aspect Climate:
Eremophila bignoniiflora prefers seasonal streams and creeks in arid areas and adjacent to the deserts in open woodlands or open mallee forests. The terrain is flat plains or gently sloping dunes or hills. The altitude ranges from 26 meters ASL to 320 meters ASL.
The temperatures range from minus 3 degrees in July to 45 degrees in January.
The rainfall ranges from lows of 150mm to 800mm average per annum.
Soil Requirements:
Eremophila bignoniiflora prefers to grow in a wide variety of soils from coarse river sands, sandy loams, light clays, medium clays, lateritic clays or on light silts to heavy silts. The soils pH ranges from 5pH to 7pH. It does not tolerate waterlogged soils. Non saline soils to moderately saline soils are tolerated.
Height & Spread:
Wild Plants: 2m to 3m by 3m to 8m.
Characteristics:
Eremophila bignoniiflora grows as a small tree with semi weeping branches and branchlets. The trunk is red-brown and strongly resinous. Older stems are thin, pale red-brown and scabrous. Branchlets are pale red-brown or glaucous-grey and glabrous. The branches and branchlets hang pendulously.
Eremophila bignoniiflora’s leaves are alternate and decussate. The linear to linear-lanceolate leaves measure 70mm to 120mm in length by 5mm to 12mm in width. The oblique bases are attenuate and sessile while the apexes are long tapering to narrow acuminate. The concolourous laminas are mid grass green to olive green and glabrous while the leaf margins are entire or rarely very finely toothed. The mid vein is prominent on the lower lamina and is difficult to see on the upper lamina. The laminas are flat or curve slightly upwards from the mid vein. The laminas are thick coriaceous.
The inflorescences of Eremophila bignoniiflora are born singularly from the leaf axis. The white, cream to pale pink, rarely deep pink or red flowers are spotted in ochre or carmine. The pedicels measure 5mm to 25mm in length. The sepals are mid olive green, glabrous and measure 5mm to 11mm in length by 3mm to 4.5mm in width at the base. The 4 imbricate ovate sepal lobes have a broad acuminate apex.
The corolla measures 20mm to 30mm in length and is glabrous externally and with a few short white hirsute hairs internally. The 2 side lobes are ovoid with obtuse apexes, while the lower lobes are oblong with the apex being deeply emarginated. Both sets of lobes are reflexed.
The 4 white stamens are slightly exerted or slightly inserted with the mouth of the corolla. The oblong anthers are fawn.
The style is exerted and measures 21mm to 32mm in length. The corolla is swollen around the ovary which becomes constricted before expanding again towards the apex. Flowers appear from September to January with some flowers appearing all year.
The fruits of Eremophila bignoniiflora are glabrous ovoid berries which split from the base towards the apex. They measure 15mm to 20mm in length by 10mm to 15mm in width.
Wildlife:
Eremophila bignoniiflora‘s fleshy fruits are eaten by Blue tongue Lizards, native rats and mice. All honeyeaters both small and large are attracted to the flowers.
Cultivation:
Eremophila bignoniiflora is a beautiful medium broad growing shrub that deserves a place in most native gardens where the rainfall is below a 1000mm average annually and the soils are very sandy to medium clays or gravelly and rocky. It is frost tolerant and drought resistant. In cultivation it will grow from 2 meters to 3 meters by 3 meters to 6 meters in diameter.
Eremophila bignoniiflora is one plant that is worthwhile persisting with in Mediterranean and temperate climates. As a bird attracting plant in small gardens it is as good as small Grevillea species but have not gained wide acceptance because of its climatic intolerances. One good way to overcome the watering problem closer to the coast where higher rainfall is a problem but the air is still dry for most of the year; is to plant it beneath tall open canopy eucalyptus trees so that it is facing north. This will allow more sunlight through and the trees will soak up a lot of the moisture imitating drier conditions. Remember though that sunlight and heat are just as important as low rainfall. One method to increase the temperature of the soils and surrounding air is to lay a layer of mulch using black stones. A second method is to use reflected heat from buildings to increase the amount of light and raise day time temperatures. This means planting them on north facing walls.
It often reaches its full potential in just 7 years and flowers from the fourth year.
Propagation:
Seeds: Eremophila bignoniiflora‘s seeds require treatment before sowing as they contain inhibitors to prevent premature germination. Place seeds in a calico bag with some sand and put them through the weekend washes. The washing helps to remove some of the inhibitors acting like several desert storms while the sand will lightly scarify the seeds again imitating the blown sands of a desert.
Sow treated seeds directly into a seed raising mix and cover with 5mm of the mix. When the seedlings are 25mm to 50mm tall, prick them out and plant them into 50mm native tubes using a seed raising mix.
Once the seedlings reach 150mm to 200mm in height plant them out into their permanent position. Mass plantings can be achieved with spacing of 8 meter to 9 meters.
Cuttings: Use 70mm to 100mm long half ripened material when growing from cuttings from the present season‘s growth. Take them in mid-autumn or early spring.
1 Prepare the cutting mix by adding one third sharp clean river sand, one third peat and one third perlite. These ingredients are sterilize,
2 Select good material from non diseased plants,
3 Select semi green stems for cuttings. Look for a stem with two or three nodes,
4 Place the cutting on a flat, hard surface, and make a clean down one side of the cutting for 10mm to 15mm with a sharp sterile knife or razor blade. – This scarification of the node will increase the chances of roots emerging from this spot. Now remove all but one or two the leaves, leaving the apex leaves in tact. If the leaves are very large in proportion to the stem, cut off the apical halves.
5 Fill a saucer with water, and place a little weak to medium rooting hormone into another container like a milk bottle top. Dip the node end of the cutting into the water and then into the rooting hormone. Tap off any excess hormone,
6 Use a small dipple stick or old pencil to poke a hole into the soilless potting mix. Ensure the hole is slightly larger than the stem diameter and be careful not to wipe the rooting hormone off the cuttings base, place the cuttings in a pattern ensuring the cuttings are not touching each other,
7 I like to place the pots in Plastic bags to help maintain temperature and moisture. Place in a semi shaded place like under 50mm shade cloth.
8 When the cuttings have struck, open the bag to allow air circulation for a few days to a week,
9 Once hardened off remove the cuttings from the bag and allow to further hardening for a few more days,
10 Transplant into a good potting mix to grow on.
Fertilize using seaweed, fish emulsion or organic chicken pellets soaked in water on an alternate basis. Fertilize every two months until the plants are established then annually in early September to October to maintain health, vitality and better flowering.
Further Comments from Readers:
Hi reader, it seems you use The Bible of Botany a lot. That’s great as we have great pleasure in bringing it to you! It’s a little awkward for us to ask, but our first aim is to purchase land approximately 1,600 hectares to link several parcels of N.P. into one at The Pinnacles NSW Australia, but we need your help. We’re not salespeople. We’re amateur botanists who have dedicated over 30 years to saving the environment in a practical way. We depend on donations to reach our goal. If you donate just $5, the price of your coffee this Sunday, We can help to keep the planet alive in a real way and continue to bring you regular updates and features on Australian plants all in one Botanical Bible. Any support is greatly appreciated. Thank you.
In the spirit of reconciliation we acknowledge the Bundjalung, Gumbaynggirr and Yaegl and all aboriginal nations throughout Australia and their connections to land, sea and community. We pay our respect to their Elders past, present and future for the pleasures we have gained.
Eremophila brevifolia
Classification
Unranked: Eudicots
Unranked: Asterids
Order: Lamiales
Family: Scrophuliaceae
Genus: From Eromos/Eremaeios, which is Ancient Greek for a desert, arid or wasteland and from Philos, which is Ancient Greek for loving or to be loved. It refers to the shrubs, which have a love of dry, open desert plains.
Species: From Brevis, which is Latin for short and Folium, which is Latin for foliage. It refers to leaves which are short and often succulent.
Common Name:
Distribution:
Eremophila brevifolia is restricted to 2 disjunct populations south from Morawa and Eneabbain to Geraldton and the Swan River Plains to south of Kellerberrin and south of Moora in far south western, Western Australia. Eremophila brevifolia is very rare with only a few plants at each location.
https://avh.ala.org.au/occurrences/search?taxa=Eremophila+brevifolia#tab_mapView
Habitat Aspect Climate:
Eremophila brevifolia prefers full sun to light dappled shade. It grows as a small shrub on gently sloping dunes away from the coast or rolling hills. The altitude ranges from 15 meters ASL to 120 meters ASL.
The temperatures range from 0 degrees in July to 38 degrees in January.
The rainfall ranges from lows of 400mm to 800mm average per annum.
Soil Requirements:
Eremophila brevifolia prefers to grow sandy loams to gravelly sandy loams and fatty sands. The soils pH ranges from 5pH to 6pH. It does not tolerate waterlogged soils. Non saline soils to moderately saline soils are tolerated.
Height & Spread:
Wild Plants: Usually 1m to 2m but has been recorded at 3.6m by 1m to 1.4m.
Characteristics:
Eremophila brevifolia grows as a small open shrub with erect branches and branchlets. The trunk is red-brown and strongly resinous. Older stems are thin and pale grey. Branchlets are grass-green and glabrous.
The alternate leaves of Eremophila brevifolia are crowded towards the end of the branches. The ovate to orbicular leaves measure 4mm to 5.5mm in length by 4mm to 5.5mm in width. The appressed petioles measure 0.6m to 1mm in length. The bases are tapering to cuneate while the apexes are broad acute to obtuse or truncate. The thick semi succulent, concolourous laminas are mid grass-green to deep grass-green and glabrous. The laminas are flat or recurve slightly from the mid vein to the margins. The leaf margins have 2 to 3 pairs of teeth on the apical half. The mid vein is slightly prominent on the lower lamina and is not visible on the upper lamina.
The inflorescences of Eremophila brevifolia are born singularly from the leaf axis. The pedicels measure 10mm to 16mm in length. The cupular calyxes are mid grass-green, glabrous and measure 1mm to 2mm in length. The linear to narrow lanceolate mid grass-green calyx lobes are glabrous and measure 6.5mm to 9mm in length by 1mm to 1.5mm in width near the base.
The white, lilac, pastel pink or pastel blue corollas have a deeper coloured throat, are glabrous externally and sparsely covered with a few short white puberulent hairs internally. The corollas measure 20 to 28mm in length. The 2 side lobes are ovoid with obtuse apexes, while the lower lobe is oblong with a shallowly emarginated apex and the upper lobes is more deeply emarginated. The lower and lateral lobes are erect while the upper lobe is reflexed.
The 4 white stamens are slightly inserted with the mouth of the corolla. The oblong anthers are white.
The style is exerted and measures 22mm to 30mm in length. The corolla is swollen around the ovary which becomes constricted before expanding again towards the apex. Flowers appear from July to September.
The fruits of Eremophila brevifolia are glabrous ovoid berries which split from the base towards the apex. They measure 3.5mm to 5mm in length by 3mm to 4.5mm in diameter. The green berries turn grey-brown when ripe. The style is persistent on the ripe berries.
Wildlife:
Eremophila brevifolia‘s fleshy fruits are eaten by Blue tongue Lizards, native rats and mice. All honeyeaters both small and large are attracted to the flowers.
Cultivation:
Eremophila brevifolia is a beautiful small shrub that deserves a place in most native or exotic garden where the rainfall ranges from 600mm to 1000mm average annually and the soils are very sandy to medium clays or gravelly and rocky. It is frost tolerant and drought resistant.
Eremophila brevifolia is one plant that is worthwhile persisting with in Mediterranean and temperate climates. As a bird attracting plant in small gardens it is as good as any Grevillea species but has not gained wide acceptance because of their climatic intolerances of humid tropical climates. One good way to overcome the watering problem closer to the coast where higher rainfall is a problem but the air is still dry for most of the year; is to plant them beneath tall open canopy Eucalyptus trees so that it is facing north. This will allow more sunlight through and the trees will soak up a lot of the moisture imitating desert conditions of dryness. Sunlight and heat are just as important as low rainfall. One method to increase the temperature of the soils and surrounding air is to lay a layer of mulch using black stones. A second method is to use reflected heat from buildings to increase the amount of light and raise day time temperatures. This means planting them on north facing walls.
Cultivated plants will grow from 1.5 meters to 2 meters in height by 1.5 meters to 2 meters in diameter when grown in the open.
Propagation:
Seeds: Eremophila brevifolia‘s seeds require treatment before sowing as they contain inhibitors to prevent premature germination. Place seeds in a calico bag with some sand and put them through the weekend washes. The washing helps to remove some of the inhibitors acting like several desert storms while the sand will lightly scarify the seeds again imitating the blown sands of a desert.
Sow treated seeds directly into a seed raising mix and cover with 5mm of the mix. When the seedlings are 25mm to 40mm tall, prick them out and plant them into 50mm native tubes using a good seed raising mix. Prick the tips out to help promote a bushier shrub.
Once the seedlings reach 150mm to 200mm in height give them a light pruning and plant them out into their permanent position. Mass plantings can be achieved with spacing of 2 meter to 3 meters.
Cuttings: Use 70mm to 100mm long half ripened material when growing from cuttings from the present season’s growth. Take them in mid-autumn or early spring.
1 Prepare the cutting mix by adding one third sharp clean river sand, one third peat and one third perlite. These ingredients are sterilize,
2 Select good material from non diseased plants,
3 Select semi green stems for cuttings. Look for a stem with two or three nodes,
4 Place the cutting on a flat, hard surface, and make a clean down one side of the cutting for 10mm to 15mm with a sharp sterile knife or razor blade. – This scarification of the node will increase the chances of roots emerging from this spot. Now remove all but one or two the leaves, leaving the apex leaves in tact. If the leaves are very large in proportion to the stem, cut off the apical halves.
5 Fill a saucer with water, and place a little mild to medium rooting hormone into another container like a milk bottle top. Dip the node end of the cutting into the water and then into the rooting hormone. Tap off any excess hormone,
6 Use a small dipple stick or old pencil to poke a hole into the soilless potting mix. Ensure the hole is slightly larger than the stem diameter and be careful not to wipe the rooting hormone off the cuttings base, place the cuttings in a pattern ensuring the cuttings are not touching each other,
7 I like to place the pots in Plastic bags to help maintain temperature and moisture. Place in a semi shaded place like under 50mm shade cloth.
8 When the cuttings have struck, open the bag to allow air circulation for a few days to a week,
9 Once hardened off remove the cuttings from the bag and allow to further hardening for a few more days,
10 Transplant into a good potting mix to grow on.
Fertilize using seaweed, fish emulsion or organic chicken pellets soaked in water on an alternate basis. Fertilize every two months until the plants are established then annually in early September to October to maintain health, vitality and better flowering.
Further Comments from Readers:
Hi reader, it seems you use The Bible of Botany a lot. That’s great as we have great pleasure in bringing it to you! It’s a little awkward for us to ask, but our first aim is to purchase land approximately 1,600 hectares to link several parcels of N.P. into one at The Pinnacles NSW Australia, but we need your help. We’re not salespeople. We’re amateur botanists who have dedicated over 30 years to saving the environment in a practical way. We depend on donations to reach our goal. If you donate just $5, the price of your coffee this Sunday, We can help to keep the planet alive in a real way and continue to bring you regular updates and features on Australian plants all in one Botanical Bible. Any support is greatly appreciated. Thank you.
In the spirit of reconciliation we acknowledge the Bundjalung, Gumbaynggirr and Yaegl and all aboriginal nations throughout Australia and their connections to land, sea and community. We pay our respect to their Elders past, present and future for the pleasures we have gained.
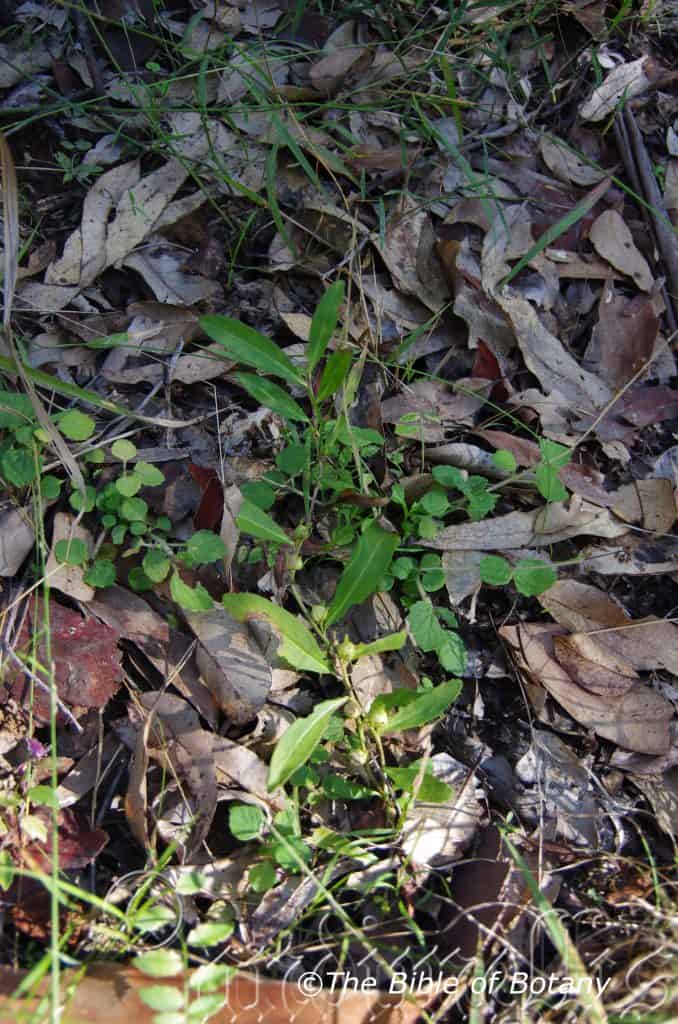
Glenugue Forest Reserve NSW
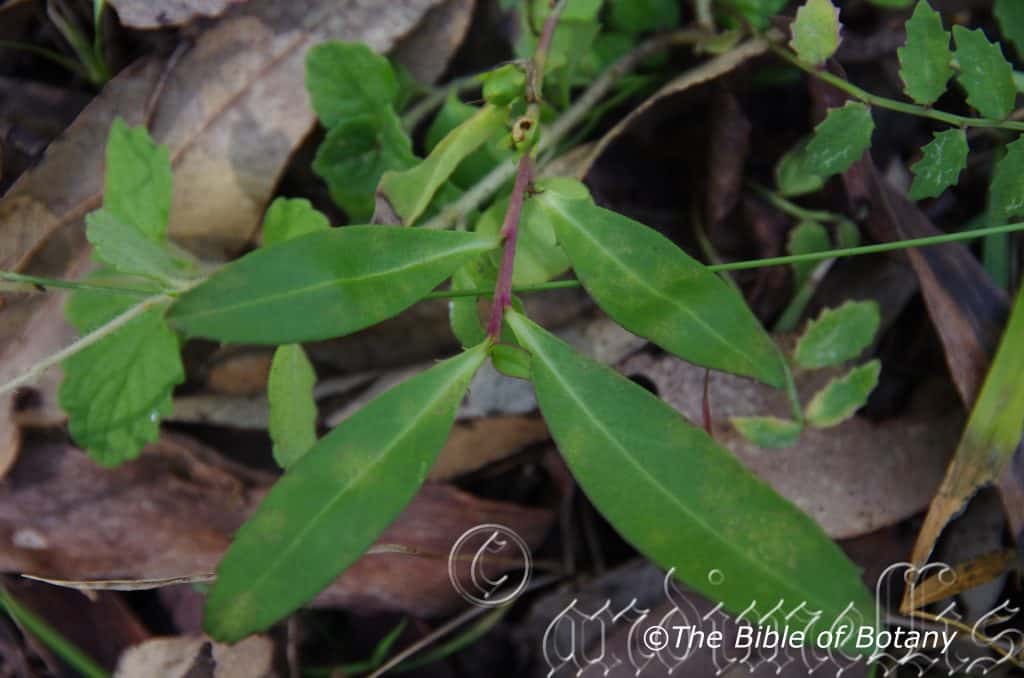
Glenugue Forest Reserve NSW
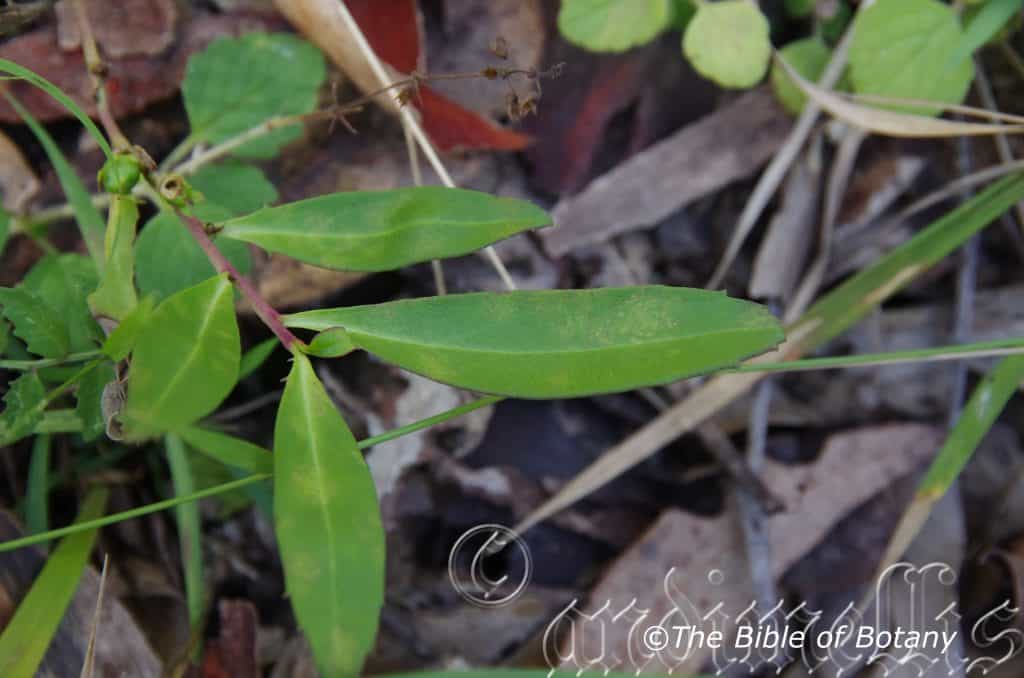
Glenugue Forest Reserve NSW

Glenugue Forest Reserve NSW
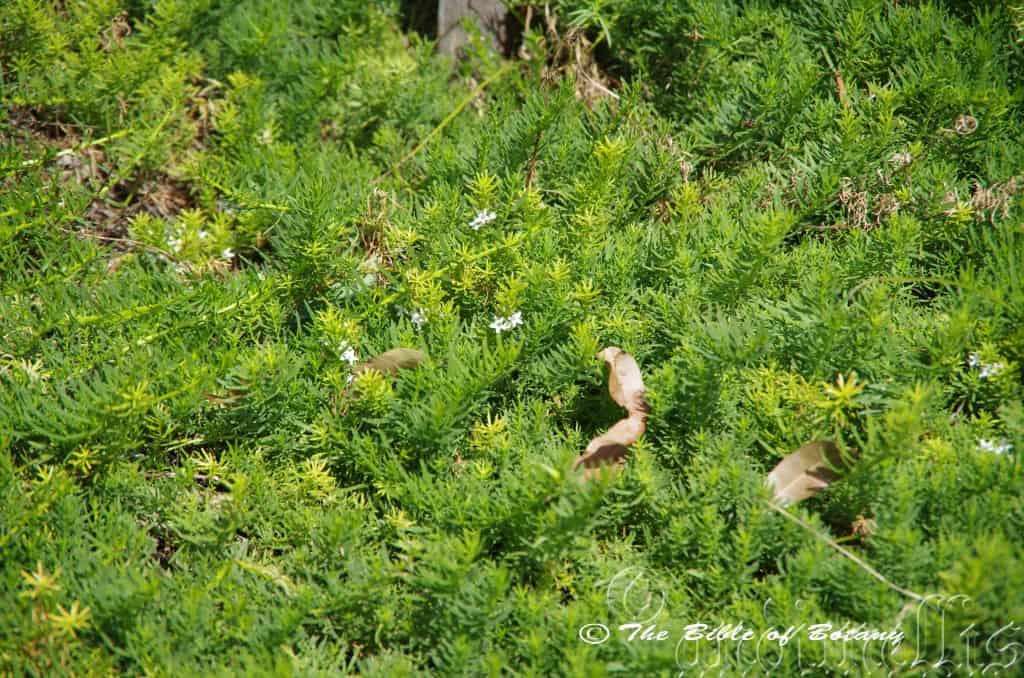
Rosser Gardens Benowa Qld.

Glenugue Forest Reserve NSW
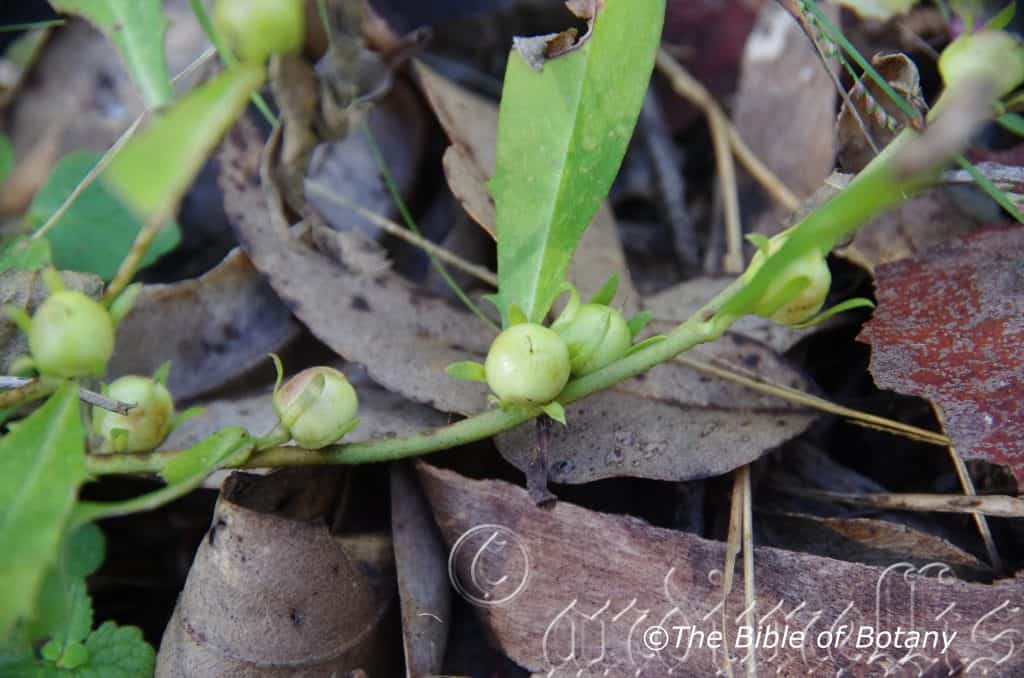
Glenugue Forest Reserve NSW
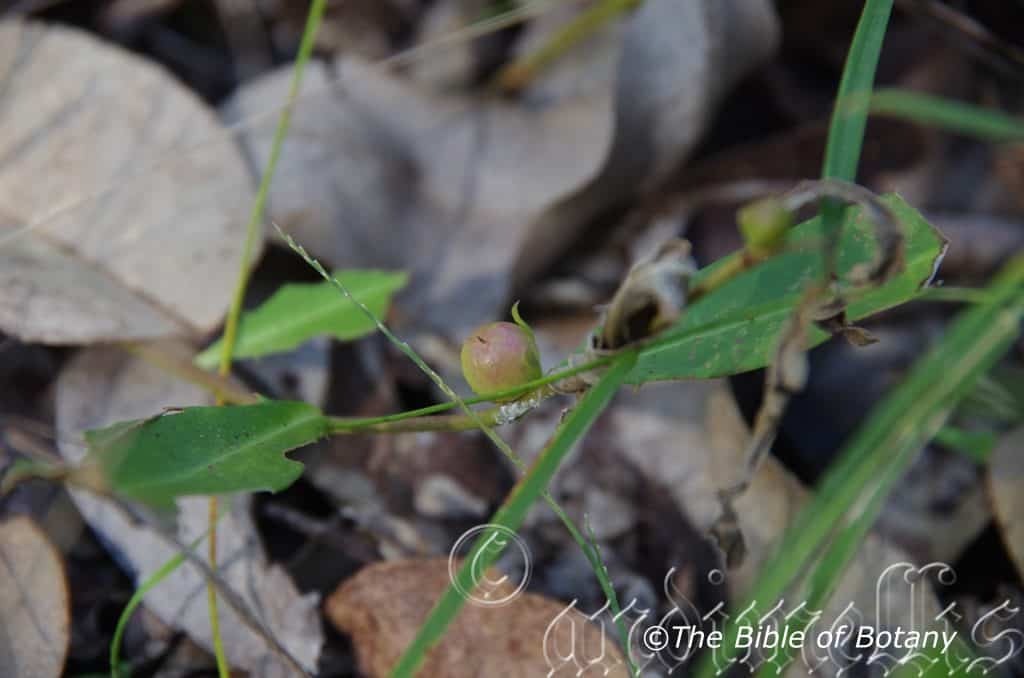
Glenugue Forest Reserve NSW
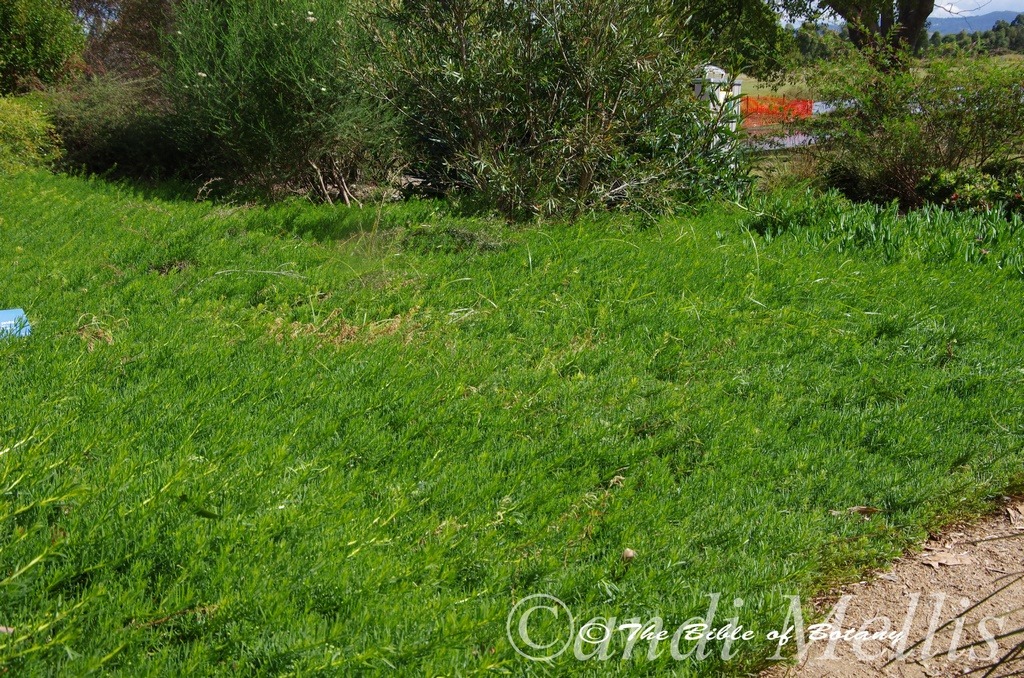
Rosser Gardens Benowa Qld.
Eremophila debilis
Classification
Unranked: Eudicots
Unranked: Asterids
Order: Lamiales
Family: Scrophuliaceae
Genus: From Eromos/Eremaeios, which is Ancient Greek for a desert, arid or wasteland and from Philos, which is Ancient Greek for loving or to be loved. It refers to the shrubs, which have a love of dry, open desert plains.
Species: From Dedile, which is Latin for weak, feeble or debilitated. It refers to the straggly weak nature of the growth habit.
Common Name: Amulla or Winter Apple.
Distribution:
Eremophila debilis is a wide spread specie which is found on the Great Dividing Range to the coast. It is especially common on the western slopes of the Great Dividing Range. It is found south from Cairns in far north Queensland to Boosey Creek in northern Victoria.
There are 2 recorded sightings in South Australia at Farrel Flats on the Mount Lofty ranges and south of Adelaide at Upper Sturt.
https://avh.ala.org.au/occurrences/search?taxa=Eremophila+debilis#tab_mapView
Habitat Aspect Climate:
Eremophila debilis prefers full sunlight to light dappled shade. It grows in dry woodlands, dry open Eucalyptus forests and adjacent to dry coastal heaths and mountainous heaths. The altitude ranges from 20 meters ASL to 1100 meters ASL.
The temperatures range from minus 2 degrees in July to 45 degrees in January.
The rainfall ranges from lows of 350mm to 3000mm average per annum.
Soil Requirements:
Eremophila debilis prefers to grow in a wide variety of soils from river sands, sandy loams, light clays, medium clays laterites and on alluvial flats. The soils are derived from brown basalts, black basalt, granites, sandstones, metamorphic rocks or accumulated sands. The soils pH ranges from 4.5pH to 7pH. It does not tolerate of waterlogged soils. Non saline soils to very saline soils are tolerated.
Height & Spread:
Wild Plants: 0.2m to 0.3m by 1m to 2.2m.
Characteristics:
Eremophila debilis grows as a small shrub with semi weeping branches and branchlets. The branches are red-brown and strongly resinous. Older stems are thin, pale red-brown and scabrous. Branchlets are pale red-brown or glaucous-grey and glabrous. The branches and branchlets hang pendulously.
Eremophila debilis‘s leaves are alternate and decussate. The linear to linear lanceolate leaves measure 70mm to 120mm in length by 5mm to 12mm in width. The olive-green, glabrous petioles measure 6mm to 15mm in length. The bases are oblique, attenuate and sessile while the apexes are long tapering to narrow acuminate. The concolourous laminas are mid grass-green to olive-green and glabrous while the leaf margins are entire or rarely very finely toothed. The mid vein is prominent on the lower lamina and is difficult to see on the upper lamina. The laminas are flat or curve slightly upwards from the mid vein. The laminas are thick coriaceous.
The inflorescences of Eremophila debilis are born singularly from the leaf axis. The white, cream to pale pink, rarely deep pink or red flowers are spotted in ochre or carmine. The pedicels measure 5mm to 25mm in length. The sepals are mid olive green, glabrous and measure 5mm to 11mm in length by 3mm to 4.5mm in width at the base. The 4 imbricate ovate sepal lobes have a broad acuminate apex.
The corolla measures 20mm to 30mm in length and is glabrous externally and with a few short white hirsute hairs internally. The 2 side lobes are ovoid with obtuse apexes, while the lower lobes are oblong with the apex being deeply emarginated. Both sets of lobes are reflexed.
The 4 white stamens are slightly exerted or slightly inserted with the mouth of the corolla. The oblong anthers are fawn.
The style is exerted and measures 21mm to 32mm in length. The corolla is swollen around the ovary which becomes constricted before expanding again towards the apex. Flowers appear from September to January with some flowers appearing all year.
The fruit of Eremophila debilis is a glabrous ovoid berry which split from the base towards the apex. They measure 15mm to 20mm in length by 10mm to 15mm in width.
Wildlife:
Eremophila debilis‘s fleshy fruits are eaten by Blue tongue Lizards, native rats and mice. All honeyeaters both small and large are attracted to the flowers.
Cultivation:
Eremophila debilis is a beautiful ground cover that deserves a place in most native or exotic garden where the rainfall is below a 1000mm average annually and the soils are very sandy to medium clays or gravelly and rocky. It is frost tolerant and drought resistant.
Eremophila debilis is one plant that is worthwhile persisting with in Mediterranean and temperate climates. As a bird attracting plant in small gardens it is as good as any Grevillea species but has not gained wide acceptance because of its climatic intolerances. One good way to overcome the watering problem closer to the coast where higher rainfall is a problem but the air is still dry for most of the year; is to plant them beneath tall open canopy eucalyptus trees so that it is facing north. This will allow more sunlight through and the trees will soak up a lot of the moisture imitating desert conditions of dryness. Sunlight and heat are just as important as low rainfall. One method to increase the temperature of the soils and surrounding air is to lay a layer of mulch using black stones.
A second method is to use reflected heat from buildings to increase the amount of light and raise day time temperatures. This means planting them on north facing walls.
It often reaches its full potential in just 7 years and flower from the fourth year.
Propagation:
Seeds: Eremophila debilis‘s seeds require treatment before sowing as they contain inhibitors to prevent premature germination. Place seeds in a calico bag with some sand and put them through the weekend wash. The washing helps to remove some of the inhibitors acting like several desert storms while the sand will lightly scarify the seeds again imitating the blown sands within a desert.
Sow treated seeds directly into a seed raising mix and cover with 5mm of the mix. When the seedlings are 25mm to 50mm tall, prick them out and plant them into 50mm native tubes using a seed raising mix.
Fertilize using Seaweed, fish emulsion or organic chicken pellets soaked in water on an alternate basis. Fertilize every two months.
Once the seedlings reach 150mm to 200mm in height plant them out into their permanent position. Mass plantings can be achieved with spacing of 8 meter to 9 meters.
Cuttings: Use 70mm to 100mm long half ripened material when growing from cuttings from the present season’s growth. Take them in mid-autumn or early spring.
1 Prepare the cutting mix by adding one third sharp clean river sand, one third peat and one third perlite. These ingredients are sterilize,
2 Select good material from non diseased plants,
3 Select semi green stems for cuttings. Look for a stem with two or three nodes,
4 Place the cutting on a flat, hard surface, and make a clean cut down one side of the cutting at the base for 10mm with a sharp sterile knife or razor blade. – This scarification of the node will increase the chances of roots emerging from this spot. Now remove all but one or two the leaves, leaving the apex leaves in tact. If the leaves are very large in proportion to the stem, cut off the apical halves.
5 Fill a saucer with water, and place a little weak to medium rooting hormone into another container like a milk bottle top. Dip the node end of the cutting into the water and then into the rooting hormone. Tap off any excess hormone,
6 Use a small dipple stick or old pencil to poke a hole into the soilless potting mix. Ensure the hole is slightly larger than the stem diameter and be careful not to wipe the rooting hormone off the cuttings base, place the cuttings in a pattern ensuring the cuttings are not touching each other,
7 I like to place the pots in Plastic bags to help maintain temperature and moisture. Place in a semi shaded place like under 50mm shade cloth.
8 When the cuttings have struck, open the bag to allow air circulation for a few days to a week,
9 Once hardened off remove the cuttings from the bag and allow to further hardening for a few more days,
10 Transplant into a good potting mix to grow on.
Fertilize using seaweed, fish emulsion or organic chicken pellets soaked in water on an alternate basis. Fertilize every two months until the plants are established then annually in early September to October to maintain health, vitality and better flowering.
Further Comments from Readers:
Hi reader, it seems you use The Bible of Botany a lot. That’s great as we have great pleasure in bringing it to you! It’s a little awkward for us to ask, but our first aim is to purchase land approximately 1,600 hectares to link several parcels of N.P. into one at The Pinnacles NSW Australia, but we need your help. We’re not salespeople. We’re amateur botanists who have dedicated over 30 years to saving the environment in a practical way. We depend on donations to reach our goal. If you donate just $5, the price of your coffee this Sunday, We can help to keep the planet alive in a real way and continue to bring you regular updates and features on Australian plants all in one Botanical Bible. Any support is greatly appreciated. Thank you.
In the spirit of reconciliation we acknowledge the Bundjalung, Gumbaynggirr and Yaegl and all aboriginal nations throughout Australia and their connections to land, sea and community. We pay our respect to their Elders past, present and future for the pleasures we have gained.
Eremophila duttonii
Classification
Unranked: Eudicots
Unranked: Asterids
Order: Lamiales
Family: Scrophuliaceae
Subfamily:
Genus: From Eromos/Eremaeios, which is Ancient Greek for a desert, arid or wasteland and from Philos, which is Ancient Greek for loving or to be loved. It refers to the shrubs, which have a love of dry, open desert plains.
Species: Is probably named in honour of J. Dutton; 1863- 19.., who was a research officer at the Bathurst Research Station.
Common Name: Budda or Harlequin Fuchsia.
Distribution:
Eremophila duttonii is a widespread species in central Australia south from Tennet Creek to the Great Australian Bite and from Yalgool in the west to the Bogan River in the east. There are 2 disjunct populations further north on Blythe Creek in northwestern Western Australia and on the South Alligator River south of Darwin in far north Northern Territory.
https://avh.ala.org.au/occurrences/search?taxa=Eremophila+duttonii#tab_mapView
Habitat Aspect Climate:
Eremophila duttonii prefers full sun to light dappled shade. It grows naturally along dry streams and creeks in arid areas adjacent to the deserts in the open or below other small tree. The terrain is flat plains or gently sloping dunes or hills. The altitude ranges from 2 meters BSL to 700 meters ASL.
The temperatures range from minus 6 degrees in July to 43 degrees in January.
The rainfall ranges from lows of 150mm to 500mm average per annum.
in and place it in a moist sterile seed raising mix. When the cuttings have obviously struck and have developed good roots treat them as for seedlings.
Soil Requirements:
Eremophila duttonii prefers red soils that are sandy, sandy loams, light clays or light gravelly clays. The soils are usually derived from decomposed sandstones, granites or alluvial deposits. The soils pH ranges from 5pH to 7pH. It does not tolerate waterlogged soils. Non saline soils to very saline soils are tolerated.
Height & Spread:
Wild Plants: 2m to 4m by 2m to 4m
Characteristics:
Eremophila duttonii grows as a small shrub with upright branches and branchlets. The branches are pale grey and glabrous. Older stems are thin, pale grey and glabrous. Juvenile branchlets are pale grey-green or and covered in short white or pale grey pilose hairs.
Eremophila duttonii‘s opposite, decussate leaves are lanceolate to linear-lanceolate or narrow elliptical and measure 15mm to 50mm in length by 2.5mm to 8mm in width. The bases are attenuate and slightly asymmetrical while the apexes are acute to narrow acute. The concolourous laminas are mid olive green, glabrous on the upper lamina while the lower lamina is sparsely covered in short white to pale grey pilose hairs. The leaf margins are entire or very finely toothed. The laminas are flat and semi glossy to glossy. The leaves are sessile.
The inflorescences of Eremophila duttonii are born singularly from the leaf axis. The flowers are red or orange-red near the base and surrounding the ovary turning yellow near the lobes or rarely all yellow. The pedicels measure 3mm to 30mm. The sepals measure 10mm to 25mm in length by 5mm to 10mm in width including the 8mm to 23mm lobes. The 4 imbricate sepal lobes are red- brown or green, cuspidate glandular-puberulent. The apex is attenuate to cuspidate.
The corolla measures 25mm to 35mm in length and is sparsely covered in short white puberulent hairs externally and glabrous internally. Side lobes are obtuse with an acuminate apex, while the lower lobe is broadly oblong with an emarginated apex. The upper lobe is broadly oblong and further divided with two acuminate apexes. Both sets of lobes are deflexed.
The 4 exserted pale creamy green stamens measure 30mm to 40mm in length. The anthers measure 4mm to 5mm in length.
The yellow to pale green style is exserted and measures 35mm to 50mm in length. The corolla is swollen around the ovary becomes constricted before expanding again towards the apex. Flowers appear from June to December.
The fruits of Eremophila duttonii are broad, glabrous, ovoid berries. The fruits are woody and dull grey when ripe. The capsules measure 7.5mm to 11mm in length by 5mm to 7.5mm in width.
Wildlife:
Eremophila duttonii‘s wildlife is unknown to the author.
Cultivation:
Eremophila duttonii is a beautiful medium shrub that deserves a place in most native or exotic garden where the rainfall is below a 800mm average annually and the soils are very sandy to very light clays, gravelly or rocky. It is frost tolerant and drought resistant. In cultivation it will grow 2 meters to 5 meters in height by 3 meters to 5 meters in diameter.
Eremophila duttonii is one plant that is worthwhile persisting with in Mediterranean and temperate climates. As a bird attracting plant in small gardens it is as good as any Grevillea specie but have not gained wide acceptance because of the climatic intolerances.
Plant it beneath tall open canopy trees like some Eucalyptus species and with it facing north. This will allow more sunlight through and the trees will soak up a lot of the moisture imitating desert conditions of dryness. Remember though that sunlight and heat are just as important as low rainfall.
One method to increase the temperature of the soils and surrounding air is to lay a layer of mulch using black stones. A second method is to use reflected heat from buildings to increase the amount of light and raise day time temperatures. This means planting them on north facing walls.
It needs to be pruned to ensure a bushy well shaped, smaller shrub. In its natural surroundings plants become sparsely leaved though additional watering in arid areas and pruning will see this Eremophila come to the fore. It often reaches its full potential in just 5 years and flower from the third year.
Garden beds would need to be open with plenty of space between plants to allow air flow as well as to give the branchlets a chance to spread and be appreciated for their unique beauty. Correct spacing will contrast the foliages better without one overpowering the other. For mass planting space the plants at least 2.5 meters to 3 meter centers if you are using it amongst rocks or around the small desert garden, Plant it sparingly to attain a barren scene, so not to make the area look cluttered or detract from the other features. 4 or 5 in an area of 100 square meters would be ample. 4 plants separately planted or plant 2 close together and separate the other 3 to give width and depth where you want it. The use of annuals between will add additional colour. In addition most annuals flower when Eremophila duttonii is resting during the late summer to late autumn.
Propagation:
Seeds: Eremophila duttonii’s seeds require treatment before sowing as they contain inhibitors to prevent premature germination. Place seeds in a calico bag with some sand and put them through the weekend washes. The washing helps to remove some of the inhibitors acting like several desert storms while the sand will lightly scarify the seeds again imitating the blown sands of a desert.
Sow treated seeds directly into a seed raising mix and cover with 5mm of the mix. Place the trays in a sunny warm position and keep moist not wet. Germination will be sporadic and can be unreliable.
When the seedlings are 25mm to 50mm tall, prick them out and plant them into 50mm native tubes using a seed raising mix.
Once the seedlings reach 150mm to 200mm in height plant them out into their permanent position. Mass plantings can be achieved with spacing of 8 meter to 9 meters.
Cuttings: Use 100mm long half ripened material when growing from cuttings from the present season’s growth. Take them in mid-autumn or early spring.
1 Prepare the cutting mix by adding one third sharp clean river sand, one third peat and one third perlite. These ingredients are sterilize,
2 Select good material from non diseased plants,
3 Select semi green stems for cuttings. Look for a stem with two or three nodes,
4 Place the cutting on a flat, hard surface, and make a clean cut down one side of the cutting at the base for 10mm with a sharp sterile knife or razor blade. – This scarification of the node will increase the chances of roots emerging from this spot. Now remove all but one or two the leaves, leaving the apex leaves in tact. If the leaves are very large in proportion to the stem, cut off the apical halves.
5 Fill a saucer with water, and place a little weak to medium rooting hormone into another container like a milk bottle top. Dip the node end of the cutting into the water and then into the rooting hormone. Tap off any excess hormone,
6 Use a small dipple stick or old pencil to poke a hole into the soilless potting mix. Ensure the hole is slightly larger than the stem diameter and be careful not to wipe the rooting hormone off the cuttings base, place the cuttings in a pattern ensuring the cuttings are not touching each other,
7 I like to place the pots in Plastic bags to help maintain temperature and moisture. Place in a semi shaded place like under 50mm shade cloth.
8 When the cuttings have struck, open the bag to allow air circulation for a few days to a week,
9 Once hardened off remove the cuttings from the bag and allow to further hardening for a few more days,
10 Transplant into a good potting mix to grow on.
Fertilize using seaweed, fish emulsion or organic chicken pellets soaked in water on an alternate basis. Fertilize every two months until the plants are established then annually in early September to October to maintain health, vitality and better flowering.
Further Comments from Readers:
Hi reader, it seems you use The Bible of Botany a lot. That’s great as we have great pleasure in bringing it to you! It’s a little awkward for us to ask, but our first aim is to purchase land approximately 1,600 hectares to link several parcels of N.P. into one at The Pinnacles NSW Australia, but we need your help. We’re not salespeople. We’re amateur botanists who have dedicated over 30 years to saving the environment in a practical way. We depend on donations to reach our goal. If you donate just $5, the price of your coffee this Sunday, We can help to keep the planet alive in a real way and continue to bring you regular updates and features on Australian plants all in one Botanical Bible. Any support is greatly appreciated. Thank you.
In the spirit of reconciliation we acknowledge the Bundjalung, Gumbaynggirr and Yaegl and all aboriginal nations throughout Australia and their connections to land, sea and community. We pay our respect to their Elders past, present and future for the pleasures we have gained.
Eremophila forrestii
Classification
Unranked: Eudicots
Unranked: Asterids
Order: Lamiales
Family: Scrophuliaceae
Genus: From Eromos/Eremaeios, which is Ancient Greek for a desert, arid or wasteland and from Philos, which is Ancient Greek for loving or to be loved. It refers to the shrubs, which have a love of dry, open desert like plains.
Species: Is named in honour of George Forrest; 1873-1932, who was a Scottish botanist who collected over 2000 new species in Tibet and China and has around 60 species named in his honour.
Subspecies: Eremophila forrestii subsp. capensis. From Cape, which is Latinized for coming from the Cape of Good Hope. It refers to the species, which were first discovered on Peninsula or capes.
Subspecies: Eremophila forrestii subsp. forrestii. Is named in honour of George Forrest; 1873-1932, who was a Scottish botanist who collected over 2000 new species in Tibet and China and has around 60 species named in his honour.
Subspecies: Eremophila forrestii subsp. hasteana. From Hasteana, which is unknown.
Subspecies: Eremophila forrestii subsp. inland. From In, which is Latin for in, into or ante and Land/Lond, which is Old English for the ground or soil. It refers to an area of land within a country.
Subspecies: Eremophila forrestii subsp. viridis. From Virens, which is Latin for green. It refers to any structure or organ, which is bright green.
Common Name: Emu Bush.
Distribution:
Eremophila forrestii subsp. capensis is restricted to a small area on the Exmouth Peninsula in coastal central Western Australia.
Eremophila forrestii subsp. forrestii is a widespread species in central coastal Western Australia to a little over the border of the Northern Territory and far north western South Australia.
Eremophila forrestii subsp. hastieana is widespread, scattered species south from the eastern side of Talandji to Kalgoorlie in central Western Australia.
Eremophila forrestii subsp. inland is restricted to two disjunct populations and maybe between the two populations at Newman and the Gibson Desert in Western Australia.
Eremophila forrestii subsp. viridis is found in several disjunct scattered populations in central coastal Western Australia to a little over the border of the Northern Territory and far north western South Australia.
https://avh.ala.org.au/occurrences/search?taxa=Eremophila+forrestii#tab_mapView
Habitat Aspect Climate:
Eremophila foresterii prefers full sun to light dappled shade. It grows naturally along dry streams and creeks in arid areas, adjacent to the deserts in the open or below other small trees. The terrain is flat plains or gently sloping dunes or hills. The altitude ranges from 1 meter ASL to 400 meters ASL.
The temperatures range from 2 degrees in July to 43 degrees in January.
The rainfall ranges from lows of 150mm to 500mm average per annum.
Soil Requirements:
Eremophila forrestii subsp. forrestii prefers red sandy loams on ridges and plains derived from decomposed sandstones.
Eremophila forrestii subsp. hasteana prefers soils that are light red clays, light red gravelly clays and medium red clays on flat plains derived from decomposed sandstones.
Eremophila forrestii subsp. viridis prefers red sandy loams on plains derived from decomposed sandstones.
The soils pH ranges from 6pH to 7pH. It does not tolerate waterlogged soils. Non saline soils to very saline soils saline soils are tolerated.
Height & Spread:
Wild Plants:
Eremophila forrestii subsp. forrestii 0.5m to 1m by 0.5m to 1m
Eremophila forrestii subsp. hasteana 1m to 2m by 1m to 2m
Eremophila forrestii subsp. viridis 1m to 2m by 1m to 2m
Characteristics:
Eremophila forrestii grows as a densely foliaged and branched medium size shrub with up right branches and branchlets. The trunk is pale grey to glaucous and glabrous. Older stems are thin, pale grey to glaucous or densely covered in white puberulent hairs. The juvenile branchlets are scabrous.
Eremophila forrestii sub sp. forrestii‘s juvenile branchlets are pale glaucous green to pale blue green or glaucous-grey and covered in short white puberulent hairs.
Eremophila forrestii subsp. hasteana‘s juvenile branchlets are grey-green to deep grey green or deep glaucous-green with grey puberulent hairs.
Eremophila forrestii sub sp. viridis‘s juvenile branchlets are pale green to glaucous-green and densely covered in short pubescent hairs.
Eremophila forrestii subsp. forrestii‘s adjacent leaves are thick and fleshy and crowded towards the end of the branchlets. The lanceolate to narrow elliptical leaves measure 30mm to 35mm in length by 5mm to 10mm in width. The petiole measures 0mm to 0.5mm in length.
The bases are tapering attenuate while the apexes are acute to broad acuminate. The concolourous laminas are scabrous pale glaucous green to pale blue green or glaucous-grey and covered in short white pubescent hairs. The leaf margins are entire and curve upwards from the mid vein. The mid vein is prominent below and not visible on the upper lamina.
Eremophila forrestii subsp. hasteana’s adjacent leaves are thick and fleshy and crowded towards the end of the branchlets. The ovate to broad elliptical leaves measure 10mm to 35mm in length by 7mm to 15mm in width. The petiole measures 0mm to 0.5mm in length. The bases are tapering attenuate to rounded while the apexes are obtuse. The concolourous laminas are grey-green to deep grey-green or deep glaucous-green and sparsely covered in white puberulent hairs.The leaf margins are entire and curve upwards from the mid vein. The mid vein is prominent below and not visible on the upper lamina.
Eremophila forrestii sub sp. viridis‘s adjacent leaves are thick and fleshy and crowded towards the end of the branchlets. The obovate to oblanceolate leaves measure 17mm to 30mm in length by 7mm to 11mm in width. The petiole measures 0mm to 1mm in length. The bases are cuneate, attenuate while the apexes are obtuse to broad acuminate with a mucronate tip. The concolourous pale green to glaucous-green and densely covered in short pubescent hairs. The leaf margins are entire and curve upwards from the mid vein. The mid vein is prominent below and not visible on the upper lamina.
The inflorescences of Eremophila forrestii are born singularly from the leaf axis. The throat is sparsely streaked or spotted crimson yellow or red. The pedicels measure 5mm to 8mm in length.
The 5 rarely 6 broad linear sepals of Eremophila forrestii sub sp. forrestii measure 15mm to 20mm in length by 2.5mm to 3mm wide.
The 5 rarely 6 elliptical to broad elliptical sepals of Eremophila forrestii subsp. hasteana measure 16mm to 20mm in length by 8mm to 10mm wide.
The 5 rarely 6 broad linear sepals of Eremophila forrestii subsp. viridis measure 5mm to 9mm in length by 3mm to 6mm wide.
The apex is acute to narrow acute, and are covered in white puberulent hairs. The corolla measures 18mm to 25mm in length and is densely covered in short white puberulent hairs externally and with a few short hairs internally and on both surfaces of the lobes. The 5 lobes are oblong with the lateral lobes having an obtuse to acuminate apex while the lower lobe and upper lobes have an acuminate apex. The lower lobe is wider than the other lobes. All of the lobes are reflexed.
The long exerted white to cream stamens measure 22mm to 29mm in length and support a 2.5mm to 3mm cream-beige to pale brown anther.
The white, exserted style measures 22mm to 29mm in length. The corolla is swollen around the ovary, becomes constricted before expanding again towards the apex.
Eremophila forrestii subsp. forrestii‘s flowers are pink to cream or creamy pink and appear from April to October.
Eremophila forrestii subsp. hasteana‘s flowers are pink to yellow and appear from August to September.
Eremophila forrestii subsp. viridis‘s flowers are pink to cream or creamy pink and appear during August.
The fruits of Eremophila forrestii are glabrous broad ovoidal berries. The berries split towards the apex when ripe. The green succulent fruits turn brown and woody on ripening ripe. They measure 4.5mm to 5mm in length by 5mm to 5.5mm in diameter.
Wildlife:
Eremophila forrestii‘s flowers are very attractive to small honeyeaters.
Cultivation:
Eremophila forrestii is a beautiful small shrub that deserves a place in every native or exotic garden where the rainfall is below a 1000mm average annually and the soils are very sandy to very light clays or gravelly and rocky. It is frost tolerant and drought resistant. In cultivation Eremophila forrestii subsp. hasteana grows from 1.5 meters to 2.5 meters tall by 1.5 meters to 2.5 meters in diameter. I believe Eremophila forrestii subsp. viridis would be very similar. Eremophila forrestii subsp. forrestii is much smaller attaining a height of around 0.7 meters and a diameter of 1.5 meters.
It needs to be pruned to ensure a bushy well shaped shrub develop however Eremophila forrestii subsp. hasteana is naturally very bushy. It often reaches its full potential in just 5 years and flower from the third year.
Propagation:
Seeds: Eremophila forrestii’s seeds require treatment before sowing as they contain inhibitors to prevent premature germination. Place seeds in a calico bag with some sand and put them through the weekend washes. The washing helps to remove some of the inhibitors acting like several desert storms while the sand will lightly scarify the seeds again imitating the blown sands of a desert.
Sow treated seeds directly into a seed raising mix and cover with 5mm of the mix. When the seedlings are 25 to 50 mm tall, prick them out and plant them into 50mm native tubes using a seed raising mix.
Once the seedlings reach 150 to 200mm in height plant them out into their permanent position. Mass plantings can be achieved by planting them at 1 meter to 3 meter centers depending on the sub species or variety grown.
Cuttings: Cuttings is the only way to guarantee purity of the strain and to continue varieties of in your chosen flowering colours. Use 50mm to 70mm long cuttings from the present season’s growth. When growing from cuttings try to get cuttings from good flowering strains.
1 Prepare the cutting mix by adding one third sharp clean river sand, one third peat and one third perlite. These ingredients are sterilize,
2 Select good material from non diseased plants,
3 Select semi green stems for cuttings. Look for a stem with two or three nodes,
4 Place the cutting on a flat, hard surface, and make a clean cut down one side of the cutting at the base for 10mm with a sharp sterile knife or razor blade. – This scarification of the node will increase the chances of roots emerging from this spot. Now remove all but one or two the leaves, leaving the apex leaves in tact. If the leaves are very large in proportion to the stem, cut off the apical halves.
5 Fill a saucer with water, and place a little weak to medium rooting hormone into another container like a milk bottle top. Dip the node end of the cutting into the water and then into the rooting hormone. Tap off any excess hormone,
6 Use a small dipple stick or old pencil to poke a hole into the soilless potting mix. Ensure the hole is slightly larger than the stem diameter and be careful not to wipe the rooting hormone off the cuttings base, place the cuttings in a pattern ensuring the cuttings are not touching each other,
7 I like to place the pots in Plastic bags to help maintain temperature and moisture. Place in a semi shaded place like under 50mm shade cloth.
8 When the cuttings have struck, open the bag to allow air circulation for a few days to a week,
9 Once hardened off remove the cuttings from the bag and allow to further hardening for a few more days,
10 Transplant into a good potting mix to grow on.
Fertilize using seaweed, fish emulsion or organic chicken pellets soaked in water on an alternate basis. Fertilize every two months until the plants are established then annually in early September to October to maintain health, vitality and better flowering.
Further Comments from Readers:
Hi reader, it seems you use The Bible of Botany a lot. That’s great as we have great pleasure in bringing it to you! It’s a little awkward for us to ask, but our first aim is to purchase land approximately 1,600 hectares to link several parcels of N.P. into one at The Pinnacles NSW Australia, but we need your help. We’re not salespeople. We’re amateur botanists who have dedicated over 30 years to saving the environment in a practical way. We depend on donations to reach our goal. If you donate just $5, the price of your coffee this Sunday, We can help to keep the planet alive in a real way and continue to bring you regular updates and features on Australian plants all in one Botanical Bible. Any support is greatly appreciated. Thank you.
In the spirit of reconciliation we acknowledge the Bundjalung, Gumbaynggirr and Yaegl and all aboriginal nations throughout Australia and their connections to land, sea and community. We pay our respect to their Elders past, present and future for the pleasures we have gained.
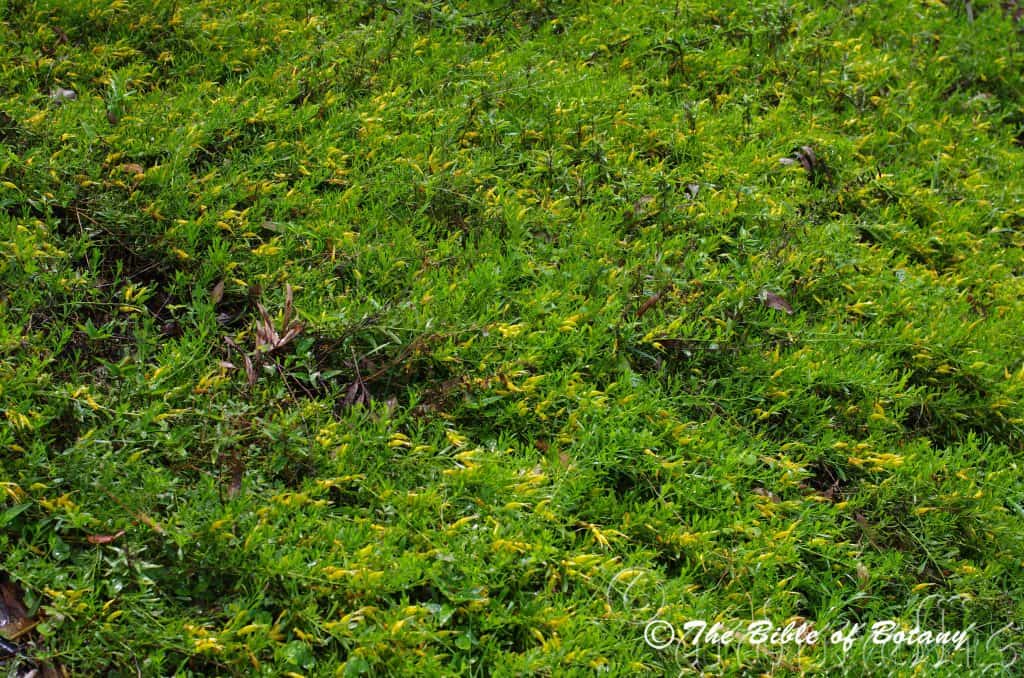
Mount Cootha Botanical Gardens Qld.
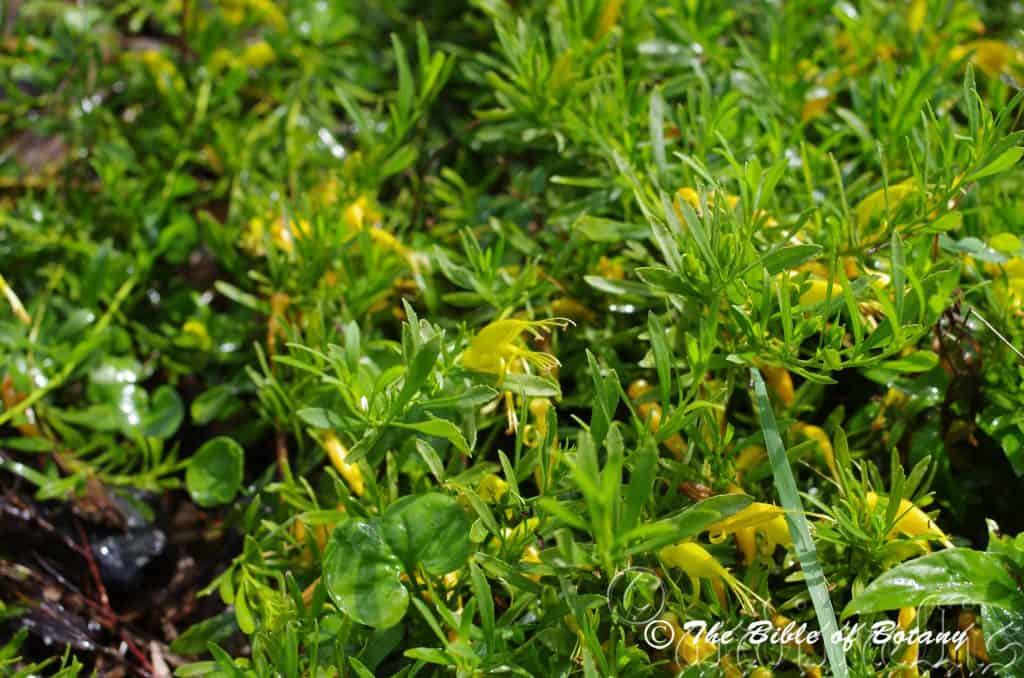
Mount Cootha Botanical Gardens Qld.
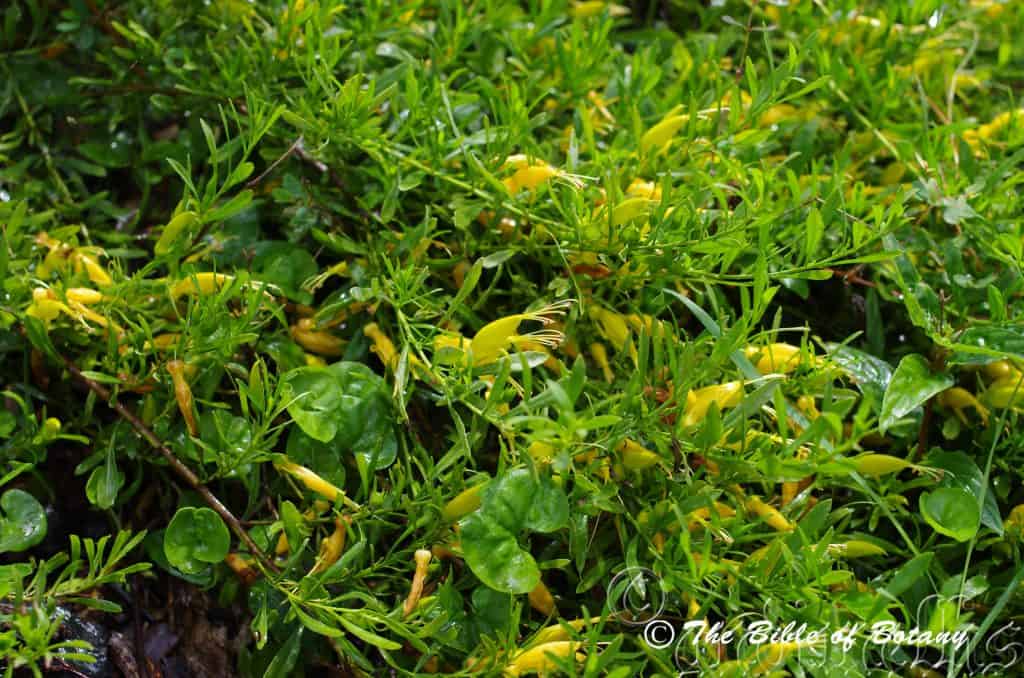
Mount Cootha Botanical Gardens Qld.
Eremophila glabra
Classification
Unranked: Eudicots
Unranked: Asterids
Order: Lamiales
Family: Scrophuliaceae
Genus: From Eromos/Eremaeios, which is Ancient Greek for a desert, arid or wasteland and from Philos, which is Ancient Greek for loving or to be loved. It refers to shrubs, which have a love of dry, open desert plains.
Species: From Glabra, which is Latin for glabrous or smooth. It refers to structures or organs, which have no hairs or scales.
Subspecies: Eremophila glabra subsp. Glabra. From Glabra, which is Latin for glabrous or smooth. It refers to structures or organs, which have no hairs or scales.
Subspecies: Eremophila glabra subsp. murrayana. Is named after Dr. James Patrick Murray; 1839-19.., who was surgeon and plant collector on Howitt’s Expedition to Coopers Creek in 1862 where he collected 96 species including the type species. In 1871. He was directly responsible for the murder of over 70 Pacific Island citizens and in 1887 was deregistered as a dentist. In 1904 he slipped on a ship bound for America still parading as a doctor.
Common Name: Emu Bush.
Distribution:
Eremophila glabra subsp. glabra is a widespread species. It is found in all the mainland states of Australia below the 20 degree latitude.
Eremophila glabra subsp. murrayana is found mainly around the conjunction of the Murray River and Darling River, the lakes system and its tributaries in the vicinity of Mildura.
https://avh.ala.org.au/occurrences/search?taxa=Eremophila+glabra#tab_mapView
Habitat Aspect Climate:
Eremophila glabra prefers full sun to light dappled shade. It grows naturally along dry streams and creeks in semi-arid areas and adjacent to the deserts in the open woodlands sparse mallees or below small open Eucalyptus forests. The terrain is mainly flat plains or gently sloping dunes or hills to rocky outcrops. The altitude ranges from 5 meters ASL to 650 meters ASL.
The temperatures range from minus 4 degrees in July to 43 degrees in January.
The rainfall ranges from lows of 150mm to 1200mm average per annum.
Soil Requirements:
Eremophila glabra subsp. glabra prefers red to red-brown sandy loams, light red to red-brown clays, light gravelly clays and calcareous sandy loams derived from decomposed calcareous sandstones.
Eremophila glabra subsp. murrayana prefers reddish gritty clays to medium red clays overlying limestone. It is found between sand dunes on the flats and on arid lakes systems and river tributaries riparian zones.
The soils pH ranges from 5pH to 8pH. It does not tolerate waterlogged soils. Non saline soils to very saline soils are tolerated.
Height & Spread:
Wild Plants:
Eremophila glabra subsp. glabra 2m to 4m by 2.5m to 3m
Eremophila glabra subsp. murrayana 0.2m to 0.5m by 0.5m to 1m
Characteristics:
Eremophila glabra subsp. glabra branches are pale grey, grey to brown and glabrous. The smaller branches and juvenile branchlets are pale green to deep green, pale blue to glaucous-blue or grey green to blue grey and are glabrous to being densely covered in pale grey to white short stellate-pulverulent to tomentose hairs.
Eremophila glabra subsp. murrayana older stems are thin red-brown and glabrous. Branchlets are green or blue grey similar to the foliage glabrous and smooth or sparsely to densely cover in glandular to puberulent hairs or long white villose hairs. Those plants that are glabrous or sparsely covered in hairs are resinous to papillate.
Eremophila glabra subsp. glabrais an extremely variable plant with at least 10 varieties which can lead to confusion in identity. The alternate, oblanceolate to elliptical leaves measure 20mm to 42mm in length by 4mm to 11mm in width. The base is cuneate to broad cuneate while the apex is acute to acute-obtuse. The concolourous laminas are pale green to mid-green grey-green glaucous blue or grey, glabrous or sparsely to densely covered in pale grey to white short stellate-pubescent to tomentose hairs. The leaf margins are entire or rarely sparsely serrated. The leaves are sessile to shortly petiole measuring 1mm to 2mm in length.
Eremophila glabra subsp. murrayana is an extremely variable plant with at least 3 varieties which can lead to confusion in identity. The alternate, linear to oblanceolate leaves measure 17mm to 40mm in length by 1mm to 5mm in width. The base is cuneate to broad cuneate while the apex is acute-obtuse to obtuse. The concolourous laminas are pale green to mid-green grey-green glaucous blue or grey, glabrous, smooth or sparsely to densely covered in short glandular to pubescent hairs or long white villose hairs. Those plants that are glabrous or sparsely covered in hairs are resinous to papillate. The leaf margins are entire or with a few short distal teeth. The leaves are sessile to shortly petiole measuring 0.5mm to 1mm in length.
Inflorescences of Eremophila glabra subsp. glabra are born singularly from the leaf axis. The corollas are just as variable as the leaves and vary from pale yellow to deep yellows, pale pinks to deep reds and orange. The pedicels measure 4.5mm to 7mm in length. The 4 imbricate sepals are narrow triangular to ovate, are of equal length and measure 5mm to 8.5mm in length by 1mm to 3mm wide at the base. The sepals are papillate and sparsely to densely covered in pale grey to white short stellate-pulverulent to tomentose hairs on both surfaces. The corolla measures 25mm to 30mm in length. It is glabrous or more commonly puberulent externally. The upper lobes and side lobes are united to form a hood while the lower lobe is attenuate and strongly recurved. The stamens are white through to the base colour of the corolla. The exerted stamens have brown anthers and measure 37mm to 45mm in length. The style is also exerted and measures 42mm to 50mm in length. The corolla is swollen around the ovary becomes constricted before expanding again towards the apex. Eremophila glabra flowers from March through to early December depending on the sub specie though flowering is usually over a long period of 3 to 5 months for each subspecies.
Inflorescences of Eremophila glabra subsp. murrayana‘s are born singularly from the leaf axis. The flowers are a yellow to deep orange yellows. The pedicel measures 4mm to 7mm in length. The 4 lanceolate to narrow triangular sepals are of equal length and measure 4.5mm to 8mm in length by 1mm to 3mm wide at the base. The sepals are resinous to papillate and sparsely to densely covered in pale grey to white pulverulent to split hispid hairs on both surfaces. The corolla measures 25mm to 30mm in length. It is glabrous or more commonly puberulent to glandular both externally and internally. The upper lobes and side lobes are united to form a hood while the lower lobe is attenuate and strongly recurved. The stamens are white through to the base colour of the corolla. The anthers and measure 37mm to 45mm in length. The style is also exerted and measures 42mm to 50mm in length. The corolla is swollen around the ovary becomes constricted before expanding again towards the apex. Eremophila glabra sub sp. murrayana flowers from March through to early December depending on the sub specie though flowering is usually over a long period of 3 to 5 months for each subspecies.
Eremophila glabra subsp. glabra fruits are ovoid to slightly globose berries. The berries measure 7.5mm to 9mm in length by 6.5mm to 8.5mm in diameter.
Eremophila glabra subsp. murrayana fruits are ovoid to slightly globose berries. The globose berries measure 5.5mm to 7mm in length by 4.2mm to 6mm in diameter.
Wildlife:
Eremophila glabra‘s fleshy fruits are eaten by Blue tongue Lizards and native rats and mice. Most small honeyeaters are attracted to the flowers.
Cultivation:
Eremophila glabra is a beautiful small shrub that deserves a place in every native or exotic garden where the rainfall is below a 1000mm average annually and the soils are very sandy to very light clays or gravelly and rocky. It is frost tolerant and drought resistant. In cultivation it will grow from 1.5 meters to 4 meters tall by 3 meters in diameter as a shrub or the smaller sub specie murrayana can be grown as a prostrate ground cover.
The foliage contrasts from green, to blue or blue greys along with the great variation in growth habit and flower colour means that complete garden beds can be devoted to it. The prostrate forms are particularly attractive in flower while the upright forms are a never ending traffic route for nectar eating birds.
Eremophila glabra looks magnificent in large rockeries and amid boulders when used on mass with the different forms. Use imagination when planting in mass by mixing the short with the tall as well as colour of foliage and flowers.
Eremophila glabra is one plant that is worthwhile persisting with in Mediterranean and drier temperate climates. I have had exceptional flowering from this plant in Nana Glen only to lose it in the wet season so it is probably better off being grown west of the Great Dividing Range. Glabrous leaf varieties are more resilient in marginal areas to those plants which have puberulent foliage.
As a bird attracting plant in small gardens it is as good as most Grevillea specie but have not gained wide acceptance because of the climatic intolerances. One good way to overcome the watering problem closer to the coast where higher rainfall is a problem is to plant them beneath tall open canopy trees so that it is facing north. This will allow more sunlight through and the trees will soak up a lot of the moisture imitating desert conditions of dryness. Remember though that sunlight and heat are just as important as low rainfall. One method to increase the temperature of the soils and surrounding air is to lay a layer of mulch using black stones. A second method is to use reflected heat from buildings to increase the amount of light and raise day time temperatures.
It often reaches its full potential in just 3 years and flower from the second year. As it is relatively short lived, 8 to 10 years it should be replanted from the 7th year to ensure continuous colour in the garden.
Garden beds would need to be open with plenty of space between plants to allow air flow as well as to give the shrubs a chance to spread and be appreciated for their unique beauty. Crowding this type of foliage with other plants will see them lose all the effectiveness of the colourful foliage and form you require or want. Correct spacing will contrast the foliages better without one overpowering the other. For mass planting space the plants at least 2.5 meters to 3 meter centers. If you are using it amongst rocks or around the small desert garden, plant them sparingly to attain a barren scene, so not to make the area look cluttered or detract from the other features. The sub specie murrayana would be better suited because of its smaller size. 4 or 5 in an area of 100 square meters would be ample. 4 plants separately planted or plant 2 close together and separate the other 3 to give width and depth where you want it. In large garden in semi-arid areas whole beds can be devoted to Eremophila as they have diverse habits branching structures, foliage colours and flowering colour.
Propagation:
Seeds: Eremophila glabra seeds require treatment before sowing as they contain inhibitors to prevent premature germination. Place seeds in a calico bag with some sand and put them through the weekend washes. The washing helps to remove some of the inhibitors acting like several desert storms while the sand will lightly scarify the seeds again imitating the blown sands of a desert.
Sow treated seeds directly into a seed raising mix and cover with 5mm of the mix. When the seedlings are 25mm to 50mm tall, prick them out and plant them into 50mm native tubes using a seed raising mix.
Once the seedlings reach 150mm to 200mm in height plant them out into their permanent position. Mass plantings can be achieved by planting them at 1 meter to 3 meters depending on the sub species or variety grown.
Cuttings: Cuttings are the only way to guarantee purity of the strain and to continue varieties of in your chosen flowering colours. Use 50mm to 70mm long cuttings from the present season‘s growth. When growing from cuttings try to get cuttings from good flowering strains.
1 Prepare the cutting mix by adding one third sharp clean river sand, one third peat and one third perlite. These ingredients are sterilize,
2 Select good material from non diseased plants,
3 Select semi green stems for cuttings. Look for a stem with two or three nodes,
4 Place the cutting on a flat, hard surface, and make a clean cut down one side of the cutting at the base for 10mm with a sharp sterile knife or razor blade. – This scarification of the node will increase the chances of roots emerging from this spot. Now remove all but one or two the leaves, leaving the apex leaves in tact. If the leaves are very large in proportion to the stem, cut off the apical halves.
5 Fill a saucer with water, and place a little weak to medium rooting hormone into another container like a milk bottle top. Dip the node end of the cutting into the water and then into the rooting hormone. Tap off any excess hormone,
6 Use a small dipple stick or old pencil to poke a hole into the soilless potting mix. Ensure the hole is slightly larger than the stem diameter and be careful not to wipe the rooting hormone off the cuttings base, place the cuttings in a pattern ensuring the cuttings are not touching each other,
7 I like to place the pots in Plastic bags to help maintain temperature and moisture. Place in a semi shaded place like under 50mm shade cloth.
8 When the cuttings have struck, open the bag to allow air circulation for a few days to a week,
9 Once hardened off remove the cuttings from the bag and allow to further hardening for a few more days,
10 Transplant into a good potting mix to grow on. Fertilize using seaweed, fish emulsion or organic chicken pellets soaked in water on an alternate basis. Fertilize every two months until the plants are established then twice annually in early September or March to maintain health, vitality and better flowering.
Fertilize using seaweed, fish emulsion or organic chicken pellets soaked in water on an alternate basis. Fertilize every two months until the plants are established then annually in early September to October to maintain health, vitality and better flowering.
Further Comments from Readers:
Hi reader, it seems you use The Bible of Botany a lot. That’s great as we have great pleasure in bringing it to you! It’s a little awkward for us to ask, but our first aim is to purchase land approximately 1,600 hectares to link several parcels of N.P. into one at The Pinnacles NSW Australia, but we need your help. We’re not salespeople. We’re amateur botanists who have dedicated over 30 years to saving the environment in a practical way. We depend on donations to reach our goal. If you donate just $5, the price of your coffee this Sunday, We can help to keep the planet alive in a real way and continue to bring you regular updates and features on Australian plants all in one Botanical Bible. Any support is greatly appreciated. Thank you.
In the spirit of reconciliation we acknowledge the Bundjalung, Gumbaynggirr and Yaegl and all aboriginal nations throughout Australia and their connections to land, sea and community. We pay our respect to their Elders past, present and future for the pleasures we have gained.
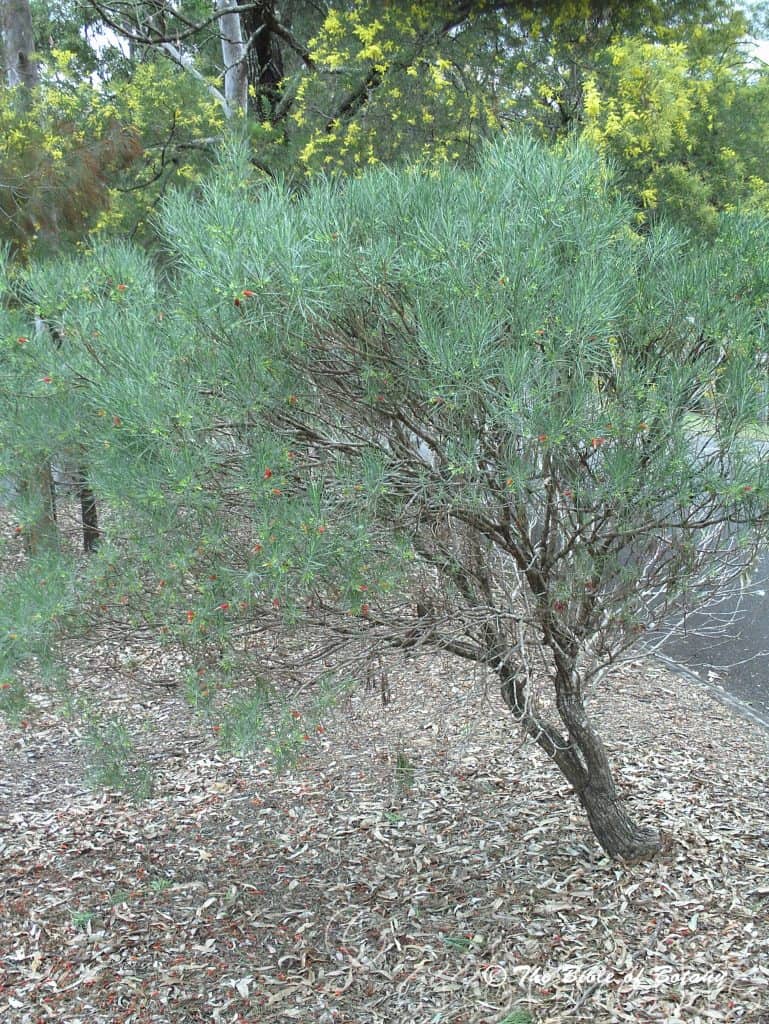
Eremophila longifolia
Classification
Unranked: Eudicots
Unranked: Asterids
Order: Lamiales
Family: Scrophuliaceae
Genus: From Eromos/Eremaeios, which is Ancient Greek for a desert, arid or wasteland and from Philos, which is Ancient Greek for loving or to be loved. It refers to shrubs, which have a love of dry, open desert plains.
Species: From Longitia/Longus, which is Latin for long in length and Folium, which is Latin for foliage. It refers to leaves, which are long and strap like.
Common Name: Long leaf Emu Bush.
It is known as Berrigan or Berrigon in the Wiradjuri clan.
Distribution:
Eremophila longifolia is a widespread species. It is found in all the mainland states of Australia west of the Great Dividing Range.
https://avh.ala.org.au/occurrences/search?taxa=Eremophila+longifolia#tab_mapView
Habitat Aspect Climate:
Eremophila longifolia prefers full sun to light dappled shade. It grows naturally along dry streams and creeks in arid areas and on the margins to the true deserts in the open woodlands, open mallee scrubs, open Eucalyptus forests or savannah grasslands. The terrain is flat plains or gently sloping dunes, hills or ridges. The altitude ranges from 5 meters ASL to 650 meters ASL.
The temperatures range from minus 4 degrees in July to 46 degrees in January February.
The rainfall ranges from lows of 100mm to 850mm average per annum.
Soil Requirements:
Eremophila longifolia prefers reddish sand, reddish sandy loams, light reddish clays or red medium clays, gravelly clays derived from decomposed sandstones. The soils pH ranges from 5.5pH to 7pH. It does not tolerate waterlogged soils. Non saline soils to moderately saline soils are tolerated.
Height & Spread:
Wild Plants: 2m to 8m by 2m to 8m
Characteristics:
Eremophila longifolia grows as a small bush to a large shrub or bushy small tree. The trunk and older branches are deep grey and glabrous. Branchlets are green and brown tuberculate and covered in short white sericeous hairs. Young juvenile branchlets are densely covered in short white sericeous hairs. Plants often sucker particularly under favourable conditions.
Eremophila longifolia is an extremely variable plant. The alternate linear to linear lanceolate leaves measure 90mm to 200mm in length by 4mm to 14mm width. The base is cuneate, tapering or tapering attenuate while the apex is narrow acute to tapering. The concolourous laminas are pale green to deep green or blue green, glabrous, sparsely to densely covered in white sericeous to tomentose hairs. The leaf margins are entire. The leaves are sessile or with a short petiole which measures from 0.5mm to 5mm in length. It is often difficult to tell where the lamina finishes and where the petiole starts.
Inflorescences of Eremophila longifolia are born from 1 to 5 in the leaf axils. The flowers are various shades of reds with or without fine spots both internally and externally. The pedicels measure 4mm to 10.5mm in length. The 4 triangular or ovate sepals are imbricate or valvate. The sepal lobes are of equal length have acute apexes and measure 2mm to 6.5mm in length by 1.5mm to 2.5mm in width at the base. The sepals are densely covered in long white sericeous and pilose hairs. The corolla measures 22mm to 30mm in length and is covered in white sericeous and pilose hairs both externally and internally. The oblong lobes have obtuse recurved apexes.
The stamens are white to yellow exerted with yellow anthers and measure 27mm to 35mm in length. The style is also exerted and measure 30mm to 38mm in length. The corolla is swollen around the ovary becomes constricted before expanding again towards the apex. Eremophila longifolia flowers from late February through to late November depending on the area it is growing however odd flowers also appear in the remaining months. Flowering is very much determined on the wet season in its immediate area for proliferation and the length of the flowering season.
The fruits are ovoid-oblong to slightly globose fleshy berries. The berries measure 5mm to 12mm in length by 5mm to 12mm in width. The berries are glossy, glabrous and fleshy with a woody endocarp. The green glossy, glabrous berries turn black on ripening. The style is persistent.
Wildlife:
Eremophila longifolia‘s fleshy fruits are eaten by native rats and mice. Honeyeaters with larger butterflies being attracted to the flowers. Fruit eating birds, honeyeaters, emus and kangaroos will eat the berries.
Cultivation:
This is a beautiful large shrub or small tree that for dry temperate, semi-arid areas to semi desert zones in Australia. It is ideal where the rainfall is below a 1000mm average annually and the soils are very sandy to very medium clays or gravelly and rocky soils overlying parent rock. It is frost tolerant and drought resistant.
The flowering season means some colour is present all year. It is particularly good food source when in flower and are a never ending traffic corridor for nectar eating birds.
Eremophila longifolia look magnificent in large rockeries and amid boulders. It makes an ideal windbreak around the home or sheds on homesteads. Plants like these that have a width equal to its height lend themselves as beautiful small parkland plants particularly in arid areas of Australia. In cultivation it will grow from 6 meters to 10 meters in height by 6 meters to 8 meters in diameter.
It often reaches its full potential when grown under average garden conditions in just 4 years and flower from the second year.
Propagation:
Seeds: Eremophila longifolia’s seeds require treatment before sowing as they contain inhibitors to prevent premature germination. Place seeds in a calico bag with some sand and put them through the weekend washes. The washing helps to remove some of the inhibitors acting like several desert storms while the sand will lightly scarify the seeds again imitating the blown sands of a desert.
Sow treated seeds directly into a seed raising mix and cover with 5mm of the mix. When the seedlings are 25 to 50 mm tall, prick them out and plant them into 50mm native tubes using a seed raising mix.
Once the seedlings reach 150 to 200mm in height plant them out into their permanent position. Mass plantings can be achieved by planting them at of 5 meter to 10 meters depending on the area you live and the type of planting system which is used.
Cuttings: Cuttings is the only way to guarantee purity of the strain and to continue varieties of in your chosen flowering colours. Use 50mm to 70mm long cuttings from the present season’s growth. When growing from cuttings try to get cuttings from good flowering strains. Take them in early autumn or after the last frosts in early spring.
1 Prepare the cutting mix by adding one third sharp clean river sand, one third peat and one third perlite. These ingredients are sterilize,
2 Select good material from non diseased plants,
3 Select semi green stems for cuttings. Look for a stem with two or three nodes,
4 Place the cutting on a flat, hard surface, and make a clean cut down one side of the cutting at the base for 10mm with a sharp sterile knife or razor blade. – This scarification of the node will increase the chances of roots emerging from this spot. Now remove all but one or two the leaves, leaving the apex leaves in tact. If the leaves are very large in proportion to the stem, cut off the apical halves.
5 Fill a saucer with water, and place a little weak to medium rooting hormone into another container like a milk bottle top. Dip the node end of the cutting into the water and then into the rooting hormone. Tap off any excess hormone,
6 Use a small dipple stick or old pencil to poke a hole into the soilless potting mix. Ensure the hole is slightly larger than the stem diameter and be careful not to wipe the rooting hormone off the cuttings base, place the cuttings in a pattern ensuring the cuttings are not touching each other,
7 I like to place the pots in Plastic bags to help maintain temperature and moisture. Place in a semi shaded place like under 50mm shade cloth.
8 When the cuttings have struck, open the bag to allow air circulation for a few days to a week,
9 Once hardened off remove the cuttings from the bag and allow to further hardening for a few more days,
10 Transplant into a good potting mix to grow on.
Fertilize using seaweed, fish emulsion or organic chicken pellets soaked in water on an alternate basis. Fertilize every two months until the plants are established then annually in early September to October to maintain health, vitality and better flowering.
Further Comments from Readers:
Hi reader, it seems you use The Bible of Botany a lot. That’s great as we have great pleasure in bringing it to you! It’s a little awkward for us to ask, but our first aim is to purchase land approximately 1,600 hectares to link several parcels of N.P. into one at The Pinnacles NSW Australia, but we need your help. We’re not salespeople. We’re amateur botanists who have dedicated over 30 years to saving the environment in a practical way. We depend on donations to reach our goal. If you donate just $5, the price of your coffee this Sunday, We can help to keep the planet alive in a real way and continue to bring you regular updates and features on Australian plants all in one Botanical Bible. Any support is greatly appreciated. Thank you.
In the spirit of reconciliation we acknowledge the Bundjalung, Gumbaynggirr and Yaegl and all aboriginal nations throughout Australia and their connections to land, sea and community. We pay our respect to their Elders past, present and future for the pleasures we have gained.
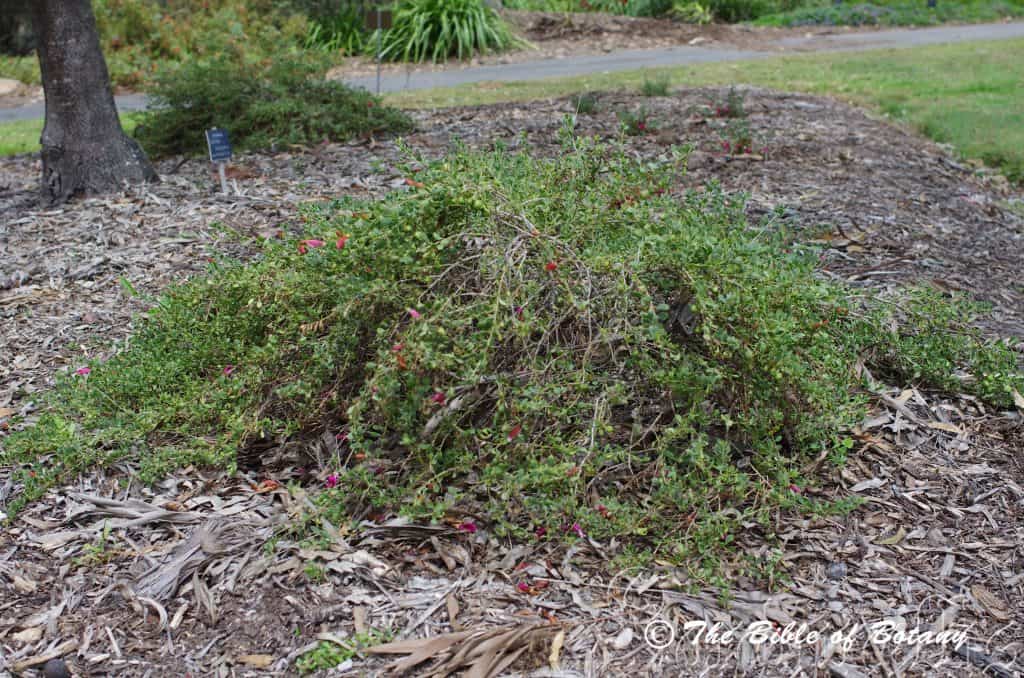
Mount Cootha Botanical Gardens Qld.
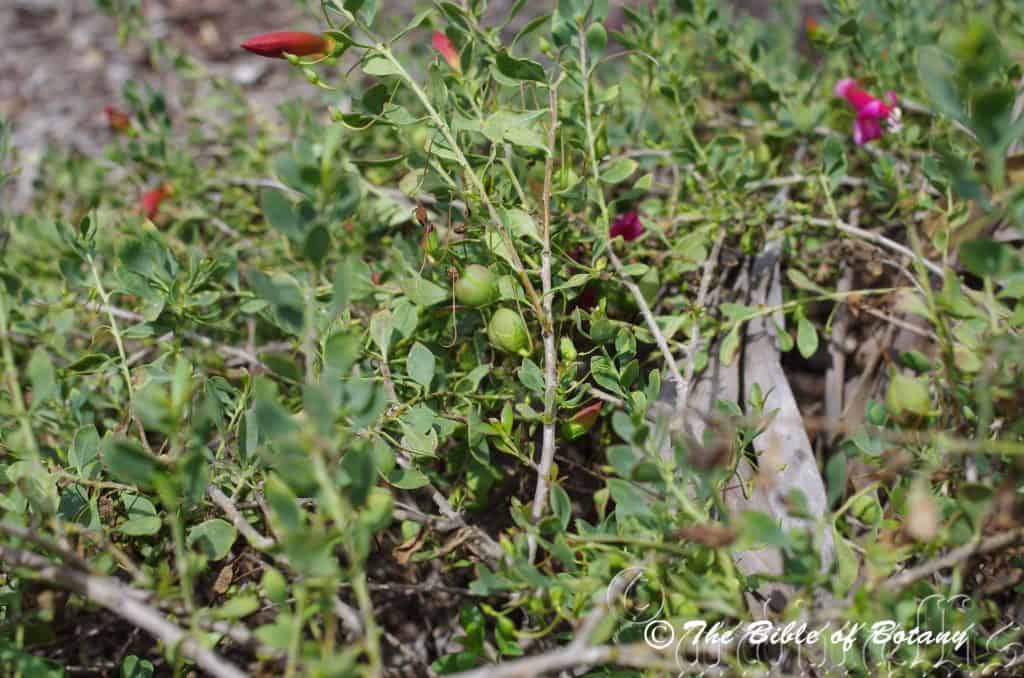
Mount Cootha Botanical Gardens Qld.
Mount Cootha Botanical Gardens Qld.
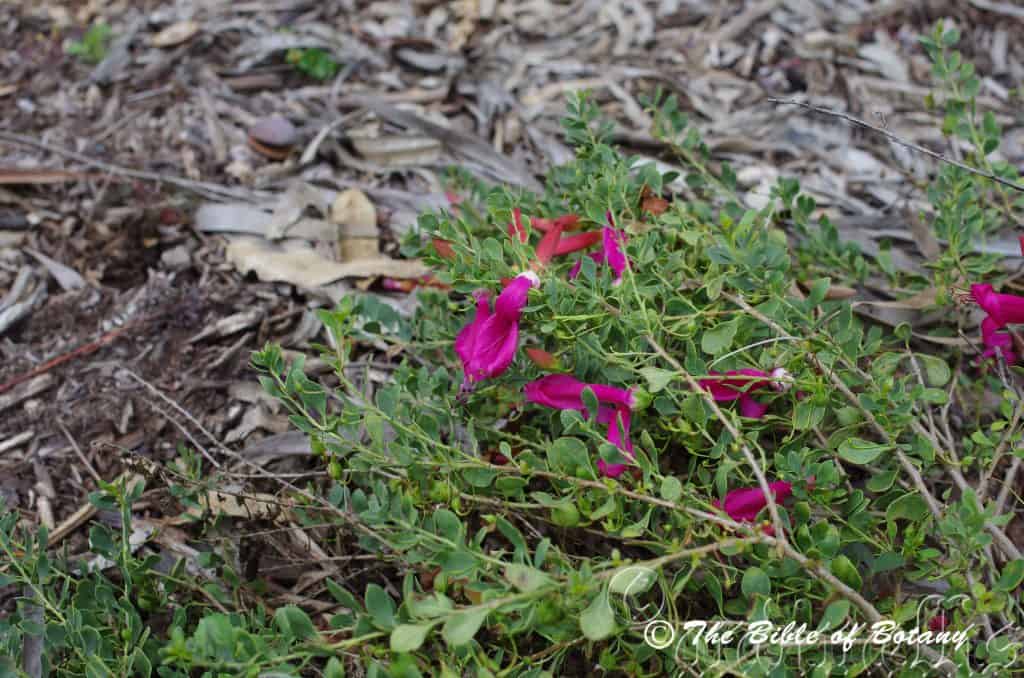
Mount Cootha Botanical Gardens Qld.
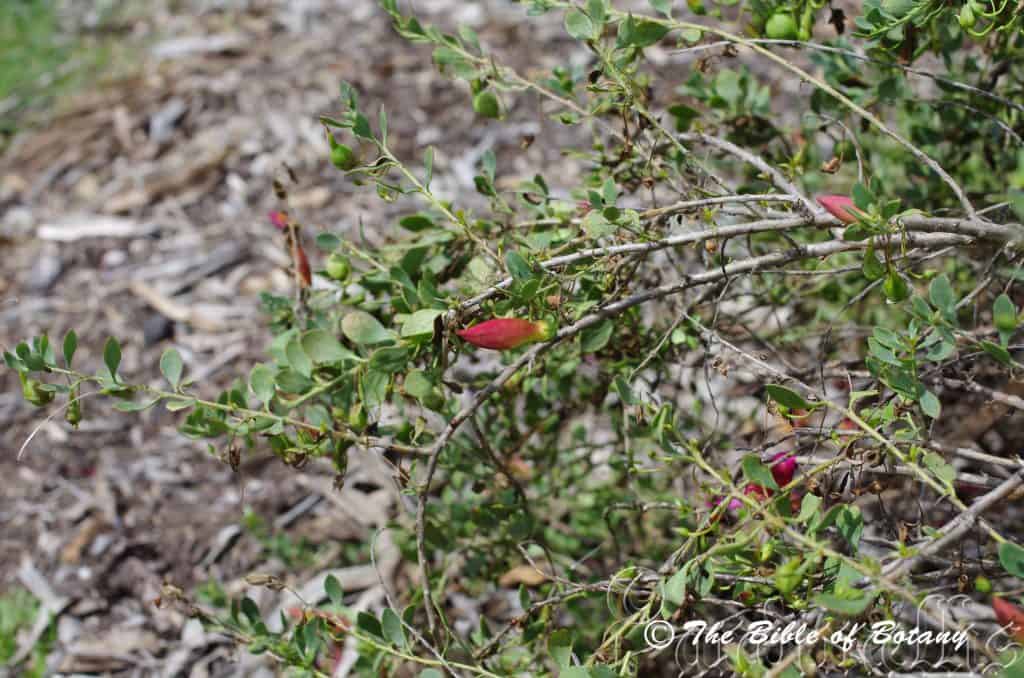
Mount Cootha Botanical Gardens Qld.
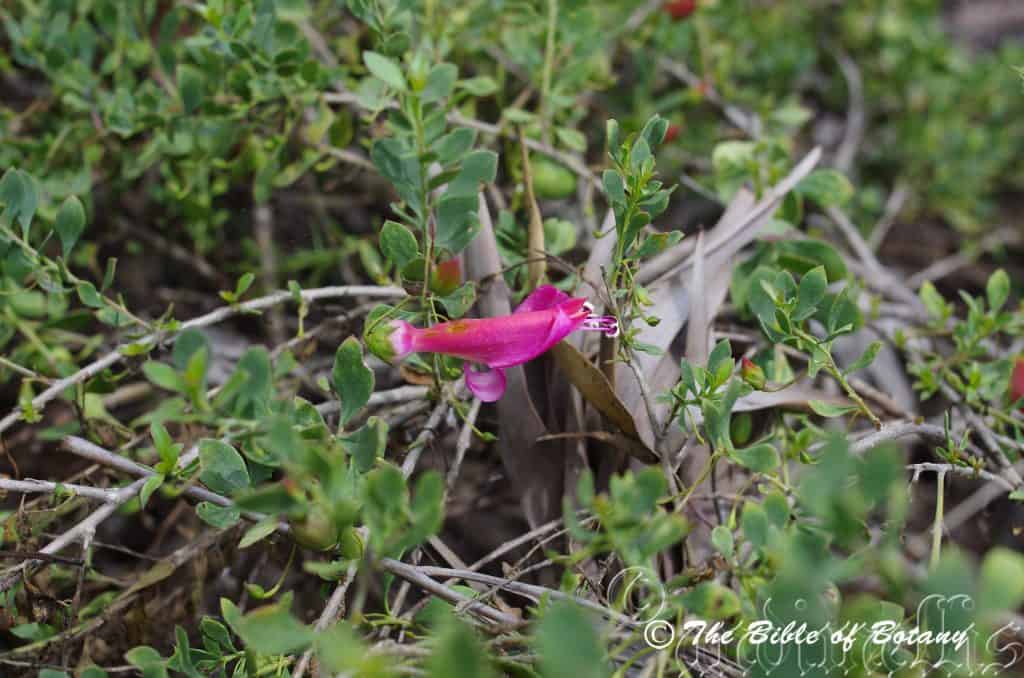
Mount Cootha Botanical Gardens Qld.
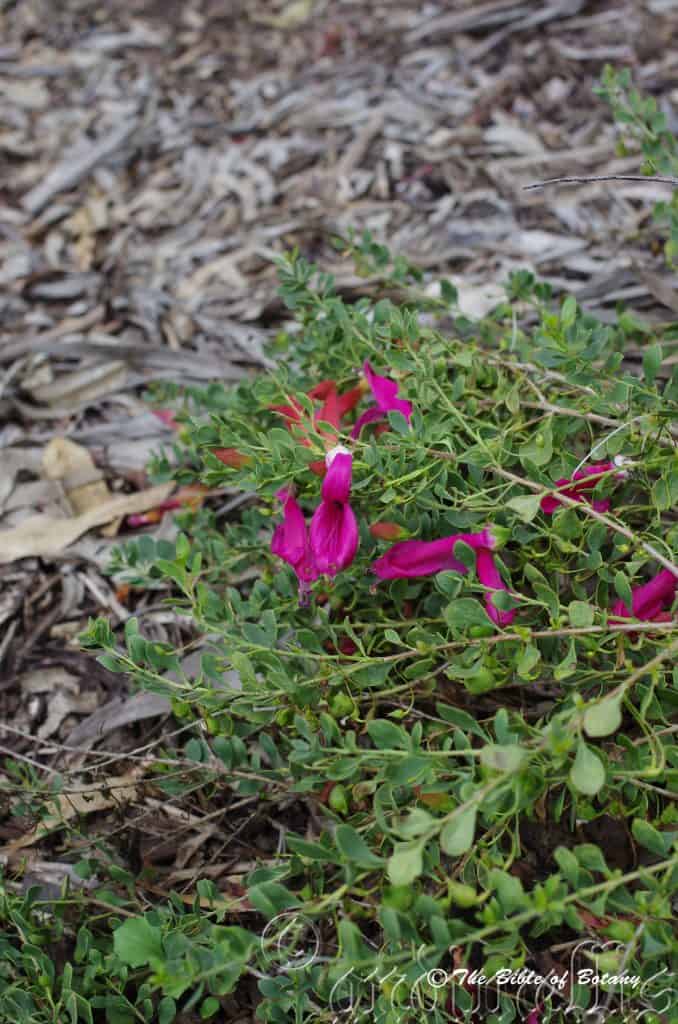
Mount Cootha Botanical Gardens Qld.
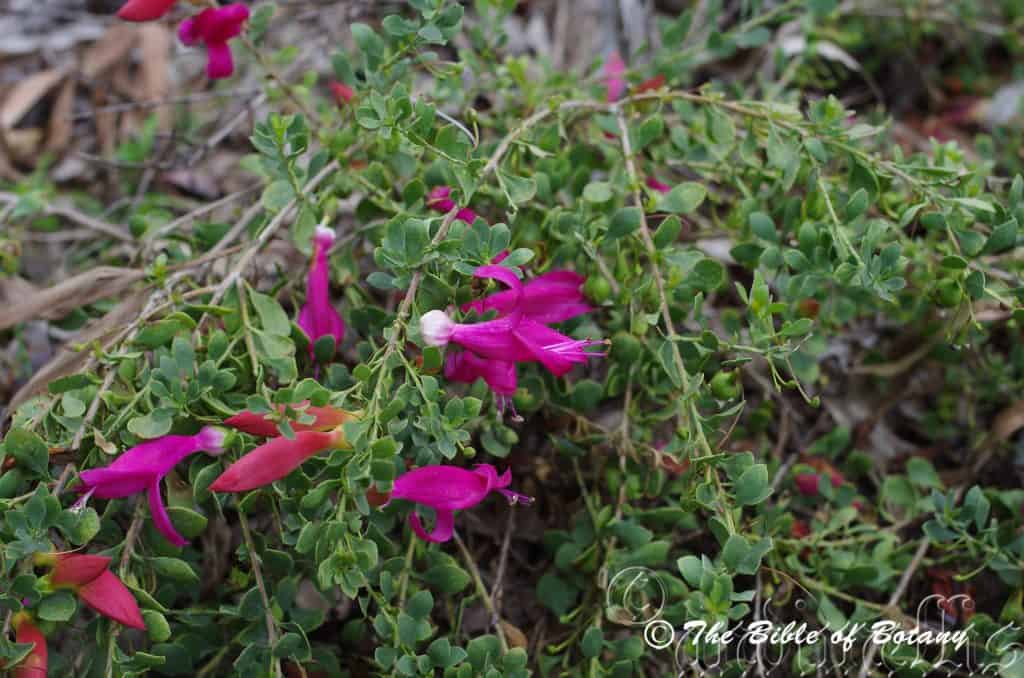
Mount Cootha Botanical Gardens Qld.
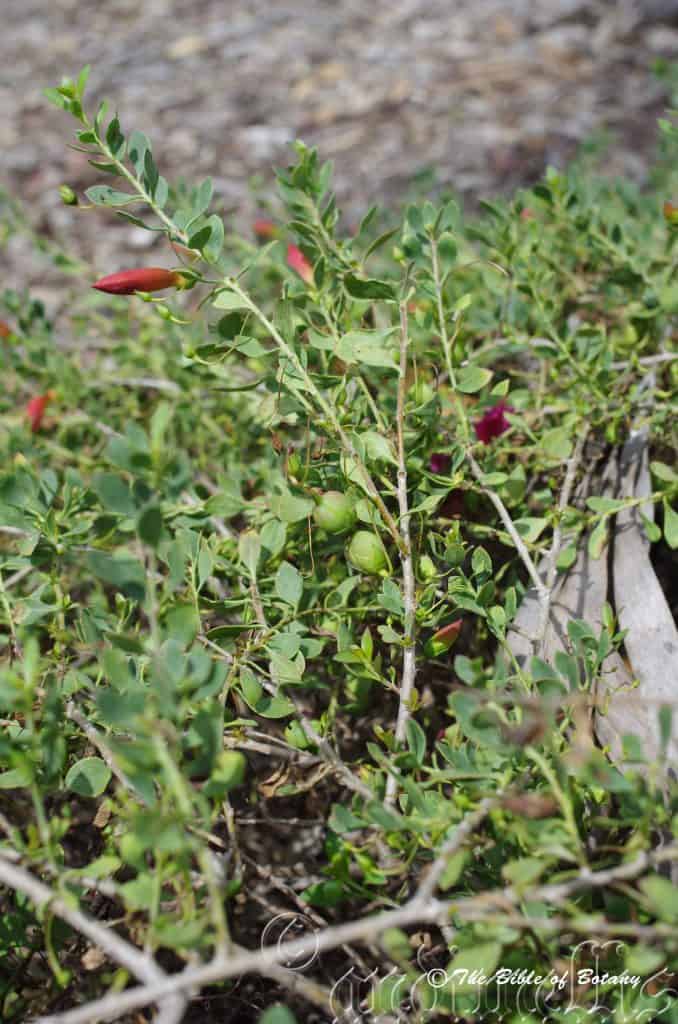
Mount Cootha Botanical Gardens Qld.
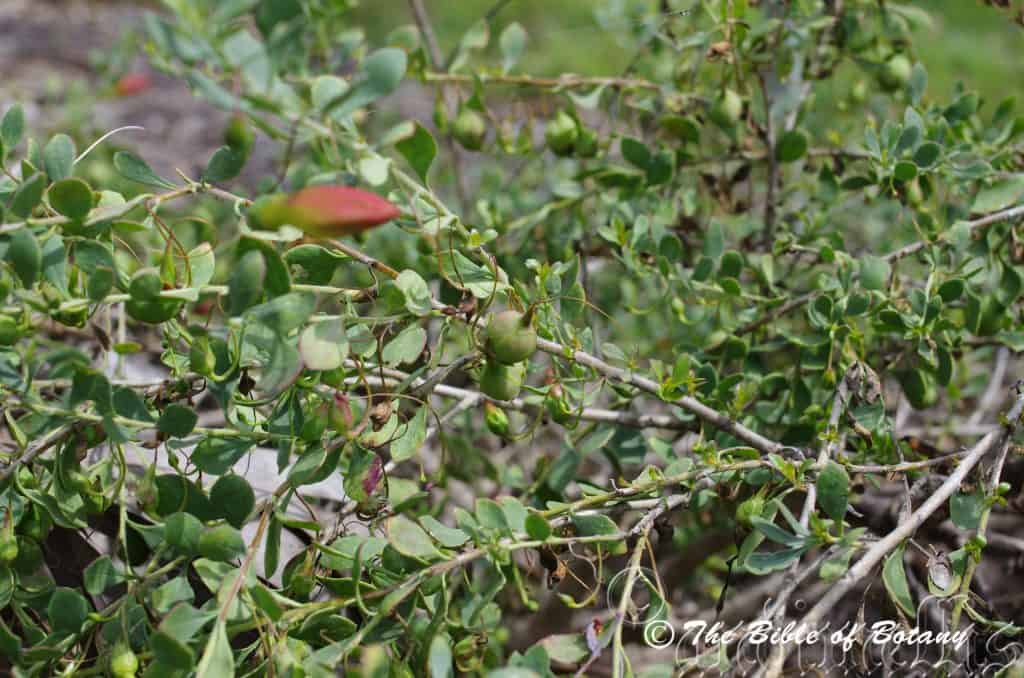
Mount Cootha Botanical Gardens Qld.
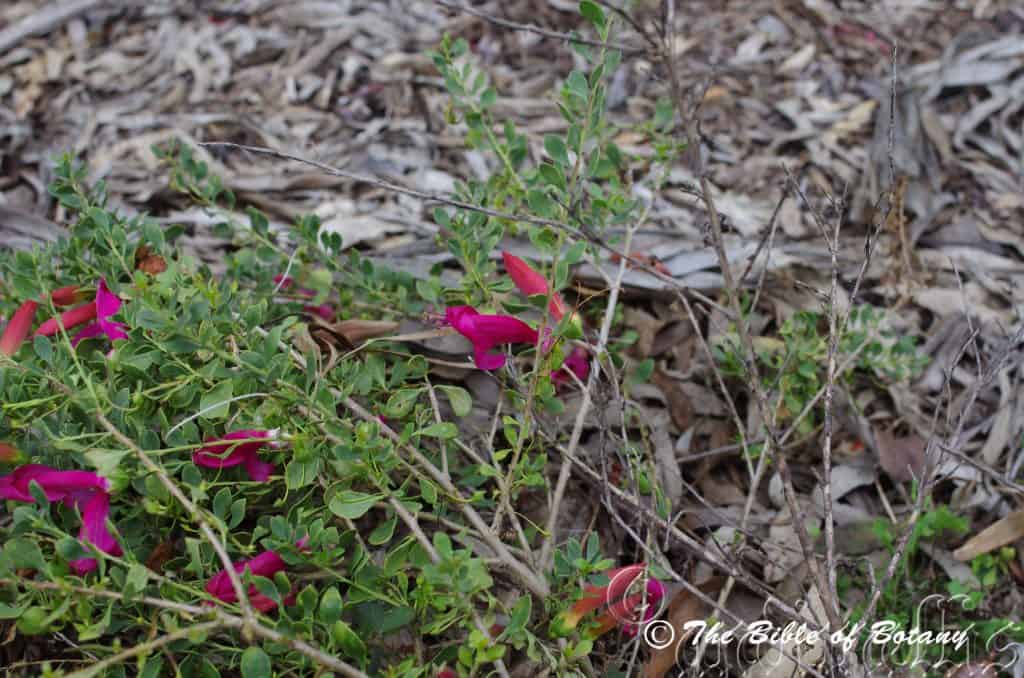
Mount Cootha Botanical Gardens Qld.
Eremophila maculata
Classification
Unranked: Eudicots
Unranked: Asterids
Order: Lamiales
Family: Scrophuliaceae
Genus: From Eromos/Eremaeios, which is Ancient Greek for a desert, arid or wasteland and from Philos, which is Ancient Greek for loving or to be loved. It refers to shrubs, which have a love of dry, open desert plains.
Species: From Maculatus, which is Latin for to stain or to have spots. It refers to a description of structures or organs, which have spots.
Subspecies: Eremophila maculata subsp. brevifolia. From Brevis, which is Latin for short and Folium, which is Latin for foliage. It refers to leaves which are shorter than others species or sub species in the species and genus.
Subspecies: Eremophila maculata subsp. filicifolia. From Filum, which is Latin for a thread or a thin cord and Folium, which is Latin for foliage. It refers to a leaves, which are thread like.
Subspecies: Eremophila maculata subsp. maculatea. From Maculatus, which is Latin for to stain or to have spots. It refers to a description of structures or organs, which have spots.
Common Name: Spotted Emu Bush or Emu Bush.
Distribution:
Eremophila maculate subsp. brevifolia is a widespread species found in the western third of Australia.
Eremophila maculate subsp. filicifolia is found in two disjunct populations in the east Pilbarra region of Western Australia.
Eremophila maculate subsp. maculata is a widespread species found in all the mainland states of Australia especially in the eastern three quarters.
https://avh.ala.org.au/occurrences/search?taxa=Eremophila+maculata#tab_mapView
Habitat Aspect Climate:
Eremophila maculata prefers full sun to light dappled shade. It grows naturally along dry streams and creeks in arid areas adjacent to the true deserts in open woodlands, open Eucalyptus forests, open type mallees, open savannah woodlands or savannah grasslands particularly on flat plains or gently sloping dunes, hills clay pans and flood plains and drainage lines. The altitude ranges from 5 meters ASL to 550 meters ASL.
The temperatures range from minus 4 degrees in July to 46 degrees in January February.
The rainfall ranges from lows of 100mm to 1000mm average per annum.
Soil Requirements:
Eremophila maculata prefers light clays, light gravelly clays through to heavy clays. The soils pH ranges from 5pH to 7.5pH. It does not tolerate waterlogged soils. Non saline soils to moderately saline soils are tolerated.
Height & Spread:
Wild Plants: 0.5m to 2m by 1.5m to 2m
Characteristics:
Eremophila maculata grows as a small bushy shrub. Older stems are grey and glabrous. Branchlets are a green brown spreading from near the ground at a wide angle. Young branchlets are glabrous or sparsely covered in white to pale grey puberulent to hirtellous hairs. Plants can root from any branches that come in contact with the ground during favourable seasons.
Eremophila maculata is a variable plant with in its species.
The alternate, linear to oblanceolate leaves of Eremophila maculata subsp. maculata measure 20mm to 40mm in length by 6mm to 14mm in width.
The alternate, linear to oblanceolate leaves of Eremophila maculata subsp. brevifolia leaves measure 7mm to 12mm in length by 2mm to 5mm in width.
The concolourous laminas are pale green to deep green or blue green, glabrous or sparsely covered in white to pale grey puberulent to hirtellous hairs. The leaf margins are entire. The apex is acute to broad acute. The leaves are sessile.
The inflorescences of Eremophila maculata are born singularly in the leaf axis. The heavily spotted flowers are in various shades of carmine, reds, yellows and orange spotted with deep purple to burgundy. The pedicels measure 10mm to 25mm. The 4 ovate imbricate sepals are of equal length and measure 4mm to 9.5mm in length by 2.5mm to 5mm widest point. The pale green to mid-green, glabrous sepals have an apex which is acute while the margins are covered in white ciliate hairs. The sepals are resinous to papillate. The corolla measures 25mm to 35mm in length and is glabrous. The two side lobes and the upper lobes are united for most of their length only dividing for the last 5mm to 7mm. The 2 side lobes spread for 90 degrees while the upper lobes are straight. The lower lobe is recurved. The oblong lobes have obtuse apexes.
Stamens are the same colour as the corolla, exerted with yellow anthers and measure 30mm to 42mm in length. The style is also exerted and measure 35mm to 45mm in length. Eremophila maculate flowers from April through to early February depending on the area it is growing. Flowering is very much determined on the wet season in its immediate area for proliferation and the length of the flowering season.
The fruits of Eremophila maculata are ovoid to ovoid-oblong fleshy berries. The berries measure 12mm to 18mm in length by 10mm to 18mm in width. The berries are glossy, glabrous with a woody endocarp. The style is persistent.
Wildlife:
Eremophila maculata‘s flowers are very attractive to the honeyeaters.
Cultivation:
This is a beautiful medium shrub that deserves a place in most native or exotic gardens where the rainfall is below a 1200mm average annually and the soils are light clays or gravelly and rocky. It is frost tolerant and drought resistant. In cultivation they will grow from 1 meter to 2 meters tall by 1.5 meters to 2.5 meters in diameter.
The different flower colours means that it is particularly attractive in flower and is a never ending traffic corridor for nectar eating birds.
Eremophila maculata looks magnificent in larger rockeries and amid boulders particularly if it is on a north facing slope. Use imagination when planting in mass by mixing the various flower colours. Don’t just plant it in straight lines. Plant it in groups of 3, 4 or 5, use curves or scatter them around a block so that you can walk between them or a mixture of both.
Eremophila maculata is one plant that is worthwhile persisting with in Mediterranean, temperate and subtropical climates. As a bird attracting plant in small gardens it is as good as any Grevillea species but have not gained wide acceptance because of the climatic intolerances. One good way to overcome the watering problem closer to the coast where higher rainfall is a problem is to plant it beneath tall open canopy trees like Eucalyptus species with it is facing north. This will allow more sunlight through and the trees will soak up a lot of the moisture imitating desert conditions of dryness. Remember though that sunlight and heat are just as important as low rainfall.
One method to increase the temperature of the soils and surrounding air is to lay a layer of mulch using black stones. A second method is to use reflected heat from buildings to increase the amount of light and raise day time temperatures. Another aspect to look at is on north facing steep slopes where large rocks abound. These are usually hot and dry so the opportunity arises to use them as a cover tree for smaller plants which also like it dry.
It often reaches its full potential in just 2 years and flower from the first year.
Propagation:
Seeds: Eremophila maculata’s seeds require treatment before sowing as they contain inhibitors to prevent premature germination. Place seeds in a calico bag with some sand and put them through the weekend washes. The washing helps to remove some of the inhibitors acting like several desert storms while the sand will lightly scarify the seeds again imitating the blown sands of a desert.
Sow treated seeds directly into a seed raising mix and cover with 5mm of the mix. When the seedlings are 25mm to 50mm tall, prick them out and plant them into 50mm native tubes using a seed raising mix.
Once the seedlings reach 150mm to 200mm in height plant them out into their permanent position. Mass plantings can be achieved by planting them at 5 meter to 12 meter centers depending on the area you live and the type of planting system which is used.
Cuttings: Cuttings is the only way to guarantee purity of the strain and to continue varieties of in your chosen flowering colours. Use 50mm to 70mm long cuttings from the present season’s growth. When growing from cuttings try to get cuttings from good flowering strains.
1 Prepare the cutting mix by adding one third sharp clean river sand, one third peat and one third perlite. These ingredients are sterilize,
2 Select good material from non diseased plants,
3 Select semi green stems for cuttings. Look for a stem with two or three nodes,
4 Place the cutting on a flat, hard surface, and make a clean cut down one side of the cutting at the base for 10mm with a sharp sterile knife or razor blade. – This scarification of the node will increase the chances of roots emerging from this spot. Now remove all but one or two the leaves, leaving the apex leaves in tact. If the leaves are very large in proportion to the stem, cut off the apical halves.
5 Fill a saucer with water, and place a little weak to medium rooting hormone into another container like a milk bottle top. Dip the node end of the cutting into the water and then into the rooting hormone. Tap off any excess hormone,
6 Use a small dipple stick or old pencil to poke a hole into the soilless potting mix. Ensure the hole is slightly larger than the stem diameter and be careful not to wipe the rooting hormone off the cuttings base, place the cuttings in a pattern ensuring the cuttings are not touching each other,
7 I like to place the pots in Plastic bags to help maintain temperature and moisture. Place in a semi shaded place like under 50mm shade cloth.
8 When the cuttings have struck, open the bag to allow air circulation for a few days to a week,
9 Once hardened off remove the cuttings from the bag and allow to further hardening for a few more days,
10 Transplant into a good potting mix to grow on.
Fertilize using seaweed, fish emulsion or organic chicken pellets soaked in water on an alternate basis. Fertilize every two months until the plants are established then annually in early September to October to maintain health, vitality and better flowering.
Further Comments from Readers:
Hi reader, it seems you use The Bible of Botany a lot. That’s great as we have great pleasure in bringing it to you! It’s a little awkward for us to ask, but our first aim is to purchase land approximately 1,600 hectares to link several parcels of N.P. into one at The Pinnacles NSW Australia, but we need your help. We’re not salespeople. We’re amateur botanists who have dedicated over 30 years to saving the environment in a practical way. We depend on donations to reach our goal. If you donate just $5, the price of your coffee this Sunday, We can help to keep the planet alive in a real way and continue to bring you regular updates and features on Australian plants all in one Botanical Bible. Any support is greatly appreciated. Thank you.
In the spirit of reconciliation we acknowledge the Bundjalung, Gumbaynggirr and Yaegl and all aboriginal nations throughout Australia and their connections to land, sea and community. We pay our respect to their Elders past, present and future for the pleasures we have gained.
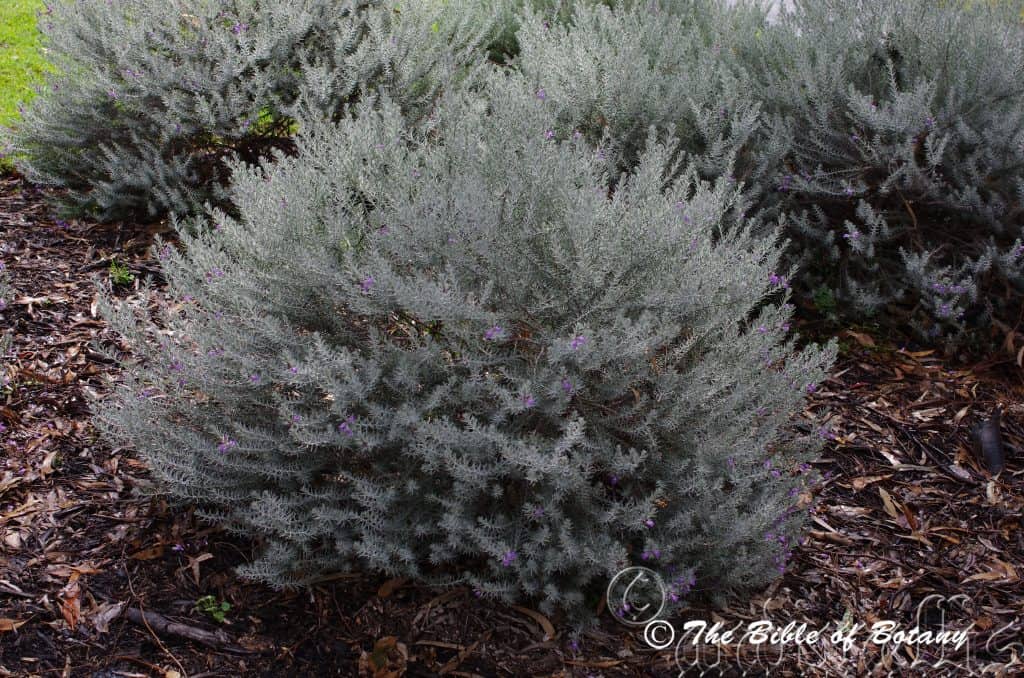
Mount Cootha Botanical Gardens Qld.
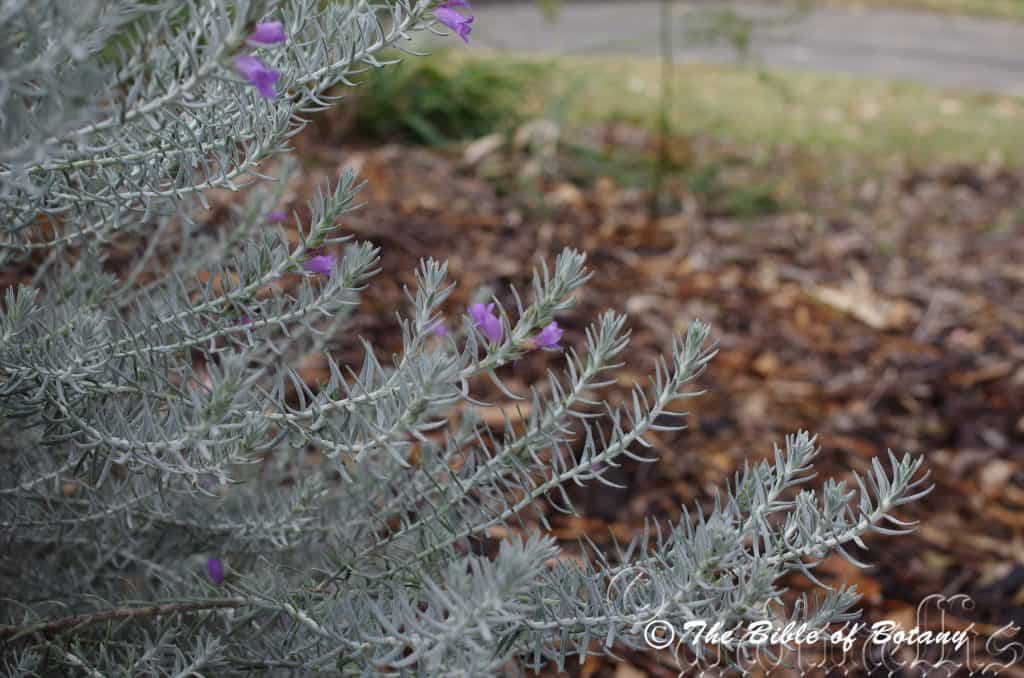
Mount Cootha Botanical Gardens Qld.
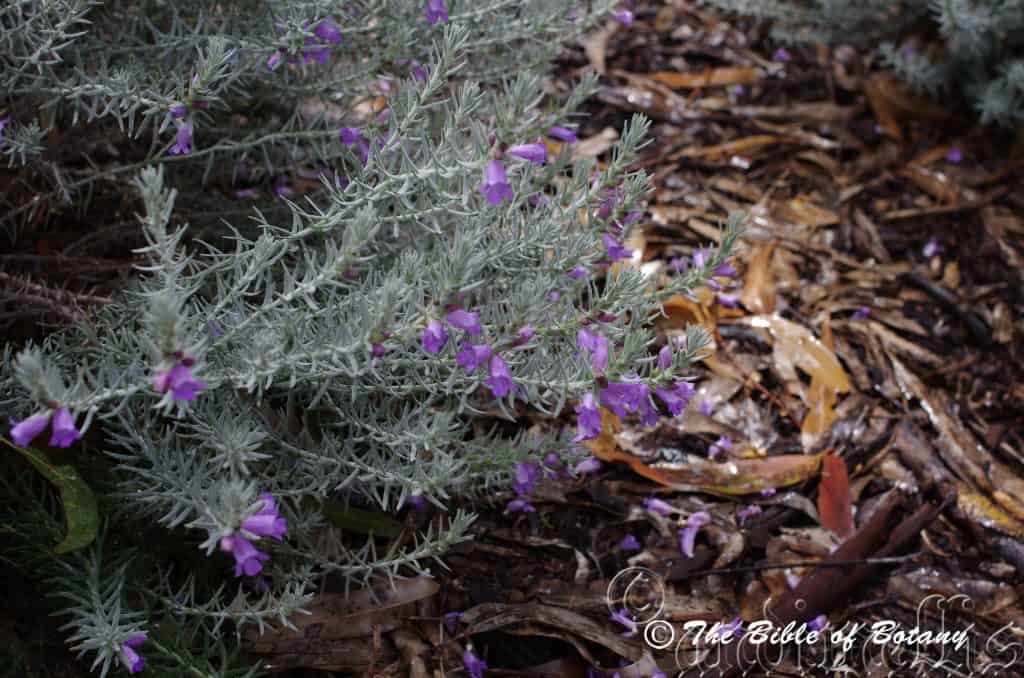
Mount Cootha Botanical Gardens Qld.

Mount Cootha Botanical Gardens Qld.
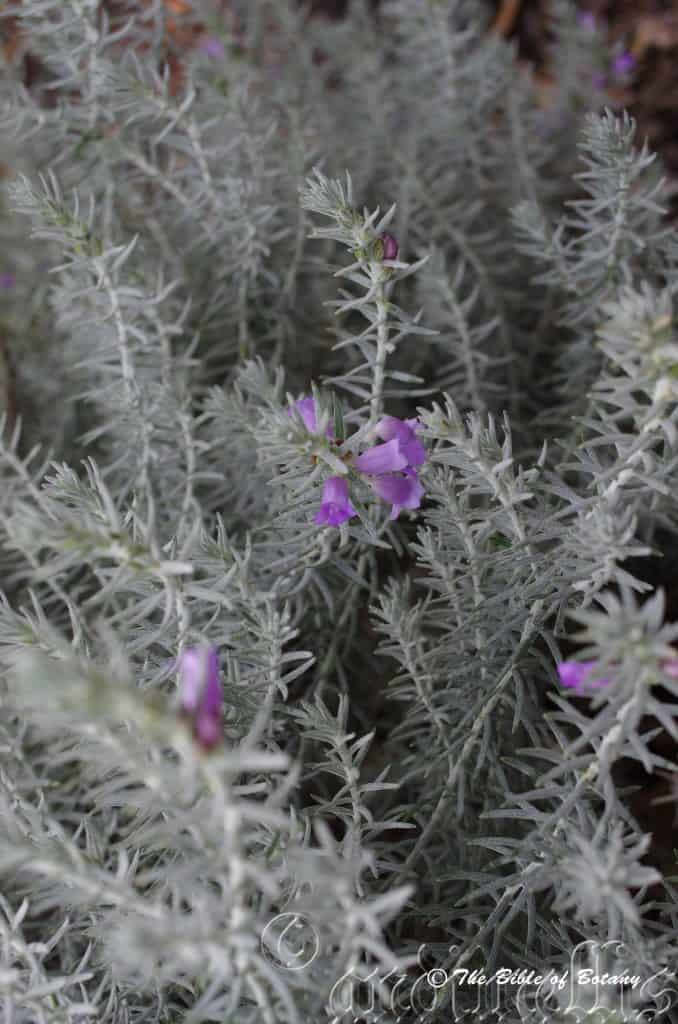
Mount Cootha Botanical Gardens Qld.
Eremophila nivea
Classification
Unranked: Eudicots
Unranked: Asterids
Order: Lamiales
Family: Scrophuliaceae
Genus: From Eromos/Eremaeios, which is Ancient Greek for a desert, arid or wasteland and from Philos, which is Ancient Greek for loving or to be loved. It refers to shrubs, which have a love of dry, open desert plains.
Species: From Nipha, which is Ancient Greek or Nix/Nivis, which are Latin for snowy or snow white. It refers to flowers, which are snowy white or the foliage being pale smoky grey.
Common Name: Desert Snow Bush.
Distribution:
Eremophila nivea is found south east of Geraldton in southern western, Western Australia in a triangular east from Morawa to Paynes Find to Wubin and Lake Moore.
https://avh.ala.org.au/occurrences/search?taxa=Eremophila+nivea#tab_mapView
Habitat Aspect Climate:
Eremophila nivea prefers full sun to light dappled shade. It grows naturally adjacent dry streams and creeks, roadside verges and rolling plains in arid areas. The altitude ranges from 5 meters ASL to 300 meters ASL.
The temperatures range from 4 degrees in July to 42 degrees in January and February.
The rainfall ranges from lows of 300mm to 600mm average per annum.
Soil Requirements:
Eremophila nivea prefers sandy loams, light clays, light gravelly clays to medium clays. The soils pH ranges from 5pH to 7.5pH. It does not tolerate waterlogged soils. Non saline soils to moderately saline soils are tolerated.
Height & Spread:
Wild Plants: 1m to 1.5m by 1m to 1.5m
Characteristics:
Eremophila nivea grows as a small bushy shrub. Older stems are a pale glaucous grey and densely covered in white or grey pubescent hairs. Branchlets are a pale glaucous grey sparsely covered in white or glaucous-grey puberulent hairs.
Eremophila nivea is a variable plant with in its species. The alternate leaves are crowded along the stems. The linear to narrow lanceolate leaves measure 20mm to 30mm long by 2mm to 4.5mm wide. The leaves are sessile. The bases are tapering while the apexes are obtuse to mucronate. The concolourous laminas are a pale grey and sparsely to densely covered in white pubescent hairs. The laminas decurve downwards at the leaf margins or are revolute. The leaf margins are entire.
The inflorescences of Eremophila nivea are born singularly from the leaf axils. The corolla is lilac to deep purple while the white throat is spotted in purple. The pedicels measure 8mm to 12mm in length. The 4 or 5 ovate sepals are of equal length and measure 14mm to 15mm in length. The deeply triangularly lobed and measure 6.5mm to 8mm in length. The corolla measures 18mm to 22mm in length and glabrous. The ovate lobes have an obtuse apex and spread outwards at right angles. The side lobes are broadly acuminate while the lower lobe is broadly mucronate. The upper lobe divides into two equal lobes to half its length and are broad acuminate.
The stamens are white, slightly inserted and measure 19mm to 22mm in length. The anthers are white and measure 4mm to 5mm anthers. The white style is exerted and measure 22mm to 24mm in length. Eremophila nivea flowers from August through to October.
The fruits are ovoid oblong to slightly globose berries. The berries measure 5mm to 6mm in length by 4.5mm to 5mm in width. The berries are glossy, glabrous with a woody endocarp. The style is persistent.
Wildlife:
Eremophila nivea‘s flowers are very attractive to smaller honeyeaters and larger butterflies.
Cultivation:
Eremophila nivea is a beautiful small shrub that deserves a place in most native gardens in semi-arid to arid zones. It is not recommended for higher humidity zones east of the Great Dividing Range or north of Broome in Western Australia. It is ideal where the rainfall is below 800mm average annually, the soils are light sandy loams or gritty light red clays and drain very quickly. It is frost tolerant and drought resistant. They also need dry well drained soils with dry atmospheric conditions to see the plants thrive.
The contrast in flower and foliage colour means it is particularly attractive in flower and are a never ending traffic corridor for nectar eating birds. This Eremophila species is very attractive 12 months of the year as when it is not in flower. The foliage is exceptionally beautiful and contrasts well with plants that have either large or fine pale green foliages.
Eremophila nivea looks magnificent in a medium to large rockery and amid boulders particularly if it is on a north facing slope. Use imagination when planting in mass by mixing various foliages together. Don’t just plant it in straight lines. plant it in clusters of 3, 4 or 5, use curves or scatter it around a block so that a mixture of fine green foliage plants can add additional colour. Ensure good air flow around the plants is maintained at all times.
It has been reported that Eremophila nivea is proving itself more reliable and adapting itself in Melbourne, Canberra and as far north as Brisbane, but I have still had problems at the Pinnacles outside Grafton on white sand over sandstone to get plants to survive more than a few months following early spring even using grafted plants. It often reaches its full potential in just 2 years and flower from the first year.
Propagation:
Seeds: Eremophila nivea‘s seeds require treatment before sowing as they contain inhibitors to prevent premature germination. Place seeds in a calico bag with some sand and put them through the weekend washes. The washing helps to remove some of the inhibitors acting like several desert storms while the sand will lightly scarify the seeds again imitating the blown sands of a desert.
Sow treated seeds directly into a seed raising mix and cover with 5mm of the mix. When the seedlings are 25mm to 50mm tall, prick them out and plant them into 50mm native tubes using a seed raising mix.
Once the seedlings reach 150mm to 200mm in height plant them out into their permanent position. Mass plantings can be achieved by planting them at 1.5 meter to 3 meters depending on the area you live and the type of planting system which is used.
Cuttings: Cuttings is the other way to guarantee a continuous supply as seeds from Eremophila are difficult to obtain. Use 50mm to 70mm long cuttings from the present season’s growth. When growing from cuttings try to get cuttings from good flowering strains. Take them in early autumn or after the last frosts in early spring.
1 Prepare the cutting mix by adding one third sharp clean river sand, one third peat and one third perlite. These ingredients are sterilize,
2 Select good material from non diseased plants,
3 Select semi green stems for cuttings. Look for a stem with two or three nodes,
4 Place the cutting on a flat, hard surface, and make a clean cut down one side of the cutting at the base for 10mm with a sharp sterile knife or razor blade. – This scarification of the node will increase the chances of roots emerging from this spot. Now remove all but one or two the leaves, leaving the apex leaves in tact. If the leaves are very large in proportion to the stem, cut off the apical halves.
5 Fill a saucer with water, and place a little weak to medium rooting hormone into another container like a milk bottle top. Dip the node end of the cutting into the water and then into the rooting hormone. Tap off any excess hormone,
6 Use a small dipple stick or old pencil to poke a hole into the soilless potting mix. Ensure the hole is slightly larger than the stem diameter and be careful not to wipe the rooting hormone off the cuttings base, place the cuttings in a pattern ensuring the cuttings are not touching each other,
7 I like to place the pots in Plastic bags to help maintain temperature and moisture. Place in a semi shaded place like under 50mm shade cloth.
8 When the cuttings have struck, open the bag to allow air circulation for a few days to a week,
9 Once hardened off remove the cuttings from the bag and allow to further hardening for a few more days,
10 Transplant into a good potting mix to grow on.
Fertilize using seaweed, fish emulsion or organic chicken pellets soaked in water on an alternate basis. Fertilize every two months until the plants are established then annually in early September to October to maintain health, vitality and better flowering.
Further Comments from Readers:
Hi reader, it seems you use The Bible of Botany a lot. That’s great as we have great pleasure in bringing it to you! It’s a little awkward for us to ask, but our first aim is to purchase land approximately 1,600 hectares to link several parcels of N.P. into one at The Pinnacles NSW Australia, but we need your help. We’re not salespeople. We’re amateur botanists who have dedicated over 30 years to saving the environment in a practical way. We depend on donations to reach our goal. If you donate just $5, the price of your coffee this Sunday, We can help to keep the planet alive in a real way and continue to bring you regular updates and features on Australian plants all in one Botanical Bible. Any support is greatly appreciated. Thank you.
In the spirit of reconciliation we acknowledge the Bundjalung, Gumbaynggirr and Yaegl and all aboriginal nations throughout Australia and their connections to land, sea and community. We pay our respect to their Elders past, present and future for the pleasures we have gained.
Eriachne glabrata
Classification
Unranked: Monocots
Unranked: Commelinidis
Order: Poales
Family: Poaceae
Genus: From Erion, which is Ancient Greek for wool and Akhne, which is Ancient Greek for chaff. It refers to the glumes which are covered in woolly like hairs.
Species: From Glabrum, which is Latin for glabrous or smooth. It refers to structures or organs usually the leaves, which have no hairs or scales.
Common Name:
Distribution:
Eriachne glabrata is found in several disjunct populations south from Clinton Lowland in Shoalwater Bay in central coastal Queensland to Wollongong in central coastal New South Wales. There is an isolated population near Middle Peak, south of the Jardine National Park on Cape York Peninsula. There is also an outlying population in the Carnarvon Gorge National Park in central Queensland. It is mainly found in coastal heaths and islands off the east coast.
https://avh.ala.org.au/occurrences/search?taxa=Eriachne+glabrata#tab_mapView
Habitat Aspect Climate:
Eriachne glabrata prefers full sun to light dappled shade. It grows in low lying coastal h wallum scrubs, wet coastal heaths, coastal Islands, coastal estuaries and on coastal deltas and at times open eucalypt forest, and sometimes on disturbed land. The altitude ranges from 3 meters ASL to around 50 meters ASL.
The temperatures range from 2 degrees in August to 38 degrees in January.
The rainfall ranges from lows of 1100mm to 2000mm average per annum.
Soil Requirements:
Eriachne glabrata prefers coarse sands, fine sands or sandy loams. The soils are usually derived from accumulated peaty beach sands or accumulated coral sands. The soils pH ranges from 5.5pH to 6.5pH. It tolerates seasonal waterlogged soils and seasonal high water tables. Non saline soils to very saline soils are tolerated and this may increase to extremely saline but we have erred on the side of safety.
Height & Spread:
Wild Plants: 0.1m to 0.4m by 0.3m to 0.4m
Characteristics:
Eriachne glabrata grows as a perennial grass with erect, terete, tufted culms. The culms are loosely or densely tufted on the slender rhizome. The culms usually measure 700mm to 400mm in height by 1mm to 3mm in diameter. The culms have 2 to 5 nodes and are glabrous. The mid culms internodes are densely covered in white pilose hairs while the nodes are glabrous or sparsely covered in white puberulent hairs. The lateral branches are simple.
Eriachne glabrata‘s linear, erect leaves measure 20mm to 80mmin length by 1mm to 2mm in width. The sheaths completely enclose the culms for 30mm to 50mm of their length. The ligules are ciliate rims of hairs that measure 0.5 mm in length with several hairs growing to 2 mm in length at each end. The concolourous laminas are grass-green to blue-green and scabrous, glabrous to sparsely covered in white puberulent hairs and tightly involute.
The inflorescences of Eriachne glabrata are compound panicles. The ovate panicles are at the end of a long rachis and measure 10mm to 55mm in length by 5mm to 30mm in width.
The spikelets are tight and regularly arranged along the spike. The spikelets measure 1.5mm to 1.8mm in length. The spikelets are pedicelled with the 2 fertile spikelets are without a rachilla extension. The spikelets are cuneate, laterally compressed and measure 3mm to 4mm in length.
The glumes are similar and thinner than the lemmas. The lower glume is ovate, membranous and without a keel but has 7 to 9 nerves. The lower glume surface is glabrous and measures 2.5mm to 4mm in length. The upper glume is ovate, membranous and without a keel but has 5 to 7 nerves and measures 2.5mm to 4mm in length. The upper glume surface is smooth and glabrous.
There are 3 white filaments on each spikelet which measure 1mm to 1.5mm in length. The pale yellow anthers measure 2mm to 2.5mm in length.
The lemmas are without awns and a keel but have five to seven nerves. The lemmas measure 2.5mm to 6mm in length and are covered in 1mm, white, pilose hairs. The muticus apex is glabrous.
The palae are without awns and are covered in white puberulent or sericeous hairs that measure 0.5mm in length. The palae have 2 nerves while the apex is muticus.
The trifid, feathery styles open from the base to the apex and appear before the stamens. The pistils measures 3mm to 3.5mm in length. The flowers appear from late December to late January.
The fruits of Eriachne glabrata are linear caryopses. The caryopses measure 1.5mm to 2mm in length. The green caryopses turn pale rusty-brown then pale straw coloured when ripe.
Wildlife:
Eriachne glabrata‘s wildlife is unknown to the author.
Cultivation:
Eriachne glabrata is not considered to be an important fodder crop. The leaves and stems are eaten along with other pasture crops when growing in the pasture. It has a rapid growth rate from mid spring after the spring rains to late autumn. It recovers well from moderate grazing and is best managed by allowing a free period between grazing.
Eriachne glabrata is classified as a weed by most gardeners without considering its potential in a small rockery or bog garden. It gives good quantities of trash for mulch. It has good potential as a landscaping grass in small gardens because of its small clump size. It recovers quickly when cut back to ground level.
In cultivation it can be grown on most types of soil even heavy clay with a skeletal covering of sand. It requires full sun for best results with a little added moisture or native fertilizer once a year to sustain maximum colour and vigour. High nitrogenous fertilizers will reduce the strength of the culms resulting in them being more readily attacked by black smut or lawn grub.
In cultivation the plants usually grow from 250mm to 350mm in height by 300mm to 350mm in diameter. The blue leaf form is a very striking in informal beds along walls beside swimming pools, small moist rockeries, and bog gardens or on the lower side of a path where water runoff will aid in amount of moisture the plants receive on a regular basis.
In a bog gardens, swamps and heaths it can easily become the centre of attraction giving depth and breadth to the garden especially if all the other plants are smaller with clump or horizontal growth habits. To be the centre of attraction plants needs to be more thinly planted than in the traditional heath garden otherwise the thin vertical culms will be overpowered by the larger leaves. Ideal companion plants would be carnivorous plants Goodenia ovata, Hibbertia linearis, Hibbertia ovalifolia, Leischenalta biloba or Leischenalta formosa. It can also be planted at the base of Melaleuca specie when making a swamp scene. Here Melaleuca quinquenervia and Melaleuca viridis stand out but any of the paper barks can be used.
Propagation:
Seeds: Eriachne glabrata‘s seeds can be sown directly into a seed raising mix. Cover the seeds with 2mm of the mix. Place the trays in a warm position under 20mm or 30mm shade. When the seedlings reach 20mm to 40mm tall, prick them out and plant them into 50mm native tubes using a seed raising mix. Place the 50mm native tubes into a tray of water and return them to the bush house.
Once the seedlings reach 150mm to 200mm in height plant them out into their permanent position. Mass plantings can be achieved by planting them at a minimum of 0.4 meters when planted in rows or at the base of swamp plants or at 1 meter centers for a more open scene where the shape or outline is the feature required.
Fertilize using seaweed, fish emulsion or organic chicken pellets soaked in water on an alternate basis. Fertilize every two months until the plants are established then annually in early September to October to maintain health, vitality and better flowering.
Further Comments from Readers:
Hi reader, it seems you use The Bible of Botany a lot. That’s great as we have great pleasure in bringing it to you! It’s a little awkward for us to ask, but our first aim is to purchase land approximately 1,600 hectares to link several parcels of N.P. into one at The Pinnacles NSW Australia, but we need your help. We’re not salespeople. We’re amateur botanists who have dedicated over 30 years to saving the environment in a practical way. We depend on donations to reach our goal. If you donate just $5, the price of your coffee this Sunday, We can help to keep the planet alive in a real way and continue to bring you regular updates and features on Australian plants all in one Botanical Bible. Any support is greatly appreciated. Thank you.
In the spirit of reconciliation we acknowledge the Bundjalung, Gumbaynggirr and Yaegl and all aboriginal nations throughout Australia and their connections to land, sea and community. We pay our respect to their Elders past, present and future for the pleasures we have gained.

Yuryaigir National Park NSW

Yuryaigir National Park NSW
Eriachne pallescens
Classification
Unranked: Monocots
Unranked: Commelinidis
Order: Poales
Family: Poaceae
Genus: From Erion, which is Ancient Greek for wool and Akhne, which is Ancient Greek for chaff. It refers to the glumes which are covered in woolly like hairs.
Species: From Pallidum, which is Latin for deficient or waning in colour. It refers to structures or organs, which are paler in colour compared to other species in the genus.
Common Name:
Distribution:
Eriachne pallescens is found north of a line of the Litchfield National Park to the south east corner of Nitmiluk National Park, and Groote Eylandt in the Northern Territory.
In the east it is found south from the Torres Strait Islands, on Cape York Peninsula in far north Queensland to Grafton in northern coastal New South Wales. It is found on the Western Plains, the Great Dividing Range to the coast and off shore Islands.
https://avh.ala.org.au/occurrences/search?taxa=Eriachne+pallescens#tab_mapView
Habitat Aspect Climate:
Eriachne pallescens prefers full sun to light dappled shade. It is mainly found growing in open Eucalyptus woodlands or open mixed woodlands. The altitude ranges from 3 meters ASL to 1050 meters ASL.
The temperatures range from 3 degrees in August to 38 degrees in January.
The rainfall ranges from lows of 1000mm to 3200mm average per annum.
Soil Requirements:
Eriachne pallescens prefers coarse sands, fine sands, and sandy loams to gravely screes, stony light clays to medium clays, podsolic soils or course silts. The soils are usually derived from alluvial deposits, accumulated peaty beach sands, accumulated coral sands or at times decomposed sandstones, granites, brown basalts or black basalts. The soils pH ranges from 4.5pH to 8pH. It does not tolerate waterlogged soils. Non saline soils to very saline soils are tolerated and this may increase to extremely saline but we have erred on the side of safety.
Height & Spread:
Wild Plants: 0.6m to 1m by 0.5m to 0.8m
Characteristics:
Eriachne pallescens grows as a perennial grass with erect, wiry, terete, tufted culms. The culms are loosely to densely tuft on the slender rhizome. The culms usually measure 230mm to 800mm however plants have been recorded growing to 1000mm in height by 1mm to 3mm in diameter. The culms have 2 to 5 nodes and are glabrous. The mid culms are glabrous. The lateral branches are often branched.
Eriachne pallescens‘s linear, erect leaves measure 50mm to 180mm in length by 2mm to 6mm in width. The sheaths completely enclose the culms for most of their length. The sheaths are glabrous with ciliate hairs on the margins. The ligules are fringe of white hairs. The hairs on the sheaths and ligules measure 0.5mm in length. The concolourous laminas are grass-green to blue-green and slightly scabrous and glabrous on the upper lamina while the lower lamina is sparsely covered in 0.5mm to 2mm long white, tuberculate based, puberulent hairs. The laminas are flat and convolute.
The inflorescences of Eriachne pallescens are compound panicles. The loosely, open, ovate panicles are at the end of a long rachis and measure 60mm to 155mm in length by 30mm to 90mm in width. The rachises are glabrous with 0.5mm long white pulverulent hairs in the axil hairs. The flexuous pedicels measure 20mm to 30mm in length.
The spikelets are tight and regularly arranged along the spike. The pedicels measure 0.5mm to 1mm in length. The 2 fertile spikelets are without a rachilla extension. The elliptical spikelets are laterally compressed and measure 3mm to 4mm in length.
The glumes are similar and thinner than the lemmas. The lower glume is ovate, membranous and without a keel but usually have 8 to 9 nerves however up to 13 are not uncommon. The lower glume surface is glabrous or densely covered in white pulverulent hairs and measure 2.5mm to 6mm in length. The upper glume is ovate, membranous and without a keel, it has 9 nerves and measures 2.5mm to 6mm in length. The upper glume surface is smooth, glabrous or is densely covered in white pulverulent hairs.
The lemmas are without a keel but have 7 nerves. The lemmas measure 3.3mm to 5mm in length and are glabrous or covered in white, pulverulent hairs. The apexes have a single awn or a single awn and a rudimentary awn. The awn measures 1.5mm to 1.8mm in length.
The palae have 2 nerves while the apexes are entire or dentate and have 2 awns.
There are 2 white filaments on each spikelet which have pale yellow anthers measure 2mm to 2.5mm in length.
The white, bifid, feathery styles open from the base to the apex and appear before the stamens. The flowers appear from late December to late February.
The fruits of Eriachne glabrata are linear caryopses. The caryopses measure 1.7mm to 3.3mm in length. The green caryopses turn pale rusty-brown then pale straw coloured when ripe.
Wildlife:
Eriachne pallescens‘s wildlife is unknown to the author.
Cultivation:
Eriachne pallescens is not considered to be an important fodder crop. The leaves and stems are eaten along with other pasture crops when growing in the pasture. It has a rapid growth rate from mid spring after the spring rains to late autumn. It recovers well from moderate grazing and is best managed by allowing a free period between grazing.
Eriachne pallescens is classified as a weed by gardeners without considering its potential in a small rockery or bog garden. It gives good quantities of trash for mulch. It recovers quickly when cut back to ground level.
In cultivation it will grow 0.8 meters to 1.2 meters tall by 0.5m to 0.8m in diameter. It can be grown on most types of soil even heavy clay. It requires full sun for best results with a little added moisture or native fertilizer once a year to sustain maximum colour and vigour. High nitrogenous fertilizers will reduce the strength of the culms resulting in them being more readily attacked by black smut or lawn grub.
Propagation:
Seeds: Eriachne pallescens‘s seeds can be sown directly into a seed raising mix. Cover the seeds with 2mm of the mix. Place the trays in a warm position under 20mm or 30mm shade. When the seedlings reach 20mm to 40mm tall, prick them out and plant them into 50mm native tubes using a seed raising mix. Place the 50mm native tubes into a tray of water and return them to the bush house.
Once the seedlings reach 100mm to 150mm in height plant them out into their permanent position. Mass plantings can be achieved by planting them at a minimum of 0.3 meters when planted in rows or at the base of swamp plants or in small clumps at 2 meter centers for a more open scene where the shape or silhouette is the feature required.
Fertilize using seaweed, fish emulsion or organic chicken pellets soaked in water on an alternate basis. Fertilize every two months until the plants are established then annually in early September to October to maintain health, vitality and better flowering.
Further Comments from Readers:
Hi reader, it seems you use The Bible of Botany a lot. That’s great as we have great pleasure in bringing it to you! It’s a little awkward for us to ask, but our first aim is to purchase land approximately 1,600 hectares to link several parcels of N.P. into one at The Pinnacles NSW Australia, but we need your help. We’re not salespeople. We’re amateur botanists who have dedicated over 30 years to saving the environment in a practical way. We depend on donations to reach our goal. If you donate just $5, the price of your coffee this Sunday, We can help to keep the planet alive in a real way and continue to bring you regular updates and features on Australian plants all in one Botanical Bible. Any support is greatly appreciated. Thank you.
In the spirit of reconciliation we acknowledge the Bundjalung, Gumbaynggirr and Yaegl and all aboriginal nations throughout Australia and their connections to land, sea and community. We pay our respect to their Elders past, present and future for the pleasures we have gained.
Eriachne rara
Classification
Unranked: Monocots
Unranked: Commelinidis
Order: Poales
Family: Poaceae
Genus: From Erion, which is Ancient Greek for wool and Akhne, which is Ancient Greek for chaff. It refers to the glumes which are covered in woolly like hairs.
Species: From Rarus which is Latin for uncommon. It refers to plants, which are rare, even when first found or rarely seen.
Common Name:
Distribution:
Eriachne rara is found in a line north and east from Double Lagoon north east of Normanton, on Cape York Peninsula in far north Queensland south to Grafton in northern coastal New South Wales. It is also found on most of the offshore Islands along the coast of Queensland from the north to Fraser Island in the south. The only exception is a disjunct population south west of St George in south western Queensland.
https://avh.ala.org.au/occurrences/search?taxa=Eriachne+rara#tab_mapView
Habitat Aspect Climate:
Eriachne rara prefers full sun to light dappled shade. It grows in open woodlands or open Eucalyptus forests. The altitude ranges from 5 meters ASL to around 1000 meters ASL.
The temperatures range from minus 3 degrees in August to 38 degrees in January.
The rainfall ranges from lows of 400mm to 3200mm average per annum.
Soil Requirements:
Eriachne rara prefers sandy loams to light gritty clays. The soils are usually derived from decomposed sandstones, granites, rhyolites and pumice stone, alluvial deposits and accumulated peaty sands behind the sand dunes or coral sands. The soils pH ranges from 5pH to 7pH. It does not tolerate waterlogged soils. Non saline soils to very saline soils are tolerated and this may increase to extremely saline but we have erred on the side of safety.
Height & Spread:
Wild Plants: 0.5m to 0.8m by 0.5m to 0.7m
Characteristics:
Eriachne rara grows as a perennial grass with erect, wiry, terete, tufted culms. The culms are loosely to moderately tuft on the slender rhizome. The culms usually measure 160mm to 750mm in height by 1mm to 3mm in diameter. The culms have 2 to 5 nodes. The mid nodes are covered in white hirsute hairs. The lateral branches are usually simple or at times are sparsely branched.
Eriachne rara‘s linear, erect leaves measure 40mm to 200mm in length by 2mm to 6mm in width. The sheaths completely enclose the culms for most of their length. The sheath is sparsely to densely covered in tuberculate based hairs which measure 1.5mm to 2mm in length. The ligules are fringe of white hairs. The ligules are a row of 0.5mm long white, ciliate hairs with a tuft of 1mm long hirsute hairs at each end. The concolourous laminas are ribbed longitudinally and are grass-green to blue-green. The laminas are slightly scabrous, glabrous or sparsely to moderately covered in white tuberculate hirsute hairs. The laminas are flat and convolute or involute.
The inflorescences of Eriachne rara are compound panicles. The loosely, open, ovate panicles are at the end of a long rachis and measure 50mm to 100mm in length by 30mm to 50mm in width. The rachises are covered in long white pilose hairs. The filiform, flexuous peduncules and pedicels are glabrous. The peduncules measure 10mm to 50mm in length while the spikes pedicels measure 2mm to 6mm in length.
The spikelets are loose and irregularly arranged along the spike. The pedicels measure 0.5mm to 1mm in length. The 2 fertile spikelets are without a rachilla extension. The ovate laterally compressed spikelets measure 5mm to 9mm in length.
The glumes are similar and thinner than the lemmas. The lower glume is ovate, membranous and without a keel but has 9 to 11 nerves. The lower glume surface is glabrous or densely covered in white pulverulent hairs and measure 5mm to 9mm in length. The lower glume‘s apexes are muticus or aristate.
The upper glume is ovate, membranous and without a keel but has 9 to 11 nerves and measures 5mm to 9mm in length. The upper glume surface is smooth, glabrous or is densely covered in white pulverulent hairs. The upper glume’s apexes are muticus or aristate.
The lemmas are without a keel but have 5 nerves and measure 3.3mm to 5.5mm in length and are covered in long, white, 2 mm pilose hairs. The apexes have a single strigose awn that measures 12mm to 20mm in length.
The palae are covered in long silky 2mm pilose hairs. The erose or dentate apexes have 2, long, deep brown strigose awns. The awns measure 20mm to 30mm in length.
There are 2 white filaments on each spikelet which have pale yellow anthers.
The white, bifid, feathery styles open from the base to the apex and appear before the stamens. The flowers appear from late December to late February.
The fruits of Eriachne rara are linear caryopses. The caryopses measure 1.8mm to 3mm in length. The green caryopses turn pale straw coloured tinged pink when ripe.
Wildlife:
Eriachne rara‘s wildlife is unknown to the author.
Cultivation:
Eriachne rara is not considered to be an important fodder crop. The young leaves and stems are eaten along with other pasture crops when growing in the pasture. It has a rapid growth rate from mid spring after the spring rains to late autumn. It does not recover well from grazing and is best managed by allowing a free period between grazing.
Eriachne rara is classified as a weed by gardeners without considering its potential in a small rockery or bog garden. It gives good quantities of trash for mulch. It has good potential as a landscaping clump grass in small gardens because of its small clump size.
In cultivation it can be grown on most types of soil even heavy clay with a skeletal covering of sand. It requires full sun for best results with a little added moisture or native fertilizer once a year to sustain maximum colour and vigour. High nitrogenous fertilizers will reduce the strength of the culms and panicles and give softer leaves resulting in them being broken or more readily attacked by black smut or lawn grub.
In cultivation the plants usually grow from 600mm to 750mm in height including the inflorescence by 300mm to 500mm in diameter. It is a rather striking in informal beds along walls beside swimming pools, small moist rockeries or on the lower side of a path where water runoff will aid in amount of moisture the plants receive on a regular basis. It needs to be planted in small isolated groups of 3 to 5 to make it look bushier which will display the blue-green look more attractive and contrast other foliages better. It can also be planted at the base of Melaleuca specie when making a swamp scene. Here Melaleuca quinquenervia and Melaleuca viridis stand out but any of the paper barks can be used.
Propagation:
Seeds: Eriachne rara‘s seeds can be sown directly into a seed raising mix. Cover the seeds with 2mm of the mix. Place the trays in a warm position under 20mm or 30mm shade. When the seedlings reach 20mm to 40mm tall, prick them out and plant them into 50mm native tubes using a seed raising mix. Place the 50mm native tubes into a tray of water and return them to the bush house.
Once the seedlings reach 100mm to 150mm in height plant them out into their permanent position. Mass plantings can be achieved by planting them at a minimum of 0.3 meters when planted in rows or at the base of swamp plants or in small clumps at 2 meter centers for a more open scene where the shape or silhouette is the feature required.
Fertilize using seaweed, fish emulsion or organic chicken pellets soaked in water on an alternate basis. Fertilize every two months until the plants are established then annually in early September to October to maintain health, vitality and better flowering.
Further Comments from Readers:
Hi reader, it seems you use The Bible of Botany a lot. That’s great as we have great pleasure in bringing it to you! It’s a little awkward for us to ask, but our first aim is to purchase land approximately 1,600 hectares to link several parcels of N.P. into one at The Pinnacles NSW Australia, but we need your help. We’re not salespeople. We’re amateur botanists who have dedicated over 30 years to saving the environment in a practical way. We depend on donations to reach our goal. If you donate just $5, the price of your coffee this Sunday, We can help to keep the planet alive in a real way and continue to bring you regular updates and features on Australian plants all in one Botanical Bible. Any support is greatly appreciated. Thank you.
In the spirit of reconciliation we acknowledge the Bundjalung, Gumbaynggirr and Yaegl and all aboriginal nations throughout Australia and their connections to land, sea and community. We pay our respect to their Elders past, present and future for the pleasures we have gained.
Eriocaulon australe
Classification
Unranked: Monocots
Unranked: Commelinidis
Order: Poales
Family: Eriocaulaceae
Genus: From Erion, which is Ancient Greek for woolly and Kaulon, which is Ancient Greek or later Caulon, which is Latin for a stick, stem or branch. It refers to the stems or culms which are covered in long, soft, silky hairs.
Species: From Terra Australis, which is Latin for land of the south. It refers to plants, which were first discovered from the land down under.
Common Name:
Distribution:
Eriocaulon australe is found south from the tip of Cape York Peninsula in far northern coastal Queensland to Foster in central coastal New South Wales.
https://avh.ala.org.au/occurrences/search?taxa=Eriocaulon+australe#tab_mapView
Habitat:
Aspect / Climate:
Eriocaulon australe prefers full sun to light dappled shade. It grows in wallum scrubs, coastal wet heaths, coastal Islands, coastal estuaries in open eucalypt forest, vine thickets or in or adjacent to littoral rainforests or open woodlands. The altitude ranges from 5 meters ASL to around 600 meters ASL.
The temperatures range from 2 degrees in August to 38 degrees in January.
The rainfall ranges from lows of 1100mm to 2000mm average per annum.
Soil Requirements:
Eriocaulon australe prefers coarse sands, fine sands, and sandy loams to light clays, medium silts or reddish podsolic soils. The soils are usually derived from accumulated peaty beach sands, accumulated coral sands, alluvial estuarine deposits or black basalts. The soils pH ranges from 5.5pH to 6.5pH. It tolerates seasonal waterlogged soils and seasonal high water tables. Non saline soils to very saline soils are tolerated and this may increase to extremely saline but we have erred on the side of safety.
Height & Spread:
Wild Plants: 0.3m to 0.5m by 0.2m to 0.3m
Characteristics:
Eriocaulon australe grows as a small perennial water growing tufted herb. The thick, fleshy, erect, cauline stems arise from a fleshy root base. The stems measure 100mm to 200mm in height. The stems are grass-green and glabrous.
Eriocaulon australe‘s linear leaves measure 200mm to 600mm in length by 3mm to 8mm in width. The bases are cauline while the apexes are long tapering to narrow acute. The concolourous laminas are mid grass green to olive-green, glabrous or sparsely to moderately covered in long white pilose hairs. The laminas are flat to slightly recurve from the mid vein to the margins. The leaf margins are entire. The mid vein is prominent on the lower lamina and is difficult to see on the upper lamina. The 4 to 5 pairs of parallel veins are faintly visible from both lamina surfaces. The laminas are flat or curve slightly upwards from the mid vein.
The inflorescences of Eriocaulon australe are semiglobosa to depressed-globose heads. The rachises measures 150mm to 500mm in length. The heads measure 3mm to 4.5mm in height by 7mm to 10mm in diameter. The heads are usually an equal mixture of male and female flowers though predominating male or female flower heads are not uncommon. The broad ovate bracts are glabrous. The apexes are broad obtuse-acute with a mucronate tip and are densely covered in persistent white tomentose hairs. The outer and inner bracts are broadly angular to obovate and are flat to slight curved.
The male flowers are stipitate with 3 outer tepals. The two lateral tepals are truncate to obovate and measure 2.5mm to 3mm in length by 0.5mm too 0.6mm in width. The third outer linear tepal is conduplicate. The 3 inner tepals are fused into an obconical tube much longer than the lobes. The 3 minute lobes are each appressed to the stamens and are very sparsely covered in white tomentose hairs. The 3 to 6 usually 3 or 6 stamens are white.
The female flowers have 3 irregular outer tepals. The 2 lateral tepals are concave and are lacerated towards apexes. The third outer tepal is often narrow-ovate and shorter than laterals. The 3 inner tepals are linear and spread widely at the base. The glabrous ovary is sessile while the white style is translucent. The flowers appear; soon after the water tables rise and will remain flowering, throughout the year provided adequate ground moisture is retained in the soil. There is a peak flowering period in late December to early February.
The fruits of Eriocaulon australe are obovoid to ovoid nuts. The nuts measure 0.6mm to 0.8mm in length by 0.5mm to 0.7mm in diameter. The glossy, green nuts turn pale glossy golden-brown to glossy honey coloured when ripe. The external cells are minute yet are isodiametric and arranged in numerous vertical planes. The style base usually measures 0.6mm to 1.2mm in length.
Wildlife:
Eriocaulon australe‘s leaves are often damaged by feeding water birds.
Cultivation:
Eriocaulon australe is a difficult plant to work with and can look out of place or weedy if not incorporated into a garden scene correctly. When it is placed correctly around a pool in a bog garden or sunny, wet courtyards or other confined spaces then a natural look, with it taking center stage erupts. Using small rocks can make the pool or any water feature appear larger. The leaves and flowers can make a great start for the scene look real and exciting balancing the ornate with the uncomplicated. When making a desert or water scene using Eriocaulon australe use medium to small rocks with few to many plants planted sparingly in small clumps around the water or in the water at the edges.
Cultivated plants will grow from 250mm to 400mm including the flowers. Deep coloured stone mulches or backdrops help highlight the small flower heads.
Propagation:
Seeds: Eriocaulon australe seeds can be sown directly into a seed raising mix. Cover the seeds with 2mm to 5mm of the mix. Place the tray or pot with the seeds into another tray and fill the lower tray with water. Place the trays in a warm position under 20mm or 30mm shade. When the seedlings reach 20mm to 40mm tall, prick them out and plant them into 50mm native tubes using a seed raising mix. Place the 50mm native tubes into a tray of water and return them to the bush house.
Once the seedlings reach 100mm to 150mm in height plant them out into their permanent position. Mass plantings can be achieved by planting them in groups of 2 or 3 at a minimum of 0.25 meters and the clumps at around 1 meter centers.
Fertilize using Seaweed, fish emulsion or organic chicken pellets soaked in water on an alternate basis. Fertilize the new plants every month with our recommended organic fertilizer until the plants are well established.
Division: Water the plants well a day or 2 before the operation is to be done if it is growing out of water.. Avoid very hot weather. Cut around the clump and out on one side so that the shovel can be placed under the root ball. (Or remove it from its pot.)
Remove the plant from the soil. Cut it into 3 or 4 equal parts, first down the middle then halve those sections again ensuring that each section has some roots and a growing shoot with leaves. Remove unwanted dead leaves and any old small sections that look weak or dead. Plants can be divided further but ensure each division has a several strong shoots and healthy roots attached to the tuff. Replant or pot ensuring the soil is at the same level as before. Water and fertilize with a half strength solution of fish emulsion. New shoots will appear within two weeks. Once the potted plants have new shoots and the roots treat them as seedlings.
Fertilize using seaweed, fish emulsion or organic chicken pellets soaked in water on an alternate basis. Fertilize every two months until the plants are established then annually in early September to October to maintain health, vitality and better flowering.
Further Comments from Readers:
Hi reader, it seems you use The Bible of Botany a lot. That’s great as we have great pleasure in bringing it to you! It’s a little awkward for us to ask, but our first aim is to purchase land approximately 1,600 hectares to link several parcels of N.P. into one at The Pinnacles NSW Australia, but we need your help. We’re not salespeople. We’re amateur botanists who have dedicated over 30 years to saving the environment in a practical way. We depend on donations to reach our goal. If you donate just $5, the price of your coffee this Sunday, We can help to keep the planet alive in a real way and continue to bring you regular updates and features on Australian plants all in one Botanical Bible. Any support is greatly appreciated. Thank you.
In the spirit of reconciliation we acknowledge the Bundjalung, Gumbaynggirr and Yaegl and all aboriginal nations throughout Australia and their connections to land, sea and community. We pay our respect to their Elders past, present and future for the pleasures we have gained.
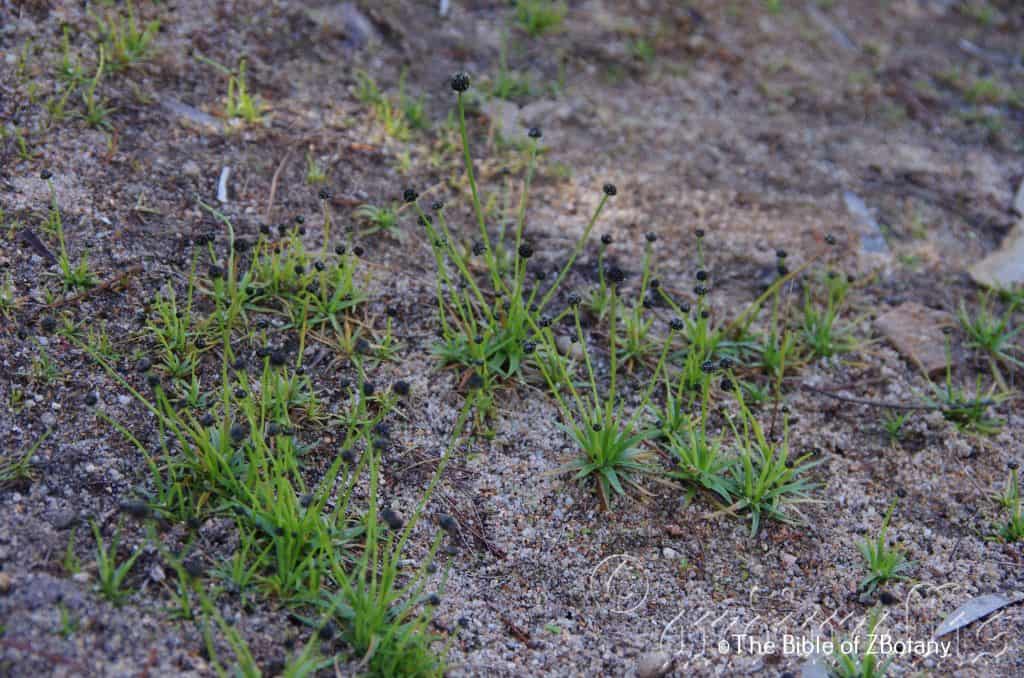
Hidden Valley Paluma Range National Park Qld.
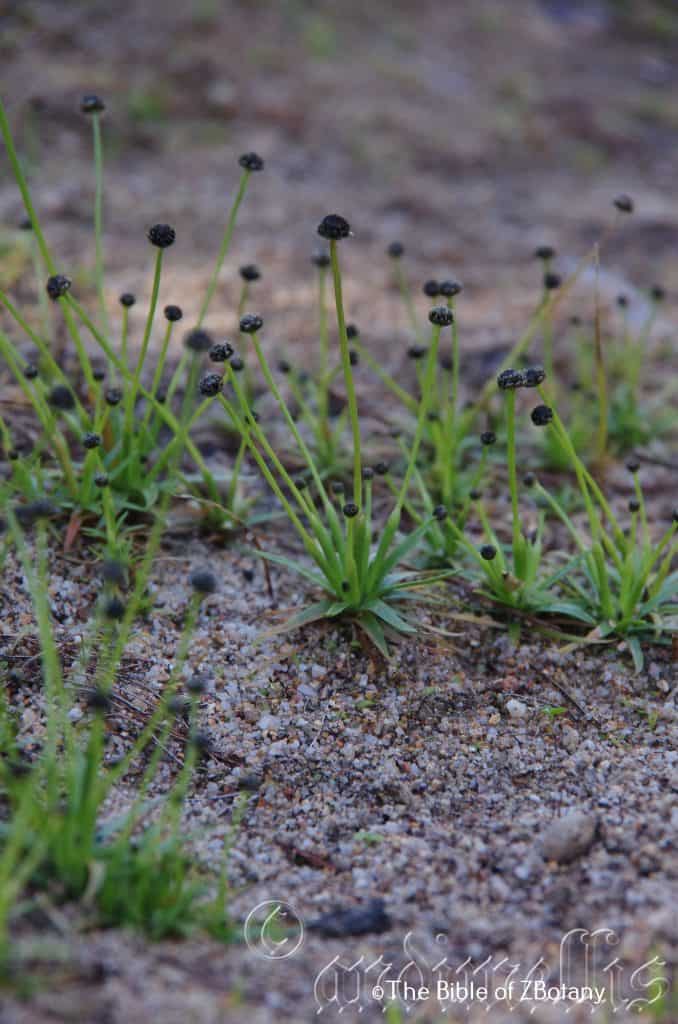
Hidden Valley Paluma Range National Park Qld.
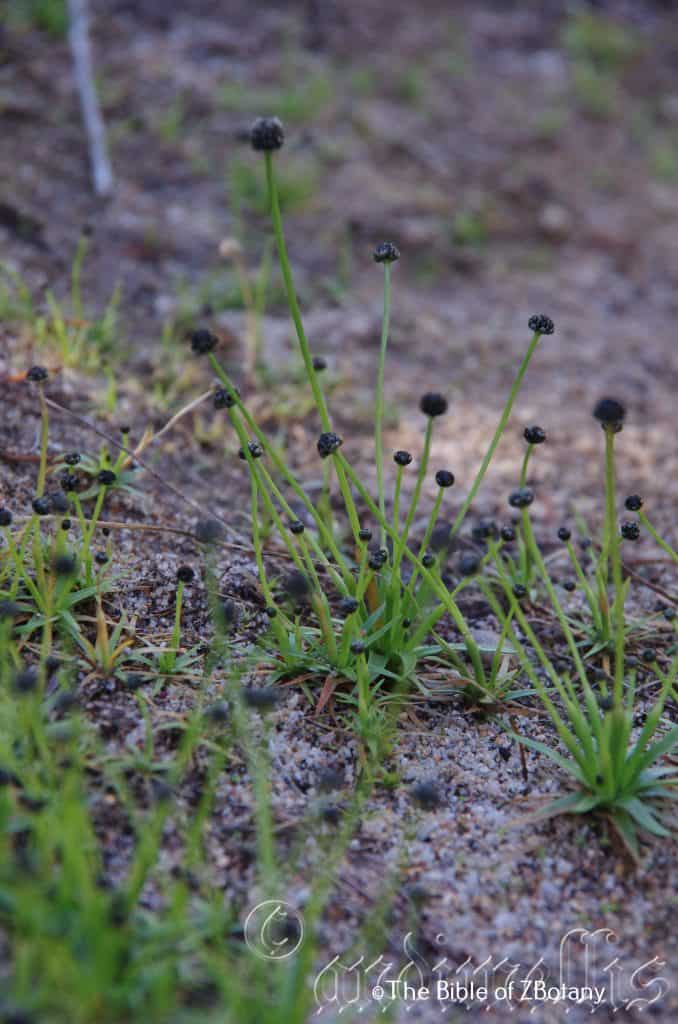
Hidden Valley Paluma Range National Park Qld.
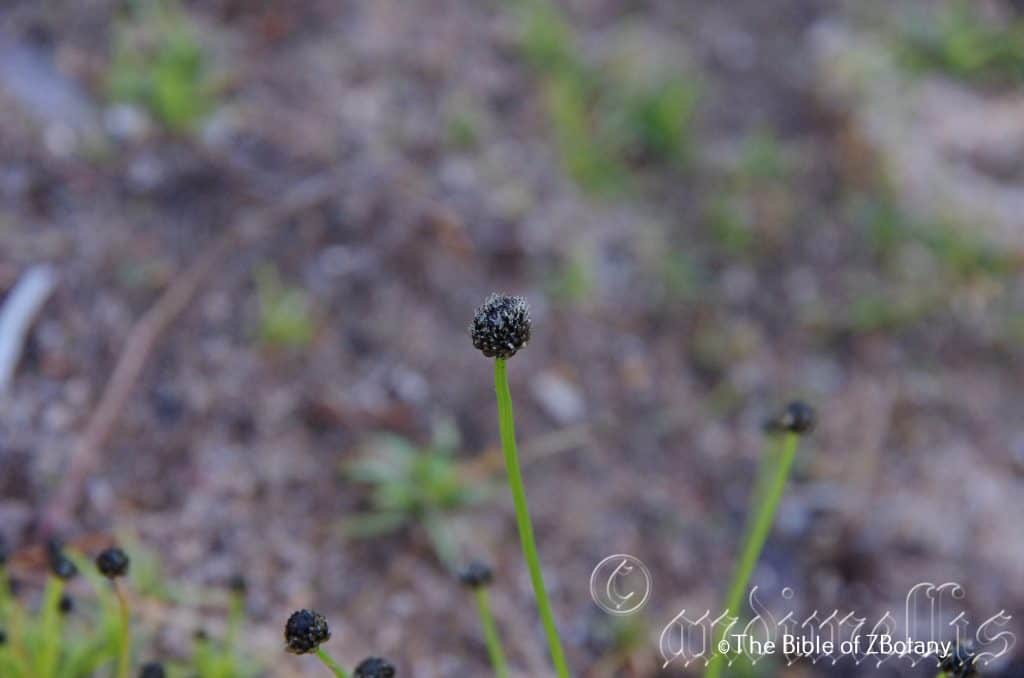
Hidden Valley Paluma Range National Park Qld.
Eriocaulon scariosum
Classification
Unranked: Monocots
Unranked: Commelinidis
Order: Poales
Family: Eriocaulaceae
Genus: From Erion, which is Ancient Greek for woolly and Kaulon, which is Ancient Greek or later Caulon, which is Latin for a stick, stem or branch. It refers to the stems or culms which are covered in long, soft, silky hairs.
Species: From Scariosus, which is Latin for thin dry and membranous. It refers to structures, or organs, which are thin, dry, membranous and papery.
Common Name:
Distribution:
Eriocaulon scariosum is found east from Southport to the headwaters of Pine Creek in far north eastern Northern Territory.
In the east it is found south from the Scardon River on Cape York Peninsula in far north eastern Queensland to Yea and Rosedale in eastern Victoria. It is mainly found in coastal heaths and islands off the east coast. It is found as far west as the Carnarvon Gorge National Park, on the Western Slopes, on and east of the Great Dividing Range to the coast.
https://avh.ala.org.au/occurrences/search?taxa=Eriocaulon+scariosum#tab_mapView
Habitat Aspect Climate:
Eriocaulon scariosum prefers full sun to light dappled shade. It grows in low lying sand plains close to the coast in association with wallum scrubs, coastal wet heaths, coastal Islands, coastal estuaries and on coastal deltas and at times open eucalypt forest, and sometimes on disturbed land close to the above sites. The altitude ranges from 5 meters ASL to around 1450 meters ASL.
The temperatures range from 2 degrees in August to 38 degrees in January.
The rainfall ranges from lows of 1100mm to 2000mm average per annum.
Soil Requirements:
Eriocaulon scariosum prefers coarse sands, fine sands, sandy loams, light clays to medium clays. The soils are derived from decomposed brown basalts, shales, granites, sandstones or accumulated beach sands. The soils pH ranges from 5.5pH to 6.5pH. It tolerates waterlogged soils and high water tables. Non saline soils to very saline soils are tolerated.
Height & Spread:
Wild Plants: 0.1m to 0.15m by 0.1m to 0.2m
Characteristics:
Eriocaulon scariosum grows as a small perennial water edge growing tufted herb. The thick, fleshy, erect, cauline stems arise from a fleshy root base. The stems measure 100mm to 200mm in height. The stems are grass-green and glabrous.
Eriocaulon scariosum‘s linear leaves measure 15mm to 80mm in length by 1mm to 2mm in width. The bases are cauline while the apexes are long tapering to narrow acute. The concolourous laminas are mid grass-green to grey-green, glabrous. The laminas are flat and slightly decurve close to the apexes. The leaf margins are entire. The mid vein and 3 or 4 pairs of parallel veins are slightly prominent on the lower lamina and are difficult to see on the upper lamina.
The inflorescences of Eriocaulon scariosum are semiglobosa to depressed-globose heads. The rachises measures 80mm to 150mm in length. The heads measure 3mm to 4.5mm in height by 4mm to 16mm in diameter. The heads are usually an equal mixture of male and female flowers though predominating male or female flower heads are not uncommon. The broad obovate to spathulate outer bracts are scarious on the outer surface while the inner surface is glabrous. The apexes are broad obtuse-acute with a mucronate tip and are densely covered in persistent white pulverulent hairs.
The broad obovate to spathulate inner bracts are greyish, and sparsely covered in white puberulent hairs on the apical half of the outer surface while the inner surface is glabrous. The inner bracts are broadly angular to obovate and are flat to slight curved. The apexes are broad obtuse-acute with a mucronate tip and are densely covered in persistent white pubescent hairs. The perianth are covered in white pubescent hairs.
The male flowers are stipitate with 3 irregular outer tepals. The two lateral tepals are concave, oblong-spathulate and measure 1.5mm to 2mm in length by 0.3mm too 0.4mm in width. The third outer tepal is linear and at times fused on the margins. The 3 inner tepals are united at the base to form a short tube. The 3 minute lobes are each appressed to the stamens. The 6, white stamens are glabrous.
The female flowers have 2 or 3 irregular outer tepals. The tepals are concave and are lacerated towards apexes. The third outer tepal when present is linear and is deep brown or black. The 3 inner tepals are inserted above the floral axis and are narrow oblong to narrow spathulate. The white tepals are densely covered in white pulverulent hairs on both surfaces. The glabrous ovary is sessile. The flowers appear from January to June.
The fruits of Eriocaulon scariosum are obovoid to ovoid nuts. The nuts measure 0.6mm to 0.8mm in length by 0.5mm to 0.7mm in diameter. The glossy, green nuts turn pale glossy golden-brown to glossy honey coloured when ripe. The external cells are minute yet are isodiametric and arranged in numerous vertical planes. The style base usually measures 0.6mm to 1.2mm in length.
Wildlife:
Eriocaulon scariosum‘s leaves are often damaged by feeding water birds.
Cultivation:
Eriocaulon scariosum is a difficult plant to work with and can look out of place or weedy if not incorporated into a garden scene correctly. When it is placed correctly around a small fish pond or frog pond in a bog garden or sunny, wet courtyards or other confined spaces then a natural look with it taking center stage erupts. Using small rocks can make the pool or any water feature appear larger. The leaves and flowers can make a great start for the scene look real and exciting balancing the ornate with the uncomplicated.
Cultivated plants will grow from 80mm to 150mm including the flowers. Deep coloured pebble mulches, rocks and backdrops help highlight the small flower heads. They add a lot of interest to the carnivorous setting and blend in beautifully.
Propagation:
Seeds: Eriocaulon scariosum seeds can be sown directly into a seed raising mix. Cover the seeds with 2mm to 5mm of the mix. Place the tray or pot with the seeds into another tray and fill the lower tray with water. Place the trays in a warm position under 20mm or 30mm shade. When the seedlings reach 15mm to 20mm tall, prick them out and plant them into 50mm standard tubes using a seed raising mix. Place the 50mm native tubes into a tray of water and return them to the bush house.
Once the seedlings reach 50mm to 60mm in height plant them out into their permanent position. Mass plantings can be achieved by planting them in groups of 2 to 5 plants at a minimum of 0.15 meters and the clumps at around 0.5 meter to 1 meter centers.
Fertilize using seaweed, fish emulsion or organic chicken pellets soaked in water on an alternate basis. Fertilize every two months until the plants are established then annually in early September to October to maintain health, vitality and better flowering.
Further Comments from Readers:
Hi reader, it seems you use The Bible of Botany a lot. That’s great as we have great pleasure in bringing it to you! It’s a little awkward for us to ask, but our first aim is to purchase land approximately 1,600 hectares to link several parcels of N.P. into one at The Pinnacles NSW Australia, but we need your help. We’re not salespeople. We’re amateur botanists who have dedicated over 30 years to saving the environment in a practical way. We depend on donations to reach our goal. If you donate just $5, the price of your coffee this Sunday, We can help to keep the planet alive in a real way and continue to bring you regular updates and features on Australian plants all in one Botanical Bible. Any support is greatly appreciated. Thank you.
In the spirit of reconciliation we acknowledge the Bundjalung, Gumbaynggirr and Yaegl and all aboriginal nations throughout Australia and their connections to land, sea and community. We pay our respect to their Elders past, present and future for the pleasures we have gained.
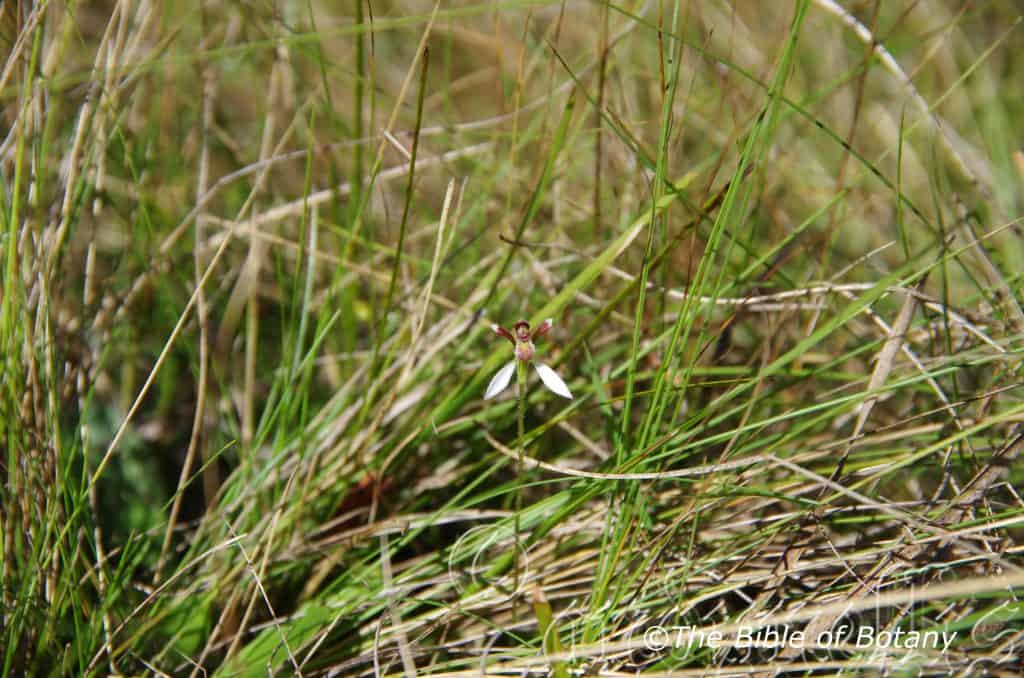
Minnie Waters NSW
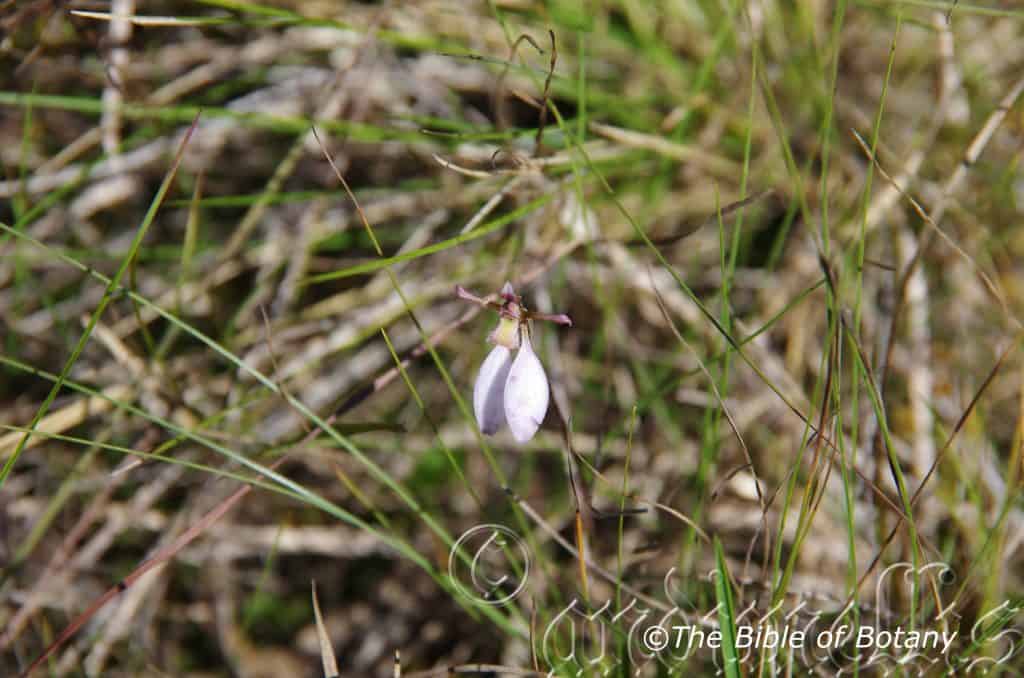
Minnie Waters NSW
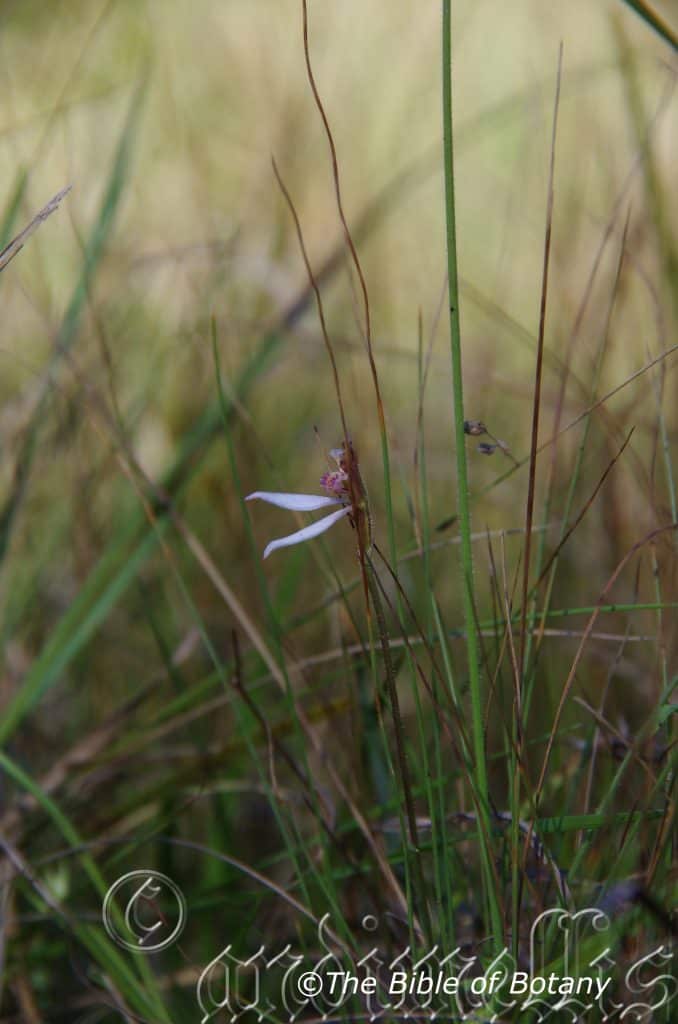
Minnie Waters NSW
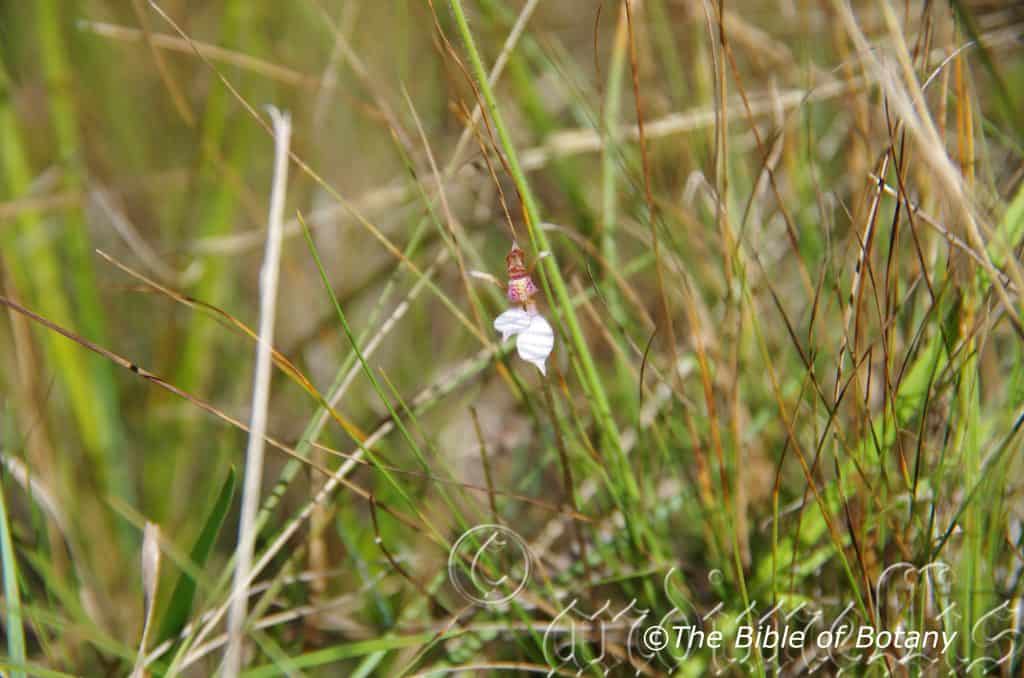
Minnie Waters NSW
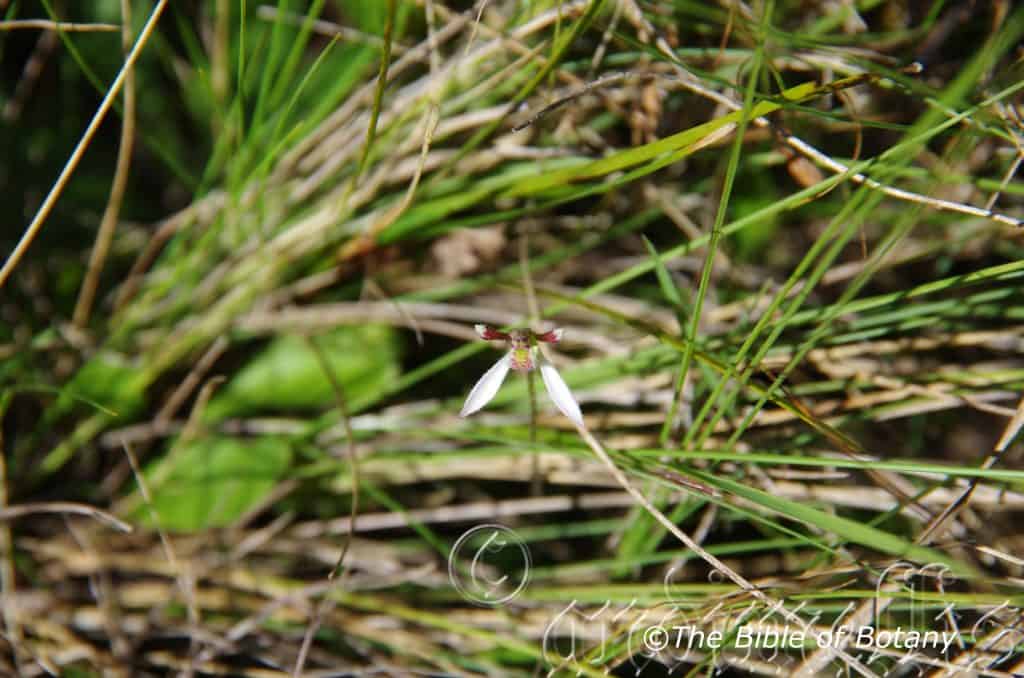
Minnie Waters NSW+
Eriochilus cucullatus
Classification
Class: Monocots
Order: Asparagales
Family: Orcidaceae
Genus: From Erion, which is Ancient Greek for woolly and Cheilos, which is Ancient Greek for a lip. It refers to an orchids’s labellum, which is covered in long, silky, almost floccose hairs.
Specie: From Cucullatus, which is Latin for having a hood or Cucull which is Latin for to be covered. It refers to flowers, which have a cucull like hood or brim.
Common Name:
Distribution:
Eriochilus cucullatus is found south from Mount Perry in central coastal Queensland to Baird Bay on Eyre Peninsula in southern South Australia. There is an isolated population in central coastal Queensland at Dalrymple Creek. It is found on the Western Slopes, on and east of the Great Dividing Range to the coast. It is always found within 240 kilometres of the coast in the east and within 50 kilometres in western Victoria and South Australia.
It is also found on the islands of Bass Straight and most of Tasmania.
https://avh.ala.org.au/occurrences/search?taxa=Eriochilus+cucullatus#tab_mapView
Habitat:
Aspect / Climate:
Eriochilus cucullatus prefers dappled shade to full shade. It grows as an understory terrestrial orchid in open Eucalyptus forests, open woodlands, on the grassland adjacent to rainforest margins, coastal heaths or open schlerophyll forests. The altitude ranges from 5 meters ASL to 950 meters ASL.
The temperatures range from minus 3 degrees in August to 39 degrees in January.
The rainfall ranges from lows of 500mm to 2000mm average per annum.
Soil Requirements:
Eriochilus cucullatus prefers to grow on better quality fatty, sandy loams to medium clays with plenty of forest litter. The soils are usually derived from decomposed brown basalt, black basalt, sandstones, granites, accumulated peaty beach sands behind the frontal dunes or alluvial deposits. The soils pH ranges from 5.5pH to 6.5pH. It does not tolerate waterlogged soils but moisture is a strong requirement for good growth. Non saline soils to moderately saline soils are tolerated.
Height & Spread:
Wild Plants: 0.2m to 0.25m by 0.03m to 0.04m.
Characteristics:
Eriochilus cucullatus grows as a small terrestrial orchid with a short non distinct rhizome. The plants grow rapidly with the onset of the wet season to produce a single leaf, flowers and seeds dying back completely during the drier months of the year.
Eriochilus cucullatus‘s single horizontal leaf is ovate and incomplete by the time the plants flower. The leaf measures 15mm to 35mm in length in length by 7mm to 12mm in width. The leaf base is cordate while the apex is broad acute. The concolourous leaves are deep green, dull and sparsely covered in white pilose and hirsute hairs. The margins are entire. The mid vein and 2 lateral veins are deep purple and slightly prominent on the lower lamina and are distinctly visible on the upper lamina.
The inflorescences of Eriochilus cucullatus is a long stiff, erect raceme. The racemes have 1 to 5 flowers. The erect deep maroon rachis is covered in white pilose and hirsute hairs. The rachises measure 180mm to 250mm in length. The ovary measures 7mm to 9mm in length including the ovary which appears to be part of the pedicel but is slightly swollen. The pedicel and ovary are lime green with deep purple longitudinal markings. All parts of the inflorescences are sparsely to moderately covered in white hirsute and pilose hairs.
The dorsal sepal is deflexed, broad oblong and leans forward over the labellum and measures 5mm to 6.5mm by 2mm to 2.5mm in width. The margins are strongly revolute. The lateral sepals are free with the inner margins touching but not fused. The elliptical to broad elliptical or spathulate sepals measure 10mm to 13mm by 3.5mm to 6mm in width.
The lateral petals are linear with acute apexes. The lateral petals measure 7mm to 10mm in length by 1mm to 2mm in width. The lateral petals margins are entire, maroon with a greenish or paler apex. The claw is often filiform and elongated.
The labellum‘s are unlobed and decurve strongly to 90 degrees. The broad oblong labellum is strongly revolute and measure 7mm to 11mm in length by 3mm to 4mm in width with 2 obtuse basal ridges separating the thickened margins from the center. The cream-yellowish with red spotted labellum is covered in tufts of stiff hairs. The flowers appear from December to May.
Eriochilus cucullatus‘s capsule is erect when it is dehisce.
Wildlife:
Eriochilus cucullatus is the host to numerous small native bees when in flower and also hosts several small pollen flies.
Cultivation:
Eriochilus cucullatus is an unusual terrestrial orchid to grow in the garden. If you are lucky enough to have it growing in your garden it is worthwhile preserving in situation.
Propagation:
Seeds: Eriochilus cucullatus seeds require treatment before sowing. Really Orchid seeds are meant for professionals with time, equipment and space. However if you wish to persevere then here are the basics and you are learning from an amateur. Once the orchids are large enough to handle treat them similarly to the genre Liparis.
1. Obtain relevant materials
The first step in growing orchid from seed will be sourcing and having at the ready all materials that will be required in the propagation process.
This includes all of the following:
Unripe orchid seed capsule. If there are 2 capsules secure the second capsule immediately after the first capsule splits or if only one capsule as soon as it changes colour.
Orchid gelling medium with agar which can be purchased from an orchid society or a specialist nursery.
Distilled water
Cooking pot
Spoon
Oven-safe glass or polypropylene containers with lids
Sealable bags
Clean, sterilized cutting board
Rubber gloves
Paper towels
Tweezers or forceps
70 percent ethanol
Bleach
Scalpel or sharp knife
Planting pot
Orchid compost
Length of wire metal
Plastic spray bottle.
deep petri dishes or sterile jars.
2. Prepare agar medium
The agar medium is a special orchid gelling mixture that distilled water will be added to distilled water.
To prepare the medium, mix equal parts of orchid gelling medium with distilled water in a cooking pot.
Place the pot on a stove and bring the mixture to boil for while stirring continuously for two minutes.
Pour the mixture into the petri dishes glass or propylene containers while ensuring not to fill the containers above 20 percent of their volume.
Loosely replace the lids to the containers. Sterilize the containers by heating them up in a microwave oven for between 2 to 3 minutes.
Spray 70 percent ethanol into a sealable bag to create a sterile environment. Transfer the heated containers into the sealable bag.
Allow the containers to cool a bit before tightening their lids and then sealing the bag. Leave the containers to stand for a few days until the mixture solidifies.
3. Prepare seed capsule and work surface
Place an open pot of water on a stove and bring to boil. Place the cutting board in the oven and sterilize.
Put on rubber gloves and sterilize the forceps, and scalpel with 70 percent ethanol.
Insert the seed capsule into a bowel filled with bleach for about fifteen minutes.
Sterilize seed capsule again with 70 percent ethanol and place on grill.
Using the sterilized scalpel, cut open the seed capsule to reveal the seeds. Using a scalpel or sharp knife, scrape out the seeds from the capsule unto an ethanol soaked paper towel.
4. Flasking of the seed
Take out the petri dishes or glass jars containers holding the agar medium. Over the steam, open up the containers and transfer seeds from the ethanol soaked paper towel into the individual containers using the sterilized forceps.
The amount of seeds will determine the number of containers required. Replace the lid of the containers and place them on a window sill that receives indirect sunlight.
5. Wait and exercise patience
All that can be done at this point is to wait until the seeds germinate. The amount of time that this might take varies and is dependent on the particular species.
Generally, the time can range from a few months to a few years. During this period of waiting, ensure the containers are free from contamination to ensure that germination is not disrupted.
6. Emergence of protocorms
Protocorms are tuber-shaped bodies with rhizoids that are produced by the young seedlings of various orchids. Protocorms represent the embryonic form of the orchid plant.
Their emergence after the period of waiting at an affirmation that everything in the propagation process is on track.
7. Transflask orchid seedlings is done after they have developed roots
Upon the emergence of the protocorms, consistently observe the growth of the seedlings. At the point when the seedlings appear to overcrowd the flask, transflasking should be carried out, typically within 30 and 60 days.
* This is done by removing individual seedlings using sterilized tweezers from the original containers and placing them in new containers also filled, in a proportion similar to the original, with agar medium. 6 to 8 in a standard petri dish or 1or 2 to a test tube
8. Transplant seedlings into planting pots
On the presumption that there are no disruptions to the plant growth, the seedlings will eventually outgrow the containers.
At this point, they can to be transplanted into planting pots. A good rule of thumb to determine when they need to be transplanted is when the seedlings have developed roots that have grown up to the length of one-quarter of an inch.
To transplant, prepare a planting pot or other container for receiving the seedling by majorly filling it up with coarse fir bark and possibly some slightly moist orchid compost mixture containing perlite, fine charcoal, redwood bark shavings, etc.
To extract the seedlings, submerge the containers in warm water to help loosen the agar gel.
Once the agar medium is softened, twist a piece of metal to form a loop and in turn, use it to carefully pull out the seedlings from the container. It is best done if the agar and seedling can be removed together.
The seedlings can be further rinsed in lukewarm water to remove any excess agar mixture still stuck to them.
Following this, the seedlings can now be planted into the prepared pot with at least 50mm of space between each individual seedling.
9. Positioning the orchid
The seedling once fully transplanted should be placed in a location that is warm with good indirect sun light.
Slowly position the pots into an area that closely assimilates the conditions it will be growing under.
The choice as to whether the plant should be exposed to full sun or in direct sunlight will be dependent on the particular orchid specie.
10. Subsequent care of the plant
After the first week, the seedling can be misted several times a day and watered just once a week.
A guide in watering the plant will be using the dryness of the fir back that is, water the plant until the fir back is completely moistened and wait till it has completely dried out before watering again.
Fertilize using seaweed, fish emulsion or organic chicken pellets soaked in water on an alternate basis. Fertilize every two months until the plants are established then annually in early September to October to maintain health, vitality and better flowering. – Good luck.
Further Comments from Readers:
Hi reader, it seems you use The Bible of Botany a lot. That’s great as we have great pleasure in bringing it to you! It’s a little awkward for us to ask, but our first aim is to purchase land approximately 1,600 hectares to link several parcels of N.P. into one at The Pinnacles NSW Australia, but we need your help. We’re not salespeople. We’re amateur botanists who have dedicated over 30 years to saving the environment in a practical way. We depend on donations to reach our goal. If you donate just $5, the price of your coffee this Sunday, We can help to keep the planet alive in a real way and continue to bring you regular updates and features on Australian plants all in one Botanical Bible. Any support is greatly appreciated. Thank you.
In the spirit of reconciliation we acknowledge the Bundjalung, Gumbaynggirr and Yaegl and all aboriginal nations throughout Australia and their connections to land, sea and community. We pay our respect to their Elders past, present and future for the pleasures we have gained.
Eriochloa procera
Classification
Unranked: Monocots
Unranked: Commelinidis
Order: Poales
Family: Poaceae
Subfamily: Chloridoideae
Tribe: Eragrostidae
Genus: From Erion, which is Ancient Greek for woolly and Khloa, which is Ancient Greek for a grass. It refers to flowering spikes and glumes, which are covered in long, silky, hairs.
Species: From Procera, which is Latin for very tall. It refers to plants, structures or organs, which are much taller or longer than other species in the genus.
Common Name: Spring Grass.
Distribution:
Eriochloa procera is mainly found north of a line from Kalbarri National Park in Western Australia to Warlock Ponds on the Sturt Highway in the Northern Territory then south easterly direction to Springsure where it is found eastward to the coast in central Queensland, then southwards to the catchments of the Clarence River and the Darling River systems in New South Wales. It is found as far south as Wollongong along the coast fringe. There are 2 isolated populations one in far north eastern South Australia at Goydon’s Lagoon south west of Lake Uloowaranie and the Northern Territory in West Macdonald National Park.
https://avh.ala.org.au/occurrences/search?taxa=Eriochloa+procera#tab_mapView
Habitat Aspect Climate:
Eriochloa procera prefers full sun to light dappled shade. It grows in wet depressions, around dams, lagoons, billabongs, and wet heaths in and adjacent to tropical and subtropical rainforests, monsoonal forests, wet sclerophyll forests, moist Brigalow forests, tropical and subtropical woodlands, temperate moist woodlands, semi-arid woodlands, and coastal grasslands. The altitude ranges from 5 meters ASL to around 900 meters ASL.
The temperatures range from minus 4 degrees in August to 44 degrees in January.
The rainfall ranges from lows of 300mm to 3000mm average per annum.
Soil Requirements:
Eriochloa procera prefers sandy loams, light gritty clays to medium silts. The soils are usually derived from decomposed brown basalt, podzolics, shale, metamorphic, alluvial deposits and accumulated peaty sands behind the sand dunes. The soils pH ranges from 5pH to 6.5pH. It does not tolerate waterlogged soils however plants are always associated with wet areas adjacent to areas that have seasonal inundations, swamps and rising water tables. Non saline soils to moderately saline soils are tolerated.
Height & Spread:
Wild Plants: 0.5m to 1m by 0.8m to 1m
Characteristics:
Eriochloa procera grows as a perennial rush with erect or geniculately ascending, terete, caespitose tufted culms. The culms are densely tufted on the slender rhizome. The culms usually measure 200mm to 1200mm in height by 1mm to 3mm in diameter. The culms are deep green-maroon with glabrous internodes while the nodes are moderately to densely covered in white pilose hairs.
Eriochloa procera‘s linear, erect leaves measure 20mm to 400mm in length by 2mm to 8mm in width. The sheaths completely enclose the culms overlapping the upper leaf. The sheaths are glabrous. The ligules measure 0.7mm to 1.2mm in length and are fringe of white ciliate hairs. The concolourous laminas are grass-green to blue-green or deep grass-green and glabrous. The laminas are involute near the base and recurve upwards as they approach the apexes having a distinct concave appearance.
The inflorescences of Eriochloa procera are compound panicles of initially appressed racemes soon becoming divaricate. The loosely, ovate panicles are at the end of a long rachis that measures 40mm to 200mm in length. The 5 to 20 racemes measure 20mm to 100mm in length. The rachises are glabrous and measure 30mm to 100mm in length. The flexuous pedicels measure 0.7mm to 1.5mm in length.
The spikelets are loosely and irregularly arranged along the raceme. The pedicels measure 0.5mm to 1mm in length. The spikelets are 2 flowered with the upper floret being fertile while the lower floret is usually barren or rarely male. The elliptical spikelets are laterally compressed and measure 2.3mm to 4mm in length.
The glumes are dissimilar and thinner than the lemmas. The minute lower glume is cupular. The pale green to pale blue-green upper glume is ovate, membranous and without a keel. It has 5 nerves and measures 2.8mm to 3.7mm in length. The upper glume surface is smooth and is densely covered in white semi appressed hirsute hairs. The apex is muticus. The glumes have a basal like node which is sparsely covered fine white hairs which measure 3mm to 4mm in length.
The lemmas are without a keel but have 7 nerves. The lemmas measure 1.7mm to 2.2mm in length and are glabrous. The sterile lower lamina is without a keel but has 5 nerves while the apex is muticus. The fertile lemma measures 1.7mm to 2.2mm in length and has a mucronate tip like awn which measures 0.3mm to 0.5mm in length
The palae are insignificant.
There are 3 white filaments on each spikelet which have deep maroon-burgundy anthers which measure 0.4mm to 0.5mm in length.
The white, trifid, feathery styles open from the base to the apex and appear before the stamens. The flowers appear from late December to late February.
The fruits of Eriochloa procera are linear caryopses. The caryopses measure 1.5mm to 1.8mm in length. The green caryopses turn pale rusty-brown then pale straw coloured when ripe
Wildlife:
Eriochloa procera‘s wildlife is unknown to the author however small aviary birds including finches and budgerigars eagerly eat the green seeds when provided to them.
Cultivation:
Eriochloa procera is considered to be an important fodder crop. The leaves and stems are eaten along with other pasture crops. It recovers well from moderate grazing and is best managed by allowing a free period between grazing.
Eriochloa procera is classified as a weed by gardeners without considering its potential in a small rockery or bog garden. It gives average quantities of trash for mulch. It has good potential as a small landscaping grass in small gardens because of its small clump size. It recovers quickly when cut back to ground level.
In cultivation it can be grown on most types of soil even heavy clay with a skeletal covering of sand. It requires full sun for best results with a little added moisture or native fertilizer once a year to sustain maximum colour and vigour. High nitrogenous fertilizers should be avoided as they will reduce the strength of the culms resulting in them being more readily attacked by black smut or lawn grub.
In cultivation the plants usually grow from 750mm to 900mm in height by 900mm to 1000mm in diameter. It is rather striking in informal beds along walls beside swimming pools, small moist rockeries or on the lower side of a path where water runoff will aid in amount of moisture the plants receive on a regular basis. It can be planted in small isolated groups of 3 to 5 to make it look bushier which will display the blue-green look more attractively and contrast other foliages better. It can also be planted at the base of Melaleuca specie when making a swamp scene. Here Melaleuca quinquenervia and Melaleuca viridis stand out but any of the paper barks can be used.
Propagation:
Seeds: Eriochloa procera seeds can be sown directly into a seed raising mix. Cover the seeds with 2mm of the mix. Place the trays in a warm position under 20mm or 30mm shade. When the seedlings reach 20mm to 40mm tall, prick them out and plant them into 50mm native tubes using a seed raising mix. Place the 50mm native tubes into a tray of water and return them to the bush house.
Once the seedlings reach 100mm to 150mm in height plant them out into their permanent position. Mass plantings can be achieved by planting them at a minimum of 0.5 meters when planted in rows or at the base of swamp plants or in small clumps at 2 meter to 3 meter centers for a more open scene where the shape or silhouette is the feature required.
Fertilize using Seaweed, fish emulsion or organic chicken pellets soaked in water on an alternate basis. Fertilize the new plants every month with our recommended organic fertilizer until the plants are well established.
Division: Water the plants well a day or 2 before the operation is to be done. Avoid very hot weather. Cut around the clump and out on one side so that the shovel can be placed under the root ball. (Or remove it from its pot.)
Remove the plant from the soil. Cut it into 3 or 4 equal parts, first down the middle then halve those sections again ensuring that each section has some roots and, rhizome and culms or shoots. The rhizomes should have at least several eyes or growing shoots. Remove unwanted dead leaves and any old small sections that look weak or dead. Plants can be divided further but ensure each division has a several strong shoots and healthy roots attached to the tuff. Replant or pot ensuring the soil is at the same level as before. Water and fertilize with a half strength solution of fish emulsion. New shoots will appear within two weeks. Once the potted plants have new shoots and the roots treat them as seedlings.
Fertilize using seaweed, fish emulsion or organic chicken pellets soaked in water on an alternate basis. Fertilize every two months until the plants are established then annually in early September to October to maintain health, vitality and better flowering.
Further Comments from Readers:
Hi reader, it seems you use The Bible of Botany a lot. That’s great as we have great pleasure in bringing it to you! It’s a little awkward for us to ask, but our first aim is to purchase land approximately 1,600 hectares to link several parcels of N.P. into one at The Pinnacles NSW Australia, but we need your help. We’re not salespeople. We’re amateur botanists who have dedicated over 30 years to saving the environment in a practical way. We depend on donations to reach our goal. If you donate just $5, the price of your coffee this Sunday, We can help to keep the planet alive in a real way and continue to bring you regular updates and features on Australian plants all in one Botanical Bible. Any support is greatly appreciated. Thank you.
In the spirit of reconciliation we acknowledge the Bundjalung, Gumbaynggirr and Yaegl and all aboriginal nations throughout Australia and their connections to land, sea and community. We pay our respect to their Elders past, present and future for the pleasures we have gained.

National Botanic Gardens ACT
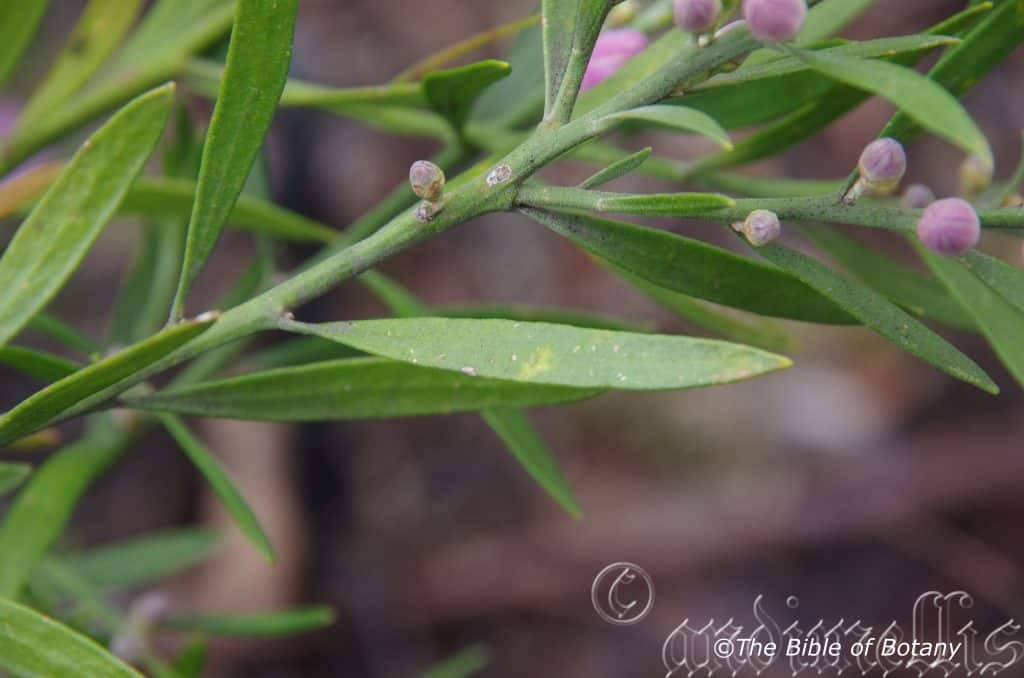
National Botanic Gardens ACT
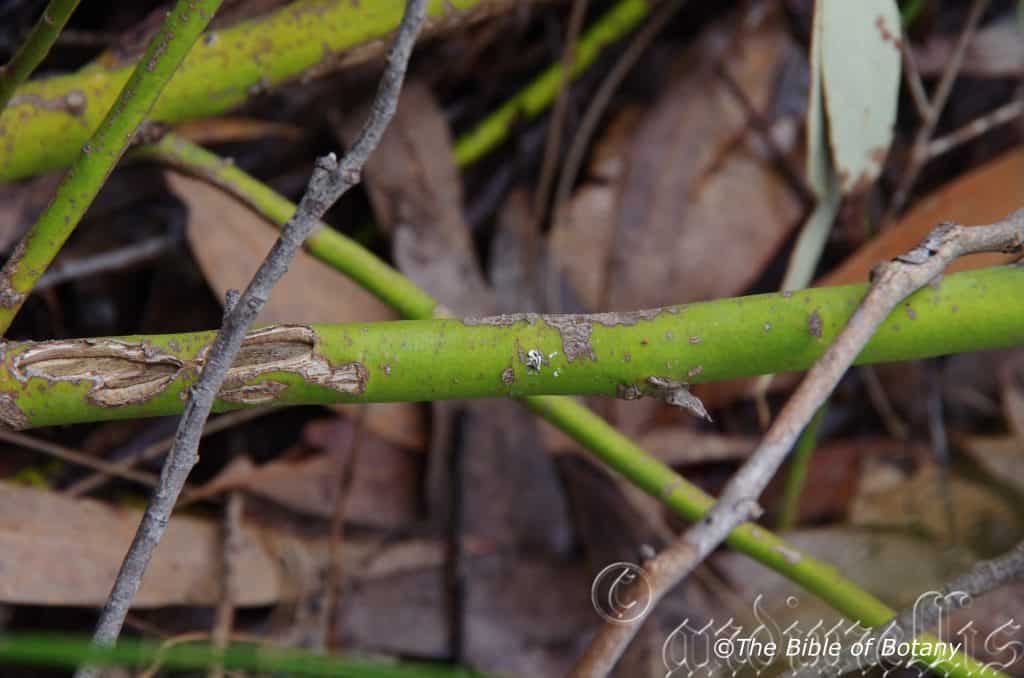
National Botanic Gardens ACT
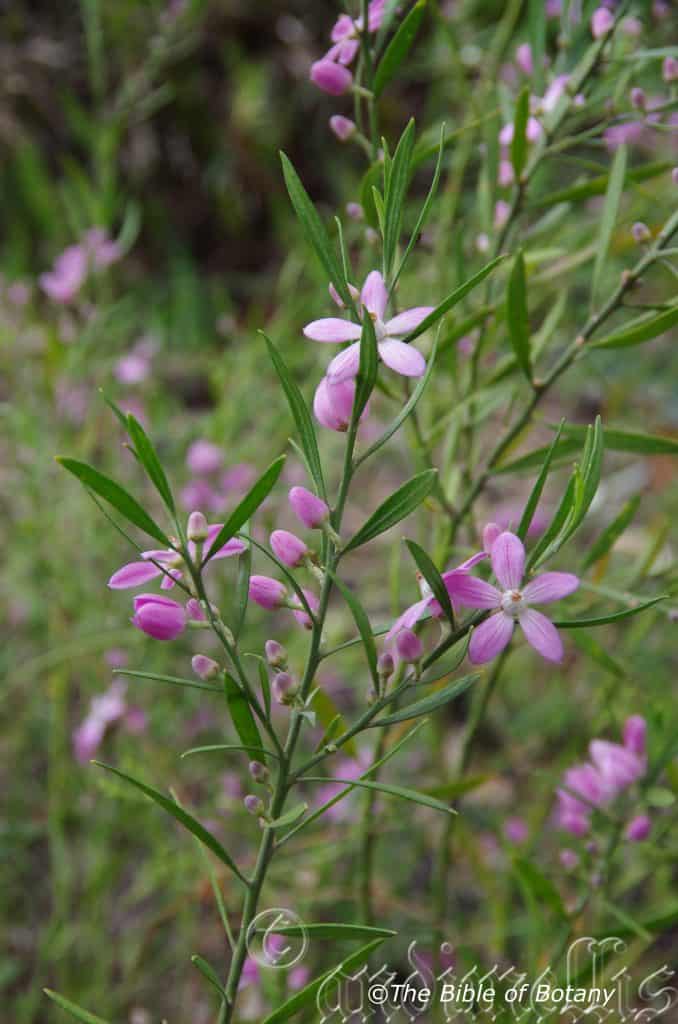
National Botanic Gardens ACT
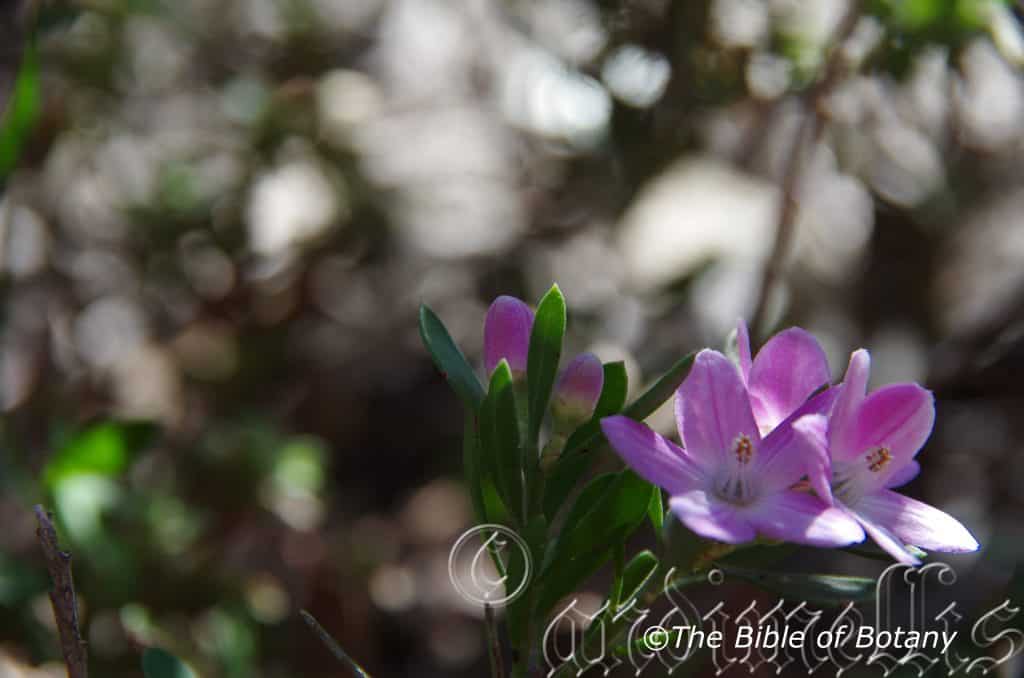
Yuraygir National Park NSW
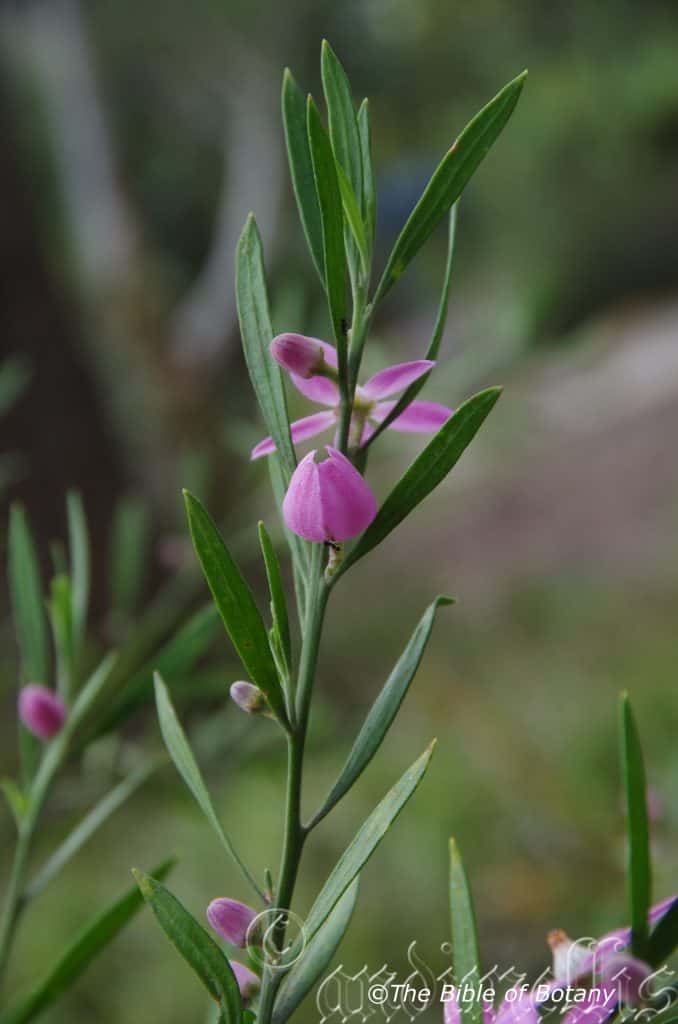
National Botanic Gardens ACT
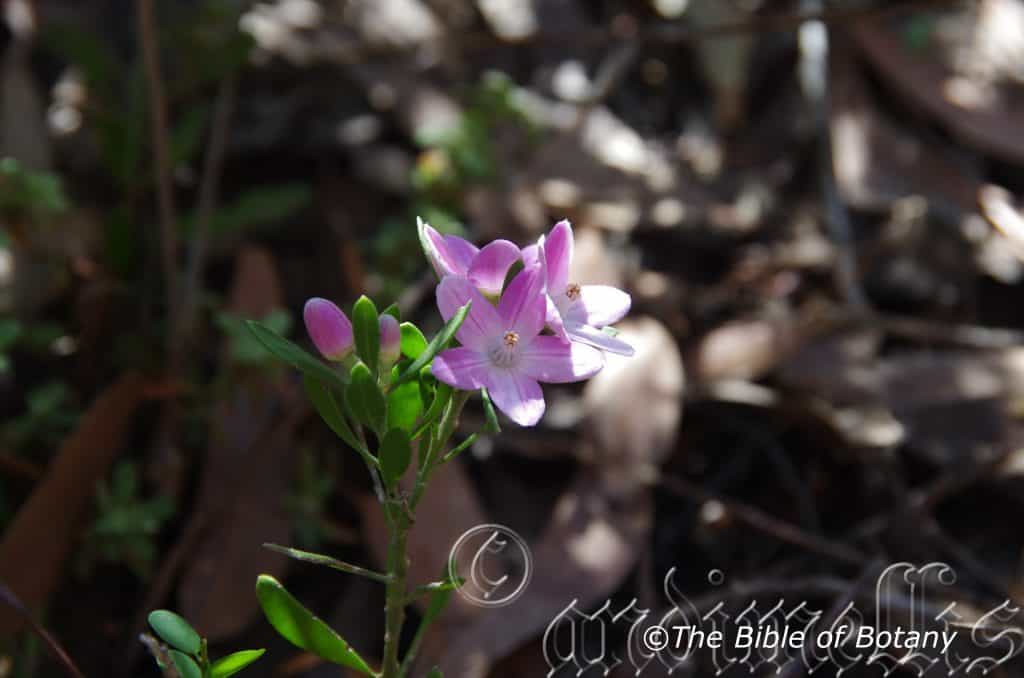
Yuraygir National Park NSW
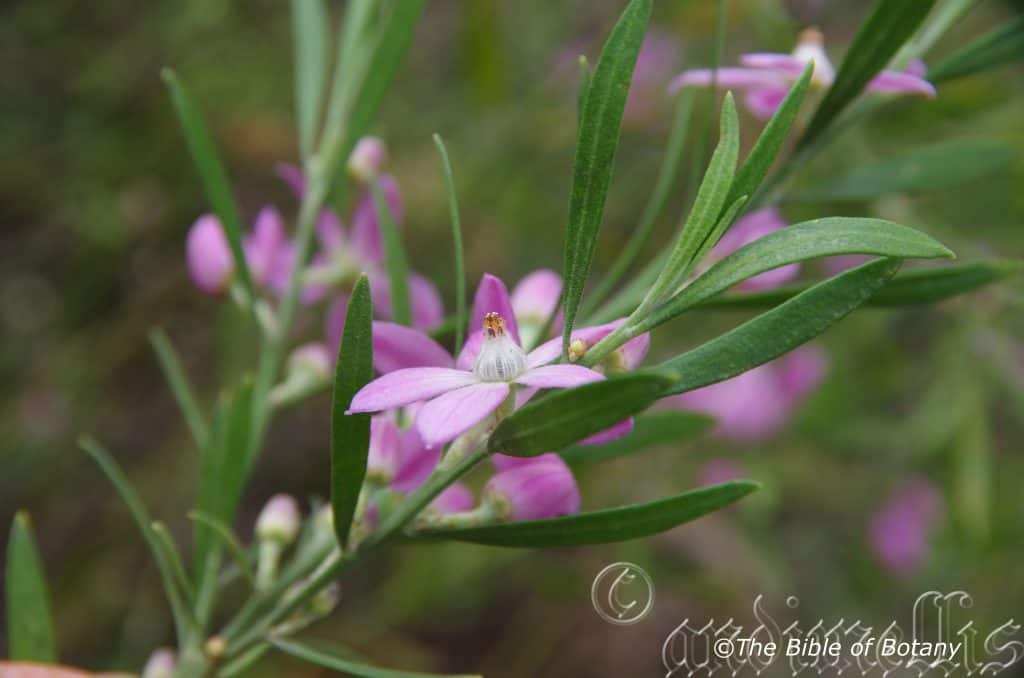
Yuraygir National Park NSW
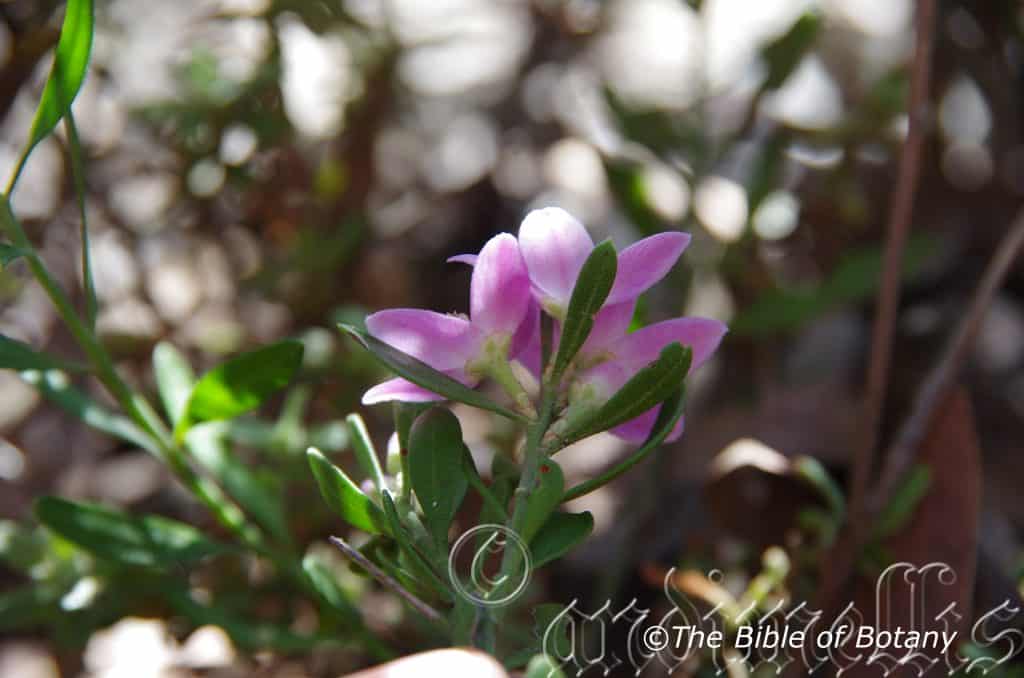
Yuraygir National Park NSW
Eriostemon australasius
Classification
Unranked: Eudicots
Unranked: Rosids
Order: Sapindales
Family: Rutaceae
Genus: From Erion, which is Ancient Greek for woolly and Stemon, which is Ancient Greek for the male reproductive organs on a flower which includes both the filaments and anthers as a single unit. It refers to the flower‘s stamens which are covered in short, silky, hairs.
Species: From Terra Australis, which is Latin for land of the south. It refers to plants, which were first discovered from the land down under.
Common Name: Wax Flower or Pink wax Flower.
Distribution:
Eriostemon australasius is found south from Fraser Island in southern coastal Queensland to Conjola Lake in southern New South Wales. There are 2 outlying populations in far Northern Queensland near Cooktown and in the Iron Range National Park while a small population exists in the Grampians in western Victoria and western ACT. It is found on and east of the Great Dividing Range.
https://avh.ala.org.au/occurrences/search?taxa=Eriostemon+australasius#tab_mapView
Habitat Aspect Climate:
Eriostemon australasius prefers dappled shade to full sun. It grows in the mountainous open woodlands, dry schlerophyll forests, moist Eucalyptus forests or areas adjacent to coastal heaths. The altitude ranges from 10 meters ASL to 550 meters ASL.
The temperatures range from minus 6 degrees in July to 34 degrees in January.
The rainfall ranges from lows of 900mm to 1800mm average per annum.
Soil Requirements:
Eriostemon australasius prefers better quality fine sands, sandy loams to gravelly light clays. The soils are derived from decomposed sandstones or accumulated beach sands. The soils pH ranges from a 5.5pH to 7pH. It does not tolerate waterlogged soils. None saline soils to moderately saline soils are tolerated.
Height & Spread:
Wild Plants: 1m to 2m by 1.5m to 2m
Characteristics:
Eriostemon australasius grows as an erect small open shrub. Stems are thin deep green and glabrous growing at a wide angle and sparsely covered in farinaceous lumps. Young shoots are deep green with small stellate hairs. The stems are terete to triangular.
The opposite, narrow oblong to narrow elliptical leaves of Eriostemon australasius measure 20mm to 80mm in length by 8mm to 15mm in width. The base is narrow cuneate tapering into an indefinite petiole while the apex is narrow acute. Both surfaces of the new growth are sparsely covered in white stellate hairs becoming glabrous as they mature. The discolourous laminas are deep sea green on the upper lamina while the lower lamina is slightly paler. The leaf margins are entire and slightly recurved close to the margin. The mid vein is slightly prominent on the lower lamina and is not visible from the upper lamina.
Inflorescences of Eriostemon australasius are born near the apex of the stems from the leaf axils. The angular pedicels measure 4mm to 12mm in length. There are 5 to 10 bracteole scales near the base of the flower. The elliptical petals measure 16mm to 20mm in length by 9mm to 13mm wide with a mucronate point at the apex. The apexes are slightly recurved or incurved at the apex with inflexed margins at the base. There are 3 distinct veins running lengthwise from the base.
The 10 stamens are white to pale pink turning deep red close to the anthers while the anthers are white. The styles are united at the base and for most of their length. The styles measure 7mm to 8mm in length. The style measures 7mm to 8mm in length and has a distinctly bumpy stigma. Eriostemon australasius flowers from early September through to late November. Flowering appears to be more prolific following a cooler winter period.
The fruits are a swollen obovate ovary or cocci. The cocci measure 8mm to 9mm long by 8mm to 9mm wide at the base. There are 5 to 20 reddish brown seeds in each fruit.
Wildlife:
Eriostemon australasius‘s do not appear to have any predators though the flowers are occasionally visited by many small butterflies, native bees and beetles.
Cultivation:
Eriostemon australasius is a magnificent small shrub that deserves a place in every native or exotic garden. It is ideal in almost every setting near ponds, at the edge of a rainforest in courtyards, around swimming pools or larger rockeries where their size is balanced. In cultivation it will grow from 1 meter to 2.5 meters in height by 1.5 meters to 2.5 meters in diameter when grown in the open.
It grows exceptionally well on lighter soils where deep leaf litter keeps the soil cool and moisture at an even level. If these requirements are met it can cope with temperatures as low as minus 7 degrees and up to 33 degrees. It is moderately drought resistant in their rainfall zones.
It often reaches its full potential in just 3 years and flower from the second year from seed. Plants will live naturally for 6 to 8 years so should be replaced every 5 to 6 years to maintain continuity in blossom.
Be imaginative when planting in mass. Use the plants in different configurations and use curves. Light pruning after flowering or tip pruning will enhance the shrubs bushiness and provide longer stronger flower stems in the following season.
It is best used adjacent to small areas of bush close to paths or the house so their pink flowers can be viewed regularly. It is great in large rockeries as a fill in plant. Here it can be planted in small groups of 2 or 3 scattered as you would find them in nature to give a great bush scene. It is best used in the mid ground surrounded by shorter plants with fine foliages with white or red flowers so they will dominate at the center of the bed especially when it isin flower. This is one plant that benefits highly from being mass planted or planted in scattered clumps. Its small size enables this to be achieved and their open habit allows for planting closer together so the branches intertwine. This type of planting should have centers of 1 meter to 2 meters.
Six or more planted back from a bend will become a very strong focal point when planted in this manner especially when it is in bloom. That is when it will gain a lot of attention whether you are coming or going because of the fresh clean look of the foliage even in the driest of times. It can be regularly tip pruned if a smaller shrub is required. It responds well to pruning recovering quickly and often increasing the number of flowers in the following season.
Ensure that the whole plant or at least most of it is on display from most sections of the garden as the flowers are a real bonus.
When it is in flower these plants will catch your attention and the viewer will be transfixed on the display rather than watching the path. Plant them at 0.8 meter to 1 meter centers.
Propagation:
Seeds: Seeds can be removed easily from the plants as they dry. Once Eriostemon australasius has finished flowering and the fruits have swollen place an old sheet below the plants and keep a close eye on it. Peg it down so it doesn’t blow around. When the seeds start to disperse, it can be all over in one day; especially if the weather turns hot, with the seeds being scattered on the ground. Clean the rubbish off and sieve the material for the seeds.
Seeds need to be treated by rubbing between fine sandpaper. Another method is to drop them into hot water and allow it to cool. I have also laid the rubbish out at the time of collecting and burnt it with the seeds still amongst the rubbish. No one method has proven better than the other, with all producing erratic results but better than if I did not treat the seeds.
Sow freshly treated seeds directly into a seed raising mix, keeping them moist not wet. When the seedlings are 20mm to 25mm tall, prick them out and plant them into 50mm native tubes using a good organic mix.
As the seedlings roots reach the bottom of the tubes plant them out into their permanent position. Do not delay.
Cuttings: Eriostemon australasius strikes very easy from cuttings. Use 50mm to 70mm long cuttings from the present season’s growth after it has hardened off. When growing from cuttings try to get cuttings from good flowering strains. Take them in early autumn or after the last frosts in early spring.
1 Prepare the cutting mix by adding one third sharp clean river sand, one third peat and one third perlite. These ingredients are sterilize,
2 Select good material from non diseased plants,
3 Select semi green stems for cuttings. Look for a stem with two or three nodes.
4 Place the cutting on a flat, hard surface, and make a clean cut down one side of the cutting at the base for 10mm with a sharp sterile knife or razor blade. – This scarification of the node will increase the chances of roots emerging from this spot. Now remove all but one or two the leaves, leaving the apex leaves in tact. If the leaves are very large in proportion to the stem, cut off the apical halves.
5 Fill a saucer with water, and place a little weak to medium rooting hormone into another container like a milk bottle top. Dip the node end of the cutting into the water and then into the rooting hormone. Tap off any excess hormone,
6 Use a small dipple stick or old pencil to poke a hole into the soilless potting mix. Ensure the hole is slightly larger than the stem diameter and be careful not to wipe the rooting hormone off the cuttings base, place the cuttings in a pattern ensuring the cuttings are not touching each other,
7 I like to place the pots in Plastic bags to help maintain temperature and moisture. Place in a semi shaded place like under 50mm shade cloth.
8 When the cuttings have struck, open the bag to allow air circulation for a few days to a week,
9 Once hardened off remove the cuttings from the bag and allow to further hardening for a few more days,
10 Transplant into a good potting mix to grow on.
Fertilize using seaweed, fish emulsion or organic chicken pellets soaked in water on an alternate basis. Fertilize every two months until the plants are established then annually in early September to October to maintain health, vitality and better flowering.
Further Comments from Readers:
Hi reader, it seems you use The Bible of Botany a lot. That’s great as we have great pleasure in bringing it to you! It’s a little awkward for us to ask, but our first aim is to purchase land approximately 1,600 hectares to link several parcels of N.P. into one at The Pinnacles NSW Australia, but we need your help. We’re not salespeople. We’re amateur botanists who have dedicated over 30 years to saving the environment in a practical way. We depend on donations to reach our goal. If you donate just $5, the price of your coffee this Sunday, We can help to keep the planet alive in a real way and continue to bring you regular updates and features on Australian plants all in one Botanical Bible. Any support is greatly appreciated. Thank you.
In the spirit of reconciliation we acknowledge the Bundjalung, Gumbaynggirr and Yaegl and all aboriginal nations throughout Australia and their connections to land, sea and community. We pay our respect to their Elders past, present and future for the pleasures we have gained.
Eriostemon myoporoides
Classification
Unranked: Eudicots
Unranked: Rosids
Order: Sapindales
Family: Rutaceae
Genus: From Erion, which is Ancient Greek for woolly and Stemon, which is Ancient Greek for the male reproductive organs on a flower which includes both the filaments and anthers as a single unit. It refers to the flower’s stamens which are covered in short, silky, hairs.
Species: From Myo, which is Ancient Greek for to close or to be shut, Poros, which is Ancient Greek for a pore and Eidos/Oides, which are Ancient Greek for alike or similar to. It refers to plants, which have the ability to open and close their pores. – silar to many of the plants found in the Myoporum genus. – Successive Ionic Layer Adsorption and Reaction. Is a nano coating technique where thin films are built atom-by-atom by repeatedly dipping a substrate into solutions of cations and anions, allowing layers to adsorb and react to form insoluble materials, useful for applications like solar cells and sensors
Common Name: Wax Flower or White Wax Flower.
Distribution:
Eriostemon myoporoides is found south from the Kroombits National Park in central eastern Queensland around to the Grampians in south western Victoria. It is found on the western slopes, on and east of the Great Dividing Range to the coast.
https://avh.ala.org.au/occurrences/search?taxa=Eriostemon+myoporoides#tab_mapView
Habitat Aspect Climate:
Eriostemon myoporoides prefers dappled shade to full sun. It grows in open woodlands, heath or dry sclerophyll forest . The altitude ranges from 10 meters ASL to 550 meters ASL.
The temperatures range from minus 6 degrees in July to 34 degrees in January.
The rainfall ranges from lows of 900mm to 1800mm average per annum.
Soil Requirements:
Eriostemon myoporoides prefers better quality fine sands, sandy loams to gravelly light clays. The soils are derived from decomposed sandstones or accumulated beach sands. The soils pH ranges from a 5.5pH to 7pH. It does not tolerate waterlogged soils. None saline soils to moderately saline soils are tolerated.
Height & Spread:
Wild Plants: 1m to 2m by 1.5m to 2m
Characteristics:
Eriostemon myoporoides grows as an erect small open shrub. Stems are thin deep green and glabrous growing at a wide angle and sparsely covered in farinaceous lumps. Young shoots are deep green with small stellate hairs. The stems are terete to triangular.
The opposite, narrow oblong to narrow elliptical leaves of Eriostemon myoporoides measure 20mm to 80mm in length by 8mm to 15mm in width. The base is narrow cuneate tapering into an indefinite petiole while the apex is narrow acute. Both surfaces of the new growth are sparsely covered in white stellate hairs becoming glabrous as they mature. The discolourous laminas are deep sea green on the upper lamina while the lower lamina is slightly paler. The leaf margins are entire and slightly recurved close to the margin. The mid vein is slightly prominent on the lower lamina and is not visible from the upper lamina.
Inflorescences of Eriostemon myoporoides are born near the apex of the stems from the leaf axils. The angular pedicels measure 4mm to 12mm in length. There are 5 to 10 bracteole scales near the base of the flower. The elliptical petals measure 16mm to 20mm in length by 9mm to 13mm wide with a mucronate point at the apex. It is slightly recurved or incurved at the apex with inflexed margins at the base. There are 3 distinct veins running lengthwise from the base.
The 10 stamens are white to pale pink turning deep red close to the anthers while the anthers are white. The styles are united at the base and for most of their length. The styles measure 7mm to 8mm in length. The style measures 7mm to 8mm in length and has a distinctly bumpy stigma. Eriostemon australasius flowers from early September through to late November. Flowering appears to be more prolific following a cooler winter period.
The fruits are a swollen obovate ovary or cocci. The cocci measure 8mm to 9mm long by 8mm to 9mm wide at the base. There are 5 to 20 reddish brown seeds in each fruit.
Wildlife:
Eriostemon myoporoides’s do not appear to have any predators though the flowers are visited by native colony bees including Tetragonula carbonaria and many small beetles.
Cultivation:
Eriostemon myoporoides is a magnificent shrub that deserves a place in every native or exotic garden. It is ideal in almost every setting near ponds, at the edge of a rainforest, around swimming pools or larger rockeries where its size is balanced. In cultivation it will grow from 1 meter to 2 meters in height by 1.5 meters to 2 meters in diameter when grown in the open.
It grows exceptionally well on lighter soils where deep leaf litter keeps the soil cool and moisture at an even level. If these requirements are met it can cope with temperatures as low as minus 7 degrees and up to 33 degrees. It is moderately drought resistant in their rainfall zones.
It often reaches its full potential in just 3 years and flower from the second year from seed. Plants will live naturally for 6 to 8 years so should be replaced every 5 to 6 years to maintain health and continuity of blooms.
Be imaginative when planting in mass. Use the plants in different configurations and use curves. Light pruning after flowering or tip pruning will enhance the shrubs bushiness and provide longer stronger flower stems in the following season.
It is best used adjacent to small areas of bush close to paths or the house so their pink flowers can be viewed regularly. It is great in large rockeries as a fill in plant. Here it can be planted in small groups of 2 or 3 scattered as you would find them in nature to give a great bush scene. Used in the mid ground surrounded by shorter plants with fine foliages with white or red flowers so it will dominate at the center of the bed especially when it is in flower. This is one plant that benefits highly from being mass planted or planted in scattered clumps. Its small size enables this to be achieved and their open habit allows for planting closer together so the branches intertwine. This type of planting should have centers of 1 meter to 2 meters.
Six or more planted as a hedge row will become a very strong focal point when planted in this manner especially when it is in bloom. That is when it will gain a lot of attention whether you are coming or going because of the fresh clean look of the foliage even in the driest of times. It can be regularly tip pruned if a smaller shrub is required. It responds well to pruning recovering quickly and often increasing the number of flowers in the following season.
Ensure that the whole plant or at least most of it is on display from most sections of the garden as the flowers are a real bonus.
The flowers last relatively well in doors as a cut flower and this can serve as a pruning mechanism.
Propagation:
Seeds: Seeds can be removed easily from the plants as they dry. Once Eriostemon myoporoides has finished flowering and the fruits have swollen place an old sheet below the plants and keep a close eye on it. Peg it down so it doesn’t blow around. When the seeds start to disperse, it can be all over in one day; especially if the weather turns hot, with the seeds being scattered on the ground. Clean the rubbish off and sieve the material for the seeds.
Seeds need to be treated by rubbing between fine sandpaper. Another method is to drop them into hot water and allow it to cool. I have also laid the rubbish out at the time of collecting and burnt it with the seeds still amongst the rubbish. No one method has proven better than the other, with all producing erratic results but better than if I did not treat the seeds.
Sow freshly treated seeds directly into a seed raising mix, keeping them moist not wet. When the seedlings are 20mm to 25mm tall, prick them out and plant them into 50mm native tubes using a good organic mix.
As the seedlings roots reach the bottom of the tubes plant them out into their permanent position. Do not delay.
Cuttings: Fortunately Eriostemon myoporoides cuttings strike relatively easy. Use 80mm to 120mm long semi hardwood to hardwood cuttings. Take them in warmer months of the year. Remove half the leaves from the bottom section being careful not to tear the bark.
1 Prepare the cutting mix by adding two thirds sharp clean river sand, one third peat or one third perlite. These ingredients must be sterilized,
2 Select good material from non diseased plants,
3 Select semi green stems for cuttings,
4 Place the cutting on a flat, hard surface, and make a clean cut down one side of the cutting at the base for 10mm with a sharp sterile knife or razor blade. – This scarification of the node will increase the chances of roots emerging from this spot. Now remove all but one or two the leaves, leaving the apex leaves in tact. If the leaves are very large in proportion to the stem, cut off the apical halves.
5 Fill a saucer with water, and place a little medium strength rooting hormone into another container like a milk bottle top. Dip the node end of the cutting into the water and then into the rooting hormone. Tap off any excess hormone,
6 Use a small dipple stick or old pencil to poke a hole into the soilless potting mix. Ensure the hole is slightly larger than the stem diameter and be careful not to wipe the rooting hormone off the cuttings base,
7 If the cuttings cannot be placed in a controlled hot house environment, I like to place the tubes in bucket with holes drilled in the bottom to allow excess water to drain out. A plastic bag that fits over the bucket is ideal to help maintain temperature and moisture. Place in a semi shaded, warm position like under 50mm shade cloth.
8 When the cuttings have struck, open the bag to allow air circulation for a few days to a week,
9 Once hardened off remove the cuttings from the bag and allow to further hardening for a few more days to a week,
10 Transplant into a good potting mix to grow on.
Fertilize using seaweed, fish emulsion or organic chicken pellets soaked in water on an alternate basis. Fertilize every two months until the plants are established then annually in early September to October to maintain health, vitality and better flowering.
Further Comments from Readers:
Hi reader, it seems you use The Bible of Botany a lot. That’s great as we have great pleasure in bringing it to you! It’s a little awkward for us to ask, but our first aim is to purchase land approximately 1,600 hectares to link several parcels of N.P. into one at The Pinnacles NSW Australia, but we need your help. We’re not salespeople. We’re amateur botanists who have dedicated over 30 years to saving the environment in a practical way. We depend on donations to reach our goal. If you donate just $5, the price of your coffee this Sunday, We can help to keep the planet alive in a real way and continue to bring you regular updates and features on Australian plants all in one Botanical Bible. Any support is greatly appreciated. Thank you.
In the spirit of reconciliation we acknowledge the Bundjalung, Gumbaynggirr and Yaegl and all aboriginal nations throughout Australia and their connections to land, sea and community. We pay our respect to their Elders past, present and future for the pleasures we have gained.
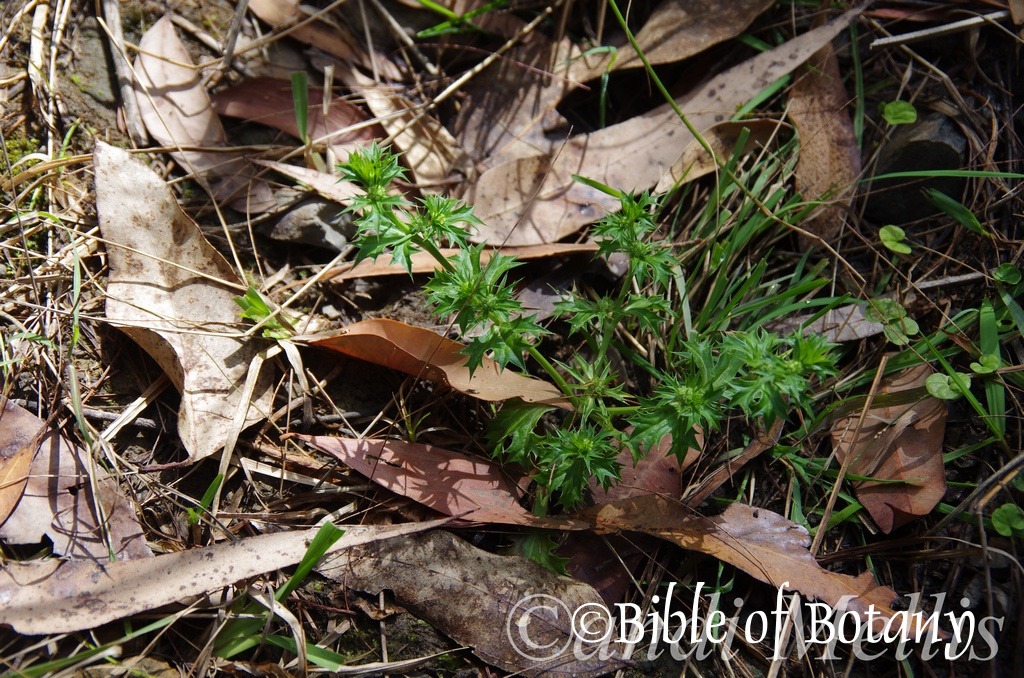
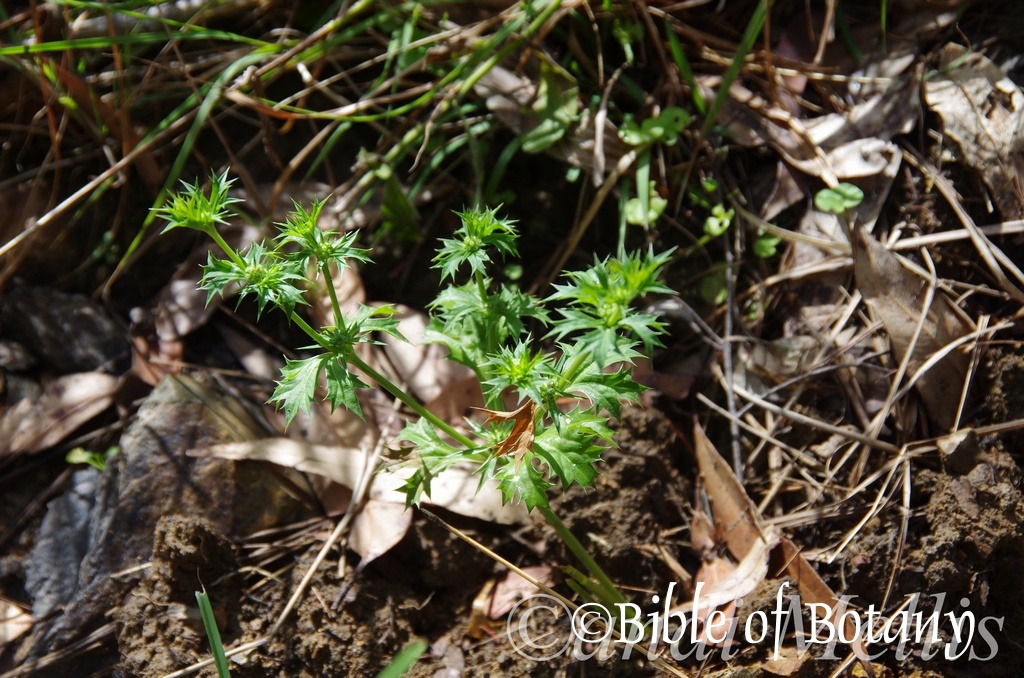


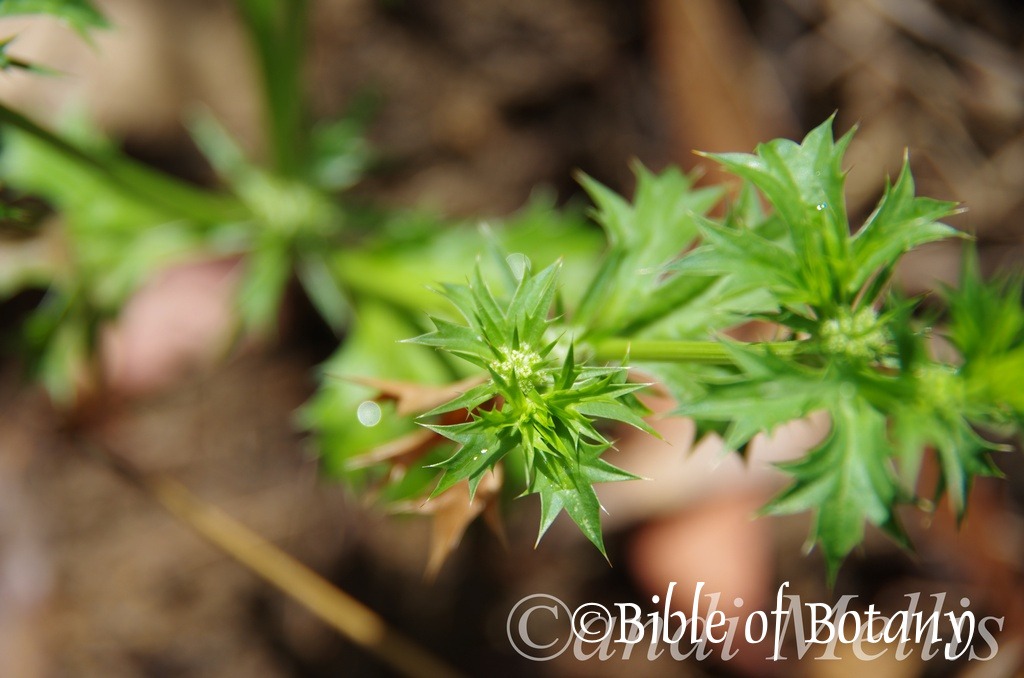
Eryngium expansum
Classification:
Unranked: Eudicots
Clade: Asterids
Order: Apiales
Family: Apiacea
Genus: From Eryngion which is Ancient Greek or later Erygion, which is Latin for holly sea and Gynos/Guna, which is Ancient Greek or Gynus which is Latin for a woman. It refers to the deep blue-purplish to sea-blue or bluish-purple flowers including the female reproductive organs in some species.
Species: From Exposita which is Latin for to expose or spread out. It refers to the large leaves in comparison to the plant, which are large and somewhat spreading.
Common Name: Saw Tooth Parsley.
Distribution:
Eryngium expansum is found in several disjunct populations south from Bundaberg in central coastal Queensland to Clouds Creek near Chaelundi National Park and Dorrigo National Park in northern New South Wales. There are 3 isolated populations one both sides of Claremont in Queensland and the other in the Barrington Tops National Park in central New South Wales. It is found on the Western Plains, Western slopes, on and east of the Great Dividing Range.
https://avh.ala.org.au/occurrences/search?taxa=Eryngium+expansum#tab_mapView
Habitat Aspect Climate:
Eryngium expansum prefers full sun to light dappled shade. It is found growing on moist soils adjacent to rainforest or moist Eucalyptus forests, along tracks in drainage channels, in moist riparian zones on creek banks and streams, in moist depressions in paddocks and disturbed sites close to permanent water. The altitude ranges from 5 meters ASL to 800 meters ASL.
The temperatures range from Minus 4 degrees in July to 34 degrees in January.
The rainfall ranges from lows of 600mm to 2000mm average per annum.
Soil Requirements:
Eryngium expansum prefers loams to medium clays. The soils are derived from better quality decomposed brown basalt, black basalt, meta-sandstones, meta-shales, granites, rhyolite, metamorphic rocks or accumulated sands. The soils pH ranges from 4.5pH to 7pH. It does not tolerate waterlogged soils. Non saline soils to moderately saline soils are tolerated.
Height & Spread:
Wild Plants: 0.15m to 0.6m by 0.3m to 0.4m
Characteristics:
Eryngium expansum grows as a small prostrate or ascending annual or perennial herb with a dichotomous branching system. The stems are deep grass-green to blue-green and glabrous.
The basal leaves of Erygyium expansum are oblong to obovate and measure 50mm to 80mm in length by 20mm to 40mm in width. The bases are cuneate to attenuate for a short distance while the apexes are obtuse to acute. The margins are covered in course, soft spinose lobed teeth. The petioles measure 25mm to 50mm including the attenuate section. The stem leaves are ovate to triangular, are deeply lobed and covered in soft spinose teeth. They measure 10mm to 20mm in length by 15mm to 30mm in width. The petioles measure 5mm to 8mm in length. The concolourous laminas are deep grass-green to deep blue-green and are glabrous. The laminas are flat slightly or recurve slightly upwards from the mid vein to the margins and decurve downwards close to the apex as the leaves age. The mid vein and 2 lateral veins are slightly prominent on the lower laminas. The veins are visible on the upper lamina.
The inflorescences of Eryngium expansum are semi spherical, globose heads born form the leaf axils. The sessile flower heads are measure 3mm to 5mm in length by 3mm to 5mm in diameter. The mid green to mid blue-green bracts are narrow lanceolate and measure 7mm to 13.5mm in length. The apexes are spinose. The individual disc florets are white to pastel green. The flowers appear from mid-November to mid-March.
The fruits of Eryngium expansum are compressed, cylindrical achenes. The achenes are covered with bladdery scales. The greenish achenes turn fawn to pale brown, when ripe. The sepals are persistent on the ripe fruit. They measure 2mm to 2.5mm in length.
Wildlife:
Eryngium expansum wildlife is unknown to the author however plants in our district that have grown above the water surface on the banks of the dam were eaten by the Red Neck Wallaby Notamacropus rufogriseus, in times of drought. There is a strong possibility that other roos would also eat the plants whenever it is available.
The small tap root and leaves are edible and apparently have a distinct carrot flavour with a slight coriander taste.
Cultivation:
Eryngium expansum is a small perennial herb that warrants a position in a small moist rockery. While the green flowers are insignificant the foliage with its bright blue-green colour and distinctive shape would add great variation to any small garden or corner.
It is an ideal plant where quick growth is needed to fill in gaps or where a small prostrate plant is required in very wet areas. It is fast growing. The plants grow best in a better quality humus soil which has generous quantities of good quality mulch. Fertilize during the growing season and the plants will respond with flushes or growth but be sparingly with nitrogenous fertilizers as the stems will become soft and susceptible to insect attack and stress very quickly, especially where moisture varies from the optimum.
Cultivated plants usually grow from 150mm to 300mm in height by 150mm to 250mm in diameter when grown in the open. It is best planted in groups of 3 with the individual plants planted at 300mm to 400mm centres. This will form small non uniform rounded mounds. In the vegetable garden find a place that always suffers from poor drainage and plant them at 300mm centres in rows 250mm apart. Use new soft growth before it has fully hardened off. 12 to 15 plants would be required by the average family eating 2 or 3 meals a week.
Eryngium expansum is one of those plants that deserves a place in the native garden especially where native foods are sought. The leaves make an interesting addition to salads, soups and even ice-cream with their delicate carrot leaf flavour. It is soft and tender. It has been a favourite in our family on toast with tomato replacing basil. The plants grew exceptionally well at Nana Glen on medium to heavy soil derived from decomposed meta-shale which had been heavily mulched over the years and gained extra moisture from the concrete driveway.
Propagation:
Seeds: Eryngium expansum seeds do not require treatment before sowing. Sow fresh seeds directly into a seed raising mix and cover with 2mm of the mix. When the seedlings are 25mm to 50mm tall, prick them out and plant them into 50mm native tubes using a seed raising mix.
Once the seedlings reach 100mm to 200mm in length nip the tips out to promote lateral growth and plant them out into their permanent position.
Fertilize using seaweed, fish emulsion or organic chicken pellets soaked in water on an alternate basis. Fertilize every two months until the plants are established then annually in early September to October to maintain health, vitality and better flowering.
Further Comments from Readers:
Hi reader, it seems you use The Bible of Botany a lot. That’s great as we have great pleasure in bringing it to you! It’s a little awkward for us to ask, but our first aim is to purchase land approximately 1,600 hectares to link several parcels of N.P. into one at The Pinnacles NSW Australia, but we need your help. We’re not salespeople. We’re amateur botanists who have dedicated over 30 years to saving the environment in a practical way. We depend on donations to reach our goal. If you donate just $5, the price of your coffee this Sunday, We can help to keep the planet alive in a real way and continue to bring you regular updates and features on Australian plants all in one Botanical Bible. Any support is greatly appreciated. Thank you.
In the spirit of reconciliation we acknowledge the Bundjalung, Gumbaynggirr and Yaegl and all aboriginal nations throughout Australia and their connections to land, sea and community. We pay our respect to their Elders past, present and future for the pleasures we have gained.
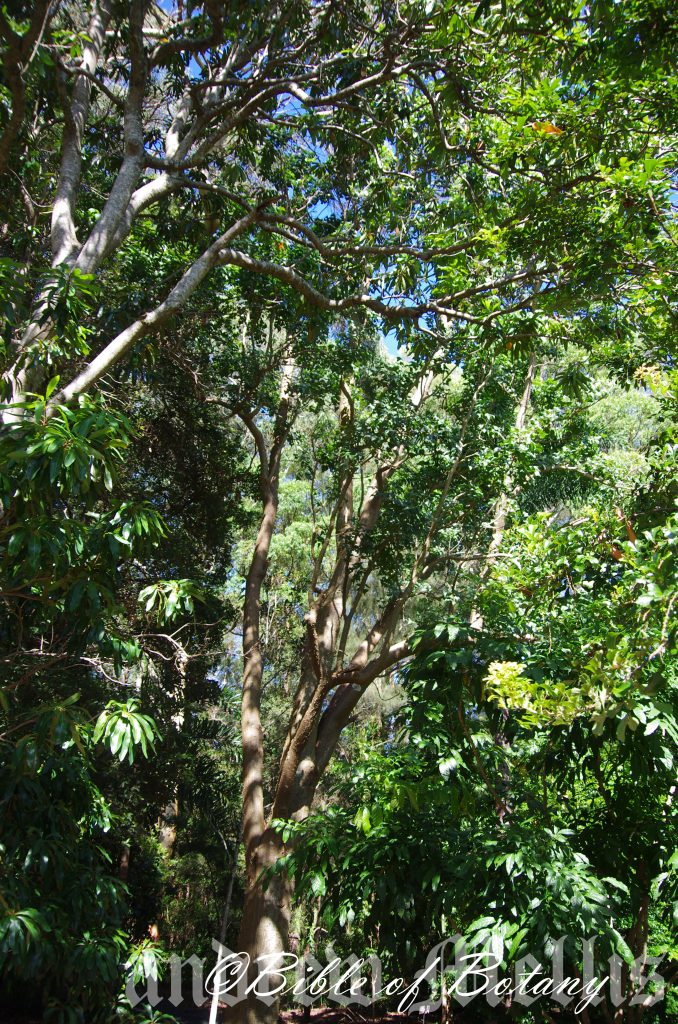
NCBG Coffs Harbour NSW
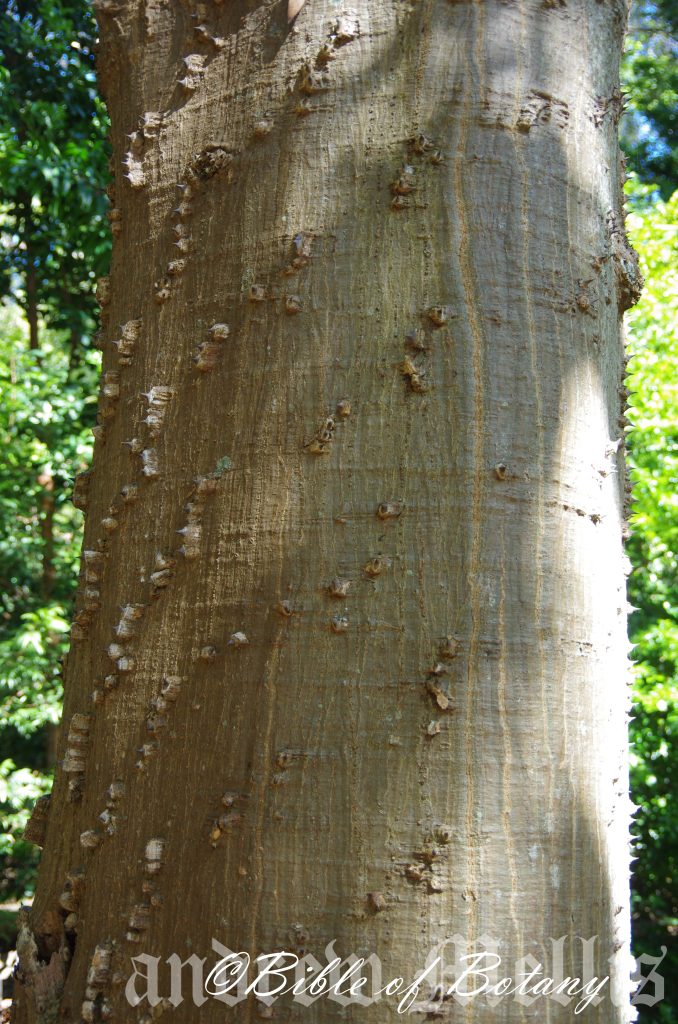
NCBG Coffs Harbour NSW
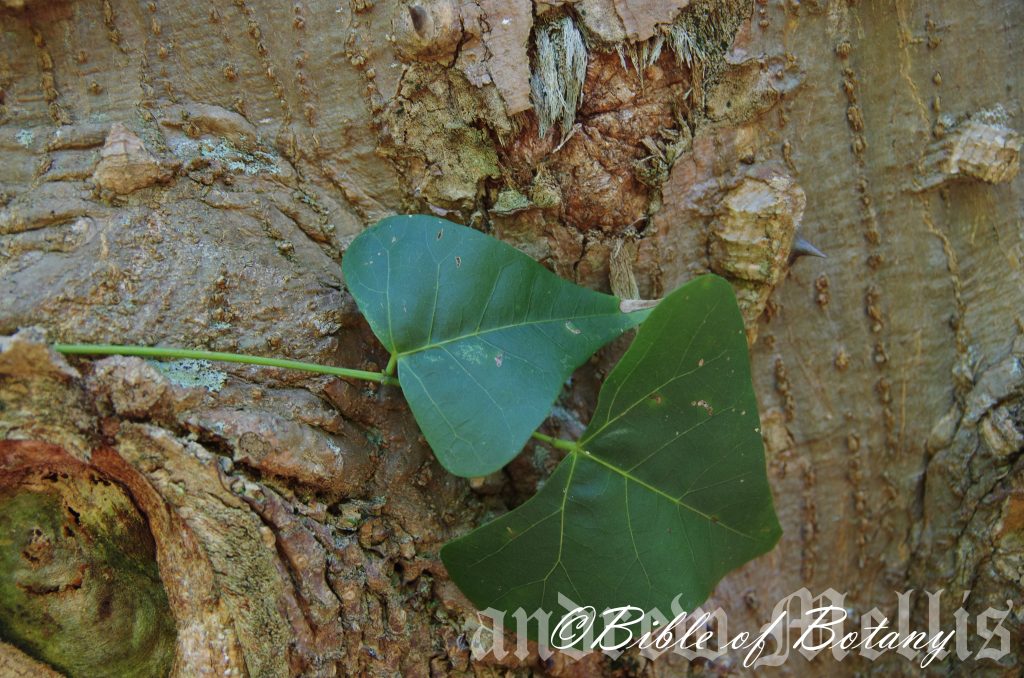
NCBG Coffs Harbour NSW

NCBG Coffs Harbour NSW
Erythrina numerosa
Classification:
Unranked: Eudicots
Clade: Rosids
Order: Fabales
Family: Fabaceae
Subfamily: Faboideae
Tribe: Phaseoleae
Genus: From Erythros, which is Ancient Greek for scarlet-red. It refers to flowers, which are scarlet-red.
Species: From Numerosus, which is Latin for very many or numerous. It refers to the profusion of flowers, which are produced during the flowering season.
Common Name: Native Coral Tree or Batwing Coral Tree.
Distribution:
Erythrina numerosa is restricted to a small area south from the upper Brisbane Valley and west to Pine Mountain to Grafton.
https://avh.ala.org.au/occurrences/search?taxa=Erythrina+numerosa#tab_mapView
Habitat Aspect Climate:
Erythrina numerosa prefers full sun to dappled light. It grows on the margins of dry rain forests. The altitude ranges from 50 meters ASL to 550 meters ASL.
The temperatures range from 0 degrees in July to 39 degrees in January.
The rainfall ranges from lows of 1000mm to an average of 1600mm annually.
Soil Requirements:
Erythrina numerosa prefers sandy loams, gravelly loams, to rocky heavy clays. The soils are usually derived from decomposed basalts, metamorphic rocks or shale. The soils pH ranges from 5.5pH to 6.5pH. They do not tolerate waterlogged soils. Non saline soils to moderately saline soils are tolerated.
Height & Spread:
Wild Plants: 5m to 18m by 4m to 12m.
Characteristics:
Erythrina numerosa‘s trunk and branches are pale fawn to pale khaki and glabrous. The trunk has shallow longitudinal furrows. The conical lepidote growths on the trunk are corky. The cones are surmounted by a large rigid black glossy prickle. The branchlets are glabrous, pale green and covered in white stellate hairs.
Erythrina numerosa‘s leaves are trifoliate on a long rachis. The 3 lobed leaflets are broad triangular with the apex leaflet being the largest. It measures 60mm to 95mm in length by 80mm to 115mm in width. The 2 opposite lateral leaflets measure 48mm to 75mm in length by 60mm to 80mm in width. The petiole and petiolules are glabrous and bare of spines in this specie. The petiole measures 40mm to 115mm in length while the apical petiolule measures 8mm to 12mm in length and the lateral petiolules measure 3mm to 7mm in length. The bases are very broad rounded while the lateral lobes apexes are broad obtuse and the terminal lobe is broad acuminate-broad caudate. The margins are entire, flat spreading or slightly curved upwards from the middle. The mid vein is prominent on the lower lamina and is visible on the upper lamina. The concolourous laminas are sea green and semi glossy on the upper lamina and dull on the lower lamina. Young shoots are sparsely covered in short white stellate hairs when young soon becoming glabrous.
The inflorescences of Erythrina numerosa are racemes born terminally. There are 15 to 60 flowers in a panicle. The panicles measure 150mm to 460 in length by 15mm to 300mm in diameter. The single lobe calyx is red-brown and measures 17mm to 25mm in length. The standard and corolla are bright salmon to orange. The corolla measures 38mm to 54mm in length. The oblong standard is recurved with an obtuse apex which has an n emarginated tip. The standard measures 38mm to 54mm in length by 30mm to 36mm wide and have an acute apex. The margin is entire and incurved. Lateral petals and keel are inserted and measure 15mm to 23mm in length.
The 10 salmon to orange stamens of which 9 form a tube for half their length measure 23mm to 28mm in length and have yellow ochre coloured anther. The 10th stamen is free. The style looks similar to the stamens but devoid of the anther measures 23mm to 28mm in length. Flowering occurs from July to November at the end of the dry season when the trees are deciduous.
Erythrina numerosa fruits are long linear, grey-brown, and strongly curved or even twisted pods. The pods measure 130mm to 240mm in length by 12mm to 16mm in diameter around the seeds. The pods are very strongly constricted between the seeds. There are 3 to 7 seeds in a pod. The orange-red ellipsoidal seeds are glabrous and measure 5mm to 8mm in length by 2mm to 2.5mm in diameter.
Wildlife:
Most large aggressive Honeyeaters and Lorikeets are attracted to the flowers and I have seen nocturnal damage done to the flowers suspecting either the brushtail possum Trichosurus vulpecula and the ringtail possum Pseudocheirus peregrinus, which both will also consume the flowers and nectar.
Cultivation:
Erythrina numerosa is very suitable for growing in cool sub-tropical to warm temperate climates. It is frost sensitive when young but older trees protected from the frosts will survive quite cold conditions down to minus 4.It is moderately fast growing and being a legume adds nitrogen to the soil. In cultivation it generally grows around 8 meters to 12 meters tall by 7 meters to 10 meters in diameter.
Erythrina numerosa does look particularly stunning placed amongst large boulders where it maintains the hard look of the rocks. The boulders assist in keeping the root zone cool and help to retain moisture in the lower strata of the soil. Here the tree makes a very strong barren look when in its deciduous state at the end of the dry season.
Try using it as the main feature in a formal garden bed in the middle of a traffic island or between two driveways. Plant it singularly or in small groups of 2, 3, or 4 for a spectacular entry in semi arid gardens. Here the ground can be covered in small Grevillea species to give additional height. The Grevillea species will give great winter colour in yellow orange and red while Erythrina numerosa will give strength and boldness to the scene because of its trunk and silhouette when deciduous or fresh green look when in leaf.
It is just as good placed at the edge of a forest where adequate sunlight prevails. Here its colour in flower and bird attractiveness makes it an ideal subject. It also provides coolness in summer and warmth in winter.
Garden beds would need to be open with the plants below just touching each other so as to allow air flow. Try using plants below that flower at different times as not to clash as orange is a difficult colour to harmonize. Purple flowers are the best colour contrast so shrubs like Hovea acutifolia or ground covers like Hardenbergia comptoniana are the ideal companion. There is a long term problem with these plants together as it is all legumes and soil acidification will occur. Other plants to try could be Hibiscus species or Solanum species though not as spectacular it is very compatible and have beautiful flowers.
Propagation:
Seeds: Erythrina numerosa seeds can be sown into a seed raising mix after treatment in spring. Treat the seeds by placing them in hot water; not boiling, and allow them to soak for 4 hours. Alternatively a light scarification can be done to break the testa on the seeds. Cover the seeds with 5mm of fine sand. Place the trays in a sunny warm position and keep moist not wet. When the seedlings are 40 to 60 mm tall, prick them out and plant them into 50mm native tubes using a good organic mix. All Erythrina specie form a large tap root so you will need to transplant them as soon as the roots appear at the bottom of the tubes. If it is to be held over the following winter then 75mm native tubes would be a better option.
Once the seedlings reach 200 to 250mm in height prick the growing tips out and plant them out into their permanent position. For mass plantings plant them at 1.8 meter to 2 meter centers. Amongst boulders use wider spacing so the beauty of the rocks can still be viewed.
Fertilize using seaweed, fish emulsion or organic chicken pellets soaked in water on an alternate basis. Fertilize every two months until the plants are established then annually in early September to October to maintain health, vitality and better flowering.
Further Comments from Readers:
Hi reader, it seems you use The Bible of Botany a lot. That’s great as we have great pleasure in bringing it to you! It’s a little awkward for us to ask, but our first aim is to purchase land approximately 1,600 hectares to link several parcels of N.P. into one at The Pinnacles NSW Australia, but we need your help. We’re not salespeople. We’re amateur botanists who have dedicated over 30 years to saving the environment in a practical way. We depend on donations to reach our goal. If you donate just $5, the price of your coffee this Sunday, We can help to keep the planet alive in a real way and continue to bring you regular updates and features on Australian plants all in one Botanical Bible. Any support is greatly appreciated. Thank you.
In the spirit of reconciliation we acknowledge the Bundjalung, Gumbaynggirr and Yaegl and all aboriginal nations throughout Australia and their connections to land, sea and community. We pay our respect to their Elders past, present and future for the pleasures we have gained.
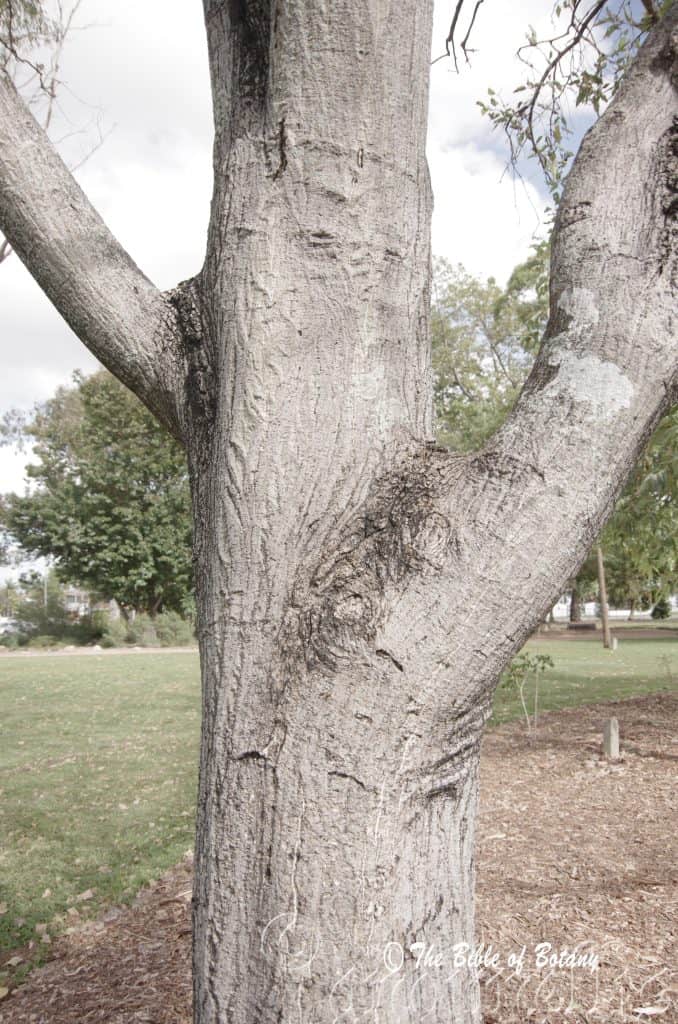
Townsville Qld.
Erythrina vespertilio
Classification:
Unranked: Eudicots
Clade: Rosids
Order: Fabales
Family: Fabaceae
Subfamily: Faboideae
Tribe: Phaseoleae
Genus: From Erythros, which is Ancient Greek for scarlet-red. It refers to flowers, which are scarlet-red.
Species: From Hesperos, which is Ancient Greek or later Vesper, which is Latin for the twilight zone, evening or later a bat and Tid, which is Old English for the time or an hour. It refers to the evening and morning twilight zones when micro bat activity is at their peak. In botany it refers to the shape of the leaves, resemble the outline of a bat in flight.
Common Name: Native Coral Tree or Batswing Coral Tree.
Distribution:
Erythrina vespertilio is found north of as line from Sharks Bay in Western Australia to Acacia Creek near Killarney in far south eastern Queensland.
https://avh.ala.org.au/occurrences/search?taxa=Erythrina+vespertilio#tab_mapView
Habitat Aspect Climate:
Erythrina vespertilio prefers full sun to dappled light. It grows on the margins of dry rain forests, monsoonal forests, beaches, headlands and within river riparian zones especially in the drier parts of its range in central Australia. The altitude ranges from 5 meters ASL to 850 meters ASL.
The temperatures range from 2 degrees in July to 44 degrees in January.
The rainfall ranges from lows of 180mm to an average of 2600mm annually.
Soil Requirements:
Erythrina vespertilio prefers coarse sands, fine sands, and sandy loams to heavy clays or rocky to gravelly soils. The soils are usually derived from decomposed basalts, sandstones, shale alluvial deposits or accumulated beach sands. The soils pH ranges from 5pH to 7pH. It does not tolerate waterlogged soils. Non saline soils to moderately saline soils are tolerated.
Height & Spread:
Wild Plants: 5m to 12m by 4m to 6m.
Characteristics:
Erythrina vespertilio‘s trunk and branches are pale fawn to pale khaki and glabrous. The spongy trunk has longitudinal furrows. The conical lepidote growths on the trunk are corky. The branches and branchlets are bare or covered in large rigid brown to black glossy prickles. The branchlets are glabrous, pale green and covered in white stellate hairs.
Erythrina vespertilio‘s leaves are trifoliate or rarely bi-foliate on a long rachis. The 3 lobed leaflets are broad triangular with the apex leaflet usually being wider than the 2 lateral leaflets. They measures 20mm to 95mm in length by 40mm to 120mm in width. The petiole and petiolules are glabrous and are bare of spines in this specie. The petiole measures 45mm to 80mm in length while the apical petiolule measures 20mm to 60mm in length and the lateral petiolules measure 6mm to 12mm in length. The bases are very broad acute while the lateral lobes apexes are broad obtuse while the terminal lobe is broad acuminate-broad caudate. The margins are entire, flat spreading or slightly curved upwards from the middle. The mid vein is prominent on the lower lamina and is visible on the upper lamina. The concolourous laminas are glabrous, pale green to mid green and dull to semi glossy on the upper lamina and dull on the lower lamina.
The inflorescences of Erythrina vespertilio are panicles born terminally. There are 15 to 20 flowers in a raceme. The racemes measure 70mm to 300 in length by 15mm to 150mm in diameter. The single lobe calyx is red-brown and measures 14mm to 20mm in length. The standard and corolla are bright salmon to orange. The corolla measures 20mm to 30mm in length. The oblong standard is recurved with an obtuse to broad acute apex which has an emarginated tip. The standard measures 20mm to 30mm in length by 15mm to 24mm in width. The margin is entire and incurved. Lateral petals and keel are inserted and measure 12mm to 18mm in length.
The 10 salmon to orange stamens of which 9 form a tube for half their length measure 25mm to 30mm in length and have yellow ochre coloured anther. The 10th stamen is free. The style looks similar to the stamens but devoid of the anther measures 25mm to 30mm in length. Flowering occurs from August to September at the end of the dry season when the trees are deciduous.
Erythrina vespertilio fruits are long linear, grey-brown, and strongly curved pods. The pods measure 110mm to 150mm in length by 9mm to 17mm in diameter around the seeds. The pods are very strongly constricted between the seeds. There are 3 to 7 seeds in a pod. The deep orange-red to deep yellow-brown, slightly reniform seeds are glabrous, semi glossy and measure 6mm to 12mm in length by 1.5mm to 2mm in diameter.
Wildlife:
Most large aggressive Honeyeaters like the noisy Friarbird Philemon corniculatus, and Rainbow Lorikeet Trichoglossus moluccanus, and the Scaly breasted Lorikeet Trichoglossus chlorolepidotus, are attracted to the flowers and I have seen nocturnal damage done to the flowers suspecting either the brushtail possum Trichosurus vulpecula, and the ringtail possum Pseudocheirus peregrinus, which both will also consume the flowers and nectar.
Cultivation:
Erythrina vespertilio is very suitable for growing in cool sub-tropical to warm temperate climates. It is frost sensitive when young but older trees protected from the frosts will survive quite cold conditions down to minus 4. It is moderately fast growing and being a legume adds nitrogen to the soil. In cultivation it generally grows around 7 meters to 10 meters in height by 7 meters to 10 meters in diameter.
Erythrina vespertilio would look particularly stunning placed amongst large boulders where they soften the rocks. The boulders assist in keeping the root zone cool and help to retain moisture in the lower strata of the soil. Here the tree makes a very strong barren look when in their deciduous state at the end of the dry season. It is ideal on steep banks and placed amongst rocks on escarpment blocks or plains in arid and semi-arid zones.
Try using it as the main feature in a formal garden bed in the middle of a traffic island or between two driveways. Plant it singularly or in small groups of 2, 3, or 4 for a spectacular entry in arid gardens. Here the ground can be covered in small Grevillea specie to give height. The Grevillea species will give great winter colour in yellow orange and red while Erythrina numerosa will give strength and boldness to the scene because of its trunk and silhouette when deciduous or fresh green look when in leaf.
It is just as good placed at the edge of a forest where adequate sunlight prevails. Here its colour in flower and bird attractiveness makes it an ideal subject. It also provides coolness in summer and warmth in winter when the leaves have been discarded.
Garden beds would need to be open with the plants below just touching each other so as to allow air flow. Try using plants below that flower at different times as not to clash as orange is a difficult colour to harmonize. Purple flowers are the best colour contrast so shrubs like Hovea acutifolia or ground covers like Hardenbergia comptoniana are the ideal companion. There is a long term problem with these plants together as it is all legumes and soil acidification will occur. Other plants to try could be Hibiscus specie or Solanum specie though not as spectacular it is very compatible and have beautiful flowers.
Propagation:
Seeds: Erythrina vespertilio seeds can be sown into a seed raising mix after treatment in spring. Treat the seeds by placing them in hot water and allow them to soak for 4 hours. Cover the seeds with 5mm of fine sand. Place the trays in a sunny warm position and keep moist not wet. When the seedlings are 40mm to 60mm tall, prick them out and plant them into 50mm native tubes using a good organic mix. Erythrina form a large tap root so you will need to transplant them as soon as the roots appear at the bottom of the tubes. If it is to be held over the following winter then 75mm native tubes would be a better option.
Once the seedlings reach 200mm to 250mm in height prick the growing tips out and plant them out into their permanent position. For mass plantings plant them at 1.8 meter to 2 meter centers. Amongst boulders use wider spacing so the beauty of the rocks can still be viewed.
Fertilize using seaweed, fish emulsion or organic chicken pellets soaked in water on an alternate basis. Fertilize every two months until the plants are established then annually in early September to October to maintain health, vitality and better flowering.
Further Comments from Readers:
Hi reader, it seems you use The Bible of Botany a lot. That’s great as we have great pleasure in bringing it to you! It’s a little awkward for us to ask, but our first aim is to purchase land approximately 1,600 hectares to link several parcels of N.P. into one at The Pinnacles NSW Australia, but we need your help. We’re not salespeople. We’re amateur botanists who have dedicated over 30 years to saving the environment in a practical way. We depend on donations to reach our goal. If you donate just $5, the price of your coffee this Sunday, We can help to keep the planet alive in a real way and continue to bring you regular updates and features on Australian plants all in one Botanical Bible. Any support is greatly appreciated. Thank you.
In the spirit of reconciliation we acknowledge the Bundjalung, Gumbaynggirr and Yaegl and all aboriginal nations throughout Australia and their connections to land, sea and community. We pay our respect to their Elders past, present and future for the pleasures we have gained.
Erythrophleum chlorostachys
Classification:
Unranked: Magnoliophyta
Clade: Magnoliopsida
Order: Fabales
Family: Fabaceae
Subfamily: Caesalpinioideae
Genus: From Erythros, which is Ancient Greek for scarlet-red and Phloia, which is Ancient Greek for bark. It refers to the scarlet-red sap, which exudes from beneath the bark when damaged.
Species: From Khloros, which is Ancient Greek for green or yellowish-green and Sporum, which is Ancient Greek for a fern seed. It refers to spores which are green to yellowish-green.
Common Name: Cooktown Ironwood.
Distribution:
Erythrophleum chlorostachys is found in almost a continuous strip north of a line, east from the De Grey River north to the Kimberley Range in Western Australia then to Townsville in north eastern Queensland.
https://avh.ala.org.au/occurrences/search?taxa=Erythrophleum+chlorostachys#tab_mapView
Habitat Aspect Climate:
Erythrophleum chlorostachys prefers full sun to dappled light. It grows in monsoonal forests, monsoonal and dry vine forests, tropical rainforests, wet and dry Eucalyptus forests, savannah and open woodlands. The altitude ranges from 3 meters ASL to 500 meters ASL.
The temperatures range from 8 degrees in July to 44 degrees in January.
The rainfall ranges from lows of 250mm to an average of 3000mm annually. In the lower rainfall areas it is found on soils with good moisture retention and close to seasonal creeks and rivers.
Soil Requirements:
Erythrophleum chlorostachys prefers coarse sands to heavy clays with or without rocks and gravel. The soils are usually derived from alluvial deposits or decomposed granites, basalts or sandstones. The soils pH ranges from 5.5pH to 7pH. It does not tolerate waterlogged soils, however many of the soils have water tables which would keep the upper soil moist through capillary action. Non saline soils to moderately saline soils are tolerated as are salt laden winds.
Height & Spread:
Wild Plants: 1m to 15m by 2m to 12m.
Characteristics:
Erythrophleum chlorostachys‘s trunk is pale to mid grey or grey-brown and strongly tessellated. Branches are pale grey-brown and scabrous while the branchlets are glabrous, pale grey-brown only turning a pale yellow green with the current flush of leaves. Terminal shoots are covered in short brown hirtellus hairs.
Erythrophleum chlorostachys‘s leaves are pinnate with 4 to 9 leaflets on a rachis. Leaflets are opposite except where there is an apex leaflet. The leaflets are broad elliptical to broad ovate, asymmetrical and measure 30mm to 55mm in length by 22mm to 45mm in width. The yellow to yellow-green petioles are covered in long brown villose hairs and measure 5mm to 9mm in length. The bases are strongly oblique while the apexes are broad-obtuse. The concolourous laminas are deep sea green and dull to semi glossy on the upper lamina and dull on the lower lamina. The margins are entire, flat spreading. The mid vein is slightly prominent on the lower lamina and is distinctly visible on the upper lamina. Young shoots are sparsely covered in short brown hirtellous hairs. The 2 stipules are caduceous and measure less than 1 mm in length.
The inflorescence of Erythrophleum chlorostachys are spikes born terminally. The spikes measure 150mm to 250 in length by 15mm to 25mm in diameter. The bright green calyx measures 1.5mm to 2mm in length including the lobes. The 3 oblong lobes have an acute apex and measure 0.7 to 1mm in length. The 6 bright green petals measure 3mm to 3.5mm in length by 1mm to 1.5mm wide and have an acute apex. The calyx and petals margins are fimbriate.
The 9 white stamens measure 5.5mm to 6.5mm in length and have an ochre coloured anther. The thick bright green style measures 6mm to 6.5mm in length. The ovary and style are covered in long white hirtellous hairs. Flowering occurs from July to November.
Erythrophleum chlorostachys fruits are long flat deep brown to black pods. There are 3 to 5 seeds to a pod usually 3.The pods measure 55mm to 105mm in length by 25mm to 40mm in width. The pods are strongly constricted between the seeds. The deep brown to black are oval, flat and measure 9mm to 12mm in diameter.
Wildlife:
Erythrophleum chlorostachys‘s wildlife is unknown to the author.
Cultivation:
Erythrophleum chlorostachys is a wide spreading small shade tree for both arid and tropical areas in Australia. It is fast growing and being a legume adds nitrogen to the soil. In cultivation they generally grow around 7 meters to 9 meters in height by 6 meters to 8 meters in diameter.
The tree should not be planted close to homes or structures where rainwater is collected for drinking as all parts of the tree are poisonous. The alkaloids are water soluble and are slow to break down.
Erythrophleum chlorostachys does look particularly stunning placed amongst large boulders where they soften the rocks or as stand alone specimen. The boulders assist in keeping the root zone cool and help to retain moisture in the lower strata of the soil.
Try using it as the feature in a formal garden bed in the middle of a traffic island or between two driveways. Plant it singularly for a spectacular entry in arid gardens. Here the ground can be scatter planted in small Grevillea to give height. The Grevillea will give great winter colour in yellow orange and red while Erythrophleum chlorostachys will give strength and boldness to the scene because of its trunk.
Garden beds would need to be open with the plants below just touching each other so as to allow air flow. This scene gives coolness in a hot environment with a warm welcome, not the harshness from where your visitors or you have just come from.
Propagation:
Seeds: Erythrophleum chlorostachys seeds can be sown into a seed raising mix after treatment in spring or summer. Treat the seeds by placing them in hot water and allow them to soak for 4 to 6 hours. Cover the seeds with 5mm of fine sand. Place the trays in a sunny warm position and keep moist. When the seedlings are 40 to 60 mm tall, prick them out and plant them into 50mm native tubes using a good organic mix.
Once the seedlings reach 200 to 250mm in height prick the growing tips out and plant them out into their permanent position. For mass plantings plant them at 1.8 meter to 2 meter centers. Amongst boulders use wider spacing so the beauty of the rocks can still be viewed.
Fertilize using seaweed, fish emulsion or organic chicken pellets soaked in water on an alternate basis. Fertilize every two months until the plants are established then annually in early September to October to maintain health, vitality and better flowering.
Further Comments from Readers:
Hi reader, it seems you use The Bible of Botany a lot. That’s great as we have great pleasure in bringing it to you! It’s a little awkward for us to ask, but our first aim is to purchase land approximately 1,600 hectares to link several parcels of N.P. into one at The Pinnacles NSW Australia, but we need your help. We’re not salespeople. We’re amateur botanists who have dedicated over 30 years to saving the environment in a practical way. We depend on donations to reach our goal. If you donate just $5, the price of your coffee this Sunday, We can help to keep the planet alive in a real way and continue to bring you regular updates and features on Australian plants all in one Botanical Bible. Any support is greatly appreciated. Thank you.
In the spirit of reconciliation we acknowledge the Bundjalung, Gumbaynggirr and Yaegl and all aboriginal nations throughout Australia and their connections to land, sea and community. We pay our respect to their Elders past, present and future for the pleasures we have gained.
Erythrorchis cassythoides
Classification:
Class: Monocots
Order: Asparagales
Family: Orcidaceae
Genus: From Erythros, which is Ancient Greek for scarlet-red and Orchis, which is Ancient Greek for a man’s testicles. It refers to the orchids, (testicles) which have a reddish tinge through the yellow-ochre sepals.
Species: From Kassyo, which is Ancient Greek for to sow or stitched up and Eidos/Oides, which is Ancient Greek for alike or similar to. It refers to the stems twinning tightly around its host similar to the creeping parasites in the Cassytha genus.
Common Name:
Distribution:
Erythrorchis cassythoides is found south from Duaringa Shire in central coastal Queensland to Royal National Park in coastal New South Wales.
https://avh.ala.org.au/occurrences/search?taxa=Erythrorchis+cassythoides#tab_mapView
Habitat Aspect Climate:
Erythrorchis cassythoides prefers dappled shade to full shade. It grows as an understory epiphytic orchid in schlerophyll forest and moist Eucalyptus forests along the coast and coastal ranges. It grows on various eucalypts trunks including smooth, corky iron and box gums, stumps and logs. The altitude ranges from 5 meters ASL to 900 meters ASL.
The temperatures range from minus 3 degrees in August to 39 degrees in January.
The rainfall ranges from lows of 600mm to 1800mm average per annum.
Soil Requirements:
Erythrorchis cassythoides host trees prefers to grow on better quality fatty, sandy loams to medium clays with plenty of mulch. The soils are usually derived from decomposed brown basalt, black basalt, sandstone, granite, meta-shales and accumulated peaty sands behind the back dunes. The soils pH ranges from 5pH to 6.5pH are preferred. It does not tolerate waterlogged soils. Non saline soils to moderately saline soils are tolerated.
Height & Spread:
Wild Plants: 0.2m to 0.25m by 0.03m to 0.04m.
Characteristics:
Erythrorchis cassythoides grows as a semi terrestrial-epiphytic climber with stems to 6 m long. The erect, brown to purple-brown stems are extensively branched longitudinally on old Eucalyptus stumps and along the trunks of many Eucalyptus trees. The stems are covered in small papillate lumps.
The plants start growing at the base of Eucalyptus stumps and live Eucalyptus trees indicating to the author 1 of four possibilities needed for growth. There may be a symbiotic relationship between the orchid and trees that is necessary for survival of the orchid, or
The orchids are saprophytic and rely on fungi that are present within the soil close to the base of certain Eucalyptus trees to survive.
Until the fungi have been isolated and grown in culture and a method of attachment to the host is found these orchids will elude any attempt to cultivate them cultivation.
Erythrorchis cassythoides‘s triangular scale like leaves measure 4mm to 20mm in length by 5mm to 10mm in width. The leaf bases are truncate and cauline while the apexes are acute. The concolourous leaves are brown to purple-brown. The margins are entire. The mid vein is not visible on either lamina.
The inflorescences of Erythrorchis cassythoides are long numerous, racemose or paniculate with 1 or 2 orders of branching from the leaf axils. The ultimate alternate branches have 5 to 25 individual flowers. The nodding rachises are covered in small papillate lumps. The rachises measure 30mm to 120mm in length. The khaki to olive-yellow pedicels are glabrous and measure 9mm to 12mm in length. All parts of the inflorescences are glabrous. The triangular floral bracts are scale-like and measure 2mm to 5mm in length by 2mm to 3.5mm in width.
The erect dorsal sepal is broad elliptical and measures 11mm to 16.5mm by 4mm to 6mm in width. The margins are entire while the apex is decurve and obtuse-acute. The divaricate lateral sepals are broad elliptical to slightly broad falcate-elliptical and measures 11mm to 16mm by 3.5mm to 5.5mm in width. The margins are entire while the apex is decurve and obtuse-acute. The sepals are olive yellow to khaki-yellow and turn yellow-brown to khaki-brown with age. There are 4 or 5 olive-brown to khaki-brown longitudinal streaks.
The lateral petals are broad linear with acute apexes. The lateral petals measure 11mm to 16mm in length by 2mm to 3.5mm in width. The lateral petals are slightly convolute with entire margins or crenate near the apexes. The petals are olive yellow to khaki-yellow and turn yellow-brown to khaki-brown with age. There are 4 or 5 olive-brown to khaki-brown longitudinal streaks.
The labellum’s are strongly involute for their entire length and measure 9mm to 12mm in length by 5mm to 8.5mm in diameter. The margins are entire for most of its length and is undulating to crenate near and at the obtuse apex. The labellum has transverse brown or reddish-brown streaks becoming deeper with age. The foot is pastel cream. The flowers appear from September to December.
The pendent capsules are deep purple-brown almost black when it is dehiscent. The capsules measure 60mm to 200mm in length by 8mm to 15mm in diameter.
Wildlife:
Erythrorchis cassythoides is the host to numerous small native bees when in flower and also hosts several small pollen flies.
Cultivation:
Erythrorchis cassythoides is an unusual orchid to grow in the garden. If you are lucky enough to have them growing it is worthwhile preserving with in situation. Do not attempt to move them as the chances of survival are next to none. The best approach is to mulch them with 20mm to 30mm of existing mulch from nearby trees on an annual basis.
Propagation:
Seeds: Unknown
Further Comments from Readers:
Hi reader, it seems you use The Bible of Botany a lot. That’s great as we have great pleasure in bringing it to you! It’s a little awkward for us to ask, but our first aim is to purchase land approximately 1,600 hectares to link several parcels of N.P. into one at The Pinnacles NSW Australia, but we need your help. We’re not salespeople. We’re amateur botanists who have dedicated over 30 years to saving the environment in a practical way. We depend on donations to reach our goal. If you donate just $5, the price of your coffee this Sunday, We can help to keep the planet alive in a real way and continue to bring you regular updates and features on Australian plants all in one Botanical Bible. Any support is greatly appreciated. Thank you.
In the spirit of reconciliation we acknowledge the Bundjalung, Gumbaynggirr and Yaegl and all aboriginal nations throughout Australia and their connections to land, sea and community. We pay our respect to their Elders past, present and future for the pleasures we have gained.
All information is included in good faith and has been thoroughly researched prior to printing. The website or the author does not warrant or guarantee the accuracy of any information on these pages, nor does the website or the author accept any responsibility for any loss arising from the use of the information found within. The views and opinions are strictly those of the author or those members who chose to actively participate in the contents herein.