Plant Descriptions Damasonium minus – Denhamia pittosporoides
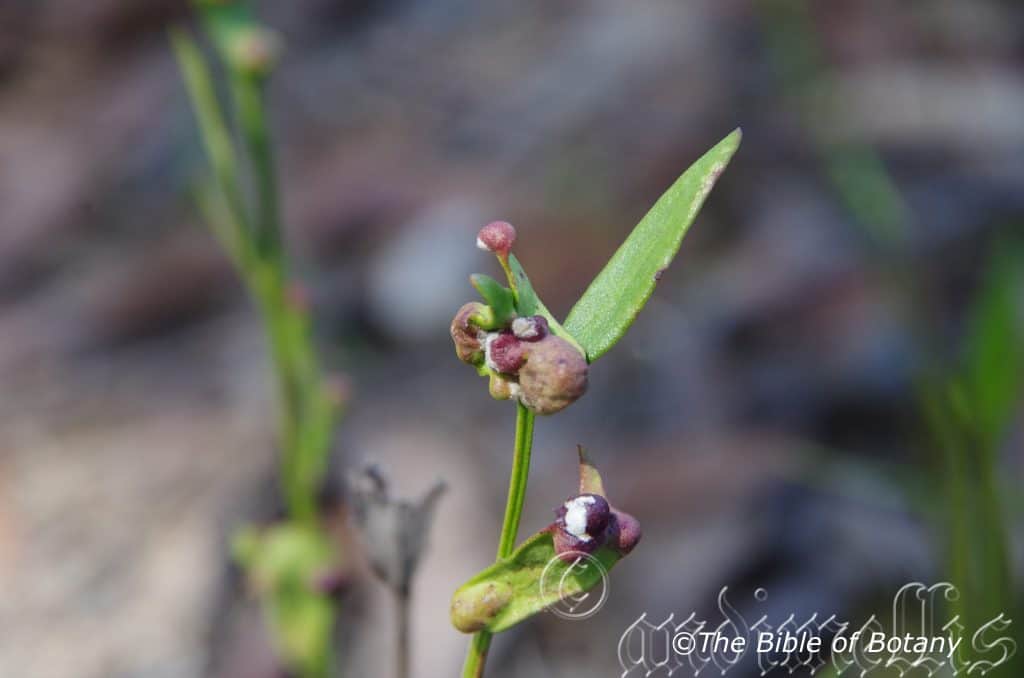
Damasonium minus
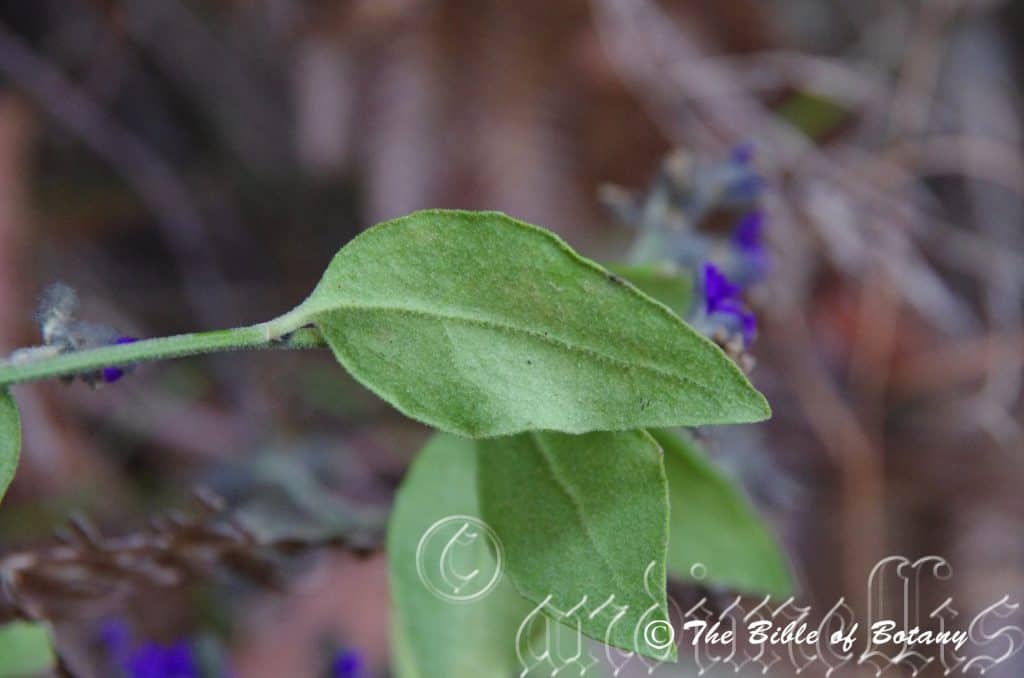
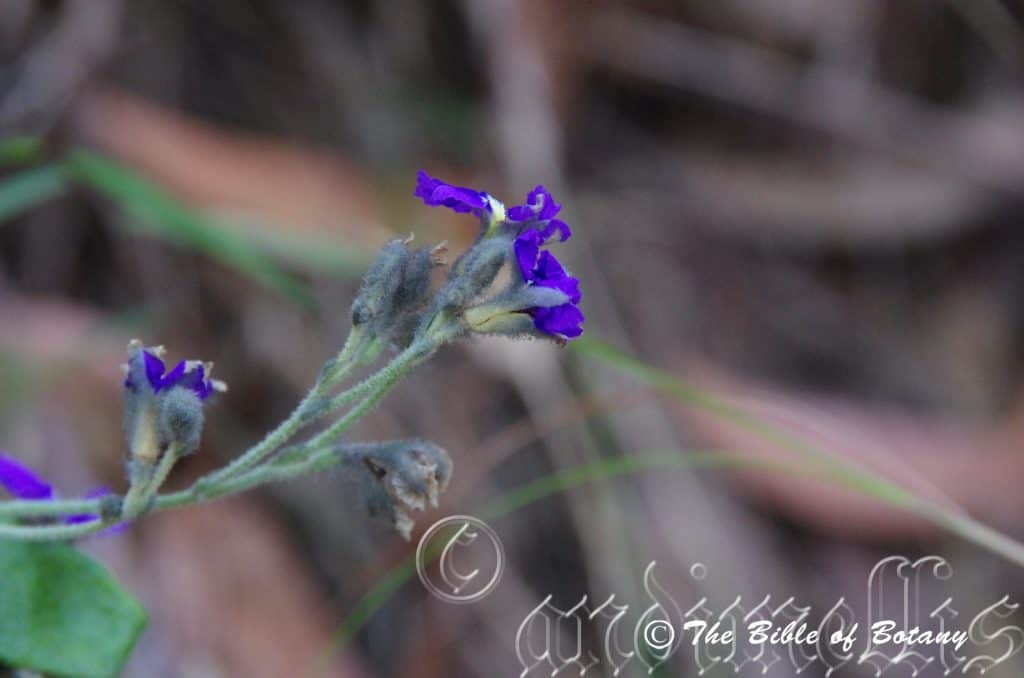
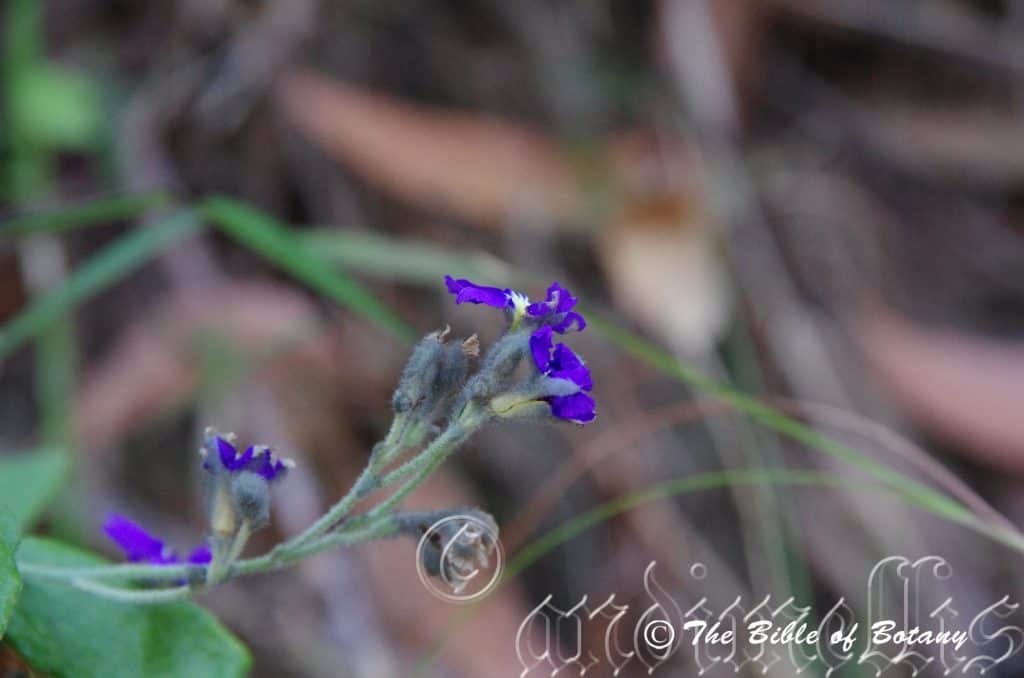
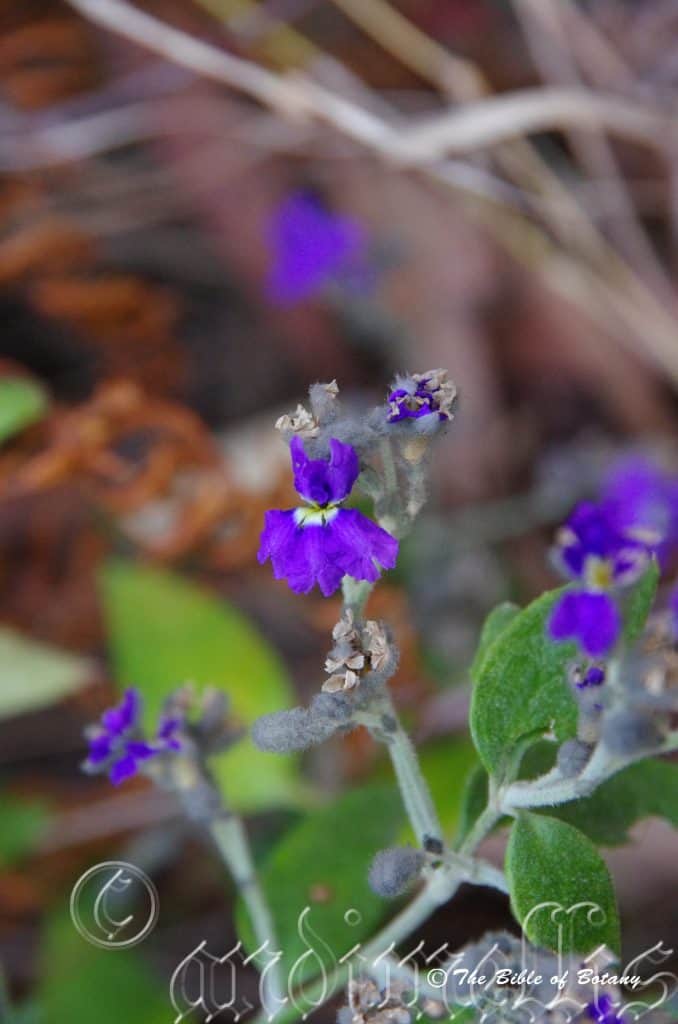
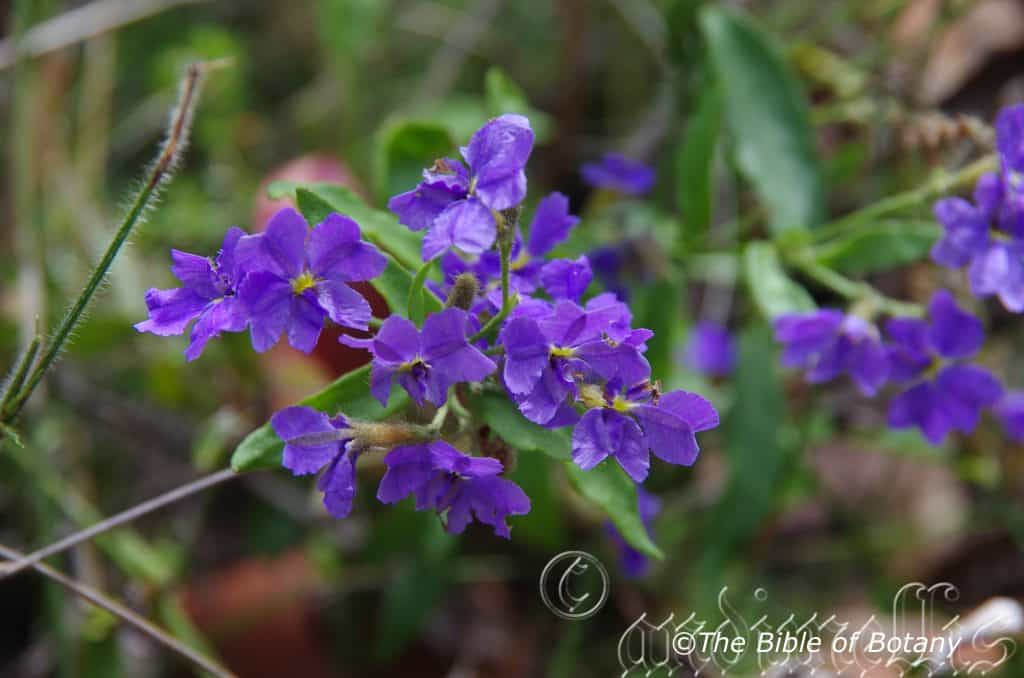
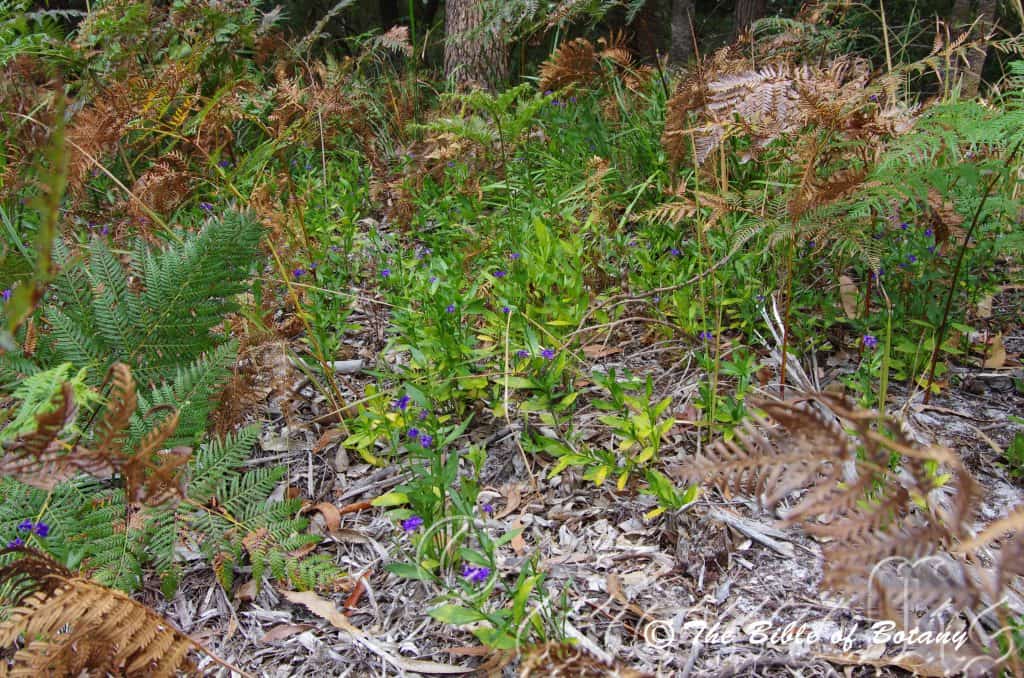
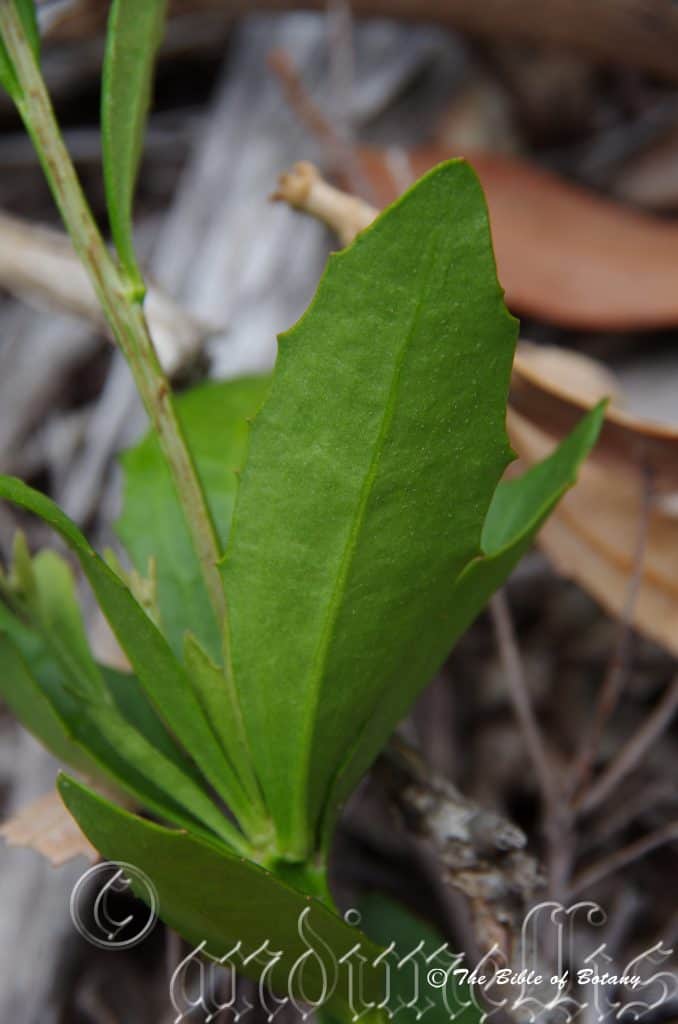
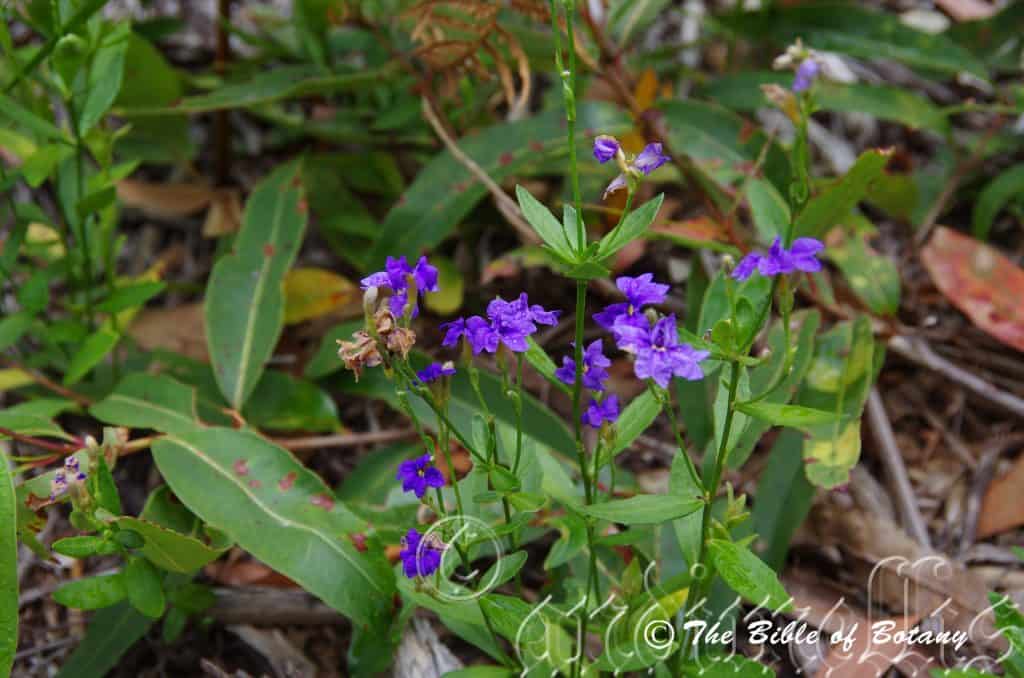
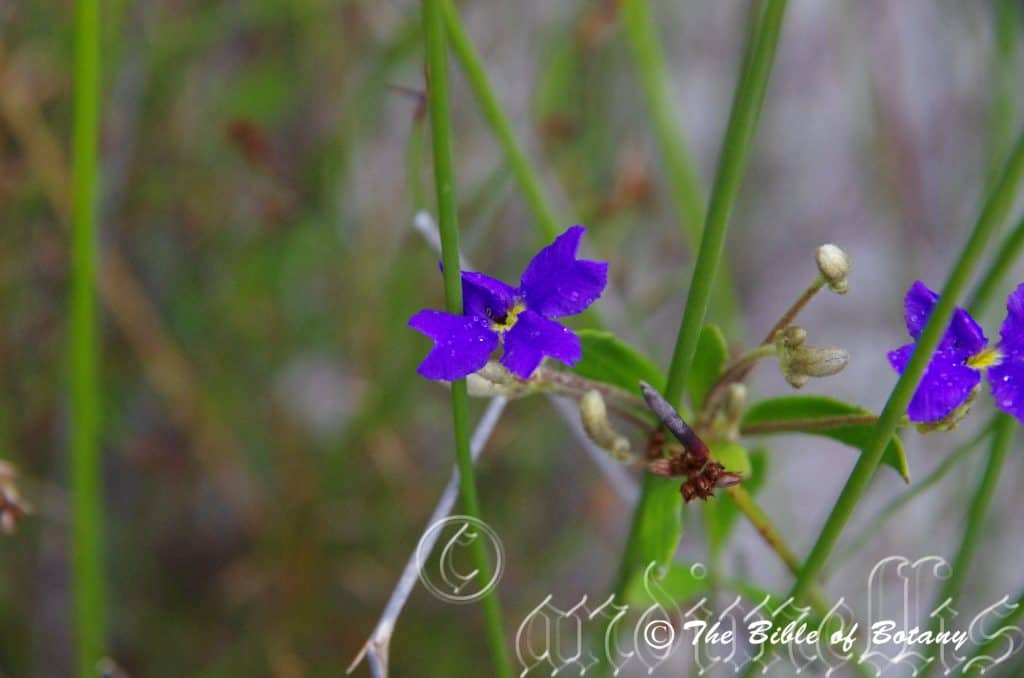
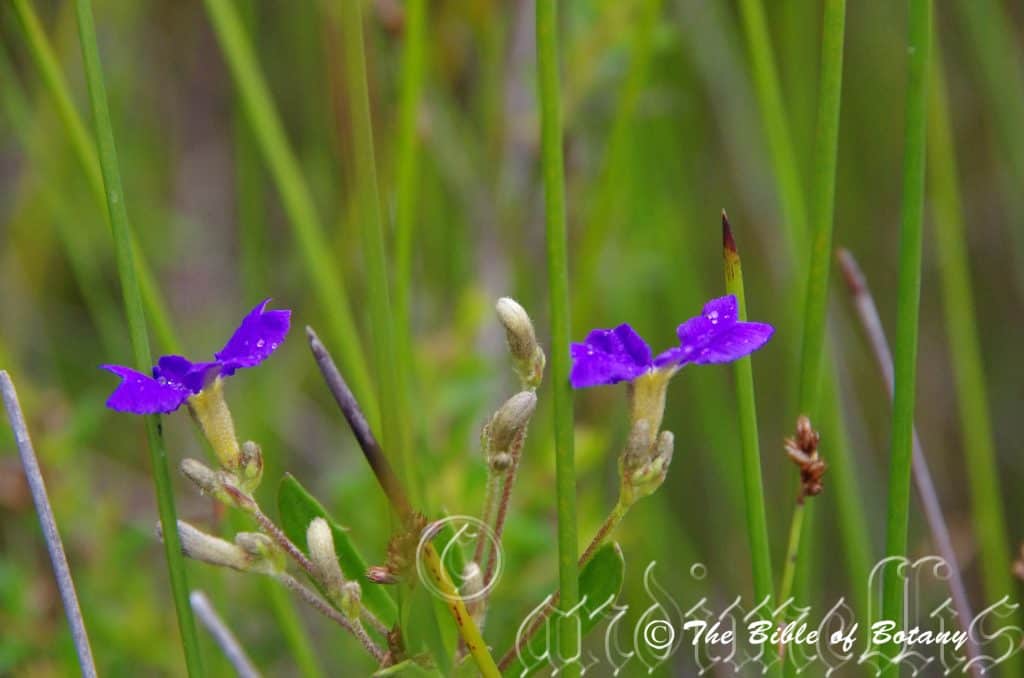
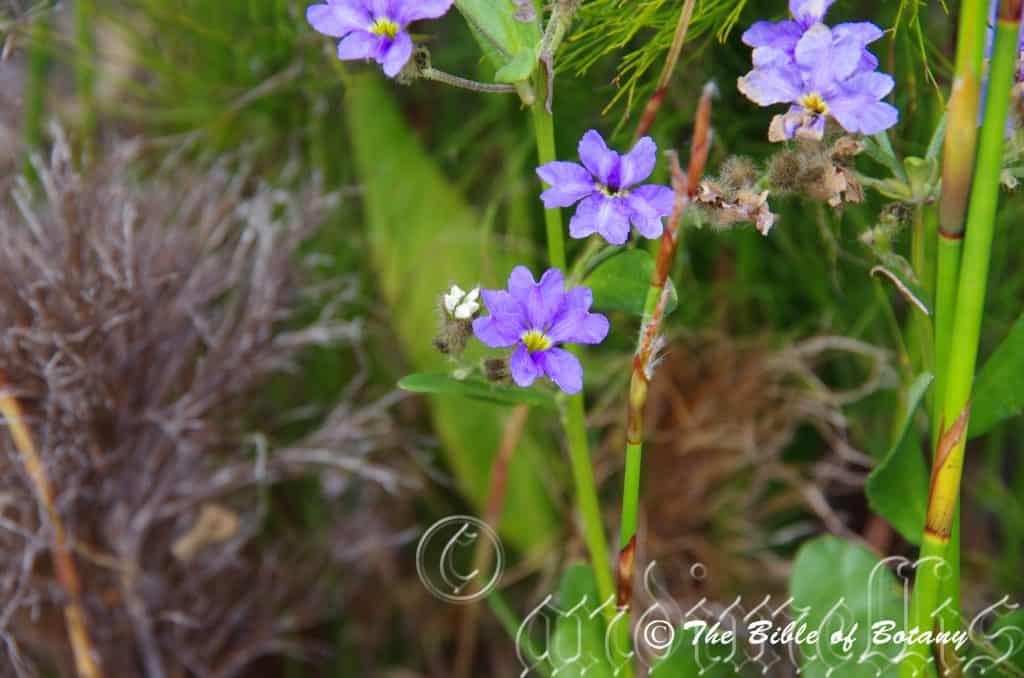
Dampiera diversifolia
Dampiera purpurea
Dampiera stricta
Dampiera sylvestris
Daphnandra apatela
Daphnandra micrantha
Daphnandra tenuipes
Darlingia darlingiana
Darwinia citriodora
Darwinia collina
Darwinia oldfieldii
Daucus glochidiatus
Davallia solida subsp. pyxidata
Davallia solida subsp. solida
Davidsonia jerseyana
Davidsonia johnsonii
Davidsonia pruriens
Daviesia acicularis
Daviesia arborea
Daviesia genistifolia
Daviesia horridia
Daviesia latifolia
Daviesia novaanglica
Daviesia ulicifolia
Daviesia umbellata
Daviesia villifera
Daviesia wyattiana
Dawsonia superba var. pulchra
Decaspermum humile
Deeringia amaranthoides
Dendrobium arborescens
Dendrobium aemulum
Dendrobium cucumerinum
Dendrobium discolor
Dendrobium dolichophyllum
Dendrobium fairfaxii
Dendrobium gracilicaule
Dendrobium linguiforme
Dendrobium melaleucaphilum
Dendrobium monophyllum
Dendrobium mortii
Dendrobium phalaenopsis
Dendrobium pugioniforme
Dendrobium schoeninum
Dendrobium teretifolium
Dendrobium tetragonum
Dendrocnide excelsa
Dendrocnide moroides
Dendrocnide photinophylla
Dendrophthoe vitellina
Denhamia bilocularis
Denhamia celastroides
Damasonium minus
Classification
Unranked: Monocots
Order: Alismatales
Family: Alismataceae
Genus: From Damazo, which is Ancient Greek for to subdue. It refers to some of the species which contain certain subdued poisons and or drugs.
Species: From Minus, which is Latin for substantially smaller. It refers to structures, organs or the plants, which are rather minute or smaller compared to other species in the genus.
Common Name: Starfruit
Distribution:
Damasonium minus is found throughout the mainland and Tasmania where ever fresh water is available. It is found in a line east from Innisfail in far north Queensland to Adelaide and in a line south from Port Dennison in Western Australia to Sydney in New South Wales. There are several disjunct populations in South Australia near Marla, Cardney and on Islands and surrounding Lake Gairdner.
https://avh.ala.org.au/occurrences/search?taxa=Damasonium+minus#tab_mapView
Habitat Aspect Climate:
Damasonium minus prefers full sun. It grows on the fringes of coastal swamps, wallums, billabongs, dams, backwaters in creeks and lakes in shallow water. It is an erect, emergent annual or short-lived perennial with submergent, floating or emergent leaves. The altitude ranges from 2 meters ASL to 760 meters ASL.
The temperatures range from minus 4 degrees in August to 44 degrees in January. Water temperatures range from 1 degree to 30 degrees.
The rainfall ranges from lows of 100mm to an average of 2400mm annually.
Soil Requirements:
Damasonium minus prefer better quality soil stratas from sandy loams to heavy silt clays. The soils are usually alluvium based derived from decomposed granites and sandstones. The soils pH ranges from 5PH to a 6.5pH are preferred. It tolerates waterlogged soils. Locations I have found the plant growing naturally the water is non saline to slightly saline however the plants in northern and central South Australia may prove the plants can tolerate water which is far more saline than those found around Grafton.
Height & Spread:
Wild Plants: 0.3m to 1m by 0.5m to 0.8m.
Characteristics:
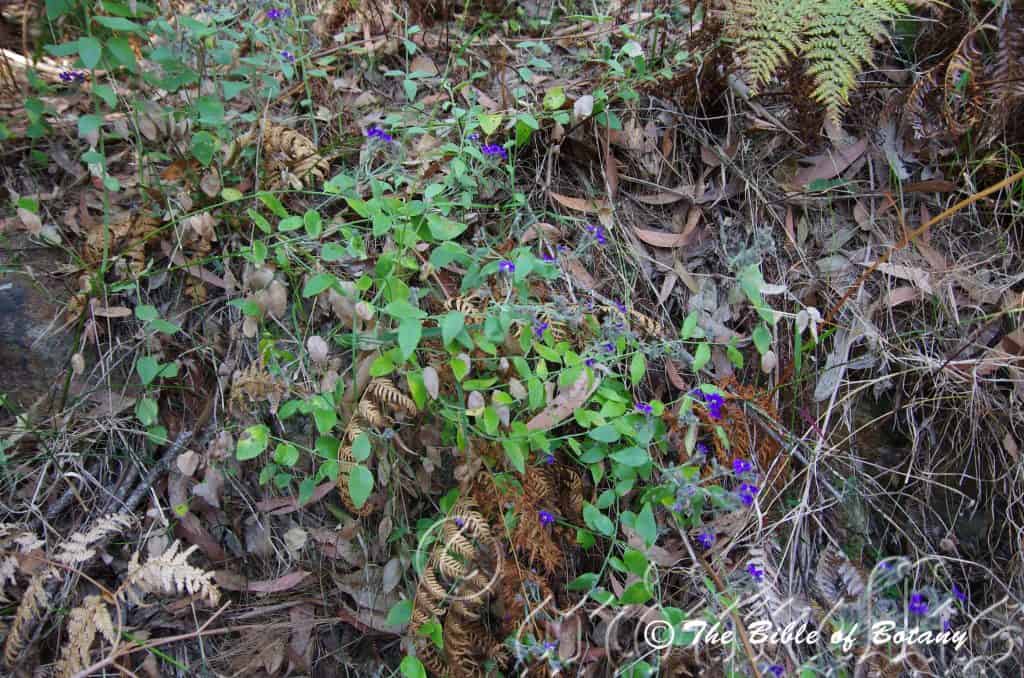
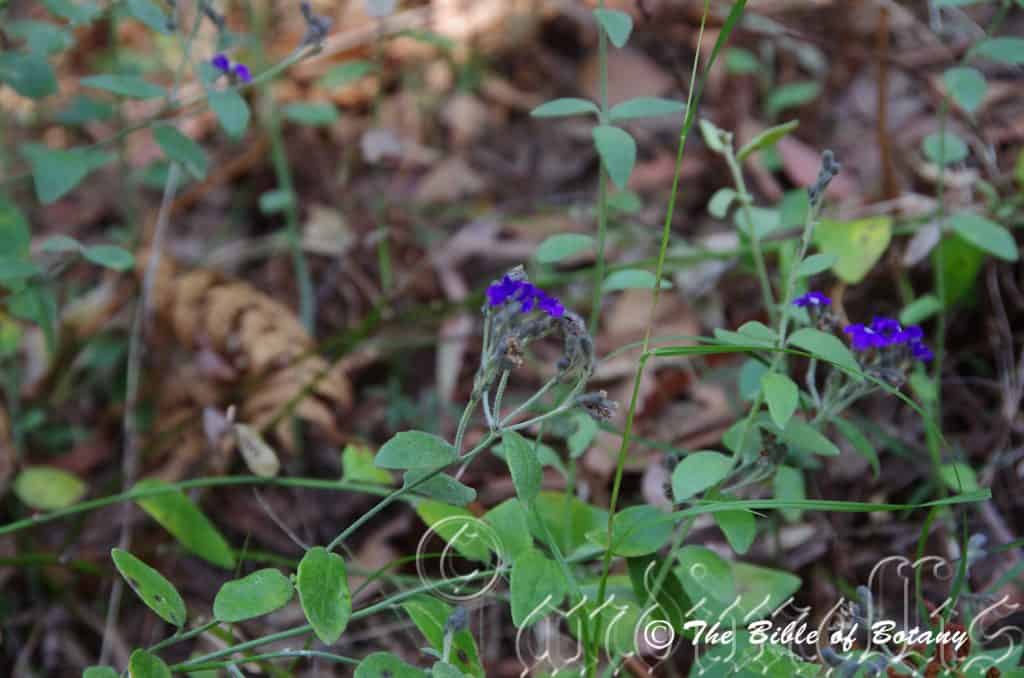
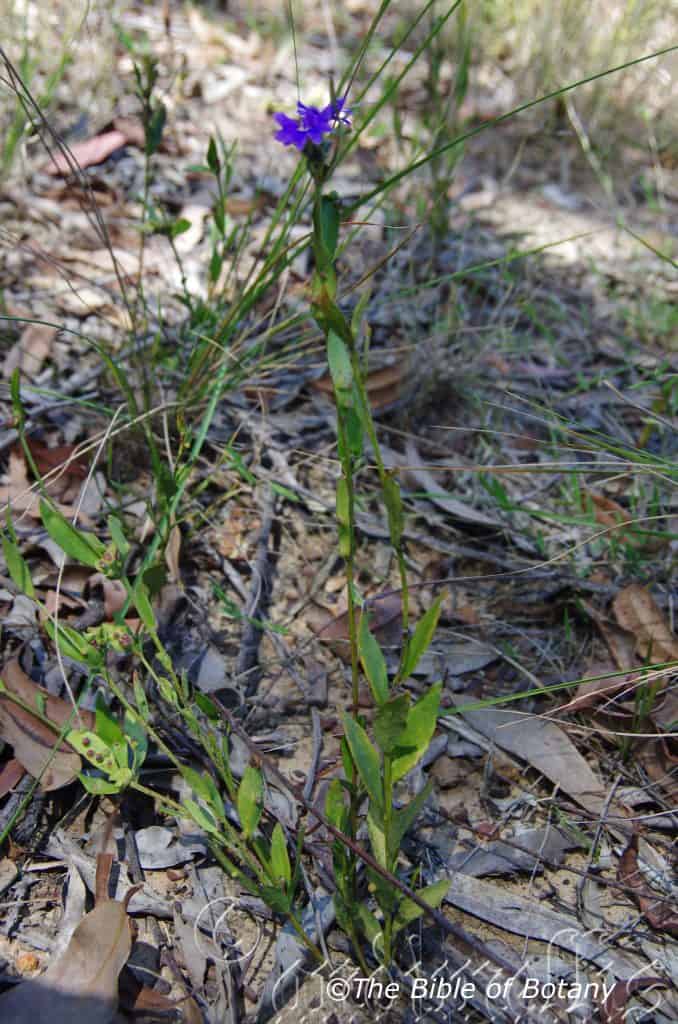
Damasonium minus is a small stoloniferous perennial.
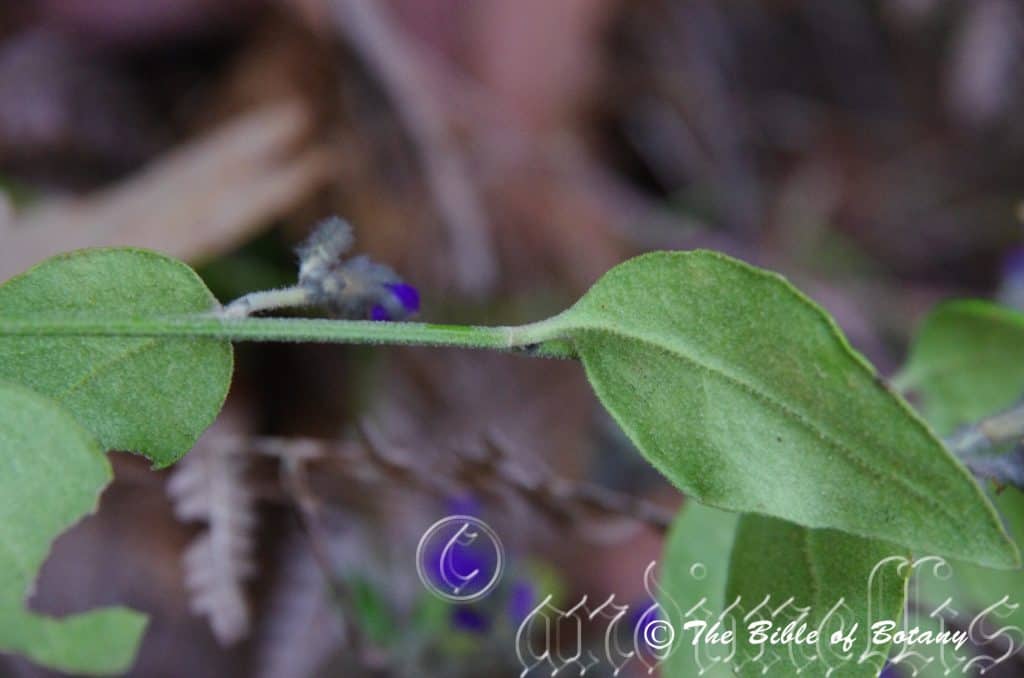
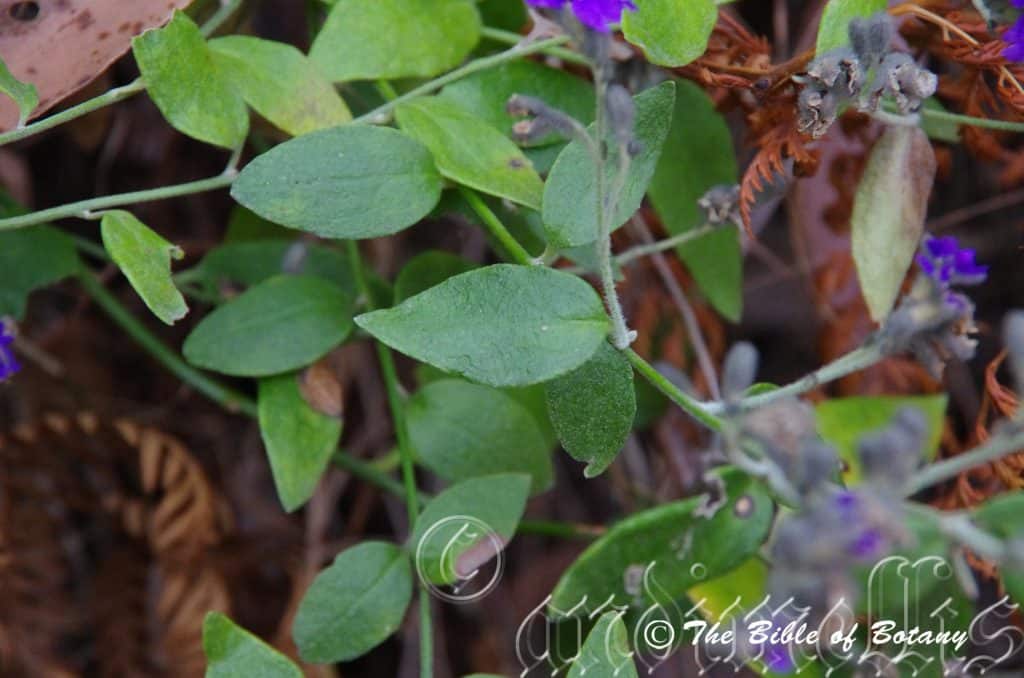
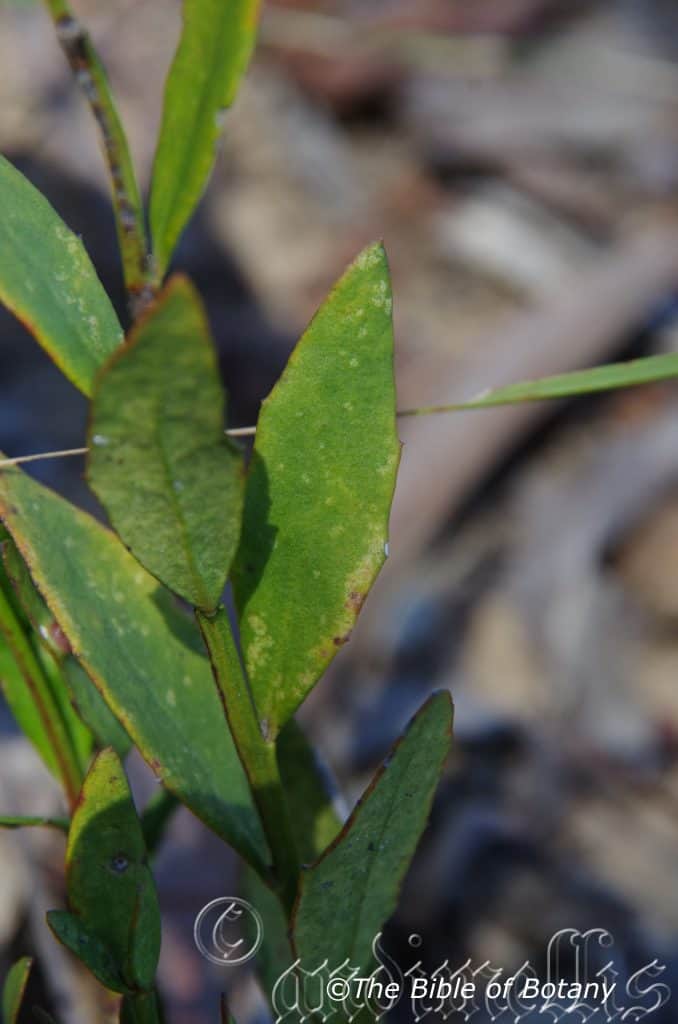
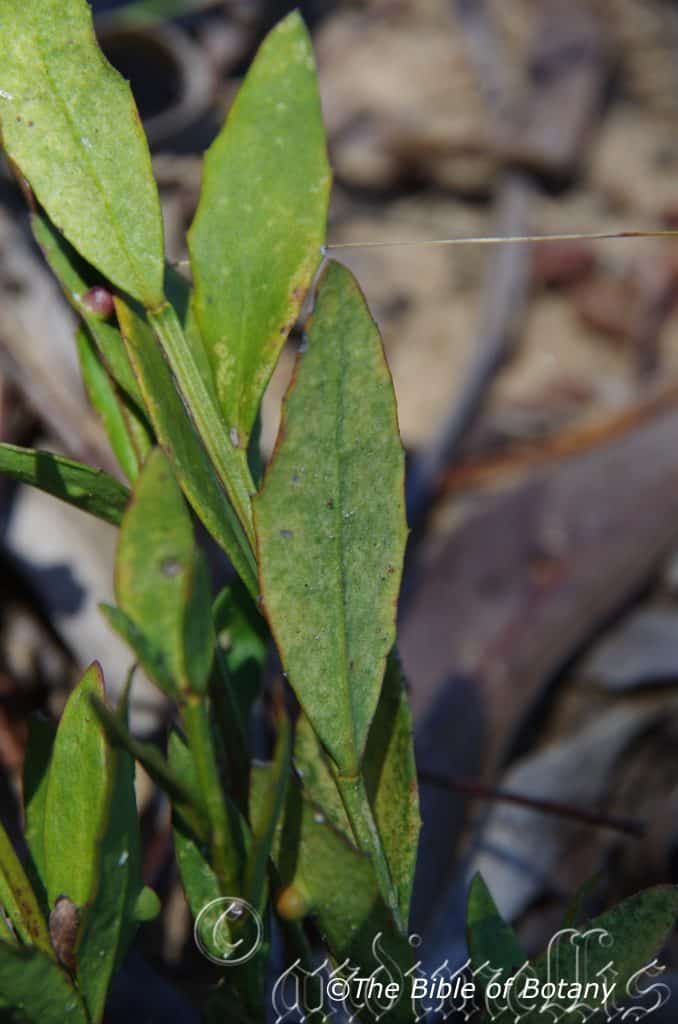
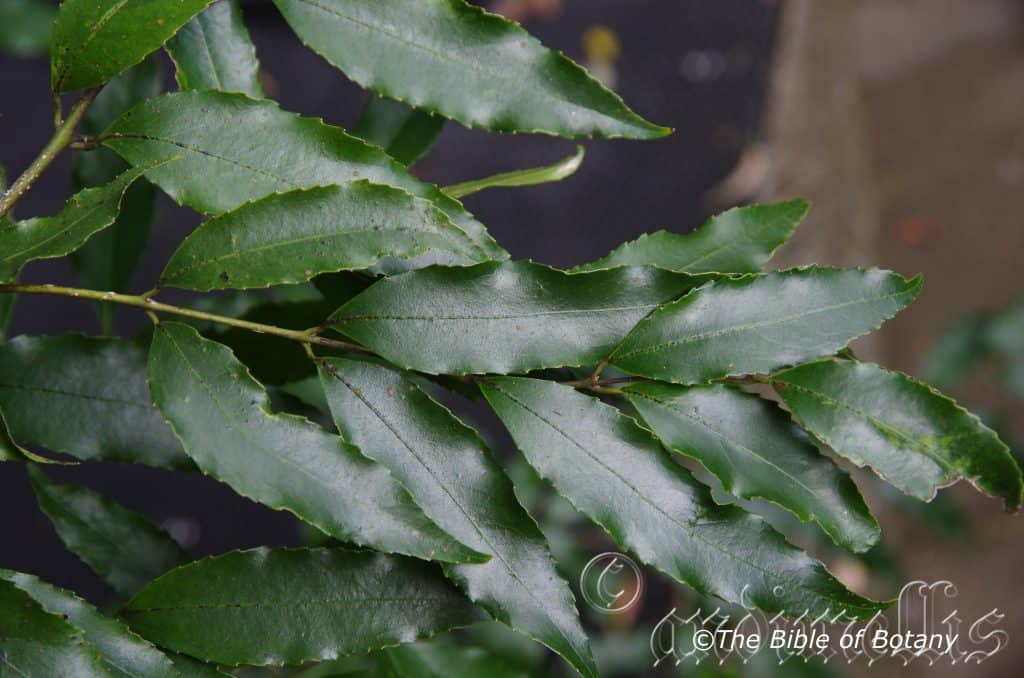
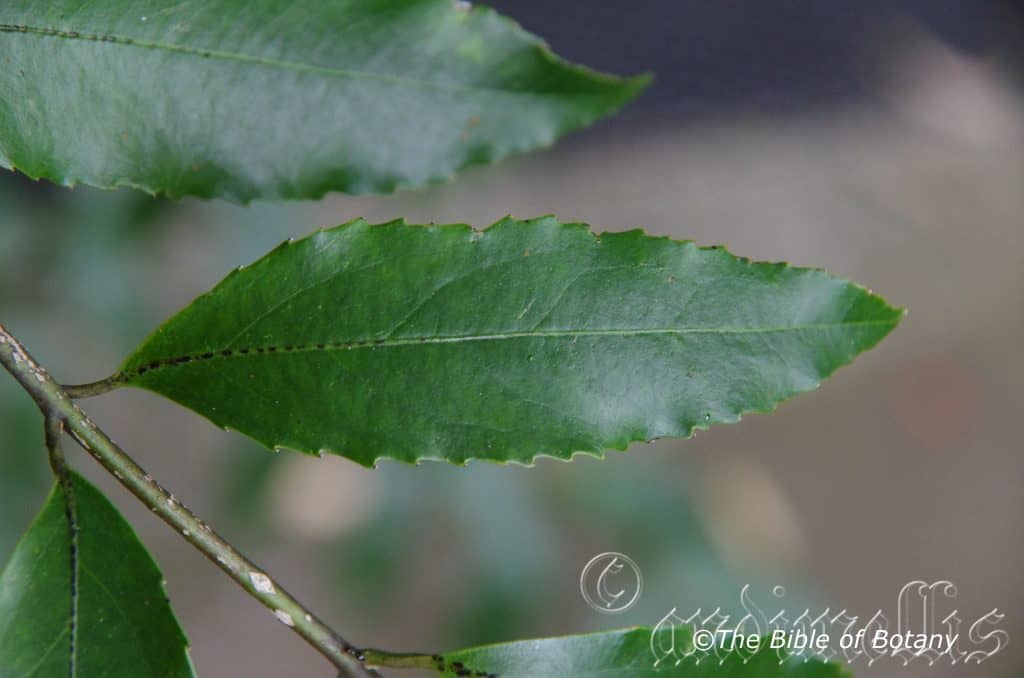
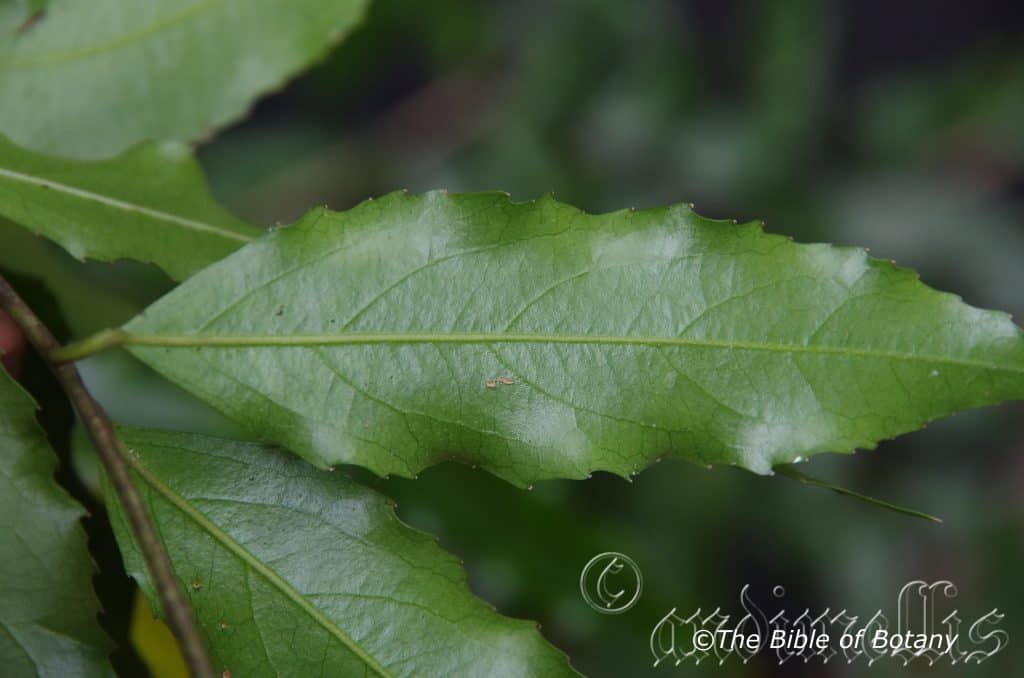
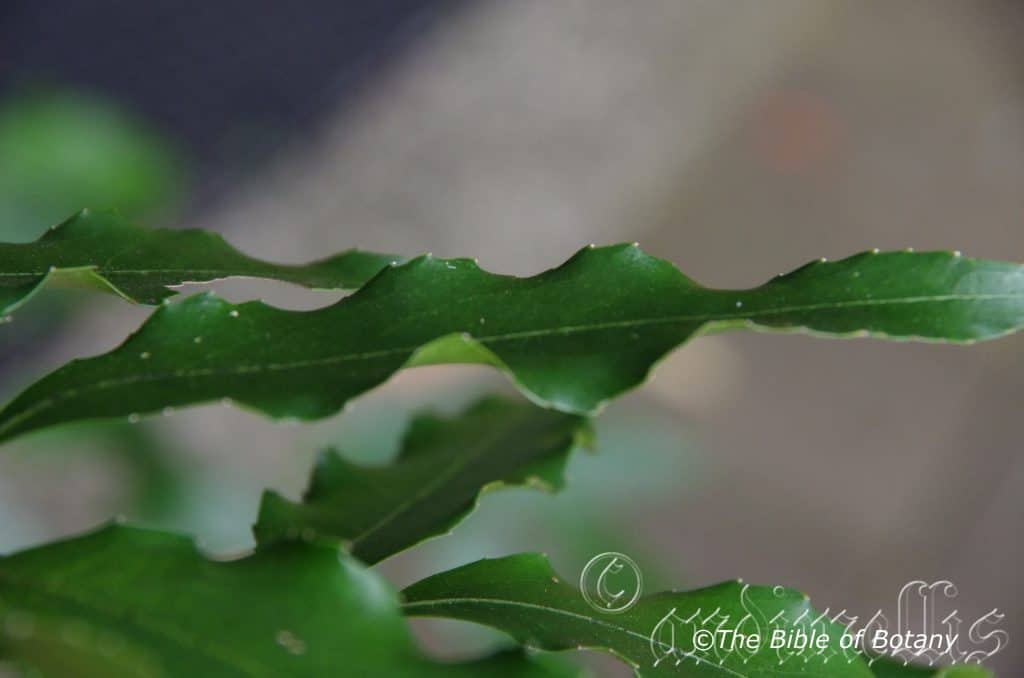
Damasonium minus’s leaves are clustered in whirls from a central growing point. The simple, lanceolate to ovate leaves measure 50mm to 100mm in length by 15mm to 40mm in width. The bases are rounded to cordate while the apexes are tapering to acute. The concolourous laminas are grass-green with 3 to 5 parallel veins connected by numerous finer transverse veins. The laminas are flat or slightly recurve upwards from the midvein to the margins and slightly decurve downwards near the apex. The leaf’s margins are entire and are slightly undulating. The mid vein is strongly prominent on the lower lamina while the parallel secondary veins are prominent. The main vein is visible on the upper lamina. The petioles measure 30mm to 300mm in length and are longer on floating and submergent leaves than emergent leaves.
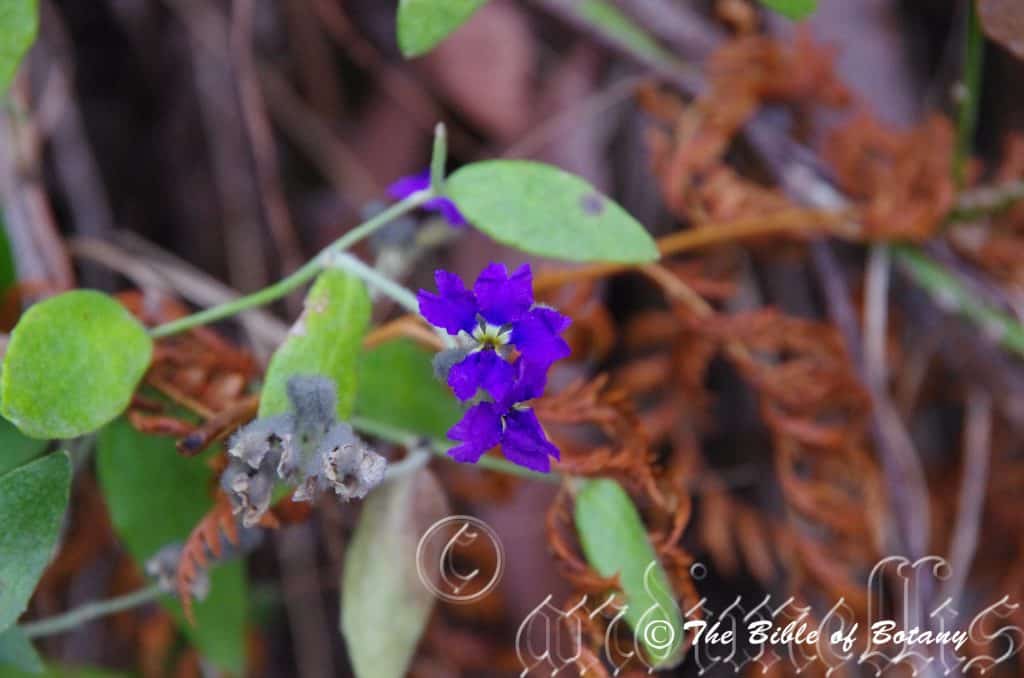
The inflorescences of Damasonium minus are born on panicles from the central rosette. The glabrous panicles measure 100mm to 500mm in length. The caduceus pascal grass-green, linear bracts are clasping. The 3 strongly concave, ovate sepals are grass-green and measure 1.5mm to 3.1mm in length. The 3 white to pale pink, ovate to elliptical petals measure 6mm to 7mm in length by 3mm to 6mm in width.
The 6 white hyaline filaments measure 2.5mm to 3mm in length. The anthers are pale yellow.
The dome shaped ovary is lime-green to grass-green and measures 4mm in length by 4mm in diameter near the base. The 6 to 9 pistils are short and are positioned around the upper girth of the ovary. The flowers appear from early December to late February.
Damasonium minus’s fruits are stellate aggregate follicles. The aggregates measure 10mm to 12mm in diameter while the individual follicles measure 5mm to 6mm in length by 2mm to 2.6mm in depth. The green follicles turn purplish black when ripen and dehisce separately to discard the 2 seeds in each follicle. The creamy grey, flattened seeds measure 1.5mm to 1.7mm in length. The seeds are partly transversely ridged and tuberculate.
Wildlife:
Damasonium minus’s wildlife is unknown to the author.
Cultivation:
Damasonium minus is a beautiful small water plant that grows well in any sunny to partially shaded dam, pool, fish or frog pond. It is equally good in the bog garden adjacent to these features or growing directly in the ponds. It also makes very good plants in aquariums provided plenty of light is assured.
Propagation:
Seeds: Sow fresh Damasonium minus seeds directly into a seed raising mix. Place the trays in a larger container of water in a warm position under 30mm shade. Germination is reliable and usually is fully completed within 30 days. When the seedlings are 40mm to 50mm tall, prick them out and plant them into 50mm native tubes using a good organic mix. Place the tubes in a container of wet.
When the seedlings reach 150mm to 200mm in height, plant them out into their permanent positions.
For mass plantings plant the seedlings at 500mm to 800mm centers.
Fertilize using Seaweed, fish emulsion or organic chicken pellets soaked in water on an alternate basis. Fertilize every two months until the plants are established then annually in early September to October to maintain health, vitality and better flowering.
Further Comments from Readers:
Hi reader, it seems you use The Bible of Botany a lot. That’s great as we have great pleasure in bringing it to you! It’s a little awkward for us to ask, but our first aim is to purchase land approximately 1,600 hectares to link several parcels of N.P. into one at The Pinnacles NSW Australia, but we need your help. We’re not salespeople. We’re amateur botanists who have dedicated over 30 years to saving the environment in a practical way. We depend on donations to reach our goal. If you donate just $5, the price of your coffee this Sunday, We can help to keep the planet alive in a real way and continue to bring you regular updates and features on Australian plants all in one Botanical Bible. Any support is greatly appreciated. Thank you.
In the spirit of reconciliation we acknowledge the Bundjalung, Gumbaynggirr and Yaegl and all aboriginal nations throughout Australia and their connections to land, sea and community. We pay our respect to their Elders past, present and future for the pleasures we have gained.
Dampiera diversifolia
Classification
Unranked: Eudicots
Unranked: Asterids
Family: Asterales
Subfamily: Goodeniaceae
Genus: Is named in honour of William Dampier; Baptised 1651-1715, who was an early British Sailor and collector of plants from Australia’s north west coast.
Species: From Diversum, which is Latin for more than one form and Folium, which is Latin for foliage. It refers to where the leaves are very variable in shape and size.
Common Name: Prostrate Dampier.
Distribution:
Dampiera diversifolia is found in the south western corner of Western Australia east from the Walpole-Nornalup National Park to Nuyisland Nature Reserve.
https://avh.ala.org.au/occurrences/search?taxa=Dampiera+diversifolia#tab_mapView
Habitat Aspect Climate:
Dampiera diversifolia prefers full sun to light dappled shade. It grows on heathlands, headlands and adjacent to coastal swamps and marshes where there is plenty of moisture. The altitude ranges from 10 meters ASL to 80 meters ASL.
The temperatures range from minus 6 degrees in July to 38 degrees in January.
The rainfall ranges from lows of 300mm to an average of 1800mm annually.
Soil Requirements:
Dampiera diversifolia prefers better quality sandy loams to light sandy clays. The soils are derived from decomposed granites and sandstones. The soils pH ranges from 5PH to a 6pH. It does not tolerate waterlogged soils. Non saline soils to moderately saline soils are tolerated.
Height & Spread:
Wild Plants: 0.3m to 0.8m by 0.5m to 1m.
Characteristics:
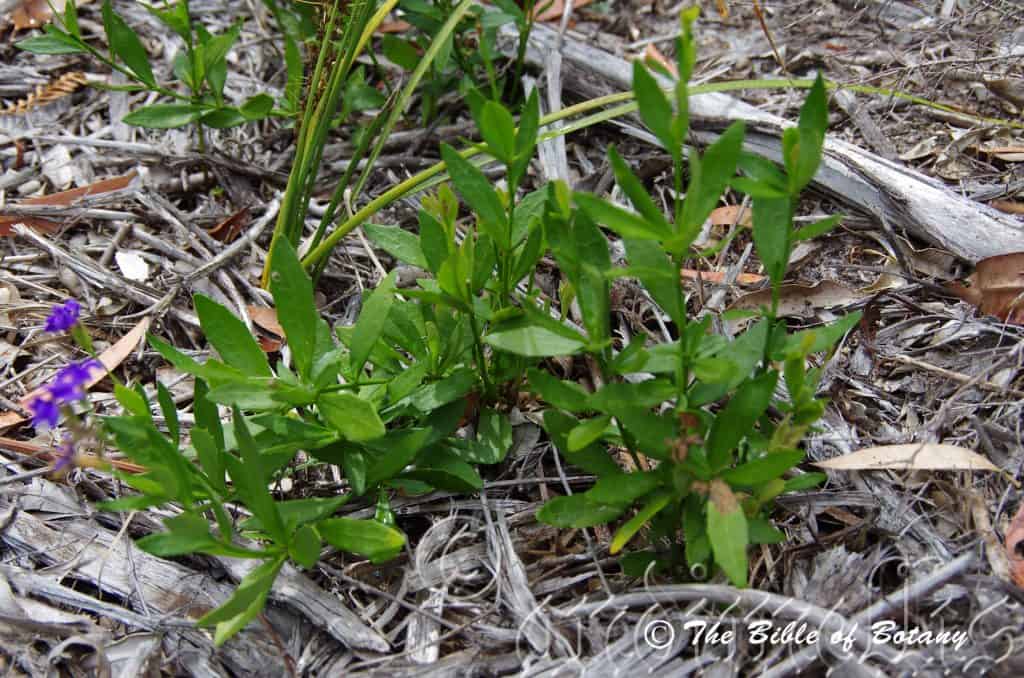
Dampiera diversifolia is a small open multi stemmed prostrate perennial herb with deep green stems. The stems are scabrous and covered in white to pale grey tomentose hairs. The young juvenile stems are glabrous, paler in colour and densely covered in golden to pale brown tomentose hairs.
Dampiera diversifolia’s leaves are clustered along the stem. The simple, oblong, oblanceolate, lanceolate or spathulate leaves are glabrous, and measure 5mm to 10mm in length by 4mm to 8mm in width. The bases are round to cuneate while the apexes are acute to obtuse. The concolourous laminas are deep green and slightly scabrous on the upper laminas. The laminas are flat. The leaf’s margins are entire or irregularly toothed and are flat to revolute. The mid vein is prominent on the lower lamina and is not visible on the upper lamina. The petioles measure 0mm to 1mm in length.
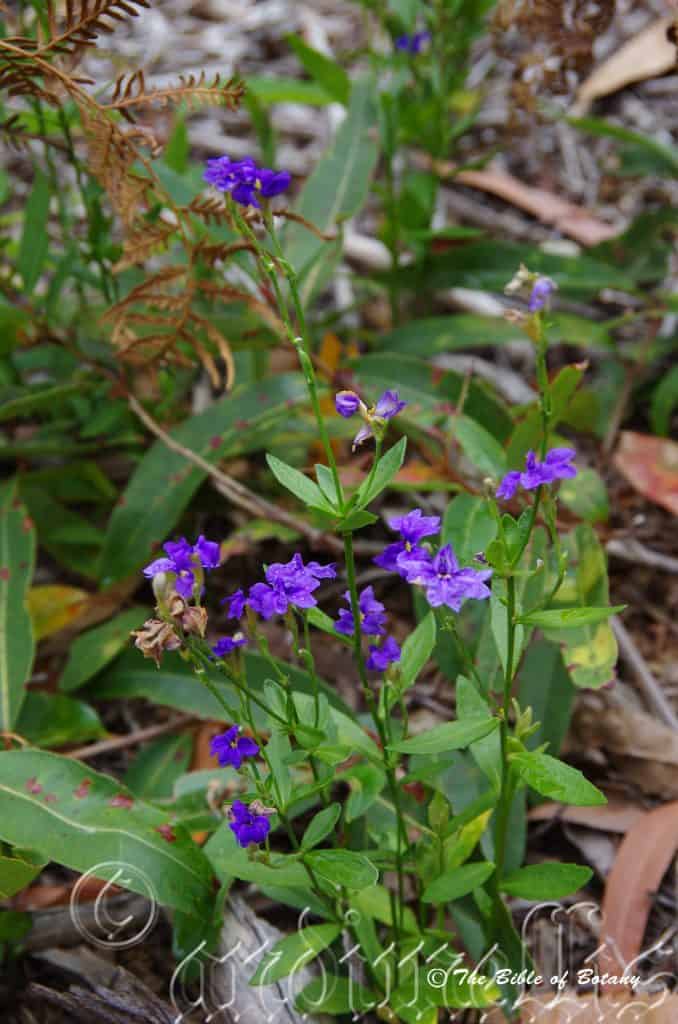
The inflorescences of Dampiera diversifolia are born on short peduncles from the leaf axils. The peduncles have 1 to 2 leaves, a pair of bracteoles and 1 or 2 individual flowers, usually one. The corollas are white to yellow while the lobes are deep purple-blue, purple or almost navy-blue lobes are yellow or white at the base. The apexes are truncate with a mucronate tip. The corollas are glabrous externally and covered in pale grey puberulent hairs internally.
The 3 upper linear lobes have 2 broad longitudinal wings barely extending beyond the acute apexes. The upper lobes measure 10mm to 15mm in length by 8mm to 11mm in width including the wings.
The 2 lower linear lobes have 2 longitudinal wings which extend well beyond the acute apexes. They measure 6mm to 7mm in length by 5mm to 6mm in width.
The wings margins are irregularly crenate and undulating. The lobes are pale purple, rarely white to deep purple while the wings are paler. The throat of the corolla and base of the lobes are yellow. The flowers occur from September to early January.
Dampiera diversifolia’s fruits are small elliptical capsules. The outer testa turns a deep grey black on ripening. They are 4mm to 5mm in length by 2mm to 2.5mm in width and are densely covered in short golden-brown tomentose hairs on the lower portion.
Wildlife:
The inflorescences Dampiera diversifolia of attract smaller nectar feeding butterflies and native bees but never in large quantities.
Cultivation:
Dampiera diversifolia is a beautiful small under shrub for almost every flat situation where full sun and good drainage can be provided. Around swimming pools and sunny courtyards its foliage breaks up the hard surface lines of bricks and cobblestones. It is an excellent plant for filling in that odd spot around the sunny rockery. It has a short suckering root system which once established is beneficial for reproducing cuttings from. The suckering habit is never invasive and should be used to your advantage. Treat the plants as annuals or perennials. Prune the old plant back to near the center after flowering has finished to produce more vigour in the plant. Keep the pruning material for cutting material. For larger perennials fertilize with a full strength organic fertilizer at the end of winter. This will help prevent the center dying back and ensure the plants will spread up to a meter in diameter.
It can cope with light frosts and temperatures down to minus 4.
It looks great in medium size rockeries and scattered amongst boulders or on moist banks. Its main requirement is to have a coarse sandy loam for a base and a cool root run during the hottest months. In the garden it is procumbent growing from 50mm to 75mm in height by 600mm to 1 meter in diameter.
Dampiera diversifolia would make a great contribution to a moist sandy or rocky terrain rock garden. Here it can be used as a fill in plant, or scattered throughout the bed.
When you use it in areas that are strewn with large boulders do not over crowd the scene as the boulders are a formidable part of the scene. Dampiera diversifolia is well suited to such conditions so use contours to display the plants boulder country are almost always rising and falling in contour and have sharp rises. Plants must be planted sparingly with short annuals between to give vibrant colour. Make the scene so that none of the plants are taller than 600mm in height. The idea is to achieve a feeling of expansive harshness. This can be achieved with using Dampiera diversifolia’s deep green obcordate leaves contrasting with finer pale green or soft grey to glaucous coloured foliage. If large deep green leaf plants are wanted try using them as prostrate plants. Use a lot of procumbent plants like Hibbertia linearis to make the rocks look larger and the spaces between the larger plants bigger. Mix them with other smaller shrubs so none of them dominate the scene but blend in to give a mosaic of foliage and boulders. Here I immediately think of Actinotis helianthi or the golden paper daisies Xerochrysum viscosum or Xerochrysum viscosum for two great contrasting foliage, though with Actinotis helianthi there are very strong contrasts between Dampiera sylvestris’s foliage colour and flower colour.
Propagation:
Seeds: Sow fresh Dampiera diversifolia seeds directly into a seed raising mix, keeping them moist not wet. Place the trays in a warm sunny position. Germination is unreliable and erratic. They may require a short period packed in a dry calico or paper bag and placed in the fridge for a month or two. When the seedlings are 40mm to 50 mm tall, prick them out and plant them into 50mm native tubes using a good organic mix.
When the seedlings reach 200mm in height they can be planted out into their permanent positions.
Cuttings: Use 40mm to 50mm long ripened material which has some existing roots or at least 2 nodes gives best results.
Use 50mm to 70mm long herbaceous cuttings taken from October to early April or later if you are in a frost free area. Vigorously growing plants of the form you desire should be used when growing from cuttings. Remove the leaves from the lower one-third to one-half of the stem being careful not to tear the stem. A rooting hormone is not required as the cuttings strike easily and within a couple of weeks. Place the cuttings in a warm position under 30mm shaded. Keep moist not wet.
When the cuttings have obviously struck and have developed good roots treat them as for seedlings.
For mass plantings plant the seedlings at 500mm to 800mm centers.
Fertilize using Seaweed, fish emulsion or organic chicken pellets soaked in water on an alternate basis. Fertilize every two months until the plants are established then annually in early September to October to maintain health, vitality and better flowering.
Further Comments from Readers:
Hi reader, it seems you use The Bible of Botany a lot. That’s great as we have great pleasure in bringing it to you! It’s a little awkward for us to ask, but our first aim is to purchase land approximately 1,600 hectares to link several parcels of N.P. into one at The Pinnacles NSW Australia, but we need your help. We’re not salespeople. We’re amateur botanists who have dedicated over 30 years to saving the environment in a practical way. We depend on donations to reach our goal. If you donate just $5, the price of your coffee this Sunday, We can help to keep the planet alive in a real way and continue to bring you regular updates and features on Australian plants all in one Botanical Bible. Any support is greatly appreciated. Thank you.
In the spirit of reconciliation we acknowledge the Bundjalung, Gumbaynggirr and Yaegl and all aboriginal nations throughout Australia and their connections to land, sea and community. We pay our respect to their Elders past, present and future for the pleasures we have gained.
North Brother NSW
North Brother NSW
North Brother NSW
North Brother NSW
North Brother NSW
North Brother NSW
North Brother NSW
North Brother NSW
North Brother NSW
Dampiera purpurea
Classification
Unranked: Eudicots
Unranked: Asterids
Family: Asterales
Subfamily: Goodeniaceae
Genus: Is named in honour of William Dampier; Baptised 1651-1715, who was an early British Sailor and collector of plants from Australia’s north west coast.
Species: From Purpurea, which is Latin for purple. It refers to organs, which are purplish, deep reddish-purple or purple in colour.
Common Name: Purple Dampier.
Distribution:
Dampiera purpurea is found from the Carnarvon Gorge west of Rockhampton in central Queensland south to the Ottway Ranges in North western Victoria. It is found on the Western Plains, Western Slopes, on and east of the Great Dividing Range.
https://avh.ala.org.au/occurrences/search?taxa=Dampiera+purpurea#tab_mapView
Habitat Aspect Climate:
Dampiera purpurea prefers full sun to light dappled shade. It grows on heathlands, headlands and adjacent to highland swamps and marshes where there is plenty of moisture. It is found from 5 meters ASL to 1300 meters ASL.
The temperatures range from minus 6 degrees in July to 38 degrees in January.
The rainfall ranges from lows of 300mm to an average of 1800mm annually.
Soil Requirements:
Dampiera purpurea prefers better quality sandy loams to light sandy clays. The soils are usually derived from decomposed granites and sandstones. The soils pH ranges from 6.5pH to 7pH. It does not tolerate waterlogged soils. Non saline soils to moderately saline soils are tolerated.
Height & Spread:
Wild Plants: 0.2m to 0.8m by 0.2m to 6m.
Characteristics:
Dampiera purpurea is a small open multi stemmed sub-shrub with erect pale blue green stems. The stems are scabrous and covered in pale grey tomentose hairs. The juvenile stems are glabrous, paler in colour and densely covered in pale grey tomentose hairs.
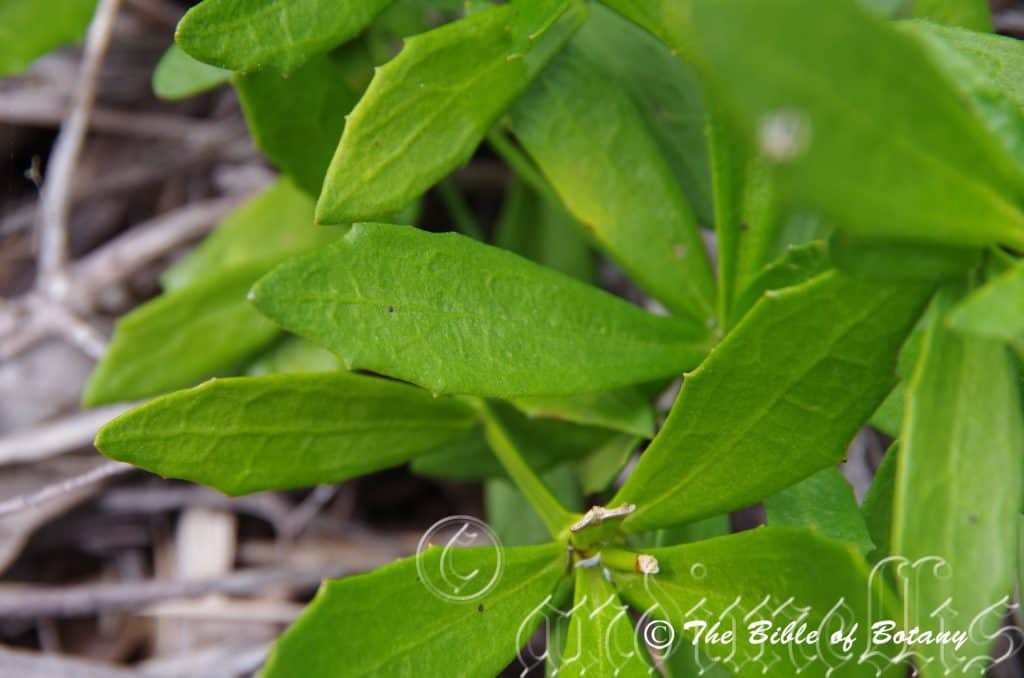
Dampiera purpurea’s leaves are alternate, simple, and obovate to elliptical and measure 10mm to 60mm in length by 5mm to 40mm in width. The base is broad cuneate to cuneate while the apex is obtuse to acute. The discolourous laminas are blue-green to grey-green, glabrous to scabrous on the upper laminas while the lower laminas are greyer and covered in pale grey tomentose hairs or rarely golden-brown tomentose hairs. The laminas are flat or decurve downwards near the apex. The leaf’s margins are entire to bluntly irregularly tooth. The mid vein is slightly prominent on the lower lamina and is not visible on the upper lamina. The petioles measure 0mm to 1mm in length.
The inflorescences of Dampiera purpurea are born in simple panicles of 2 to 9 branches with 3 to 7 individual flowers on each branch. The elliptical sepals are densely covered in short golden-brown tomentose hairs and measure 2mm to 2.5mm in length including the 0.5mm lobes. Individual corollas measure 12mm to 15mm in length by 3mm to 4.5mm in width. The corollas are covered in grey to deep grey pilose hairs.
The 3 upper adaxial, linear lobes have 2 longitudinal wings extending beyond the acute apexes. The lobes measure 10mm to 12mm in length by 2.5mm to 3.5mm in width. The wings measure 1.5mm to 2.5mm in width.
The 2 lower abaxial, linear lobes further divide into 3 separate lobes. They measure 6mm to 9mm in length by 2mm to 3mm in width. The 2 side wings measure 1.5mm to 2.5mm in width.
The wings margins are irregularly lobed or fringed and undulating. The lobes are pale purple, rarely white to deep purple while the wings are paler. The throat of the corolla and base of the lobes are yellow. The flowers appear from August to early February.
Dampiera purpurea’s fruits are small elliptical follicles. The outer testa turns a deep grey black on ripening. They measure 4mm to 5mm in length by 2mm to 2.5mm in width. The follicles are ribbed and are densely covered in short pale grey to deep grey tomentose hairs on the lower portion.
Wildlife:
Dampiera purpurea’s inflorescences attract smaller nectar feeding butterflies and native bees but never in large quantities.
Cultivation:
Dampiera purpurea are beautiful small sub-shrubs for almost every situation where full sun and good drainage can be provided. Around swimming pools and courtyards its foliage breaks up hard lines. If it is kept trimmed to its smaller size of half a meter, then it will make the area look larger. It has a short suckering root system which once established is beneficial for reproducing cuttings from. The suckering habit is never invasive and should be used to your advantage. Treat the plants as annuals and prune the old plant back to near the ground every 12 months to allow the new suckers to become more vigorous and to form the new plants. This is best done in late February where mild frosts are experienced or early spring as the weather starts to warm up.
It looks great in medium size rockeries and scattered amongst boulders or on moist banks. Its main requirement is to have a coarse sandy loam for a base and a cool root run during the hottest months.
There are 2 distinct types of heath lands those that are entirely flat with all small plants with mixed foliage or the windswept headland. Dampiera purpurea is an ideal plant for the flat heath where all the plants are packed close together in the garden and it is all of equal height. Don’t use contours to display the plants as heath lands are almost always flat or have a slight rise. Plants must be planted close together and be short so you can see over the tallest ones with the exception of one or two plants at the most. These will be feature plants. The idea is to achieve a feeling of expansive flatness and this can only be achieved if you are looking over the whole site. This can be achieved with using the Dampiera purpurea’s blue green leaves and have them contrast finer pale green or soft grey, glaucous coloured foliage. Use a lot of procumbent plants like Hibbertia species like Hibbertia procumbens or a small prostrate herb like Pelargonium australe. Mix them with other smaller shrubs so none of them dominate the scene but blend in to give a mosaic of foliage colours that you oversee. Here I immediately think of Actinotis helianthi or the golden paper daisies Xerochrysum bracteatum or Xerochrysum viscosum for two great contrasting foliage, though with Actinotis helianthi there is avery strong contrasts between Dampiera sylvestris’s foliage colour and flower colour.
Propagation:
Seeds: Sow fresh Dampier purpurea seeds directly into a seed raising mix, keeping them moist not wet. Place the trays in a warm sunny position. Germination is unreliable and erratic. They may require a short period packed in a dry calico or paper bag and placed in the fridge for a month or two. When the seedlings are 40mm to 50 mm tall, prick them out and plant them into 50mm native tubes using a good organic mix.
When the seedlings reach 200mm in height they can be planted out into their permanent positions.
Cuttings: Use 50mm to 100mm long half ripened material which has some existing root on the suckers. Take them in early autumn where frosts are not a problem or in early spring after the last frosts. Place the suckers in a good quality native mix and water in with a seaweed extract fertilizer at half strength. When the cuttings have obviously struck and have developed good roots treat them as for seedlings.
For mass plantings space seedlings out at 300mm to 500mm centers.
Fertilize using Seaweed, fish emulsion or organic chicken pellets soaked in water on an alternate basis. Fertilize every two months until the plants are established then annually in early September to October to maintain health, vitality and better flowering.
Further Comments from Readers:
Hi reader, it seems you use The Bible of Botany a lot. That’s great as we have great pleasure in bringing it to you! It’s a little awkward for us to ask, but our first aim is to purchase land approximately 1,600 hectares to link several parcels of N.P. into one at The Pinnacles NSW Australia, but we need your help. We’re not salespeople. We’re amateur botanists who have dedicated over 30 years to saving the environment in a practical way. We depend on donations to reach our goal. If you donate just $5, the price of your coffee this Sunday, We can help to keep the planet alive in a real way and continue to bring you regular updates and features on Australian plants all in one Botanical Bible. Any support is greatly appreciated. Thank you.
In the spirit of reconciliation we acknowledge the Bundjalung, Gumbaynggirr and Yaegl and all aboriginal nations throughout Australia and their connections to land, sea and community. We pay our respect to their Elders past, present and future for the pleasures we have gained.
Sherwood Nature Reserve NSW
Wombat Creek Nature Reserve NSW
Wombat Creek Nature Reserve NSW
Wombat Creek Nature Reserve NSW
Author’s Garden The Pinnacles NSW

Wombat Creek Nature Reserve NSW
Sherwood Nature Reserve NSW
Author’s Garden The Pinnacles NSW
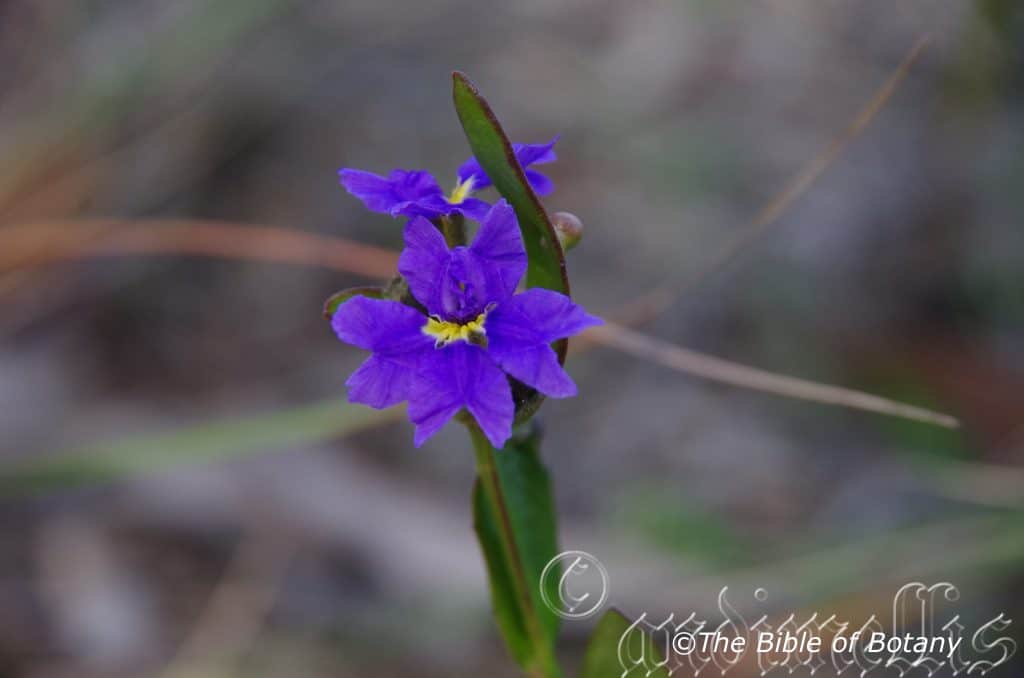
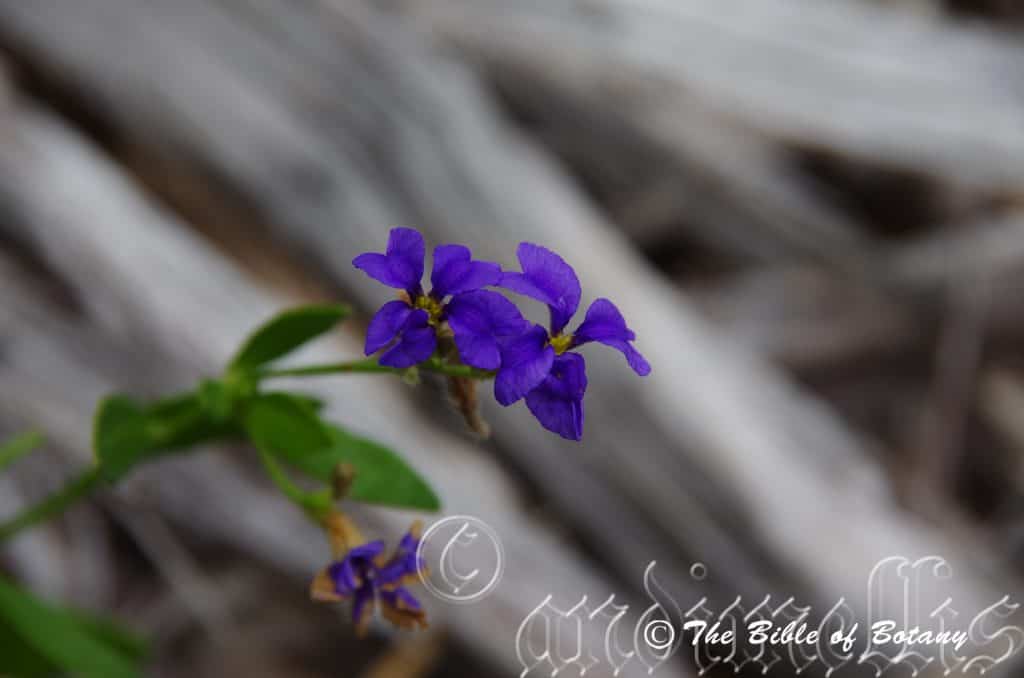
Dampiera stricta
Classification
Unranked: Eudicots
Unranked: Asterids
Family: Asterales
Subfamily: Goodeniaceae
Genus: Is named in honour of William Dampier; Baptised 1651-1715, who was an early British Sailor and collector of plants from Australia’s north west coast.
Species: From Stricta, which is Latin for to draw tight. It refers to organs, which are stiff and rigid.
Common Name: Heath Dampier.
Distribution:
Dampiera stricta distribution is in several disjunct populations on the east coast mainly east of the Great Dividing Range. It is found south from Redland Bay in Queensland to Wilsons Promontory in southern Victoria on mainland Australia. It is also found on the eastern Bass Strait Islands including Flinders Island and eastern Tasmania. There appears to be some confusion with its distribution as to whether it is found on Stradbroke Island and Moreton Island east of Brisbane or whether it is Dampiera sylvestris. As I have not studied or observed plants in recent years I am going to go along with the ANPSA where they have sited the coastal forms north of Brisbane and on the coast as Dampiera sylvestris.
https://avh.ala.org.au/occurrences/search?taxa=Dampiera+stricta#tab_mapView
Habitat Aspect Climate:
Dampiera stricta prefers full sun to light dappled shade. It grows in most types of moist heaths. It is found from 10 meters ASL to 600 meters ASL.
The temperatures range from minus 5 degrees in July to 38 degrees in January.
The rainfall ranges from lows of 600mm to an average of 2000mm annually.
Soil Requirements:
Dampiera stricta prefers better quality coarse sands to sandy loams. The soils are usually derived from decomposed granites, skeletal sands and skeletal loams overlying sandstone or shale. The soils pH ranges from 6.5pH through to a 7pH. Waterlogged soils are not tolerated at all. Saline soils are not tolerated.
Height & Spread:
Wild Plants: 0.2m to 0.6m by 0.5m to 0.8m.
Characteristics:
Dampiera stricta is a small multi stemmed perennial. The stems are 3 angled, glabrous or sparsely scabrous. The young stems are paler in colour.
Dampiera stricta’s alternate simple leaves are linear to elliptical or lanceolate. The glabrous, dull to semi glossy, deep green leaves measure 16mm to 45mm in length by 2mm to 19mm in width. They are tightly grouped towards the apex of the growing stems. The bases are round to cuneate while the apexes are obtuse or obtuse-acute. The discolourous laminas are slightly scabrous to glabrescent and deep grey-green while the lower laminas are paler. The leaf’s margins are entire or with a few irregularly spaced teeth. They are slightly curved upwards from the midrib. The mid vein is slightly prominent on the lower lamina and is not visible on the upper lamina. The leaves are sessile.
The inflorescence of Dampiera stricta is born in simple corymbs of 1 to 2 branches with 1 or 2 individual flowers from the leaf axils. The elliptical sepals are densely covered in short rusty-brown tomentose hairs and measure 0.7mm to 1.2mm in length including the 0.7mm to 1.2mm lobes. Individual corollas measure 12mm to 15mm in length by 3mm to 4.5mm in width. The corollas are covered in rusty pilose hairs externally and glabrous internally.
The 3 upper, linear lobes have a distinct apiculate apex and 2 longitudinal wings extending beyond the acute apexes. The lobes measure 10mm to 12mm in length by 2.5mm to 3.5mm in width. The wings measure 2mm to 2.7mm in width.
The 3 lower, linear lobes have a distinct apiculate apex and 2 longitudinal wings extending beyond the acute apexes. The lobes measure 7mm to 10mm in length by 2mm to 3mm in width. The wings measure 2mm to 2.5mm in width.
The wings margins are irregularly undulating. The lobes are purple, rarely white or pink to deep violet while the wings are a similar colour. The throat of the corolla and base of the lobes are cream to deep yellow. The flowers occur from August to early February.
Dampiera stricta’s fruits are small elliptical follicles. The outer testa turns a deep grey black on ripening. They are 4mm to 5mm in length by 2mm to 2.5mm in width. The follicles are ribbed and densely covered in short rusty-brown pilose hairs.
Wildlife:
The inflorescences of Dampiera stricta attract smaller nectar feeding butterflies and native bees but never in large quantities.
Cultivation:
Dampiera stricta are beautiful small sub-shrubs for almost every situation where full sun and good drainage can be provided. Along fences its foliage break up hard lines. If it is kept trimmed or remove spent flowers the plants will thicken up and have a tendency to sucker more. Its small size and deep coloured flowers make the area look larger. It has a short suckering root system which once established is beneficial for reproducing cuttings from. The suckering habit is never invasive and should be used to your advantage. Treat the plants as annuals and prune the old plant back to near the ground every 12 months to allow the new suckers to become more vigorous and to form the new plants. This is best done in late February where mild frosts are experienced or early spring as the weather starts to warm up. Large plants can grow to 1 meter in diameter.
It looks great in medium size rockeries and scattered amongst boulders or on moist banks. Its main requirement is to have a sharp sandy loam or sandy loam for a base and a cool root run during the hottest months.
There are 2 distinct types of heath lands, those that are entirely flat with all small plants with mixed foliages or the windswept headland. Dampiera purpurea is an ideal plant for the flat heath where all the plants are packed close together in the garden and they are all of equal height. Don’t use contours to display the plants as heath lands are almost always flat or have a slight rise. Plants must be planted close together and be short so you can see over the tallest ones with the exception of one or two plants at the most. These will be feature plants. The idea is to achieve a feeling of expansive flatness and this can only be achieved if you are looking over the whole site. This can be achieved with using the Dampiera stricta’s blue green leaves and having those contrasting finer pale green or soft grey, glaucous coloured foliage. Use a lot of procumbent plants like Hibbertia accuminatum or a prostrate herb like Pelargonium australe. Mix them with other smaller shrubs so none of them dominate the scene but blend in to give a mosaic of foliage colours that you oversee. Here I immediately think of Actinotis helianthi or the golden paper daisies Xerochrysum viscosum or Xerochrysum viscosum for two great contrasting foliage, though with Actinotis helianthi there are very strong contrasts between Dampiera stricta’s growth habit, foliage colour and flower colour.
Propagation:
Seeds: Sow fresh Dampiera stricta‘s seeds directly into a seed raising mix, keeping them moist not wet. Place the trays in a warm sunny position. Germination is unreliable and erratic. They may require a short period packed in a dry calico or paper bag and placed in the fridge for a month or two. When the seedlings are 40mm to 50 mm tall, prick them out and plant them into 50mm native tubes using a good organic mix.
When the seedlings reach 200mm in height they can be planted out into their permanent positions.
Cuttings: Use 50mm to 100mm long half ripened material which has some existing root on the suckers. Take them in early autumn where frosts are not a problem or in early spring after the last frosts. Place the suckers in a good quality native mix and water in with a seaweed extract fertilizer ate half strength. When the cuttings have obviously struck and have developed good roots treat them as for seedlings.
For mass plantings space seedlings out at 300mm to 500mm centers.
Fertilize using Seaweed, fish emulsion or organic chicken pellets soaked in water on an alternate basis. Fertilize every two months until the plants are established then annually in early September to October to maintain health, vitality and better flowering.
Further Comments from Readers:
Hi reader, it seems you use The Bible of Botany a lot. That’s great as we have great pleasure in bringing it to you! It’s a little awkward for us to ask, but our first aim is to purchase land approximately 1,600 hectares to link several parcels of N.P. into one at The Pinnacles NSW Australia, but we need your help. We’re not salespeople. We’re amateur botanists who have dedicated over 30 years to saving the environment in a practical way. We depend on donations to reach our goal. If you donate just $5, the price of your coffee this Sunday, We can help to keep the planet alive in a real way and continue to bring you regular updates and features on Australian plants all in one Botanical Bible. Any support is greatly appreciated. Thank you.
In the spirit of reconciliation we acknowledge the Bundjalung, Gumbaynggirr and Yaegl and all aboriginal nations throughout Australia and their connections to land, sea and community. We pay our respect to their Elders past, present and future for the pleasures we have gained.
Innes Lake National Park NSW
Innes Lake National Park NSW
Innes Lake National Park NSW
Innes Lake National Park NSW
Innes Lake National Park NSW
Innes Lake National Park NSW
Innes Lake National Park NSW
Innes Lake National Park NSW
Innes Lake National Park NSW
Innes Lake National Park NSW
Innes Lake National Park NSW
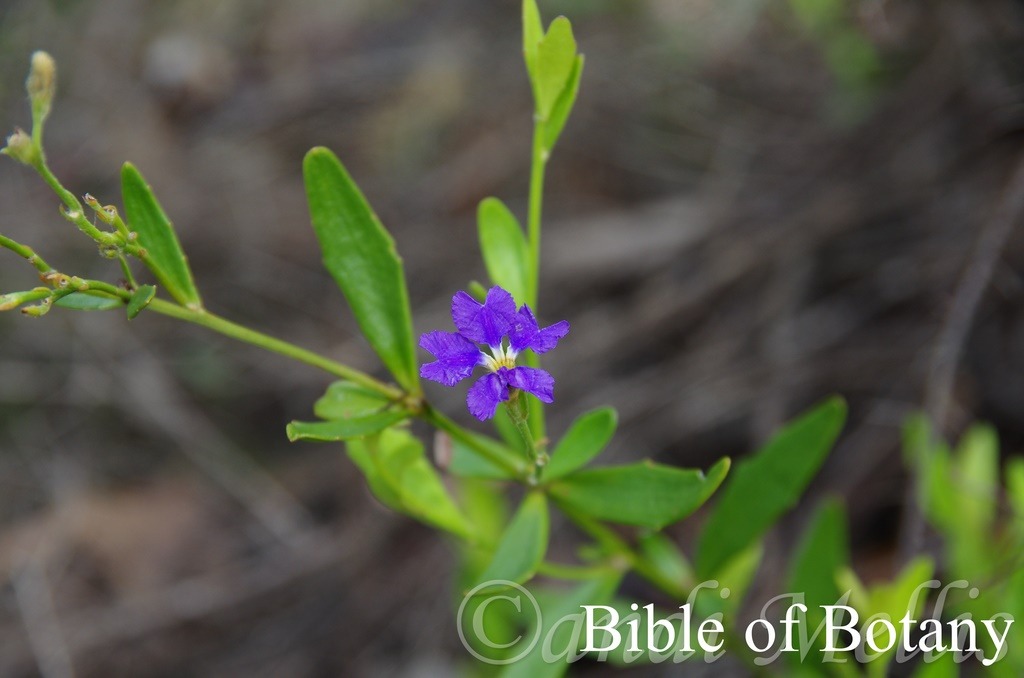
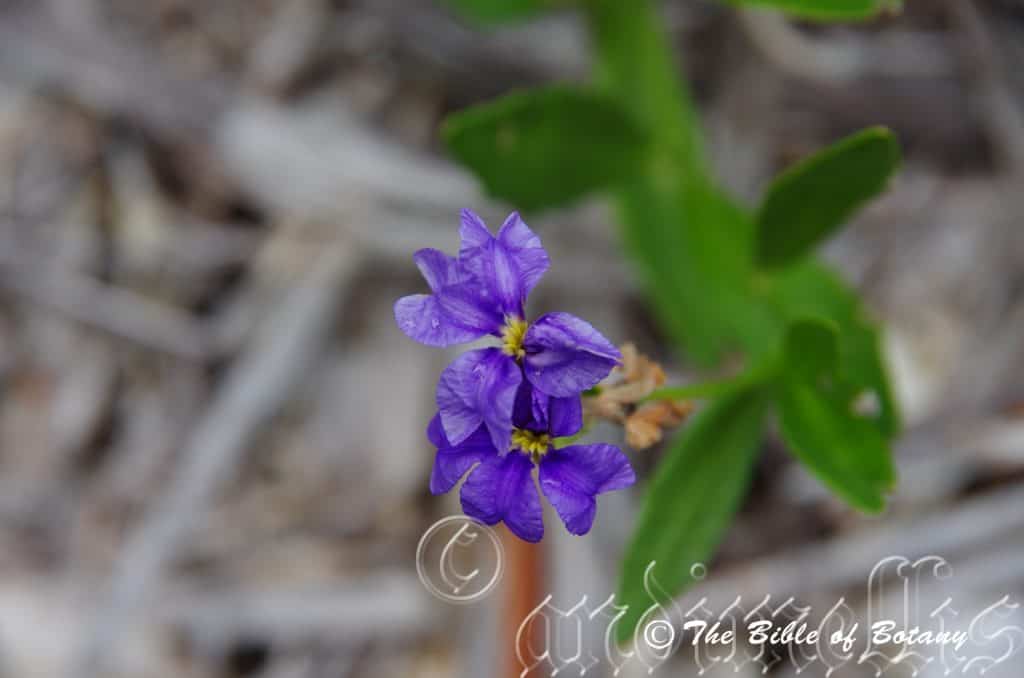
Dampiera sylvestris
Classification
Unranked: Eudicots
Unranked: Asterids
Family: Asterales
Subfamily: Goodeniaceae
Genus: Is named in honour of William Dampier; Baptised 1651-1715, who was an early British Sailor and collector of plants from Australia’s north west coast.
Species: From Sylvaticum, which is Latin for a forest. It refers to growing in, on or beneath trees in a forest.
Common Name: Forest Dampiera.
Distribution:
Dampiera sylvestris distribution from the Carnarvon Gorge west of Rockhampton along the Kolan River west of Bundaberg and Gladstone then along the coastal forests south to Bulahdehlah in New South Wales. Its range is restricted to the eastern slopes of the Great Dividing Range except for the population in the Carnarvon Gorge. It is most likely the species found on Stradbroke Island and Moreton Island.
https://avh.ala.org.au/occurrences/search?taxa=Dampiera+sylvestris#tab_mapView
Habitat Aspect Climate:
Dampiera sylvestris prefers full sun to light dappled shade. It grows in open woodlands or open Eucalyptus forests close to the coast including back dune. It is found from 105 meters ASL to 100 meters ASL.
The temperatures range from minus 1 degree in July to 38 degrees in January.
The rainfall ranges from lows of 800mm to an average of 2000mm annually.
Soil Requirements:
Dampiera sylvestris prefers coarse sands to sandy loams or peaty sands. The soils are derived from decomposed sandstone or accumulated beach sands. The soils pH ranges from 6.5pH to a 7pH are preferred. It does not tolerate waterlogged soils. Saline soils are not tolerated.
Height & Spread:
Wild Plants: 0.2m to 0.7m by 0.5m to 0.8m.
Characteristics:
Dampiera sylvestris is a small multi stemmed perennial. The stems are 3 angled, glabrous or sparsely scabrous. The young stems are paler in colour and are glabrous.
Dampiera sylvestris’s alternate simple leaves are oblong to lanceolate. The glabrous, dull to semi glossy, deep green leaves measure 50mm to 80mm in length by 8mm to 30mm in width. They are tightly clustered towards the apex of the growing stems. The base is round to cuneate while the apex is obtuse or round-acute. The lamina is discolourous with the upper lamina being slightly scabrous to glabrescent and deep green while the lower lamina is slightly paler. The leaf’s margins are entire or with a few irregularly spaced teeth. They are slightly curved upwards from the midrib. The mid vein is slightly prominent on the lower lamina and is not visible on the upper lamina. The leaves are sessile.
The inflorescence of Dampiera sylvestris is born in simple corymbs of 1 to 4 branches with 4 or 5 individual flowers from the leaf axils. The linear or linear-oblong sepals are densely covered in short golden-brown tomentose hairs and measure 2mm to 2.5mm in length including the 1.8mm to 2mm lobes. Individual corollas measure 14mm to 17mm in length by 4mm to 5mm in width. The corollas are covered in long pale grey pilose hairs externally and glabrous internally.
The 3 upper, linear lobes have a distinct apiculate apex and 2 longitudinal wings extending beyond the acute apexes. The lobes measure 10mm to 12mm in length by 2.5mm to 3.5mm in width. The wings measure 4mm to 5mm in width.
The 3 lower, linear lobes have a distinct apiculate apex and 2 longitudinal wings extending beyond the acute apexes. The lobes measure 7mm to 10mm in length by 2mm to 3mm in width. The wings measure 3mm to 4.5mm in width.
The wings margins are irregularly undulating. The lobes are purple, rarely white or pale blue to deep violet while the wings are a similar colour. The throat of the corolla and base of the lobes are cream to deep yellow. The flowers occur from August to early February.
Dampiera sylvestris’s fruits are small elliptical follicles. The outer testa turns a deep grey black on ripening. They are 3.5mm to 4.5mm in length by 2mm in diameter. The ribbed follicles were covered in grey pilose hairs.
Wildlife:
Dampiera sylvestris’s inflorescences attract smaller nectar feeding butterflies and native bees but never in large quantities.
Cultivation:
Dampiera sylvestris is a beautiful small herb for most situations where full sun and good drainage can be provided. Around swimming pools and courtyards its foliage will break up hard lines. If it is kept trimmed or remove spent flowers the plants will thicken up and have a tendency to sucker more. Its small size and deep purple flowers can make the area look larger. It has a short suckering root system which once established is beneficial for reproducing cuttings from. The suckering habit is never invasive and should be used to your advantage. Treat the plants as annuals and prune the old plant back to near the ground every 12 months to allow the new suckers to become more vigorous and to form the new plants. This is best done in late February where mild frosts are experienced or early spring as the weather starts to warm up. Large plants can grow to 1 meter in diameter.
It looks great in medium size rockeries and scattered amongst boulders or on moist banks. Its main requirement is to have a coarse sandy loam or sandy loam for a base and a cool root run during the hottest months.
There are 2 distinct types of heath lands those that are entirely flat with all small plants with mixed foliage or the windswept headland. Dampiera purpurea is an ideal plant for the flat heath where all the plants are packed close together in the garden and they are all of equal height. Don’t use contours to display the plants as heath lands are almost always flat or have a slight rise. Plants must be planted close together and be short so you can see over the tallest ones with the exception of one or two plants at the most. These will be feature plants. The idea is to achieve a feeling of expansive flatness and this can only be achieved if you are looking over the whole site. This can be achieved with using the Dampiera sylvestris’s blue green leaves and having those contrasting finer pale green or soft grey, glaucous coloured foliage. Use a lot of procumbent plants like Hibbertia accuminata, Hibbertia diffusa, Leischenalta formosa or a prostrate Pelargonium australe. Mix them with other smaller shrubs so none of them dominate the scene but blend in to give a mosaic of foliage colours that you oversee. Actinotis helianthi or the golden paper daisies Xerochrysum bracteatum or Xerochrysum viscosum are two great contrasting foliages and flower colour.
Propagation:
Seeds: Sow fresh Dampiera sylvestris‘s seeds directly into a seed raising mix, keeping them moist not wet. Place the trays in a warm sunny position. Germination is unreliable and erratic. They may require a short period packed in a dry calico or paper bag and placed in the fridge for a month or two. When the seedlings are 40mm to 50 mm tall, prick them out and plant them into 50mm native tubes using a good organic mix.
When the seedlings reach 200mm in height they can be planted out into their permanent positions.
Cuttings: Use 50mm to 100mm long half ripened material which has some existing root on the suckers. Take them in early autumn where frosts are not a problem or in early spring after the last frosts. Place the suckers in a good quality native mix and water in with a seaweed extract fertilizer ate half strength. When the cuttings have obviously struck and have developed good roots treat them as for seedlings.
For mass plantings space seedlings out at 300mm to 500mm centers.
Fertilize using Seaweed, fish emulsion or organic chicken pellets soaked in water on an alternate basis. Fertilize every two months until the plants are established then annually in early September to October to maintain health, vitality and better flowering.
Further Comments from Readers:
Hi reader, it seems you use The Bible of Botany a lot. That’s great as we have great pleasure in bringing it to you! It’s a little awkward for us to ask, but our first aim is to purchase land approximately 1,600 hectares to link several parcels of N.P. into one at The Pinnacles NSW Australia, but we need your help. We’re not salespeople. We’re amateur botanists who have dedicated over 30 years to saving the environment in a practical way. We depend on donations to reach our goal. If you donate just $5, the price of your coffee this Sunday, We can help to keep the planet alive in a real way and continue to bring you regular updates and features on Australian plants all in one Botanical Bible. Any support is greatly appreciated. Thank you.
In the spirit of reconciliation we acknowledge the Bundjalung, Gumbaynggirr and Yaegl and all aboriginal nations throughout Australia and their connections to land, sea and community. We pay our respect to their Elders past, present and future for the pleasures we have gained.
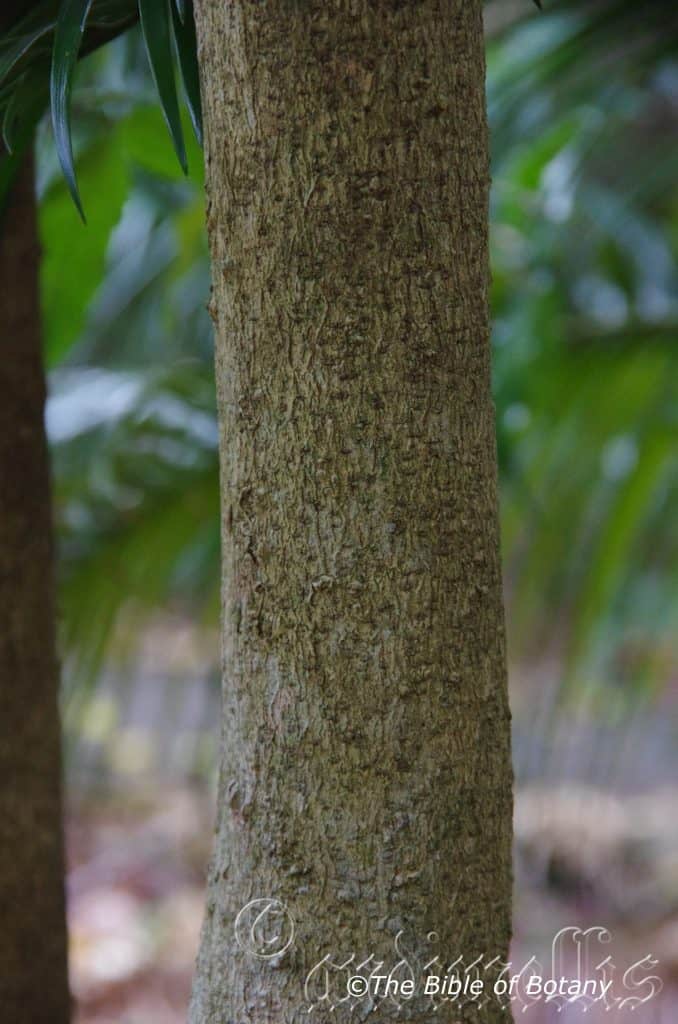
Daphnandra apatela
Classification
Unranked: Magnoliids
Order: Laurales
Family: Atherospermataceae
Genus: From Daphne, which is Ancient Greek for the name of the nymph who was changed into a laurel to escape Apollo and Andros, which is Ancient Greek for the male reproductive organs of a flower. It refers to anthers, which resemble the exotic Daphne.
Species: From A, which is Greek/Latin for without or not having and Patalon, which is Ancient Greek for a petal. It refers to flowers, which do not have petals.
Common Name:
Distribution:
Daphnandra apatela is found south from the Brisbane Valley in southern Queensland to Wattagans in central coastal New South Wales. There is an outing population near Miriam Vale in central coastal Queensland. It is found on and east of the Great Dividing Range.
https://avh.ala.org.au/occurrences/search?taxa=Dampiera+stricta#tab_mapView
Habitat Aspect Climate:
Daphnandra apatela prefers full sun to dappled shade. It grows along creeks, streams and river banks, gullies and occasionally flats in all types of rainforests. It is one of the first trees to recolonize an area following land disturbance. It is found from 10 meters ASL to 800 meters ASL.
The temperatures range from minus 2 degrees in July to 37 degrees in January.
The rainfall ranges from lows of 500mm to an average of 1800mm annually.
Soil Requirements:
Daphnandra apatela prefers better quality sandy loams to medium clays. The soils are usually derived from decomposed brown basalt, black basalt, metamorphic rocks or at times alluviums. The soils pH ranges from 4.5pH to 6pH. It does not tolerate waterlogged soils. Non saline soils to moderately saline soils are tolerated.
Height & Spread:
Wild Plants: 15m to 30m by 8m to 12m.
Characteristics:
Daphnandra apatela is a tall straight shafted tree has pale grey to grey scabrous bark often with small tuberculate lumps. The trunks are flanged but never buttressed on older trees. The olive-green to pale brown-green branches are deep grey and slightly scabrous or glabrous. Branchlets are glabrescent to covered in white puberulent or pannate hairs.
Daphnandra apatela’s simple elliptical to ovate-elliptical leaves measure 60mm to 150mm in length by 15mm to 40mm in width. The petioles measure 3mm to 8mm in length. The bases are broad cuneate while the apexes are acuminate-caudate. The discolourous laminas are grass-green to sea-green and glabrous on the upper lamina while the lower lamina is paler. The laminas slightly recurve from the midvein to the margins and are slightly undulating. The leaf margins are shallowly and finely toothed except for basal cuneate section. The mid vein is prominent on the lower laminas while the 2 to 7 pairs of lateral veins are slightly prominent on the lower laminas and are visible on the upper laminas.
The new growth is lime green and glabrous or sparsely covered in white puberulent or pannate hairs.
Fallen leaves dry dull grey-green to black on the upper lamina and mid grey on the lower lamina.
The inflorescence of Daphnandra apatela are short loose thryse born from the leaf axils. The rachises peduncles and pedicels are glabrous. The rachises measure 4mm to 10mm in length while peduncle measures 6mm to 12mm in length and the pedicels measure 2mm to 5mm in length. The pascal yellow to pascal yellow-green perianth measure 2.5mm to 3.5mm in length by 6mm to 8mm in diameter. The 4 obtuse sepals measure 2.5mm to 3mm in length. The 4 lanceolate petals measure 3mm to 3.5mm in length.
The 8 pascal yellow to pascal yellow-green stamens, measure 1.5mm to 2mm in length.
The ovary is glabrous or sparsely covered in fawn puberulent or pannate hairs. The white style measures 1.5mm to 2mm in length. The sweetly scented flowers appear from August to October however the buds appear as early as May.
Daphnandra apetela’s fruits are symmetrical or asymmetrical elliptical to urn shaped capsules. The green capsules turn deep grey-brown when ripe. The perianth and style are persistent on the capsules. They measure 8mm to 25mm in length by 4mm to 10mm in diameter. The capsules contain several achenes that measure 4mm to 6mm in length with 4mm to 12mm long plumose hairs. The pedicels extend from 3.5mm to 6.5mm in length. The fruits mature from December to March sometimes April.
Wildlife:
Daphnandra apatela wildlife is unknown to the author.
Cultivation:
Daphnandra apatela is a beautiful, small, dense canopy trees for small to medium gardens where a specimen tree or rainforest enhancement tree is required. In cultivation it will grow 12 meters to 18 meters in height by 8 meters to 12 meters in diameter when grown in the open. It does well at least as far south as Melbourne and Adelaide where frosts are not severe. It is relatively fast growing on most soils given plenty of mulch and adequate water.
It is best used adjacent to small areas of bush, close to paths for shade or the house so its fragrant flowers can be viewed and enjoyed regularly. It is great as the central feature in a rockery or long driveways. It can be planted as the formation for an avenue or as the feature over a BBQue. If it is surrounded by shorter plants with deep green foliage and red flowers it will dominate at the center giving a dense rainforest look with plenty of colour. Great contrasting flowering trees of similar size would be Stenocarpus sinuatis narrower or Harpullia pendula with a similar width, which would make beautiful avenues or park scenes. For a shorter large shrub Grevillea irrasa offers a fantastic leaf contrast with orange flowers and grows 4 meters to 5 meters in height and diameter.
It is also suitable as park tree, placed in the foreground or planted centrally as a small spreading feature tree in medium gardens. Placed at the rear of a bush garden their perfume will draw your attention so that you will want to investigate further. Plants with small white, pink or lavender flowers and large leaves can be used in the midground while small white, pink or mauve flowering prostrate shrubs are best in the front. Whether it is in flower or not these trees will catch your attention because of the proliferation of flowers.
Daphnandra apatela would make a fantastic accent tree particularly where shade is required. In front of low set or 2 story homes, commercial, industrial sheds or around school buildings where they will break up hard rigid architectural lines and give warmth in the winter and coolness in the summer. Its dense foliage will hide hard boring or dilapidated structures and give breadth to a building because of their smaller size.
Propagation:
Seeds: Collect the capsules of Daphnandra apatela as soon as they begin to split and hold in a paper bag for a week or two. Sow the fresh seeds directly into a seed raising mix, keeping them moist not wet. Place the trays in a warm position under 30mm shade. Germination is quick and usually completed in around 3 weeks. Seeds have a low viability with a germination rate of less than 20mm so plant the seeds thickly when sowing. When the seedlings are 40mm to 50mm in height, prick them out and plant them into 50mm native tubes using a good organic mix.
As the seedlings roots reach the bottom of the tubes plant them out into their permanent position.
For mass plantings plant the seedlings out at 7 meter to 10 meter centers for the dense rainforest look or for specimen trees plant them at 12 meter to 20 meter centers.
Fertilize using Seaweed, fish emulsion or organic chicken pellets soaked in water on an alternate basis. Fertilize every two months until the plants are established then annually in early September to October to maintain health, vitality and better flowering.
Further Comments from Readers:
Hi reader, it seems you use The Bible of Botany a lot. That’s great as we have great pleasure in bringing it to you! It’s a little awkward for us to ask, but our first aim is to purchase land approximately 1,600 hectares to link several parcels of N.P. into one at The Pinnacles NSW Australia, but we need your help. We’re not salespeople. We’re amateur botanists who have dedicated over 30 years to saving the environment in a practical way. We depend on donations to reach our goal. If you donate just $5, the price of your coffee this Sunday, We can help to keep the planet alive in a real way and continue to bring you regular updates and features on Australian plants all in one Botanical Bible. Any support is greatly appreciated. Thank you.
In the spirit of reconciliation we acknowledge the Bundjalung, Gumbaynggirr and Yaegl and all aboriginal nations throughout Australia and their connections to land, sea and community. We pay our respect to their Elders past, present and future for the pleasures we have gained.
NCBG Coffs Harbour NSW
NCBG Coffs Harbour NSW
NCBG Coffs Harbour NSW
NCBG Coffs Harbour NSW
NCBG Coffs Harbour NSW
Daphnandra micrantha
Classification
Unranked: Magnoliids
Order: Laurales
Family: Atherospermataceae
Genus: From Daphne, which is Ancient Greek for the name of the nymph who was changed into a laurel to escape Apollo and Andros, which is Ancient Greek for the male reproductive organs of a flower. It refers to anthers, which resemble the exotic Daphne.
Species: From Mikros, which is Ancient Greek for small or very small and Antha/Anthos, which are Ancient Greek for the male reproductive organs on a flower or the flower. It refers to flowers, which are smaller than those of other species in the genus.
Common Name: Grey Sassafras.
Distribution:
Daphnandra micrantha is found south from the Macpherson Ranges in southern Queensland to the Hastings and Manning River catchment areas in central coastal New South Wales. It is found on and east of the Great Dividing Range.
https://avh.ala.org.au/occurrences/search?taxa=Dampiera+micrantha#tab_mapView
Habitat Aspect Climate:
Daphnandra micrantha prefers full sun to dappled shade. It grows along creeks, streams river banks or gullies adjacent to drier developed rainforests and recolonizing disturbed land. It is found from 10 meters ASL to 450 meters ASL.
The temperatures range from 10 degrees in July to 37 degrees in January.
The rainfall ranges from lows of 1200mm to an average of 3200mm annually.
Soil Requirements:
Daphnandra micrantha prefers quality sandy loams to medium clays. The soils are usually derived from decomposed brown basalt, black basalt, metamorphic rocks and at times alluviums. The soils pH ranges from 4.5pH to 6pH. It does not tolerate waterlogged soils. Non saline soils to moderately saline soils are tolerated.
Height & Spread:
Wild Plants: 8m to 12m by 6m to 9m.
Characteristics:
Daphnandra micrantha is a tall straight shafted tree has pale grey to grey scabrous bark often with small tuberculate lumps. The trunks are flanged but never buttressed on older trees. The olive-green to pale brown-green branches are deep grey and slightly scabrous or glabrous. Branchlets are glabrescent to covered in white puberulent or pannate hairs.
Daphnandra micrantha’s simple obovate to elliptical rarely ovate leaves measure 70mm to 170mm in length by 10mm to 50mm in width. The petioles measure 3mm to 8mm in length. The bases are cuneate while the apexes are acute or acute-caudate. The discolourous laminas are grass-green to sea-green and glabrous on the upper lamina while the lower lamina is paler. The laminas are flat. The leaf margins are shallowly and finely toothed except for basal cuneate section though on rare occasions can extend sparsely to the petiole. The mid vein is prominent on the lower laminas while the 3 to 4 pairs of lateral veins are slightly prominent on the lower laminas and are visible on the upper laminas.
The new growth is lime green and glabrous or sparsely covered in white puberulent or pannate hairs.
Fallen leaves dry dull olive-grey to black on the upper lamina and much paler below.
The inflorescence of Daphnandra micrantha are short loose thryse born from the leaf axils. The petiolate, rachises and peduncles are glabrous. The rachis measures 25mm to 55mm in length while peduncles measures 5mm to 10mm in length and the pedicels measure 3mm to 7mm in length. The pale yellow to pale yellow-green perianth measure 3mm to 4.5mm in length by 7mm to 9mm in diameter. The 4 obtuse sepals measure 3.5mm to 4mm in length. The 4 lanceolate petals measure 4mm to 4.5mm in length.
The 8 pale yellow to pale yellow-green stamens measure 1mm to 1.5mm in length.
The ovary is glabrous. The white style measures 1.5mm to 2mm in length. The sweetly scented flowers appear from September to November however the buds appear as early as July.
Daphnandra micrantha’s fruits are symmetrical or asymmetrical cylindrical to urn shaped capsules. The green capsules turn deep grey-brown when ripe. The perianth and style are persistent on the capsules. They measure 15mm to 25mm in length by 4mm to 6.5mm in diameter. The capsules contain several chartaceous achenes that measure 4mm to 6mm in length with 8mm to 13mm long plumose hairs. The pedicels extend from 5.5mm to 10mm in length. The fruits mature from January to April.
Wildlife:
Daphnandra micrantha is the host plant for the larvae stages of the beautiful green and black Macleay’s Swallowtail, Graphium macleayanus.
Cultivation:
Daphnandra micrantha is a beautiful, small, dense canopy tree for small to medium gardens where a specimen tree or rainforest enhancement is required. In cultivation it usually grows 6 meters to 10 meters in height by 5 meters to 8 meters in diameter when grown in the open. It does well at least as far south as Melbourne and Adelaide where frosts are not severe. It is relatively fast growing on most soils given plenty of mulch and little extra water.
It is best used adjacent to small areas of bush, close to paths for shade or the house so its fragrant flowers can be viewed and enjoyed regularly. It is great as the central feature in a rockery or long driveways. Here they can be planted as the formation for an avenue or as the feature surrounding a BBQ. If it is surrounded by shorter plants with deep green foliage and red flowers they will dominate at the center giving a dense rainforest look with plenty of colour. Great contrasting flowering trees of similar size would be Cochlospermum fraseri or Harpullia pendula in warmer tropical gardens or Clerodendron tomentosum or Harpullia pendula in warm temperate gardens which would make beautiful avenues or park scenes. For a shorter large shrub Grevillea irrasa offers a fantastic leaf contrast with orange flowers and grows to 4 meters to 5 meters. If adequate ground moisture is available then their range can be extended to semi-arid gardens.
It is also suitable as small park trees, placed in the foreground or planted centrally as a small spreading feature tree in medium gardens. Placed at the rear of a bush garden their perfume will draw your attention so that you will want to investigate further. Plants with small white, pink or lavender flowers and large leaves can be used in the midground while small white, pink or mauve flowering prostrate shrubs are best in the front. Whether it is in flower or not these trees will catch your attention because of the proliferation of flowers.
Daphnandra micrantha makes a fantastic accent tree particularly where shade is required. In front of low set homes, commercial, industrial sheds or around school buildings they will break up hard rigid architectural lines and give warmth in the winter and coolness in the summer. Its dense foliage will hide hard boring or dilapidated structures and give breadth to a building because of its smaller size.
Propagation:
Seeds: Collect Daphnandra micrantha’s seeds as soon as the capsules begin to split and hold in a paper bag for a week or two. Sow the fresh seeds directly into a seed raising mix, keeping them moist not wet. Place the trays in a warm position under 30mm shade. Germination is quick and usually completed in around 3 weeks. Seeds have a low viability with a germination rate of less than 20mm so plant the seeds thickly when sowing. When the seedlings are 40mm to 50mm in height, prick them out and plant them into 50mm native tubes using a good organic mix.
As the seedlings roots reach the bottom of the tubes plant them out into their permanent position.
For mass plantings plant the seedlings out at 7 meter to 10 meter centers for the dense rainforest look or for specimen trees plant them at 12 meter to 20 meter centers.
Fertilize using Seaweed, fish emulsion or organic chicken pellets soaked in water on an alternate basis. Fertilize every two months until the plants are established then annually in early September to October to maintain health, vitality and better flowering.
Further Comments from Readers:
Hi reader, it seems you use The Bible of Botany a lot. That’s great as we have great pleasure in bringing it to you! It’s a little awkward for us to ask, but our first aim is to purchase land approximately 1,600 hectares to link several parcels of N.P. into one at The Pinnacles NSW Australia, but we need your help. We’re not salespeople. We’re amateur botanists who have dedicated over 30 years to saving the environment in a practical way. We depend on donations to reach our goal. If you donate just $5, the price of your coffee this Sunday, We can help to keep the planet alive in a real way and continue to bring you regular updates and features on Australian plants all in one Botanical Bible. Any support is greatly appreciated. Thank you.
In the spirit of reconciliation we acknowledge the Bundjalung, Gumbaynggirr and Yaegl and all aboriginal nations throughout Australia and their connections to land, sea and community. We pay our respect to their Elders past, present and future for the pleasures we have gained.
Daphnandra tenuipes
Classification
Unranked: Magnoliids
Order: Laurales
Family: Atherospermataceae
Genus: From Daphne, which is Ancient Greek for the name of the nymph who was changed into a laurel to escape Apollo and Andros, which is Ancient Greek for the male reproductive organs of a flower. It refers to anthers, which resemble the exotic Daphne.
Species: From Tanu, which is Ancient Greek or later Tenue, which is Latin for slender and fine and Pous, which is Ancient Greek or Pedi, which is Latin for a foot or feet. It refers to pedicels or petioles, which are rather slender.
Common Name: Red Flowered Socketwood.
Distribution:
Daphnandra tenuipes is found south from the Macpherson Range in far south eastern Queensland to the Night Cap Range in far northern New South Wales. It is found on and east of the Great Dividing Range.
https://avh.ala.org.au/occurrences/search?taxa=Dampiera+tenuipes#tab_mapView
Habitat Aspect Climate:
Daphnandra tenuipes prefers full sun to dappled shade. It grows along dry seasonal creeks and river banks, dry gallery forests and ridges and occasionally on flats in and adjacent to all types of rainforests from 250 meters above sea level to 600 meters ASL.
The temperatures range from minus 2 degrees in July to 37 degrees in January.
The rainfall ranges from lows of 950mm to an average of 1800mm annually.
Soil Requirements:
Daphnandra tenuipes prefers to grow on a wide range of better quality sandy loams to medium clays. The soils are usually derived from decomposed brown basalt, black basalt, metamorphic rocks and at times alluviums. The soils pH ranges from 4.5pH to 6pH. It does not tolerate waterlogged soils. Non saline soils to moderately saline soils are tolerated.
Height & Spread:
Wild Plants: 5m to 10m by 4m to 8m.
Characteristics:
Daphnandra tenuipes is a tall straight shafted tree has grey bark mottled grey-brown, scabrous and often with small tuberculate lumps. The trunks are flanged but never buttressed on older trees. The olive-green to pale brown-green branches are deep grey and slightly scabrous or glabrous. Branchlets and new growth are glabrescent.
Daphnandra tenuipes‘s simple lanceolate to ovate-elliptical leaves measure 40mm to 130mm in length by 15mm to 30mm in width. The petioles measure 2mm to 8mm in length. The bases are rounded-cuneate to rounded while the apexes are acuminate. The discolourous laminas are deep grass-green to sea-green, semi-glossy and glabrous on the upper laminas while the lower laminas are paler and semi-glossy to dull. The laminas are flat to slightly recurved from the mid vein to the margins. The leaf margins are usually finely crenate except for basal cuneate-rounded section though on rare occasions can be entire. The mid vein is strongly prominent on the lower laminas while the 3 to 4 pairs of lateral veins are slightly prominent on the lower laminas and are visible on the upper laminas.
The new growth is lime green, glossy and glabrous.
Fallen leaves dry dull mid olive-green to deep olive-brown or brown on the upper lamina and much paler below.
The inflorescence of Daphnandra tenuipes are short loose thryse born from the leaf axils. The petiolate, rachises and peduncles are glabrous. The rachis measures 10mm to 30mm in length while peduncles measures 0mm to 10mm in length and the pedicels measure 5mm to 12mm in length. The pale yellow-orange to pale orange-green perianth measure 3mm to 4.5mm in length by 7mm to 10mm in diameter. The 4 obtuse sepals measure 3.5mm to 4.5mm in length. The 4 lanceolate petals measure 4mm to 5mm in length.
The 8 pale orange-red stamens, measure 1.5mm to 2mm in length.
The ovary is glabrous. The white style measures 1.5mm to 2mm in length. The sweetly scented flowers appear from September to November however the buds appear as early as July.
Daphnandra tenuipes’s fruits are usually obpyriform capsules. The green capsules turn deep grey-brown when ripe. The perianth and style are persistent on the capsules. The capsules measure 8mm to 21mm in length by 6mm to 13mm in diameter. The capsules contain several chartaceous achenes that measure 4mm to 6mm in length with 8mm to 13mm long plumose hairs. The pedicels extend from 8mm to 14mm in length. The fruits mature from January to April.
Wildlife:
Daphnandra tenuipes wildlife is unknown to the author.
Cultivation:
Daphnandra tenuipes is a beautiful, small, dense canopy tree for small to medium gardens where a specimen tree or rainforest enhancement are required. In cultivation it will grow 6 meters to 10 meters in height by 4 meters to 7 meters in diameter when grown in the open.
It is best used adjacent to small areas of bush, close to paths for shade or the house so its fragrant flowers can be viewed and enjoyed regularly. It is great as the central feature in a rockery or long driveways. It can be planted as the foundation for an avenue or as the feature surrounding a BBQ. If it is surrounded by shorter plants with deep green foliage and red flowers they will dominate at the center giving a dense rainforest look with plenty of colour. Great contrasting flowering trees of similar size would be Cochlospermum fraseri or Harpullia pendula in warmer tropical gardens or Clerodendron tomentosa and Harpullia pendula in warm temperate gardens, which would make beautiful avenues or park scenes. For a shorter large shrub Grevillea irrasa offers a fantastic leaf contrast with orange flowers and grows to 4 meters to 5 meters in drier more arid or monsoonal areas. If addition ground moisture can be supplied then their range can be extended to semi-arid gardens.
It is also suitable as a small park tree, placed in the foreground or planted centrally as a small spreading feature tree in medium gardens. Placed at the rear of a bush garden its perfume will draw your attention so that you will want to investigate further. Plants with small white, pink or lavender flowers and large leaves can be used in the midground while small white, pink or mauve flowering prostrate shrubs are best in the front. Whether it is in flower or not it will catch your attention because of the proliferation of flowers.
Daphnandra tenuipes would make fantastic accent tree particularly where shade is required. In front of low set homes, commercial, industrial sheds or around school buildings they will break up hard rigid architectural lines and give warmth in the winter and coolness in the summer. Their dense foliage will hide hard boring or dilapidated structures and give breadth to a building because of their smaller size.
Propagation:
Seeds: Collect Daphnandra tenuipes‘s capsules as soon as the capsules begin to split and hold in a paper bag for a week or two. Sow the fresh seeds directly into a seed raising mix, keeping them moist not wet. Place the trays in a warm position under 30mm shade. Germination is quick and usually completed in around 3 weeks. Seeds have a low viability with a germination rate of less than 30mm so plant the seeds thickly when sowing. When the seedlings are 40mm to 50mm in height, prick them out and plant them into 50mm native tubes using a good organic mix.
As the seedlings roots reach the bottom of the tubes plant them out into their permanent position.
For mass plantings plant the seedlings out at 7 meter to 10 meter centers for the dense rainforest look or for specimen trees plant them at 12 meter to 20 meter centers.
Fertilize using Seaweed, fish emulsion or organic chicken pellets soaked in water on an alternate basis. Fertilize every two months until the plants are established then annually in early September to October to maintain health, vitality and better flowering.
Further Comments from Readers:
Hi reader, it seems you use The Bible of Botany a lot. That’s great as we have great pleasure in bringing it to you! It’s a little awkward for us to ask, but our first aim is to purchase land approximately 1,600 hectares to link several parcels of N.P. into one at The Pinnacles NSW Australia, but we need your help. We’re not salespeople. We’re amateur botanists who have dedicated over 30 years to saving the environment in a practical way. We depend on donations to reach our goal. If you donate just $5, the price of your coffee this Sunday, We can help to keep the planet alive in a real way and continue to bring you regular updates and features on Australian plants all in one Botanical Bible. Any support is greatly appreciated. Thank you.
In the spirit of reconciliation we acknowledge the Bundjalung, Gumbaynggirr and Yaegl and all aboriginal nations throughout Australia and their connections to land, sea and community. We pay our respect to their Elders past, present and future for the pleasures we have gained.
Darlingia darlingiana
Classification
Unranked: Eudicots
Order: Proteales
Family: Proteaceae
Subfamily: Grevilleoideae
Tribe: Roupaleae
Subtribe: Floydiinae
Genus: Is named in honour of Sir Richard Darling; 1772-1858, who was a British military officer, governor of New South Wales and a ruthless adversary.
This plant was first described as Helicia darlingiana and later as Darlingia spectatissima. The genus Helicia was described in 1790 and in 1865. Ferdinand von Mueller decided that the specimen in front of him collected by Dallachy from Rockingham Bay; which is in general the Cardwell to Tully area, belonged to the genus Helicia and so he named it Helicia darlingiana after Sir Charles Darling, the Governor of New South Wales. It was quite common in those days to recognise patrons, actual or hopeful, maybe some would call it a form of bribe or thank you for services rendered.
Mueller later described the genus Darlingia as being distinct from that of Helicia, on the basis of the number of ovules and differences in leaves. It would appear that either he had forgotten he had already described it as a Helicia or he wanted to give it a more appropriate name because the inflorescence really stood out. It can be spectacular. So he published the name Darlingia spectatissima validly in the Journal of Botany, British and Foreign. I don’t know what specimen he used for this name as he doesn’t indicate it in the publication, but later that year he published it again but based this time on the specimen of Dallachy’s according to Lawrie Johnson.
This second publication was in the Fragmenta Vol 5 page 152, so this meant the one specimen collected by Dallachy, now had two names and the second one was the same as one already used. Hence the second one is considered to be illegitimate as it is superfluous.
“The Rules of Botanical Nomenclature must be adhered to. The Rules state “that the earliest validly published name must be used…”. Hence the name ‘darlingiana’ had to be used and the person who recognised this and made this transfer was the late Lawrie Johnson from the Sydney Herbarium. Thus the valid name for this species reads with the authority as Darlingia darlingiana (F. Muell.) L.A.S.Johnson. This indicates that Mueller gave the name ‘darlingiana’, and Johnson transferred it to the genus Darlingia. The authority is the key to the literature referring to the name of the species.” Modified from
http://sgaptownsville.org.au/Darlingia-darlingiana.html
Species: Is named in honour of Sir Richard Darling; 1772-1858, who was a British military officer, governor of New South Wales and a ruthless adversary.
Common Name: Brown Silky Oak.
Distribution:
Darlingia darlingiana found south from Cooktown to Townsville to in far north eastern Queensland. It is found on and east of the Great Dividing Range.
https://avh.ala.org.au/occurrences/search?taxa=Darlingia+darlingiana#tab_mapView
Habitat Aspect Climate:
Darlingia darlingiana prefers full sun to dappled shade. It grows along creeks, streams and river banks, on mountains in well-developed rainforests. It is one of the first trees to recolonize an area following land disturbance. It is found from 10 meters ASL to 1150 meters ASL.
The temperatures range from 10 degrees in July to 37 degrees in January.
The rainfall ranges from lows of 1200mm to an average of 3200mm annually.
Soil Requirements:
Darlingia darlingiana prefers better quality sandy light clays to medium clays. The soils are derived from decomposed brown basalt and black basalt. The soils pH ranges from 5pH to 7pH. It does not tolerate waterlogged soils. Non saline soils to moderately saline soils are tolerated as are salt laden winds.
Height & Spread:
Wild Plants: 30m to 35m by 8m to 16m.
Characteristics:
Darlingia darlingiana is a tall straight shafted tree with a deep grey scabrous trunk. The branches are deep grey and slightly scabrous or glabrous. Branchlets are sparsely covered in rusty or brown pannate hairs terminal buds.
Darlingia darlingiana’s simple elliptical to oblong-elliptical leaves measure 120mm to 400mm in length by 40mm to 85mm in width. The base is cuneate while the apex is obtuse to broad acute. The discolourous laminas are grass-green to sea-green and glabrous on the upper lamina while the lower lamina is paler. The leaf margins are usually entire on mature trees. There are 2 to 5 deep to shallow lobes on juvenile trees. The laminas recurve upwards from the midevening to the margins. The mid vein is prominent on the upper lamina while the lateral veins are visible. The new growth is lime green, glossy bronze on the apex third and glabrous. The petioles measure 8mm to 23mm in length.
The inflorescence of Darlingia darlingiana are long dense terminal racemes that measure 150mm to 200mm in length by 50mm to 60mm in diameter. Individual tepals measure 25mm to 30mm in length. The linear bracts measure 3.5mm to 5mm in length. The 4 hypogynous tepals are strongly globular around the ovary. The white tepals are united for 7mm to 10mm near the base and measure 25mm to 35mm in overall length.
The ovary is covered in golden hirtellous hairs. The white style measures 50mm to 65mm in length and has an ovoid stigma that measures 5mm to 6mm in length by 3.5mm to 4.5mm in diameter. The strongly, sweetly scented flowers appear from December to January.
Darlingia darlingiana’s fruits are flattened elliptical follicles. The green follicles turn deep fawn to brown when ripe. They measure 45mm to 70mm long by 20mm to 30mm in width. The follicles contain two fawn flat winged seeds that measure 40mm to 65mm in length by 20mm to 30mm in width. The white wing that surrounds the seed measures 3mm to 10mm in width.
Wildlife:
The inflorescences attract large nectar feeding birds and butterflies.
Cultivation:
Darlingia darlingiana is an ideal tree for medium to large gardens where a specimen tree or rainforest enhancement are required. In cultivation it will grow 15 meters to 25 meters in height by 8 meters to 15 meters in diameter. It does well at least as far south as Coffs Harbour where it has maintained its lower branches and leaves almost to the ground. It is fast growing on most soils when given plenty of mulch and adequate water.
It is best used adjacent to small areas of bush, close to paths for shade or the house so its fragrant white flowers can be viewed and smelt regularly. It would look good along a large driveway. It can be planted as the foundation for an avenue or as the feature adjacent to a BBQ. If it is surrounded by shorter plants with deep green foliage and red flowers they will dominate at the center giving a dense rainforest look with plenty of colour. Great contrasting flowering trees of similar size would be Stenocarpus sinuatis which would make beautiful avenues or park scenes. For a shorter large shrub Grevillea irrasa offers a fantastic leaf contrast with orange flowers and grows to 4 meters to 5 meters.
Propagation:
Seeds: Sow fresh Darlingia darlingiana seeds directly into a seed raising mix, keeping them moist not wet. Place the trays in a warm shaded position. When the seedlings are 40mm to 50mm tall, prick them out and plant them into 50mm native tubes using a good organic mix.
As the seedlings roots reach the bottom of the tubes plant them out into their permanent position.
For mass plantings plant the seedlings out at 10 meter to 12 meter centers for specimen trees or 6 meter to 8 meters apart for the dense rainforest look.
Fertilize using Seaweed, fish emulsion or organic chicken pellets soaked in water on an alternate basis. Fertilize every two months until the plants are established then annually in early September to October to maintain health, vitality and better flowering.
Further Comments from Readers:
Hi reader, it seems you use The Bible of Botany a lot. That’s great as we have great pleasure in bringing it to you! It’s a little awkward for us to ask, but our first aim is to purchase land approximately 1,600 hectares to link several parcels of N.P. into one at The Pinnacles NSW Australia, but we need your help. We’re not salespeople. We’re amateur botanists who have dedicated over 30 years to saving the environment in a practical way. We depend on donations to reach our goal. If you donate just $5, the price of your coffee this Sunday, We can help to keep the planet alive in a real way and continue to bring you regular updates and features on Australian plants all in one Botanical Bible. Any support is greatly appreciated. Thank you.
In the spirit of reconciliation we acknowledge the Bundjalung, Gumbaynggirr and Yaegl and all aboriginal nations throughout Australia and their connections to land, sea and community. We pay our respect to their Elders past, present and future for the pleasures we have gained.
Darwinia citriodora
Classification
Unranked: Eudicots
Unranked: Rosids
Family: Mrytales
Subfamily: Chamelaucieae
Genus: Is named in Honour of Dr. Eramus Darwin; 1731-1802 who was Charles Darwin’s grandfather, a botanist and poet.
Species: From Citrinus, which is old Anglo-French for yellow and later Citrinus, which is Latin for Citrus and Odour, smell or scent. It usually refers to plant’s leaves having a lemon scent.
Common Name: Lemon scented Darwinia.
Distribution:
Darwinia citriodora is found in 2 disjunct populations in south western, Western Australia. The first is south from Jurien Bay to the Margaret River and west to near Southern Cross. The second population is east from Bremer Bay to Walpole and north to Kendenup.
https://avh.ala.org.au/occurrences/search?taxa=Darwinia+citriodora#tab_mapView
Habitat Aspect Climate:
Darwinia citriodora prefers full sun to light dappled shade. It grows on granite outcrops, hills and slopes in open woodlands. It is found from 10 meters ASL to 300 meters ASL.
The temperatures range from 3 degrees in July to 38 degrees in January.
The rainfall ranges from lows of 400mm to an average of 1600mm annually.
Soil Requirements:
Darwinia citriodora prefers better quality sandy loams to light clays. The soils are derived from decomposed granites and other siliceous based rocks. The soils pH ranges from 5.5pH to 6pH are preferred. It is not tolerant of waterlogged soils. Non saline soils to moderately saline soils are tolerated.
Height & Spread:
Wild Plants: 1m to 1.5m by 1m to 1.5m.
Characteristics:
Darwinia citriodora is a small rounded shrub with light reddish brown slightly flaky stems. The pale yellow-green or bright pink juvenile stems are glabrous.
Darwinia citriodora‘s decastate leaves are oblong-lanceolate to oblong and measure 6mm to 12mm in length by 3mm to 6mm in width. The leaves are sessile. The bases are rounded while the apexes are obtuse to broad acute. The discolourous laminas are pale blue-green to deep blue-green or mid green, and glabrous on the upper laminas while the lower laminas are much paler. The laminas are flat. The leaf margins are entire. The mid vein is strongly prominent on the lower lamina and is distinctly visible on the upper lamina.
The inflorescences of Darwinia citriodora are born in clusters from the terminals. There are 4 to 6 individual flowers in a cluster. The clusters measure 16mm to 20mm in length by 12mm to 15mm in diameter. The individual corollas measure 4mm to 5mm in length by 2mm to 3mm in diameter. The 4 acuminate lobes measure 3mm in length. The style is the most conspicuous part of the flower and measures 8mm to 10mm in length. The corolla and style are glossy creamy yellow, creamy orange or creamy red with the style turning deep red towards the stigma. The upper third of the style is covered in stiff white hirsuit hairs. The outer 8 leaves act like bracts and are creamy yellow or on rare occasions is bright pink. They do not spread laterally but remain perpendicular to surround the corollas. They turn yellow, orange or red once flowering commences. The sessile flowers appear from July to January.
Darwinia citriodora‘s fruits are small elliptical follicles. The green follicles turn deep grey black on ripening. The ellipsoidal mid tan to mid brown seeds are faintly rugose with 4 or 5 longitudinal ribs. They measure 7mm to 9mm in length by 2.4mm to 3mm in diameter.
Wildlife:
Darwinia citriodora inflorescences are very attractive to smaller nectar feeding birds and butterflies.
Cultivation:
Darwinia citriodora are beautiful small shrubs for almost every situation where full sun and good drainage can be provided. Around swimming pools and courtyards its foliage helps to break up hard lines. In cultivation it will grow 1.5 meters to 2.5 meters in height by 1.5 meters to 3 meters in diameter. It forms a dense well rounded shrub. It can be used as a small fast growing hedge or screen between fences or borders between beds in temperate, semi-arid and arid areas of Australia.
It looks great on dry banks. Allow them to dry out between watering especially towards the end of the dry season.
It is an ideal plant for the main feature in a dry heath setting. When you design a flat heath gardens which Darwinia citriodora is well suited, try not to use contours or straight lines to display the plants as heath lands are almost always flat or have a slight rise grow in random patches throughout the heaths. Plants should be planted close together and be short so you can see over the tallest ones with the exception of one or two plants at the most. This is where Darwinia citriodora will feature at its best being surrounded by smaller plants to half a meter or 750mm at the most. Ensure that those plants immediately adjacent to the feature plant or plants have finer foliage in pale green or grass green to really highlight the blue-green leaves. The idea is to achieve a feeling of expansive flatness. Use a lot of procumbent plants like Carpobrotus edulis or Hibbertia diffusa or Hibbertia riparia. Mix it with other smaller shrubs so none of them dominate the scene but blend in to give a mosaic of foliage colours that you oversee. Actinotis helianthi or the golden paper daisies Xerochrysum bracteatum or Xerochrysum viscosum for two great contrasting foliages.
For mass plantings space seedlings out at 2 meter centers for plants which are to be used for screens or small hedges and 2.5 meter centers where small groups of 3 or 4 close together are required.
The foliage can be used in floral arrangements.
Propagation:
Seeds: Sow fresh Darwinia citriodora seeds directly into a seed raising mix, keeping them moist not wet. Place the trays in a warm sunny position. When the seedlings are 40mm to 50mm in height prick them out and plant them into 50mm native tubes using a good organic mix. Seed is erratic and difficult to germinate.
When the seedlings reach 100mm to 150mm in height prick the tips out and plant them into their permanent positions.
Cuttings: Use 60mm to 80mm long half ripened material when growing from cuttings. Take them in early spring as the apical buds begin to swell or are noticed. Remove the lower half of the leaves trying not to tear the bark or from the stems.
1 Prepare the cutting mix by adding one third sharp clean river sand, one third peat and one third perlite. These ingredients are sterilize,
2 Select good material from non diseased plants,
3 Select semi green stems for cuttings. Look for a stem with two or three nodes,
4 Place the cutting on a flat, hard surface, and make a clean slice down one side of the cutting for 10mm with a sharp sterile knife or razor blade. – This scarification of the node will increase the chances of roots emerging from this spot. Now remove all but one or two of the leaves, leaving a pair of apical leaves in tact.
5 Fill a saucer with water, and place a little mild to medium rooting hormone into another container like a milk bottle top. Dip the node end of the cutting into the water and then into a medium strength rooting hormone. Tap off any excess hormone,
6 Use a small dipple stick or old pencil to poke a hole into the soilless potting mix. Ensure the hole is slightly larger than the stem diameter and be careful not to wipe the rooting hormone off the cuttings base, place the cuttings in a pattern ensuring the cuttings are not touching each other,
7 I like to place the pots in Plastic bags to help maintain temperature and moisture. Place in a semi shaded place like under 50mm shade cloth.
8 When the cuttings have struck, open the bag to allow air circulation for a few days to a week,
9 Once hardened off remove the cuttings from the bag and allow to further hardening for a few more days,
10 Transplant into a good potting mix to grow on.
Fertilize using Seaweed, fish emulsion or organic chicken pellets soaked in water on an alternate basis. Fertilize every two months until the plants are established then annually in early September to October to maintain health, vitality and better flowering.
Further Comments from Readers:
Hi reader, it seems you use The Bible of Botany a lot. That’s great as we have great pleasure in bringing it to you! It’s a little awkward for us to ask, but our first aim is to purchase land approximately 1,600 hectares to link several parcels of N.P. into one at The Pinnacles NSW Australia, but we need your help. We’re not salespeople. We’re amateur botanists who have dedicated over 30 years to saving the environment in a practical way. We depend on donations to reach our goal. If you donate just $5, the price of your coffee this Sunday, We can help to keep the planet alive in a real way and continue to bring you regular updates and features on Australian plants all in one Botanical Bible. Any support is greatly appreciated. Thank you.
In the spirit of reconciliation we acknowledge the Bundjalung, Gumbaynggirr and Yaegl and all aboriginal nations throughout Australia and their connections to land, sea and community. We pay our respect to their Elders past, present and future for the pleasures we have gained.
Darwinia collina
Classification
Unranked: Eudicots
Unranked: Rosids
Order: Mrytales
Family: Chamelaceae
Genus: Is named in Honour of Dr. Eramus Darwin; 1731-1802 who was Charles Darwin’s grandfather, a botanist and poet.
Species: From Colinum/Collina, which are Latin for hills. It refers to plants, which prefer to grow on hilly terrain.
Common Name: Yellow Mountain Bell.
Distribution:
Darwinia collina is found in a single area in the far south west of Western Australia on the higher peaks on the Stirling Ranges.
https://avh.ala.org.au/occurrences/search?taxa=Darwinia+collina#tab_mapView
Habitat Aspect Climate:
Darwinia collina prefers full sun to light dappled shade. It grows on peaty sands on hills and slopes. It is found from 10 meters ASL to 150 meters ASL.
The temperatures range from 3 degrees in July to 38 degrees in January.
The rainfall ranges from lows of 400mm to an average of 1000mm annually.
Soil Requirements:
Darwinia collina prefers sandy loams to light clays. The soils are derived from decomposed granites quartz based rocks. The soils pH ranges from 6.5pH to 7pH are preferred. It does not tolerate waterlogged soils. Non saline soils to moderately saline soils are tolerated.
Height & Spread:
Wild Plants: 0.3m to 1.3m by 0.4m to 1.3m.
Characteristics:
Darwinia collina is a small rounded shrub with light reddish brown slightly flaky stems. The juvenile stems are deeper in colour and are glabrous.
Darwinia collina‘s decussate leaves are oblong to oblong-lanceolate and measure 6mm to 12mm in length by 3mm to 6mm in width. The leaves are sessile. The bases are rounded while the apexes are obtuse to broad acute. The discolourous laminas are pale blue-green to deep blue-green or mid green, and glabrous on the upper laminas while the lower laminas are much paler. The laminas are flat. The leaf margins are entire. The mid vein is strongly prominent on the lower lamina and is distinctly visible on the upper lamina.
The inflorescences of Darwinia collina are born in clusters from the terminals. There are 4 to 6 individual flowers in a cluster. The clusters measure 16mm to 20mm in length by 12mm to 15mm in diameter. The individual corollas measure 4mm to 5mm in length by 2mm to 3mm in diameter. The style measures 3mm to 4mm in length. The corolla and style are glossy creamy yellow, creamy orange or creamy red with the style turning deep red towards the stigma. The upper third of the style is covered in stiff white hirsuit hairs. The outer leaves act like bracts and are the most conspicuous part of the flower. They are creamy yellow to bright yellow. They do not spread laterally but remain perpendicular to surround the corollas. They turn yellow, orange or red once flowering commences. The sessile flowers appear from July to January.
Darwinia collina‘s fruits are small elliptical follicles. The green follicles turn deep grey black on ripening.
Wildlife:
Darwinia collina inflorescences attract smaller nectar feeding birds and butterflies.
Cultivation:
Darwinia collina are beautiful small shrubs for almost every situation where full sun and good drainage can be provided. Around swimming pools and courtyards its foliage break up hard lines. In cultivation it will grow 1 meter to 1.5 meters in height by 1.2 meters to 1.5 meters in diameter. It forms a dense well rounded shrub. It can be used as a small fast growing hedge or screen between fences or borders between beds in temperate, semi-arid and arid areas of Australia.
It looks great in medium size garden beds and scattered amongst boulders or on dry banks. Its main requirement is to have a coarse to fine sandy loam for a base and to dry out between watering especially towards the end of the dry season.
It is an ideal plant for the feature in a small heath setting. When you design a flat heath garden which Darwinia collina is well suited don’t use contours to display the plants as heath lands are almost always flat or have a slight rise. Plants should be planted close together and be short so you can see over the tallest ones with the exception of one or two plants at the most. This is where Darwinia collina will feature at its best being surrounded by smaller plants from 200mm to 800mm at the most. Ensure that those plants immediately adjacent to the feature plant or plants have finer foliage in pale green or grass green to really highlight the blue-green leaves. The idea is to achieve a feeling of expansive flatness. Use a lot of procumbent plants like Carpobrotus edulis or Hibbertia species like Hibbertia riparia, Hibbertia linearis or Hibbertia dentata. Mix it with other smaller shrubs so none of them dominate the scene but blend in to give a mosaic of foliage colours that you oversee. Actinotis helianthi or the golden paper daisies Xerochrysum bracteatum or Xerochrysum viscosum are two great contrasting foliage herbs with Dampiera sylvestris’s foliage colour and flowers adding another dimension.
The foliage can be used in floral arrangements.
Propagation:
Seeds: Sow fresh Darwinia collina seeds directly into a seed raising mix, keeping them moist not wet. Place the trays in a warm sunny position. When the seedlings are 40mm to 50mm tall, prick them out and plant them into 50mm native tubes using a good organic mix.
Seed is erratic and difficult to germinate.
When the seedlings reach 100mm to 150mm in height prick the tips out and plant them out into their permanent positions.
Cuttings: Use 60mm to 80mm long half ripened material when growing from cuttings. Take them in early spring as the apical buds begin to swell or are noticed. Remove the lower half of the leaves trying not to tear the bark or from the stems.
1 Prepare the cutting mix by adding one third sharp clean river sand, one third peat and one third perlite. These ingredients are sterilize,
2 Select good material from non diseased plants,
3 Select semi green stems for cuttings. Look for a stem with two or three nodes,
4 Place the cutting on a flat, hard surface, and make a clean slice down one side of the cutting for 10mm with a sharp sterile knife or razor blade. – This scarification of the node will increase the chances of roots emerging from this spot. Now remove all but one or two of the leaves, leaving a pair of apical leaves in tact.
5 Fill a saucer with water, and place a little mild to medium rooting hormone into another container like a milk bottle top. Dip the node end of the cutting into the water and then into a medium strength rooting hormone. Tap off any excess hormone,
6 Use a small dipple stick or old pencil to poke a hole into the soilless potting mix. Ensure the hole is slightly larger than the stem diameter and be careful not to wipe the rooting hormone off the cuttings base, place the cuttings in a pattern ensuring the cuttings are not touching each other,
7 I like to place the pots in Plastic bags to help maintain temperature and moisture. Place in a semi shaded place like under 50mm shade cloth.
8 When the cuttings have struck, open the bag to allow air circulation for a few days to a week,
9 Once hardened off remove the cuttings from the bag and allow to further hardening for a few more days,
10 Transplant into a good potting mix to grow on.
Fertilize using Seaweed, fish emulsion or organic chicken pellets soaked in water on an alternate basis. Fertilize every two months until the plants are established then annually in early September to October to maintain health, vitality and better flowering.
Further Comments from Readers:
Hi reader, it seems you use The Bible of Botany a lot. That’s great as we have great pleasure in bringing it to you! It’s a little awkward for us to ask, but our first aim is to purchase land approximately 1,600 hectares to link several parcels of N.P. into one at The Pinnacles NSW Australia, but we need your help. We’re not salespeople. We’re amateur botanists who have dedicated over 30 years to saving the environment in a practical way. We depend on donations to reach our goal. If you donate just $5, the price of your coffee this Sunday, We can help to keep the planet alive in a real way and continue to bring you regular updates and features on Australian plants all in one Botanical Bible. Any support is greatly appreciated. Thank you.
In the spirit of reconciliation we acknowledge the Bundjalung, Gumbaynggirr and Yaegl and all aboriginal nations throughout Australia and their connections to land, sea and community. We pay our respect to their Elders past, present and future for the pleasures we have gained.
Darwinia oldfieldii
Classification
Unranked: Eudicots
Unranked: Rosids
Family: Mrytales
Subfamily: Chamelaucieae
Genus: Is named in Honour of Dr. Eramus Darwin; 1731-1802 who was Charles Darwin’s grandfather, a botanist and poet.
Species: Is named in honour of Augustus F. Oldfield; 1821-1887, who was an English botanist who collected in Tasmania and walked from Sydney to Melbourne in the late 1840’s.
Common Name:
Distribution:
Darwinia oldfieldii is in the vicinity of Kalbarri National Park on the west Coast of Western Australia.
https://avh.ala.org.au/occurrences/search?taxa=Darwinia+oldfieldii#tab_mapView
Habitat Aspect Climate:
Darwinia oldfieldii prefers full sun to light dappled shade. It grows on plains and rocky headlands. It is found from 10 meters ASL to 80 meters ASL.
The temperatures range from 3 degrees in July to 38 degrees in January.
The rainfall ranges from lows of 250mm to an average of 450mm annually.
Soil Requirements:
Darwinia oldfieldii prefers sandy loams to rocky sandstone loams. The soils are derived from decomposed sandstones or accumulated beach sands. The soils pH ranges from 6.5pH to 7pH are preferred. It does not tolerate waterlogged soils. Non saline soils to moderately saline soils are tolerated as are salt laden winds.
Height & Spread:
Wild Plants: 0.2m to 0.8m by 0.4m to 1m.
Characteristics:
Darwinia oldfieldii is a small rounded shrub with light reddish brown slightly flaky stems. The juvenile stems are deeper in colour and are glabrous.
Darwinia oldfieldii‘s decussate leaves are oblong to oblong-lanceolate and measure 5mm to 10mm in length by 2mm to 5mm in width. The leaves are sessile. The bases are rounded while the apexes are obtuse to broad acute. The discolourous laminas are pale blue-green, deep blue-green, grey-green or mid green, and glabrous on the upper laminas while the lower laminas are much paler. The laminas are flat. The leaf margins are entire. The mid vein is strongly prominent on the lower lamina and is distinctly visible on the upper lamina.
The inflorescences of Darwinia oldfieldii are born in clusters from the terminals. There are 18 to 24 individual flowers in a cluster. The clusters measure 16mm to 20mm in length by 22mm to 25mm in diameter. The individual corollas measure 4mm to 5mm in length by 2mm to 3mm in diameter. The style measures 10mm to 12mm in length. The corolla and style are deep pink, scarlet red or deep crimson-red with the style turning deep red towards the stigma. Style is glabrous. The outer leaves act like bracts and are the most conspicuous part of the flower. They are deep pink, scarlet red or deep crimson-red. They do not spread laterally but remain perpendicular to surround the corollas. The sessile flowers appear from July to January.
Darwinia oldfieldii fruits are small elliptical follicles. The green follicles turn deep grey black on ripening.
Wildlife:
Darwinia oldfieldii inflorescences attract smaller nectar feeding birds and butterflies.
Cultivation:
Darwinia oldfieldii is a beautiful small shrub for almost every situation where full sun and good drainage can be provided. Around swimming pools and courtyards its foliage helps break up hard lines. In cultivation it will grow 0.2 meters to 0.6 meters in height by 0.6 meters to 1 meter in diameter. It forms a dense well rounded shrub.
It looks great in medium size rockeries and scattered amongst boulders or on dry banks. Allow it to dry out between watering especially towards the end of the dry season.
It is an ideal plant for the feature in a small heath setting. When you design a flat heath garden which Darwinia oldfieldii is well suited don’t use contours to display the plants as heath lands are almost always flat or have a slight rise. Plants must be planted close together and be short so you can see over the tallest ones with the exception of one or two plants at the most. Ensure that those plants immediately adjacent to the Darwinia oldfieldii have finer foliage in deep green or grass green to really highlight the blue-green leaves. The idea is to achieve a feeling of expansive flatness. Use a lot of procumbent plants like Carpobrotus edulis or Hibbertia diffusa. Mix it with other smaller shrubs so none of them dominate the scene but blend in to give a mosaic of foliage colours that you oversee. Here I immediately think of the golden paper daisies Xerochrysum bracteatum, Xerochrysum viscosum, Dampiera sylvestris foliage or Grevillea masonii for four great contrasting foliage.
The foliage can be used in floral arrangements.
Propagation:
Seeds: Sow fresh Darwinia oldfieldii seeds directly into a seed raising mix, keeping them moist not wet. Place the trays in a warm sunny position. When the seedlings are 40mm to 50mm tall, prick them out and plant them into 50mm native tubes using a good organic mix.
Seed is erratic and difficult to germinate.
When the seedlings reach 200mm in height they can be planted out into their permanent positions.
Cuttings: Use 60mm to 80mm long half ripened material when growing from cuttings. Take them in early spring as the apical buds begin to swell or are noticed. Remove the lower half of the leaves trying not to tear the bark or from the stems.
1 Prepare the cutting mix by adding one third sharp clean river sand, one third peat and one third perlite. These ingredients are sterilize,
2 Select good material from non diseased plants,
3 Select semi green stems for cuttings. Look for a stem with two or three nodes,
4 Place the cutting on a flat, hard surface, and make a clean slice down one side of the cutting for 10mm with a sharp sterile knife or razor blade. – This scarification of the node will increase the chances of roots emerging from this spot. Now remove all but one or two of the leaves, leaving a pair of apical leaves in tact.
5 Fill a saucer with water, and place a little mild to medium rooting hormone into another container like a milk bottle top. Dip the node end of the cutting into the water and then into a medium strength rooting hormone. Tap off any excess hormone,
6 Use a small dipple stick or old pencil to poke a hole into the soilless potting mix. Ensure the hole is slightly larger than the stem diameter and be careful not to wipe the rooting hormone off the cuttings base, place the cuttings in a pattern ensuring the cuttings are not touching each other,
7 I like to place the pots in Plastic bags to help maintain temperature and moisture. Place in a semi shaded place like under 50mm shade cloth.
8 When the cuttings have struck, open the bag to allow air circulation for a few days to a week,
9 Once hardened off remove the cuttings from the bag and allow to further hardening for a few more days,
10 Transplant into a good potting mix to grow on.
Fertilize using Seaweed, fish emulsion or organic chicken pellets soaked in water on an alternate basis. Fertilize every two months until the plants are established then annually in early September to October to maintain health, vitality and better flowering.
Further Comments from Readers:
Hi reader, it seems you use The Bible of Botany a lot. That’s great as we have great pleasure in bringing it to you! It’s a little awkward for us to ask, but our first aim is to purchase land approximately 1,600 hectares to link several parcels of N.P. into one at The Pinnacles NSW Australia, but we need your help. We’re not salespeople. We’re amateur botanists who have dedicated over 30 years to saving the environment in a practical way. We depend on donations to reach our goal. If you donate just $5, the price of your coffee this Sunday, We can help to keep the planet alive in a real way and continue to bring you regular updates and features on Australian plants all in one Botanical Bible. Any support is greatly appreciated. Thank you.
In the spirit of reconciliation we acknowledge the Bundjalung, Gumbaynggirr and Yaegl and all aboriginal nations throughout Australia and their connections to land, sea and community. We pay our respect to their Elders past, present and future for the pleasures we have gained.
Daucus glochidiatus
Classification
Unranked: Eudicots
Unranked: Asterids
Order: Apiales
Family: Apialaceae
Genus: From Daukus, which is Greek the carrot. Named by, Theophrastus for a carrot therefore, it refers to plants, which are related to the carrot.
Species: From Glochidium, which is Latin for the barb on an arrow or fishing hook. It refers to a structure or organ, which has a barb.
Common Name: Native Parsnip or Native Carrot.
Distribution:
Daucus glochidiatus is a widespread species through Australia both on the mainland and Tasmania in temperate to semi tropical zones and arid areas. It is not found in the true deserts.
https://avh.ala.org.au/occurrences/search?taxa=Daucus+glochidiatus#tab_mapView
Habitat Aspect Climate:
Daucus glochidiatus prefers full sun to light dappled shade. It grows in moist open Eucalyptus forests, moist open woodlands, and moist dry rainforests in moist riparian zones or around pools lakes, dams or billabongs. It is found from 10 meters ASL to 1250 meters ASL.
The temperatures range from minus 5 degrees in July to 42 degrees in January.
The rainfall ranges from lows of 300mm to an average of 3200mm annually.
Soil Requirements:
Daucus glochidiatus prefers better quality sandy loams to medium clays. The soils are derived from decomposed fatty sandstones clay type granites, brown basalt, black basalt and metamorphic rocks. The soils pH ranges from 5PH to a 7pH are preferred. It does not tolerate waterlogged soils though poorly drained slopes are acceptable as are moist flats. Non saline soils to moderately saline soils are tolerated.
Height & Spread:
Wild Plants: 0.1m to 0.6m by 0.2m to 0.3m.
Characteristics:
Daucus glochidiatus is a small open multi stemmed perennial herb with deep grass-green stems often branching from near the base. The stems are glabrous sparsely covered in white or pale grey hispid hairs.
Daucus glochidiatus’s leaves are bipinnate and measure 20mm to 50mm in length by 4mm to 8mm in width. The 2 to 4 lobes narrow linear and measure 5mm to 20mm in length. The apexes are acute to taper. The concolourous laminas are grass-green and glabrous. The laminas are flat. The leaf margins are entire and sparsely covered in white hispid hairs. The mid vein and lateral veins are slightly prominent on the lower lamina and are covered in white hispid hairs. The petioles are slightly sheathing and measure 15mm to 40mm in length.
The inflorescences of Daucus glochidiatus are born on umbels. The peduncles’ involucral bracts are often pinnatifid and number 1 to 4.They bracts are linear to narrow to lanceolate and often have membranous margins and or are hispid. The 1 to 6 individual white, pink to crimson flowers are almost sessile or with 2 to 5 unequal rays. The flowers measure 1.5mm to 1.8mm in diameter. The flowers occur from September to February.
Daucus glochidiatus’s fruits are small ovoidal ribbed capsules. There is a longitudinal, row of white hooked bristles either side of the ribs. The capsules measure 3mm to 5mm in length by 3mm to 5mm in width. The green capsules turn pale dull grey-brown when ripe.
Wildlife:
Daucus glochidiatus wildlife is unknown to the author.
It was consumed by native aborigines prior to settlement. It has a distinctive tender carrot, parsnip flavour. All parts are edible and the seeds have a very high quality strong herbal carrot flavour. It is worthwhile growing for the seeds and the dried leaves for soups and stews. The leaves and roots dry well and can be used as a dried herb.
Cultivation:
Daucus glochidiatus is an interesting plant to notate in the lawn or garden bed. It is not an aggressive weed and can add some character to new gardens while waiting for the more permanent plants to mature.
The plants can cope with frosts and temperatures down to minus 4.
It looks its best when planted in mass at the front of a bed where other plants take the attention. In cultivation it will grow 300mm to 600mm in height by 200mm to 350mm in diameter.
Propagation:
Seeds: Sow fresh Daucus glochidiatus seeds directly into the vegetable patch or garden bed. Rake the surface lightly as the seeds seem to need light to germinate. Water gently as not to disturb the seeds to much. Keep moist until seedlings appear. Fertilize using our recommended native organic mix weekly for the next month.
Allow a few to set seed. Once the capsules turn grey-brown and begin to split the heads can be harvested and allowed to dry in a paper or calico bag.
Fertilize using Seaweed, fish emulsion or organic chicken pellets soaked in water on an alternate basis. Fertilize every two months until the plants are established then annually in early September to October to maintain health, vitality and better flowering.
Further Comments from Readers:
Hi reader, it seems you use The Bible of Botany a lot. That’s great as we have great pleasure in bringing it to you! It’s a little awkward for us to ask, but our first aim is to purchase land approximately 1,600 hectares to link several parcels of N.P. into one at The Pinnacles NSW Australia, but we need your help. We’re not salespeople. We’re amateur botanists who have dedicated over 30 years to saving the environment in a practical way. We depend on donations to reach our goal. If you donate just $5, the price of your coffee this Sunday, We can help to keep the planet alive in a real way and continue to bring you regular updates and features on Australian plants all in one Botanical Bible. Any support is greatly appreciated. Thank you.
In the spirit of reconciliation we acknowledge the Bundjalung, Gumbaynggirr and Yaegl and all aboriginal nations throughout Australia and their connections to land, sea and community. We pay our respect to their Elders past, present and future for the pleasures we have gained.
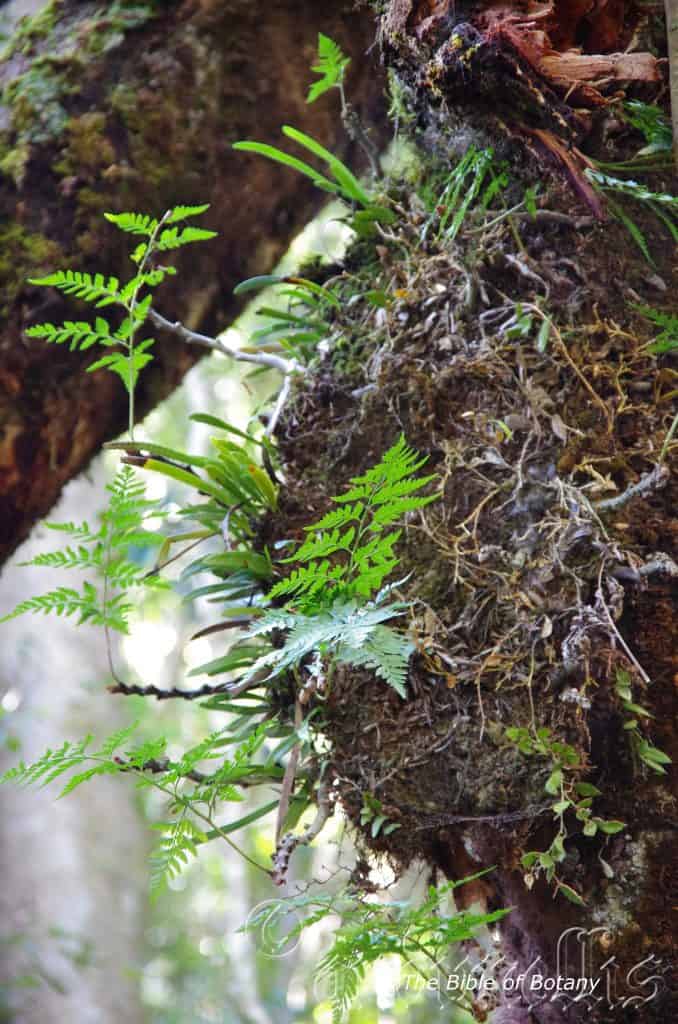
Washpool National Park NSW
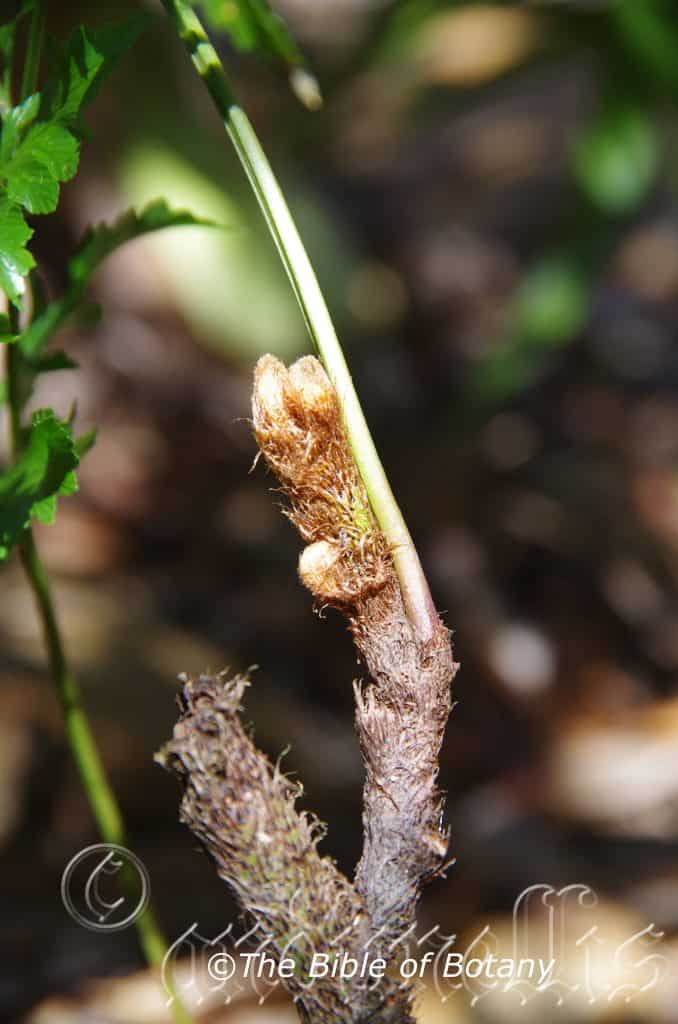
Author’s Garden The Pinnacles NSW
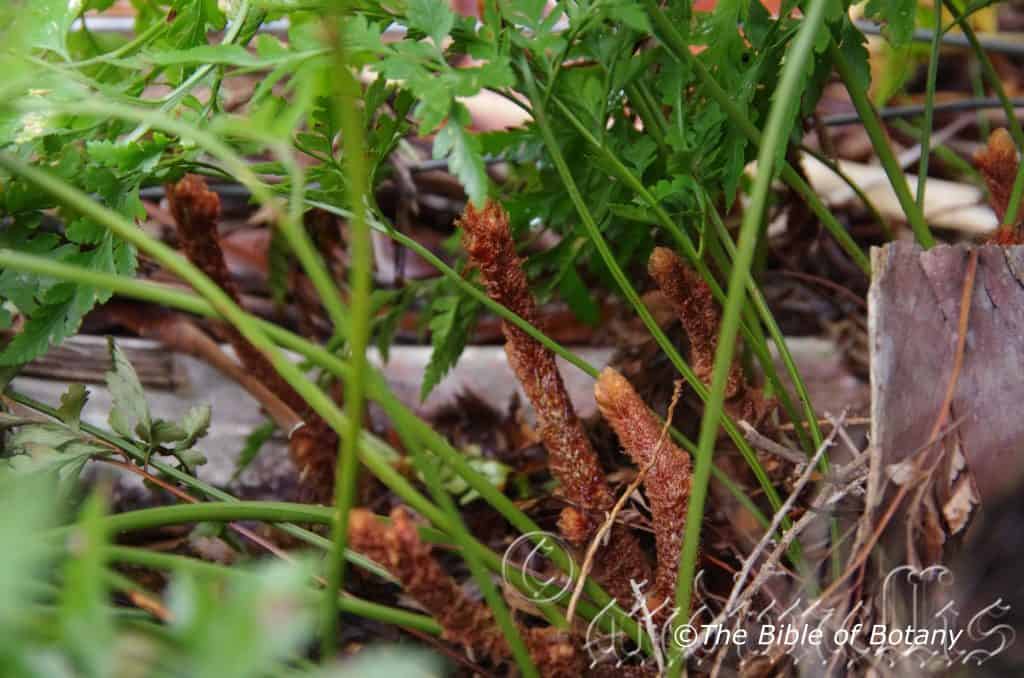
Author’s Garden The Pinnacles NSW

Author’s Garden The Pinnacles NSW
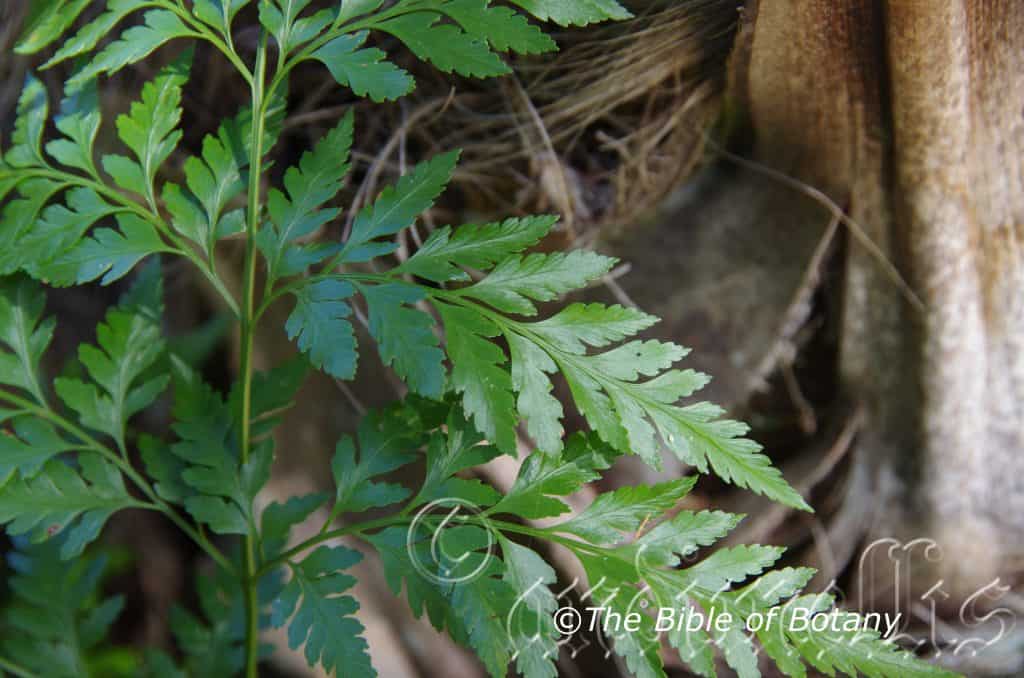
Author’s Garden The Pinnacles NSW
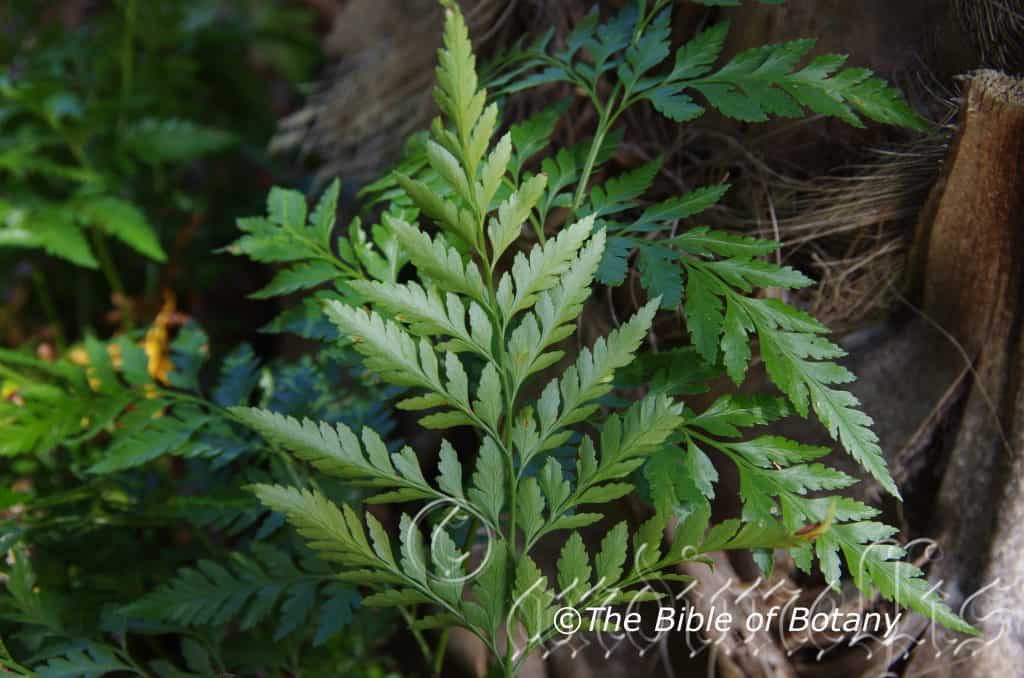
Author’s Garden The Pinnacles NSW
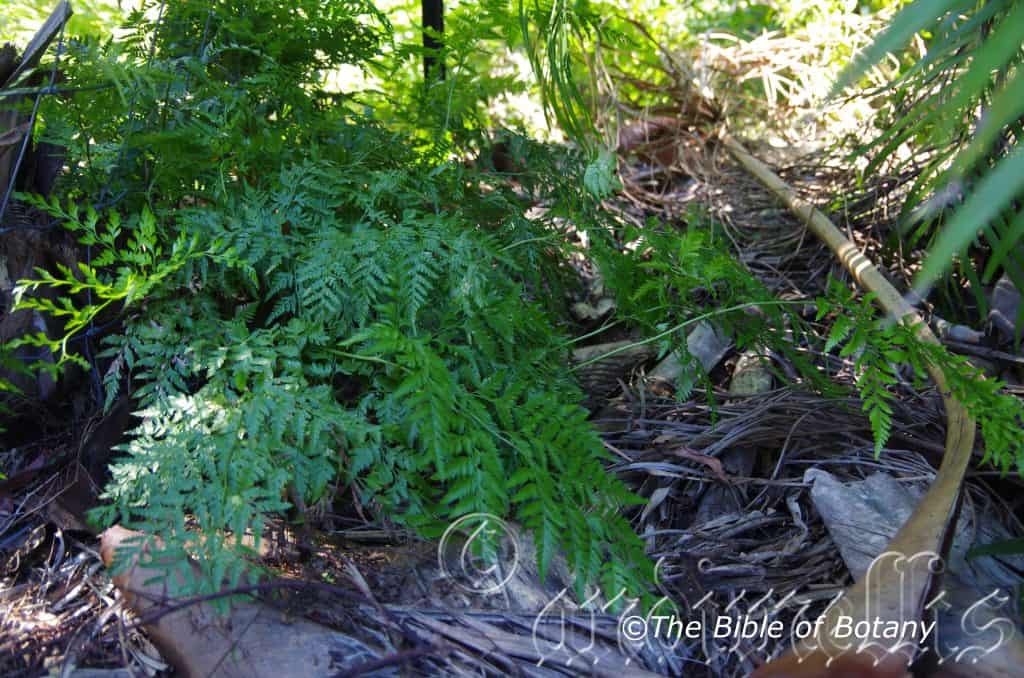
Author’s Garden The Pinnacles NSW
Davallia solida
Classification
Division: Pteridophyta
Class: Pteridospida
Order: Polypodopsida
Family: Davalliaceae
Genus: Is named in Honour of Edmund Davall; 1763-1798, who was a Swiss botanist.
Species: From Solida, which is Latin for dense or solid. It refers to foliage, which is very dense.
Subspecies: Davallia solida var. pyxidata. From Pyxidion, which is Ancient Greek for a little box with a lid. It refers to seed vessels, which open transversely with the top part acting as a lid.
Subspecies: Davallia solida var. Solida. From Solida, which is Latin for dense or solid. It refers to foliage, which is very dense.
Common Name: Australian Hares Foot Fern.
Distribution:
Davallia solida var. pyxidata is found in 2 disjunct populations in Victoria as far south west in the Grampians and east of Melbourne near Mansfield. It is widespread in eastern New South Wales and eastern Queensland at least as far north as Childers and west of Rockhampton to the Carnarvon Gorge, mainly east of the Great Dividing Range.
Further North the subspecies Davallia solida var. solida is found from near Innisfail to Cairns with another population in the Iron Range on Cape York Peninsula in far North Queensland. It is possibly found between these populations with varieties being somewhat difficult to determine.
https://avh.ala.org.au/occurrences/search?taxa=Davallia+solida#tab_mapView
Habitat Aspect Climate:
Davallia solida prefers dense shade, light shade and dappled light areas as an epiphyte or lithophyte in montane rainforests, littoral rainforests and moist Eucalyptus forests. It is commonly found in the baskets of other epiphytes like stags Platycerium superbum, elkorns Platycerium bifurcatum, bird nests Asplenium australisicum or growing in the forks of trees where leaf litter gathers. It can also be found growing on more porous rocks like granites and sandstones or in crevices of basalts where leaf litter accumulates in large quantities. It is found from 10 meters ASL to 900 meters ASL.
The temperature ranges from minus 4 degrees in August to 36 degrees in January.
The rainfall ranges from lows of 800mm to 3000mm average per annum.
Soil Requirements:
Davallia solida prefers high leaf litter content beneath a rainforest canopy or open Eucalyptus forests. The soils pH ranges from 5pH to 6.5pH, due to the high leaf litter decomposing which releases the nutrient for the ferns to grow.
Height & Spread:
Wild Plants:500mm to 1000mm by 500mm to 1000mm.
Characteristics:
Davallia solida var. solida has long creeping rhizomes are densely covered in large broad brown acuminate, papery scales with paler margins. The margins are covered in long brown rigid hairs. The rhizome is 8mm to 12mm in diameter.
Davallia olida var. pyxidata has long creeping rhizomes are white waxy and densely covered with appressed deep brown to almost black scales with paler margins bearing long crisped hairs. The scales are often and mostly caduceus while the rhizomes measure 10mm to 14mm in diameter.
Davallia solida var. solida’s fronds are bipinnate or tripinnate, large and triangular in shape. They dimorphic fronds are coriaceous and measure 300mm to 600mm by 250mm to 500mm in width. The concolourous laminas are deep green. The rachis and stipes are glabrous except for a small section near the base and in the axis, are covered in scales and rigid hairs and measure 100mm to 200mm in length. Pinnules measure 100mm to 120mm long by 30mm to 40mm at the base. The sterile pinnules are deeply lobed with crenate margins while the apex is acuminate to obtuse.
Davallia solida var. pyxidata fronds are bipinnate or tripinnate, large and triangular in shape. They dimorphic fronds are coriaceous and measure 100mm to 500mm by 50mm to 250mm in width. The concolourous laminas are grass-green to deep green. The rachis and stipes are glabrous except for a small section near the base and in the axis, are covered in scales and rigid hairs and measure 30mm to 160mm in length. Pinnules measure 100mm to 120mm long by 30mm to 40mm at the base. The sterile pinnules are deeply lobed with crenate margins while the apex is acuminate to obtuse. Sporangia are arranged close to the pinnules margins.
Davallia solida var. solida fertile fronds with segments narrower than sterile ones while the sori are submarginal and slightly depressed. The spores are yellow-brown while the indusium measure 1.2mm in length by 1mm in width. Sporangia are arranged close to the pinnules margins, Indusium is 1mm long with brown spore.
Davallia solida var. pyxidata fertile fronds sori are submarginal, scattered around the edges of the ultimate lobes which have a short or long tooth on 1 or both sides. The indusium is usually 1mm in length often with unattached sides near the slightly flaring apexes. Indusium is 1mm long with brown spore.
Wildlife:
Davallia solida is sometimes the host for a small unknown hairy caterpillar.
Cultivation:
Davallia solida is a beautiful fern for courtyards, around swimming pools or in the garden where part shade or dappled light prevails or in the garden used as an epiphytic plant in the forks of larger trees where leaf litter will acuminate. Davallia solida var. pyxidata is excellent for around swimming pools where it can grow to its full potential over carefully placed rocks or as a hanging basket specimen or growing out of an old stump. It is drought tolerant once established so the occasional lapse in watering won’t affect it. If it does happen to look dead after a long holiday during a severe drought prune all the fronds off to a few centimetres of the rhizome and give it a good soaking. Apply a double strength dose of our recommended fertilize two days later and again give a little water as not to leach the fertilizer and within two weeks it will be back to its former glory.
Propagation:
Spores: All ferns that are declared rare, vulnerable or endangered are protected by Federal and State Laws and must not be removed from the wild unless you are a land developer, mining company or main Roads department etc. This includes bulbs, roots, leaves and flowers. No part of any plant can be removed from Federal, State or Local Government land without the prior permission of the authority and this includes the spore.
Most people are put off at the thought of growing ferns from spore. Like all plants that produce their offspring from seed or spore the methods are basically the same. Remember nature has been doing this for millions of years and has been very successful. I have had excellent results growing over 200 different species of Australian ferns so don’t be afraid. Give it a go.
Step 1. Select spore from the fern fronds. Wait until the fern is just starting to release its spore. Rinse the fronds under clean running water and dry. This is to wash off any other spores from rogue ferns that may have settled onto the fronds. (There is nothing worse than having common brake or common soft bracken contaminating a prized tree fern or epiphyte.)
 Step 2. Place the dry fronds in a clean brown paper bag and keep them in a cool dark place like the linen closet for about a week to ten days before you are ready to sow the spore. The exception to this rule applies to ferns, which produce green spores. These must be sown immediately that it is released. Todea Barbara is a good example of a fern, which produces green spore.
Step 3. Take a large ice cream container, a small ice cream container and a clean clear plastic bag large enough to seal the large ice cream container and three or four milk bottle tops.
Step 4. Punch or drill 6 to 10 5mm holes in the bottom of the small ice cream container.
 Step 5. Wash both containers, tops and plastic bag so that it is very clean and sterile.
Step 6. Use a clean fine seed raising mi. We used 30mm fine sand, 30mm peat and 30mm perlite and 10mm vermiculite. We used crushed basalt, crusher dust and peat in a 50:50 ratio for epiphytes. Moisten the mix enough that water does not run out when the mix is squeezed between the fingers.
Step 7. Place the moisten mix (Enough to half fill the small ice cream container) in the microwave oven with a large glass of water for 7 or 8 minutes, until the water is boiling. Allow them to cool in the oven. You will need the water later so do not tip it out.
Step 8. Take the brown paper bag out of the linen closet. Shake the bag and remove the fronds. You should have a yellow, brown, black or rarely greenish brown or ochre powder or very fine, small round pin head size spore depending on the specie involved.
Step 9. Remove the mixture from the oven once it has cooled and place it in the small ice cream container and level.
Step 10. Sprinkle the spore sparsely over the mixture in the small ice cream container.
Step 11. Place the milk bottle tops in the large ice cream container with the flat surface facing down. Place the small ice cream container in the large ice cream container so that it is sitting on the milk bottle tops.
Step 12. Remove the water from the microwave and pour it into the larger ice cream container so there is 25mm to 30mm of water in the bottom.
Step 13. Place the ice cream containers in the plastic bag and seal.
Step 14. Place the contents and bag in a warm shady place preferably 50mm to 70mm shade depending on the specie. Shade houses and some window sills are ideal.
Step 15. The surface should turn green within a week to two weeks. The prothallus will then develop. From the prthalus the first true fronds will appear. Wait until the ferns are 20mm to 35mm in height before you attempt to transplant them. Once they are ready open the bag up slightly and allow the air to flow around the little ferns. Every 3 to 5 days open the bag a little further so the ferns get use to their new environment. Allow them a week to two weeks to harden off before you transplant them following the removal of the plastic bag. Carefully prick them out into 50mm standard squat tubes as you would any seedling.
Do not try to transplant them as single plants as they are still a little delicate still.
Once the smaller ones again reach 50mm to 70mm you may wish to divide the stronger and hardier individual plants into smaller clumps in 100mm squat pots.
Step 16. We fertilized with seaweed, fish emulsion or organic chicken pellets soaked in water on an alternate basis until established. Fertilize every two months for one year even when in the ground.
Fertilize using Seaweed, fish emulsion or organic chicken pellets soaked in water on an alternate basis. Fertilize every two months until the plants are established then annually in early September to October to maintain health, vitality and better flowering.
Further Comments from Readers:
Hi reader, it seems you use The Bible of Botany a lot. That’s great as we have great pleasure in bringing it to you! It’s a little awkward for us to ask, but our first aim is to purchase land approximately 1,600 hectares to link several parcels of N.P. into one at The Pinnacles NSW Australia, but we need your help. We’re not salespeople. We’re amateur botanists who have dedicated over 30 years to saving the environment in a practical way. We depend on donations to reach our goal. If you donate just $5, the price of your coffee this Sunday, We can help to keep the planet alive in a real way and continue to bring you regular updates and features on Australian plants all in one Botanical Bible. Any support is greatly appreciated. Thank you.
In the spirit of reconciliation we acknowledge the Bundjalung, Gumbaynggirr and Yaegl and all aboriginal nations throughout Australia and their connections to land, sea and community. We pay our respect to their Elders past, present and future for the pleasures we have gained.
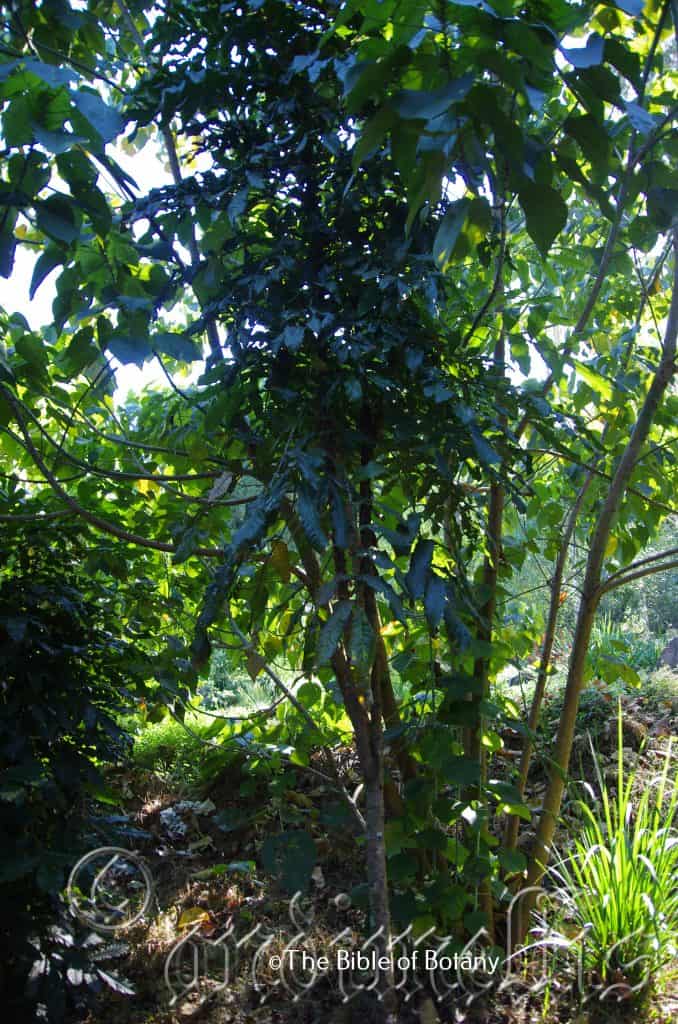
LBG Lismore NSW
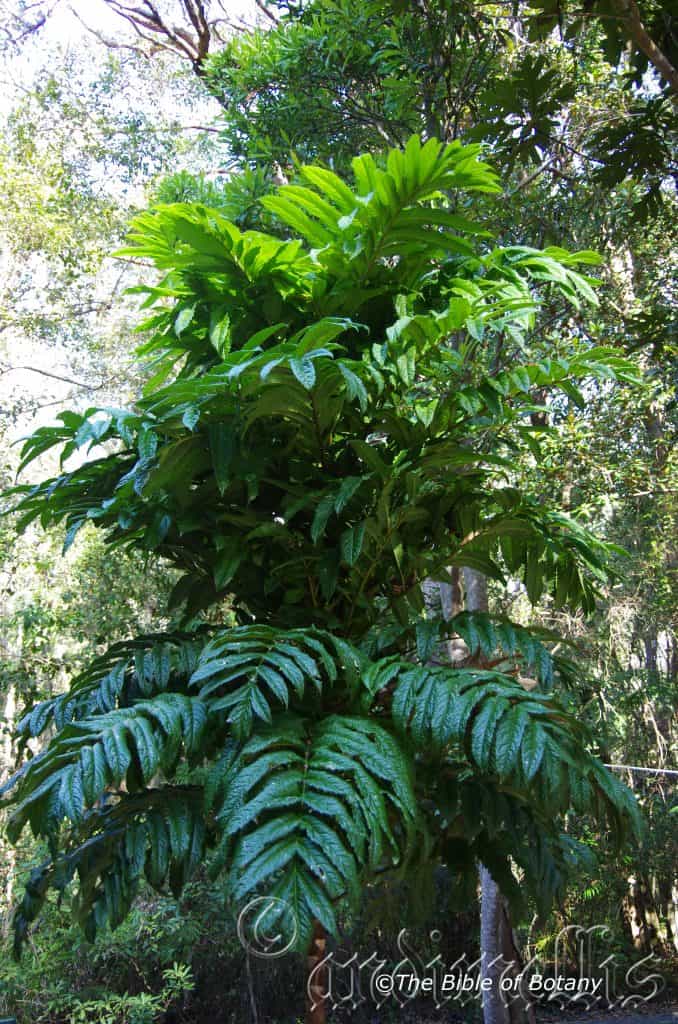
NCBG Coffs Harbour NSW
NCBG Coffs Harbour NSW
NCBG Coffs Harbour NSW
NCBG Coffs Harbour NSW
Author’s Garden The Pinnacles NSW
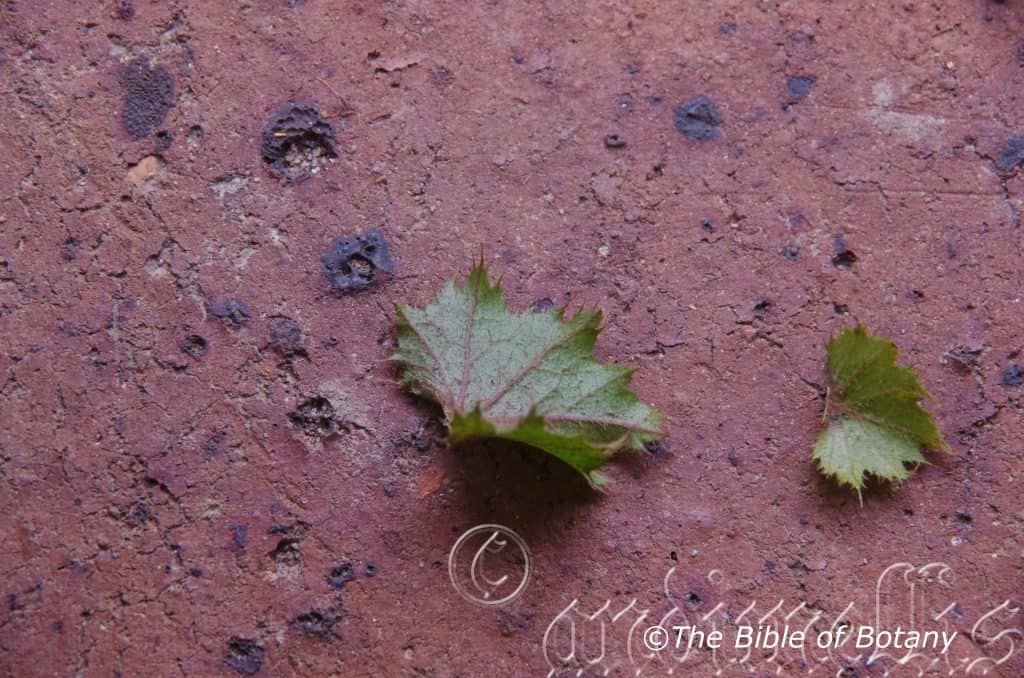
Author’s Garden The Pinnacles NSW
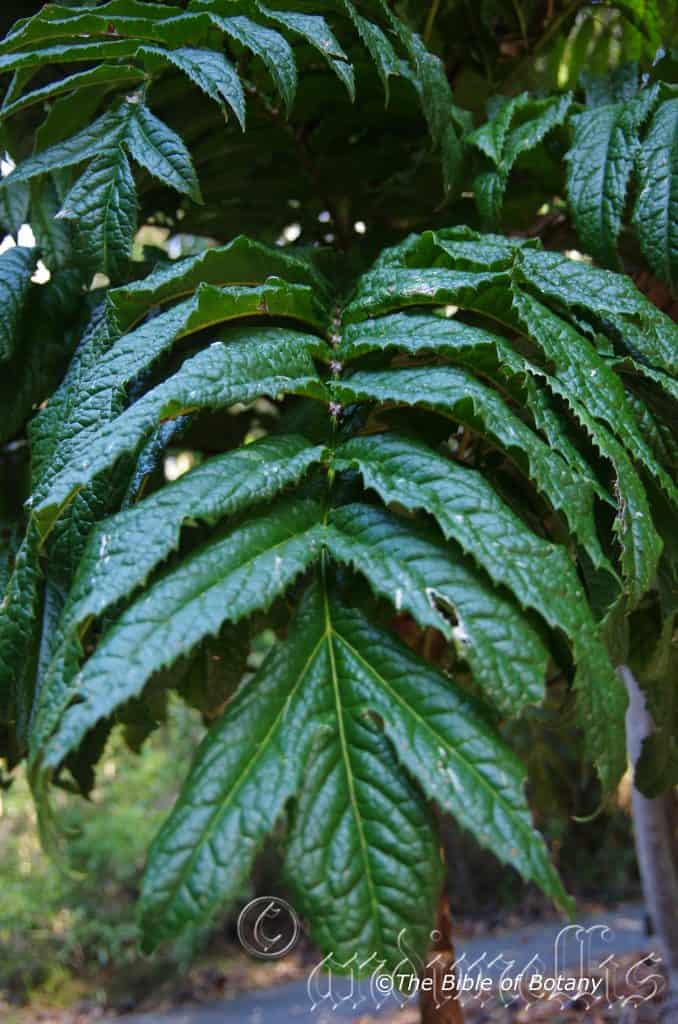
NCBG Coffs Harbour NSW
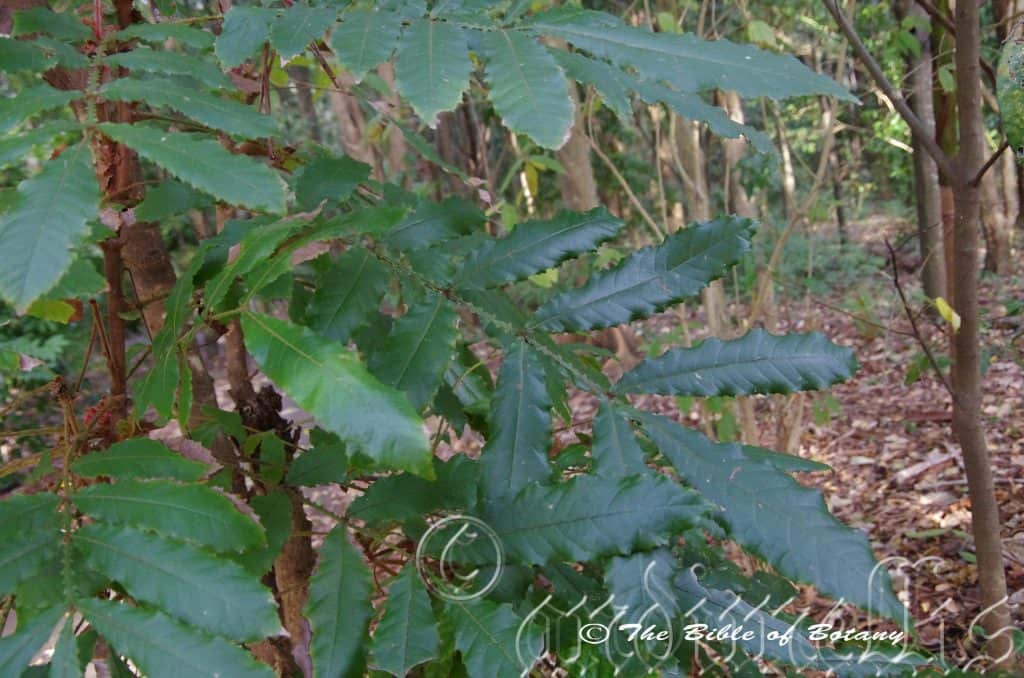
NCBG Coffs Harbour NSW
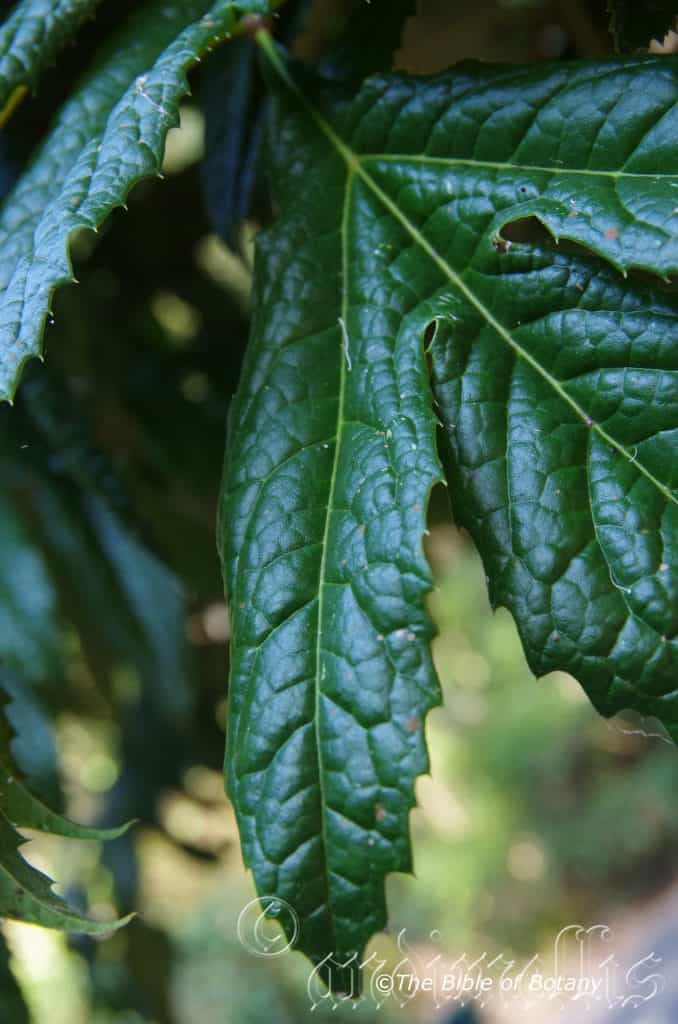
NCBG Coffs Harbour NSW
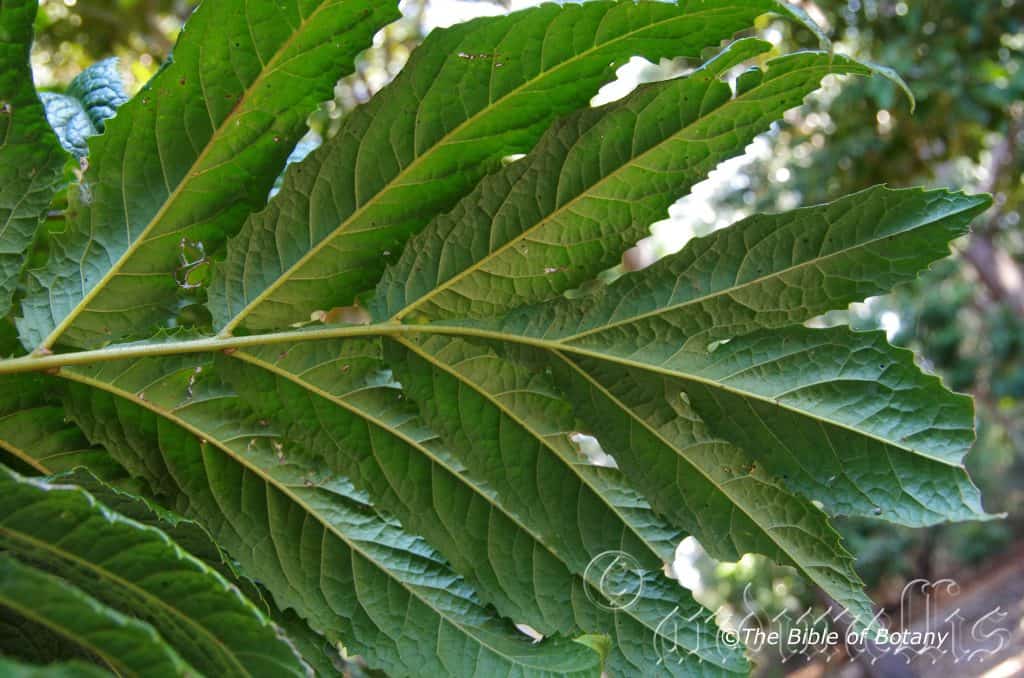
NCBG Coffs Harbour NSW
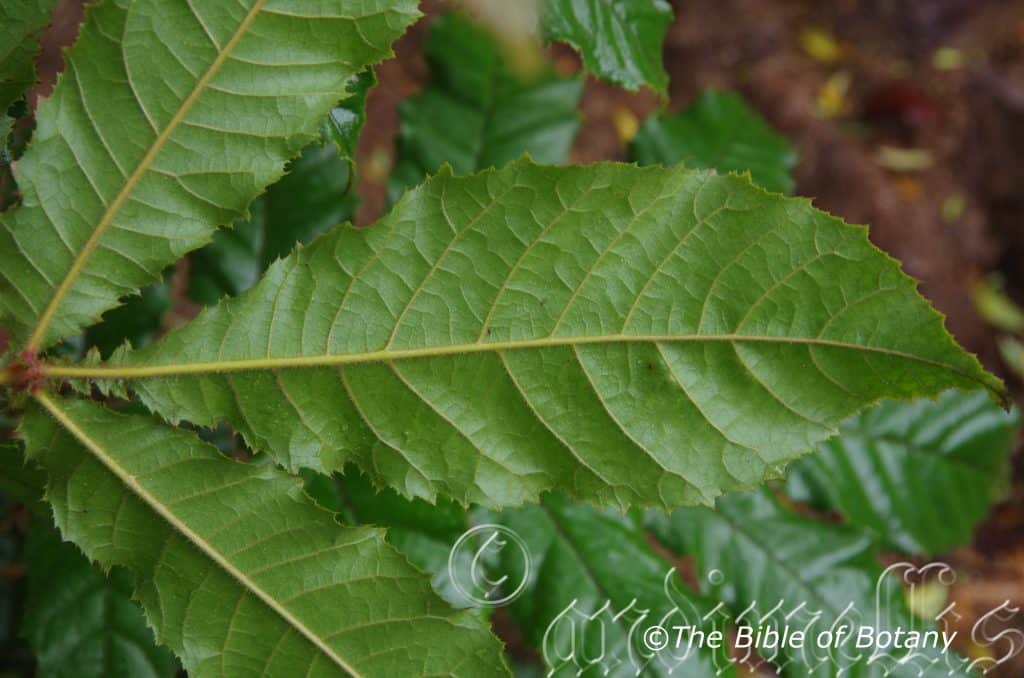
Author’s Garden The Pinnacles NSW
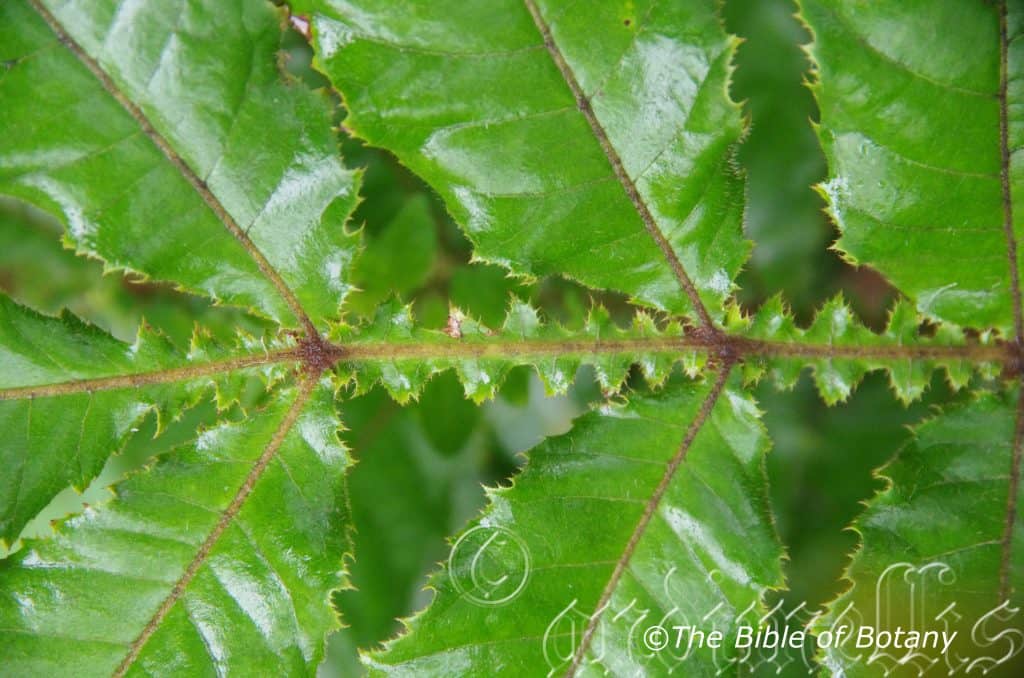
Author’s Garden The Pinnacles NSW
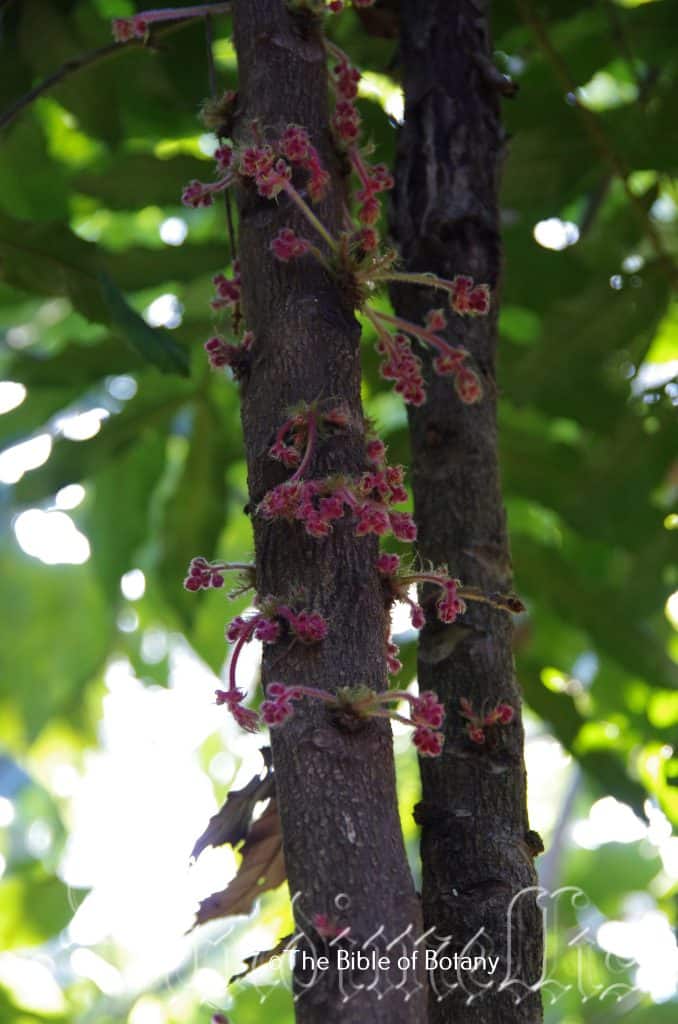
LBG Lismore NSW
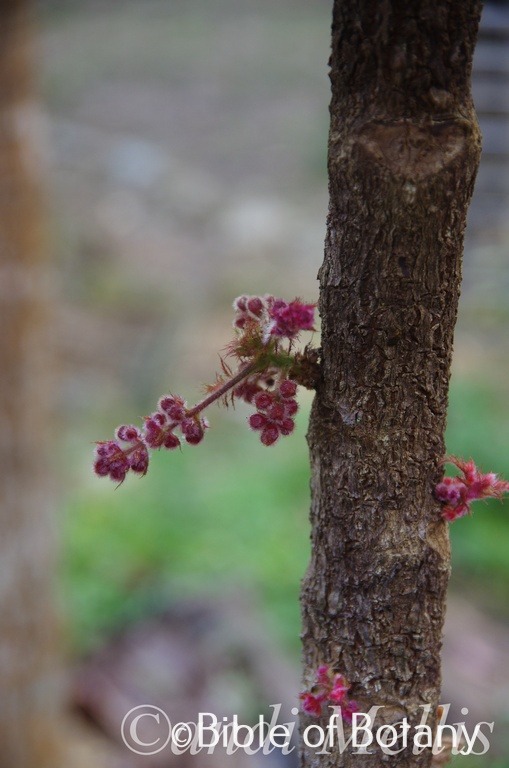
Author’s Garden The Pinnacles NSW
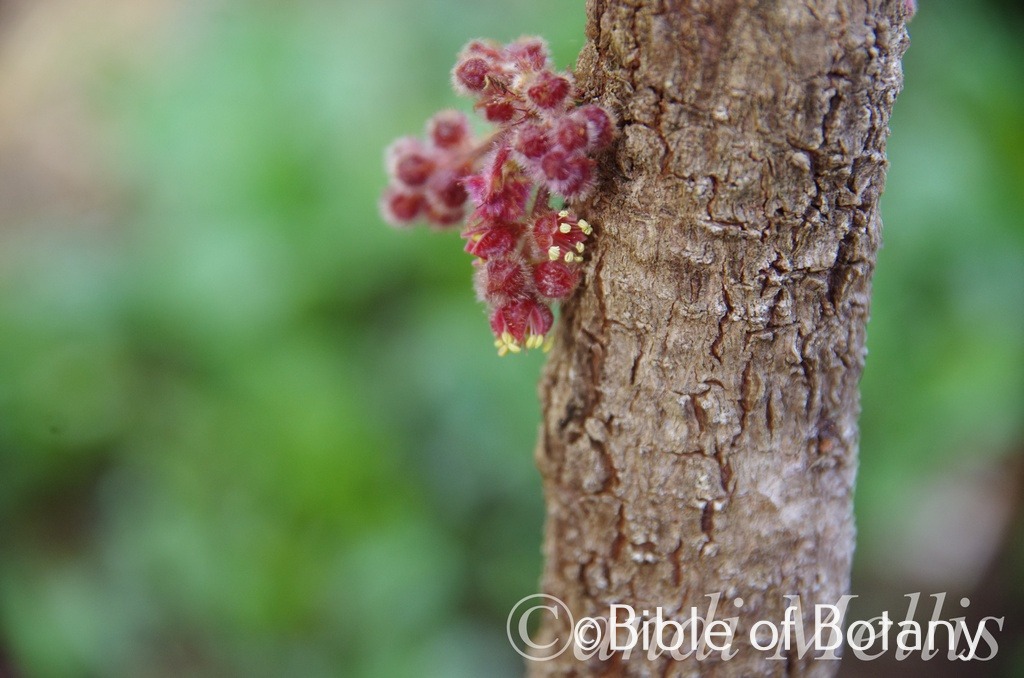
Author’s Garden The Pinnacles NSW
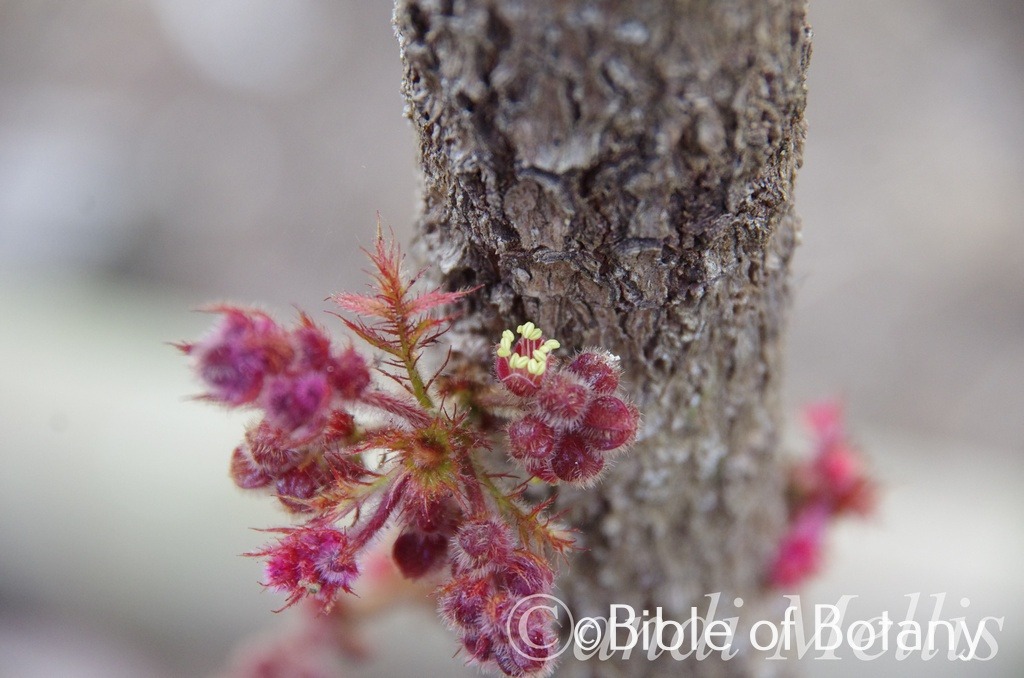
Author’s Garden The Pinnacles NSW
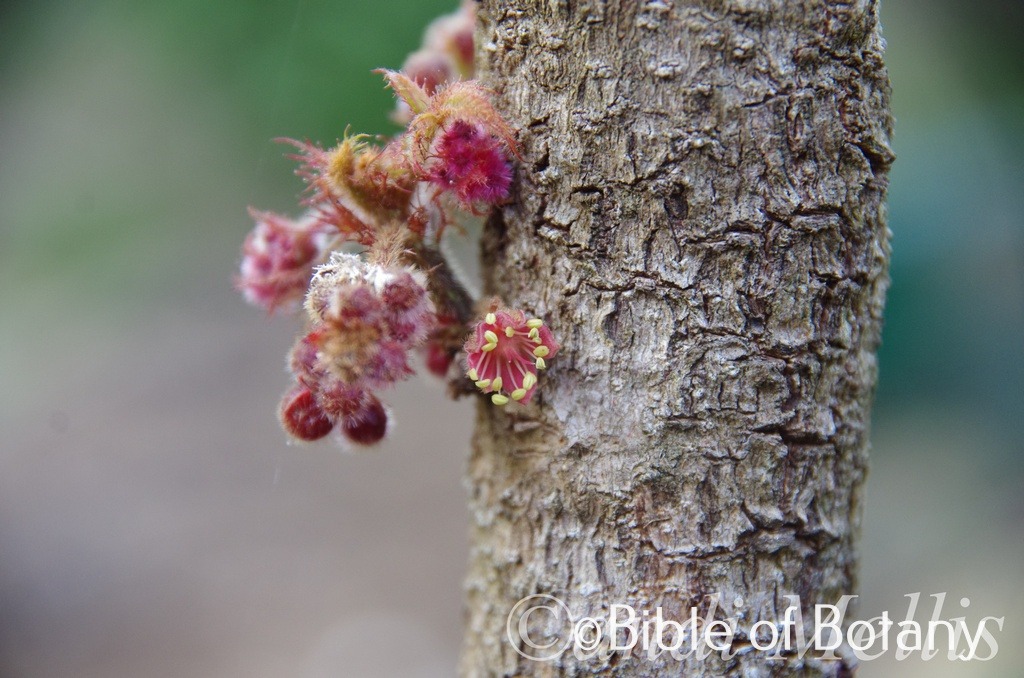
Author’s Garden The Pinnacles NSW

Australian Native Foods & Botanicals – Web Site
Davidsonia jerseyana
Classification
Division: Magnoliophyta
Class: Magnoliopsida
Order: Oxalidales
Family: Cunoniaceae
Genus: Is named in Honour of J. E. Davidson a sugar cane farmer who collected the first specimen at Rockingham Bay in Queensland. He wrote the poem Botanic Garden.
Species: From Jerseyana, which is unknown, unless it is in reference to the first plants, which may have been discovered on a Jersey farm in northern eastern NSW.
Common Name: Davidson’s Plum.
Ooray a unique gift – Number of local Aboriginal languages on the North Coast of new South Wales.
Distribution:
Davidsonia jerseyana is found from the Brunswick River north to the Tweed River in far coastal northern New South Wales and far coastal southern Queensland. It is found on and east of the Great Dividing Range.
https://avh.ala.org.au/occurrences/search?taxa=Davidsonia+jerseyana#tab_mapView
Habitat Aspect Climate:
Davidsonia jerseyana prefers full sun to dappled shade. It grows in warm coastal rainforests. It is found from 300 meters ASL to 800 meters ASL.
The temperatures range from 3 degrees in July to 36 degrees in January.
The rainfall ranges from lows of 1200mm to 2000mm average per annum.
Soil Requirements:
Davidsonia jerseyana prefers fertile medium clays. The soils are derived from decomposed black basalts. The soils pH ranges from PH of 5.5pH to 6pH. It is not tolerant of waterlogged soils. Non saline soils to moderately saline soils are tolerated.
Height & Spread:
Wild Plants: 8m to 10m to 3m x 4m
Characteristics:
Davidsonia jerseyana grows as a very narrow medium height tree with very few or no branches. The bark is light grey with off white lentils. Young shoots are a tuft where many leaves are produced in flushes that are densely covered in short and long grey or rusty hirsute hairs.
The alternate odd pinnate leaves of Davidsonia jerseyana are born at right angles to the previous leaf and measure 350mm to 600mm in length by 150mm to 210mm in width. The 11 to 13 oblong to oblanceolate leaflets measure 60mm to 300mm in length by 30mm to 100mm in width. The rachis has long triangular scales on the section closest to the base diminishing in size as they approach the apex. The scales measure 1mm to 6mm in length.
The rachis has a deeply lobed wing which measures 8mm to 20mm in length. Rachis measures 5mm to 20mm in length while the petioles measure 1mm to 3mm in length. The base leaflets are the shortest while the apex leaflets are the longest. The bases are rounded while the apexes are acute to apiculate. The discolourous laminas are deep sea green and glabrous on the upper laminas while the lower laminas are paler and sparsely to moderately covered in short and long rusty hirsute hairs. The laminas recurve slightly from the mid vein to the margins. The leaf margins are irregularly toothed.
The inflorescences of Davidsonia jerseyana are cauliferous panicles born on the trunk. The panicles measure 40mm to 100mm in length. The deep pink, sessile flowers have a short corolla which measures 1.5mm to 2.2mm in length. The 4 coriaceous lobes are densely covered in white hirsute hairs and measure 2mm to 2.5mm in length. The lobes are recurved.
The 6 stamens are pale yellow to deep yellow and measure 4mm to 6mm in length. The flowers appear from late November through to early March.
The 6 creamy fawn to creamy fawn-green filaments measure 5mm to 6mm in length while the fawn to fawn-tan anthers measure 2.5 mm to 3.5mm in length.
The 5 to 7 locule ovary is densely covered in white hirsute hairs. The pascal green tinged fawn style measures 5mm to 6mm in length. The flowers appear from late November through to early March.
The fruits of Davidsonia jerseyana are an ovoid drupe measuring 30mm to 50mm long and 38mm to 45mm in diameter. The blue-green, pruinose unripe fruits turn deep blue-black when ripe. The 1 or 2 flat, pink to pinkish-red, pyrenes have 3 or 4 fimbriate or laninate margins. The pyrenes contain a solitary seed. The fruits appear from late April through to October.
Wildlife:
Davidsonia jerseyana fruit is eaten by possums, native rats, the King Parrot Alisterus scapularis, and was a staple part of the Australian Aborigines and first Europeans to settle in Australia.
Epidemiological studies indicate that populations consuming high levels of plant derived foods have low incidence rates of various cancers. Recent findings implicate a variety of phytochemicals, including phenolics, in these anticancer properties. Both monophenolic and polyphenolic compounds from a large variety of plant foods, spices and beverages have been shown to inhibit or attenuate the initiation, progression and spread of cancers in cells in vitro and in animals in vivo. https://pubmed.ncbi.nlm.nih.gov/21520702/
The following native Australian plants also contain high levels of both monophenolic and polyphenolic compounds Antidesma ereostre, Antidesma parvifolium, Terminalia ferdinandiana, Tasmannia lanceolata, Scaevola spinescens, Syzygium anisatum, Backhousia citriodora Leaves, Davidsonia pruriens, Davidsonia pruriens, Davidsonia jerseyana, Davidsonia. johnsonii and Pleiogynium timoriense.
Cultivation:
Davidsonia jerseyana is a beautiful small narrow growing tree that can be placed in every native or exotic garden in the tropics to sub tropics or warm temperate zones which are free from frosts. It is ideal in almost every setting near ponds, at the edge of a rainforest in courtyards, around swimming pools or in the orchard. It can be grown in frost prone areas as long as the frosts are not severe and it is protected in its early years of growth until the leaves are above the highest frosts.
If it is given adequate moisture, plenty of organic mulch for moisture retention and an even soil temperature, applying native fertilizers on a regular basis the plants will respond with good flowering over a long period and will yield good quality fruit with maximum size. Davidsonia jerseyana is still not being farmed professionally on a large scale. The drupes have a flavour reminiscent of plums with the tartness of a lemon mixed together.
If it is placed around a pool or sunny courtyard try to plant 2 or 3 in a straight and spaced at regular intervals will produce an ideal formal look. For the more informal look plant them at different spacing or make a clump of 3 to 5 using curves for the natural look. The choice of companion plants with bright yellow to cream flowers beneath the trees once they have grown 2 or 3 meters will contrast the stark grey trunks beautifully when it is not in fruit or admirably as the deep purple black fruits mature. It would not matter whether fine or large leaf plants are used provided as long as it is a pale green or lime green for an all year contrast. Various Hibbertia species like Hibbertia aspera or hibbertia diffusa would look great on the ground and give the Davidsonia species extra height. The slender growth habit would make small areas look larger and walls look longer.
It is best used adjacent to small areas of bush close to paths or the house so its unusual flowers and deep purple fruits can be viewed regularly and picked before the birds begin to feed on them.
It often commences flowering from the third or fourth year from seed. For the orchard plant the trees in rows 4.5 meters apart and plant the trees 3 meters apart. Be careful not to damage flower spikes as it will reflower from those spikes annually.
Propagation:
Seeds: Davidsonia jerseyana seeds do not require treatment before sowing. Remove the flesh, wash and sow fresh seeds directly into deep seed raising tray and cover with 10mm of the mix. When the seedlings are 25mm to 50mm tall, prick them out and plant them into 50mm native tubes using a seed raising mix. Alternatively place a seed directly into the 50mm native tubes.
Once the seedlings reach 150mm to 200mm in height plant them out into their permanent position. Mass plantings can be achieved by planting them at 3 meters to 4 meters apart. When planting for the fruit in an orchard, plant the seedlings at 4 meter centers so easy harvesting can take place.
Cuttings: Davidsonia jerseyana can be grown from cuttings but these are quite difficult and seed is true to form without a great deal of variation.
Fertilize using Seaweed, fish emulsion or organic chicken pellets soaked in water on an alternate basis. Fertilize every two months until the plants are established then twice annually in early September and again in March to maintain health, vitality and better flowering.
Further Comments from Readers:
Hi reader, it seems you use The Bible of Botany a lot. That’s great as we have great pleasure in bringing it to you! It’s a little awkward for us to ask, but our first aim is to purchase land approximately 1,600 hectares to link several parcels of N.P. into one at The Pinnacles NSW Australia, but we need your help. We’re not salespeople. We’re amateur botanists who have dedicated over 30 years to saving the environment in a practical way. We depend on donations to reach our goal. If you donate just $5, the price of your coffee this Sunday, We can help to keep the planet alive in a real way and continue to bring you regular updates and features on Australian plants all in one Botanical Bible. Any support is greatly appreciated. Thank you.
In the spirit of reconciliation we acknowledge the Bundjalung, Gumbaynggirr and Yaegl and all aboriginal nations throughout Australia and their connections to land, sea and community. We pay our respect to their Elders past, present and future for the pleasures we have gained.
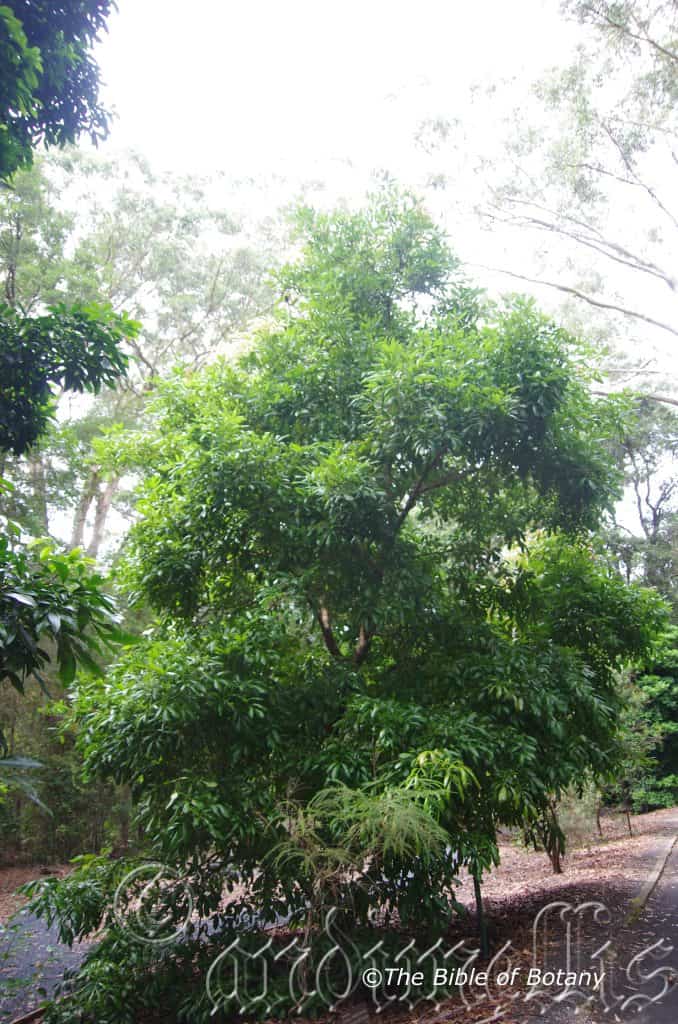
NCBG Coffs Harbour NSW
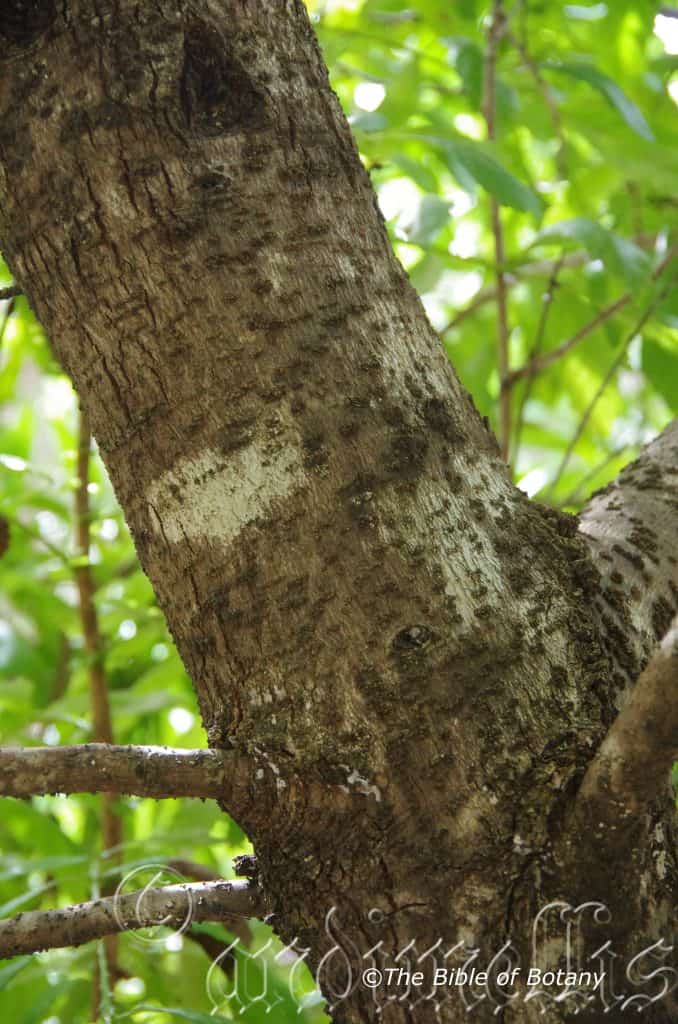
NCBG Coffs Harbour NSW
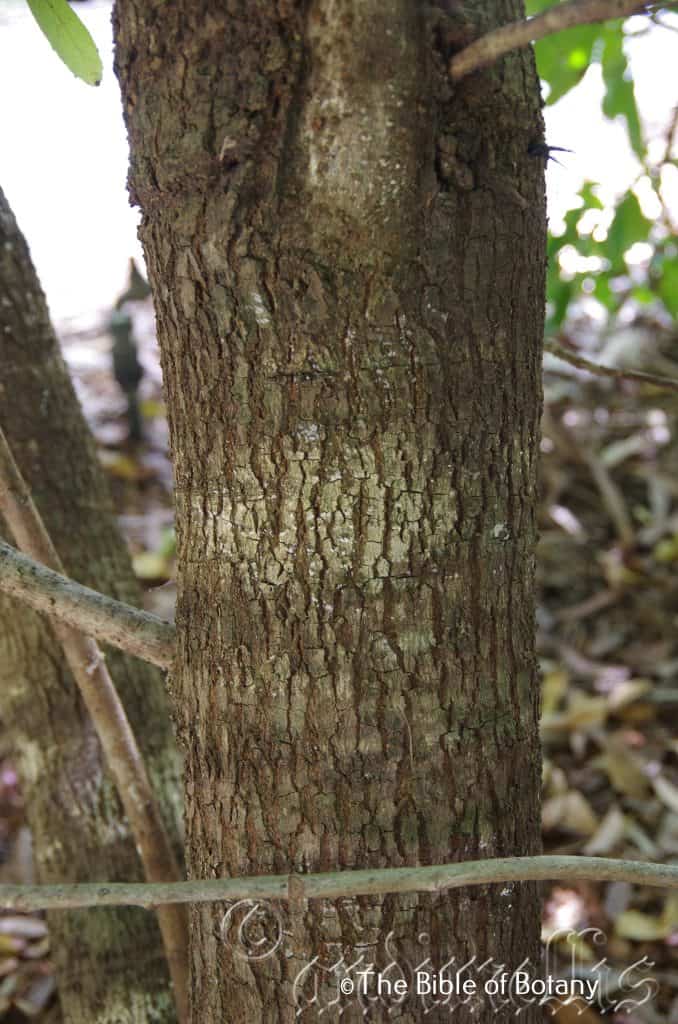
NCBG Coffs Harbour NSW
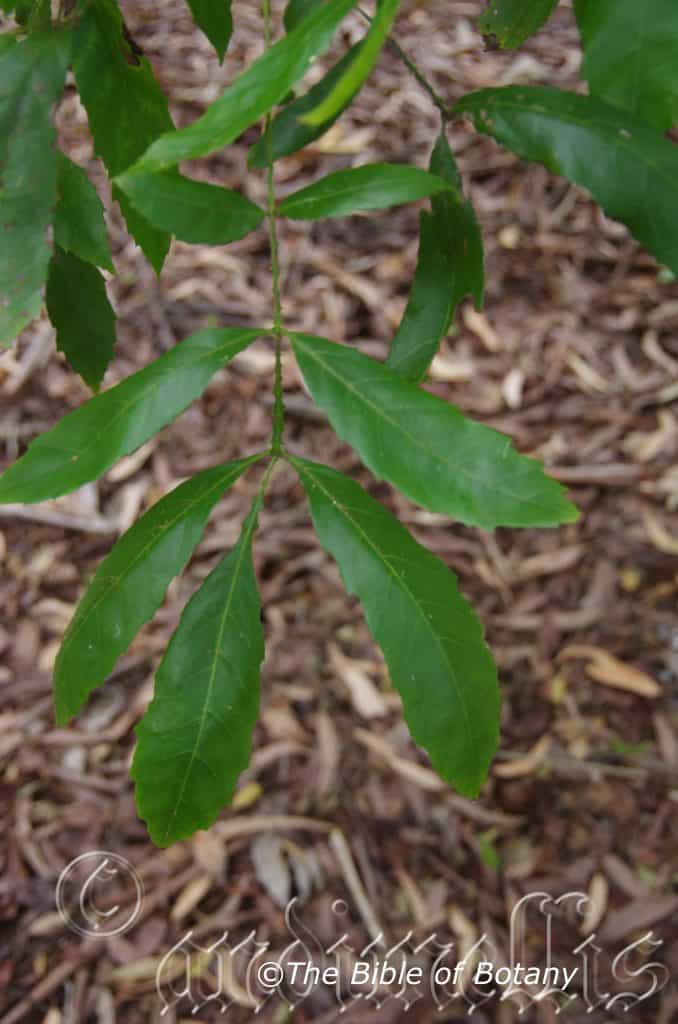
NCBG Coffs Harbour NSW
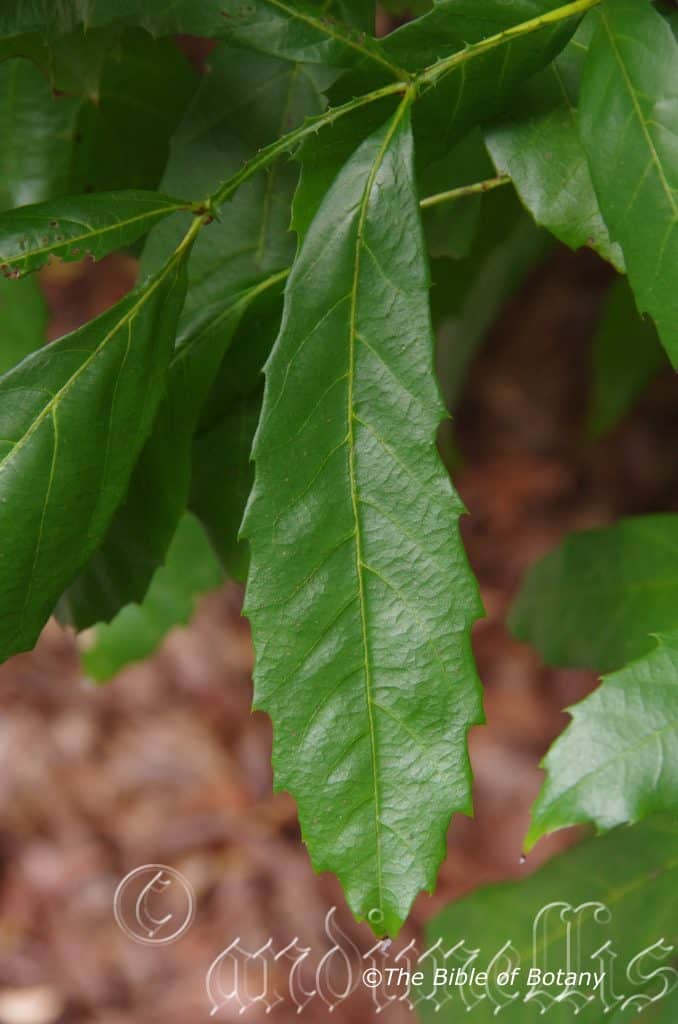
NCBG Coffs Harbour NSW
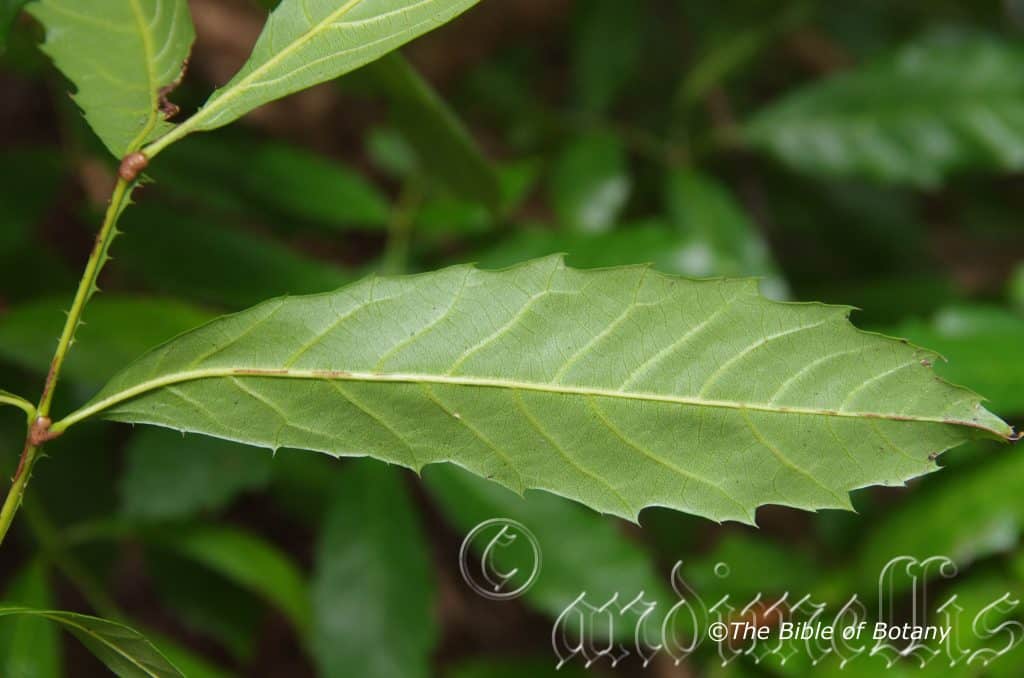
NCBG Coffs Harbour NSW
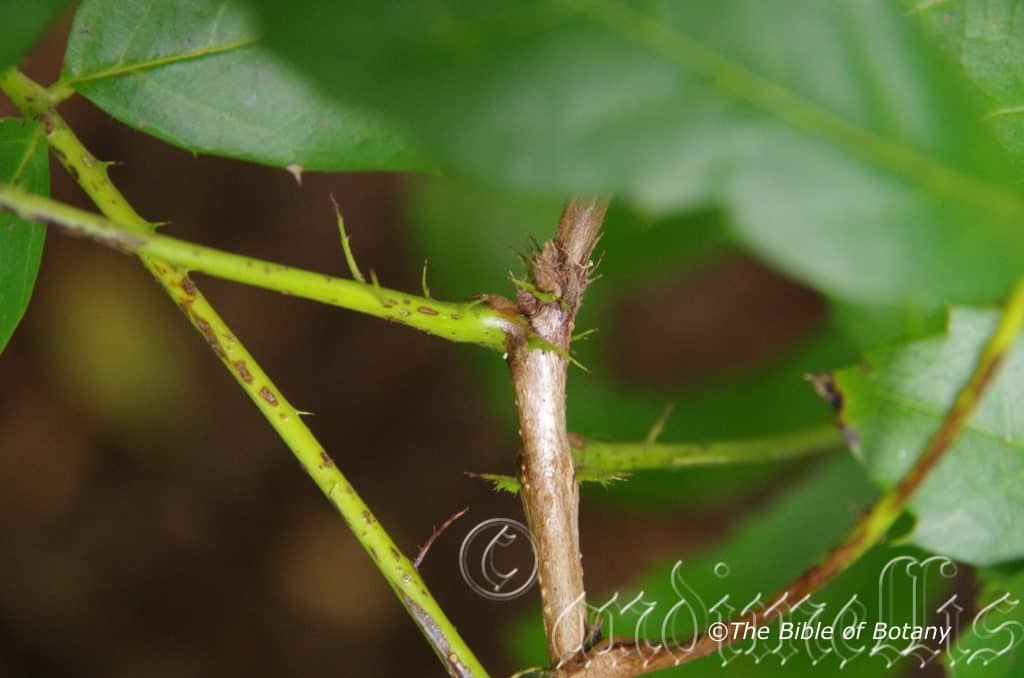
NCBG Coffs Harbour NSW
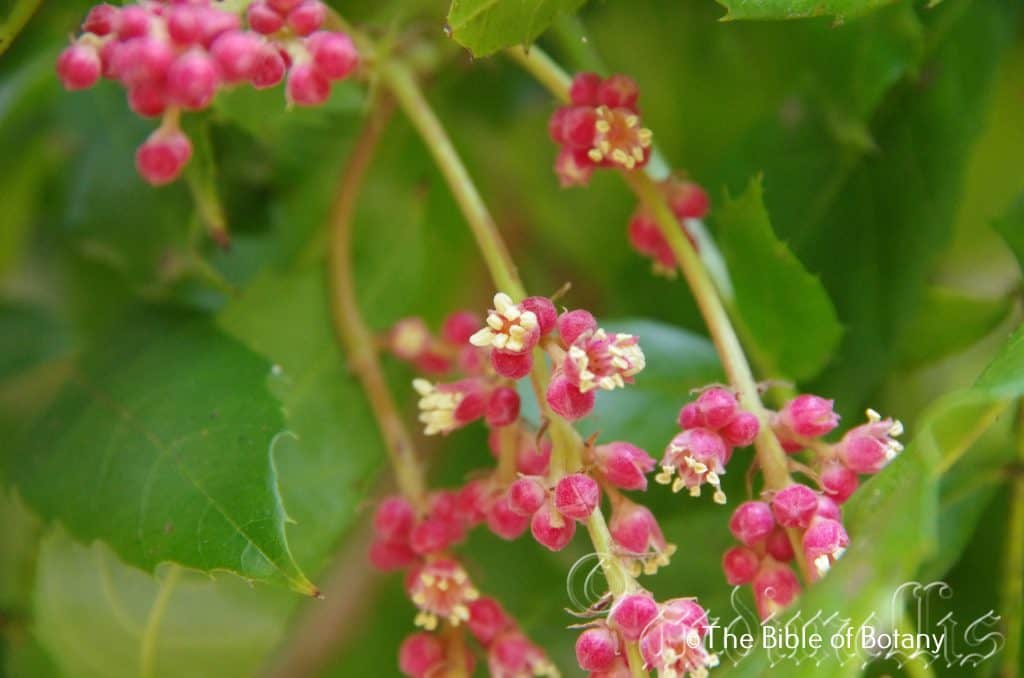
NCBG Coffs Harbour NSW
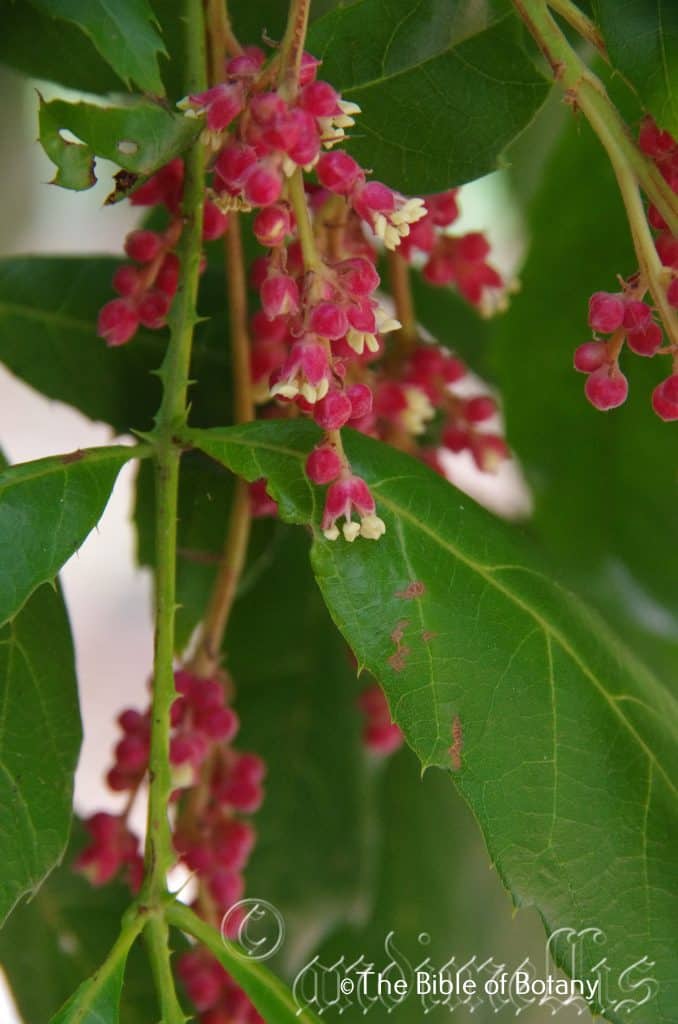
NCBG Coffs Harbour NSW
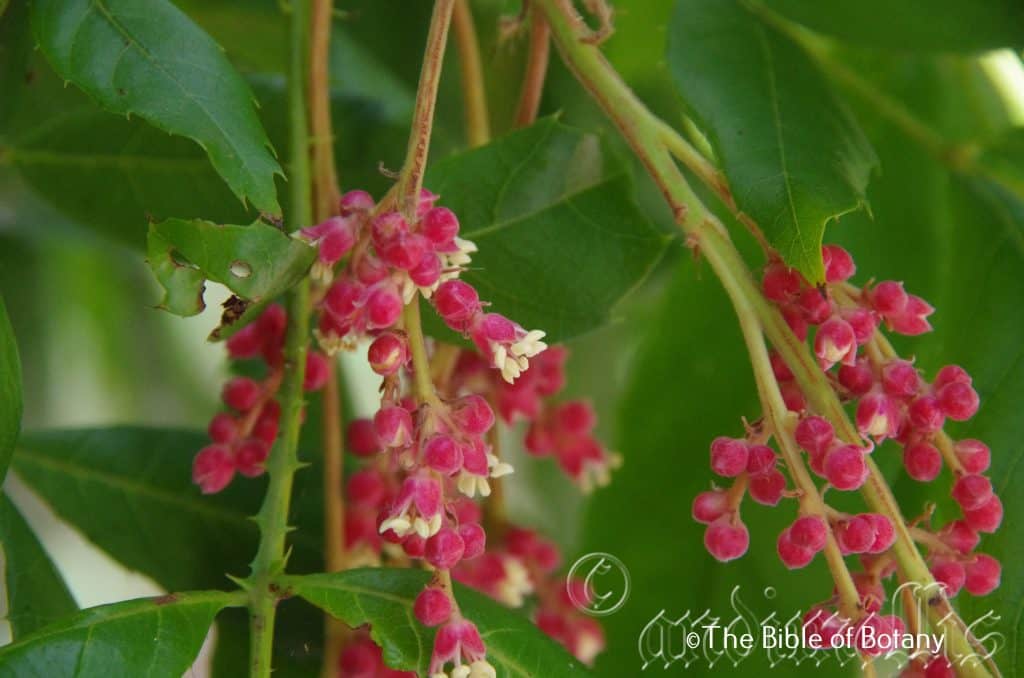
NCBG Coffs Harbour NSW
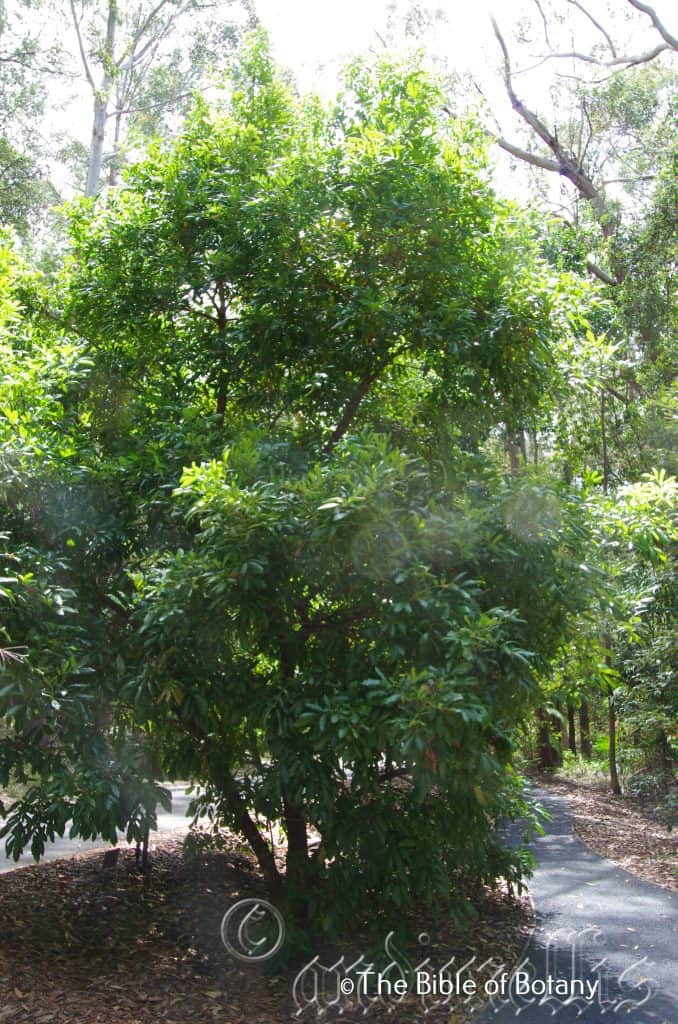
NCBG Coffs Harbour NSW
Australian Native Foods & Botanicals – Web Site
Davidsonia johnsonii
Classification
Division: Magnoliophyta
Class: Magnoliopsida
Order: Oxalidales
Family: Cunoniaceae
Genus: Is named in Honour of J. E. Davidson a sugar cane farmer who collected the first specimen at Rockingham Bay in Queensland. He wrote the poem Botanic Garden.
Species: Is named in honour of Lawrence Alexander Johnson 1925-19, who made outstanding contributions to botanical systematics in Australia at all taxonomic levels and to the theory of biological systematics..
Common Name: Smooth Leaf Davidson Plum.
Ooray a unique gift – Number of local Aboriginal languages on the North Coast of new South Wales.
Distribution:
Davidsonia johnsonii is found from the Brunswick River north to the Tweed River in far coastal northern New South Wales and far coastal southern Queensland. It is found on and east of the Great Dividing Range.
https://avh.ala.org.au/occurrences/search?taxa=Davidsonia+johnsonii#tab_mapView
Habitat Aspect Climate:
Davidsonia johnsonii prefers full sun to dappled shade. It grows in warm coastal rainforests. It is found from 300 meters ASL to 800 meters ASL.
The temperatures range from 3 degrees in July to 36 degrees in January.
The rainfall ranges from lows of 1200mm to 2000mm average per annum.
Soil Requirements:
Davidsonia johnsonii prefers fertile red medium clays. The soils are usually derived from decomposed black basalts. The soils pH ranges from 5.5pH to 6.5pH. It is not tolerant of waterlogged soils. Non saline soils to moderately saline soils are tolerated.
Height & Spread:
Wild Plants: 6m to 12m to 3m x 4m
Characteristics:
Davidsonia johnsonii grows as a narrow, bushy small tree with very few branches that often suckers profusely from roots near the main trunk. The bark is light grey with off white lentils. The new growth and branchlets are densely covered with white or pale grey, soft, non-irritant, hirsute hairs.
The alternate odd pinnate leaves of Davidsonia johnsonii are born at right angles to the previous leaf and measure 120mm to 320mm in length by 150mm to 210mm in width. The petiole measures 30mm to 70mm in length. The 5 to 9 obovate to oblanceolate leaflets measure 20mm to 150mm in length by 15mm to 60mm in width. The rachis has triangular scales on the section closest to the base diminishing in size as they approach the apex. The orbiculare stipules are deep green, glabrous and glossy.
The base leaflets are the shortest while the apex leaflets are the longest. The bases are cuneate while the apexes are broadly acuminate to apiculate. The discolourous laminas are mid green and glabrous on the upper laminas while the lower laminas are paler. The laminas decurve downwards slightly from the mid vein to the margins. The leaf margins are evenly toothed. The main vein and lateral veins are strongly prominent on the lower surface and are glabrous or sparsely covered in fine, soft, off white to rusty hirsute hairs.
The inflorescences of Davidsonia johnsonii are cauliferous panicles born amongst the foliage. The panicles measure 150mm to 200mm in length. The deep pink, sessile flowers have a short corolla which measures 1.5mm to 2.2mm in length. The 4 coriaceous lobes are densely covered in white hirsute hairs and measure 2mm to 2.5mm in length. The lobes are recurved.
The 6 stamens are pale yellow to deep yellow and measure 4mm to 6mm in length. The flowers appear from late November through to early March.
The 6 creamy fawn to creamy fawn-green filaments measure 5mm to 6mm in length while the fawn to fawn-tan anthers measure 2.5 mm to 3.5mm in length.
The 5 to 7 locule ovary is densely covered in white hirsute hairs. The pascal green tinged fawn style measures 5mm to 6mm in length. The flowers appear from late November through to early March.
The fruits of Davidsonia johnsonii are an ovoid drupe measuring 30mm to 40mm long and 30mm to 50mm in diameter. The blue-green, pruinose unripe drupes turn deep blue-black when ripe. The 1 or 2 flat, pink to pinkish-red, pyrenes have 3 or 4 fimbriate or lacinate margins. The pyrenes reveal a solitary seed and are usually infertile. The flowers appear from January through to April.
Wildlife:
Davidsonia johnsonii fruit is eaten by possums, native rats and was a staple part of the Australian Aborigines and first Europeans to settle in Australia.
Epidemiological studies indicate that populations consuming high levels of plant derived foods have low incidence rates of various cancers. Recent findings implicate a variety of phytochemicals, including phenolics, in these anticancer properties. Both monophenolic and polyphenolic compounds from a large variety of plant foods, spices and beverages have been shown to inhibit or attenuate the initiation, progression and spread of cancers in cells in vitro and in animals in vivo. https://pubmed.ncbi.nlm.nih.gov/21520702/
The following native Australian plants also contain high levels of both monophenolic and polyphenolic compounds Antidesma ereostre, Antidesma parvifolium, Terminalia ferdinandiana, Tasmannia lanceolata, Scaevola spinescens, Syzygium anisatum, Backhousia citriodora Leaves, Davidsonia pruriens, Davidsonia pruriens, Davidsonia jerseyana, Davidsonia. johnsonii and Pleiogynium timoriense.
Cultivation:
Davidsonia johnsonii is a beautiful small narrow growing tree that can be placed in every native or exotic garden in the tropics to sub tropics or warm temperate zones which are free from frosts. It is ideal in almost every setting near ponds, at the edge of a rainforest, around swimming pools or in the orchard. It can be grown in frost prone areas as long as the frosts are not severe and it is protected in its early years of growth until the leaves are above the highest frosts.
If it is given adequate moisture, plenty of mulch for moisture retention and an even soil temperature, applying native fertilizers on a regular basis the plants will respond with good flowering over a longer period and will yield good quality fruit with maximum size. Davidsonia johnsonii is still not being farmed professionally on a large scale. The drupes have a flavour reminiscent of plums with the tartness of a lemon mixed together.
If it is placed around a pool or sunny courtyard try to plant 2 or 3 in a straight and spaced at regular intervals will produce an ideal formal look. For the more informal look plant them at different spacing or make a clump of 3 to 5 using curves for the natural look. The choice of companion plants with bright yellow to cream flowers beneath the trees once they have grown 2 or 3 meters will contrast the stark grey trunks beautifully when it is not in fruit or admirably as the deep purple black fruits mature. It would not matter whether fine or large leaf plants are used provided as long as they are a pale green or lime green for an all year contrast. Hibbertia species would look great on the ground and give the Davidsonia johnsonii extra height. The slender growth habit would make small areas look larger and walls look longer.
It is best used adjacent to small areas of bush close to paths or the house so their deep purple fruits can be viewed regularly and picked before the birds begin to feed on them.
It often reaches commence flowering from the third or fourth year.
For the orchard plant the trees in rows 4.5 meters apart and plant the trees 3 meters apart.
Propagation:
Seeds:
Davidsonia johnsonii seeds are infertile, so propagation must be carried out by stem cuttings or root cuttings.
It is best to select suckers furtherest form the parent tree.
Sever the root on the parent side of the tree and water thoroughly. After 10 to 14 days dig the sucker out and pot into 150mm pots.
When the sucker has developed new growth it can be planted out in a semi shaded or dappled light position.
Once the seedlings reach 150mm to 200mm in height plant them out into their permanent position. Mass plantings can be achieved by planting them at 3 meters to 4 meters apart. When planting for the fruit in an orchard, plant the seedlings at 4 meter centers so easy harvesting can take place.
Fertilize using Seaweed, fish emulsion or organic chicken pellets soaked in water on an alternate basis. Fertilize every two months until the plants are established then twice annually in early September and again in March to maintain health, vitality and better flowering and fruiting.
Further Comments from Readers:
Hi reader, it seems you use The Bible of Botany a lot. That’s great as we have great pleasure in bringing it to you! It’s a little awkward for us to ask, but our first aim is to purchase land approximately 1,600 hectares to link several parcels of N.P. into one at The Pinnacles NSW Australia, but we need your help. We’re not salespeople. We’re amateur botanists who have dedicated over 30 years to saving the environment in a practical way. We depend on donations to reach our goal. If you donate just $5, the price of your coffee this Sunday, We can help to keep the planet alive in a real way and continue to bring you regular updates and features on Australian plants all in one Botanical Bible. Any support is greatly appreciated. Thank you.
In the spirit of reconciliation we acknowledge the Bundjalung, Gumbaynggirr and Yaegl and all aboriginal nations throughout Australia and their connections to land, sea and community. We pay our respect to their Elders past, present and future for the pleasures we have gained.
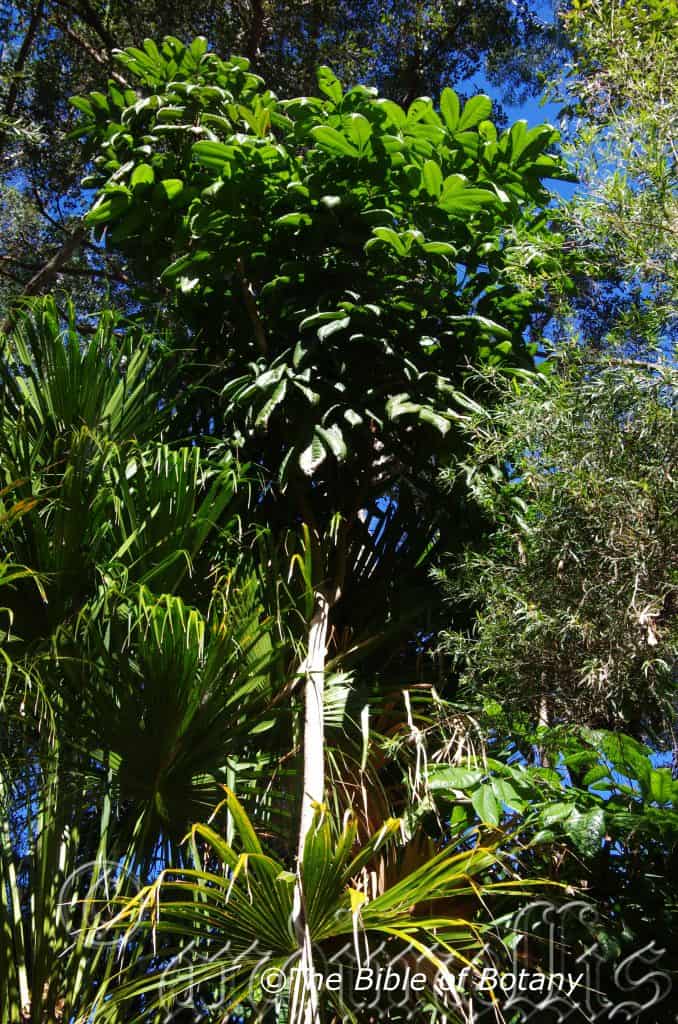
NCBG Coffs Harbour NSW
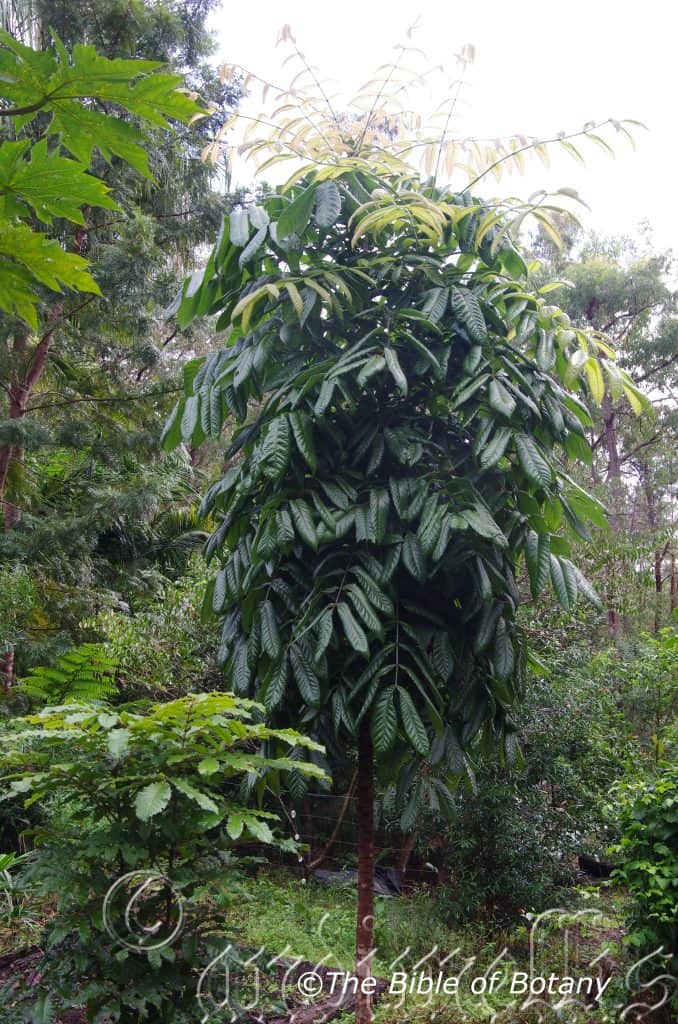
Author’s Garden The Pinnacles NSW
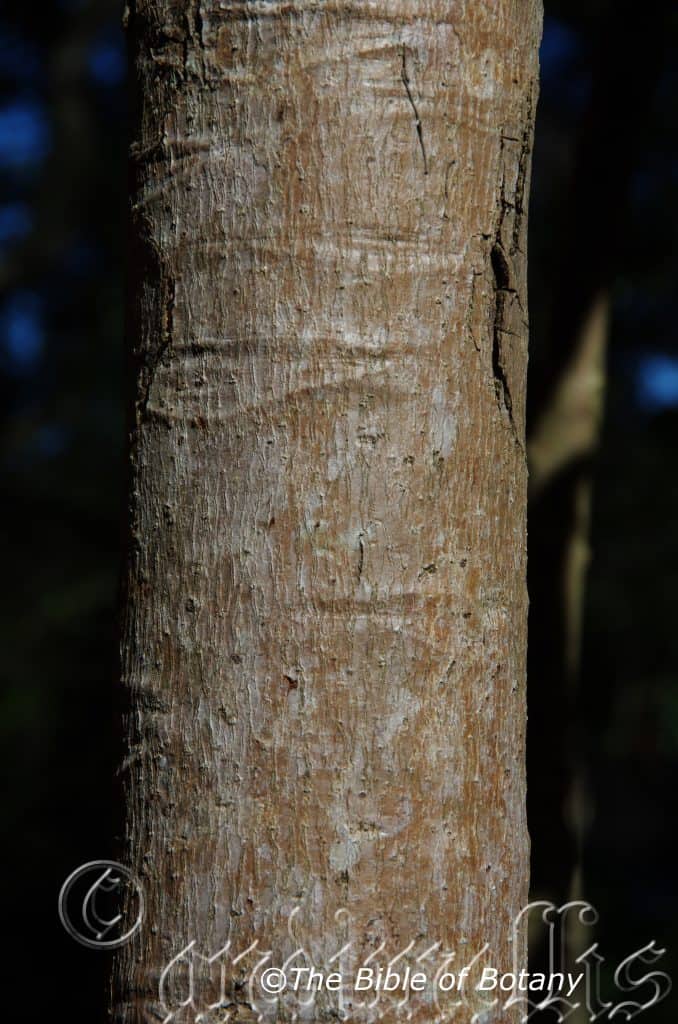
NCBG Coffs Harbour NSW
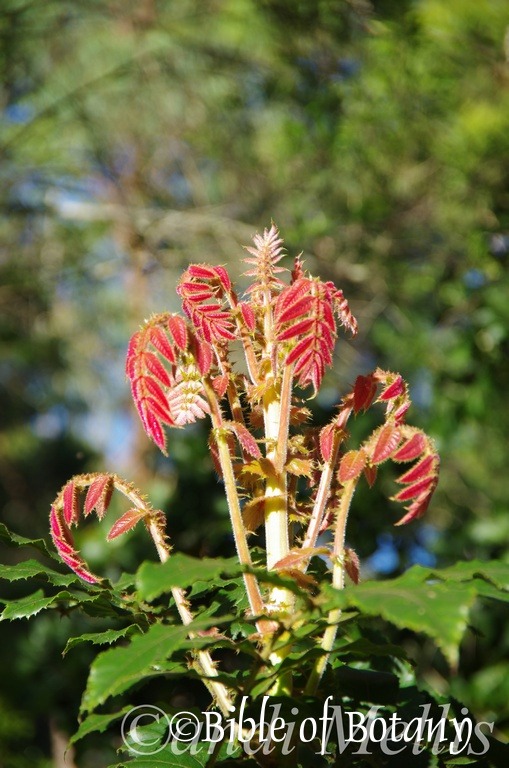
Author’s Garden The Pinnacles NSW
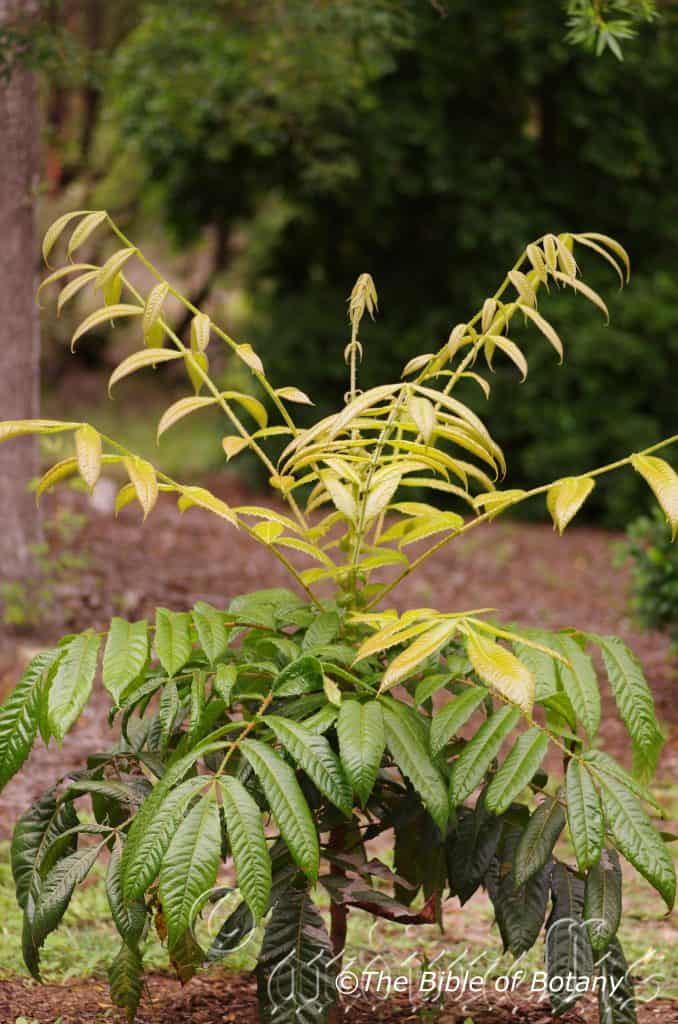
Author’s Garden The Pinnacles NSW
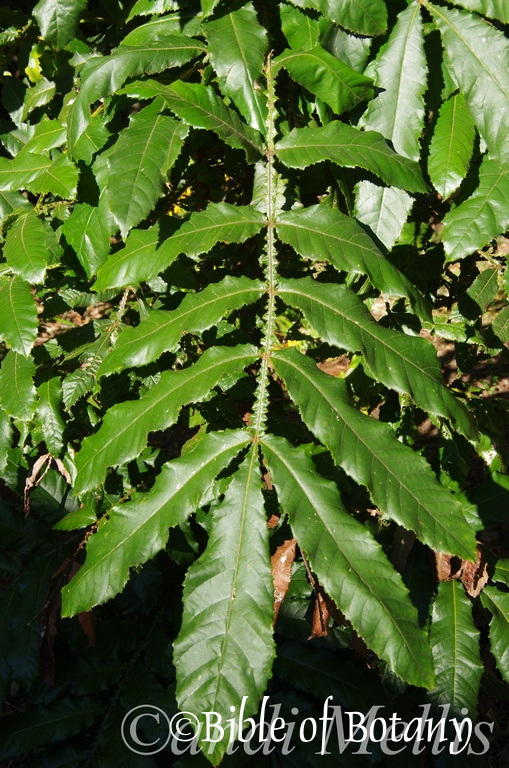
Author’s Garden The Pinnacles NSW
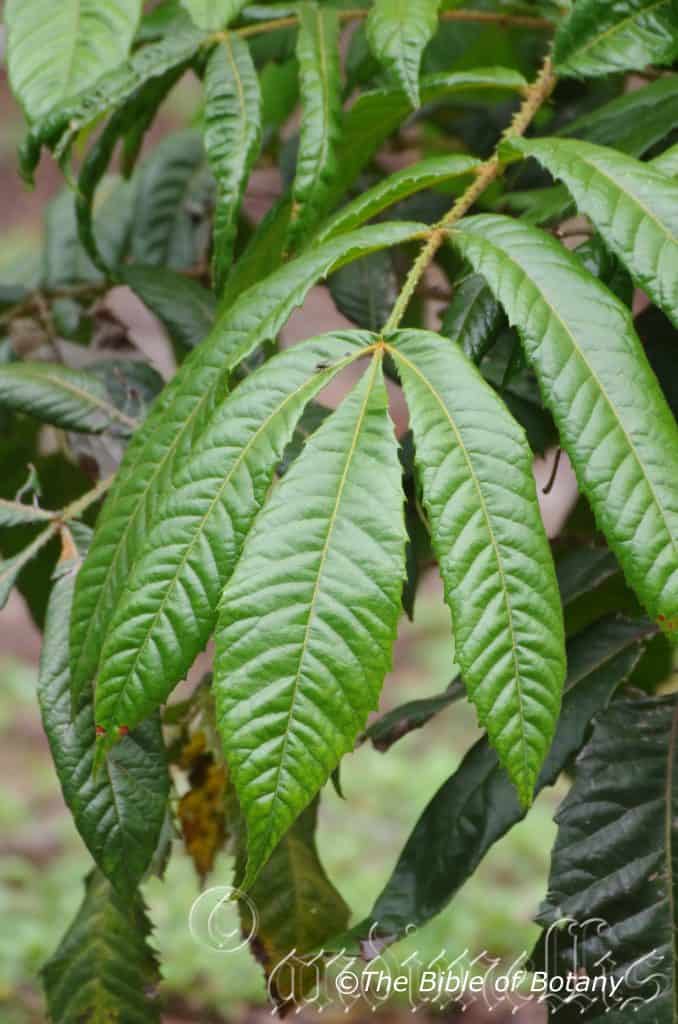
Author’s Garden The Pinnacles NSW
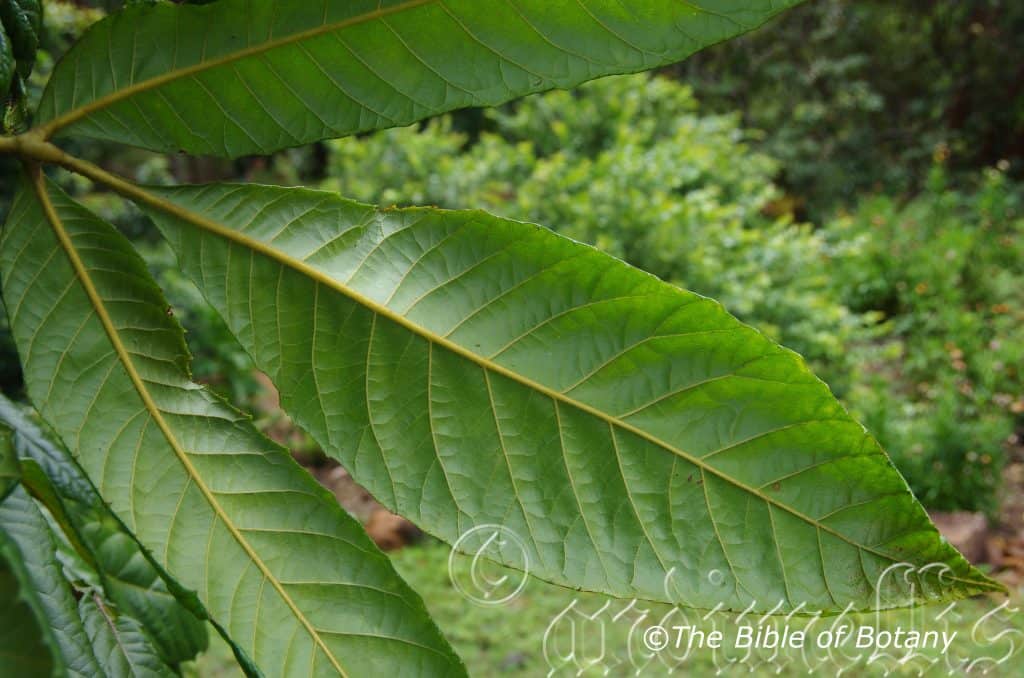
Author’s Garden The Pinnacles NSW
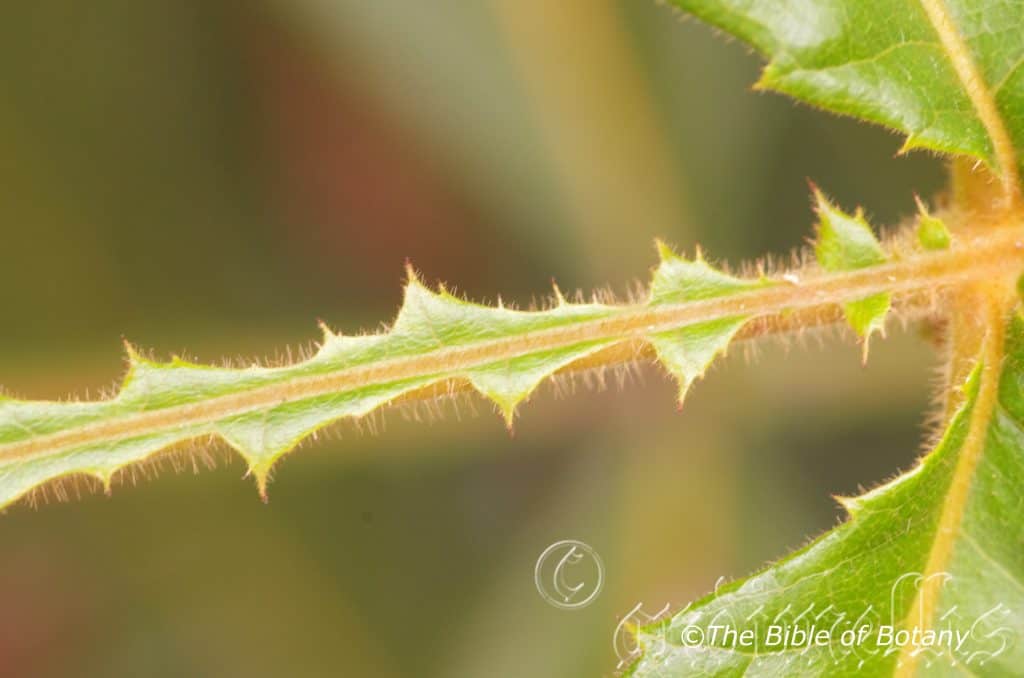
Author’s Garden The Pinnacles NSW
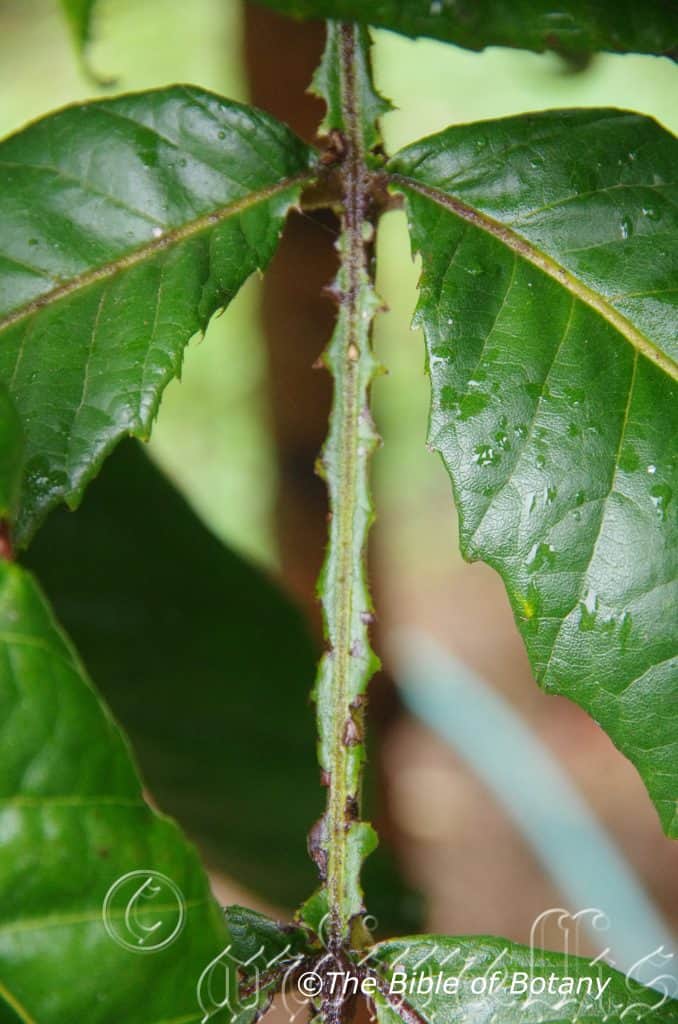
Author’s Garden The Pinnacles NSW
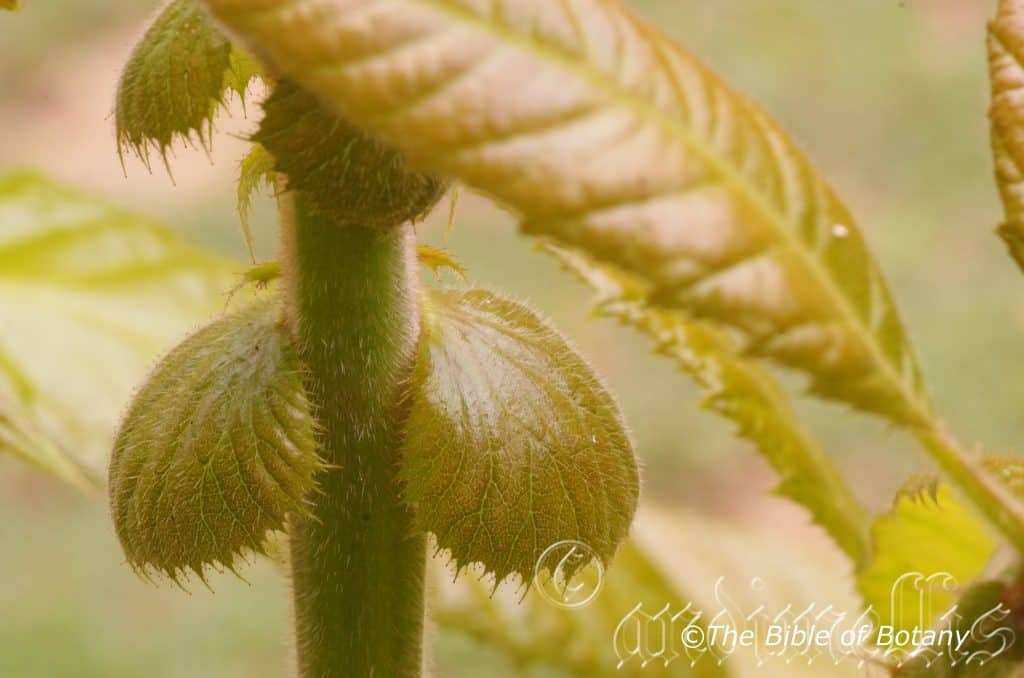
Author’s Garden The Pinnacles NSW
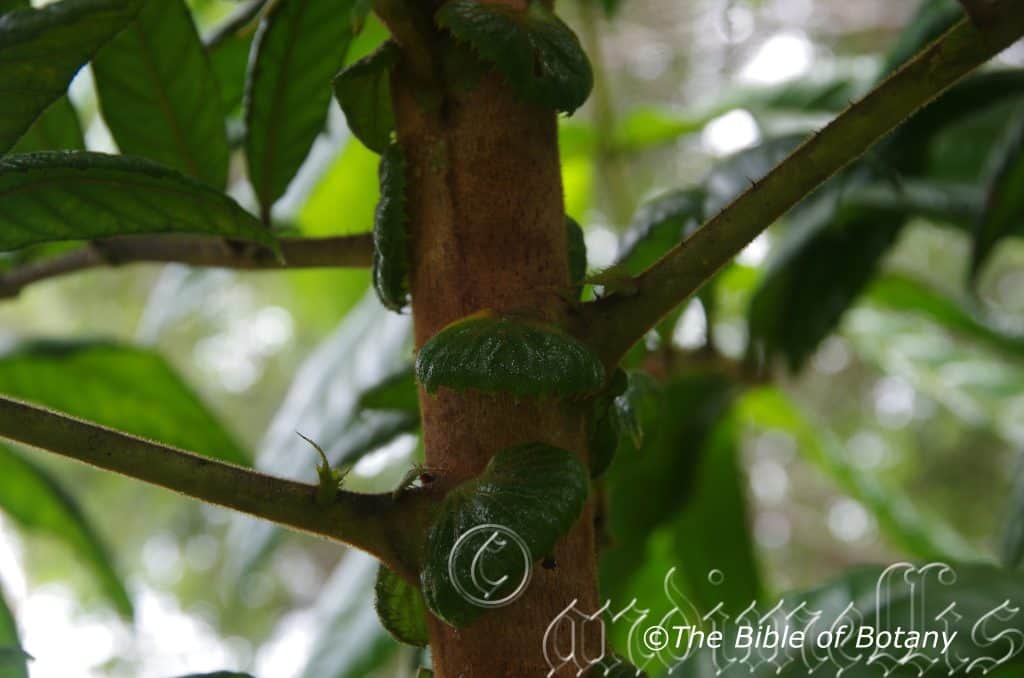
Author’s Garden The Pinnacles NSW
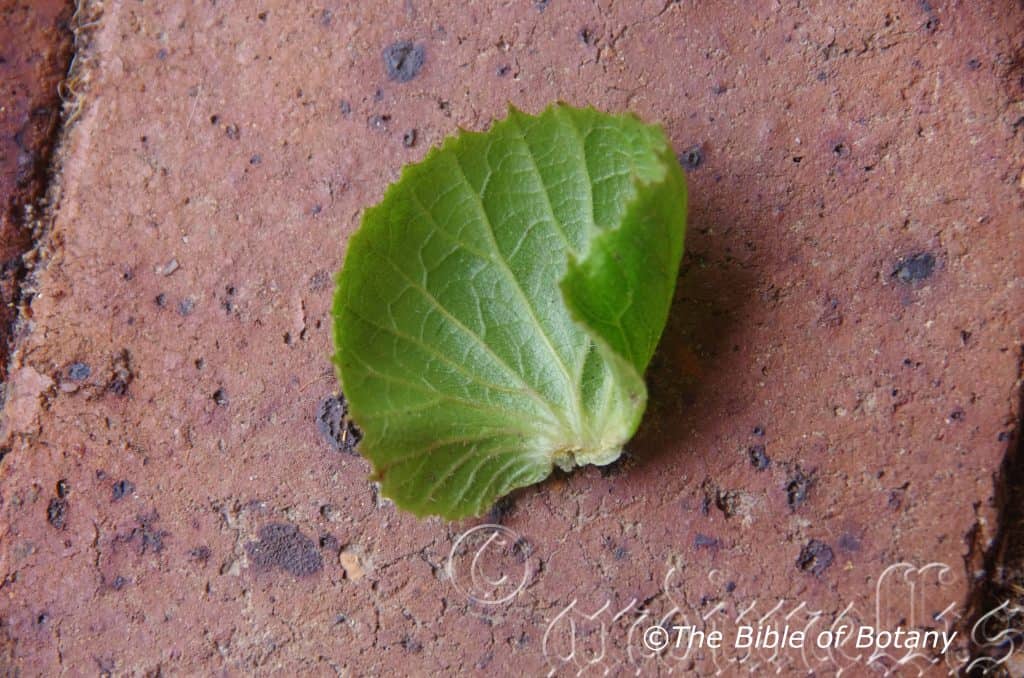
Author’s Garden The Pinnacles NSW
Author’s Garden The Pinnacles NSW
NCBG Coffs Harbour NSW
Anthela varia Author’s Garden The Pinnacles NSW
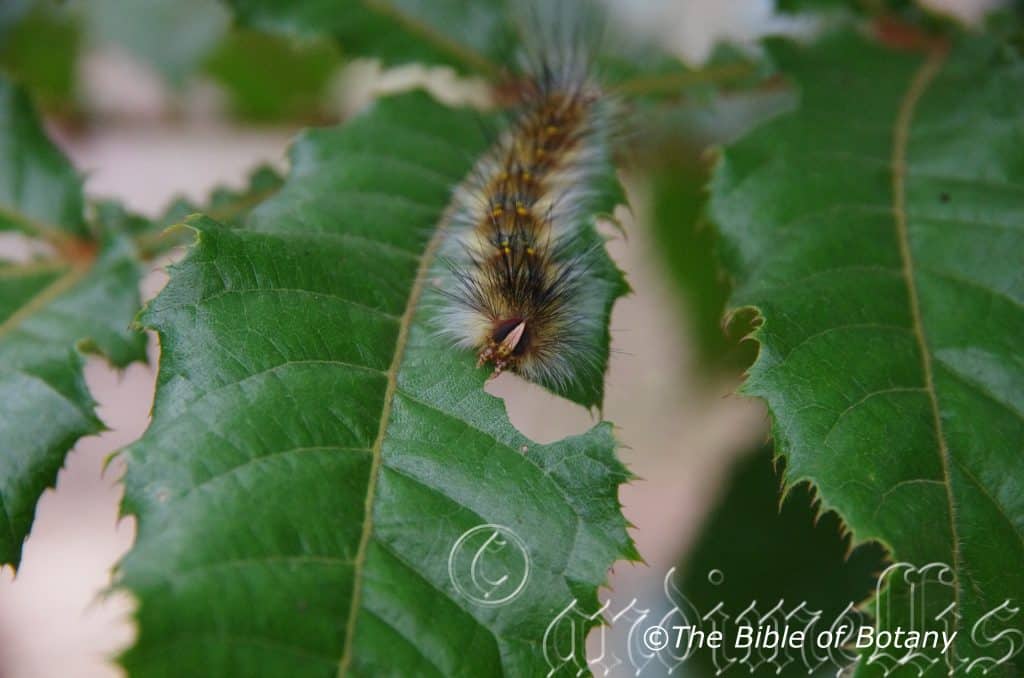
Anthela varia Author’s Garden The Pinnacles NSW

Australian Native Foods & Botanicals – Web Site
Davidsonia pruriens
Classification
Division: Magnoliophyta
Class: Magnoliopsida
Order: Oxalidales
Family: Cunoniaceae
Genus: Is named in Honour of J. E. Davidson a sugar cane farmer who collected the first specimen at Rockingham Bay in Queensland. He wrote the poem Botanic Garden.
Species: From Pruinosus, which is Latin for frosty or to be covered in frost. It refers to fruits, which appear to be covered in a powdery or waxy substance that resemble frost.
Common Name: Davidson’s Plum.
Ooray a unique gift – Number of local Aboriginal languages on the North Coast of new South Wales.
Distribution:
Davidsonia pruriens is found from Mungkan Kandu National Park and the Daintree National Park of far North Queensland. It is found on and east of the Great Dividing Range.
https://avh.ala.org.au/occurrences/search?taxa=Davidsonia+pruriens#tab_mapView
Habitat Aspect Climate:
Davidsonia pruriens prefers full sun to dappled shade. It grows in warm coastal rainforests. It is found from 50 meters ASL to 800 meters ASL.
The temperatures range from 5 degrees in July to 36 degrees in January.
The rainfall ranges from lows of 1800mm to 3200mm average per annum.
Soil Requirements:
Davidsonia pruriens prefers better quality light clays to medium clays. The soils are derived from decomposed black basalts. The soils pH ranges from PH of 5.5pH to 6pH. It does not tolerate waterlogged soils. Saline soils are not tolerated at all.
Height & Spread:
Wild Plants: 8m to 10m to 3m x 4m
Characteristics:
Davidsonia pruriens grows as a very narrow medium height tree with very few or no branches. The bark is light grey with off white lentils. Young shoots are a tuft where many leaves are produced in flushes that are densely covered in short and long grey or rusty hirsute hairs.
The alternate odd pinnate leaves of Davidsonia pruriens are born at right angles to the previous leaf and measure 350mm to 600mm in length by 150mm to 210mm in width. The 11 to 13 oblong to oblanceolate leaflets measure 60mm to 280mm in length by 30mm to 100mm in width. The base leaflets are the shortest while the apex leaflets are the longest. The bases are rounded while the apexes are acute to apiculate. The discolourous laminas are deep sea green and glabrous on the upper laminas while the lower laminas are paler and glabrous or sparsely covered in short and long rusty hirsute hairs. The laminas recurve slightly from the mid vein to the margins. The leaf margins are irregularly toothed. The rachis has long triangular scales on the section closest to the base diminishing in size as they approach the apex. The scales measure 1mm to 6mm in length. Rachis measures 5mm to 20mm in length. The persistent stipules are cordate to orbicular. The margins are toothed. The petioles measure 1mm to 3mm in length. The rachis has a deeply lobed wing which measures 8mm to 20mm in length.
The inflorescences of Davidsonia pruriens are cauliferous panicles born on the trunk. The panicles measure 40mm to 100mm in length. The deep pink, sessile flowers have a short corolla which measures 2mm to 3.5mm in length by 3mm to 5mm in diameter. The 4 coriaceous lobes are densely covered in fine white hirsute hairs and measure 3mm to 4.5mm in length. The 4 acute lobes are decurved. The 5 stamens are pale yellow to deep yellow and measure 4mm to 6mm in length.
The 6 creamy fawn to creamy fawn-green filaments measure 6mm to 7.5mm in length while the fawn to fawn-tan anthers measure 3mm to 4mm in length.
The 5 to 7 locule ovary is densely covered in white hirsute hairs. The pascal green tinged fawn style measures 6mm to 7.5mm in length. The flowers appear from late November through to early March.
The fruits of Davidsonia pruriens are an ovoid drupe measuring 35mm to 50mm long and 40mm to 60mm in diameter. The blue-green with a white waxy coating unripe fruit turns deep blue-black. The 1 or 2 flat, pink, pyrenes have 3 or 4 fimbriate or lacinate margins. The pyrenes reveal a solitary seed. The fruits appear from late April through to October.
Wildlife:
Davidsonia pruriens fruit is eaten by possums, native rats and was a staple part of the Australian Aborigines and first Europeans to settle in Australia. The caterpillar Anthela varia, consuming the leaves however damage has always been minimal.
Epidemiological studies indicate that populations consuming high levels of plant derived foods have low incidence rates of various cancers. Recent findings implicate a variety of phytochemicals, including phenolics, in these anticancer properties. Both monophenolic and polyphenolic compounds from a large variety of plant foods, spices and beverages have been shown to inhibit or attenuate the initiation, progression and spread of cancers in cells in vitro and in animals in vivo. https://pubmed.ncbi.nlm.nih.gov/21520702/
The following native Australian plants also contain high levels of both monophenolic and polyphenolic compounds Antidesma ereostre, Antidesma parvifolium, Terminalia ferdinandiana, Tasmannia lanceolata, Scaevola spinescens, Syzygium anisatum, Backhousia citriodora Leaves, Davidsonia pruriens, Davidsonia pruriens, Davidsonia jerseyana, Davidsonia. johnsonii and Pleiogynium timoriense.
Cultivation:
Davidsonia pruriens is a beautiful small narrow growing tree that can be placed in every native or exotic garden in the tropics to sub tropics or warm temperate zones which are free from frosts. It is ideal in almost every setting near ponds, at the edge of a rain forest in court yards, around swimming pools or in the orchard. It can be grown in frost prone areas as long as the frosts are not severe and it is protected in their early years of growth until the leaves are above the highest frosts.
If it is given adequate moisture, plenty of mulch for moisture retention and an even soil temperature, applying native fertilizers on a regular basis the plants will respond with good flowering over a long period and will yield good quality fruit with maximum size. I have always been amazed that Davidsonia pruriens are still not being farmed professionally on a large scale. The drupes have a flavour reminiscent of plums with the tartness of a lemon mixed together.
If it is placed around a pool or sunny courtyard try to plant 2 or 3 in a straight and spaced at regular intervals will produce an ideal formal look. For the more informal look plant them at different spacing or make a clump of 3 to 5 using curves for the natural look. The choice of companion plants with bright yellow to cream flowers beneath the trees once they have grown 2 or 3 meters will contrast the stark grey trunks beautifully when it is not in fruit or admirably as the deep purple black fruits mature. It would not matter whether fine or large leaf plants are used provided as long as they are a pale green or lime green for an all year contrast. Hibbertia species would look great on the ground and give the Davidsonia pruriens extra height. The slender growth habit would make small areas look larger and walls look longer.
It is best used adjacent to small areas of bush close to paths or the house so their deep purple fruits can be viewed regularly and picked before the birds begin to feed on them.
They often reach commence flowering from the third or fourth year.
For the orchard plant the trees in rows 4.5 meters apart and plant the trees 3 meters apart.
Propagation:
Seeds: Davidsonia pruriens’s seeds do not require treatment before sowing. Remove the flesh, wash and sow fresh seeds directly into a seed raising mix and cover with 10mm of the mix. When the seedlings are 25 to 50 mm tall, prick them out and plant them into 50mm native tubes using a seed raising mix. Alternatively place a seed directly into the 50mm native tubes.
Once the seedlings reach 150mm to 200mm in height plant them out into their permanent position. Mass plantings can be achieved by planting them at 3 meters to 4 meters apart. When planting for the fruit in an orchard, plant the seedlings at 4 meter centers so easy harvesting can take place.
Fertilize using Seaweed, fish emulsion or organic chicken pellets soaked in water on an alternate basis. Fertilize every two months until the plants are established then twice annually in early September and again in March to maintain health, vitality and better flowering.
Further Comments from Readers:
Hi reader, it seems you use The Bible of Botany a lot. That’s great as we have great pleasure in bringing it to you! It’s a little awkward for us to ask, but our first aim is to purchase land approximately 1,600 hectares to link several parcels of N.P. into one at The Pinnacles NSW Australia, but we need your help. We’re not salespeople. We’re amateur botanists who have dedicated over 30 years to saving the environment in a practical way. We depend on donations to reach our goal. If you donate just $5, the price of your coffee this Sunday, We can help to keep the planet alive in a real way and continue to bring you regular updates and features on Australian plants all in one Botanical Bible. Any support is greatly appreciated. Thank you.
In the spirit of reconciliation we acknowledge the Bundjalung, Gumbaynggirr and Yaegl and all aboriginal nations throughout Australia and their connections to land, sea and community. We pay our respect to their Elders past, present and future for the pleasures we have gained.

YuryaigirNational Park NSW
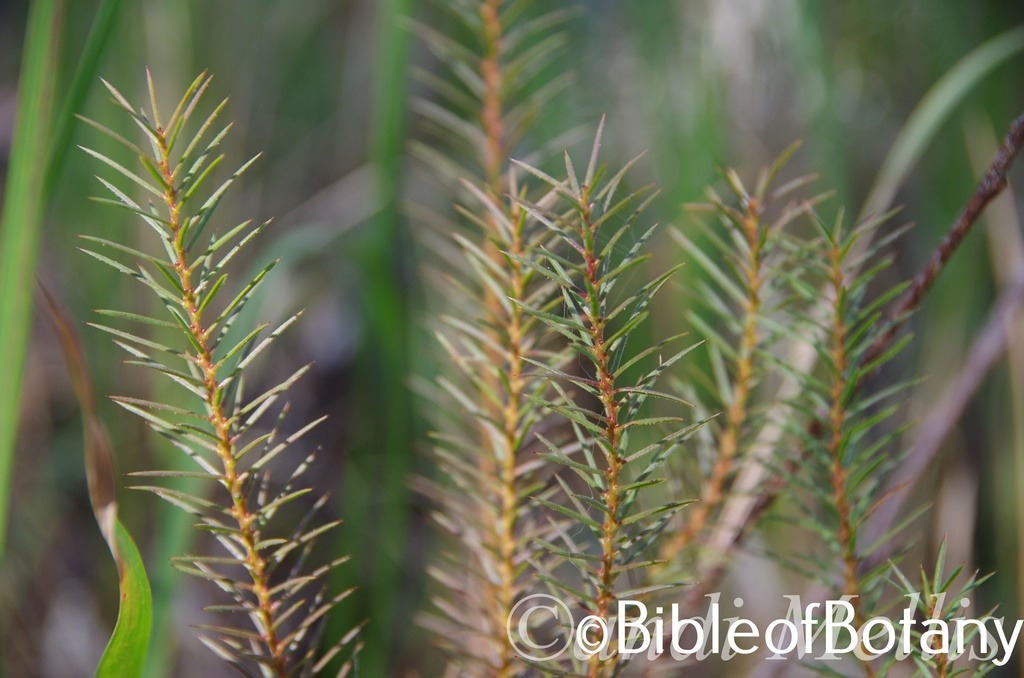
Yuryaigir National Park NSW
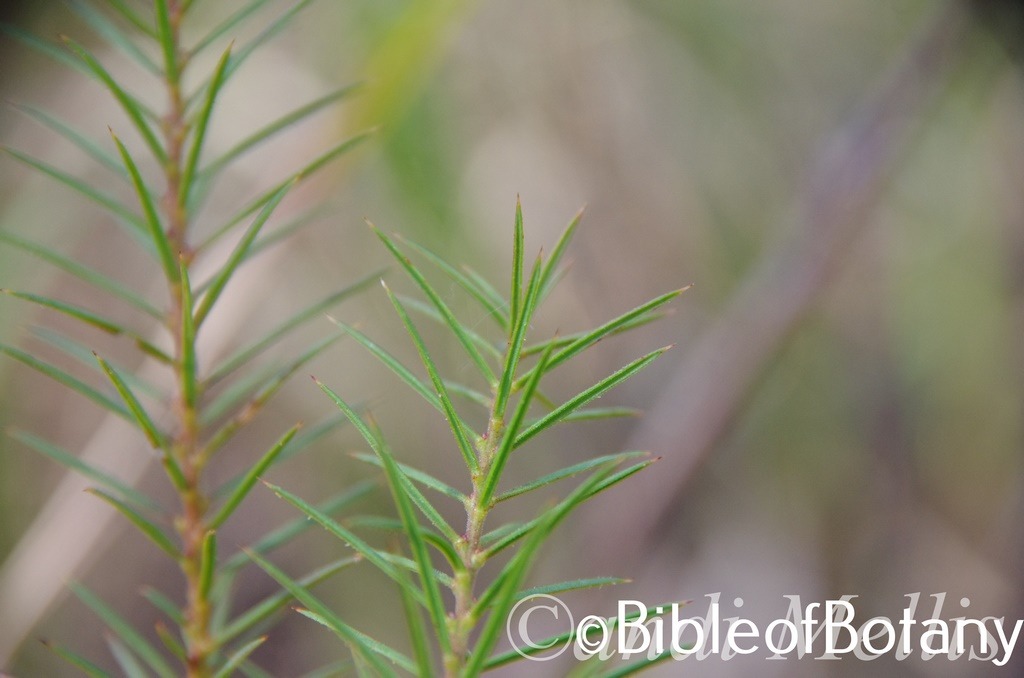
Yuryaigir National Park NSW
Daviesia acicularis
Classification
Unranked: Eudicots
Order: Fabales
Family: Fabaceae
Subfamily: Faboideae
Tribe: Mirbelieae
Genus: Is named in Honour of Hugh Davies; 1739-1821, who was a Welsh botanist who lived in Angelsea and translated the native plants into Welsh.
Species: From Acus/Acicula, which is Latin for needle or sharp, and Laris which is Latin for a shape. It refers to organ, which are needle sharp.
Common Name: Needle Daviesia.
Distribution:
Daviesia acicularis can be found south from Planet Creek to Charleville in central Queensland and Burrawantie 50 kilometers east of Enngonia then east of a line to Ben Boyde National Park in far south eastern New South Wales. It is mainly found west, on and east of the Great Dividing Range.
https://avh.ala.org.au/occurrences/search?taxa=Daviesia+acicularis#tab_mapView
Habitat Aspect Climate:
Daviesia acicularis prefers full sun to dappled shade. It grows in dry to moist open schlerophyll forests. It can be found on coastal hills to steep mountains and ridges from 5 meters ASL to 1,600 meters ASL.
The temperatures range from a low of minus 5 degrees in July to 40 degrees in January.
The rainfall is from lows of 400mm averages to 1500mm annually.
Soil Requirements:
Daviesia acicularis prefers shallow to deep sandier soils derived from decomposed sandstones or granites over the parent rocks. The soils pH ranges from 4.5pH to 7pH. It does not tolerate waterlogged soils. Non saline soils to moderately saline soils are tolerated as are salt laden winds.
Height & Spread:
Wild Plants: 0.5m to 1.2m by 0.3m to 1m
Characteristics:
Daviesia acicularis grows as a small multi stemmed erect shrub with. The glossy yellow-brown bark is hispid or rarely glabrous.
The crowded leaves of Daviesia acicularis are subulate or narrow linear to narrow-elliptic and measure 10mm to 40mm in length by 0.5mm to 4mm in width. The stipules are absent on this specie. The bases are truncate while the apex is pungently acute. The margins recurved to revolute, with very fine, scattered minute teeth. The mid vein is somewhat prominent on the upper lamina and is indistinct on the lower lamina.
The inflorescences of Daviesia acicularis are small racemes or reduced to a single flower born in the leaf axils. The rachises measures 1mm to 2mm in length, while the pedicels are sessile tomeasure 0.2mm in length. The individual flowers are typical legume and measure 6mm to 7mm in height by 8mm to 10mm in width. The calyx measures 3.5mm to 4.5mm in length including the receptacle which measures 0.6mm to 1.0 mm. The fine teeth are subequal with an acuminate apex. The flowers appear from late July in the north to October in southern populations.
Daviesia acicularis’s fruits are long flat pods. The glabrous, green and burgundy or green and maroon pods turn deep burgundy then brown on ripening. The pods measure 6mm to 9mm in length excluding the beak by 4mm to 7mm in width.
Wildlife:
Daviesia acicularis is a honey source for native bees and is a safe habitat to many small finches and other small birds which nest close to the ground.
Cultivation:
Daviesia acicularis is an ideal medium size shrub for native bush gardens. It is a good plant for frosty areas as it can stand frosts and temperatures down to minus 5 degrees. It is also drought tolerant once established and can cope with consistently low rainfall and is ideal on dry sandy escarpments, hills and ridges.
If it is given a little moisture, plenty of mulch for moisture retention and an even soil temperature, applying native fertilizers on an annual basis the plants will respond with exceptionally heavy flowering crops year after year. It often reaches its full potential in just 2 years and flowers from the first year from seed. In cultivation it will grow from 1.5 meter to 2 meters by 1 meters to 1.2 meters in diameter when grown in the open. It can be tip pruned to increase bushiness and flowering in the following season. Pruning should be done immediately after flowering has finished.
Planted in groups of 3 to 5 plants, back from a bend will become a very strong focal point in larger gardens particularly when in flower and gain a lot of attention whether you are coming or going because of the fresh clean look of the foliage even in the driest of times. Place it in the midground with large leaf, or fine leaf ground covers and very small shrubs or annuals in front. To the rear, use large leaf taller plants. Plants with pink, orange, red or purple flowers can be used in both the foreground and background. Plants with finer foliage in pale green or blue greys will also compliment the scene during periods when there are few flowers in the garden.
Daviesia acicularis is short lived shrub to around 10 years so should be replaced from the sixth to eighth year to retain vigorous growth in the garden.
Imagine a feature shrub in the centre of a bed or vehicle turn around with a mass planting of Daviesia aicularis planted out with mixed with a Hovea like Hovea acutifolia, Hovea australis or Hovea heterophylla in flower.
Propagation:
Seeds: Daviesia acicularis‘s seeds require treatment before sowing. Place the seeds into a container and pour off boiling water onto the seeds and allow the water to cool. Let the seeds soak for 8 to 10 hours. The seeds that have not swollen from 1.5 times to twice their original size after soaking should be retreated before sowing. The seeds that have swollen from 1.5 to 2 times their original size should be sown immediately. The seeds that have not swollen should again be retreated.
Note: Any seeds which are floating on the surface are infertile and should be discarded.
Seeds that have not swollen after repeating the boiling water technique could be treated using the abrasion technique.
This involves rubbing the seeds gently between two sheets of very fine sandpaper to reduce the thickness of the seed coat. What we did if there are large numbers of seeds to do is a glue sheet of medium corundum to the inside surfaces of a small disposable container. Place the seeds into the container and shake the container vigorously for several minutes. Check to see if the coating has been partially removed.
Sow the freshly treated seeds directly into a seed raising mix and cover with 2mm to5mm of the mix. Place the trays in a warm to hot airy position keeping them moist not wet. When the seedlings are 25mm to 50mm tall, prick them out and plant them into 50mm native tubes using a seed raising mix. Nip the tips out of those plants you want to grow as shrubs to help promote bushiness from an early stage.
Once the seedlings reach 150mm to 200mm in height again nip the tips out and plant them out into their permanent position.
Fertilize using Seaweed, fish emulsion or organic chicken pellets soaked in water on an alternate basis. Fertilize every two months until the plants are established then annually in early September to October to maintain health, vitality and better flowering.
Further Comments from Readers:
Hi reader, it seems you use The Bible of Botany a lot. That’s great as we have great pleasure in bringing it to you! It’s a little awkward for us to ask, but our first aim is to purchase land approximately 1,600 hectares to link several parcels of N.P. into one at The Pinnacles NSW Australia, but we need your help. We’re not salespeople. We’re amateur botanists who have dedicated over 30 years to saving the environment in a practical way. We depend on donations to reach our goal. If you donate just $5, the price of your coffee this Sunday, We can help to keep the planet alive in a real way and continue to bring you regular updates and features on Australian plants all in one Botanical Bible. Any support is greatly appreciated. Thank you.
In the spirit of reconciliation we acknowledge the Bundjalung, Gumbaynggirr and Yaegl and all aboriginal nations throughout Australia and their connections to land, sea and community. We pay our respect to their Elders past, present and future for the pleasures we have gained.
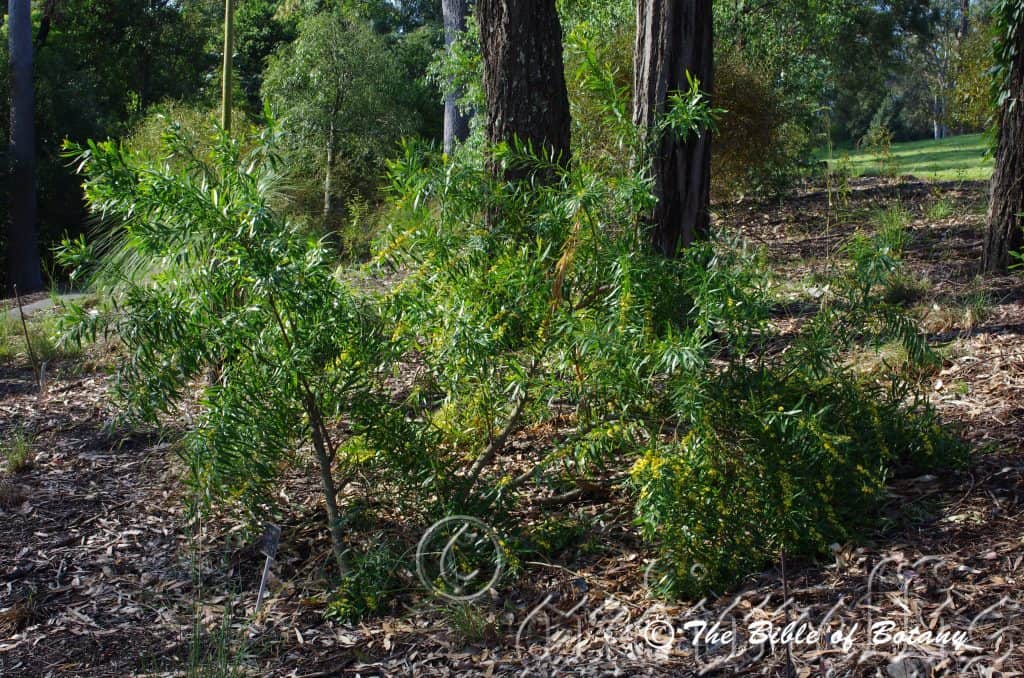
Mount Cootha Botanic Gardens Qld.
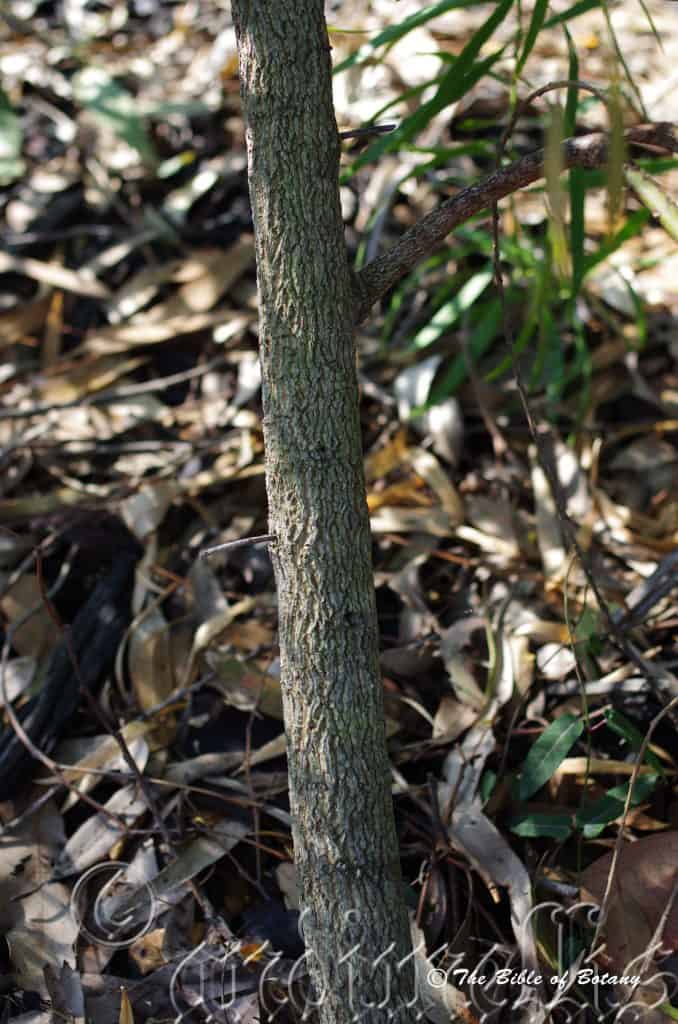
Mount Cootha Botanic Gardens Qld.
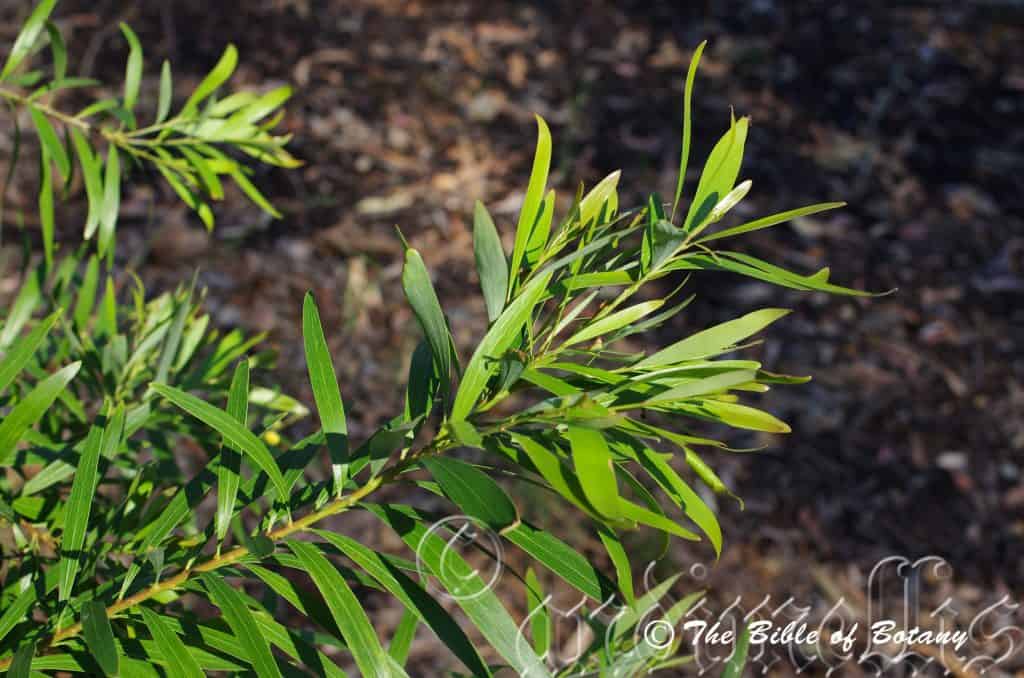
Mount Cootha Botanic Gardens Qld.
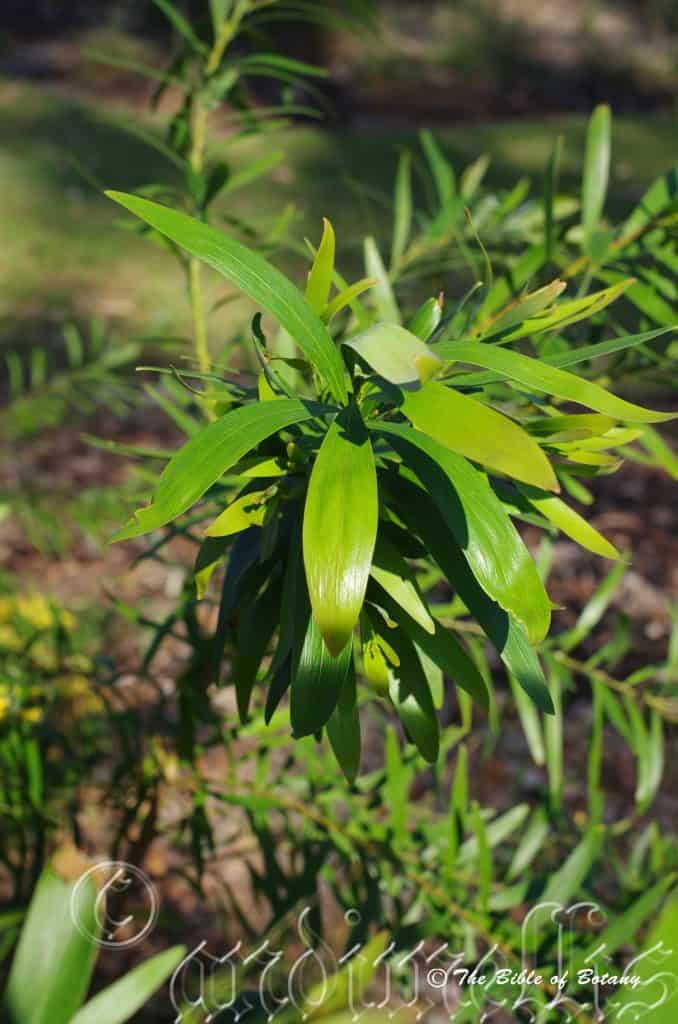
Mount Cootha Botanic Gardens Qld.
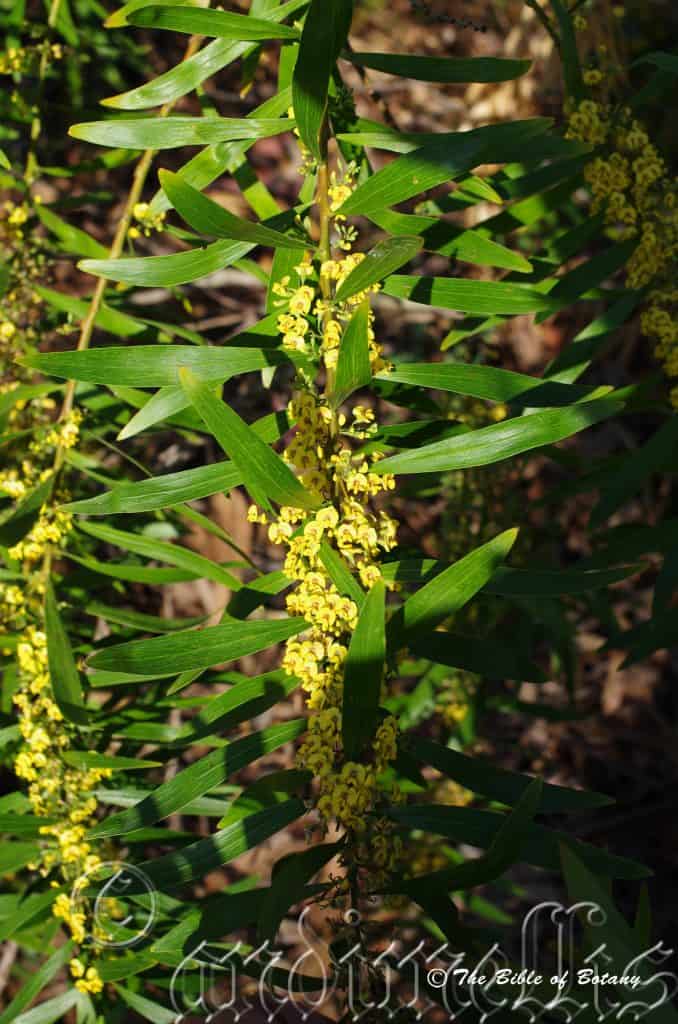
Mount Cootha Botanic Gardens Qld.
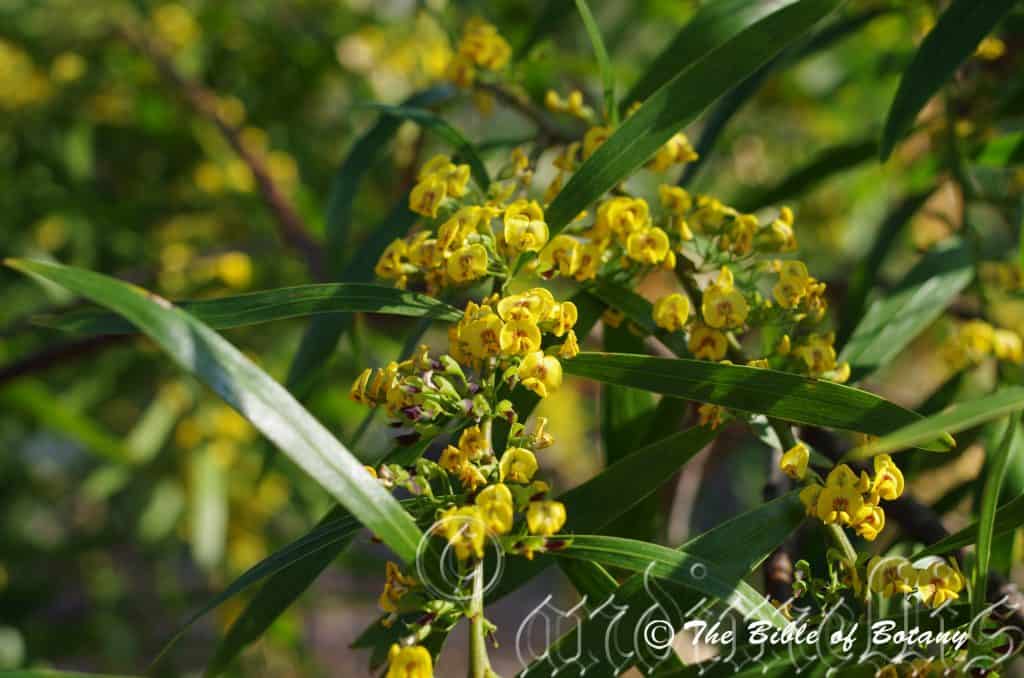
Mount Cootha Botanic Gardens Qld.
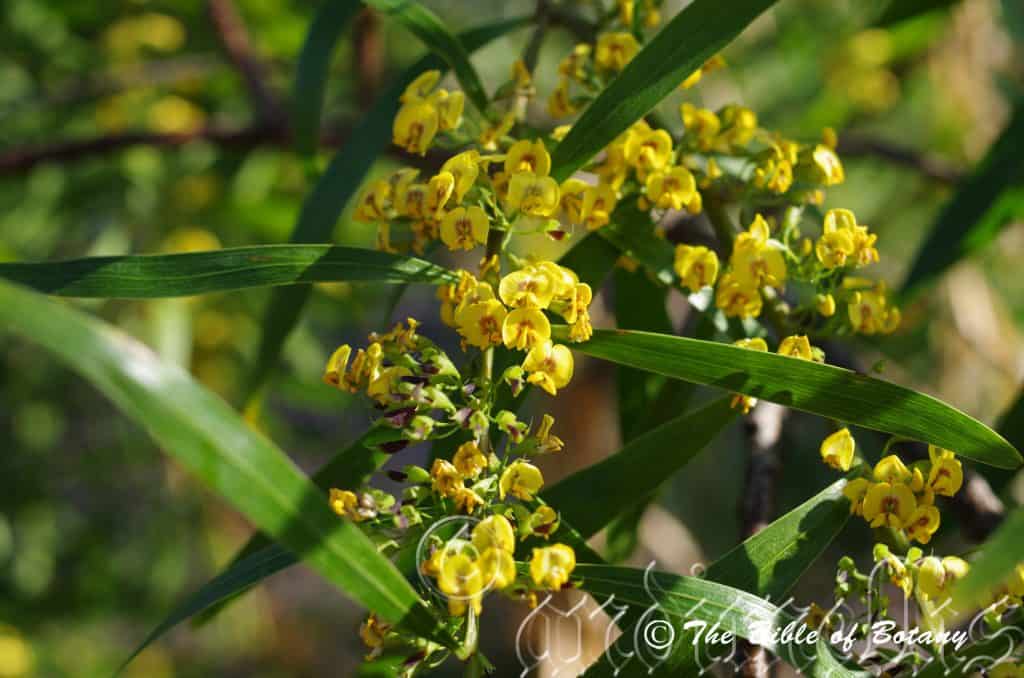
Mount Cootha Botanic Gardens Qld.
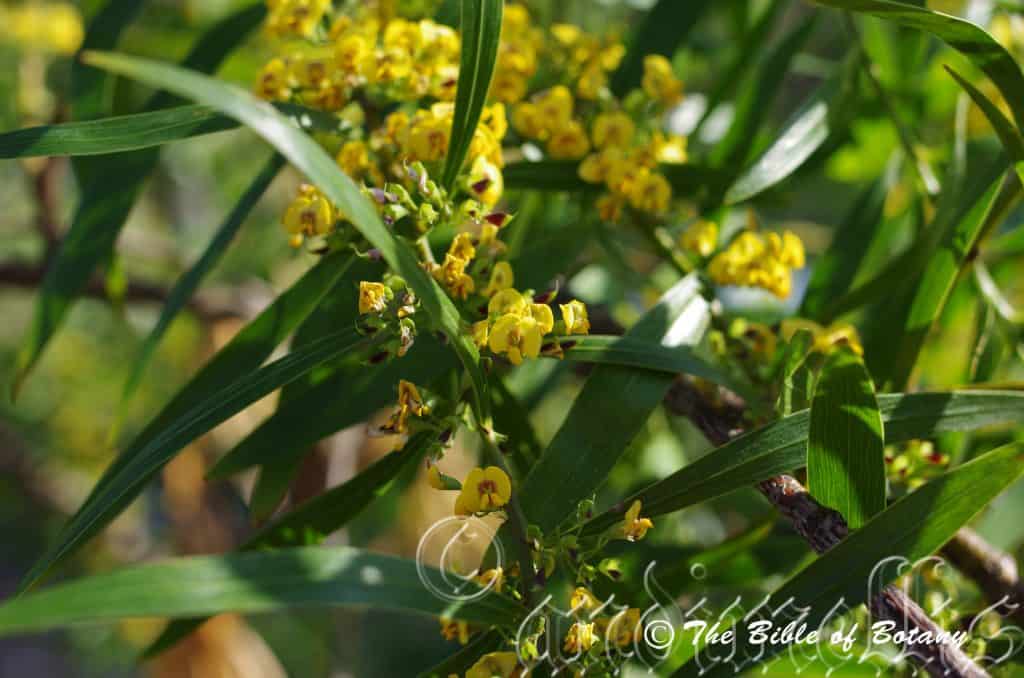
Mount Cootha Botanic Gardens Qld.
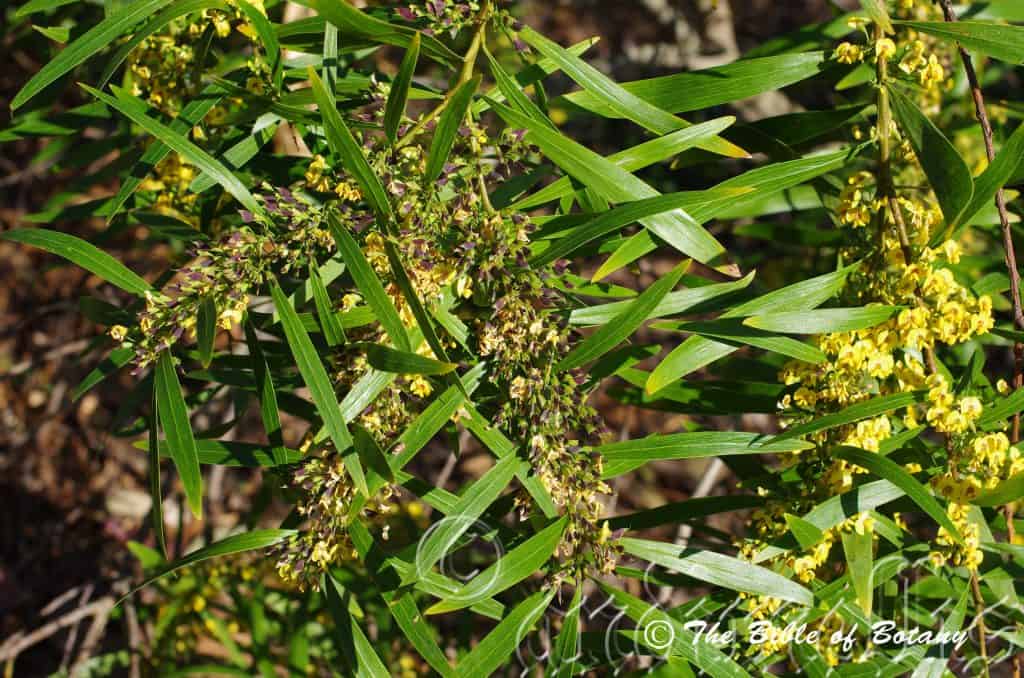
Mount Cootha Botanic Gardens Qld.
Daviesia arborea
Classification
Unranked: Eudicots
Order: Fabales
Family: Fabaceae
Subfamily: Faboideae
Tribe: Mirbelieae
Genus: Is named in Honour of Hugh Davies; 1739-1821, who was a Welsh botanist who lived in Angelsea and translated the native plants into Welsh.
Species: From Arborescent, which is Latin for a tree. It refers to plants, which have a typical tree like structure.
Common Name: Tree Pea.
Distribution:
Daviesia arborea can be found south from Dalby in south east Queensland to Comboyne New South Wales. It is mainly found on and east of the Great Dividing Range.
https://avh.ala.org.au/occurrences/search?taxa=Daviesia+arborea#tab_mapView
Habitat Aspect Climate:
Daviesia arborea prefers full sun to dappled shade. It grows in moist open schlerophyll forests. They can be found on coastal hills to steep mountains and ridges from 50 meters ASL to 1,100 meters ASL. It is found from 10 meters ASL to 150 meters ASL.
The temperatures range from a low of minus 3 degrees in July to 40 degrees in January.
The rainfall is from lows of 700mm to averages 1500mm annually.
Soil Requirements:
Daviesia arborea has no preferences for soil types as it grows in almost every soil type from sandy loams to heavy clays. The soils are derived from decomposed basalts, sandstones granites and metamorphic rocks. The soils pH ranges from 4.5pH to 7pH. It does not tolerate waterlogged soils. Non saline soils to very saline soils are tolerated as are salt laden winds. For a plant that has such a diverse soil preference it is surprising that it is not more widespread.
Height & Spread:
Wild Plants: 2m to 10m by 2.5m to 5m
Characteristics:
Daviesia arborea grows as a small multi stemmed shrub with arching stems close to the ground or as a small single trunk tree with pendulant branches. The corky bark on the trunk and main stems is pale grey to pale grey-fawn and deeply fissured longitudinally. Young shoots are deep grass-green glabrous, semi-glossy and tinged red to orange-red on the upper surface.
The alternate leaves of Daviesia arborea are broad linear to linear-elliptical, straight to slightly asymmetrical and measure 45mm to 120mm in length by 5mm to 12mm in width. The stipules are absent on this specie. The petiole like bases measures 1mm to 2.5mm in length. The bases are tapered to the short thick pulvinus while the apexes narrow obtuse. The discolourous laminas are mid grass-green to deep grass-green and glabrous on the upper laminas while the lower laminas are slightly paler. The laminas are flat while margins are entire. The mid vein and parallel veins are prominent on the upper laminas and are distinctly visible on the lower laminas. The venation is prominently reticulate and yet distinctly visible between the parallel veins.
The inflorescences of Daviesia arborea are small racemes of 8 to 15 flowers born in the leaf axils. The rachises measure 8mm to 21mm in length while the pedicels measure 2mm to 4mm in length. The individual flowers are typical legume and measure 6mm to 7mm in height by 8mm to 10mm in width. The lime-green calyxes measure 4mm to 5.5mm in length including the 1.5mm to 2mm receptacle. The upper pair of calyx lobes is united with an emarginated, truncate apex. The lower and lateral 4 calyx lobes are acute to obtuse. The lobes measure 1.5mm to 2mm in length.
The united, oval standard petals are yellow to orange with or without burgundy markings. The apexes are emarginated truncate. The standards measure 6mm to 7.5mm in height by 4.5mm to 5mm in width. The yellow, oblong wing petals run parallel to the keel and measure 6mm to 7mm in length by 4mm to 5mm in width. The yellow with red to burgundy or maroon keels measure 4.5mm to 5.5mm in length by 2.5mm to 3mmin height. Daviesia arborea flowers appear from late September to October.
Daviesia arborea’s fruits are long flat pods. The glabrous, green and burgundy or green and maroon pods turn deep burgundy then brown on ripening. The pods measure 7mm to 9mm in length by 4mm to 5.5mm in width.
Wildlife:
Daviesia arborea is a honey source for native bees and is a safe habitat to many small finches and other small birds which nest close to the ground.
Cultivation:
Daviesia arborea is ideal in large rockeries or native bush gardens where they can be mass planted. It is good plants in frosty areas as they can stand frosts and temperatures down to minus 3 degrees. It is also drought tolerant once established and can cope with consistently low rainfall and are ideal on dry sandy escarpments, hills and ridges.
If it is given adequate moisture, plenty of mulch for moisture retention and an even soil temperature, applying native fertilizers on a regular basis the plants will respond with exceptionally heavy flowering crops year after year. It often reaches its full potential in just 2 years and flower from the first year from seed. In cultivation it will grow from 1.5 meter to 2.5 meters by 1.5 meters to 2.5 meters in diameter when grown in the open. It can be tip pruned to increase bushiness and flowering in the following season. Pruning should be done immediately after flowering has finished.
Planted in groups of 3 to 5 plants, back from a bend will become a very strong focal point in larger gardens particularly when in flower and gain a lot of attention whether you are coming or going because of the fresh clean look of the foliage even in the driest of times. Place it in the midground with large leaf, or fine leaf ground covers and very small shrubs or annuals in front. To the rear, use large leaf taller plants. Plants with pink, orange, red or purple flowers can be used in both the foreground and background. Plants with finer foliage in pale green or blue greys will also compliment the scene during periods when there are few flowers in the garden.
Daviesia arborea is short lived to around 10 years so should be replaced from the sixth to eight year to retain vigorous growth in the garden.
Imagine a feature shrub in the centre of a bed or vehicle turn around with a mass planting of Daviesia arborea planted out with mixed with a Hovea like Hovea acutifolia, H. australis or Hovea heterophylla in flower.
Propagation:
Seeds: Daviesia arborea‘s seeds require treatment before sowing. Place the seeds into a container and pour boiling water onto the seeds and allow the water to cool. Let the seeds soak for 8 to 10 hours. The seeds that have not swollen from 1.5 times to twice their original size after soaking should be retreated before sowing. The seeds that have swollen from 1.5 to 2 times their original size should be sown immediately. The seeds that have not swollen should again be retreated.
Note: Any seeds which are floating on the surface are infertile and should be discarded.
Seeds that have not swollen after repeating the boiling water technique could be treated using the abrasion technique.
Alternatively the abrasion method has proven very successful for us. This involves rubbing the seeds gently between two sheets of very fine sandpaper to reduce the thickness of the seed coat. What we did if there are large numbers of seeds to do is a glue sheet of medium corundum to the inside surfaces of a small disposable container. Place the seeds into the container and shake the container vigorously for several minutes. Check to see if the coating has been partially removed.
Sow the freshly treated seeds directly into a seed raising mix and cover with 2mm to5mm of the mix. Place the trays in a warm to hot airy position keeping them moist not wet. When the seedlings are 25mm to 50mm tall, prick them out and plant them into 50mm native tubes using a seed raising mix. Nip the tips out of those plants you want to grow as shrubs to help promote bushiness from an early stage.
Once the seedlings reach 150mm to 200mm in height again nip the tips out and plant them out into their permanent position.
Fertilize using Seaweed, fish emulsion or organic chicken pellets soaked in water on an alternate basis. Fertilize every two months until the plants are established then annually in early September to October to maintain health, vitality and better flowering.
Further Comments from Readers:
Hi reader, it seems you use The Bible of Botany a lot. That’s great as we have great pleasure in bringing it to you! It’s a little awkward for us to ask, but our first aim is to purchase land approximately 1,600 hectares to link several parcels of N.P. into one at The Pinnacles NSW Australia, but we need your help. We’re not salespeople. We’re amateur botanists who have dedicated over 30 years to saving the environment in a practical way. We depend on donations to reach our goal. If you donate just $5, the price of your coffee this Sunday, We can help to keep the planet alive in a real way and continue to bring you regular updates and features on Australian plants all in one Botanical Bible. Any support is greatly appreciated. Thank you.
In the spirit of reconciliation we acknowledge the Bundjalung, Gumbaynggirr and Yaegl and all aboriginal nations throughout Australia and their connections to land, sea and community. We pay our respect to their Elders past, present and future for the pleasures we have gained.
Daviesia genistifolia
Classification
Unranked: Eudicots
Order: Fabales
Family: Fabaceae
Subfamily: Faboideae
Tribe: Mirbelieae
Genus: Is named in Honour of Hugh Davies; 1739-1821, who was a Welsh botanist who lived in Angelsea and translated the native plants into Welsh.
Species: From Genista, which is Latin for a broom and Folium, which is Latin for foliage. It refers to stems and leaves, which are like a broom.
Common Name: Broom Bitter Pea.
Distribution:
Daviesia genistifolia is found south from the Carnarvon Gorge in southern central Queensland to Mount Cunningham in southern New South Wales then west to the Grampians and Mount Gambier in south eastern South Australia.
It is also found south from Mount Livingstone to Kangaroo Island and far southern Eyre Peninsula in South Australia.
There are 2 small isolated populations in south western, Western Australia at Point Naturaliste and King George Sound.
https://avh.ala.org.au/occurrences/search?taxa=Daviesia+genistifolia#tab_mapView
Habitat Aspect Climate:
Daviesia genisitifolia prefers full sun to dappled shade. It grows in dry schlerophyll forests. It grows dry Eucalyptus forests, dry woodlands or savannah woodlands. It is found from 100 meters ASL to 1200 meters ASL.
The temperatures range from a low of minus 3 degrees in July to 40 degrees in January.
The rainfall is from lows of 180mm to averages 1400mm annually.
Soil Requirements:
Daviesia genistifolia has no preferences for soil types as it grows in almost every soil type from sandy loams to heavy clays. The soils can be derived from decomposed basalts, sandstones granites and metamorphic rocks. The soil PH ranges from 4.5pH to 6pH. It is not tolerant of waterlogged soils. Slightly saline soils are tolerated as are salt laden winds.
Height & Spread:
Wild Plants: 0.5m to 2m by 1m to 1.5m
Characteristics:
Daviesia genistifolia grows as a small multi stemmed shrub branching close to the ground. The bark is light grey and glabrous. Young shoots are dark green.
The alternate leaves of Daviesia genistifolia are terete or vertically compressed and measure 5mm to 30mm in length by 0.5mm to 1.2mm width at the base. The stipules are absent on this species while the leaves are sessile. The bases are spreading while the apexes taper from the base into a sharp, rigid spine. The concolourous laminas are grey-green to deep sea-green. The phyllodes margins are entire. The mid vein and lateral veins are not distinct on either surface.
The inflorescences of Daviesia genistifolia are small racemes of 2 to 6 flowers born in the leaf axils. The calyxes measure 2.2mm to 3.5mm in length including the 0.5mm to 1mm receptacle. The shallow teeth of the calyx measure 0.5mm to 0.6mm in length. The individual flowers are typical legume and measure 12mm to 15mm in height by 11mm to 15mm in width.
The oval standard petals are yellow to orange with or without burgundy markings. The united standards have an emarginated obtuse apex. The standards measure 15mm to 17mm in length by 4.5mm to 5mm in width. The linear wing petals run parallel to the keel and measure 4mm to 5mm in length by 1mm to 1.5mm in width. The discolourous keels are yellow to orange above and red, maroon or burgundy below measure 8mm to 10mm in length by 5mm to 6mmin height. The rachises measure 1mm to 8mm in length while the pedicels measure 0.5mm to 1.3mm in length. Daviesia genisitfolia’s flowers appear from late August through to October.
Daviesia genisitfolia‘s fruits are pods. The glabrous pods measure 8mm to 11mm long by 4mm to 8mm wide.
Wildlife:
Daviesia genistifolia is a honey source for native bees and is a safe habitat to many small finches including the Red Browed Finch, Neochmia temporalis, and other small birds which nest close to the ground.
Cultivation:
Daviesia genistifolia is pungent small shrub that should be placed away from paths and where children are likely to play in the garden. It is ideal on slopes and banks where it can be mass planted. It is a good plant in frosty areas as it can stand frosts and temperatures down to minus 5 degrees. It is also drought resistant once established and can cope with consistently low rainfall and are ideal on dry sandy escarpments, hills and ridges.
If it is given adequate moisture, plenty of mulch for moisture retention and an even soil temperature, applying native fertilizers on a regular basis the plants will respond with heavy flowering crops year after year. It oftens reaches its full potential in just 1 year and flower from the first year from seed. In cultivation it will grow from 1 meter to 1.5 meters by 1.5 meters in diameter. It can be pruned to increase bushiness and flowering in the following season. Pruning should be done immediately after flowering has finished.
Daviesia genistifolia is short lived to around 8 years so should be replaced from the sixth or seventh year to retain the flowering and habitat.
If dogs and cats are a problem then this is a great shrub to plant along the fence lines. The spines are a great deterrent for animals while harbouring small birds.
Imagine a feature shrub in the centre of a bed or vehicle turn around with a mass planting of Daviesia latifolia planted out at 1.5 meter to 1.8 meter centers mixed with a Hovea like Hovea acutifolia, H. australis or Hovea heterophylla in flower.
Propagation:
Seeds: Daviesia genistifolia‘s seeds require treatment before sowing. Place the seeds into a container and pour boiling water onto the seeds and allow the water to cool. Let the seeds soak for 8 to 10 hours. The seeds that have not swollen from 1.5 times to twice their original size after soaking should be retreated before sowing. The seeds that have swollen from 1.5 to 2 times their original size should be sown immediately. The seeds that have not swollen should again be retreated.
Note: Any seeds which are floating on the surface are infertile and should be discarded.
Seeds that have not swollen after repeating the boiling water technique could be treated using the abrasion technique.
Alternatively the abrasion method has proven very successful for us. This involves rubbing the seeds gently between two sheets of very fine sandpaper to reduce the thickness of the seed coat. What we did if there are large numbers of seeds to do is a glue sheet of medium corundum to the inside surfaces of a small disposable container. Place the seeds into the container and shake the container vigorously for several minutes. Check to see if the coating has been partially removed.
Sow the freshly treated seeds directly into a seed raising mix and cover with 2mm to5mm of the mix. Place the trays in a warm to hot airy position keeping them moist not wet. When the seedlings are 25mm to 50mm tall, prick them out and plant them into 50mm native tubes using a seed raising mix. Nip the tips out of those plants you want to grow as shrubs to help promote bushiness from an early stage.
Once the seedlings reach 150mm to 200mm in height again nip the tips out and plant them out into their permanent position.
Fertilize using Seaweed, fish emulsion or organic chicken pellets soaked in water on an alternate basis. Fertilize every two months until the plants are established then annually in early September to October to maintain health, vitality and better flowering.
Further Comments from Readers:
Hi reader, it seems you use The Bible of Botany a lot. That’s great as we have great pleasure in bringing it to you! It’s a little awkward for us to ask, but our first aim is to purchase land approximately 1,600 hectares to link several parcels of N.P. into one at The Pinnacles NSW Australia, but we need your help. We’re not salespeople. We’re amateur botanists who have dedicated over 30 years to saving the environment in a practical way. We depend on donations to reach our goal. If you donate just $5, the price of your coffee this Sunday, We can help to keep the planet alive in a real way and continue to bring you regular updates and features on Australian plants all in one Botanical Bible. Any support is greatly appreciated. Thank you.
In the spirit of reconciliation we acknowledge the Bundjalung, Gumbaynggirr and Yaegl and all aboriginal nations throughout Australia and their connections to land, sea and community. We pay our respect to their Elders past, present and future for the pleasures we have gained.
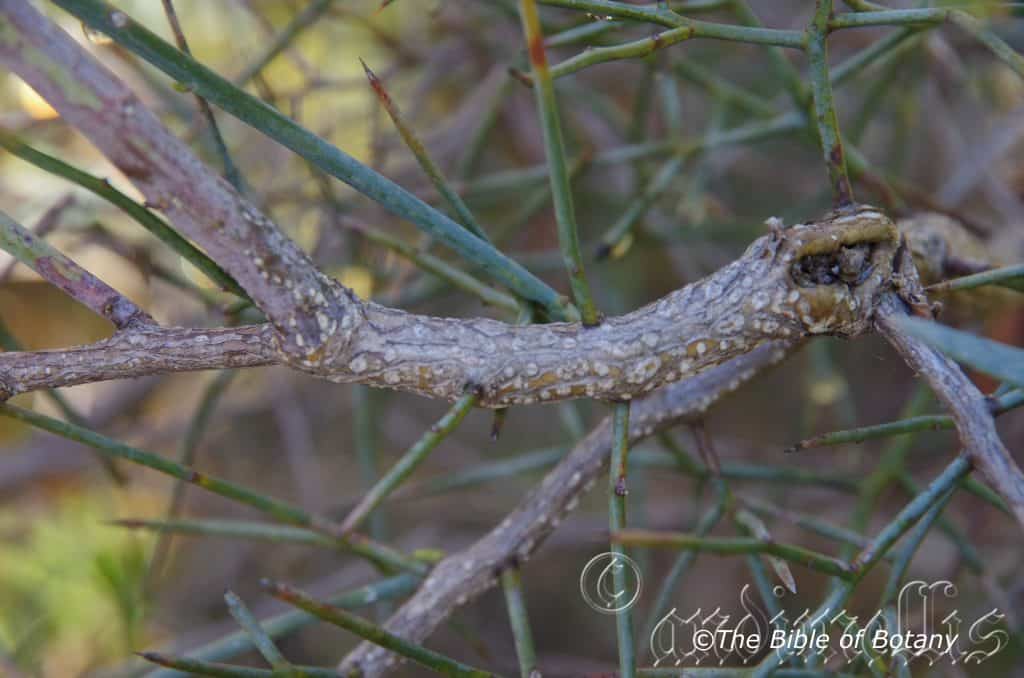
National Botanic Gardens ACT
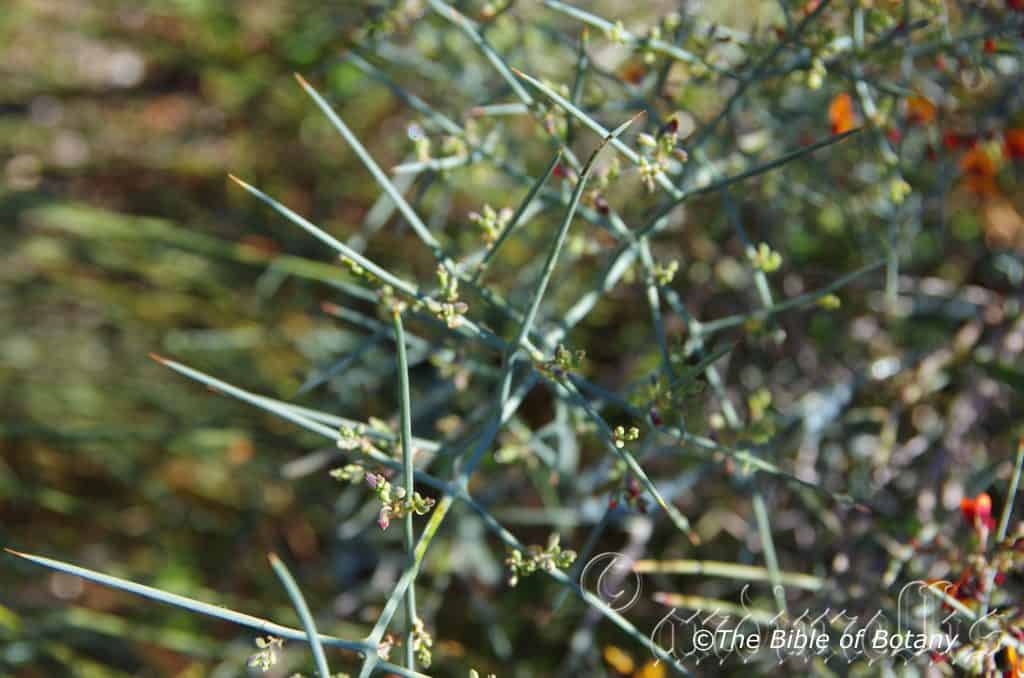
National Botanic Gardens ACT
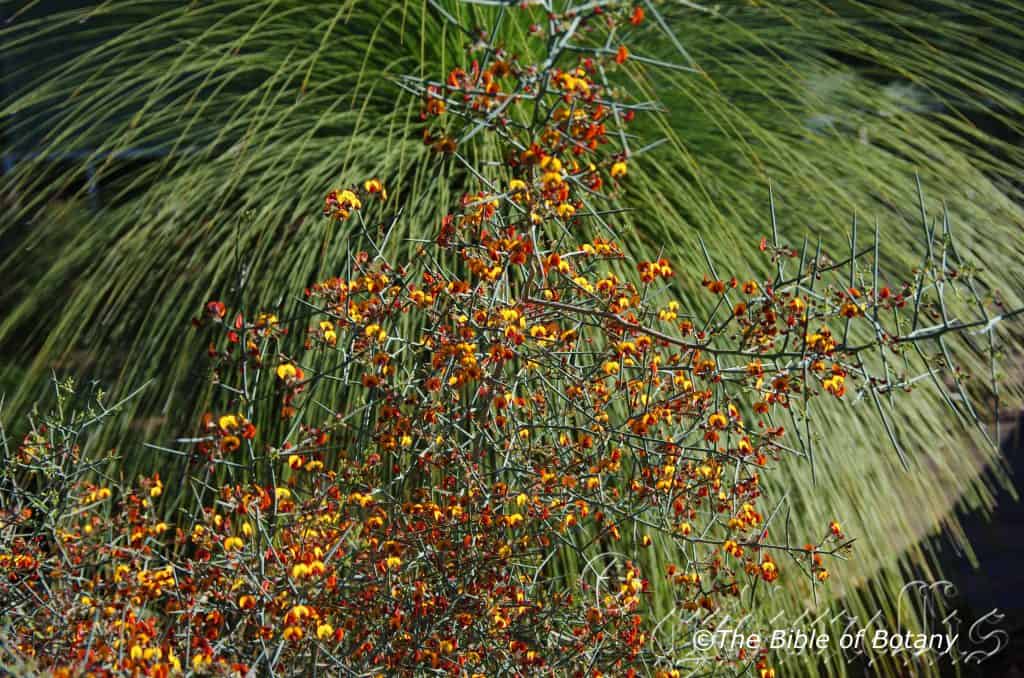
National Botanic Gardens ACT
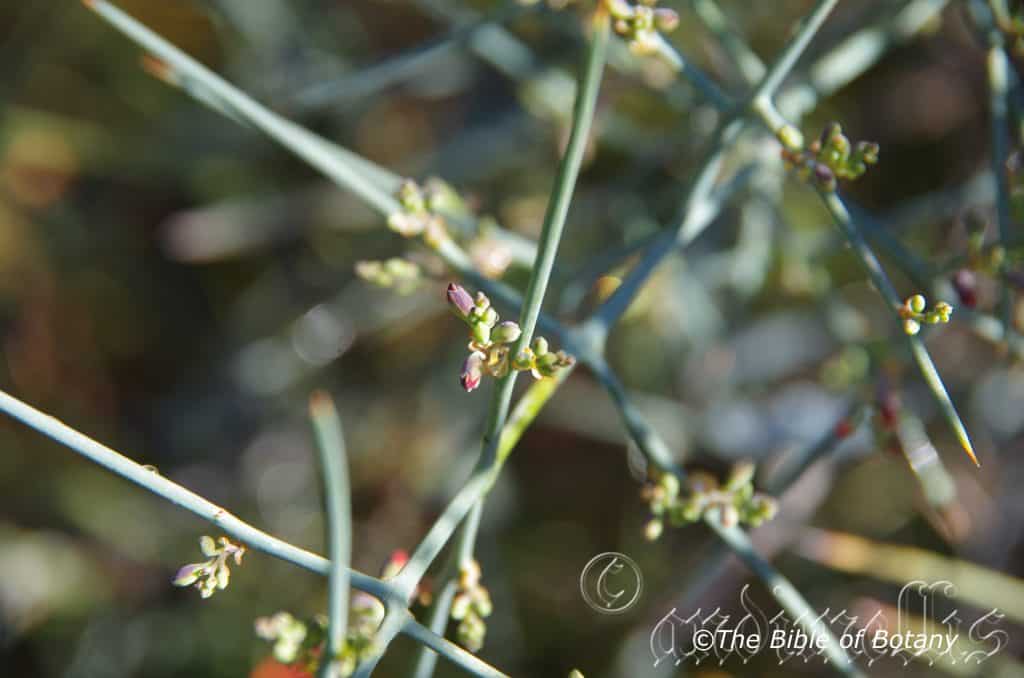
National Botanic Gardens ACT
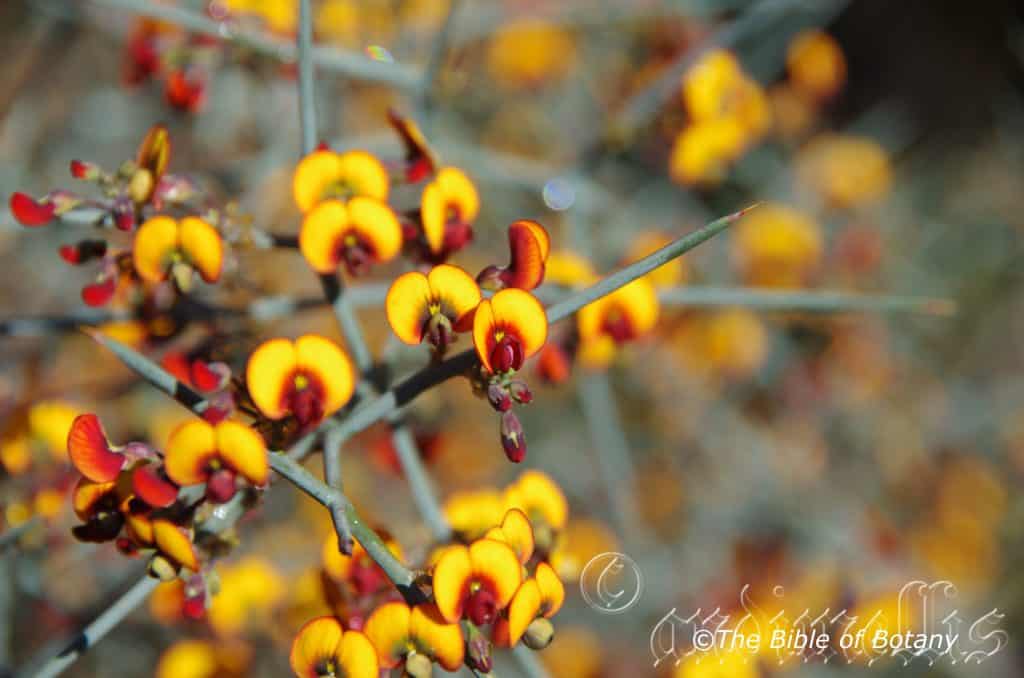
National Botanic Gardens ACT
Daviesia horrida
Classification
Unranked: Eudicots
Order: Fabales
Family: Fabaceae
Subfamily: Faboideae
Tribe: Mirbelieae
Genus: Is named in Honour of Hugh Davies; 1739-1821, who was a Welsh botanist who lived in Angelsea and translated the native plants into Welsh.
Species: From Horrida, which is Latin for dreadful, horrid, frightful. It refers to plants, which are horribly thorny, have stiff rigid spines that are unwecoming.
Common Name: Prickly Bitter Pea.
Distribution:
Daviesia horrida is found south from thre Darling Range to the Pallinup River in far south west of Western Australia.
https://avh.ala.org.au/occurrences/search?taxa=Daviesia+horrida#tab_mapView
Habitat Aspect Climate:
Daviesia horridia prefers full sun to dappled shade. It grows in dry schlerophyll woodlands on dry flats, hillsides and ridges. It is found from 5 meters ASL to 265 meters ASL.
The temperatures range from a low of minus 3 degrees in July to 40 degrees in January.
The rainfall is from lows of 450mm to averages 1200mm annually.
Soil Requirements:
Daviesia horrida has a preferences for lateritic and granitic soils from sandy loams to heavy clays. The soils are derived from decomposed sandstones and granites. The soil PH ranges from 4.5pH to 6pH. It is not tolerant of waterlogged soils. Slightly saline soils to moderately saline soils are tolerated.
Height & Spread:
Wild Plants: 0.5m to 2m by 1m to 2m
Characteristics:
Daviesia horrida is an erect spindly shrub with terete, glabrous stems.
The alternate simple leaves or phylloclades are clearly present not continuous with stem and measure 25mm to 145mm in length by 3mm to 20mm in width. The linear, flat leaves are glabrous with entire margins. The glabrous pedicels measure 4mm to 5.5mm in length.
The ribbed, glabrous calyx measure 3mm to 5mm length. The glabrous corolla is mostly yellow or orange, with some deeper yellow or orange spots, streaks or blotches measure 9mm to 11mm in length. The glabrous standard measures 8.5mm to 10mm in length, while the wings measure 6.5mm to 7.5mm in length and the keel measures 6.5mm to 7mm in length including the small beak. The 10 free filaments are alternate short and long and measure 6mm and 7 mm in length, while the anthers measure 0.2mm to 0.3mm long. The sessile to sub sessile, glabrous ovary supports the terete style that measures 7.5mm to 8mm in length. The flowers appear from July to November.
The glabrous sessile or subsessile pods or follicles measure 10mm to 18mm in length by 10mm to 20mm in width. The pods are not constricted between the seeds, flat or compressed.
Wildlife:
Daviesia horrida is a honey source for native bees and is a safe habitat to many small finches and other small birds which nest close to the ground.
Cultivation:
Daviesia horrida is pungent small shrub that should be placed away from paths and where children are likely to play in the garden. It is ideal on banks where individual plants can easily make a potent hedge.
If it is given a little water with a good layer of organic mulch and native fertilizers it will respond with heavy flowering crops year after year. It often reaches its full potential in just 2 years and flower from the first year from seed. In cultivation it will grow from 1.5 meter to 2 meters by 2 meters in diameter. It can be pruned to increase bushiness and flowering in the following season. Pruning should be light and done immediately after flowering has finished.
Daviesia horrida is short lived to around 8 years so should be replaced from the sixth or seventh year to retain the flowering and habitat.
If dogs and cats are a problem then this is a great shrub to plant along the fence lines. The spines are a great deterrent for animals while harbouring small birds.
Imagine a feature 2 or 3 shrubs in the centre of a bed or vehicle turn around with a mass planting of annuals planted forming circle.
Propagation:
Seeds: Daviesia horridas seeds require treatment before sowing. Place the seeds into a container and pour boiling water onto the seeds and allow the water to cool. Let the seeds soak for 8 to 10 hours. The seeds that have not swollen from 1.5 times to twice their original size after soaking should be retreated before sowing. The seeds that have swollen from 1.5 to 2 times their original size should be sown immediately. The seeds that have not swollen should again be retreated.
Note: Any seeds which are floating on the surface are infertile and should be discarded.
Seeds that have not swollen after repeating the boiling water technique could be treated using the abrasion technique.
Alternatively the abrasion method has proven very successful for us. This involves rubbing the seeds gently between two sheets of very fine sandpaper to reduce the thickness of the seed coat. What we did if there are large numbers of seeds to do is a glue sheet of medium corundum to the inside surfaces of a small disposable container. Place the seeds into the container and shake the container vigorously for several minutes. Check to see if the coating has been partially removed.
Sow the freshly treated seeds directly into a seed raising mix and cover with 2mm to5mm of the mix. Place the trays in a warm to hot airy position keeping them moist not wet. When the seedlings are 25mm to 50mm tall, prick them out and plant them into 50mm native tubes using a seed raising mix. Nip the tips out of those plants you want to grow as shrubs to help promote bushiness from an early stage.
Once the seedlings reach 150mm to 200mm in height again nip the tips out and plant them out into their permanent position.
Fertilize using Seaweed, fish emulsion or organic chicken pellets soaked in water on an alternate basis. Fertilize every two months until the plants are established then annually in early September to October to maintain health, vitality and better flowering.
Further Comments from Readers:
Hi reader, it seems you use The Bible of Botany a lot. That’s great as we have great pleasure in bringing it to you! It’s a little awkward for us to ask, but our first aim is to purchase land approximately 1,600 hectares to link several parcels of N.P. into one at The Pinnacles NSW Australia, but we need your help. We’re not salespeople. We’re amateur botanists who have dedicated over 30 years to saving the environment in a practical way. We depend on donations to reach our goal. If you donate just $5, the price of your coffee this Sunday, We can help to keep the planet alive in a real way and continue to bring you regular updates and features on Australian plants all in one Botanical Bible. Any support is greatly appreciated. Thank you.
In the spirit of reconciliation we acknowledge the Bundjalung, Gumbaynggirr and Yaegl and all aboriginal nations throughout Australia and their connections to land, sea and community. We pay our respect to their Elders past, present and future for the pleasures we have gained.
Daviesia latifolia
Classification
Unranked: Eudicots
Order: Fabales
Family: Fabaceae
Subfamily: Faboideae
Tribe: Mirbelieae
Genus: Is named in Honour of Hugh Davies; 1739-1821, who was a Welsh botanist who lived in Angelsea and translated the native plants into Welsh.
Species: From Latus, which is Latin for broad and Folium, which is Latin for foliage. It refers to leaves, which are very broad or very broad when compared to other species in the genus.
Common Name: Hop Bitter Pea.
Distribution:
Daviesia latifolia is found south from Dalby in south eastern Queensland to the Grampians in south western Victoria. There are 2 disjunct populations found in far northern Queensland one at Cape Sidmouth with the second being confusing at Mount Morgan near Richmond which does not correlate exactly marked as orange on the map. It is found from the coast to the western slopes of the Great Dividing Range.
It is also found on the eastern two thirds of Tasmania.
https://avh.ala.org.au/occurrences/search?taxa=Daviesia+latifolia#tab_mapView
Habitat Aspect Climate:
Daviesia latifolia prefers full sun to dappled shade. It grows in moist open schlerophyll forests and woodlands. It grows on coastal hills to steep mountains, ridges or spurs. The altitude ranges from5 meters ASL to 1800 meters ASL.
The temperatures range from a low of minus 3 degrees in July to 40 degrees in January.
The rainfall ranges from 400mm to averages 600mm annually. The lower rainfall areas associated with the plants from Tasmania and the Grampians in Victoria are on mountain slopes where orographic precipitation occurs.
Soil Requirements:
Daviesia latifolia prefers sand to light gritty clays or fatty sands. The soils are derived from decomposed sandstone, granites and gritty shale. The soils pH ranges from 4.5pH to 7pH. It does not tolerate waterlogged soils. Non saline soils to moderately saline soils are tolerated as are salt laden winds. For a plant that has such a diverse distribution it is surprising narrow in its selection of soil types.
Height & Spread:
Wild Plants: 1m to 3m but at rare times to 5m by 2m to 4m
Characteristics:
Daviesia latifolia grows as a small multi stemmed shrub with semi erect stems close to the ground. The bark on the stems is pale grey to pale grey-fawn and scabrous to glabrous. Young shoots are olive-green to grey-green, glabrous, dull and tinged red to orange-red on the upper surface.
The alternate leaves of Daviesia latifolia are broad ovate-elliptical, elliptical or lanceolate and measure 20mm to 140mm in length by 5mm to 50mm in width. The stipules are absent on this species. The petiole like bases measure 3mm to 12mm in length. The bases are tapered to cuneate or attenuate while the apexes are obtuse, broad acute to broad acuminate. The discolourous or concolourous laminas are grey-green to dull olive-green and/or slightly glaucous and glabrous on the upper laminas while the lower laminas are slightly paler. The laminas are flat or recurve slightly to strongly upwards from the mid vein to the margins and decurve slightly to strongly to the apex. The laminas are also slightly to strongly undulating. The phyllode’s margins are finely crenulate. The mid vein and main reticulated lateral veins are prominent on the upper laminas and are distinctly visible on the lower laminas.
The inflorescences of Daviesia latifolia are small racemes of 18 to 35 flowers born in the leaf axils. The rachises and pedicels are grey-green to olive green and glabrous. The rachis measures 25mm to 85mm in length while the pedicels measure 8mm to 20mm in length. The linear to narrow lanceolate bract at the base of each flower measures 1mm to 2mm in length.
The individual flowers are typical legume and measure 6mm to 8mm in height by 9mm to 12mm in width. The deep red-maroon, lime-green or lime-green tinged orange or red calyxes measure 2.4mm to 3.5mm in length including the 0.6mm to 1mm receptacle. The upper pair of calyx lobes are united with an obtuse-truncate apex. The lower and lateral 4 calyx lobes are acute. The lobes measure 0.6mm to 1mm in length. The united, broad ovate standard petals have an emarginated obtuse apex. The standards are yellow to orange with red, maroon or burgundy markings near the base. The standards measure 6mm to 7mm in height by 4.5mm to 6mm in width. The yellow, oblong wing petals run parallel to the keel and are splashed with red, maroon or orange near the base. The wing petals measure 5mm to 6mm in length by 4mm to 5mm in width. The deep red to burgundy or maroon keels measure 4.5mm to 5mm in length by 2mm to 3mm in height. Daviesia latifolia’s lightly perfumed flowers appear from September to December.
Daviesia latifolia’s fruits are rounded triangular flat pods. The glabrous, reddish-brown to burgundy brownish-maroon pods turn brown on ripening. The pods measure 7mm to 9mm in length by 4.5mm to 7mm in width.
Wildlife:
Daviesia latifolia is a honey source for native bees and is a safe habitat to many small finches and other small birds which nest close to the ground. It also attracts butterflies to feed on the nectar.
Cultivation:
Daviesia latifolia is ideal in medium to large native bush gardens where it can be mass planted. It is good for planting in frosty areas as it can stand frosts and temperatures down to minus 5 degrees. It is also drought tolerant once established and can cope with consistently low rainfall and is ideal on dry sandy escarpments, hills and ridges.
If a little attention is given to magination it can be utilised as a feature shrub in the centre of a heath bed with other taller heath plants like Hovea acutifolia, H. australis, Hovea heterophylla, Hardenbergia violacea or red or pink dwarf Grevillea specie like Grevillea sericea.
Daviesia latifolia is short lived to around 10 years so should be replaced from the sixth to eight year to retain vigorous growth in the garden.
Propagation:
Seeds: Daviesia latifolia‘s seeds require treatment before sowing. Place the seeds into a container and pour boiling water onto the seeds and allow the water to cool. Let the seeds soak for 4 to 10 hours. The seeds that have not swollen repeat the process.
Note, that any seeds which are floating on the surface are infertile and should be discarded.
Sow the freshly treated seeds directly into a seed raising mix and cover with 2mm to 5mm of the mix. Place the trays in a warm to hot airy position keeping them moist not wet. When the seedlings are 25mm to 50mm tall, prick them out and plant them into 50mm native tubes using a seed raising mix. Nip the tips out of those plants you want to grow as shrubs to help promote bushiness from an early stage.
Once the seedlings reach 150mm to 200mm in height again nip the tips out and plant them out into their permanent position.
Fertilize using Seaweed, fish emulsion or organic chicken pellets soaked in water and apply the liquid on an alternate basis. Fertilize every 2 months until the plants are established then annually in early September to October to maintain health, vigour and better flowering.
Further Comments from Readers:
Hi reader, it seems you use The Bible of Botany a lot. That’s great as we have great pleasure in bringing it to you! It’s a little awkward for us to ask, but our first aim is to purchase land approximately 1,600 hectares to link several parcels of N.P. into one at The Pinnacles NSW Australia, but we need your help. We’re not salespeople. We’re amateur botanists who have dedicated over 30 years to saving the environment in a practical way. We depend on donations to reach our goal. If you donate just $5, the price of your coffee this Sunday, We can help to keep the planet alive in a real way and continue to bring you regular updates and features on Australian plants all in one Botanical Bible. Any support is greatly appreciated. Thank you.
In the spirit of reconciliation we acknowledge the Bundjalung, Gumbaynggirr and Yaegl and all aboriginal nations throughout Australia and their connections to land, sea and community. We pay our respect to their Elders past, present and future for the pleasures we have gained.
Daviesia nova-anglica
Classification
Unranked: Eudicots
Order: Fabales
Family: Fabaceae
Subfamily: Faboideae
Tribe: Mirbelieae
Genus: Is named in Honour of Hugh Davies; 1739-1821, who was a Welsh botanist who lived in Angelsea and translated the native plants into Welsh.
Species: From Novae/Novus, which is Latin for new and Anglica, which is Latin for England. It refers to many plants, which originate from the New England Plateau in north eastern New South Wales.
Common Name: Prickly Pea.
Distribution:
Daviesia nova-anglica is found south from near Warwick in southern Queensland to Warialda in northern New South Wales. It is found on the Great Dividing Range.
https://avh.ala.org.au/occurrences/search?taxa=Daviesia+nova-anglica#tab_mapView
Habitat Aspect Climate:
Daviesia nova-anglica prefers full sun to dappled shade. It grows in dry sclerophyll forests dry heaths and open woodlands. It is found from 10 meters ASL to 800 meters ASL.
The temperatures range from a low of minus 3 degrees in July to 38 degrees in January.
The rainfall is from lows of 500mm to averages 1200mm annually.
Soil Requirements:
Daviesia nova-anglica prefers coarse to fine sandy loams to light gritty clays. The soils are usually derived from decomposed granites and sandstone. The soils pH ranges from 4.5pH to 6pH. It does not tolerate waterlogged soils. Non saline to moderately saline soils are tolerated as are salt laden winds.
Height & Spread:
Wild Plants: 0.5m to 3m by 1m to 2m
Characteristics:
Daviesia nova-anglica grows as a small multi stemmed shrub with arching branching close to the ground. The bark is light grey and glabrous. Young shoots are dark green and covered in brown hispid hairs.
The alternate leaves of Daviesia nova-anglica are terete or vertically compressed leaves and measure 5mm to 12mm in length by 2.5mm to 6mm width at the base. The stipules are absent on this species. The petioles measure 0mm to 0.5mm in length. The bases are subcordate to truncate while the apexes are broad acute to short acuminate ending in a short, sharp spine. The concolourous laminas are deep green to sea-green and glabrous. The laminas are flat. The phyllode’s margins are usually flat or at times recurve to revolute entire and glabrous or covered in short hispid hairs. The mid vein is prominent on the upper lamina and is visible on the lower lamina. The lateral veins are prominent near the bases on the upper laminas and are faintly visible on the lower lamina. The veins are covered in fawn to brown hispid hairs on both laminas.
The inflorescences of Daviesia nova-anglica are usually born singularly or on a small raceme of 2 flowers from the leaf axils. The mid green rachises and pedicels are glabrous. The rachis measures 3mm to 6mm in length while the pedicels measure 4mm to 10mm in length. The linear to narrow lanceolate bracts at the base of each flower measures 1mm to 1.5mm in length by o.5mm to 0.8mm in width.
The individual flowers are typical legume and measure 6mm to 8mm in height by 9mm to 12mm in width. The mid green calyxes measure 2.7mm to 3mm in length including the 0.5mm to 0.8mm receptacle. The upper pair of calyx lobes are united with an emarginate truncate apex. The lower and lateral 4 calyx lobes are acute. The lobes measure 0.6mm to 1mm in length. The united, broad ovate standard petals are yellow to orange with red, maroon or burgundy markings near the base. The standards measure 7mm to 9mm in height by 7mm to 8mm in width. The yellow, oblong wing petals run parallel to the keel and are splashed with red, maroon or orange near the base. The wing petals measure 6mm to 7mm in length by 5mm to 6mm in width. The deep red to burgundy or maroon keels measure 5mm to 6mm in length by 2.5mm to 3.5mm in height. Daviesia nova-anglica‘s flowers appear from August to October.
Daviesia nova-anglica’s fruits are rounded triangular flat pods. The glabrous, reddish-brown to burgundy brownish-maroon pods turn brown on ripening. The pods measure 6mm to 7mm in length by 4.5mm to 6mm in width.
Wildlife:
Daviesia nova-anglica is a honey source for native bees and is a safe habitat to many small finches and other small birds which nest close to the ground. The small brown butterfly Neolucia agricola occidens, frequently is seen on the plants.
Cultivation:
Daviesia nova-anglica is ideal in medium to large native bush gardens where it can be mass planted. It is good for planting in frosty areas as it can stand frosts and temperatures down to minus 5 degrees. It is also drought tolerant once established and can cope with consistently low rainfall and is ideal on dry sandy escarpments, hills and ridges.
If a little attention is given to laying organic mulches and watering, allowing it to dry out between waterings will see it thrive. Use other taller heath plants like with purple flowers like Hovea acutifolia, H. australis, Hovea heterophylla, Hardenbergia violacea or red or pink dwarf Grevillea species like Grevillea sericea.
Daviesia latifolia is short lived to around 10 years so should be replaced from the sixth to eight year to retain vigorous growth in the garden.
Propagation:
Seeds: Daviesia nova-anglica‘s seeds require treatment before sowing. Place the seeds into a container and pour boiling water onto the seeds and allow the water to cool. Let the seeds soak for 4 to 10 hours. The seeds that have not swollen repeat the process.
Note, that any seeds which are floating on the surface are infertile and should be discarded.
Sow the freshly treated seeds directly into a seed raising mix and cover with 2mm to 5mm of the mix. Place the trays in a warm to hot airy position keeping them moist not wet. When the seedlings are 25mm to 50mm tall, prick them out and plant them into 50mm native tubes using a seed raising mix. Nip the tips out of those plants you want to grow as shrubs to help promote bushiness from an early stage.
Once the seedlings reach 150mm to 200mm in height again nip the tips out and plant them out into their permanent position.
Fertilize using Seaweed, fish emulsion or organic chicken pellets soaked in water and apply the liquid on an alternate basis. Fertilize every 2 months until the plants are established then annually in early September to October to maintain health, vigour and better flowering.
Further Comments from Readers:
Hi reader, it seems you use The Bible of Botany a lot. That’s great as we have great pleasure in bringing it to you! It’s a little awkward for us to ask, but our first aim is to purchase land approximately 1,600 hectares to link several parcels of N.P. into one at The Pinnacles NSW Australia, but we need your help. We’re not salespeople. We’re amateur botanists who have dedicated over 30 years to saving the environment in a practical way. We depend on donations to reach our goal. If you donate just $5, the price of your coffee this Sunday, We can help to keep the planet alive in a real way and continue to bring you regular updates and features on Australian plants all in one Botanical Bible. Any support is greatly appreciated. Thank you.
In the spirit of reconciliation we acknowledge the Bundjalung, Gumbaynggirr and Yaegl and all aboriginal nations throughout Australia and their connections to land, sea and community. We pay our respect to their Elders past, present and future for the pleasures we have gained.
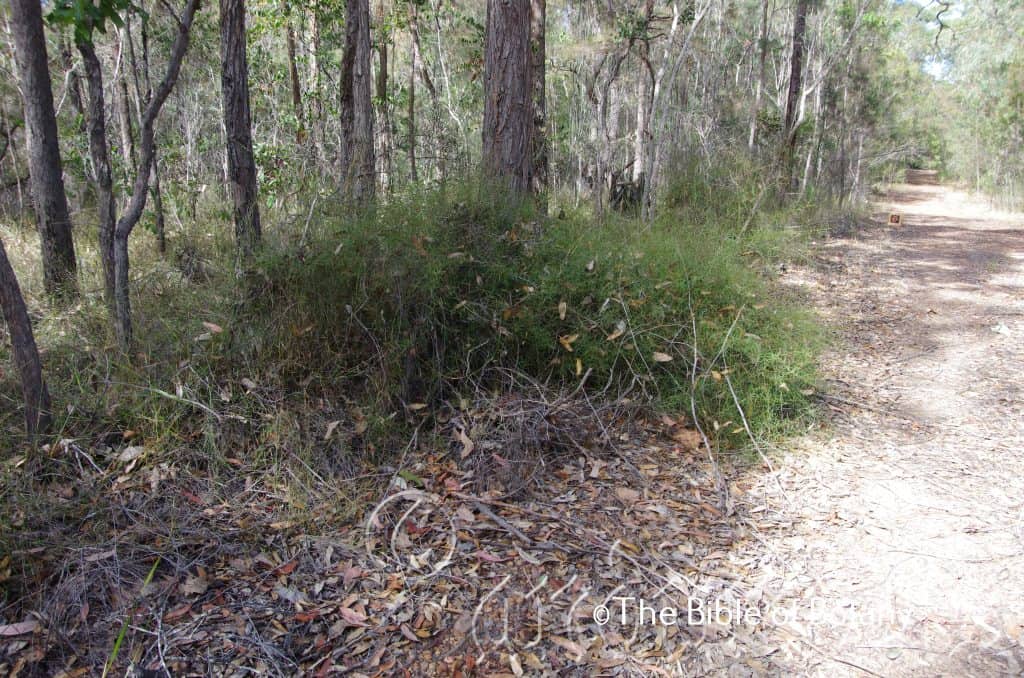
The Pinnacles NSW
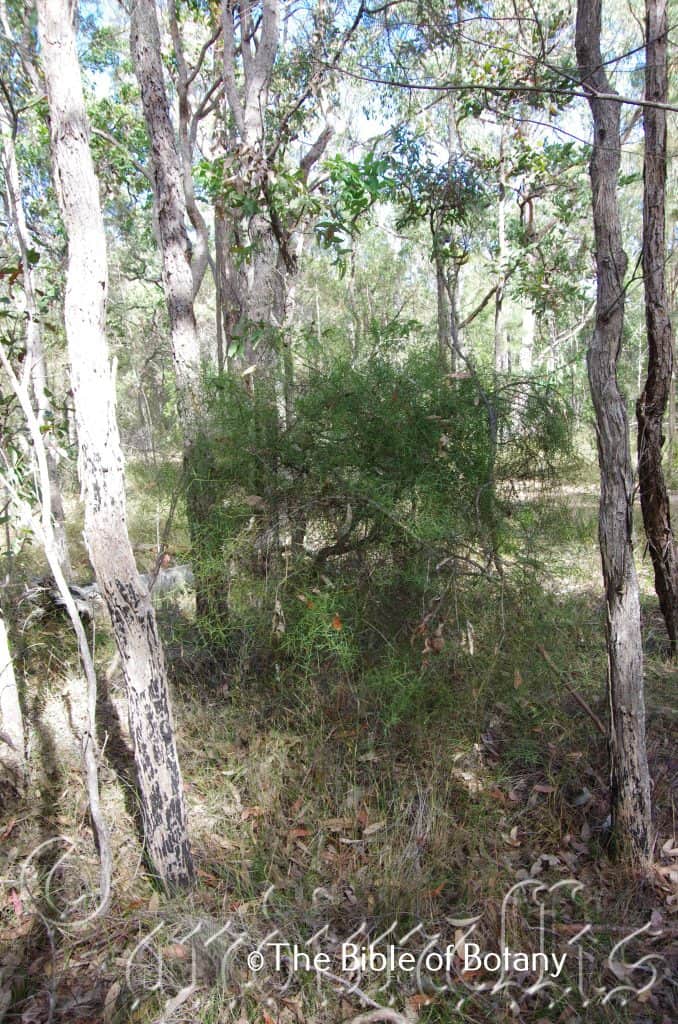
The Pinnacles NSW
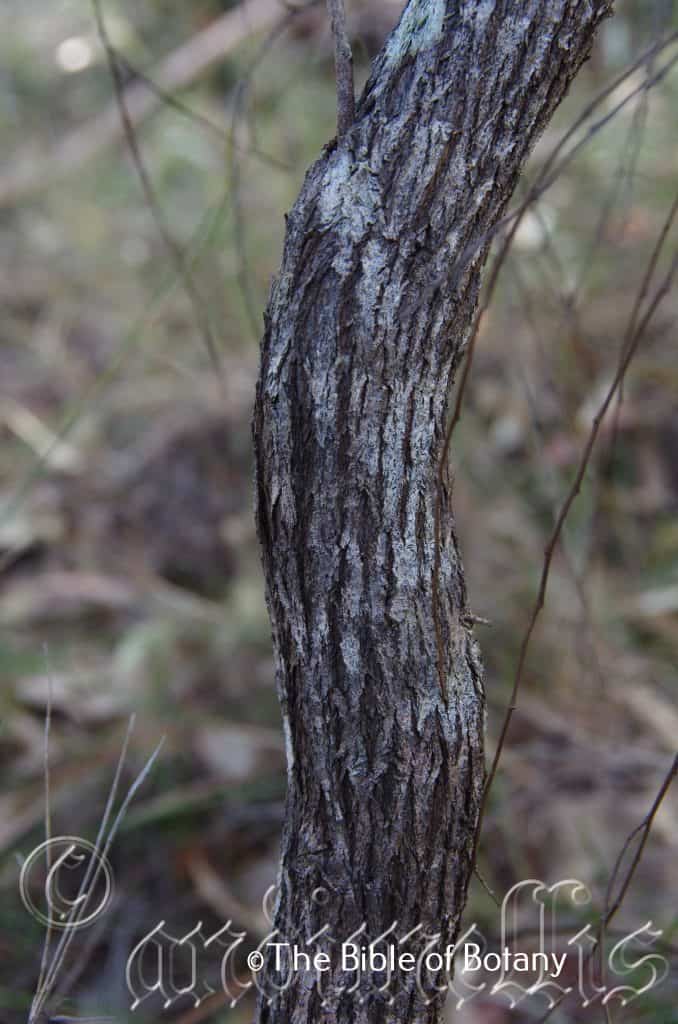
The Pinnacles NSW
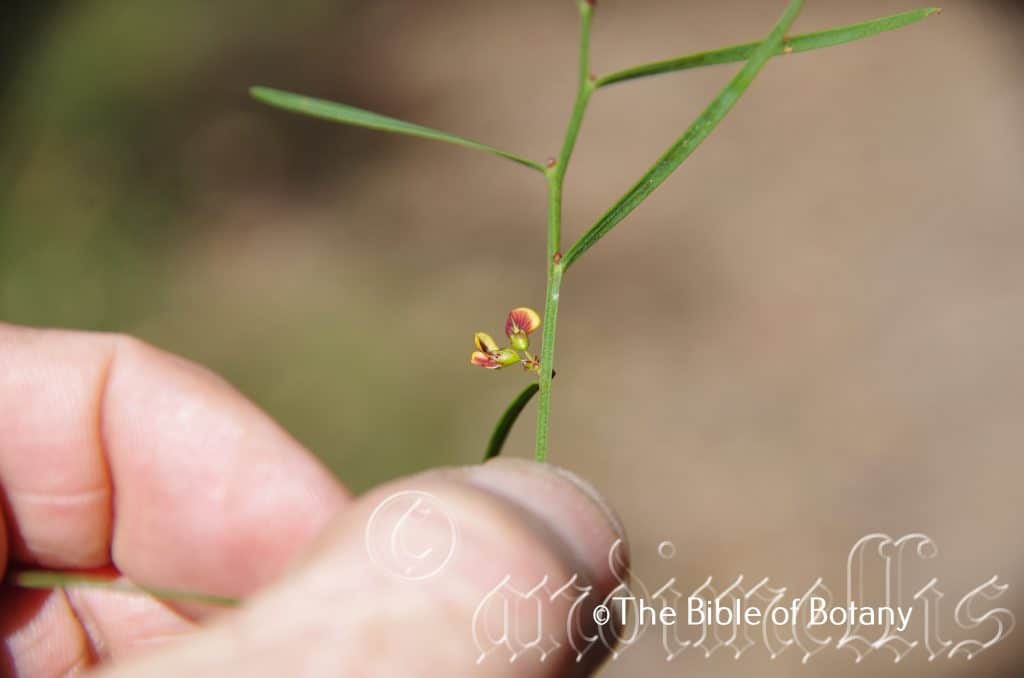
The Pinnacles NSW
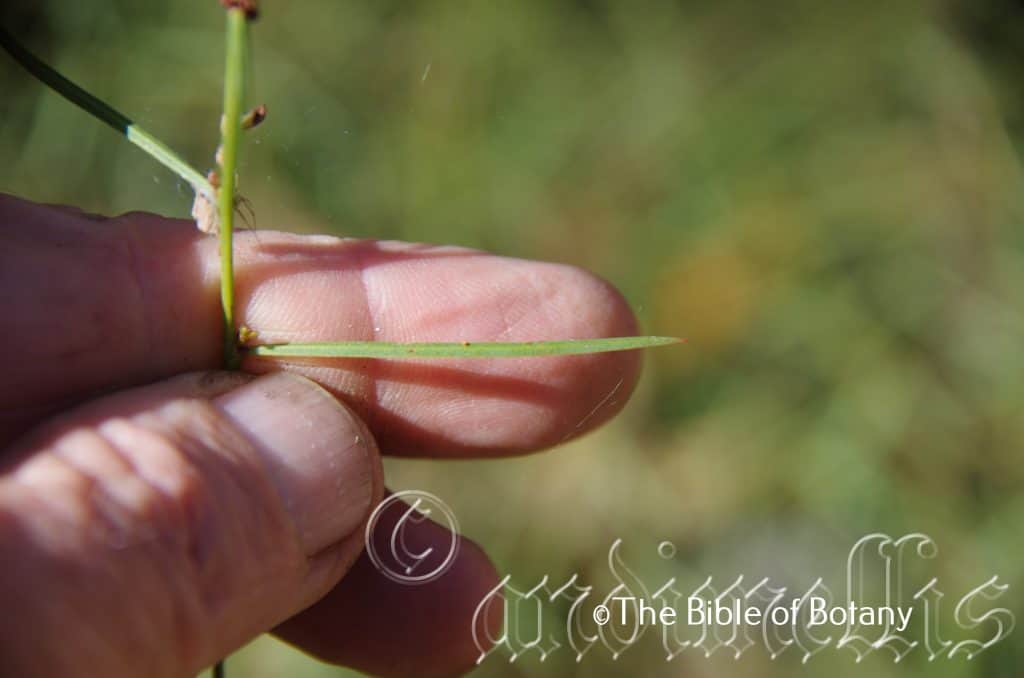
The Pinnacles NSW
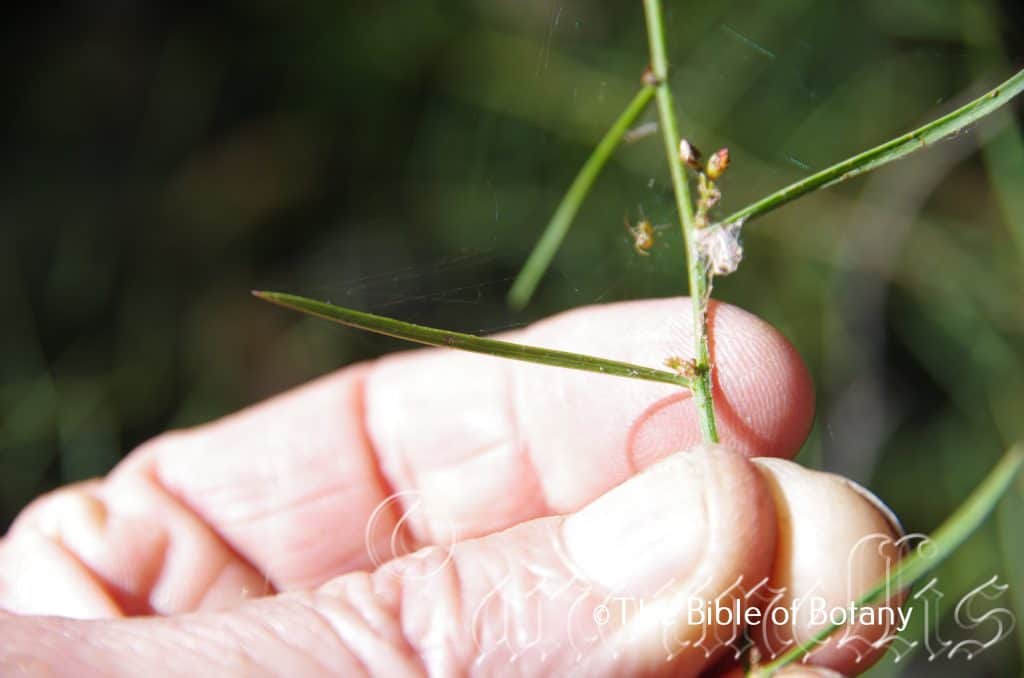
The Pinnacles NSW
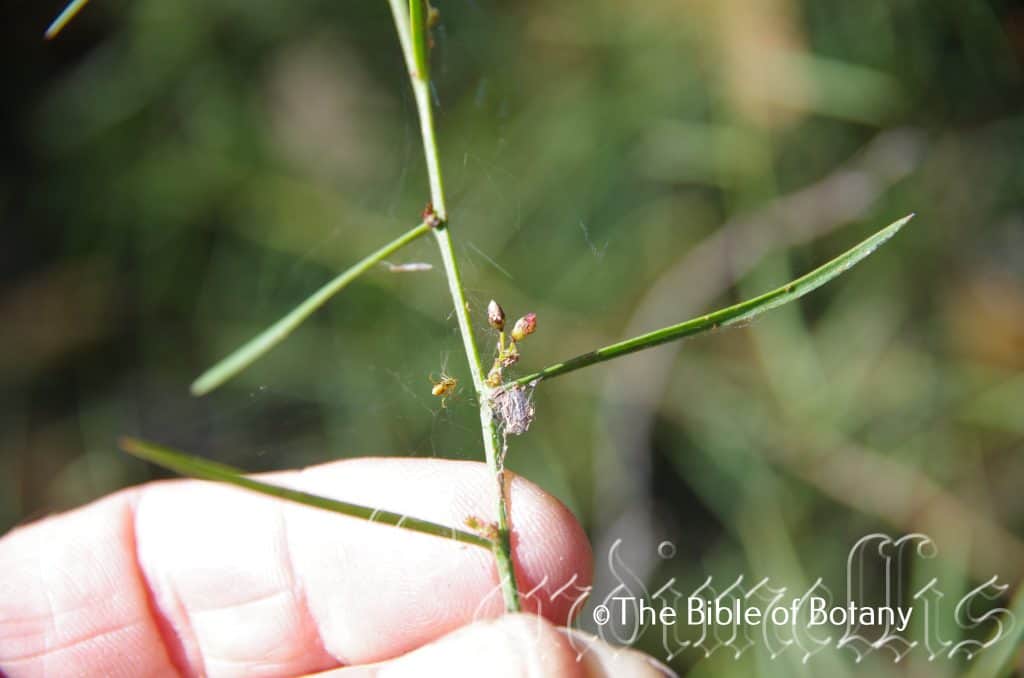
The Pinnacles NSW
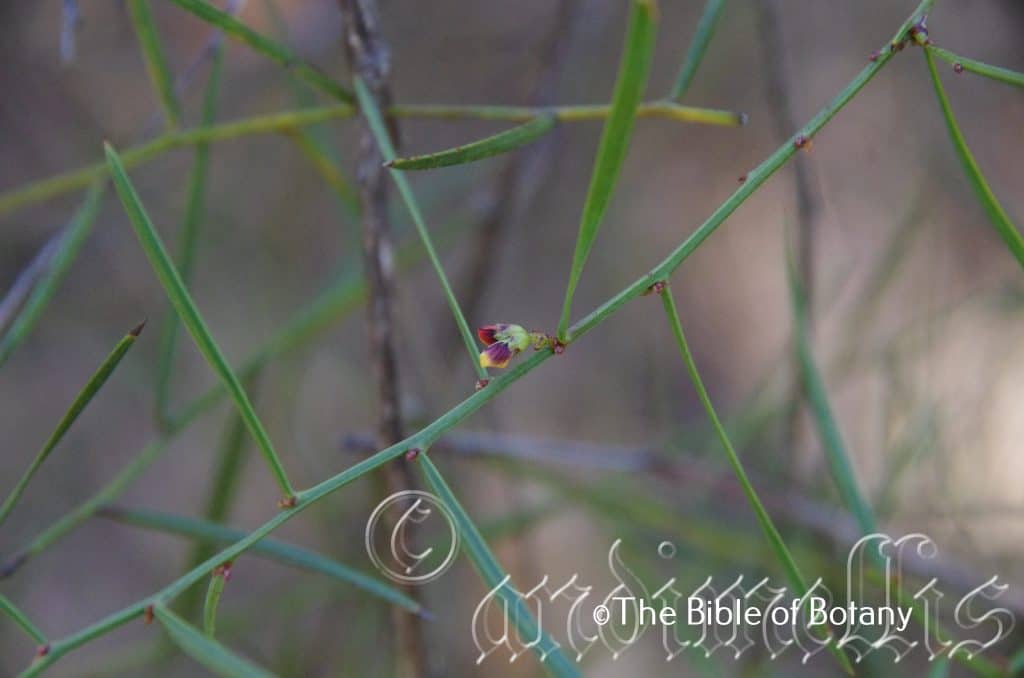
The Pinnacles NSW
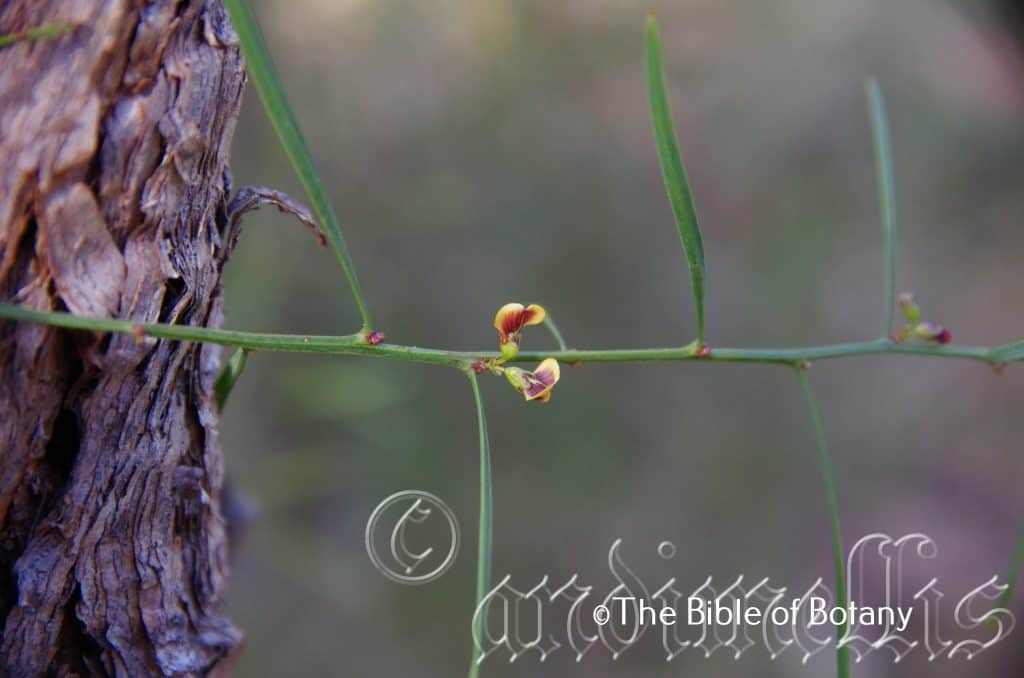
The Pinnacles NSW
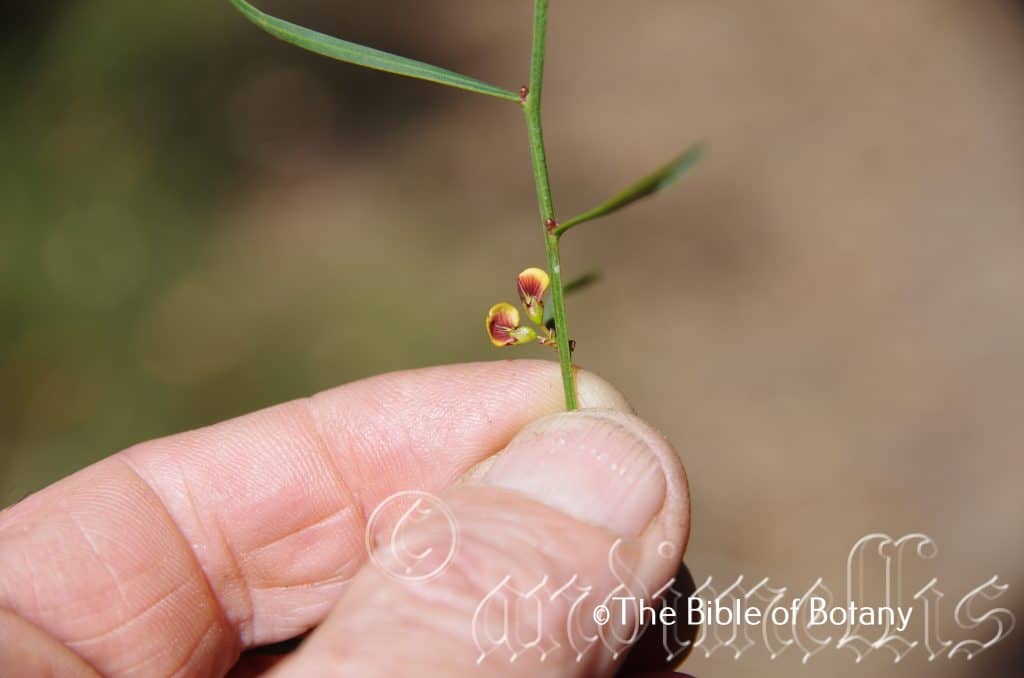
The Pinnacles NSW
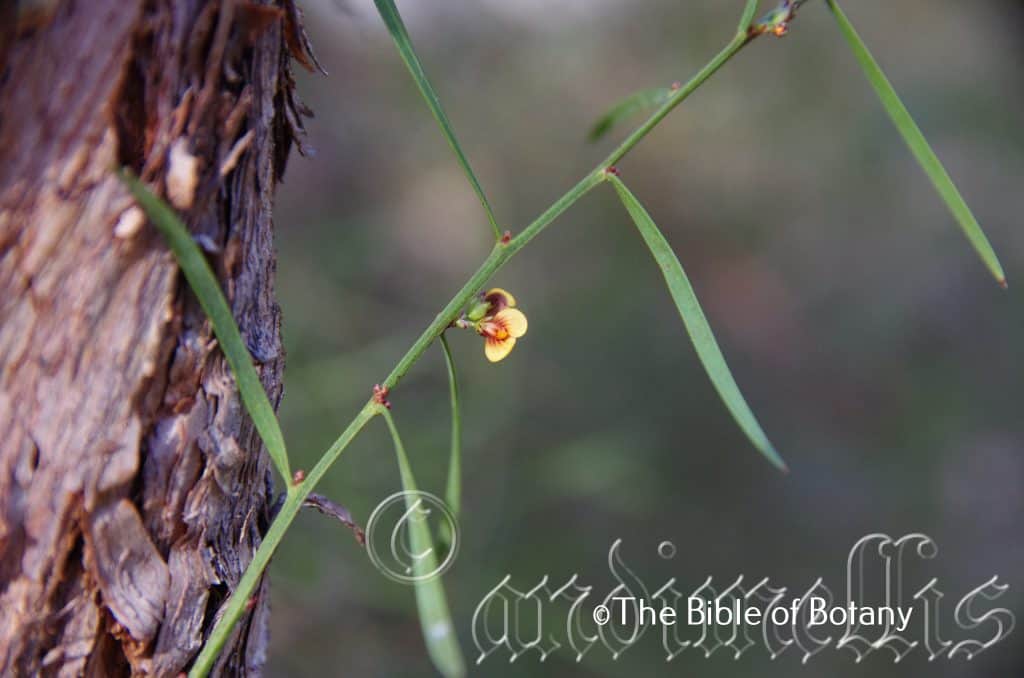
The Pinnacles NSW
Daviesia ulicifolia
Classification
Unranked: Eudicots
Order: Fabales
Family: Fabaceae
Subfamily: Faboideae
Tribe: Mirbelieae
Genus: Is named in Honour of Hugh Davies; 1739-1821, who was a Welsh botanist who lived in Angelsea and translated the native plants into Welsh.
Species: From Ulex/Ulecis, which is Latin for the ancient name of this genus in Europe and Folium, which is Latin for foliage. It refers to leaves, which resemble the leaves of Ulex Europaeus.
Subspecie: Daviesia ulicifolia subsp. aridicola. From Arida, which is Latin for dry and Kola, which is Ancient Greek or Cola, which is Latin for to dwell. It refers to plants, which have environments or habitats that are rather dry or arid.
Subspecies: Daviesia ulicifolia subsp. pilligensis. From Billarga, which is Latinized from the local Kamilaroi aboriginal vernacular for the swamp oak and Ensis/Ana, which is Latin for to originate from. It refers to plants, which were first discovered and grow in the Pilliga Scrub National Park.
Subspecies: Daviesia ulicifolia subsp. ruscifolia. From Ruscum, which is Latin for a butchers broom and Folium, which is Latin for foliage. It refers to the stems of shrubs, which were preferred to make butcher’s brooms from or resemble those of a butcher’s broom.
Subspecies: Daviesia ulcifolia subsp. stenophylla. From Stenos, which is Ancient Greek for narrow and Phullon/Phyllon, which is Ancient Greek for a leaf. It refers to leaves, which are narrower on this species compared to other species in the genus.
Subspecies: Daviesia ulicifolia subsp. ulicifolia. From Ulex/Ulecis, which is Latin for the ancient name of this genus in Europe and Folium, which is Latin for foliage. It refers to leaves, which resemble the leaves of Ulex Europaeus.
Common Name: Gorse Bitter Pea.
Distribution:
Daviesia ulicifolia is found south from the Daintree National Park in far north east Queensland to Wilsons Promontory then north west to Leonora in central southern Western Australia. It is also found on the Swan River Delta Plain and Merilup National Park in the south west.
In the east it is found on the Western Plains, Western Slopes, on and east of the Great Dividing Range to the coast.
In Tasmania it is found on Flinders Island and from Circular Head in the north west to South port in the far south.
https://avh.ala.org.au/occurrences/search?taxa=Daviesia+ulcifolia#tab_mapView
Habitat Aspect Climate:
Daviesia ulicifolia prefers full sun to dappled shade. It grows in dry schlerophyll forests. It is found amongst medium trees, mulgas or low trees, low dry scrub lands and scrubs or inland mulga heaths from plains to mountains. It is found from 5 meters ASL to 1350 meters ASL.
The temperatures range from a low of minus 3 degrees in July to 38 degrees in January.
The rainfall ranges from lows of 200mm to averages 1600mm annually.
Soil Requirements:
Daviesia ulicifolia prefers skeletal to shallow sands to medium clays. The soils are usually derived from decomposed sandstones. The soils pH ranges from 5pH to 6pH. It is not tolerant of waterlogged soils. Â Non saline soils to moderately saline soils are tolerated.
Height & Spread:
Wild Plants: 1m to 2m by 1m to 2m
Characteristics:
Daviesia ulicifolia grows as a small shrub with arching branches which branch close to the ground. The bark is pale grey and glabrous. Young shoots are deep grass-green.
For detailed differences of sub specie see groupings below. The alternate leaves of Daviesia ulicifolia are lanceolate to narrow elliptical. They measure 4mm to 20mm in length by 1mm to 5mm wide near the base. They are rigid coriaceous, very pungent with a rounded base while the apex is cuneate with a long and very pungent thorn. The mid vein is prominent on the both the laminas.
The inflorescences of Daviesia ulicifolia are small umbellata of 3 to 7 flowers or in pairs which are usually born from the leaf axis. The rachises 5mm to 7mm long with the peduncles measuring 0.5mm to 1.3mm long.
The calyx measure 2.4 to 3.3mm in length including the 0.5 to 1mm receptacle. The two united teeth of the calyx measure 0.5mm to 0.6mm in length and are truncate with an emarginated apex. The individual flowers are typical legume and measure 11mm to 13mm in length by 9mm to 12mm in length. The oval standard petals are yellow to orange with or without burgundy markings, measure 12mm to 14mm in length by 4mm in width. The linear wing petals run parallel to the keel and are 1mm in length by 1mm in width. The keel is yellow to orange above and red, maroon or burgundy below measures 6mm to 8mm in length by 5mm high. Daviesia ilicifolia flowers appear from August to November.
The fruits are flat pods. The pods measure 5mm to 8mm in length by 3.5mm to 5.5mm in width. The typical reniform seeds are off white to pale grey marked and moderately covered irregular deep grey or black blotches. They measure 3mm to 4mm in length by 2mm to 2.5mm in diameter.
Confusing Subspecies Varieties:
Daviesia ulicifolia subsp. aridicola inflorescence is either umbellate or racemose with 2 to 7 flowers. The glaucous leaves are lanceolate to oblong and measure 8mm to 17mm in length by 1.3mm to 2.5mm in width.
Daviesia ulicifolia subsp. pilligensis’s stems and leaves are glabrous, flat to concave above while the midrib is equally prominent on both laminas or slightly more prominent on the lower lamina. They measure 7mm to 20mm in length by 2mm to 5mm in width. The standard petal is yellow.
Daviesia ulicifolia subsp. ruscifolia‘s leaves are convex above while the midrib is more prominent above than below. The leaves measure 5mm to 12mm in length by 1.5mm to 4mm in width. The standard petal orange fades to yellow on aging. The stems are often densely covered in white hispid hairs.
Daviesia ulicifolia subsp. stenophylla’s phyllodes are linear to broad linear and measure 9mm to 20mm in length by 0.5mm to 1.5mm in width.
Daviesia ulicifolia subsp. ulicifolia’s inflorescence are umbellate with 2 to 5 flowers in an umbel. The phyllodes are not glaucous, lanceolate to narrow-elliptic and measure 4mm to 20mm in length by 1mm to 4mm in width.
Wildlife:
Daviesia ulicifolia is a honey source for native bees and is a safe habitat to many small finches like the red browed finch, Neochmia temporalis and other small birds for nesting.
Cultivation:
Daviesia ulicifolia is a pungent small shrub that should be placed away from paths and where children are likely to play in the garden. It is ideal in rockeries where the can be mass planted. It is good plants in frosty areas as it can stand frosts and temperatures down to minus 5 degrees. It is also drought resistant once established and can cope with consistently low rainfall and are ideal on dry sandy escarpments, hills and ridges.
If it is given adequate moisture, plenty of organic mulch for moisture retention and an even soil temperature, applying native fertilizers on a regular basis the plants will respond with heavy flowering crops year after year. It often reaches its full potential in just 2 years and flowers from the first year from seed. In cultivation they will grow from 0.8 meters to 1.5 meters by 1.5 meters in diameter. It can be lightly pruned to increase bushiness and flowering in the following season. Pruning should be done immediately after flowering has finished.
Daviesia ulicifolia is short lived to around 6 or 7 years so should be replaced from the fourth to fifth year to retain the flowering and habitat.
Imagine it as a feature shrub in the centre of a bed or vehicle turn around with 1 or 3 Daviesia ulicifolia planted out at and surrounded with small perennials like Hovea like Hovea acutifolia, Hovea australis or Hovea heterophylla in flower.
Propagation:
Seeds: Daviesia ulicifolia‘s seeds require treatment before sowing. Place the seeds into a container and pour boiling water onto the seeds and allow the water to cool. Let the seeds soak for 4 to 8 hours. The seeds that have not swollen repeat the above exercise.
Note, that any seeds which are floating on the surface are infertile and should be discarded.
Sow the freshly treated seeds directly into a seed raising mix and cover with 5mm of the mix. Place the trays in a warm to hot airy position keeping them moist not wet. When the seedlings are 25mm to 50mm tall, prick them out and plant them into 50mm native tubes using a seed raising mix. Nip the tips out of those plants you want to grow as shrubs to help promote bushiness from an early stage.
Once the seedlings reach 150mm to 200mm in height again nip the tips out and plant them out into their permanent position.
Fertilize using Seaweed, fish emulsion or organic chicken pellets soaked in water and apply the liquid on an alternate basis. Fertilize every 2 months until the plants are established then annually in early September to October to maintain health, vigour and better flowering.
Further Comments from Readers:
Hi reader, it seems you use The Bible of Botany a lot. That’s great as we have great pleasure in bringing it to you! It’s a little awkward for us to ask, but our first aim is to purchase land approximately 1,600 hectares to link several parcels of N.P. into one at The Pinnacles NSW Australia, but we need your help. We’re not salespeople. We’re amateur botanists who have dedicated over 30 years to saving the environment in a practical way. We depend on donations to reach our goal. If you donate just $5, the price of your coffee this Sunday, We can help to keep the planet alive in a real way and continue to bring you regular updates and features on Australian plants all in one Botanical Bible. Any support is greatly appreciated. Thank you.
In the spirit of reconciliation we acknowledge the Bundjalung, Gumbaynggirr and Yaegl and all aboriginal nations throughout Australia and their connections to land, sea and community. We pay our respect to their Elders past, present and future for the pleasures we have gained.
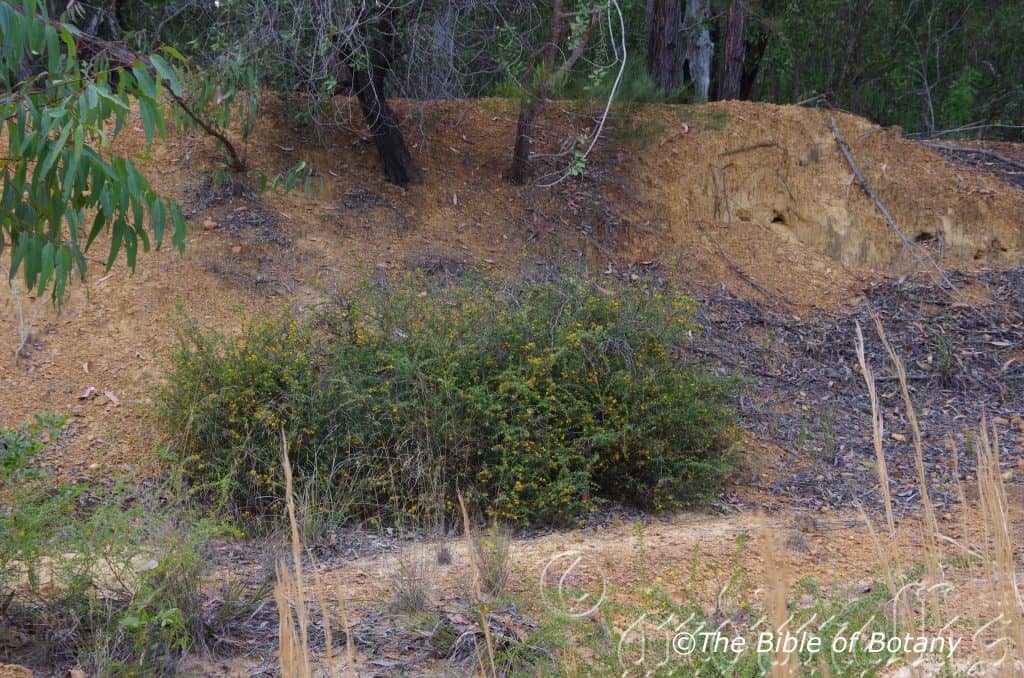
The Pinnacles NSW
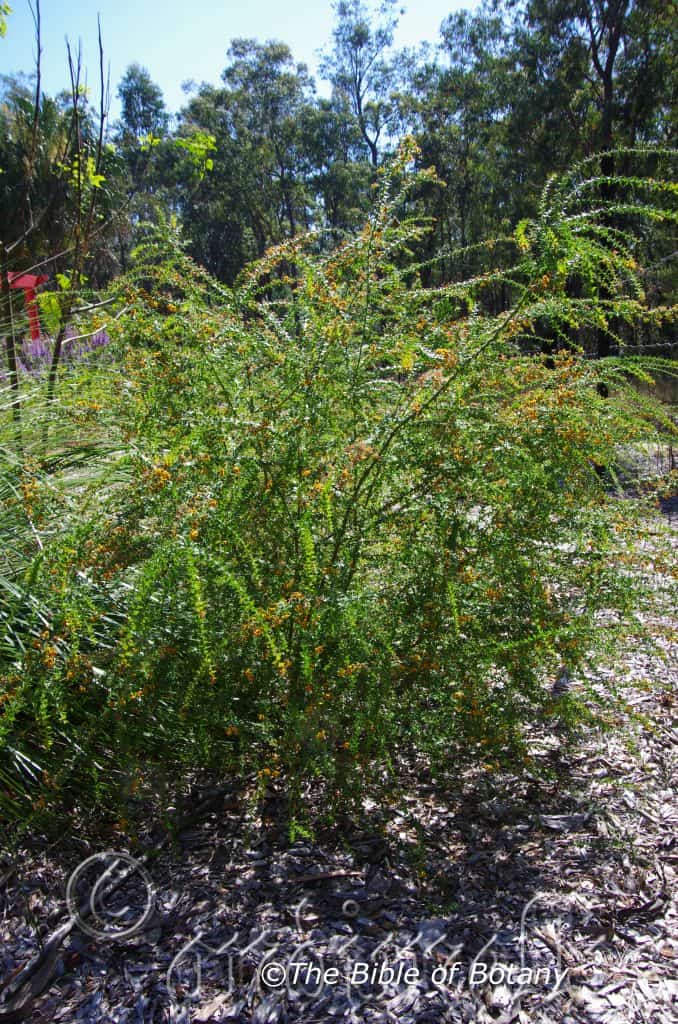
Author’s Garden The Pinnacles NSW
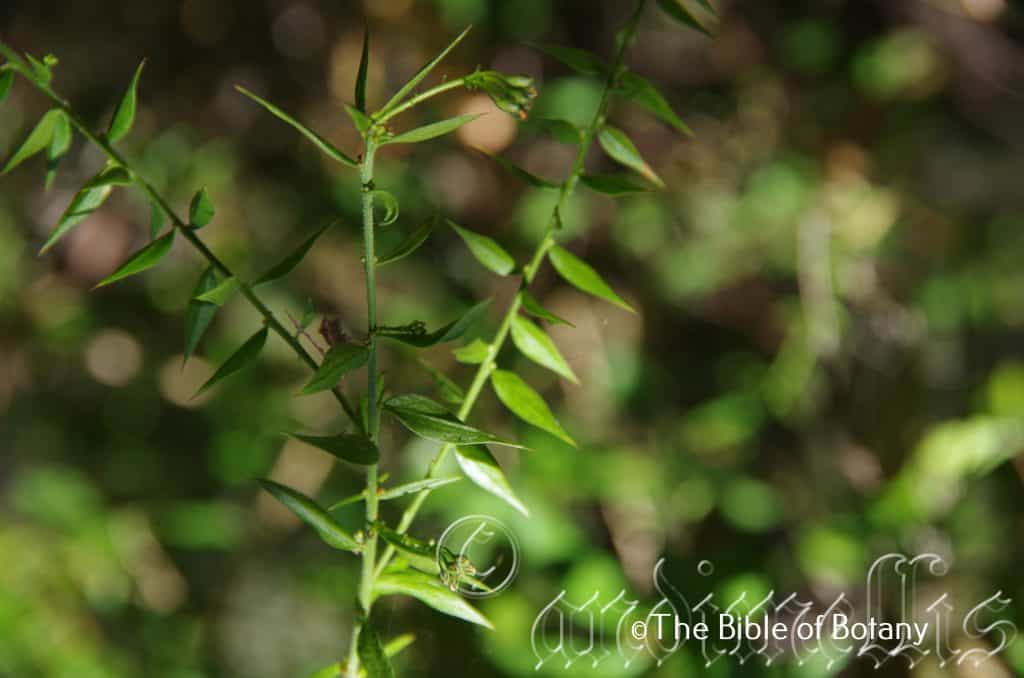
Rocky Creek NSW
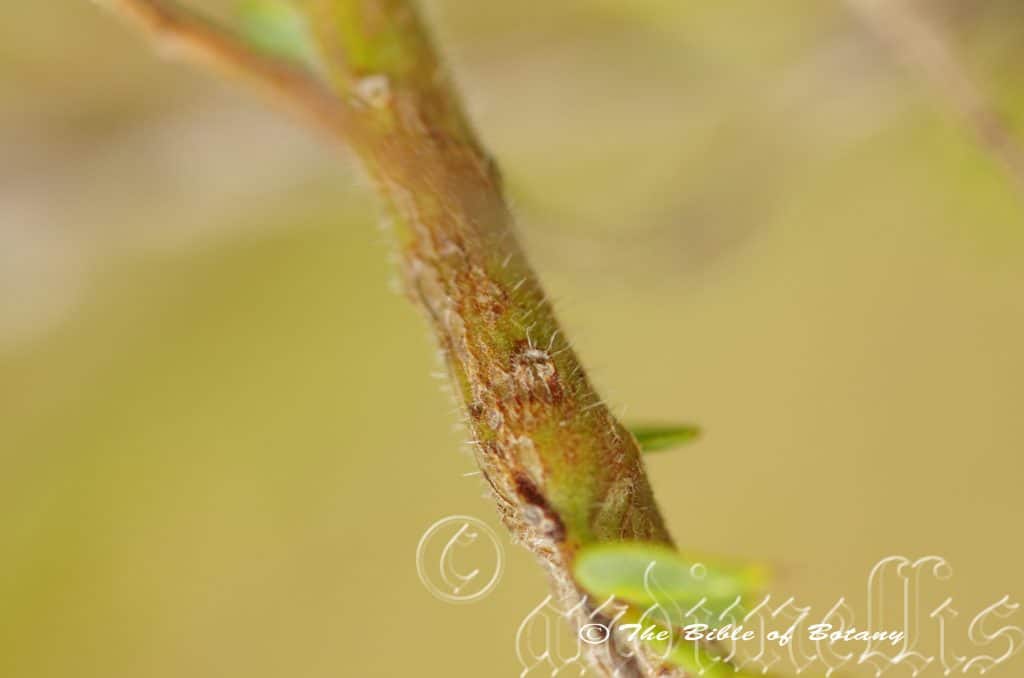
The Pinnacles NSW
Rocky Creek NSW
Woolli-Mini Water NSW
Woolli-Mini Water NSW
Author’s Garden The Pinnacles NSW

Author’s Garden The Pinnacles NSW

Author’s Garden The Pinnacles NSW
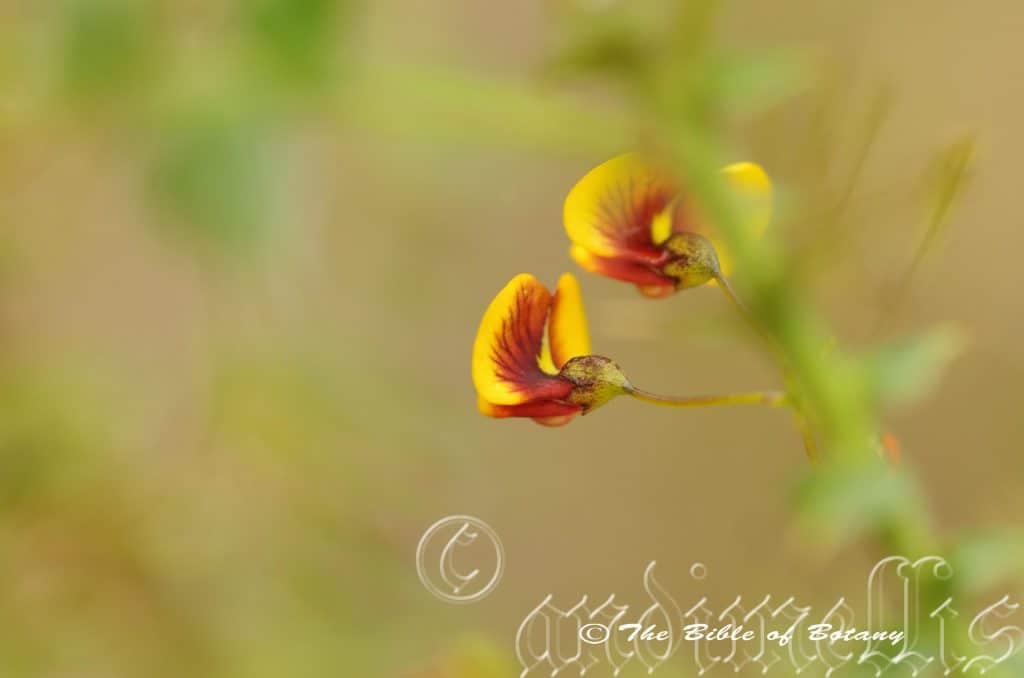
Author’s Garden The Pinnacles NSW
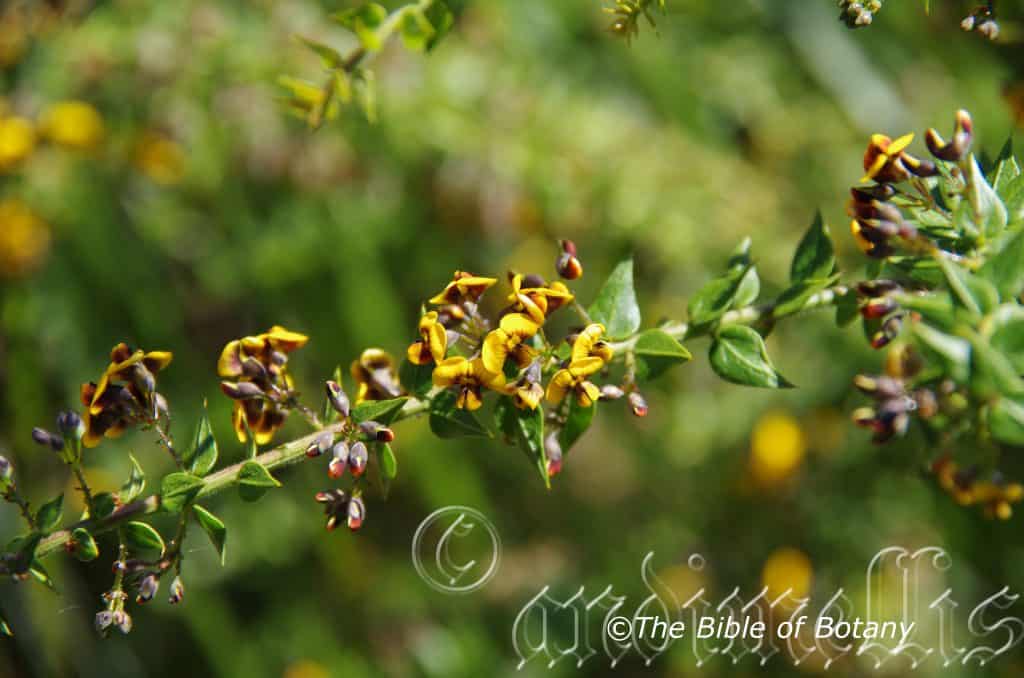
Author’s Garden The Pinnacles NSW
Daviesia umbellata
Classification
Unranked: Eudicots
Order: Fabales
Family: Fabaceae
Subfamily: Faboideae
Tribe: Mirbelieae
Genus: Is named in Honour of Hugh Davies; 1739-1821, who was a Welsh botanist who lived in Angelsea and translated the native plants into Welsh.
Species: From Umbella/Umbra, which is Latin for a parasol or umbrella. It refers to floral clusters of flowers, in which all the petioles branch from the same level on the stalk axis and terminate at the same level in loose umbels.
Common Name:
Distribution:
Daviesia umbellata is found Rockhampton in central Queensland to Sydney in central New South Wales.
https://avh.ala.org.au/occurrences/search?taxa=Daviesia+umbellata#tab_mapView
Habitat Aspect Climate:
Daviesia umbellata prefers full sun to dappled shade. It grows in dry schlerophyll forests, open woodlands among medium trees, or adjacent to heathland and on sandstone escarpments. It is found from 10 meters ASL to 900 meters ASL.
The temperatures range from a low of minus 3 degrees in July to 38 degrees in January.
The rainfall ranges from lows of 800mm to averages 1600mm annually.
Soil Requirements:
Daviesia umbellata prefers skeletal soils over sandstone or sandy loams. The soils are usually derived from decomposed sandstones or accumulated beach sands. The soils pH ranges from 5pH to 6pH. It does not tolerate waterlogged soils. Non saline soils to moderately saline soils are tolerated.
Height & Spread:
Wild Plants: 1m to 2m by 1m to 2m
Characteristics:
Daviesia umbellata grows as a small shrub branching close to the ground. The bark is light grey. Young shoots are dark green arching and covered in short white to pale grey hispid hairs.
The alternate phylodes of Daviesia umbellata are narrow lanceolate to narrow ovate. They measure 5mm to 20mm in length by 1mm to 9mm in width near the base. The bases are cordate to rounded while the apex is long tapering and finishes with a pungent spine. The concolourous laminas are deep green and covered in fawn hispid hairs especially along the mid vein and basal sections of the lateral veins. The mid vein is prominent on the upper lamina
The inflorescences of Daviesia umbellata are small umbellata of 2 to 6 flowers that are usually born in the leaf axis though sometimes they are terminally born especially in good flowering seasons. The rachises measure 3mm to 18mm in length with the individual flowers pedicels measuring 0.5mm to 4mm in length.
The calyxes measure 2.4 to 3.3mm in length including the 0.5 to 0.8mm receptacle. The two united teeth of the calyx measure 0.4mm to 0.5mm long and are truncate with an emarginated apex. The individual flowers are typical legume measuring 12mm in length by 9mm to 12mm in width. The oval standard petals are yellow to orange with or without burgundy markings, measures 12mm to 14mm in length by 4mm in width. The linear wing petals run parallel to the keel and are 1mm in length by 1mm in width. The discolourous keel is yellow to orange above and red, maroon or burgundy below measures 6mm to 8mm in length by 5mm high. The rachises measure 3mm to 18mm in length with the individual flowers pedicels measuring 0.5mm to 4mm in length. Daviesia umbellata flowers appear from late September through to December.
The fruits of Daviesia umbellata are pods. The glabrous, green pods turn grey brown when ripe. The style is persistent. They are more or less straight along one side and ovate along the edge that splits. The pods measure 8mm to 9mm in length by 5mm to 6mm wide.
Wildlife:
Daviesia umbellata is a good honey source for native bees and is a safe habitat to many small finches and other small birds for nesting.
Cultivation:
Daviesia umbellata is a pungent small shrub that should be placed away from paths and where children are likely to play in the garden. It is ideal in rockeries along fences and on banks where it can be mass planted. It is a good plant in frosty areas as it can stand frosts and temperatures down to minus 5 degrees. It is also drought resistant once established and can cope with consistently low rainfall and are ideal on dry sandy escarpments, hills and ridges.
If it is given adequate moisture, plenty of organic mulch for moisture retention and an even soil temperature, applying native fertilizers on a regular basis the plants will respond with heavy flowering crops year after year. They often reach their full potential in just 1 year and flower from the first year from seed. In cultivation it will grow from 1 meter to 1.5 meters by 1.5 meters in diameter. It can be lightly pruned to increase bushiness and flowering in the following season. Pruning should be done immediately after flowering has finished.
Daviesia umbellata is short lived to around 6 or 7 years so should be replaced from the fifth year to retain the flowering and habitat.
Imagine this as a feature shrub in the centre of a heath bed or turn around with mixed Hovea spesies like Hovea acutifolia, Hovea australis, Hovea heterophylla or small red and pink Grevillea species like Grevillea linearis surrounding it in flower.
Propagation:
Seeds: Daviesia umbellata‘s seeds require treatment before sowing. Place the seeds into a container and pour boiling water onto the seeds and allow the water to cool. Let the seeds soak for 8 to 10 hours.
Note: Any seeds which are floating on the surface are infertile and should be discarded.
Sow the freshly treated seeds directly into a seed raising mix and cover with 2mm to5mm of the mix. Place the trays in a warm to hot airy position keeping them moist not wet. When the seedlings are 25mm to 50mm tall, prick them out and plant them into 50mm native tubes using a seed raising mix. Nip the tips out of those plants you want to grow as shrubs to help promote bushiness from an early stage.
Once the seedlings reach 150mm to 200mm in height again nip the tips out and plant them out into their permanent position.
Fertilize using Seaweed, fish emulsion or organic chicken pellets soaked in water on an alternate basis. Fertilize every two months until the plants are established then twice annually in early September or March to maintain health, vitality and better flowering.
Further Comments from Readers:
Hi reader, it seems you use The Bible of Botany a lot. That’s great as we have great pleasure in bringing it to you! It’s a little awkward for us to ask, but our first aim is to purchase land approximately 1,600 hectares to link several parcels of N.P. into one at The Pinnacles NSW Australia, but we need your help. We’re not salespeople. We’re amateur botanists who have dedicated over 30 years to saving the environment in a practical way. We depend on donations to reach our goal. If you donate just $5, the price of your coffee this Sunday, We can help to keep the planet alive in a real way and continue to bring you regular updates and features on Australian plants all in one Botanical Bible. Any support is greatly appreciated. Thank you.
In the spirit of reconciliation we acknowledge the Bundjalung, Gumbaynggirr and Yaegl and all aboriginal nations throughout Australia and their connections to land, sea and community. We pay our respect to their Elders past, present and future for the pleasures we have gained.
Daviesia villifera
Classification
Unranked: Eudicots
Order: Fabales
Family: Fabaceae
Subfamily: Faboideae
Tribe: Mirbelieae
Genus: Is named in Honour of Hugh Davies; 1739-1821, who was a Welsh botanist who lived in Angelsea and translated the native plants into Welsh.
Species: From Villosa, which is Latin for shaggy and Ferae/Ferurum, which is Latin for to bear or bearing. It refers to structures or organs, which bear long, shaggy, villose hairs.
Common Name:
Distribution:
Daviesia villifera is found in several disjunct populations south from Carnarvon National Park in southern Queensland to the Clarence Valley in northern New South Wales. It is usually found on the Great Dividing Range to the coast.
https://avh.ala.org.au/occurrences/search?taxa=Daviesia+villifera#tab_mapView
Habitat Aspect Climate:
Daviesia villifera prefers full sun to dappled shade. It grows in dry schlerophyll forests dry heaths and open woodlands. The altitude ranges from 10 meters ASL to 600 meters ASL.
The temperatures range from a low of minus 3 degrees in July to 38 degrees in January.
The rainfall is from lows of 500mm to averages 1200mm annually.
Soil Requirements:
Daviesia villifera prefers sandy loams, light gritty clays to medium clays. The soils are usually derived from decomposed brown basalt and shale. The soils pH ranges from 4.5pH to 6pH. It does not tolerate waterlogged soils. Non saline to moderately saline soils are tolerated as are salt laden winds.
Height & Spread:
Wild Plants: 0.5m to 2.5m by 1m to 2m
Characteristics:
Daviesia villifera grows as a small multi stemmed shrub with short erect branches from close to the ground. The bark is pale grey and glabrous. Young shoots are deep green and densely covered in white, pale grey or pale rusty red semi caduceous hispid and sub villous hairs.
The alternate, crowded, broad ovate to narrow ovate phyllodes of Daviesia villifera measure 5mm to 10mm in length by 2mm to 6mm width at the base. The bases are subcordata to broad cuneate while the apexes are long acuminate and end in a long, reddish-brown, rigid, sharp spine. The concolourous laminas are deep green to deep olive-green, glabrous and sparsely covered in white or pale grey hispid and sub villous hairs on the upper laminas while the lower laminas are usually covered to densely covered in white to grey hispid and sub villous hairs. The laminas are slightly twisted and recurve upwards from the base to the apex. The leaves’ margins are entire. The mid vein is prominent on both laminas. The stipules are absent. The petioles measure 0mm to 0.5mm in length.
The inflorescences of Daviesia villifera are born singularly or at times impairs from the leaf axils. The deep reddish-brown filiform pedicels are glabrous. The pedicels measure 2mm to 15mm in length. The narrow elliptical bracts below the calyxes measure 0.8mm to 1.6mm in length by 0.3mm to 0.5mm in width.
The individual flowers are typical legume and measure 6.5mm to 8mm in height by 8.5mm to 10mm in width. The deep greenish-maroon calyxes measure 2.5mm to 3mm in length including the 0.6mm to 0.8mm receptacle. The upper minute pair of calyx lobes are united with an emarginate-truncate apex. The lower and lateral 4 calyx lobes are minute with broad obtuse apexes. The lobes measure 0.2mm in length. The united, broad ovate standard petals have an emarginated obtuse apex. The yellow standards have a yellow base with red, maroon or burgundy markings radiating from near the base. There is also a red, maroon or burgundy line longitudinally where the standards are united. The standards measure 4mm to 4.5mm in height by 4.5mm to 5mm in width. The yellow, oblong wing petals run parallel to the keel and are splashed with red, maroon or burgundy from near the lower lip to the upper lip. The wing petals measure 5mm to 6mm in length by 4mm to 5mm in width. The bright yellow keels are hidden by the wing petals and measure 4.5mm to 5mm in length by 2mm to 3mm in height. Daviesia villifera‘s flowers appear from August to November.
Daviesia villifera’s fruits are rounded triangular flat pods. The glabrous, reddish-maroon pods turn brown on ripening. The style is persistent at the apex of the pods. The pods measure 9mm to 11mm in length by 5mm to 7mm in width.
Wildlife:
Daviesia villifera is a honey source for native bees and is a safe habitat to many small finches and other small birds which nest close to the ground.
Cultivation:
Daviesia villifera is ideal in medium to large native bush gardens where it can be mass planted. It is a good plant in frosty areas as it can stand frosts and temperatures down to minus 5 degrees. It is also drought tolerant once established and can cope with consistently low rainfall and are ideal on dry sandy escarpments, hills and ridges.
If it is given adequate moisture, plenty of mulch for moisture retention and an even soil temperature, applying native fertilizers on a regular basis the plants will respond with exceptionally heavy flowering crops year after year. It often reaches its full potential in just 2 years and flowers from the first year from seed. In cultivation it will grow from 1 meter to 2 meters by 1 meter to 2 meters in diameter when grown in the open. It can be lightly tip pruned to increase bushiness and flowering in the following season. Pruning should be done immediately after flowering has finished.
Planted in groups of 3 to 5 plants, back from a bend will become a very strong focal point in larger gardens particularly when in flower and gain a lot of attention whether you are coming or going because of the fresh clean look of the foliage even in the driest of times. Place it in the midground with large leaf, or fine leaf ground covers and very small shrubs or annuals in front. To the rear, use large leaf taller plants. Plants with pink, orange, red or purple flowers can be used in both the foreground and background. Plants with finer foliage in pale green or blue greys will also compliment the scene during periods when there are few flowers in the garden. This will lead your eyes directly to the yellow flowers in spring and have them yearning to see what lies beyond the bend.
Imagine a feature tree in the centre of a bed or vehicle turn around with a mass planting of Daviesia arborea and Daviesia villifera planted out at 1.5 meter to 1.8 meter centers mixed with a Hovea species like Hovea acutifolia, Hovea australis or Hovea heterophylla in flower.
Daviesia villifera is short lived to around 6 or 7 years so should be replaced from the fifth year to retain vigorous growth in the garden.
Propagation:
Seeds: Daviesia villifera‘s seeds require treatment before sowing. Place the seeds into a container and pour boiling water onto the seeds and allow the water to cool. Let the seeds soak for 8 to 10 hours. The seeds that have not swollen from 1.5 times to twice their original size after soaking should be retreated before sowing. The seeds that have swollen from 1.5 to 2 times their original size should be sown immediately. The seeds that have not swollen should again be retreated.
Note, that any seeds which are floating on the surface are infertile and should be discarded.
Seeds that have not swollen after repeating the boiling water technique should be treated using the abrasion technique.
Alternatively the abrasion method has proven very successful for us. This involves rubbing the seeds gently between two sheets of very fine sandpaper to reduce the thickness of the seed coat. What we did if there are large numbers of seeds to do is a glue sheet of medium corundum to the inside surfaces of a small disposable container. Place the seeds into the container and shake the container vigorously for several minutes. Check to see if the coating has been partially removed.
Sow the freshly treated seeds directly into a seed raising mix and cover with 2mm to5mm of the mix. Place the trays in a warm to hot airy position keeping them moist not wet. When the seedlings are 25mm to 50mm tall, prick them out and plant them into 50mm native tubes using a seed raising mix. Nip the tips out of those plants you want to grow as shrubs to help promote bushiness from an early stage.
Once the seedlings reach 150mm to 200mm in height again nip the tips out and plant them out into their permanent position.
Fertilize using Seaweed, fish emulsion or organic chicken pellets soaked in water and apply the liquid on an alternate basis. Fertilize every 2 months until the plants are established then annually in early September to October to maintain health, vigour and better flowering.
Further Comments from Readers:
Hi reader, it seems you use The Bible of Botany a lot. That’s great as we have great pleasure in bringing it to you! It’s a little awkward for us to ask, but our first aim is to purchase land approximately 1,600 hectares to link several parcels of N.P. into one at The Pinnacles NSW Australia, but we need your help. We’re not salespeople. We’re amateur botanists who have dedicated over 30 years to saving the environment in a practical way. We depend on donations to reach our goal. If you donate just $5, the price of your coffee this Sunday, We can help to keep the planet alive in a real way and continue to bring you regular updates and features on Australian plants all in one Botanical Bible. Any support is greatly appreciated. Thank you.
In the spirit of reconciliation we acknowledge the Bundjalung, Gumbaynggirr and Yaegl and all aboriginal nations throughout Australia and their connections to land, sea and community. We pay our respect to their Elders past, present and future for the pleasures we have gained.
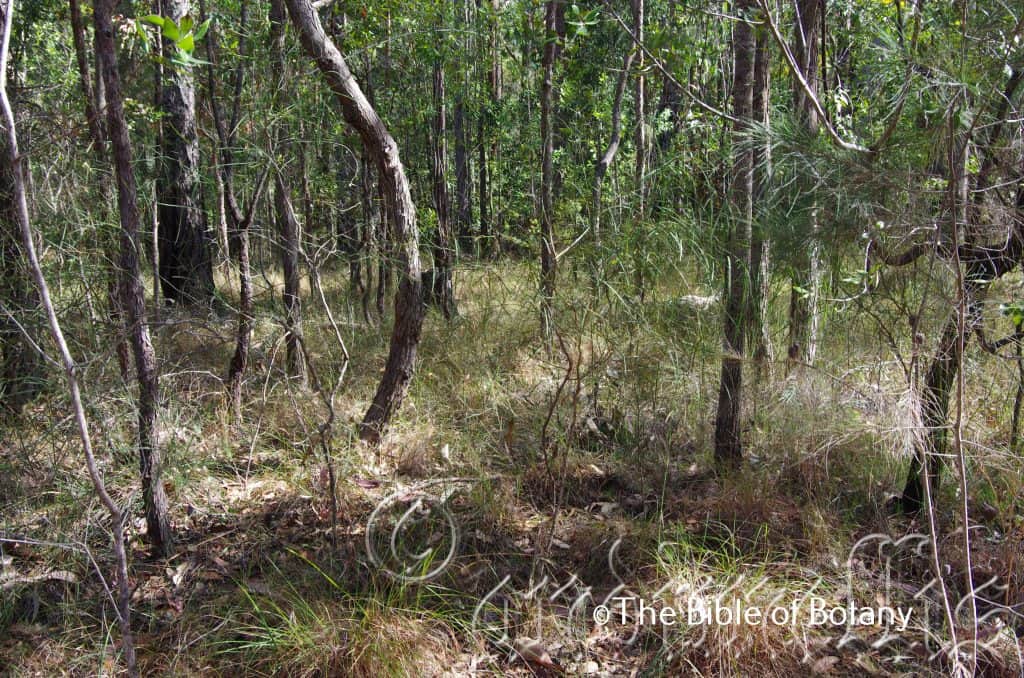
The Pinnacles NSW
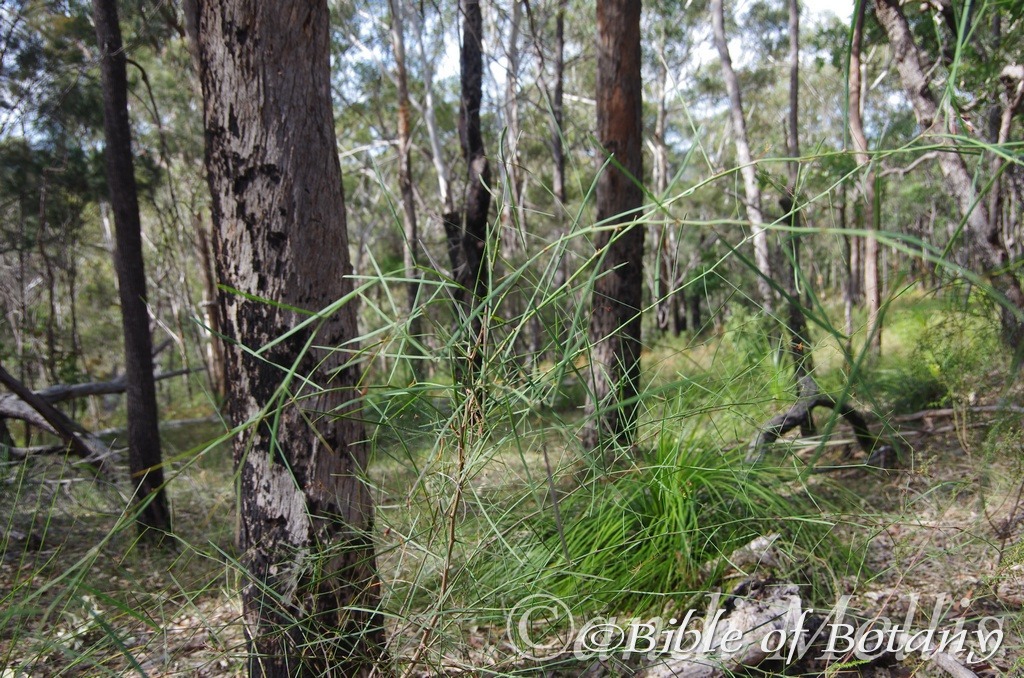
Wombat Creek National Park NSW
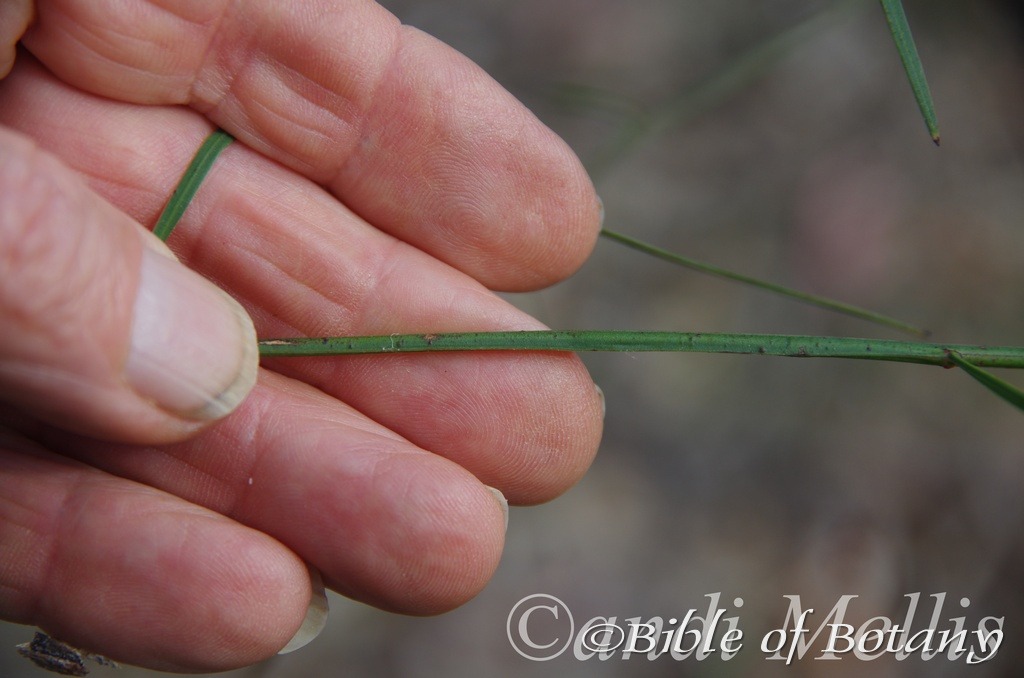
Wombat Creek National Park NSW
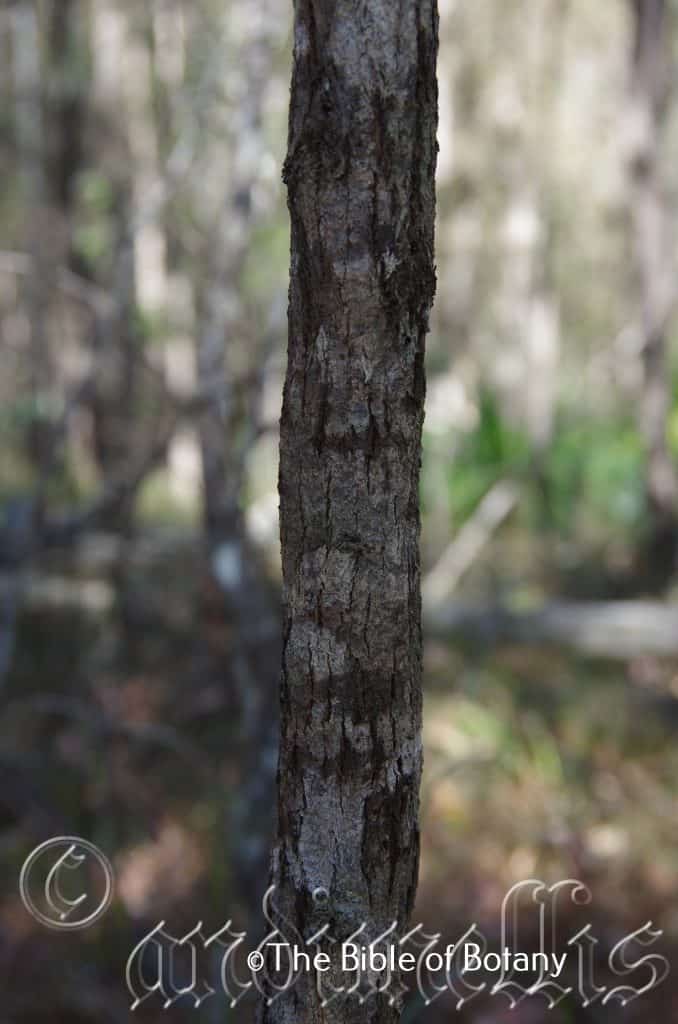
The Pinnacles NSW
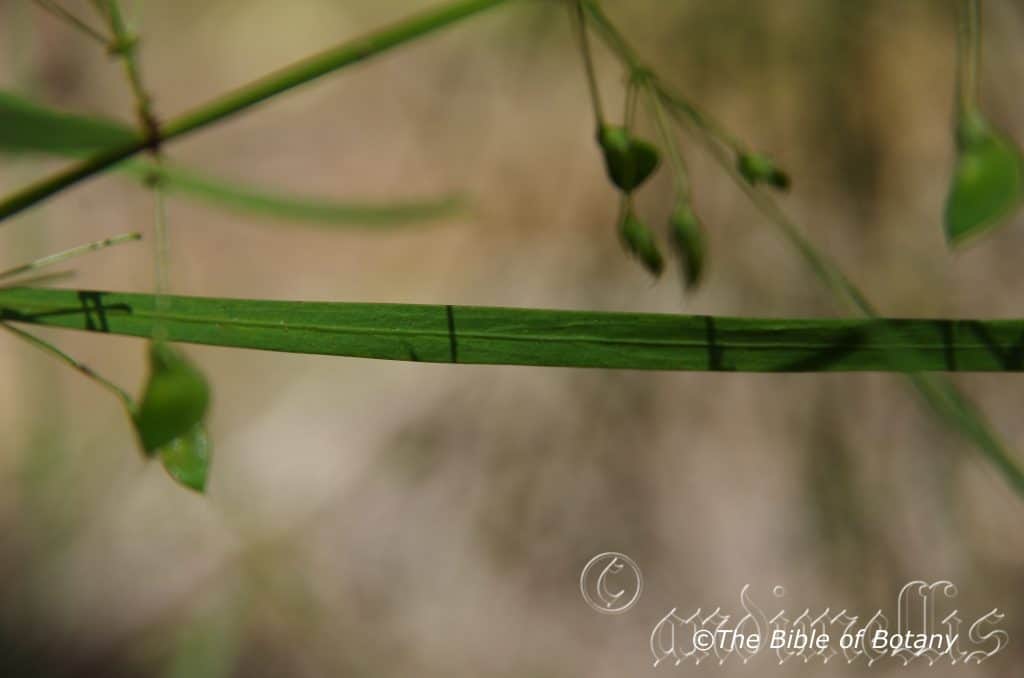
Capalaba Qld.
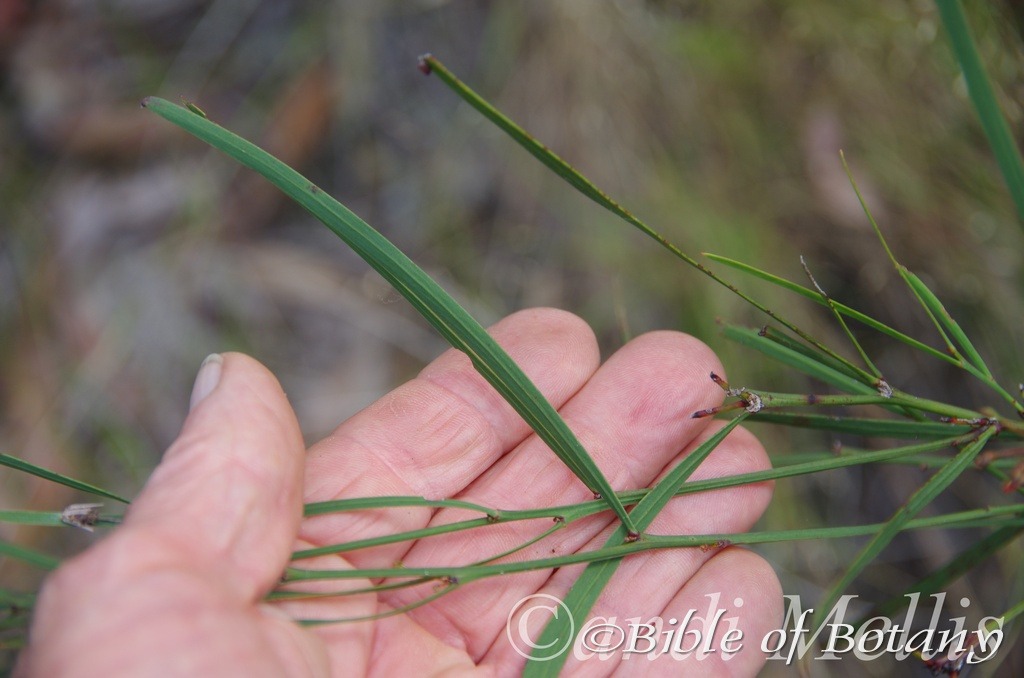
Wombat Creek National Park NSW
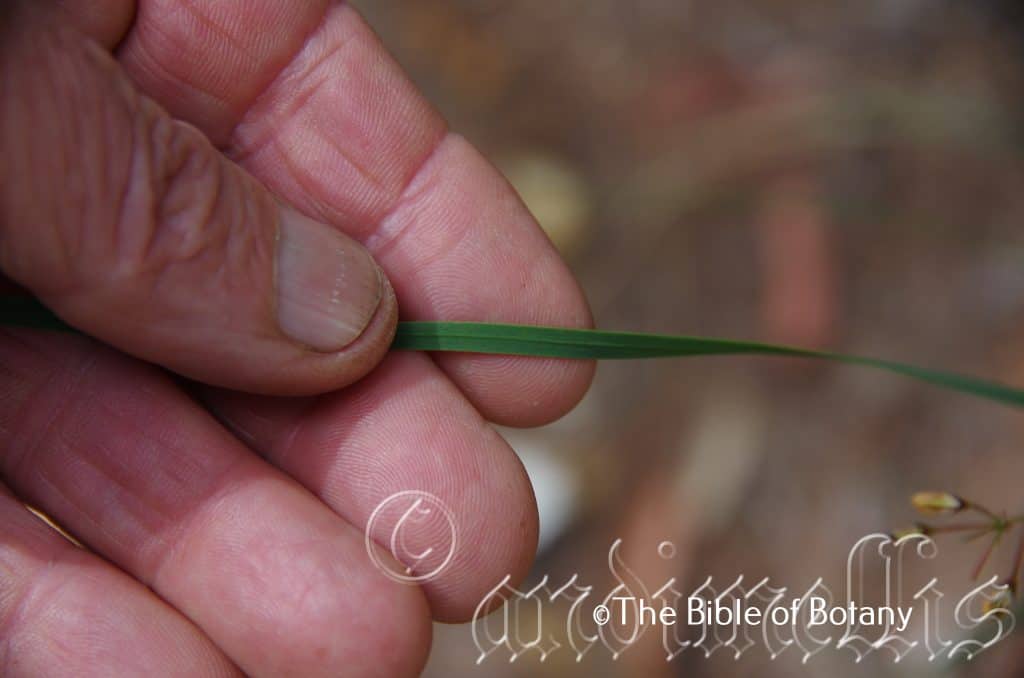
Yuraygir National Park NSW
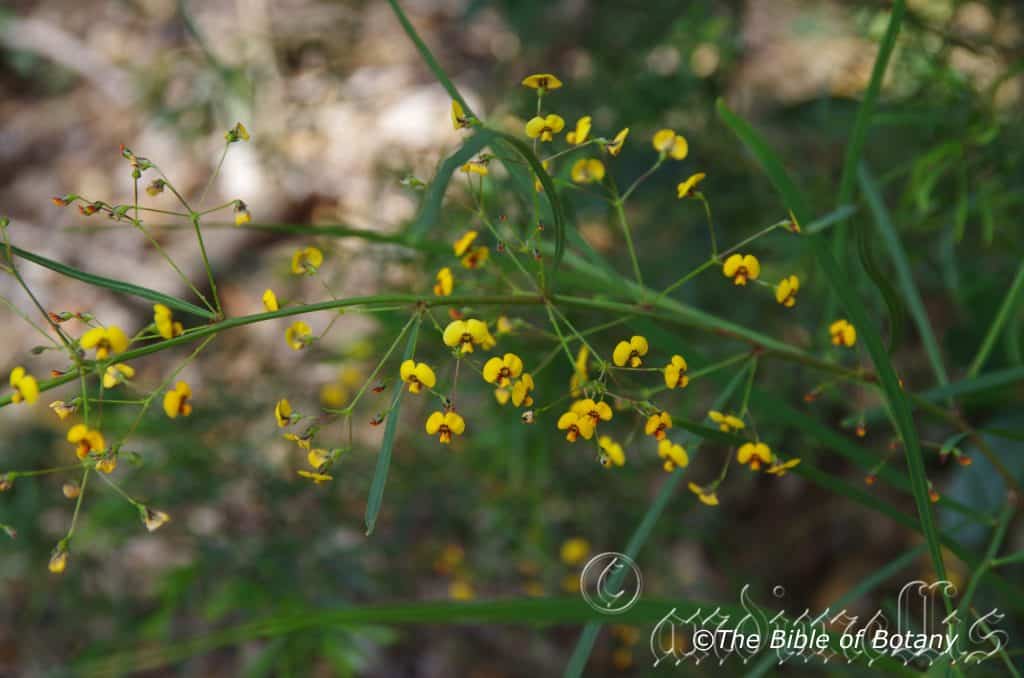
Capalaba Qld.
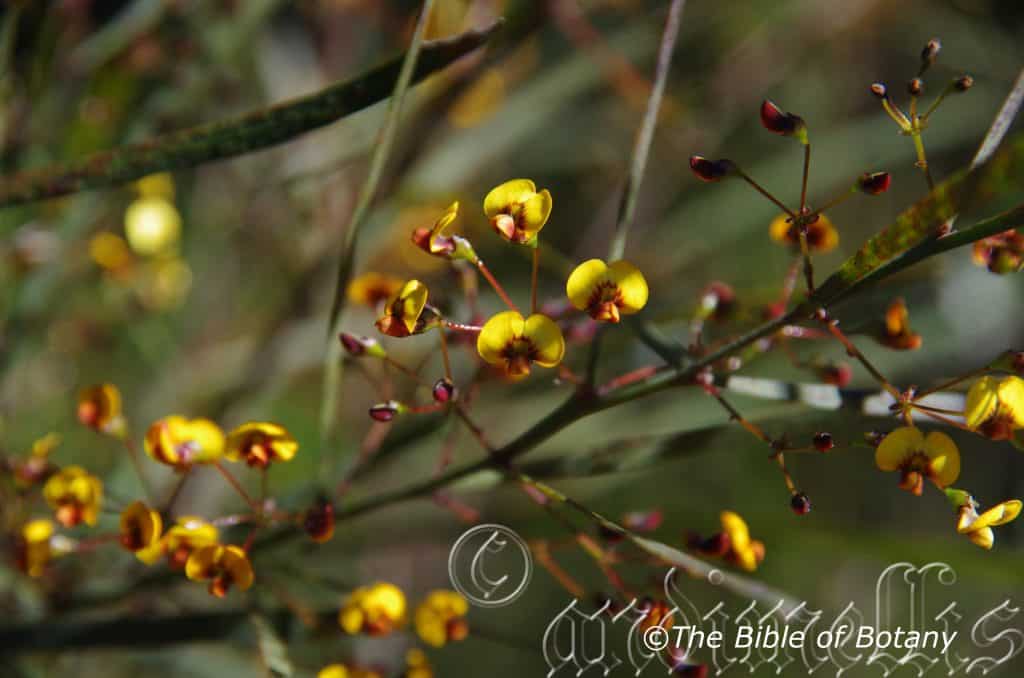
Yuraygir National Park NSW
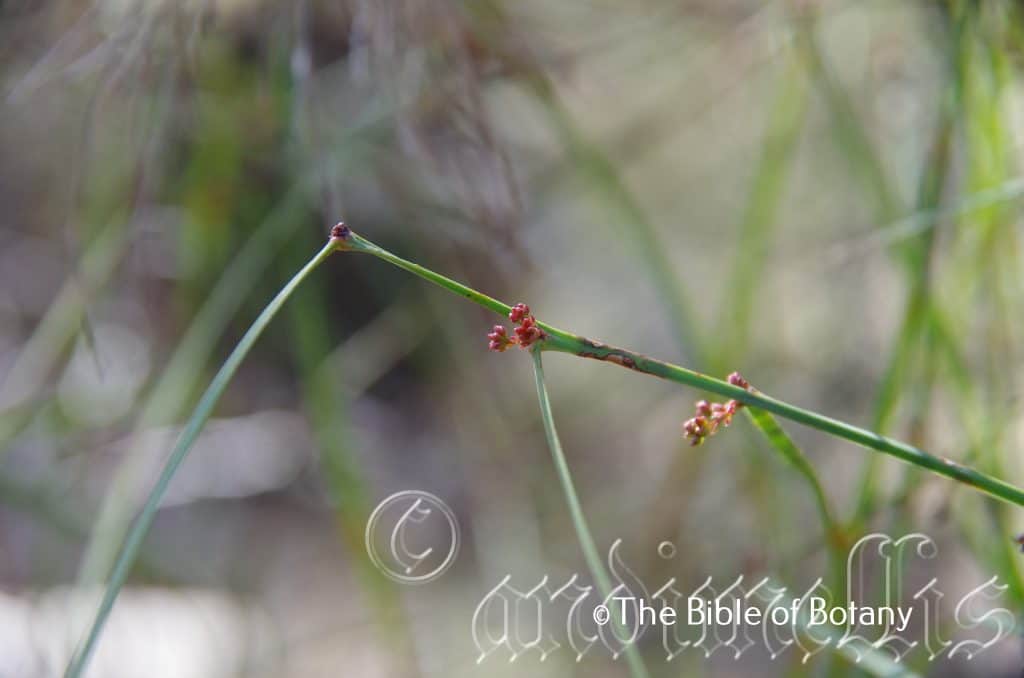
The Pinnacles NSW

Capalaba Qld.
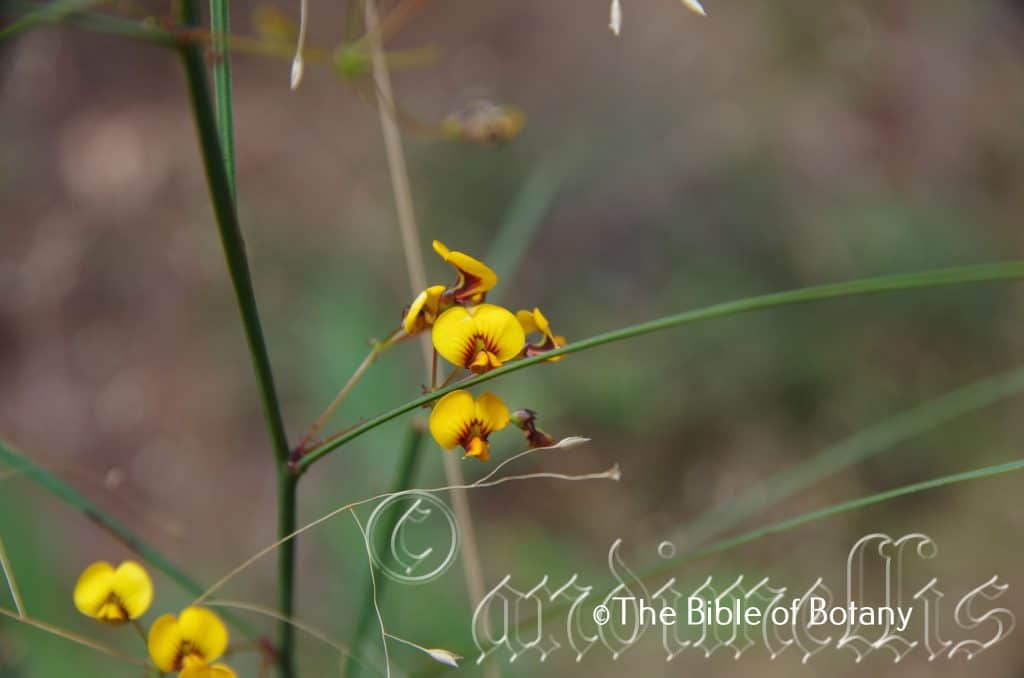
The Pinnacles NSW
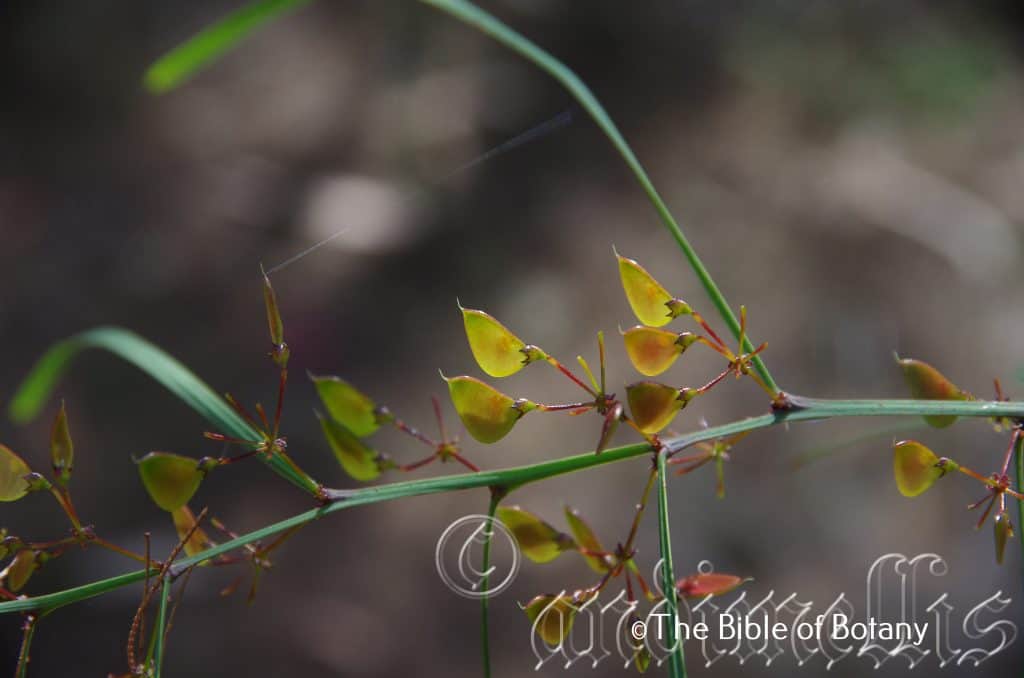
The Pinnacles NSW
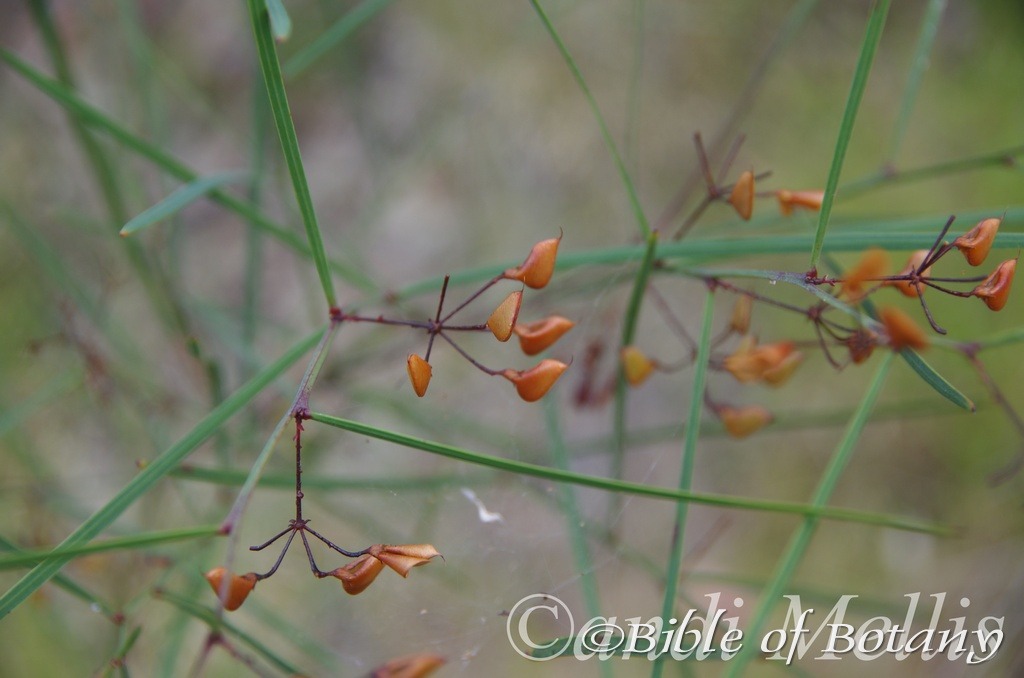
Wombat Creek National Park NSW
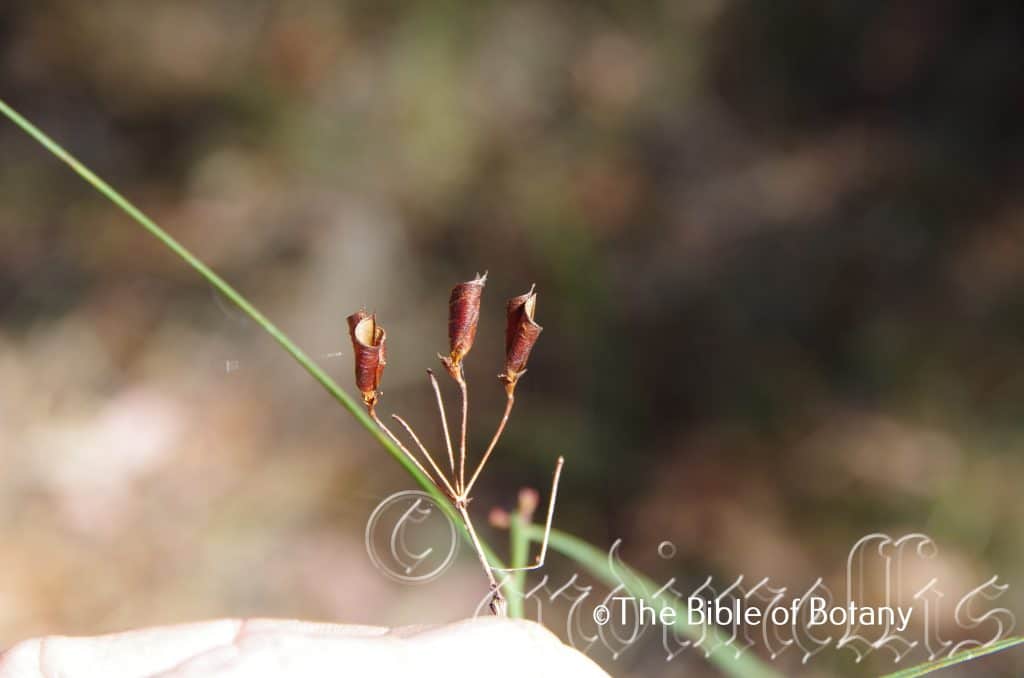
The Pinnacles NSW
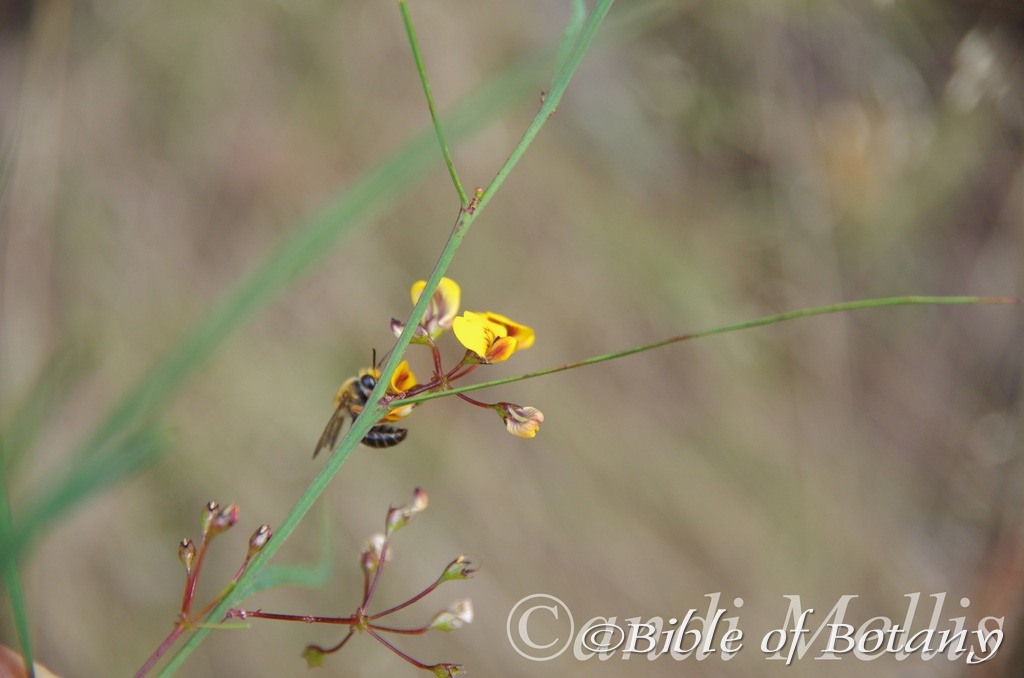
Wombat Creek National Park NSW
Daviesia wyattiana
Classification
Unranked: Eudicots
Order: Fabales
Family: Fabaceae
Subfamily: Faboideae
Tribe: Mirbelieae
Genus: Is named in Honour of Hugh Davies; 1739-1821, who was a Welsh botanist who lived in Angelsea and translated the native plants into Welsh.
Species: Maybe named in Honour of Robert Wyatt, who was an American bryologist.
Common Name: Long Leaf Bitter Pea.
Distribution:
Daviesia wyattiana is found south from Gladstone and the Carnarvon National Park in central Queensland to Woolgoolga in northern coastal New South Wales. There is a disjunct population south from Budawang Range to Mallacoota in north western coastal Victoria. It is mainly found on and east of the Great Dividing Range spreading further west as it heads north.
https://avh.ala.org.au/occurrences/search?taxa=Daviesia+wyattiana#tab_mapView
Habitat Aspect Climate:
Daviesia wyattiana prefers full sun to dappled shade. It grows in dry sclerophyll forests dry heaths and open woodlands on ridges. It altitude ranges from 10 meters ASL to 700 meters ASL.
The temperatures range from a low of minus 3 degrees in July to 38 degrees in January.
The rainfall is from lows of 500mm to averages 1200mm annually.
Soil Requirements:
Daviesia wyattiana prefers sandy loams to light gritty clays. The soils are usually derived from decomposed sandstone and gritty metamorphic rocks and at times course shale. The soils pH ranges from 4.5pH to 6pH. It does not tolerate waterlogged soils. Non saline to moderately saline soils are tolerated.
Height & Spread:
Wild Plants: 1m to 2.5m by 1m to 2m
Characteristics:
Daviesia wyattiana grows as an open small multi stemmed shrub branching close to the ground. The triangular to angular stems are pale grey-green to pale olive-green, glabrous and measure 2mm to 3.5mm in width. Young shoots are dark green and glabrous.
The alternate linear leaves are 40mm to 220mm in length by 2mm to 8mm width at the base. The stipules are absent on this species. The petioles measure 0mm to 0.5mm in length. The bases are tapered while the apexes are long acute to obtuse. The discolourous coriaceous laminas are mid grey-green, glabrous on the upper laminas while the lower laminas are usually slightly paler. The laminas are flat. The leaves’ margins are entire. The mid vein is strongly prominent on the upper lamina and faintly prominent on the lower lamina.
The inflorescences of Daviesia wyattiana are simple umbiliform born from the leaf axils. There are 4 to 7 usually 5 flowers on an umbel. There is often a single flower which develops below the umbel on the peduncle. The deep grey-green tinged maroon to deep reddish-brown or maroon filiform peduncle and pedicels are glabrous. The peduncles measure 7mm to 23mm in length while the pedicels measure 8mm to 15mm in length. The spathulate to ovate involucral bracts and the peduncular bract is at the base of the pedicel on the single peduncle flower measure 2mm to 3.4mm in length by 1mm to 1.5mm in width.
The individual flowers are typical legume and measure 8mm to 10mm in height by 9mm to 11mm in width. The deep grey-greenish tinged maroon calyxes measure 3.7mm to 4.4mm in length including the 0.8mm to 1.3mm receptacle. The 6 dimorphic acute calyx lobes measure 1.2mm to 1.8mm in length. The upper pair are usually equal in size and shape. The united or contorted, asymmetrical broad ovate standard petals have a wide deep emarginated obtuse apex when united. The yellow standards have a yellow base with a large splash of red, maroon or burgundy markings radiating from near the base. There is also a red, maroon or burgundy line longitudinally where the standards are united when united. The reverse side of the standards is yellow with red, maroon or burgundy radiating out almost to the margins. The standards measure 3.5mm to 4mm in height by 4.5mm to 5mm in width. The reddish-maroon, oblong wing petals run parallel to the keel and turn yellow close to the apex. The wing petals measure 3mm to 4mm in length by 2mm to 2.5mm in width. The reddish-maroon keels are hidden by the wing petals and measure 2.5mm to 3.5mm in length by 1.5mm to 2mm in height. Daviesia wyattiana‘s flowers appear from August to November.
Daviesia wyattiana‘s fruits are rounded triangular flat pods. The glabrous, reddish-maroon pods turn brown on ripening. The style is persistent at the apex of the pods. The pods measure 7mm to 10mm in length by 4.5mm to 5.5mm in width.
Wildlife:
Daviesia wyattiana is a honey source for native bees and some small butterflies.
Cultivation:
Daviesia wyattiana are ideal in medium to large rockeries or native bush gardens where it can be mass planted to give them a bushier affect. It is good plants in frosty areas as they can stand frosts and temperatures down to minus 5 degrees. It is also drought tolerant once established and can cope with consistently lower rainfall and are ideal on dry sandy escarpments, hills and ridges.
If it is given adequate moisture, plenty of mulch for moisture retention and an even soil temperature, applying native fertilizers on a regular basis the plants will respond with exceptionally heavy flowering crops year after year. It often reaches its full potential in just 2 years and flowers from the first year from seed. In cultivation it will grow from 1.5 meter to 2 meters by 1.5 meter to 2 meters in diameter when grown in the open. It can be tip pruned to increase bushiness and flowering in the following season. Pruning should be done immediately after flowering has finished.
The plants open habit of growth makes it ideal for small shrubberies for planting over smaller shrubs which prefer good filtered light like the yellow flowering Hibbertia linearis, the red flowering Leischenalta formosum or the blue flowering Leischenalta biloba. For great colour contrasts; when in flower together, inter mingle it with other more open plants like the deep pink flowering Kunzea opposite or Hovea australis.
Planted in groups of 3 to 5 plants, back from a bend will become a very strong focal point in larger gardens particularly when in flower and gain a lot of attention whether you are coming or going because of the fresh clean look of the foliage even in the driest of times. Place it in the midground with smaller, large leaf, or fine leaf ground covers and very small shrubs or annuals in front. To the rear, use large leaf taller plants. Plants with pink, orange, red or purple flowers can be used in both the foreground and background. Plants with finer foliage in pale green or blue greys will also compliment the scene during periods when there are few flowers in the garden. This will lead your eyes directly to the yellow flowers in spring and have them yearning to see what lies beyond the bend.
Daviesia wyattiana is short lived to around 6 or 7 years so should be replaced from the fifth year to retain vigorous growth in the garden.
Imagine 3 or 4 Daviesia wyattiana planted to one side of a heath bed and surrounded by a mass of Pink Boronia rosmarinifolia, or Hovea speciosa or Hovea montana and intermingling this with a pastel pink flowering Grevillea linearifolia. Now that is a site that would be hard to beat in late winter early spring.
Propagation:
Seeds: Because of its rarity, seeds of Daviesia wyattiana may be difficult to obtain. The seeds require treatment before sowing. Place the seeds into a container and pour boiling water onto the seeds and allow the water to cool. Let the seeds soak for 8 to 10 hours. The seeds that have not swollen from 1.5 times to twice their original size after soaking should be retreated before sowing. The seeds that have swollen from 1.5 to 2 times their original size should be sown immediately. The seeds that have not swollen should again be retreated.
Note, that any seeds which are floating on the surface are infertile and should be discarded.
Seeds that have not swollen after repeating the boiling water technique should be treated using the abrasion technique.
Alternatively the abrasion method has proven very successful for us. This involves rubbing the seeds gently between two sheets of very fine sandpaper to reduce the thickness of the seed coat. What we did if there are large numbers of seeds to do is a glue sheet of medium corundum to the inside surfaces of a small disposable container. Place the seeds into the container and shake the container vigorously for several minutes. Check to see if the coating has been partially removed.
Sow the freshly treated seeds directly into a seed raising mix and cover with 2mm to5mm of the mix. Place the trays in a warm to hot airy position keeping them moist not wet. When the seedlings are 25mm to 50mm tall, prick them out and plant them into 50mm native tubes using a seed raising mix. Nip the tips out of those plants you want to grow as shrubs to help promote bushiness from an early stage.
Once the seedlings reach 150mm to 200mm in height again nip the tips out and plant them out into their permanent position.
Fertilize using Seaweed, fish emulsion or organic chicken pellets soaked in water and apply the liquid on an alternate basis. Fertilize every 2 months until the plants are established then annually in early September to October to maintain health, vigour and better flowering.
Further Comments from Readers:
Hi reader, it seems you use The Bible of Botany a lot. That’s great as we have great pleasure in bringing it to you! It’s a little awkward for us to ask, but our first aim is to purchase land approximately 1,600 hectares to link several parcels of N.P. into one at The Pinnacles NSW Australia, but we need your help. We’re not salespeople. We’re amateur botanists who have dedicated over 30 years to saving the environment in a practical way. We depend on donations to reach our goal. If you donate just $5, the price of your coffee this Sunday, We can help to keep the planet alive in a real way and continue to bring you regular updates and features on Australian plants all in one Botanical Bible. Any support is greatly appreciated. Thank you.
In the spirit of reconciliation we acknowledge the Bundjalung, Gumbaynggirr and Yaegl and all aboriginal nations throughout Australia and their connections to land, sea and community. We pay our respect to their Elders past, present and future for the pleasures we have gained.
Dawsonia superba
Classification
Unranked: Bryophyta
Class: Polytrichopsida
Sub Class: Polytrichidae
Order: Polytrichales
Family: Polytrichaceae
Genus: Is probably named in honour of James Dawson who was an Australian Surveyor and collector of botanical specimens during the years of 1876-1899 but it cannot be substantiated 100mm.
Species: From Huper, which is Ancient Greek or later Superbiens, which is Latin for above, more than or beyond. It refers to plants which have more superior structural beauty than other plants in the genus.
Subspecies: Dawsonia superba var. pulchra. From Pulchra which is Latin for handsome or pretty. It refers to flowers, which are very attractive than the other sub species or varieties.
Subspecies: Dawsonia superba var. intermedia.From Inter/Intra, which is Latin for between or among and Mosos, which is Ancient Greek or Medium, which is Latin for half way or in a middle position. It refers to a characteristic which has a position somewhere in the middle.
Subspecies: Dawsonia superba var. superba.From Huper, which is Ancient Greek or later Superbiens, which is Latin for above, more than or beyond. It refers to plants which have more superior structural beauty than other plants in the genus.
Common Name: Giant Moss or Tall Dawsonia
Distribution:
Dawsonia superba is found south from the Macpherson National Park in south eastern Queensland to the Great Otway National Park in southern Victoria. It is also found in northern Tasmania with an outlying population in Koombit National Park in central coastal Queensland. It is mainly found on and east of the Great Dividing Range though it does extend in a northerly direction north of Melbourne.
https://avh.ala.org.au/occurrences/search?taxa=Dawsonia+superba#tab_mapView
Habitat Aspect Climate:
Dawsonia superba prefers dense shade, light shade and dappled sunlight. It grows as a lithophyte or terrestrial herb in montane rainforests, and moist closed Eucalyptus forests. It is also found growing on more porous rocks like granites and sandstones or in crevices of basalts where leaf litter accumulates in large quantities. The altitude ranges from 5 meters ASL to 900 meters ASL.
The temperature ranges from minus 4 degrees in August to 34 degrees in January.
The rainfall ranges from lows of 800mm to 3000mm average per annum.
Soil Requirements:
Dawsonia superba is usually found growing on better quality porous rocks or light clays to heavy clays. The soils pH ranges from 6.5pH to 7pH are preferred. It is not tolerant of waterlogged soils though the soils are usually moist. Non saline soils to slightly saline soils are tolerated as are salt laden winds.
Height & Spread:
Wild Plants: 150mm to 400mm by 20mm to several hundred square meters.
Characteristics:
Dawsonia superba is a stiff, robust moss. The individual plants are erect and form large spreading colonies. The stems are deep green, sea-green to almost black and glabrous.
The spiralling leaves of Dawsonia superba are linear and measure 8mm to 18mm in length. The leaves are sessile. The bases are truncate on the stem while the apexes are tapering. The concolourous grey-green to deep green laminas are glabrous.
The plants are monecious with the male and female gametoecium appearing on separate plants. The terminal gametoecium are reddish-brown. The flowers appear all year when conditions are favourable.
The fruits are reddish-brown, oblong capsules with an acute apex. They are held above the foliage. The capsules are covered in reddish-brown hairs externally and are covered in white hirtellous hairs around the lips.
Wildlife:
Dawsonia superba wildlife is unknown to the author.
Cultivation:
Dawsonia superba is a beautiful fern like plant for bush house in pots and planters. The plants are difficult to transplant and maybe difficult to repot. The plant has been included in “Bible of Botany” as many bushwalkers and enthusiasts know of it when hiking and always ask what is it or I would love to be able to cultivate them.
Fertilize using Seaweed, fish emulsion or organic chicken pellets soaked in water on an alternate basis. Fertilize every two months until the plants are established then twice annually in early September or March to maintain health, vitality and better flowering.
Propagation:
Spores: The propagation techniques for successful growing are unknown to the author.
Fertilize using Seaweed, fish emulsion or organic chicken pellets soaked in water and apply the liquid on an alternate basis. Fertilize every 2 months until the plants are established then annually in early September to October to maintain health, vigour and better flowering.
Further Comments from Readers:
Hi reader, it seems you use The Bible of Botany a lot. That’s great as we have great pleasure in bringing it to you! It’s a little awkward for us to ask, but our first aim is to purchase land approximately 1,600 hectares to link several parcels of N.P. into one at The Pinnacles NSW Australia, but we need your help. We’re not salespeople. We’re amateur botanists who have dedicated over 30 years to saving the environment in a practical way. We depend on donations to reach our goal. If you donate just $5, the price of your coffee this Sunday, We can help to keep the planet alive in a real way and continue to bring you regular updates and features on Australian plants all in one Botanical Bible. Any support is greatly appreciated. Thank you.
In the spirit of reconciliation we acknowledge the Bundjalung, Gumbaynggirr and Yaegl and all aboriginal nations throughout Australia and their connections to land, sea and community. We pay our respect to their Elders past, present and future for the pleasures we have gained.
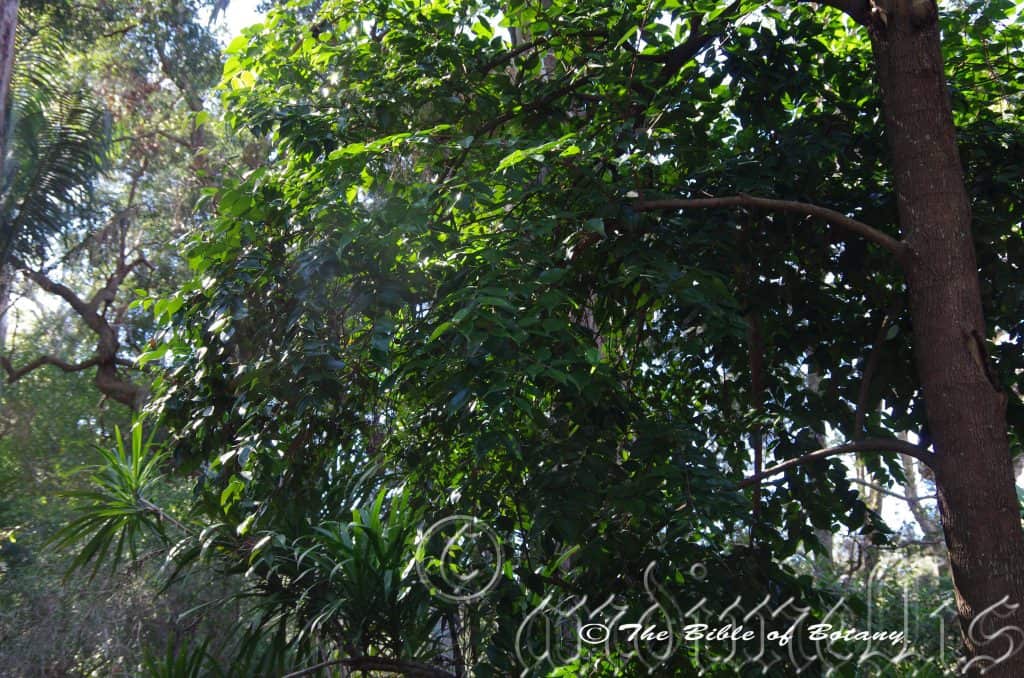
NCBG Coffs Harbour NSW
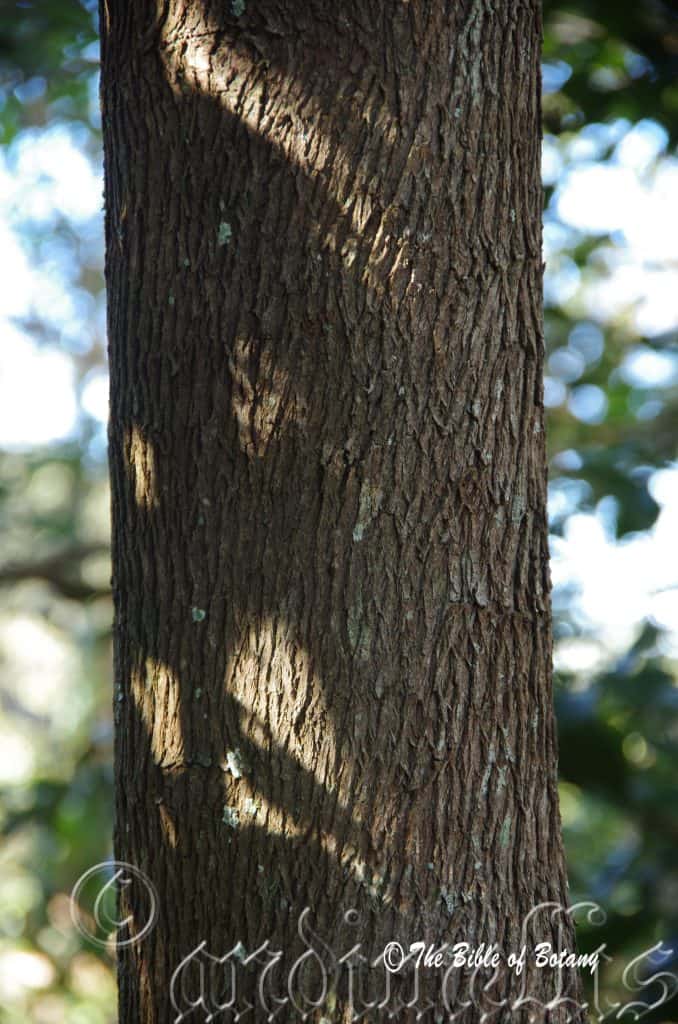
NCBG Coffs Harbour NSW
Decaspermum humile
Classification
Division: Magnoliophtya
Class: Magnoliopsida
Order: Myrtales
Family: Myrtaceae
Genus: Is named in Honour of Hugh Davies; 1739-1821, who was a Welsh botanist who lived in Angelsea and translated the native plants into Welsh.
Species: From Deca, which is Ancient Greek for ten and Sperma, which is Ancient Greek for a seed. It refers to the number of seeds numbering 8 to 10 usually 10 in each fruit.
Common Name: Silky Myrtle, Currant Myrtle, Grey Persimmon or Brown Myrtle.
Distribution:
Decaspermum humile is found in two disjunct populations, south from Cape York Peninsula to Paluma National Park in far north Queensland and south from Kroombit National Park and Fraser Island in central Queensland to Gosford in central coastal New South Wales. It is found on and east of the Great Dividing Range.
https://avh.ala.org.au/occurrences/search?taxa=Decaspermum+humile#tab_mapView
Habitat Aspect Climate:
Decaspermum humile prefers full sun to dappled shade. It is found growing in riparian zones and gallery forests adjacent and in warm, moist sub-tropical rainforests and dry tropical rainforests. The altitude ranges from 5 meters ASL to 1000 meters ASL.
The temperatures range from minus 2 degrees in August to 38 degrees in January.
The rainfall ranges from lows of 1200mm to an average of 2900mm annually.
Soil Requirements:
Decaspermum humile prefers better quality sandy light clays to medium clays. The soils are derived from decomposed brown basalt, black basalt, shale and metamorphic rocks. The soils pH ranges from 5.5pH to 7pH. It does not tolerate waterlogged soils. Non saline soils to moderately saline soils are tolerated.
Height & Spread:
Wild Plants: 10m to 18m by 8m to 12m.
Characteristics:
Decaspermum humile is a tall straight shafted small tree with a deep grey scabrous trunk. The branches are deep grey to pale grey, deep brown to reddish-brown or maroon-red and slightly scabrous or glabrous. Branchlets are pale grass-green and covered in fine, white caduceus sericeous hairs.
The opposite leaves of Decaspermum humile’s are simple ovate to lanceolate. They measure 20mm to 80mm in length by 15mm to 30mm in width. The petioles are pale green and covered in fine, white sericeous hairs and measure 4mm to 7mm in length. The bases are cuneate, attenuate while the apexes are acuminate. The discolourous laminas are deep green to sea-green and covered in fine, white caduceus sericeous hairs on the upper lamina while the lower laminas are paler and densely covered in fine white sericeous hairs. The laminas are flat to slightly recurved from the mid vein to the margins and slightly decurve towards the apexes. The laminas have 1 or 2 small undulations and are sparsely covered in conspicuous oil glands. The leaf margins are entire and slightly recurve on mature trees. The mid vein is prominent on the lower lamina and is barely prominent on the upper lamina. The lateral veins and venation are inconspicuous.
The new growth is glossy bronze-pink and covered in fine, white caduceus puberulent to canescent hairs on the upper lamina while the lower laminas are paler and covered in fine sericeous hairs.
The inflorescence of Decaspermum humile are short open botryoides, small cymes of 3 flowers, both or with single flowers all born from the leaf axils. They measure 15mm to 70mm in length by 50mm to 50mm in diameter. The lime-green hypanthium is covered in fine white sericeous hairs. The usually 5 or rarely 6 obtuse sepals measure 1.5mm to 2mm in length. The 5 or rarely 6 usually 5 white, oblong to orbicular petals measure 3mm to 5mm in length by 2.5mm to 3mm in width. The peduncles and pedicels are covered in fine white sericeous hairs. The peduncles measure 10mm to 16mm in length while the pedicels 4mm to 7mm in length on the cymes and botryoides. The single flower’s pedicels measure 8mm to 11mm in length.
The numerous, white, filiform filaments measure 4.5mm to 6mm in length. The cream anthers are orbicular.
The white, tapering style measures 4mm to 5.5mm in length and has a small, white capitate stigma. The mild honey scented flowers appear from February to April.
Decaspermum humile’s fruits are globose berries. The green berries turn black when ripe. They measure 5mm to 9mm in length by 4mm to 8mm in width. The berries contain 8 to 10 black seeds.
Wildlife:
Decaspermum humile‘s wildlife attracts most nectar feeding birds, butterflies, pollen flies and native bees.
Cultivation:
Decaspermum humile is an ideal tree for medium or large gardens where a medium specimen tree or rainforest enhancement is required. In cultivation it will grow 8 meters to 12 meters in height by 4 meters to 6 meters in diameter when grown in the open. It does well at least as far south as Melbourne and Adelaide provided only light frosts are experienced. The tree will maintain its lower branches and leaves almost to the ground. It is fast growing on most soils given plenty of mulch, adequate water and an annual native organic fertilizing regime.
It is best used adjacent to small areas of bush, close to paths for shade or the house so their fragrant white flowers can be viewed and enjoyed regularly. it is great as the central feature in a rockery or long driveway. It can be planted to form an avenue or as the feature surrounding a BBQ. If it is surrounded by shorter plants with deep green foliage and red flowers they will dominate at the center giving a dense rainforest look with plenty of colour. Great contrasting flowering trees of similar diameter would be Stenocarpus sinuatis which; is slimmer and taller, would make beautiful avenues.
It is also suitable as a small park trees, placed in the foreground or planted centrally as the main feature in small gardens.
Propagation:
Seeds: Sow fresh Decaspermum humile‘s seeds directly into a seed raising mix, keeping them moist not wet. Place the trays in a warm shaded position. When the seedlings are 40mm to 50mm tall, prick them out and plant them into 50mm native tubes using a good organic mix.
As the seedlings roots reach the bottom of the tubes plant them out into their permanent position.
For mass plantings plant the seedlings out at 10 meter to 12 meter centers for specimen trees or 6 meter to 8 meters apart for the dense rainforest look.
Fertilize using Seaweed, fish emulsion or organic chicken pellets soaked in water and apply the liquid on an alternate basis. Fertilize every 2 months until the plants are established then annually in early September to October to maintain health, vigour and better flowering.
Further Comments from Readers:
Hi reader, it seems you use The Bible of Botany a lot. That’s great as we have great pleasure in bringing it to you! It’s a little awkward for us to ask, but our first aim is to purchase land approximately 1,600 hectares to link several parcels of N.P. into one at The Pinnacles NSW Australia, but we need your help. We’re not salespeople. We’re amateur botanists who have dedicated over 30 years to saving the environment in a practical way. We depend on donations to reach our goal. If you donate just $5, the price of your coffee this Sunday, We can help to keep the planet alive in a real way and continue to bring you regular updates and features on Australian plants all in one Botanical Bible. Any support is greatly appreciated. Thank you.
In the spirit of reconciliation we acknowledge the Bundjalung, Gumbaynggirr and Yaegl and all aboriginal nations throughout Australia and their connections to land, sea and community. We pay our respect to their Elders past, present and future for the pleasures we have gained.
Deeringia amaranthoides
Classification
Unranked: Charophtya
Class: Equisetopsida
Order: Caryophyllales
Family: Amaranthacaceae
Genus: Is named in Honour of George Deering; 1695-1749, who was an English botanist.
Species: From Amaranton, which is Ancient Greek for an everlasting flower, Antha/Anthos which is Ancient Greek for the male reproductive organ on a flower or the flower and Eidos/Oides, which is Ancient Greek for alike or similar to. It refers to the plants, which are similar to those in the Amaranthus genus.
Common Name: Deeringia.
Distribution:
Deeringia amaranthoides is found south from The Torres Strait Islands, Cape York Peninsula in far north eastern Queensland to Mimosa Rocks National Park in coastal southern New South Wales. It is found on both sides of the Great Dividing Range.
https://avh.ala.org.au/occurrences/search?taxa=Deeringia+amaranthoides#tab_mapView
Habitat Aspect Climate:
Deeringia amaranthoides prefers full sun to dappled shade. It grows in most types of rainforests from moist littoral rainforests to dry tropical rainforests. The altitude ranges from 5 meters ASL to 850 meters ASL.
The temperatures range from minus 2 degrees in August to 38 degrees in January.
The rainfall ranges from lows of 500mm to an average of 3200mm annually.
Soil Requirements:
Deeringia amaranthoides prefers better quality sandy light clays to medium clays. The soils are derived from decomposed brown basalt, black basalt, sandstone, shale, metamorphic rocks and accumulated sands behind the frontal dunes. The soils pH ranges from 4.5pH to 6.5pH. It does not tolerate waterlogged soils. Non saline soils to moderately saline soils are tolerated as are salt laden winds.
Height & Spread:
Wild Plants: 2m to 12m by 3m to 4m.
Characteristics:
Deeringia amaranthoides is a tall creeper or small shrubby twiner with a brown to deep rusty-brown scabrous trunk. The bark is densely covered in farinaceous lumps. The branches are mid green, glabrous or with fine longitudinal ridges. The new growth is covered in pale grey caduceus hirsute hairs.
The alternate leaves of Deeringia amaranthoides are simple ovate to broad lanceolate and measure 50mm to 250mm in length by 30mm to 60mm in width. The petioles measure 10mm to 22mm in length. The asymmetrical bases are rounded and shortly attenuate while the apexes are acuminate. The discolourous laminas are pale olive-green, mid green to sea-green and glabrous on the upper lamina while the lower lamina is slightly paler. The upper laminas are flat or are slightly convex and decurve strongly downwards from the base to the apexes. The leaf margins are entire. The mid vein and lateral veins are strongly prominent on the lower laminas and very distinctly on the upper laminas.
The new growth is lime green, glossy bronze on the apex third and glabrous.
The inflorescence of Deeringia amaranthoides are long interrupted spikes that measure 150mm to 250mm in length by 6mm to 11mm in diameter. The flowers are subtended by a minute green bract and 2 minute green bracteoles. The perianth measures 1.5mm to 2.5mm in length by 1.2mm to 2mm in diameter over all. The individual green, hyaline petals measure 1.5mm to 2mm in length by 1mm in width. The pedicels measure 0.7mm to 2mm in length.
The 5 very slim, filiform, filaments are off white to deep burgundy almost black and are fused at the base of the ovary forming a slender ring. The filaments measure 1.5mm to 2mm in length. The dorsifixed anthers are white with white pollen.
The deep green, globose ovary is glabrous. The short white style is trilobed and measures 0.5mm in length while the stigma lobes measure 0.5mm to 0.7mm in length. The flowers appear from April to September.
Deeringia amaranthoides’s fruits are subglobose to globose berries. The green berries turn red when ripe. They measure 4mm to 8mm in length by 4mm to 7mm in diameter. The perianth segments are persistent at the base while the remnants of the style scar the apex. Each seed is attached by a long filiform funicle to a central point at the base of the berry.
Wildlife:
Deeringia amaranthoides are attractive to small and medium size fruit eating birds.
The fruits were consumed by aborigines and apparently have an unpalatable flavour reminiscent of dried grapes.
Cultivation:
Deeringia amaranthoides is a vigorous large ground cover, sub shrub or creeper for larger areas, fences, near water features or trellises. It needs some shade and even moisture to look its best and to maintain a dense look. In the garden it can fill that difficult spot in the shade on heavy soils or where there is hot sun and dense shade variation over the different seasons.
Deeringia amaranthoides is an excellent plant for well-lit areas around swimming pools, on the southern side of homes and between buildings where sunlight varies considerably throughout the year from a few hours to all day.
Inside it is susceptible and will drop its leaves when the central heating is turned on. Rotate the plants container so a different side faces the light every couple of days to a week. This will ensure the plant grows evenly and not to one side.
It is particularly useful scrambling over large mounds or along fences where it can attract and feed the birds. If used in this manner be aware of cats as low lying plants will attract the birds but leave them vulnerable to attack by cats.
It often reaches its full potential within two years and flowers from the second year. It flowers best following a wet winter. Deeringia amaranthoides is a spectacular and reliable bloomer for producing good quantities of brilliant scarlet red to crimson red fruit year after year.
Plants must be pruned annually in the first few years to encourage it to grow as a small scrambly bushy shrub. If this is not done in favourable soils and weather it will very quickly try to form the liana it is known for.
Jams and conserves most probably could be made from the fruits as it is produced in large quantities. This is one plant that has great potential to be grown for natural organic food colouring. The colour is easily extracted through crushing of semi ripe fruits and evaporating the excess water off. As the fruits ripen all at once on a spike the collection of large quantities is easy and fruiting under cultivation is very reliable.
INDOORS OR POTTED ON:
Sawdust or sand mixes are too well draining unless the sawdust has completely composted down where it exhibits a texture like plasticine to the touch. Moisture can be squeezed out between the fingers yet it remains moist. I find this a great basis to start with.
Mix equal parts of the well decomposed saw dust with the above feel with perlite and vermiculite. To this add two parts sharp clean sand, one part compost and one part good crusher dust from a basalt rock quarries. Preferably black basalt but both are good. Make sure the sand comes from a source that does not have salt.
The decomposed Sawdust in this condition creates the moisture retention and holds nutrient in. The perlite and vermiculite make the mix neutral and both have great water holding capacity without shrinkage with age. The sand creates good drainage and is good for good healthy root development. The crusher dust adds vital minerals which the plants need.
Indoor plants need good light and ventilation without drying breezes or wind.
Again fertilize the plants on a monthly basis with the above formula on a rotation basis.
Propagation:
Seeds: Sow fresh Deeringia amaranthoides‘s seeds directly into a seed raising mix, keeping them moist not wet. Place the trays in a warm shaded position under 30mm to 50mm shade. When the seedlings are 40mm to 50mm in height, prick them out and plant them into 50mm native tubes using a good organic mix.
As the seedlings roots reach the bottom of the tubes plant them out into their permanent position.
For mass plantings plant the seedlings out at 2 meter to 2.5 meter centers for shrubs or 4 meter to 6 meters apart for creepers on a fence or pergola. If it is being grown in an orchard they should be planted at 2 meter centers with the rows at 5 meters for easy maintenance.
Cuttings: Use 70mm to 100mm long semi hardwood cuttings prepared from partially mature wood of the current season’s growth, just after a flush of growth has hardened off. Take the cuttings from early spring or January to early April or later if you are in a frost free area. Take the cuttings when wood is reasonably firm and the leaves of mature size.
1 Prepare the cutting mix by adding one third sharp clean river sand, one third peat and one third perlite. These ingredients are sterilize,
2 Select good material from non diseased plants,
3 Select semi green stems for cuttings. Look for a stem with two or three nodes,
4 Place the cutting on a flat, hard surface, and make a clean down one side of the cutting for 10mm to 15mm with a sharp sterile knife or razor blade. – This scarification of the node will increase the chances of roots emerging from this spot. Now remove all but one or two the leaves, leaving the apex leaves in tact. If the leaves are very large in proportion to the stem, cut off the apical halves.
5 Fill a saucer with water, and place a little mild to medium rooting hormone into another container like a milk bottle top. Dip the node end of the cutting into the water and then into the rooting hormone. Tap off any excess hormone,
6 Use a small dipple stick or old pencil to poke a hole into the soilless potting mix. Ensure the hole is slightly larger than the stem diameter and be careful not to wipe the rooting hormone off the cuttings base, place the cuttings in a pattern ensuring the cuttings are not touching each other,
7 I like to place the pots in Plastic bags to help maintain temperature and moisture. Place in a semi shaded place like under 50mm shade cloth.
8 When the cuttings have struck, open the bag to allow air circulation for a few days to a week,
9 Once hardened off remove the cuttings from the bag and allow to further hardening for a few more days,
10 Transplant into a good potting mix to grow on.
Fertilize using Seaweed, fish emulsion or organic chicken pellets soaked in water and apply the liquid on an alternate basis. Fertilize every 2 months until the plants are established then annually in early September to October to maintain health, vigour and better flowering.
Further Comments from Readers:
Hi reader, it seems you use The Bible of Botany a lot. That’s great as we have great pleasure in bringing it to you! It’s a little awkward for us to ask, but our first aim is to purchase land approximately 1,600 hectares to link several parcels of N.P. into one at The Pinnacles NSW Australia, but we need your help. We’re not salespeople. We’re amateur botanists who have dedicated over 30 years to saving the environment in a practical way. We depend on donations to reach our goal. If you donate just $5, the price of your coffee this Sunday, We can help to keep the planet alive in a real way and continue to bring you regular updates and features on Australian plants all in one Botanical Bible. Any support is greatly appreciated. Thank you.
In the spirit of reconciliation we acknowledge the Bundjalung, Gumbaynggirr and Yaegl and all aboriginal nations throughout Australia and their connections to land, sea and community. We pay our respect to their Elders past, present and future for the pleasures we have gained.
Dendrobium arborescens
Classification
Unranked: Charophtya
Class: Equisetopsida
Order: Caryophyllales
Family: Amaranthacaceae
Genus: Is named in Honour of George Deering; 1695-1749, who was an English botanist.
Species: From Arborescent, which is Latin for a tree. It refers to plants, which have a typical tree like structure.
Common Name:
Distribution:
Deeringia arborescens is found south from Munkang Kandju National Park on Cape York Peninsula in far north eastern Queensland to Wallingat National Park in coastal southern New South Wales. It is found on and east of the Great Dividing Range.
There is an isolated population found in the Kymberley range in north western Western Australia. It could be more widespread than the map indicates as it is widespread through New Guinea and west to South East Asia.
https://avh.ala.org.au/occurrences/search?taxa=Deeringia+arborescens#tab_mapView
Habitat:
Deeringia arborescens prefers full sun to dappled shade. It is found growing in most types of rainforests from littoral rainforests to wet tropical rainforests. It is found from 5 meters ASL to 750 meters ASL.
The temperatures range from minus 2 degrees in August to 38 degrees in January.
The rainfall ranges from lows of 750mm to an average of 3200mm annually.
Soil Requirements:
Deeringia arborescens prefers quality sandy loams, light clays to medium clays. The soils are derived from decomposed brown basalt, black basalt, sandstone, shale and metamorphic rocks. The soils pH ranges from 4.5pH to 6.5pH. It does not tolerate waterlogged soils. Non saline soils to moderately saline soils are tolerated.
Height & Spread:
Wild Plants: 6m to 30m by 6m to 10m.
Characteristics:
Deeringia arborescens is a tall creeper or medium shrubby twiner with a brown to deep rusty-brown trunk. The bark is densely longitudinally furrowed and densely covered in very rough scurfy lumps and bumps. The branches are mid brown and scurfy. The new growth is covered in pale grey caduceus tortuous pilose hairs.
The alternate leaves of Deeringia arborescens’s are simple ovate to lanceolate and measure 80mm to 180mm in length by 25mm to 60mm in width. The petioles are straight or twisted similar to a tendril especially on immature plants and measure 10mm to 20mm in length. The slightly asymmetrical bases are rounded or nearly so while the apexes are acuminate. The concolourous or discolourous laminas are mid green to sea-green, glabrous and covered in patches of white hirsute hairs on the upper lamina while the lower lamina is slightly paler and covered in white multicellular or branched pilose hairs. The upper laminas are flat or are slightly convex and decurve strongly downwards from the base to the apexes. The leaf margins are entire. The mid vein and lateral veins are strongly prominent on the lower laminas and very distinctly on the upper laminas.
The inflorescence of Deeringia arborescens are panicles that measure 200mm to 300mm in length. The imperfect flowers are subtended by minute green chartaceous bracts. The perianth measures 1mm to 2mm in length by 1mm to 2mm in diameter over all. The pedicels measure 0.7mm to 1.5mm in length.
The 5 hyaline petals on the male flowers measure 1.5mm to 2.5mm in length by 1.5mm in width. The 5 filiform, hyaline filaments are off white and are fused at the base of the ovary forming a slender ring. The filaments measure 1.5mm to 2mm in length. The dorsifixed anthers are cream with cream pollen. The ovary is dysfunctional.
The deep green, globose ovary is glabrous. The short pascal yellow-green to pascal lime-green style is trilobed and measures 0.4mm in length while the stigma lobes measure 0.4mm in length. The staminodes are absent or more frequently number 3 to 5. The flowers appear from November to January.
Deeringia arborescens’s fruits are subglobose to globose berries. The green berries turn red when ripe. They measure 3mm to 5mm in length by 3mm to 5mm in diameter. The perianth segments are persistent at the base while the remnants of the style scar the apex. Each seed is attached by a long filiform funicle to a central point at the base of the berry.
Wildlife:
Deeringia arborescens are attractive to small and medium size fruit eating birds.
The fruits were consumed by aborigines and apparently have an unpalatable flavour reminiscent of dried grapes.
Cultivation:
Deeringia arborescens is a very vigorous large ground cover or creeper for larger areas, fences, in court yards, near water features or trellises. It needs some shade and even moisture to look its best and to maintain a dense look. In the garden it can fill that difficult spot in the shade on heavy soils or where there is hot sun and dense shade variation over the different seasons.
Deeringia arborescens is an excellent plant for well-lit courtyards, around swimming pools, on the southern side of homes and between buildings where sunlight varies considerably throughout the year from a few hours to all day. Inside it is susceptible to leaf drop if it dries out or when the central heating is turned on. Rotate the plants container so a different side faces the light every couple of days to a week. This will ensure the plant grows evenly and not to one side.
Plants must be pruned annually in the first few years to encourage it to grow as a small scrambly bushy shrub. If this is not done in favourable soils and weather they will very quickly try to form the liana it is known for.
Jams and conserves most probably could be made from the fruits as it is produced in large quantities. This is one plant that has great potential to be grown for natural organic food colouring. The colour is easily extracted through crushing of semi ripe fruits and evaporating the excess water off. As the fruits ripen all at once on a spike the collection of large quantities is easy and fruiting under cultivation is reliable. The fruits are a lot smaller than those of Deeringia arborescens so would require a lot more work.
INDOORS OR POTTED ON:
Sawdust or sand mixes are too well draining unless the sawdust has completely composted down where it exhibits a texture like plasticine to the touch. Moisture can be squeezed out between the fingers yet it remains moist. I find this a great basis to start with.
Mix equal parts of the well decomposed saw dust with the above feel with perlite and vermiculite. To this add two parts sharp clean sand, one part compost and one part good crusher dust from a basalt rock quarries. Preferably black basalt but both are good. Make sure the sand comes from a source that does not have salt.
The decomposed Sawdust in this condition creates the moisture retention and holds nutrient in. The perlite and vermiculite make the mix neutral and both have great water holding capacity without shrinkage with age. The sand creates good drainage and is good for good healthy root development. The crusher dust adds vital minerals which the plants need.
Indoor plants need good light and ventilation without drying breezes or wind.
Again fertilize the plants on a monthly basis with the above formula on a rotation basis.
Propagation:
Seeds: Sow fresh Deeringia arborescens seeds directly into a seed raising mix, keeping them moist not wet. Place the trays in a warm shaded position under 30mm to 50mm shade. When the seedlings are 40mm to 50mm in height, prick them out and plant them into 50mm native tubes using a good organic mix.
As the seedlings roots reach the bottom of the tubes plant them out into their permanent position.
For mass plantings plant the seedlings out at 2 meter to 2.5 meter centers for shrubs or 4 meter to 6 meters apart for creepers on a fence or pergola.
Cuttings: Use 70mm to 100mm long semi hardwood cuttings prepared from partially mature wood of the current season’s growth, just after a flush of growth has hardened off. Take the cuttings from early spring or January to early April or later if you are in a frost free area. Take the cuttings when wood is reasonably firm and the leaves of mature size. Remove half the leaves from the bottom section being careful not to tear the bark. Take a 10mm slice off the bark from the bottom of the cutting on one side. Use a weak rooting hormone, dip the cutting in and place the cutting in a moist sterile seed raising mix using a dipple stick. When the cuttings have obviously struck and have developed good roots treat them as for seedlings.
Fertilize using Seaweed, fish emulsion or organic chicken pellets soaked in water and apply the liquid on an alternate basis. Fertilize every 2 months until the plants are established then annually in early September to October to maintain health, vigour and better flowering.
Further Comments from Readers:
Hi reader, it seems you use The Bible of Botany a lot. That’s great as we have great pleasure in bringing it to you! It’s a little awkward for us to ask, but our first aim is to purchase land approximately 1,600 hectares to link several parcels of N.P. into one at The Pinnacles NSW Australia, but we need your help. We’re not salespeople. We’re amateur botanists who have dedicated over 30 years to saving the environment in a practical way. We depend on donations to reach our goal. If you donate just $5, the price of your coffee this Sunday, We can help to keep the planet alive in a real way and continue to bring you regular updates and features on Australian plants all in one Botanical Bible. Any support is greatly appreciated. Thank you.
In the spirit of reconciliation we acknowledge the Bundjalung, Gumbaynggirr and Yaegl and all aboriginal nations throughout Australia and their connections to land, sea and community. We pay our respect to their Elders past, present and future for the pleasures we have gained.
Nana Glen NSW
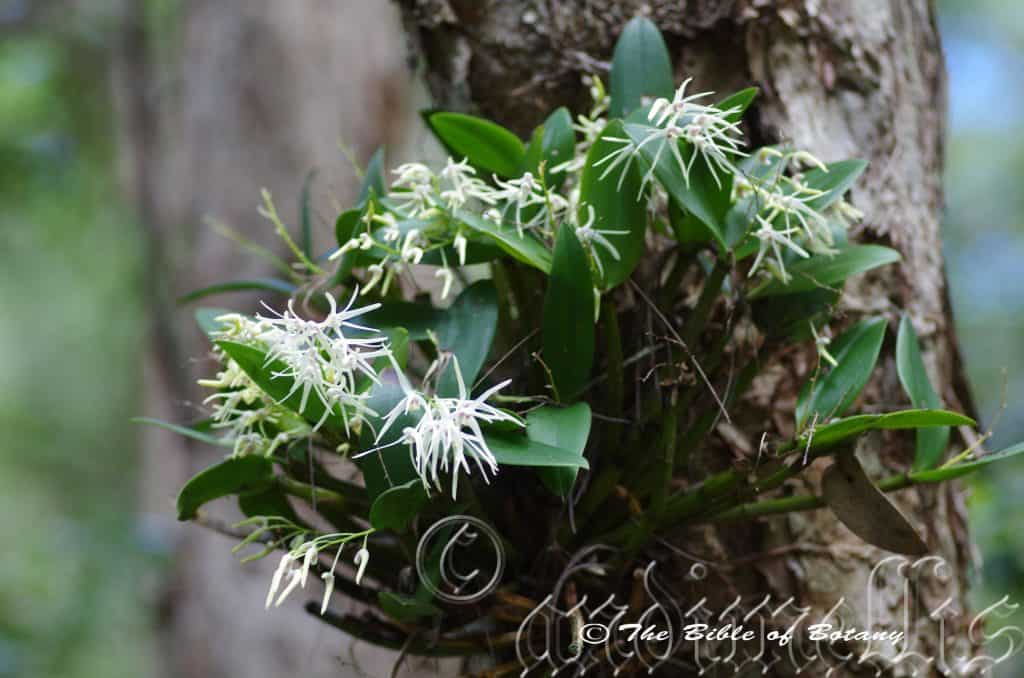
Kyogle NSW
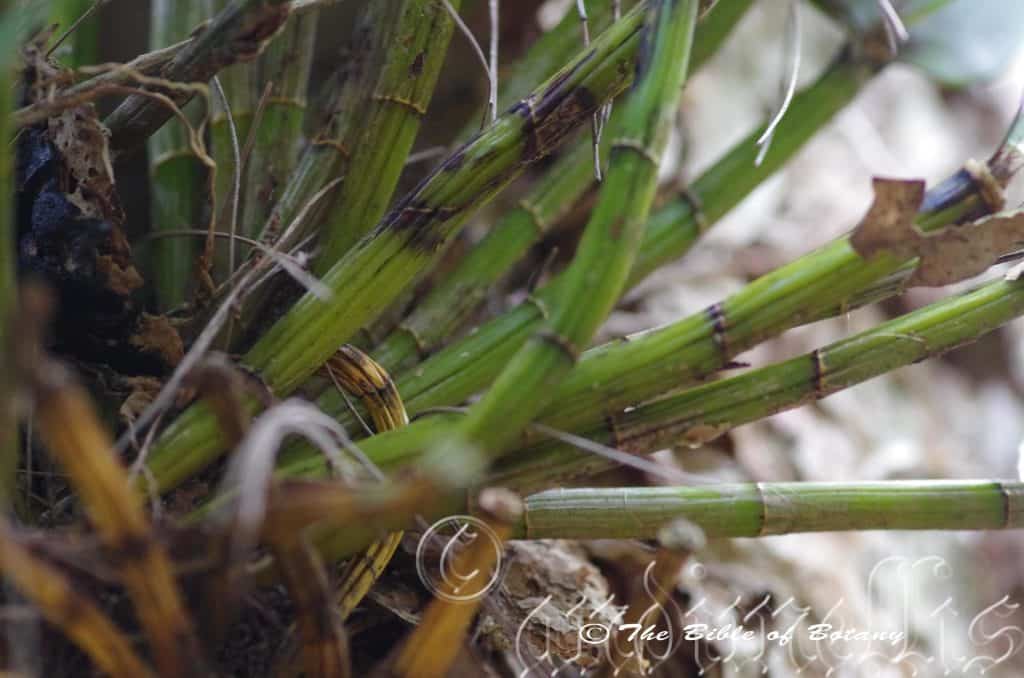
Clarence Valley NSW
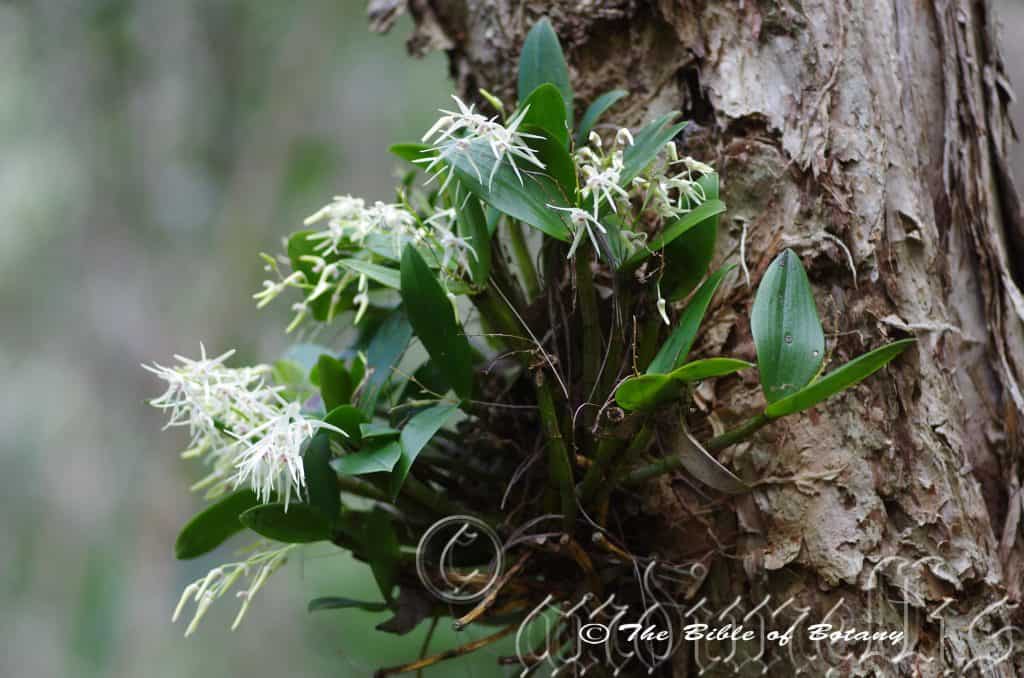
Nana Glen NSW
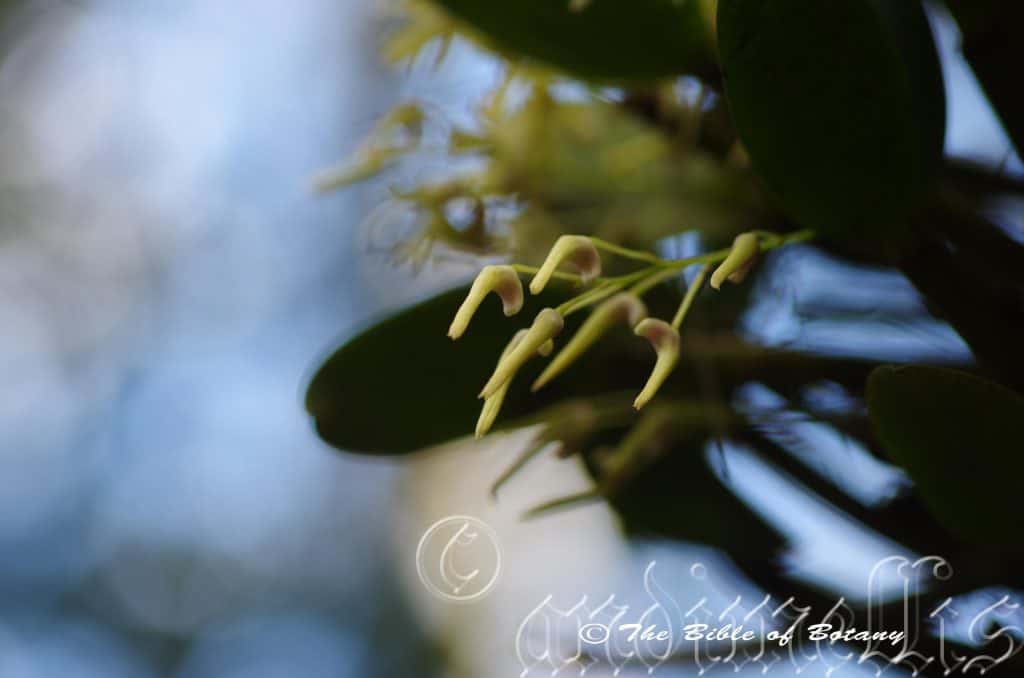
Nana Glen NSW
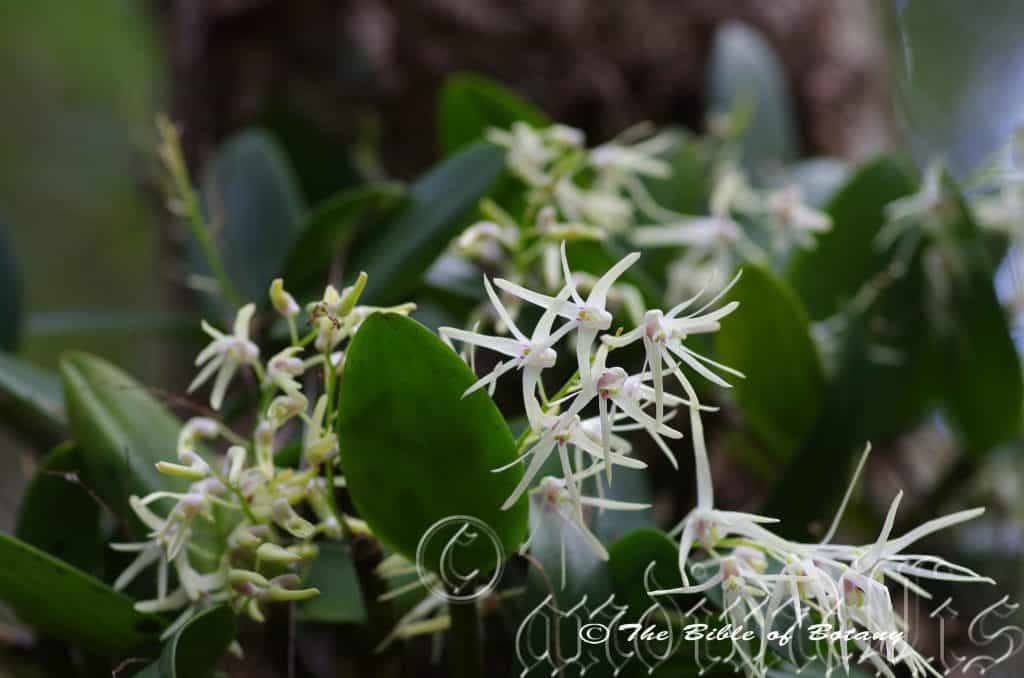
Nana Glen NSW
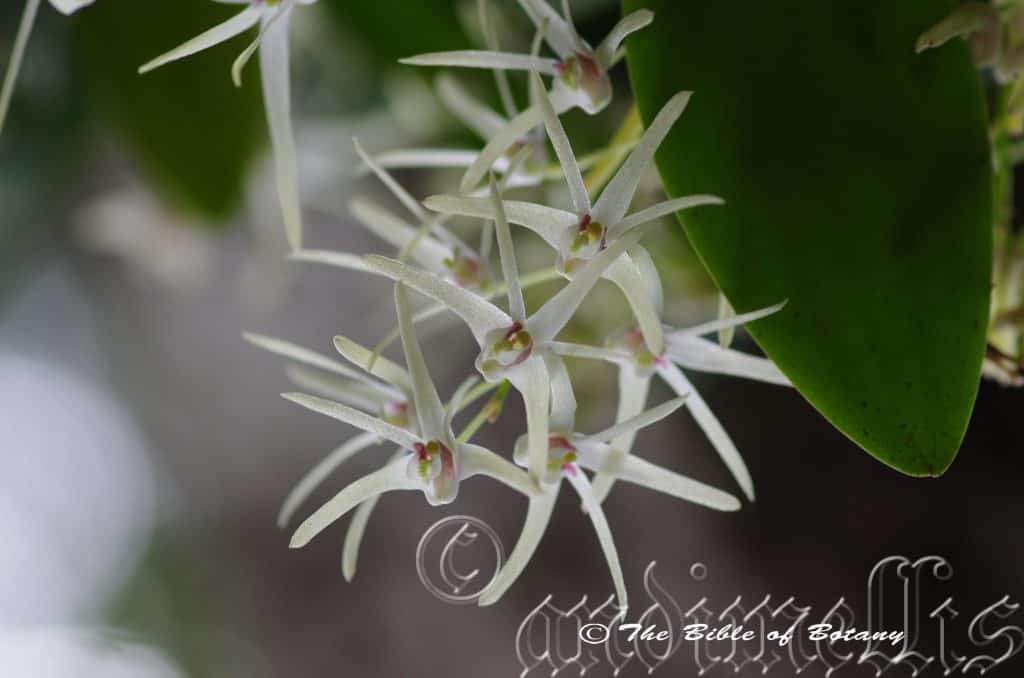
Nana Glen NSW
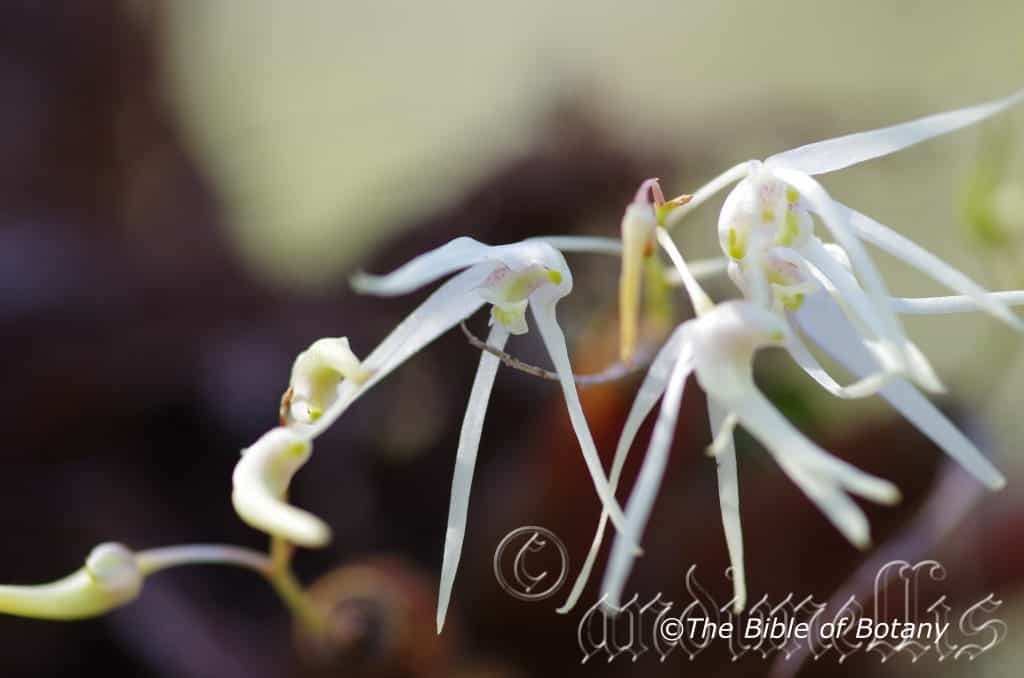
Author’s Garden The Pinnacles NSW
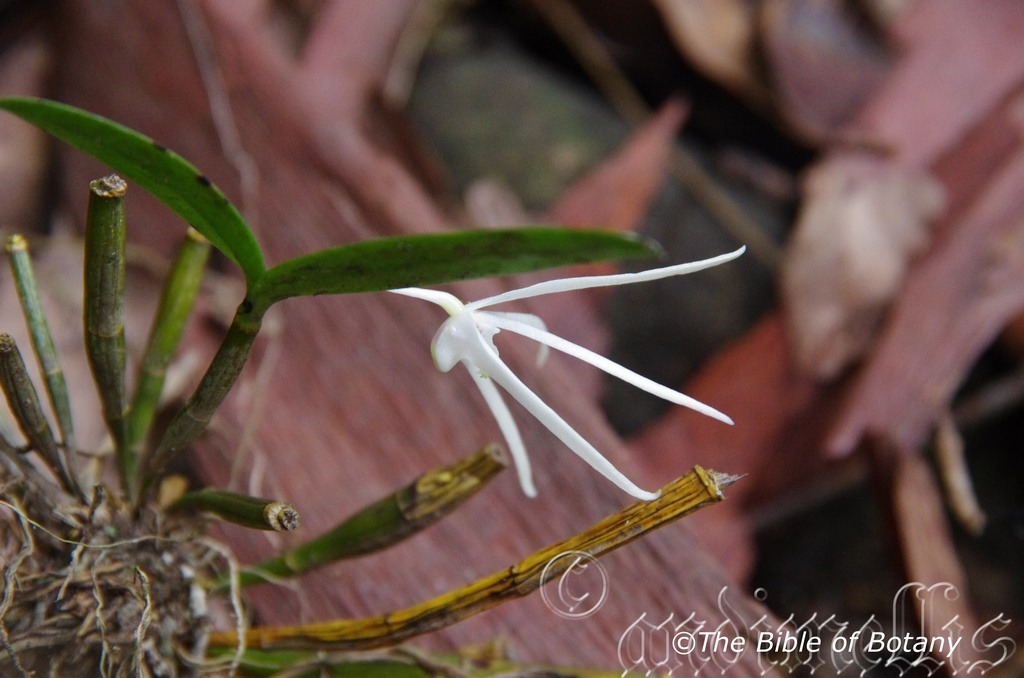
Author’s Garden The Pinnacles NSW
Dendrobium aemulum
Classification
Class: Monocots
Order: Asparagales
Family: Orcidaceae
Subfamily: Epidendroideae
Tribe: Dendrobieae
Sub Tribe: Dendrobiinae
Genus: From Dendron, which is Ancient Greek for a tree and Bios, which is Ancient Greek for life. It refers to plants, which live on trees to survive, not as parasites or saphrophytic.
Species: From Aemulus which is Latin for emulative or to compete with. It refers to plants, which appear similar to another species or genus.
Common Name: Iron Bark Orchid or White feather Orchid.
Distribution:
Dendrobium aemulum is found from Mossman in the north of Queensland to the Moruya River in southern New South Wales. It is rare north of Childers where it is found in 3 disjunct populations west of Mackay, and near Cairnes. It is found mainly on the eastern side of the Great Dividing Range
https://avh.ala.org.au/occurrences/search?taxa=Dendrobium+aemulum#tab_mapView
Habitat Aspect Climate:
Dendrobium aemulum prefers dappled shade to heavy shade. It grows as an epiphyte on iron bark Eucalyptus trees in moist Eucalyptus forests and dry Eucalyptus forests. The altitude ranges from 5 meters ASL to 450 meters ASL.
The temperatures range from 1 degrees in July to 36 degrees in January.
The rainfall ranges from lows of 900mm to 3000mm average per annum. The rainfall is seasonal mainly summer and autumn with drier winters.
Soil Requirements:
Dendrobium aemulum prefers the rough bark of coastal iron bark Eucalyptus trees as an epiphyte. It is also found growing on the non-decorticating bark of Tristania conferta when growing adjacent to rainforests.
Height & Spread:
Wild Plants: 30mm to 70mm by 300mm x 500mm.
Characteristics:
Dendrobium aemulum grows as an erect, side way pointing or downward pointing epiphyte. The stems are succulent, cylindrical canes which taper at the base. They are dark green, purple black or dark greenish purple measuring 30mm to 300mm in length by 5mm to 10mm in diameter.
The white fleshy tuberculate roots are born from the base of the canes and have suction pads to adhere the orchids to the trees and radiate outwards from the base.
There are 2 to 4 semi erect ovate leaves that measure 20mm to 60mm in length by 15mm to 25mm in width. They are glabrous conduplicate and leathery which assists in channelling water towards the roots when held erect.
Inflorescences of Dendrobium aemulum are a raceme with 2 to 12 flowers. They are born from the axis of the leaves. The rachis varies from 20mm to 60mm in length while the peduncles are 15mm to 18mm in length including the 2mm to 3mm ovary which appears to be part of the pedicel but is slightly swollen.
The sepals and petals are linear to oblong and measure 15mm to 25mm in length by 2.5mm to 3.5mm in width. The sepals and petals base is truncate with a tapering apex. The lower sepals curve forward from the ovary while the dorsal sepal stands erect.
The labellum is spathulate with a reflex apex and sides curving strongly upwards from the base to the mid-point towards the apex. The margins are entire.
The labellum is white to pale yellow with reddish and purple markings and measures 7mm to 8mm in length by 5mm in width. The sepal and petals are white to pale yellow turning pink with age. Flowering occurs from July through to September.
The seed pods are 12mm to 15mm in length by 7mm to 8mm in width and dry to a light semi glossy deep reddish brown longitudinal stripes.
Wildlife:
Dendrobium aemulum is the host to numerous small native bees when in flower and can fosters the Dendrobium beetle, Stethopachys formosa.
Cultivation:
Dendrobium aemulum is a beautiful orchid which is very easy to grow.
Dendrobium aemulum is an excellent flowering small orchid that does very well when placed on the correct trees and in a suitable position out of extreme weather conditions and shade densities. It must be grown in the vertical position so that it can orientate itself. Preferred trees in cultivation for growing the orchids on have been paper barks like Melaleuca quinquenervia or Melaleuca leucadendron. Dendrobium aemulum does not root as easily on Tristania conferta.
Once established it looks after itself and with periodic fertilizing with the native organic fertilizers will flower to its full potential.
Be ever so vigilant for Steyhopachys formosa the Dendrobium enthusiast’s nightmare. This beetle can inflict a lot of damage in just one season. Control of the beetle is simple just squash it. It is slow movers and though like all beetles can fly, would rather resort to hiding as a means of escape. The pupae are just as easy to eliminate. Check the base of all your orchids on a regular basis and again destroy any pupae. These look like small patches of white toothpaste squeezed from the tube. The larvae are the most difficult and will usually need a systemic spray or great concentration to find the small holes on the canes as they bore their way through from the inside. Eggs are yellowish and measure about 1.5mm in length.
The beetle eats buds, flowers, new shoots and developing seed pods. Larvae consume the canes.
Photos more information can be obtained from the Brisbane orchid society web site – http://bos.org.au/
Propagation:
Seeds: All orchids are protected by state and Federal laws and no part can be removed including seed pods unless a developer, multinational, mining company, road worker or state foresty department.
Dendrobium aemulum’s seeds require treatment before sowing. Really Orchid seeds are meant for professionals with time, equipment and space. However if you wish to persevere then here are the basics and you are learning from an amateur. You will need the following, a flask, chloros solution, boiled water, an eye dropper, paper bag, a warm sheltered position and a lot of patience and luck. This is a most difficult orchid to grow even by professionals as it detests root disturbance and being reorientated.
1.Collecting the seed: seed can only be collected from fully ripe pods. You may need to watch a pod for several days or even weeks following the time it stops swelling for it to turn olive yellow. At this stage the pod must be watched carefully for the pod to commence spitting along the placenta. If possible place the paper bag over the pod and tie it off. If necessary place a plastic bag over the paper bag to prevent rain or moisture contacting the seeds.
- Knowledge is very important now, as different species and genre have various numbers of viable seed in a pod. Viable seeds may be as few as 20 or as many as several million. Check the bag daily and remove once the seed begins to disperse. Shake all the seeds from the pod into the bag.
- Purchase the appropriate agar solution from an orchid society as they will know what you want and which one will be best for your species. Prepare the agar solution and pour into the flask.
- Remove some of the seeds by shaking them into a solution of 1 part chorus to 20 parts water and allow to soak for 10 minutes.
- Remove the seeds with the eye dropper in the solution and spread evenly over the set agar.
- Place the flasks in a room that is will lit with indirect light and the temperature is a consistent 25 to 30 degrees centigrade.
- Wait 4 to 7 months for the seedlings to develop to a stage where they can be removed and planted on into a fine orchid mix. Do not remove the seedlings from their environment of light or temperature for at least another two months. Even at this stage it is best to place the seedlings in a hot house where their environment can be controlled.
Division: Division is the easiest method for amateurs to propagate Dendrobium orchids. At some point, the orchid will become root-bound in its pot or large enough to divide the clump on a tree or slab. The only tools required are sharp sterile knife a slab of cork or pumice stone and some hemp or nylon string. I prefer hemp string because it is totally natural but is difficult to obtain.
The potted Dendrobium: Remove the Dendrobium from its pot and set it on a firm surface. Cut through the roots to create separate sections of the plant. Each piece should include four to five stems and a large chunk of the root system. Repot using a central stick to ensure the plant is tied securely so that it does not move.
Slab plants: Take the slab and cut it down the middle ensuring each section has healthy terminal stems. Retie the new divisions cork or pumice stone onto a new piece of cork or pumice stone. Tie them so that they do not move. Do not over tighten as this cuts off the flow of nutrients to the new leaves.
Treat plants that are growing naturally on a tree in the same way. First cut the plant in half then slice just below the roots into the outer layer of bark being careful not to damage the stems or the xylem and phloem layers of the tree Remove the section and retie it to another section of the tree or cork slab as desired.
Fertilize using Seaweed, fish emulsion or organic chicken pellets soaked in water and apply the liquid on an alternate basis. Fertilize every 2 months until the plants are established then twice annually in early September and March to maintain health, vigour and better flowering.
Further Comments from Readers:
Hi reader, it seems you use The Bible of Botany a lot. That’s great as we have great pleasure in bringing it to you! It’s a little awkward for us to ask, but our first aim is to purchase land approximately 1,600 hectares to link several parcels of N.P. into one at The Pinnacles NSW Australia, but we need your help. We’re not salespeople. We’re amateur botanists who have dedicated over 30 years to saving the environment in a practical way. We depend on donations to reach our goal. If you donate just $5, the price of your coffee this Sunday, We can help to keep the planet alive in a real way and continue to bring you regular updates and features on Australian plants all in one Botanical Bible. Any support is greatly appreciated. Thank you.
In the spirit of reconciliation we acknowledge the Bundjalung, Gumbaynggirr and Yaegl and all aboriginal nations throughout Australia and their connections to land, sea and community. We pay our respect to their Elders past, present and future for the pleasures we have gained.
Dendrobium cucumerinum
Classification
Class: Monocots
Order: Asparagales
Family: Orcidaceae
Subfamily: Epidendroideae
Tribe: Dendrobieae
Sub Tribe: Dendrobiinae
Genus: From Dendron, which is Ancient Greek for a tree and Bios, which is Ancient Greek for life. It refers to plants, which live on trees to survive, not as parasites or saphrophytic.
Species: From Kykyon, which is Ancient Greek for a cucumber. It refers to fruits or at times the leaves which resemble a cucumber.
Common Name: Tongue Orchid.
Distribution:
Dendrobium cucumerinum is found south from the Eubenangee and Wooroonooran National Parks in far north Queensland to Ulladulla in southern New South Wales. It is found on the Western Slopes, on the Great Dividing Range to the coast.
https://avh.ala.org.au/occurrences/search?taxa=Dendrobium+cucumerinum#tab_mapView
Habitat Aspect Climate:
Dendrobium cucumerinum usually prefers dappled shade but can be found in full shade. It grows in schlerophyll forest, often on exposed rocky sites and coastal littoral rainforests or at times in warm montane rainforests and well developed cool tropical rainforests and adjacent wet Eucalyptus forests. The altitude ranges from 8 meters ASL to 900 meters ASL.
The temperatures range from minus 3 degrees in July to 36 degrees in January.
The rainfall ranges from lows of 700mm to 2700mm average per annum. The rainfall is seasonal mainly summer and autumn with dry winters and springs and humid to dry atmospheric conditions between these periods.
Soil Requirements:
Dendrobium cucumerinum grows as an epiphyte on various trees or as a lithophyte on rocks within its range.
Height & Spread:
Wild Plants: 0.01m to 0.03m by 0.5m to 3m.
Characteristics:
Dendrobium cucumerinum grows as an epiphyte or lithophyte with prostrate stems. The filiform roots appear along the entire length of the stems. The aerial roots are off white to pale grey, smooth and creep over the rocks or around the trunk and branches of trees.
The single leaf appears from the apex. The elliptical, oblong, to obovate leaves of Dendrobium cucumerinum measure 20mm to 40mm in length by 8mm to 16mm in width and 4mm to 6mm thick. The bases are rounded while the apex is obtuse. The dull concolourous or discolourous laminas are deep green to deep grey-green, succulent yet tough and glabrous with 2 or 4 longitudinal furrows on the upper laminas while the lowers are similar or paler in colour and glabrous. The margins are entire. There is a semi persistent white chartaceous sheath at the base of the leaves.
The inflorescences of Dendrobium cucumerinum are long racemes with 6 to 60 flowers. The deep green rachises are produced from the leaf axils and are covered in a white chartaceous sheath at the base. The upright to semi pendant, wiry rachises vary from 50mm to 150mm in length while the pedicels measure 10mm to 18mm in length. The sepals and petals curve forward.
The 3 linear sepals are usually white or at times pale cream or very rarely pastel pink. The two lateral sepals measure 15mm to 22mm in length by 3.5mm to 4.5mm in width near the base they spread to unite and surround the ovary. The sepal margins are entire while the apex is tapering.
The dorsal sepal measures 15mm to 22mm in length by 3mm to 4mm in width near the base. The margins are entire.
The 2 linear lateral petals are usually white or at times pale cream or very rarely pastel pink. The lateral petals measure 15mm to 22mm in length by 2.5mm to 3mm in width near the base before they surround the ovary. The margins are entire.
The labellum are usually white or at times pale cream, yellow or very rarely pastel pink and measure 5mm to 6mm in length by 3mm to 4mm in width. The margins are entire.
The labellum’s column measures 2mm to 2.4mm in length while the foot measures 3mm to 3.6mm in length. The flowers appear from September to October.
Wildlife:
Dendrobium cucumerinum is the host to numerous small native bees when in flower and also unfortunately hosts the Dendrobium beetle, Stethopachys formosa.
Cultivation:
Dendrobium cucumerinum is a beautiful flowering orchid which is rather hardy and easy to grow and to propagate at least as far south as sale in Victoria along the coast. It does very well either in the bush house attached to a slab, cork or washed pumice stone or attached to most rainforest trees that do not shed their bark. Do not attach it to Eucalyptus trees as the barks contain resins which most Dendrobium detest.
Trees with mass plantings of mixed orchids look really spectacular and those that have a lot of Dendrobium cucumerinum add interest and curiosity over a long period especially when in flower. Ficus species, Ceropetalum species and Elaeocarpus species are good host trees as they are natural hosts for this orchid in the wild as are the Cupaniopsis species.
Be ever so vigilant for Steyhopachys formosa the Dendrobium enthusiast’s nightmare. This beetle can inflict a lot of damage in just one season. Plants attached to trees are less likely to be phased by Dendrobium beetle because of natural predators like birds, bats and frogs.
Control of the beetle is simple just squash it. They are slow movers and though like all beetles can fly, would rather resort to hiding as a means of escape. The pupae are just as easy to eliminate. Check the base of all your orchids on a regular basis and again destroy any pupae. These look like small patches of white toothpaste squeezed from the tube. The larvae are the most difficult and will usually need a systemic spray or great concentration to find the small holes on the canes as they bore their way through from the inside. Eggs are yellowish and measure about 1.5mm in length.
The beetle eats buds, flowers, new shoots and developing seed pods. Larvae consume the canes.
Photo with more information can be obtained from the Brisbane Orchid Society.
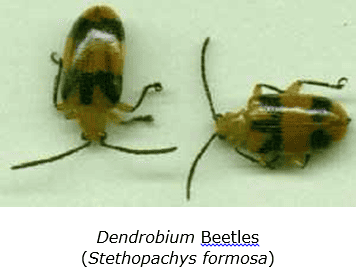
Propagation:
Seeds: All orchids are protected by state and Federal laws and no part can be removed including seed pods unless a developer, multinational, mining company, road worker or state foresty department.
Dendrobium cucumerinum’s seeds require treatment before sowing. Really Orchid seeds are meant for professionals with time, equipment and space. However if you wish to persevere then here are the basics and you are learning from an amateur. You will need the following, a flask, chloros solution, boiled water, an eye dropper, paper bag, a warm sheltered position and a lot of patience and luck. This is a most difficult orchid to grow even by professionals as it detests root disturbance and being reoriented.
- Collecting the seed: seed can only be collected from fully ripe pods. You may need to watch a pod for several days or even weeks following the time it stops swelling for it to turn olive yellow. At this stage the pod must be watched carefully for the pod to commence spitting along the placenta. If possible place the paper bag over the pod and tie it off. If necessary place a plastic bag over the paper bag to prevent rain or moisture contacting the seeds.
- Knowledge is very important now, as different species and genre have various numbers of viable seed in a pod. Viable seeds may be as few as 20 or as many as several million. Check the bag daily and remove once the seed begins to disperse. Shake all the seeds from the pod into the bag.
- Purchase the appropriate agar solution from an orchid society as they will know what you want and which one will be best for your species. Prepare the agar solution and pour into the flask.
- Remove some of the seeds by shaking them into a solution of 1 part chloros to 20 parts water and allow soaking for 10 minutes.
- Remove the seeds with the eye dropper in the solution and spread evenly over the set agar.
- Place the flasks in a room that is will lit with indirect light and the temperature is a consistent 25 to 30 degrees centigrade.
- Wait 4 to 7 months for the seedlings to develop to a stage where they can be removed and planted on into a fine orchid mix. Do not remove the seedlings from their environment of light or temperature for at least another two months. Even at this stage it is best to place the seedlings in a hot house where their environment can be controlled.
Division: Division is the easiest method for amateurs to propagate Dendrobium orchids. At some point, the orchid will become root-bound in its pot or large enough to divide the clump on a tree or slab. The only tools required are sharp sterile knife a slab of cork or pumice stone and some hemp or nylon string. I prefer hemp string because it is totally natural but is difficult to obtain.
The potted Dendrobium: Remove the Dendrobium from its pot and set it on a firm surface. Cut through the roots to create separate sections of the plant. Each piece should include four to five stems and a large chunk of the root system. Repot using a central stick to ensure the plant is tied securely so that it does not move.
Slab plants: Take the slab and cut it down the middle ensuring each section has healthy terminal stems. Retie the new divisions cork or pumice stone onto a new piece of cork or pumice stone. Tie them so that they do not move. Do not over tighten as this cuts off the flow of nutrients to the new leaves.
Treat plants that are growing naturally on a tree in the same way. First cut the plant in half then slice just below the roots into the outer layer of bark being careful not to damage the stems or the xylem and phloem layers of the tree Remove the section and retie it to another section of the tree or cork slab as desired.
Fertilize using Seaweed, fish emulsion or organic chicken pellets soaked in water on an alternate basis. Fertilize every two months until the plants are established then twice annually in early September and March to maintain health, vitality and better flowering.
Further Comments from Readers:
Hi reader, it seems you use The Bible of Botany a lot. That’s great as we have great pleasure in bringing it to you! It’s a little awkward for us to ask, but our first aim is to purchase land approximately 1,600 hectares to link several parcels of N.P. into one at The Pinnacles NSW Australia, but we need your help. We’re not salespeople. We’re amateur botanists who have dedicated over 30 years to saving the environment in a practical way. We depend on donations to reach our goal. If you donate just $5, the price of your coffee this Sunday, We can help to keep the planet alive in a real way and continue to bring you regular updates and features on Australian plants all in one Botanical Bible. Any support is greatly appreciated. Thank you.
In the spirit of reconciliation we acknowledge the Bundjalung, Gumbaynggirr and Yaegl and all aboriginal nations throughout Australia and their connections to land, sea and community. We pay our respect to their Elders past, present and future for the pleasures we have gained.

Townsville Qld.
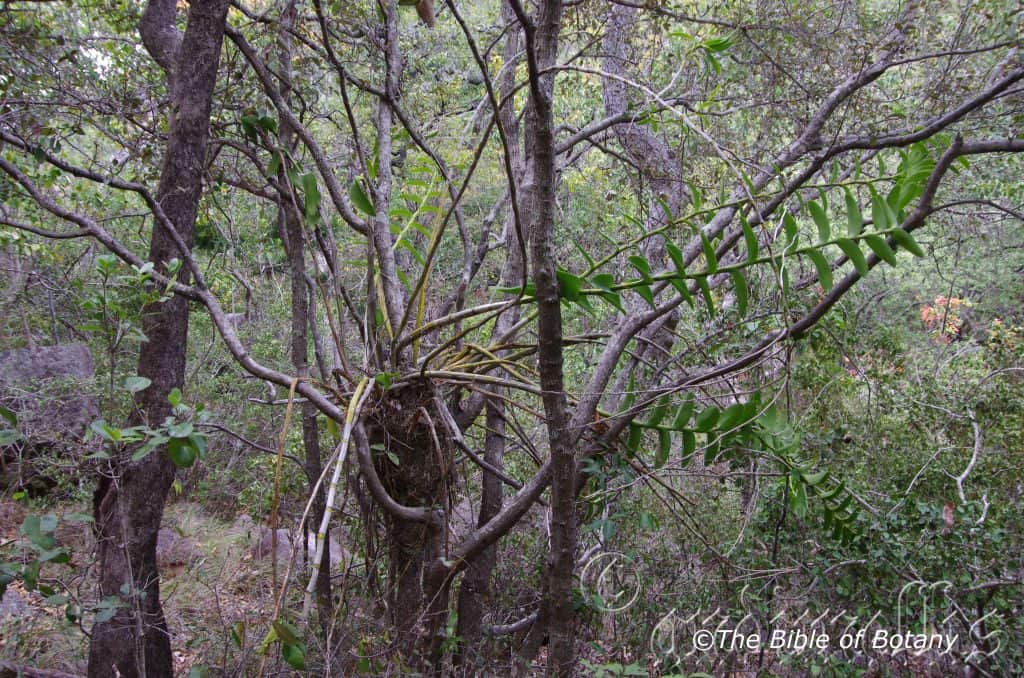
Townsville Qld.
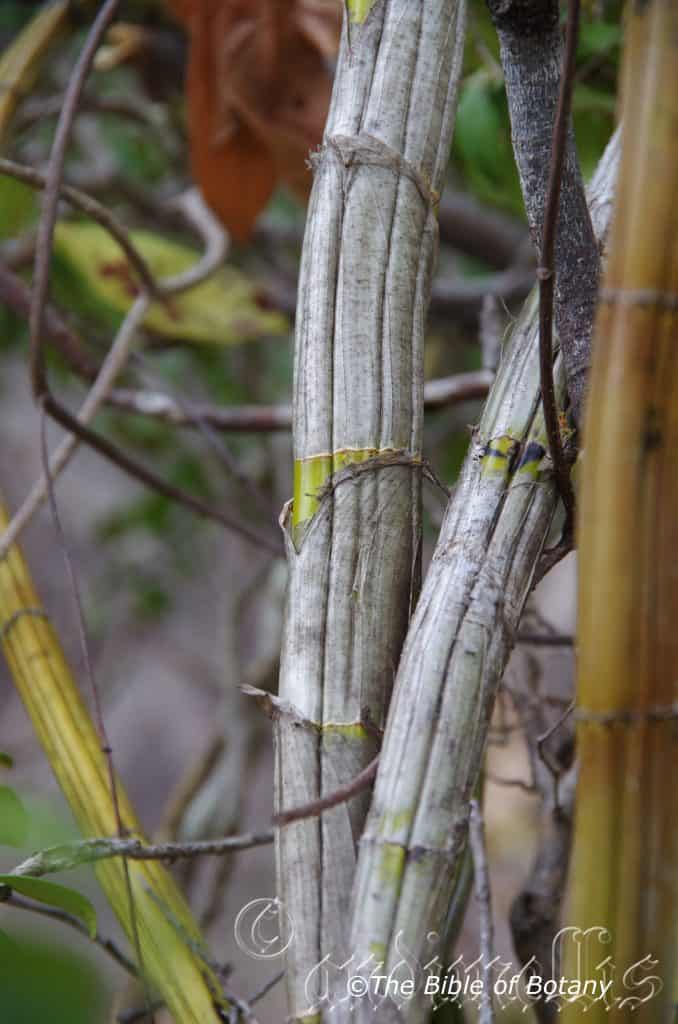
Townsville Qld.
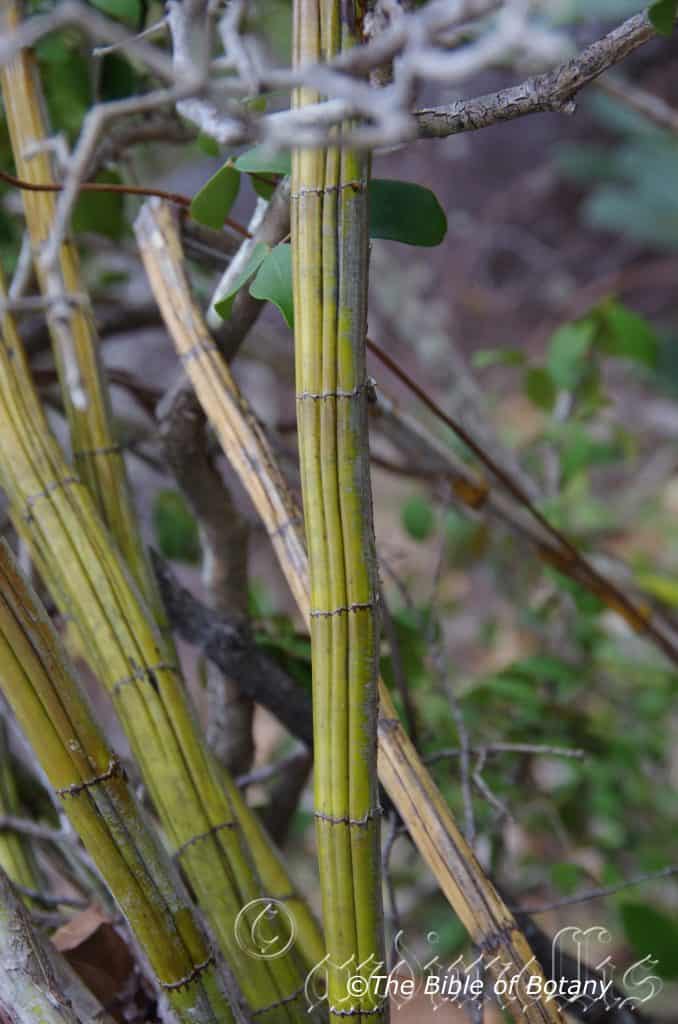
Townsville Qld.
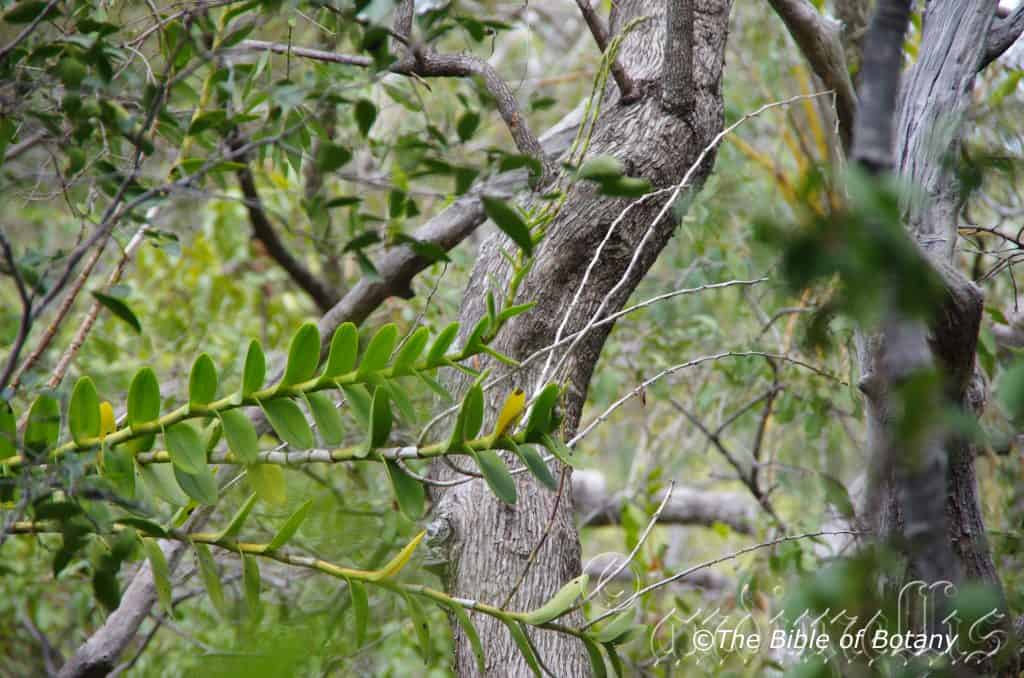
Townsville Qld.

Townsville Qld.
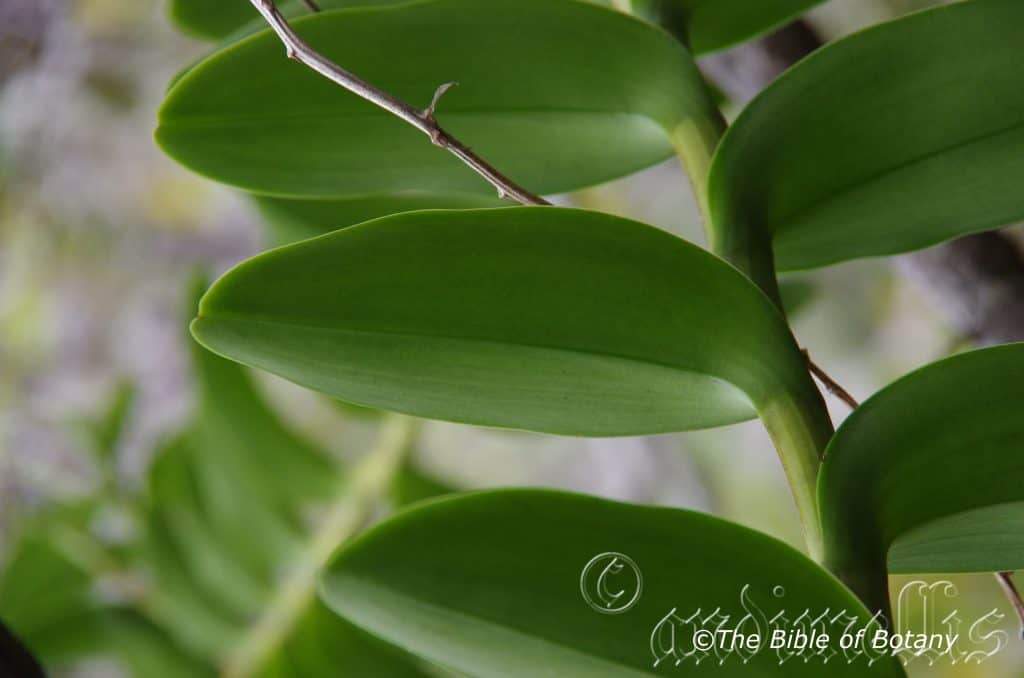
Townsville Qld.
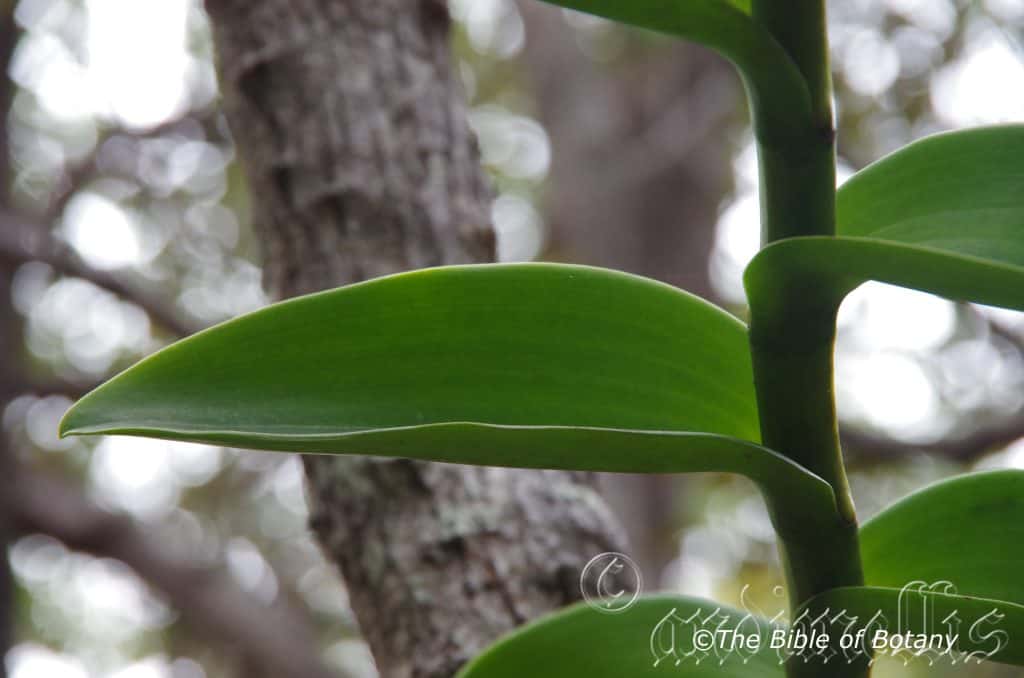
Townsville Qld.
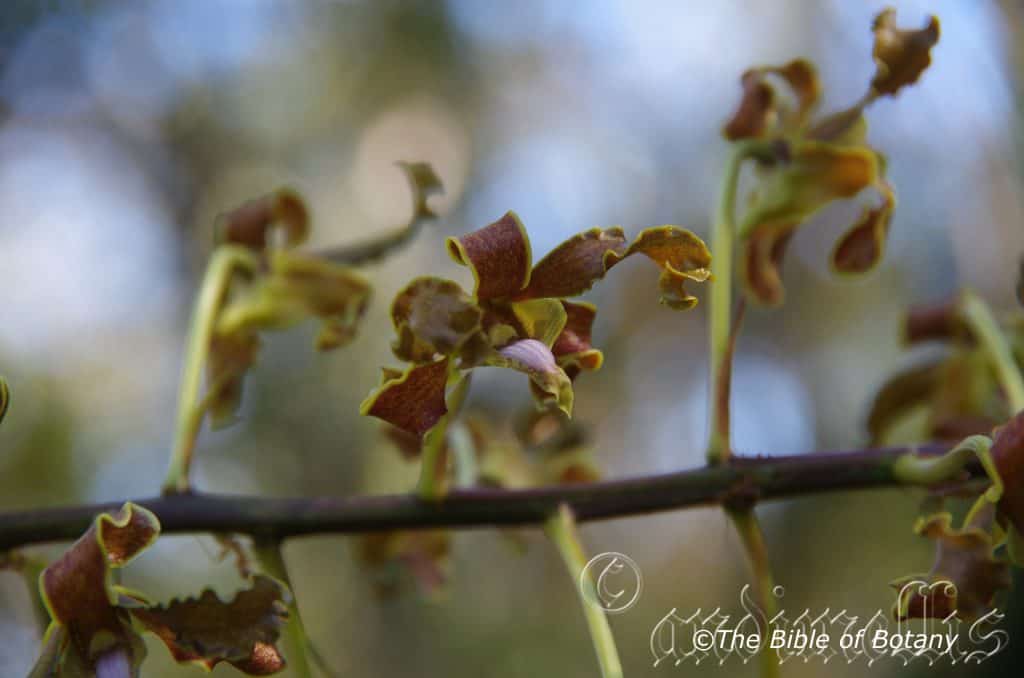
Townsville Qld.
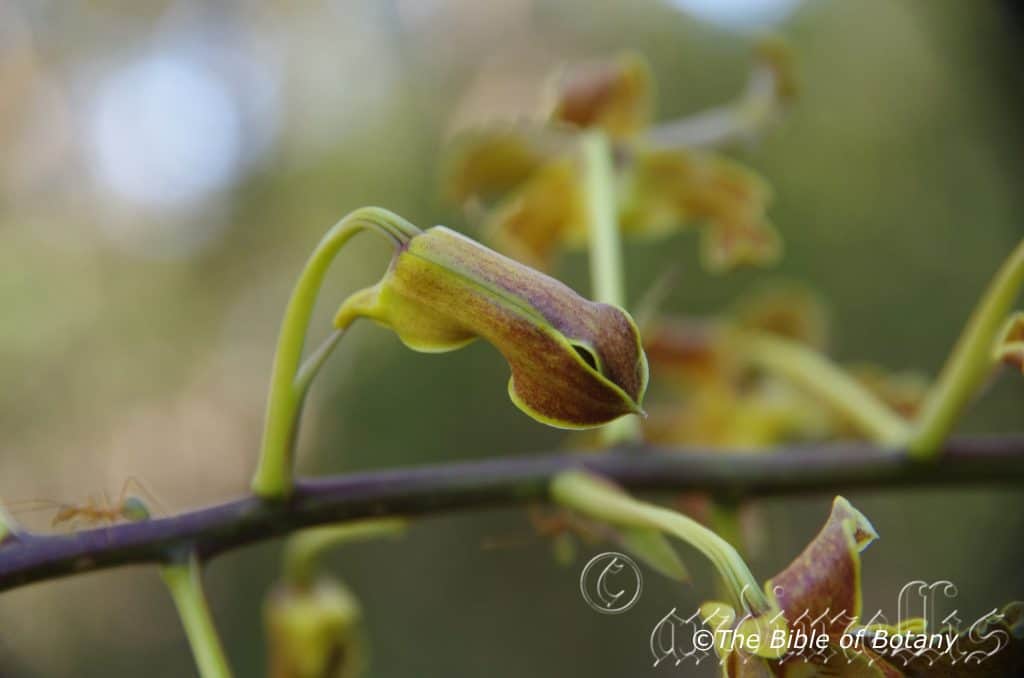
Townsville Qld.
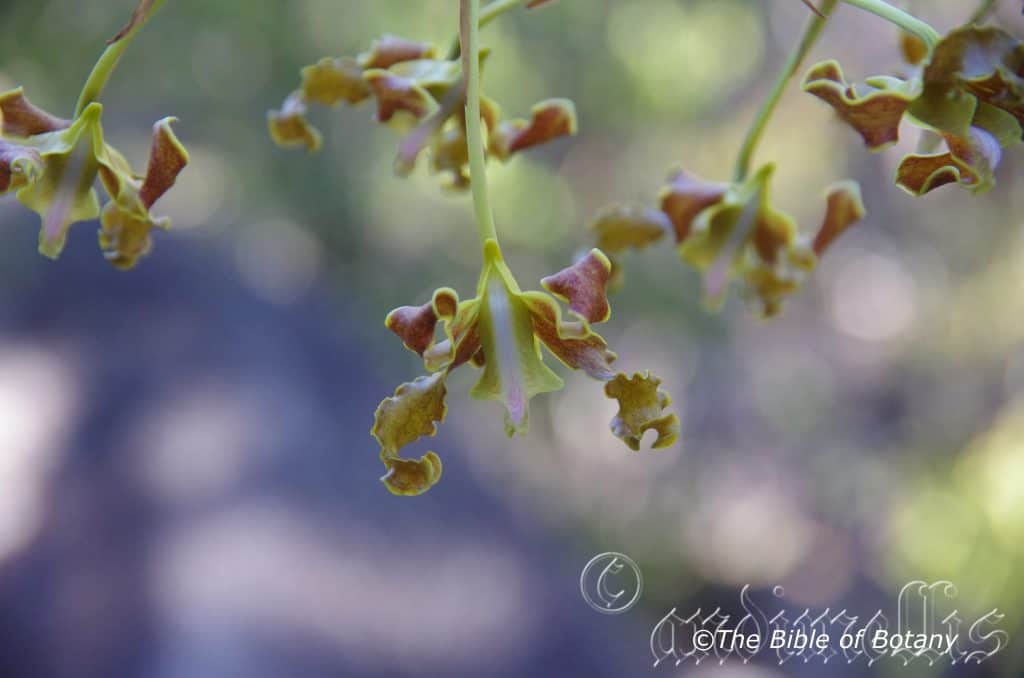
Townsville Qld.
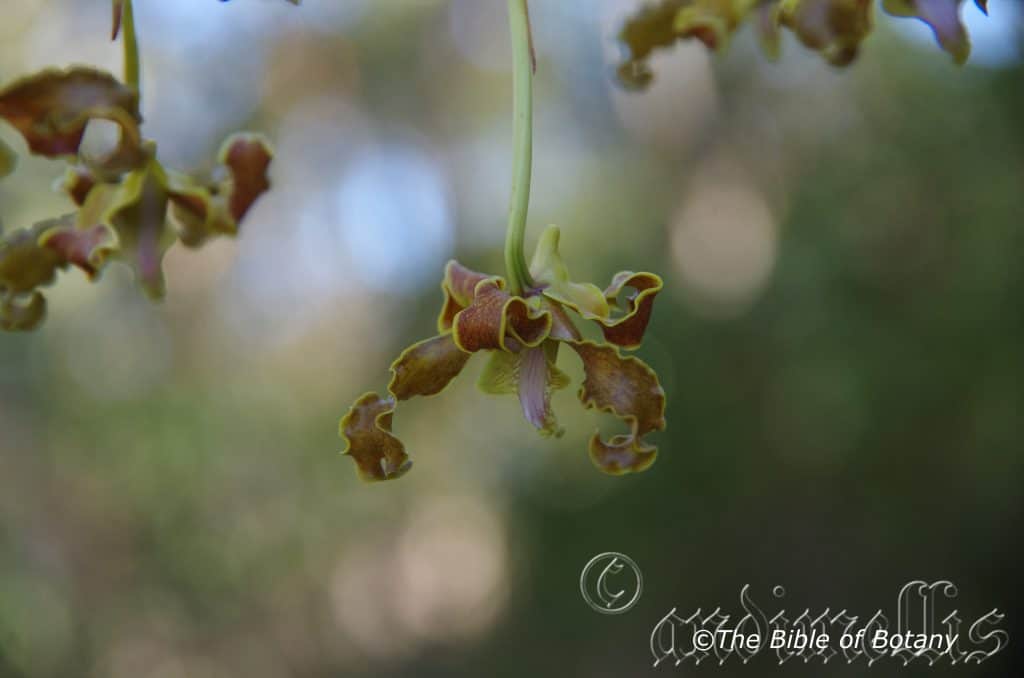
Townsville Qld.
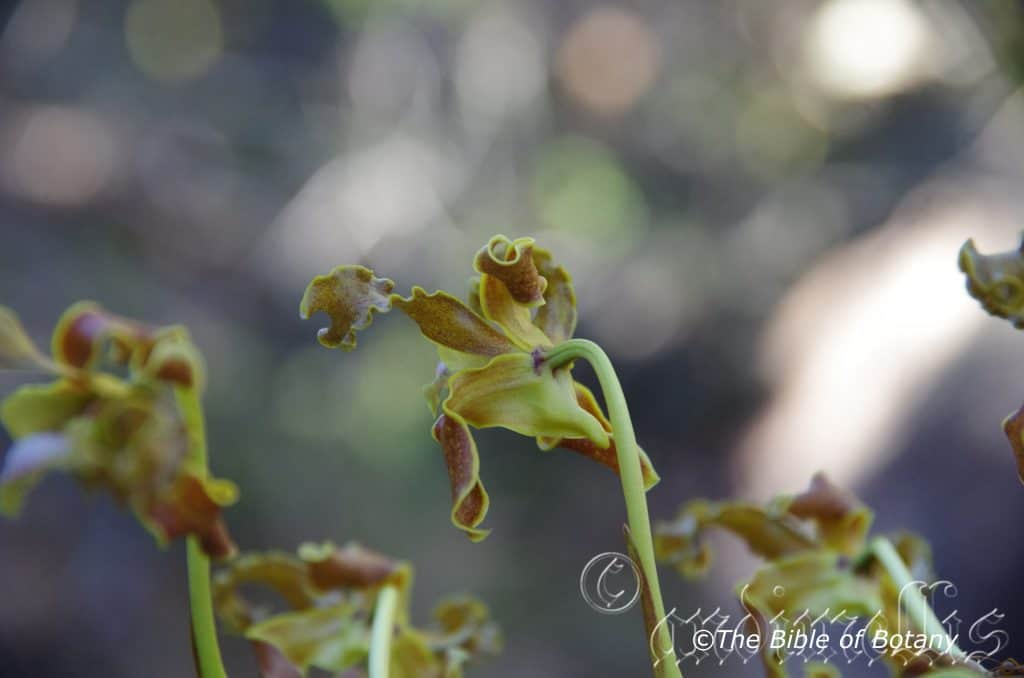
Townsville Qld.
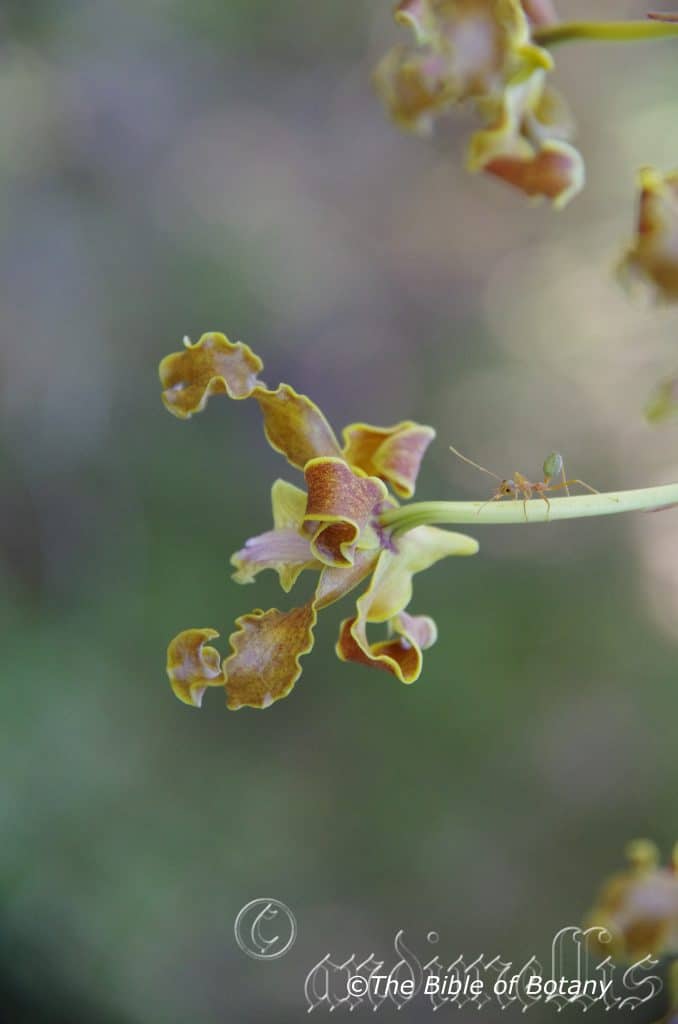
Townsville Qld.
Dendrobium discolor
Classification
Class: Monocots
Order: Asparagales
Family: Orcidaceae
Subfamily: Epidendroideae
Tribe: Dendrobieae
Sub Tribe: Dendrobiinae
Genus: From Dendron, which is Ancient Greek for a tree and Bios, which is Ancient Greek for life. It refers to plants, which live on trees to survive, not as parasites or saphrophytic.
Species: From Dis, which is Ancient Greek for two or apart and Color’s, which is Ancient Greek for the depth of a hue or tint. it refers to flowers, which have 2 very distinct colour variations or just 2 colours in the flower.
Common Name:
Distribution:
Dendrobium discolor is found from the tip of Cape York Peninsula south to Gladstone in north eastern Queensland. It is found on and east of the Great Dividing Range.
https://avh.ala.org.au/occurrences/search?taxa=Dendrobium+discolor#tab_mapView
Habitat Aspect Climate:
Dendrobium discolor prefers dappled shade. It grows as an epiphyte on various trees including Lophostemon conferta, in moist Eucalyptus forests, dry rainforests and littoral rainforests in exposed positions. The altitude ranges from 5 meters ASL to 550 meters ASL.
The temperatures range from 1 degrees in July to 36 degrees in January.
The rainfall ranges from lows of 1000mm to 3600mm average per annum. The rainfall is seasonal mainly summer and autumn with drier winters.
Soil Requirements:
Dendrobium discolor prefers various barks of coastal non decorticating Eucalyptus trees as an epiphyte. It is also found growing on the bark of Tristania conferta when growing adjacent to rainforests. It also grows as a lithophyte on exposed rocks.
Height & Spread:
Wild Plants: 300mm to 700mm by 300mm x 500mm.
Characteristics:
Dendrobium discolor grows as an erect epiphyte. The stems are succulent, cylindrical canes which taper at the base. It is dark green, purple black or dark greenish purple measuring 30mm to 300mm in length by 5mm to 10mm in diameter.
The 1 to 6 inflorescences appear from apical nodes and measure 200mm to 600mm in length and have 20 to 80 individual flowers. The chartaceous, lanceolate bracts have acuminate apexes and measure 8mm to 17mm in length. The flowers have very convoluted and crisped segments. The glabrous pedicel and ovary measure 20mm to 35mm in length. The linear to oblong, yellow to ochre with maroon markings dorsal sepal has an obtuse apex and recurved and is strongly twisted with undulating margins. It measures 15mm to 40mm in length by 3mm to 6mm in width. The oblong-lanceolate, yellow to ochre with maroon markings lateral sepals have a subacute apex are recurved with strongly undulating margins and measure 25mm to 40mm in length by 8mm to 12mm in width. The suberect, spathulate or oblanceolate, yellow to ochre with maroon markings petals have an obtuse to acute apex and measure 20mm to 50mm in length by 4mm to 8mm in width. The petals twist once to three times and have undulating margins. The yellow to ochre lip has 3 lobes that measure 15 to 25mm by 8mm to 15mm. The obovate to oblong, rounded in front side lobes are splay outwards on the margins. The smaller midlobe is triangular to ovate, acute, recurved and splays to one side. The callus of 5 ridges is slightly dilated at apex on the basal half of the midlobe. The column measures 3mm to 6mm in length.
Wildlife:
Dendrobium discolor is the host to numerous small native bees when in flower and can fosters the Dendrobium beetle, Stethopachys formosa. Oecophylla smaragdina has been seen taking nectar from the flowers around Townsville.
Cultivation:
Dendrobium discolor is a beautiful orchid which is very easy to grow.
Dendrobium discolor is an excellent flowering large orchid that does very well when placed on the correct trees and in a suitable position out of extreme weather conditions and shade densities. It must be grown in the vertical position so that they can orientate themselves. Preferred trees in cultivation for growing the orchids on have been Allocasuarina torulosa, Allocasuarina littoralis, Casuarina glauca, Casuarina cunninghamiana and Lophostemon conferta.
Once established it looks after itself and with a periodic fertilizing with the native organic fertilizers will flower to their full potential.
Be ever so vigilant for Steyhopachys formosa the Dendrobium enthusiast’s nightmare. This beetle can inflict a lot of damage in just one season. Control of the beetle is simple just squash it. They are slow movers and though like all beetles can fly, would rather resort to hiding as a means of escape. The pupae are just as easy to eliminate. Check the base of all your orchids on a regular basis and again destroy any pupae. These look like small patches of white toothpaste squeezed from the tube. The larvae are the most difficult and will usually need a systemic spray or great concentration to find the small holes on the canes as they bore their way through from the inside. Eggs are yellowish and measure about 1.5mm in length.
The beetle eats buds, flowers, new shoots and developing seed pods. Larvae consume the canes.
Photos more information can be obtained from the Brisbane orchid society web site – http://bos.org.au/
Propagation:
Seeds: All orchids that are protected by Federal and State Laws and must not be removed from the wild unless you are a land developer, mining company or main Roads department etc. This includes bulbs, roots, leaves and flowers. No part of any plant can be removed from Federal, State or Local Government land without the prior permission of the authority and this includes the spore.
Dendrobium discolor’s seeds require treatment before sowing. Really Orchid seeds are meant for professionals with time, equipment and space. However if you wish to persevere then here are the basics and you are learning from an amateur. You will need the following, a flask, chloros solution, boiled water, an eye dropper, paper bag, a warm sheltered position and a lot of patience and luck. This is a most difficult orchid to grow even by professionals as it detests root disturbance and being reorientated.
- Collecting the seed: seed can only be collected from fully ripe pods. You may need to watch a pod for several days or even weeks following the time it stops swelling for it to turn olive yellow. At this stage the pod must be watched carefully for the pod to commence spitting along the placenta. If possible place the paper bag over the pod and tie it off. If necessary place a plastic bag over the paper bag to prevent rain or moisture contacting the seeds.
- Knowledge is very important now, as different species and genre have various numbers of viable seed in a pod. Viable seeds may be as few as 20 or as many as several million. Check the bag daily and remove once the seed begins to disperse. Shake all the seeds from the pod into the bag.
- Purchase the appropriate agar solution from an orchid society as they will know what you want and which one will be best for your species. Prepare the agar solution and pour into the flask.
- Remove some of the seeds by shaking them into a solution of 1 part chorus to 20 parts water and allow to soak for 10 minutes.
- Remove the seeds with the eye dropper in the solution and spread evenly over the set agar.
- Place the flasks in a room that is will lit with indirect light and the temperature is a consistent 25 to 30 degrees centigrade.
- Wait 4 to 7 months for the seedlings to develop to a stage where they can be removed and planted on into a fine orchid mix. Do not remove the seedlings from their environment of light or temperature for at least another two months. Even at this stage it is best to place the seedlings in a hot house where their environment can be controlled.
Division: Division is the easiest method for amateurs to propagate Dendrobium orchids. At some point, the orchid will become root-bound in its pot or large enough to divide the clump on a tree or slab. The only tools required are sharp sterile knife a slab of cork or pumice stone and some hemp or nylon string. I prefer hemp string because it is totally natural but is difficult to obtain.
The potted Dendrobium: Remove the Dendrobium from its pot and set it on a firm surface. Cut through the roots to create separate sections of the plant. Each piece should include four to five stems and a large chunk of the root system. Repot using a central stick to ensure the plant is tied securely so that it does not move.
Slab plants: Take the slab and cut it down the middle ensuring each section has healthy terminal stems. Retie the new divisions cork or pumice stone onto a new piece of cork or pumice stone. Tie them so that they do not move. Do not over tighten as this cuts off the flow of nutrients to the new leaves.
Treat plants that are growing naturally on a tree in the same way. First cut the plant in half then slice just below the roots into the outer layer of bark being careful not to damage the stems or the xylem and phloem layers of the tree Remove the section and retie it to another section of the tree or cork slab as desired.
Fertilize using Seaweed, fish emulsion or organic chicken pellets soaked in water on an alternate basis. Fertilize every two months until the plants are established then twice annually in early September and March to maintain health, vitality and better flowering.
Further Comments from Readers:
Hi reader, it seems you use The Bible of Botany a lot. That’s great as we have great pleasure in bringing it to you! It’s a little awkward for us to ask, but our first aim is to purchase land approximately 1,600 hectares to link several parcels of N.P. into one at The Pinnacles NSW Australia, but we need your help. We’re not salespeople. We’re amateur botanists who have dedicated over 30 years to saving the environment in a practical way. We depend on donations to reach our goal. If you donate just $5, the price of your coffee this Sunday, We can help to keep the planet alive in a real way and continue to bring you regular updates and features on Australian plants all in one Botanical Bible. Any support is greatly appreciated. Thank you.
In the spirit of reconciliation we acknowledge the Bundjalung, Gumbaynggirr and Yaegl and all aboriginal nations throughout Australia and their connections to land, sea and community. We pay our respect to their Elders past, present and future for the pleasures we have gained.
Dendrobium dolichophyllum
Classification
Class: Monocots
Order: Asparagales
Family: Orcidaceae
Subfamily: Epidendroideae
Tribe: Dendrobieae
Sub Tribe: Dendrobiinae
Genus: From Dendron, which is Ancient Greek for a tree and Bios, which is Ancient Greek for life. It refers to plants, which live on trees to survive, not as parasites or saphrophytic.
Species: From Dolichos, which is Ancient Greek for long and Phullon/Phyllon, which is Ancient Greek for a leaf or phyllode. It refers to leaves, phyllodes or at times stems or canes which are very long and very narrow.
Common Name: Rat’s Tail Orchid.
Distribution:
Dendrobium dolichophyllum is found in several disjunct populations south from Eungella National Park west of Mackay to the Macpherson Ranges in eastern Queensland and the Border Ranges National Park and Dorrigo National Park in far north eastern New South Wales. It is mainly found on the eastern side of the Great Dividing Range.
https://avh.ala.org.au/occurrences/search?taxa=Dendrobium+dolichophyllum#tab_mapView
Habitat Aspect Climate:
Dendrobium dolichophyllum prefers dappled shade to full shade. It grows in well-developed cool tropical rainforests along the coastal ranges. The altitude ranges from 800 meters ASL to 1200 meters ASL.
The temperatures range from 1 degree in July to 32 degrees in January.
The rainfall ranges from lows of 800mm to 1800mm average per annum. The rainfall is seasonal mainly summer and autumn with dry winters and springs and humid to dry atmospheric conditions between these periods.
Soil Requirements:
Dendrobium dolichophyllum grows as an epiphyte on various trees within its range and occasionally it can be found growing as a lithophyte on rocks.
Height & Spread:
Wild Plants:0.6m to 3m by 0.5m to 1m.
Characteristics:
Dendrobium dolichophyllum grows as an epiphyte or lithophyte with its stems spreading or more often pendulant. The thick filiformis basal roots appear both from the sympodium and apical sections of the stems. The aerial roots are smooth and creeping over the rocks are around the trunk and branches of trees.
The single long leaf appears from the apex. The long linear terete leaves of Dendrobium dolichophyllum measure 200mm to 900mm in length by 4mm to 7mm width. The base is rounded while the apex is acute. The dull concolourous laminas are deep green to sea-green succulent yet tough and glabrous. The margins are entire.
The inflorescences of Dendrobium dolichophyllum are short racemes with 2 to 5 flowers. They are produced from sympodium. The upright to semi pendant, wiry rachises vary from 30mm to 80mm in length while the pedicels are 4mm to 10mm in length. The sepals and petals curve forward and outwards from the ovary.
The 3 linear sepals are yellow with red or purple striations at the base. The dorsal sepal measures 25mm to 50mm in length by 5mm to 6mm in width near the base. The 2 lateral sepals measure 30mm to 55mm in length by 10mm to 12mm in width near the base before they spread to unite and surround the ovary. The sepal margins are entire while the apex is recurved or twisted.
The 2 linear lateral petals are yellow with red or purple striations at the base. The lateral petals measure 30mm to 55mm in length by 4mm to 5mm in width near the base before they surround the ovary.
The labellum are cream with strong reddish-maroon striations and measure 25mm to 35mmin length by 4mm to 4.5mm in width. The margins are crenate and ruffled.
The labellum’s column measures 3mm to 5mm in length while the foot measures 5mm to 6mm in length. The flowers appear from July to October.
Wildlife:
Dendrobium dolichophyllum is the host to numerous small native bees when in flower and also hosts the Dendrobium beetle.
Cultivation:
Dendrobium dolichophyllum is a beautiful orchid which is rather hardy and easy to grow and to propagate at least as far south as sale in Victoria along the coast. It does very well either in the bush house in attached to cork or attached most rainforest trees that do not shed their bark. Do not attach them to Eucalyptus trees as the barks contain resins which Dendrobiums detest.
Trees with mass plantings of mixed orchids look really spectacular and those that have a lot of Dendrobium dolichophyllum add interest and curiosity over a long period especially when in flower. Ficus, Ceropetalum and Elaeocarpus specie all make good host trees as does Cupaniopsis specie.
Be ever so vigilant for Steyhopachys formosa the Dendrobium enthusiast’s nightmare. This beetle can inflict a lot of damage in just one season. Plants attached to trees are less likely to be phased by Dendrobium beetle because of natural predators like birds, bats and frogs.
Control of the beetle is simple just squash it. They are slow movers and though like all beetles can fly, would rather resort to hiding as a means of escape. The pupae are just as easy to eliminate. Check the base of all your orchids on a regular basis and again destroy any pupae. These look like small patches of white toothpaste squeezed from the tube. The larvae are the most difficult and will usually need a systemic spray or great concentration to find the small holes on the canes as they bore their way through from the inside. Eggs are yellowish and measure about 1.5mm in length.
The beetle eats buds, flowers, new shoots and developing seed pods. Larvae consume the canes.
Photo with more information can be obtained from the Brisbane Orchid Society.
Dendrobiu
Propagation:
Seeds: Dendrobium dolichophyllum‘s seeds require treatment before sowing. Really Orchid seeds are meant for professionals with time, equipment and space. However if you wish to persevere then here are the basics and you are learning from an amateur. You will need the following, a flask, chloros solution, boiled water, an eye dropper, paper bag, a warm sheltered position and a lot of patience and luck. This is a most difficult orchid to grow even by professionals as it detests root disturbance and being reorientated.
1.Collecting the seed: seed can only be collected from fully ripe pods. You may need to watch a pod for several days or even weeks following the time it stops swelling for it to turn olive yellow. At this stage the pod must be watched carefully for the pod to commence spitting along the placenta. If possible place the paper bag over the pod and tie it off. If necessary place a plastic bag over the paper bag to prevent rain or moisture contacting the seeds.
- Knowledge is very important now, as different species and genre have various numbers of viable seed in a pod. Viable seeds may be as few as 20 or as many as several million. Check the bag daily and remove once the seed begins to disperse. Shake all the seeds from the pod into the bag.
- Purchase the appropriate agar solution from an orchid society as they will know what you want and which one will be best for your species. Prepare the agar solution and pour into the flask.
- Remove some of the seeds by shaking them into a solution of 1 part chloros to 20 parts water and soak for 10 minutes.
- Remove the seeds with the eye dropper in the solution and spread evenly over the set agar.
- Place the flasks in a room that is will lit with indirect light and the temperature is a consistent 25 to 30 degrees centigrade.
- Wait 4 to 7 months for the seedlings to develop to a stage where they can be removed and planted on into a fine orchid mix. Do not remove the seedlings from their environment of light or temperature for at least another two months. Even at this stage it is best to place the seedlings in a hot house where their environment can be controlled.
Division: Division is the easiest method for amateurs to propagate Dendrobium orchids. At some point, the orchid will become root-bound in its pot or large enough to divide the clump on a tree or slab. The only tools required are sharp sterile knife a slab of cork or pumice stone and some hemp or nylon string. I prefer hemp string because it is totally natural but is difficult to obtain.
Slab plants: Take the slab and cut it down the middle ensuring each section has healthy terminal stems. Retie the new divisions cork or pumice stone onto a new piece of cork or pumice stone. Tie them so that they do not move. Do not over tighten as this cuts off the flow of nutrients to the new leaves.
Treat plants that are growing naturally on a tree in the same way. First cut the plant in half then slice just below the roots into the outer layer of bark being careful not to damage the stems or the xylem and phloem layers of the tree Remove the section and retie it to another section of the tree or cork slab as desired.
Fertilize using Seaweed, fish emulsion or organic chicken pellets soaked in water on an alternate basis. Fertilize every two months until the plants are established then twice annually in early September or March to maintain health, vitality and better flowering.
Further Comments from Readers:
Hi reader, it seems you use The Bible of Botany a lot. That’s great as we have great pleasure in bringing it to you! It’s a little awkward for us to ask, but our first aim is to purchase land approximately 1,600 hectares to link several parcels of N.P. into one at The Pinnacles NSW Australia, but we need your help. We’re not salespeople. We’re amateur botanists who have dedicated over 30 years to saving the environment in a practical way. We depend on donations to reach our goal. If you donate just $5, the price of your coffee this Sunday, We can help to keep the planet alive in a real way and continue to bring you regular updates and features on Australian plants all in one Botanical Bible. Any support is greatly appreciated. Thank you.
In the spirit of reconciliation we acknowledge the Bundjalung, Gumbaynggirr and Yaegl and all aboriginal nations throughout Australia and their connections to land, sea and community. We pay our respect to their Elders past, present and future for the pleasures we have gained.
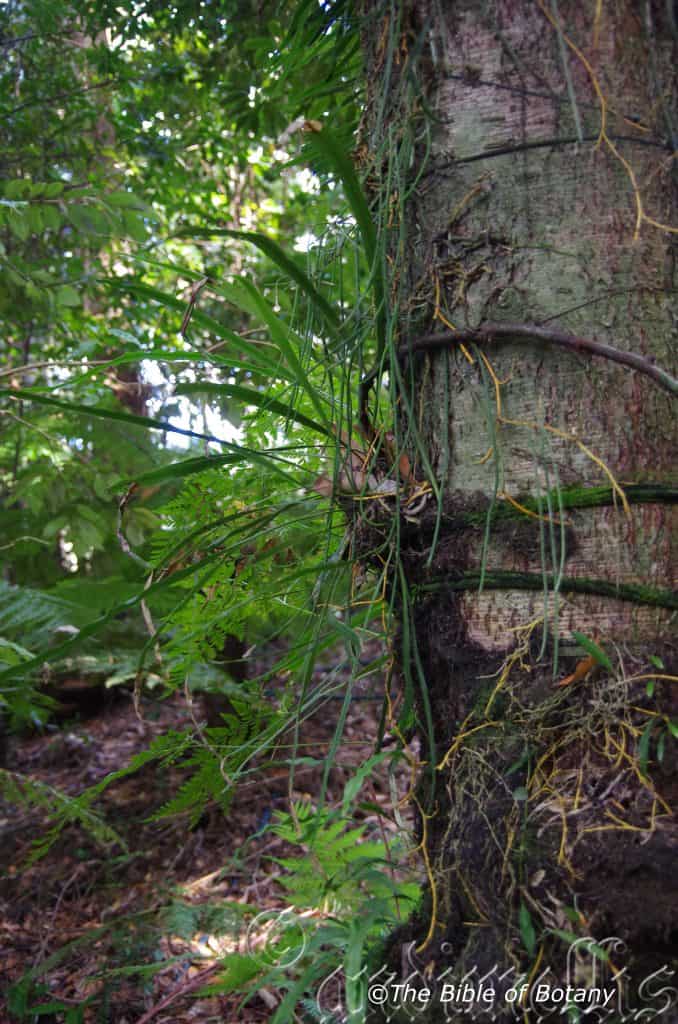
National Botanic Gardens ACT
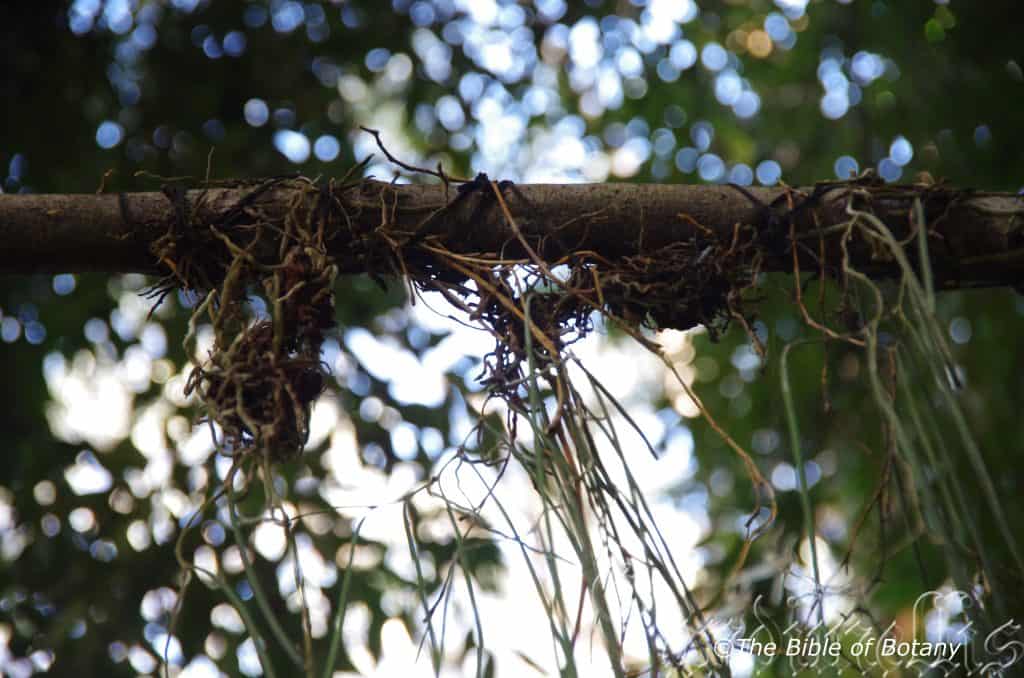
National Botanic Gardens ACT
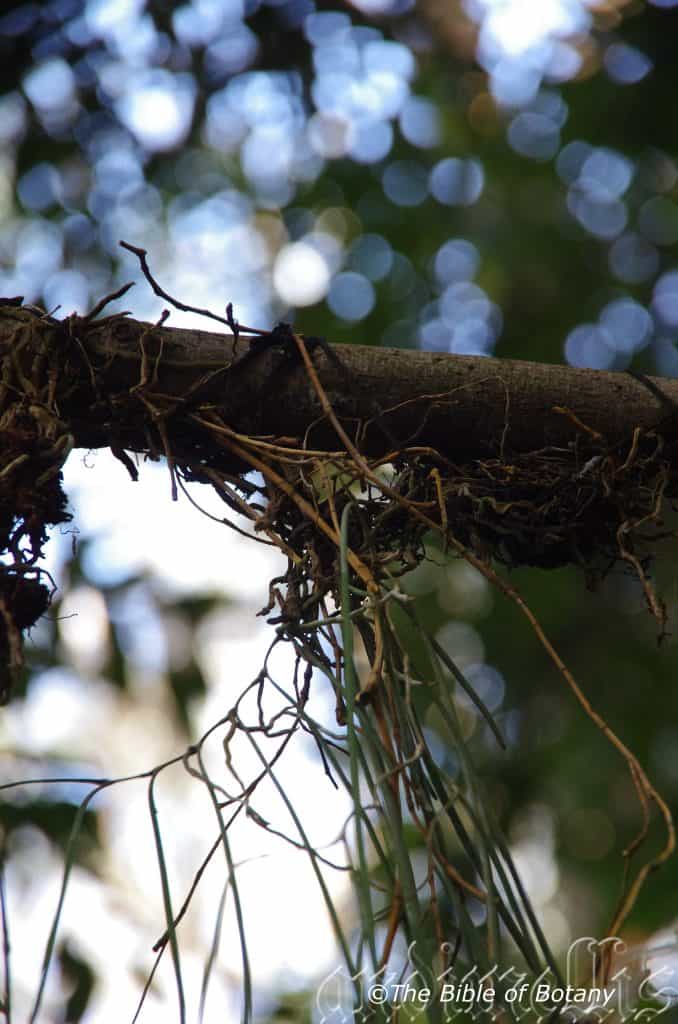
National Botanic Gardens ACT
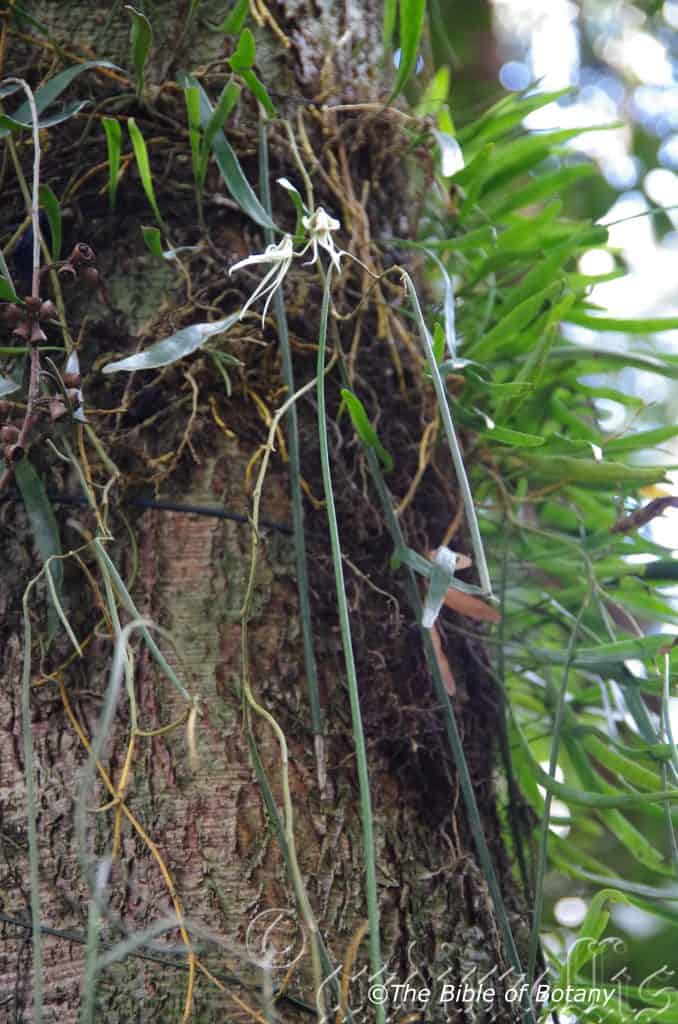
Clarence Valley NSW
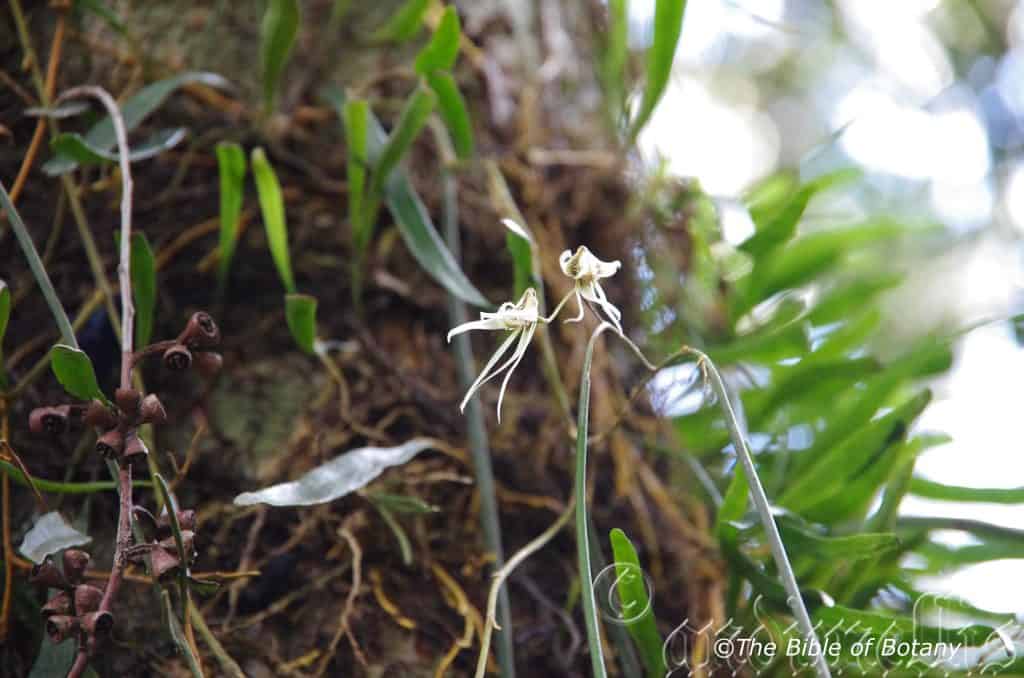
Clarence Valley NSW
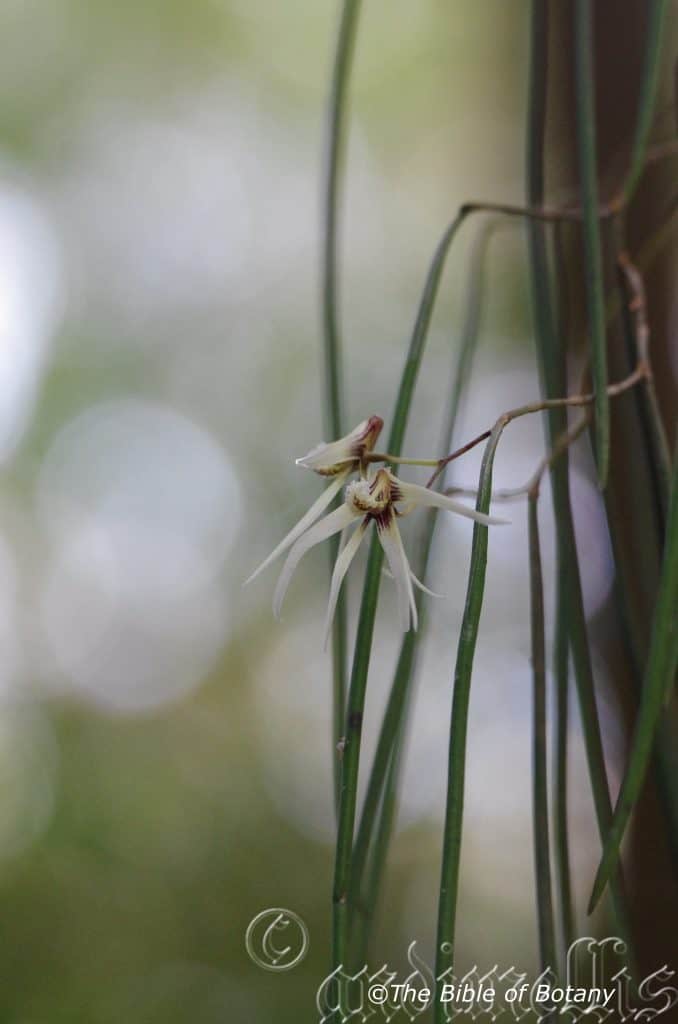
Clarence Valley NSW
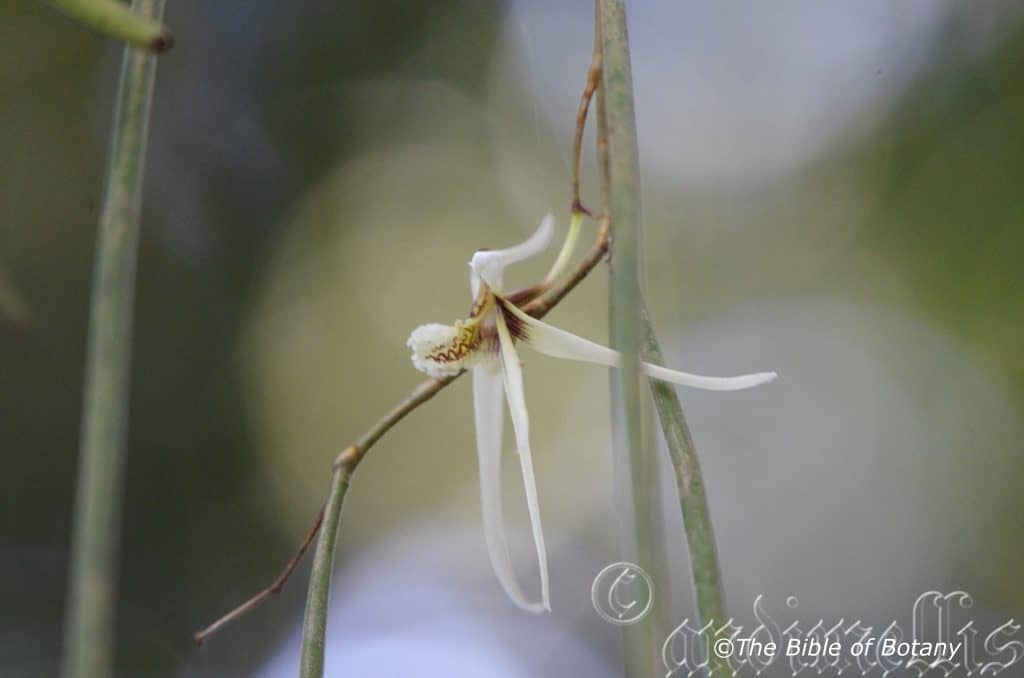
Clarence Valley NSW
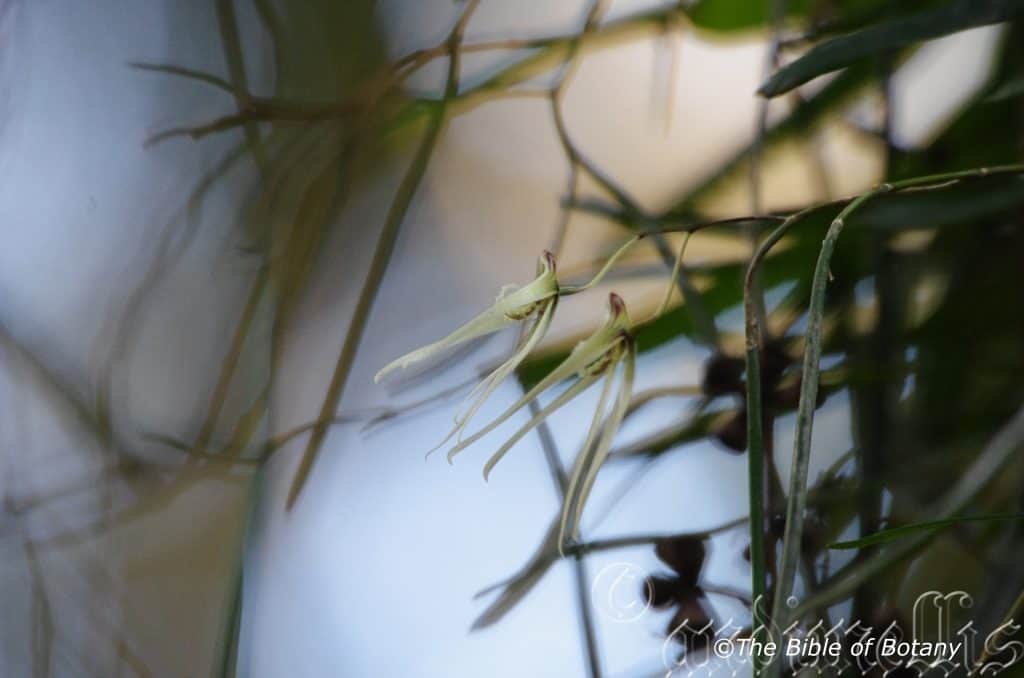
Clarence Valley NSW
Dendrobium fairfaxii
Classification
Class: Monocots
Order: Asparagales
Family: Orcidaceae
Subfamily: Epidendroideae
Tribe: Dendrobieae
Sub Tribe: Dendrobiinae
Genus: From Dendron, which is Ancient Greek for a tree and Bios, which is Ancient Greek for life. It refers to plants, which live on trees to survive, not as parasites or saphrophytic.
Species: Is named in honour of Fairfax.
Common Name: Rat’s Tail Orchid.
Distribution:
Dendrobium fairfaxii is found south from the Atherton Tableland west of Cairns in far north Queensland to the Blue Mountains in central coastal New South Wales. It is found on the eastern side of the Great Dividing Range.
https://avh.ala.org.au/occurrences/search?taxa=Dendrobium+fairfaxii#tab_mapView
Habitat Aspect Climate:
Dendrobium fairfaxii prefers dappled shade to full shade. It grows in well-developed cool tropical rainforests along the Coastal Ranges. It is found from 300 meters ASL to 1000 meters ASL.
The temperatures range from 1 degree in July to 36 degrees in January.
The rainfall ranges from lows of 800mm to 3000mm average per annum. The rainfall is seasonal mainly summer and autumn with dry winters and springs and humid to dry atmospheric conditions between these periods.
Soil Requirements:
Dendrobium fairfaxii grows as an epiphyte on various rainforest trees within its range or rarely as a lithophyte on rocks.
Height & Spread:
Wild Plants: 0.5m to 2m by 0.4m to 1m.
Characteristics:
Dendrobium fairfaxii grows as an epiphyte or at times as a lithophyte with pendulant stems. The basal roots appear both from the sympodium and apical sections of the stems. The aerial roots are smooth and creeping over the rocks are around the trunk and branches of trees.
The single long leaf appears from the apex. The long linear terete leaves of Dendrobium fairfaxii measure 100mm to 700mm in length by 4mm to 7mm width. The base is rounded while the apex is acute. The dull concolourous laminas are deep green to sea-green or deep yellow-green succulent yet tough and glabrous. The margins are entire.
The inflorescences of Dendrobium fairfaxii are short racemes with 2 to 4 flowers. They are produced from sympodium. The upright to semi pendant, wiry rachises vary from 10mm to 50mm in length while the pedicels are 14mm to 24mm in length. The dorsal sepal curves forward before curving downwards. The divaricate lateral sepals and lateral petals curve backward near the apexes.
The 3 linear sepals are usually white or at times cream have red or purple striations at the base. The dorsal sepal measures 20mm to 35mm in length by 3.5mm to 5.5mm in width near the base. The 2 lateral sepals measure 22mm to 38mm in length by 9mm to 11mm in width near the base before they spread to unite and surround the ovary. The sepal margins are entire while the apex is tapering then obtuse.
The 2 linear lateral petals usually white or at times cream have red or purple striations at the base. The lateral petals measure 25mm to 43mm in length by 2mm to 3.5mm in width near the base before they surround the ovary.
The labellum are cream and spotted with reddish-maroon and purple striations and measure 20mm to 35mm in length by 3.5mm to 6mm in width. The margins are toothed.
The labellum’s column measures 2mm to 4mm in length while the foot measures 4mm to 6mm in length. The flowers appear from August to October.
Wildlife:
Dendrobium fairfaxii is the host to numerous small native bees when in flower and also hosts the Dendrobium beetle.
Cultivation:
Dendrobium fairfaxii is a beautiful orchid which is very easy to grow. Once established it looks after itself and with a periodic fertilizing with the native organic fertilizers will flower to their full potential.
Dendrobium fairfaxii is an excellent flowering small orchid that does very well when placed on the correct trees and in a suitable position out of extreme weather conditions and shade densities. It must be grown in the vertical position so that they can orientate themselves. Preferred trees in cultivation for growing the orchids on have been Allocasuarina torulosa, Allocasuarina littoralis, Casuarina glauca, and Casuarina cunninghamiana.
Be ever so vigilant for Steyhopachys formosa the Dendrobium enthusiast’s nightmare. This beetle can inflict a lot of damage in just one season. Control of the beetle is simple just squash it. They are slow movers and though like all beetles can fly, would rather resort to hiding as a means of escape. The pupae are just as easy to eliminate. Check the base of all your orchids on a regular basis and again destroy any pupae. These look like small patches of white toothpaste squeezed from the tube. The larvae are the most difficult and will usually need a systemic spray or great concentration to find the small holes on the canes as they bore their way through from the inside. Eggs are yellowish and measure about 1.5mm in length.
The beetle eats buds, flowers, new shoots and developing seed pods. Larvae consume the canes.
Photos more information can be obtained from the Brisbane orchid society web site – http://bos.org.au/
Propagation:
Seeds: All orchids that are protected by Federal and State Laws and must not be removed from the wild unless you are a land developer, mining company or main Roads department etc. This includes bulbs, roots, leaves and flowers. No part of any plant can be removed from Federal, State or Local Government land without the prior permission of the authority and this includes the spore.
Dendrobium fairfaxii‘s seeds require treatment before sowing. Really Orchid seeds are meant for professionals with time, equipment and space. However if you wish to persevere then here are the basics and you are learning from an amateur. You will need the following, a flask, chloros solution, boiled water, an eye dropper, paper bag, a warm sheltered position and a lot of patience and luck. This is a most difficult orchid to grow even by professionals as it detests root disturbance and being reorientated.
- Collecting the seed: seed can only be collected from fully ripe pods. You may need to watch a pod for several days or even weeks following the time it stops swelling for it to turn olive yellow. At this stage the pod must be watched carefully for the pod to commence spitting along the placenta. If possible place the paper bag over the pod and tie it off. If necessary place a plastic bag over the paper bag to prevent rain or moisture contacting the seeds.
- Knowledge is very important now, as different species and genre have various numbers of viable seed in a pod. Viable seeds may be as few as 20 or as many as several million. Check the bag daily and remove once the seed begins to disperse. Shake all the seeds from the pod into the bag.
- Purchase the appropriate agar solution from an orchid society as they will know what you want and which one will be best for your species. Prepare the agar solution and pour into the flask.
- Remove some of the seeds by shaking them into a solution of 1 part chorus to 20 parts water and allow to soak for 10 minutes.
- Remove the seeds with the eye dropper in the solution and spread evenly over the set agar.
- Place the flasks in a room that is will lit with indirect light and the temperature is a consistent 25 to 30 degrees centigrade.
- Wait 4 to 7 months for the seedlings to develop to a stage where they can be removed and planted on into a fine orchid mix. Do not remove the seedlings from their environment of light or temperature for at least another two months. Even at this stage it is best to place the seedlings in a hot house where their environment can be controlled.
Division: Division is the easiest method for amateurs to propagate Dendrobium orchids. At some point, the orchid will become root-bound in its pot or large enough to divide the clump on a tree or slab. The only tools required are sharp sterile knife a slab of cork or pumice stone and some hemp or nylon string. I prefer hemp string because it is totally natural but is difficult to obtain.
Slab plants: Take the slab and cut it down the middle ensuring each section has healthy terminal stems. Retie the new divisions cork or pumice stone onto a new piece of cork or pumice stone. Tie them so that they do not move. Do not over tighten as this cuts off the flow of nutrients to the new leaves.
Treat plants that are growing naturally on a tree in the same way. First cut the plant in half then slice just below the roots into the outer layer of bark being careful not to damage the stems or the xylem and phloem layers of the tree Remove the section and retie it to another section of the tree or cork slab as desired.
Fertilize using Seaweed, fish emulsion or organic chicken pellets soaked in water on an alternate basis. Fertilize every two months until the plants are established then twice annually in early September or March to maintain health, vitality and better flowering.
Further Comments from Readers:
Hi reader, it seems you use The Bible of Botany a lot. That’s great as we have great pleasure in bringing it to you! It’s a little awkward for us to ask, but our first aim is to purchase land approximately 1,600 hectares to link several parcels of N.P. into one at The Pinnacles NSW Australia, but we need your help. We’re not salespeople. We’re amateur botanists who have dedicated over 30 years to saving the environment in a practical way. We depend on donations to reach our goal. If you donate just $5, the price of your coffee this Sunday, We can help to keep the planet alive in a real way and continue to bring you regular updates and features on Australian plants all in one Botanical Bible. Any support is greatly appreciated. Thank you.
In the spirit of reconciliation we acknowledge the Bundjalung, Gumbaynggirr and Yaegl and all aboriginal nations throughout Australia and their connections to land, sea and community. We pay our respect to their Elders past, present and future for the pleasures we have gained.
Mount Cootha Botanic Gardens Qld.
Mount Cootha Botanic Gardens Qld.
Mount Cootha Botanic Gardens Qld.
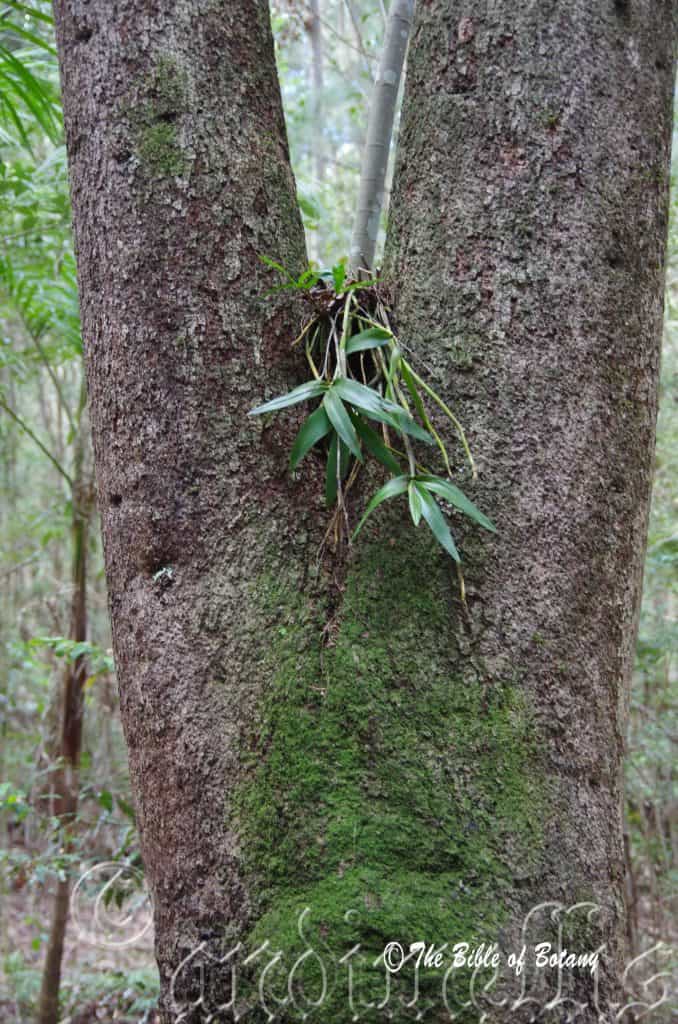
Nana Glen NSW
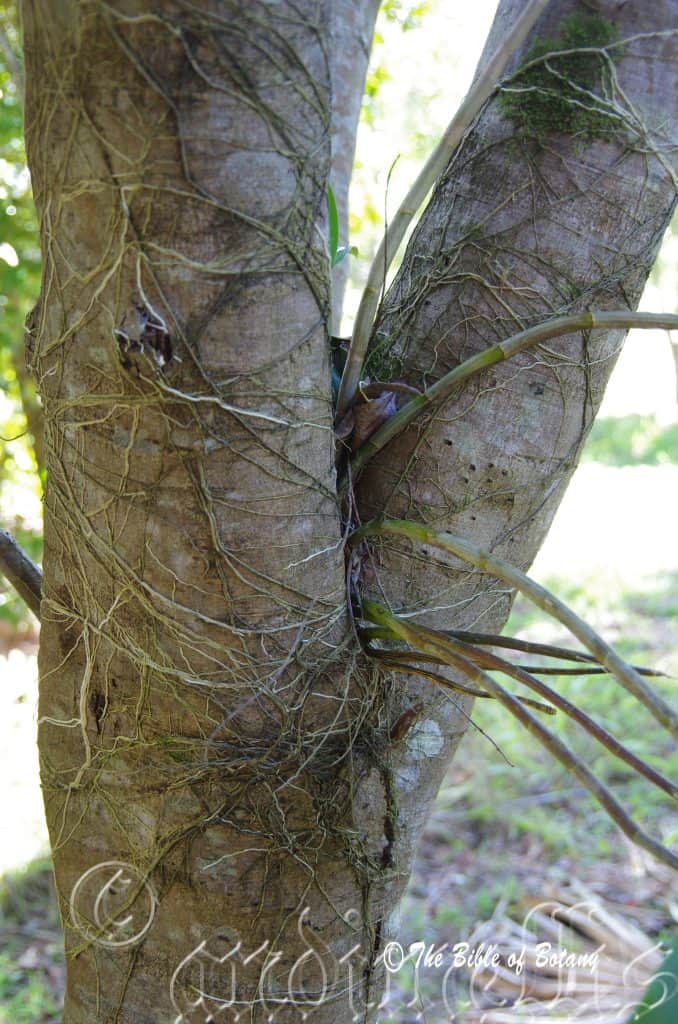
Nana Glen NSW
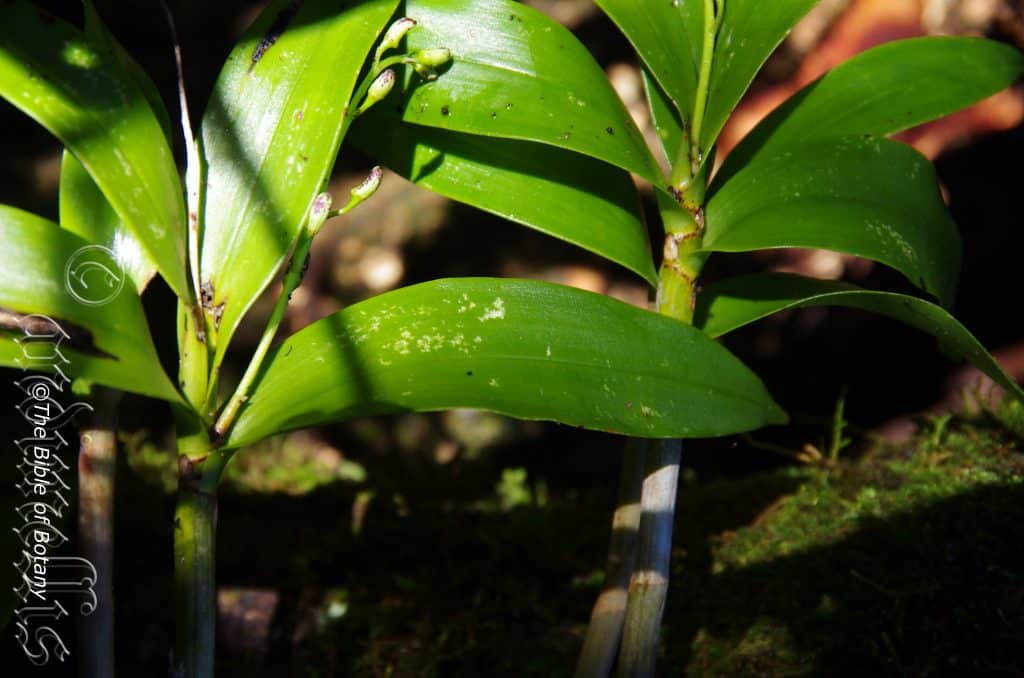
Clarence Valley NSW
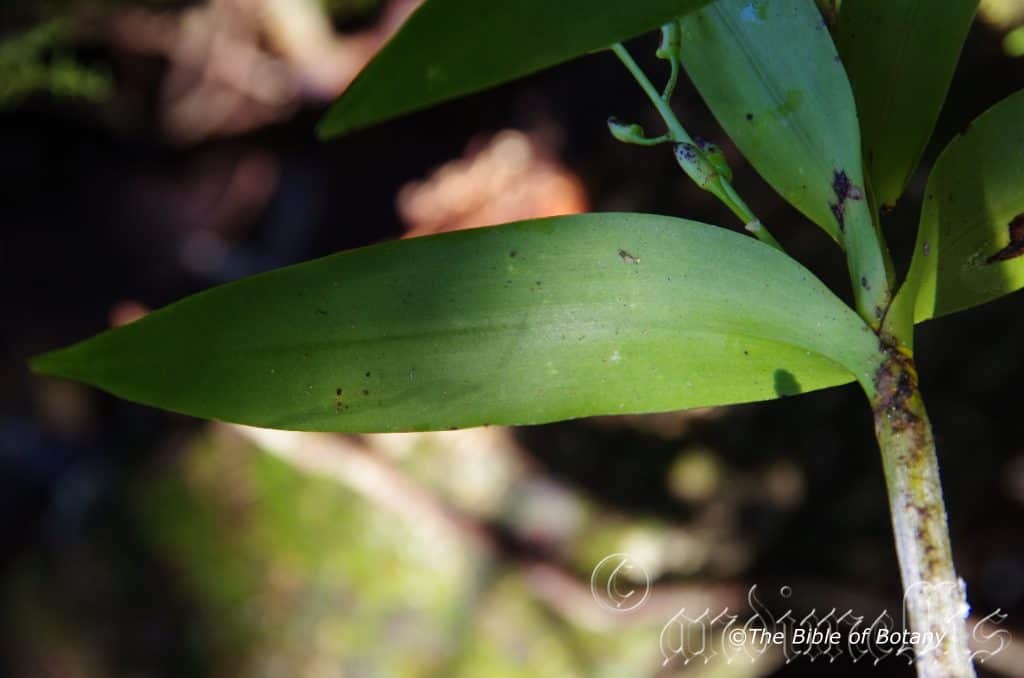
Clarence Valley NSW
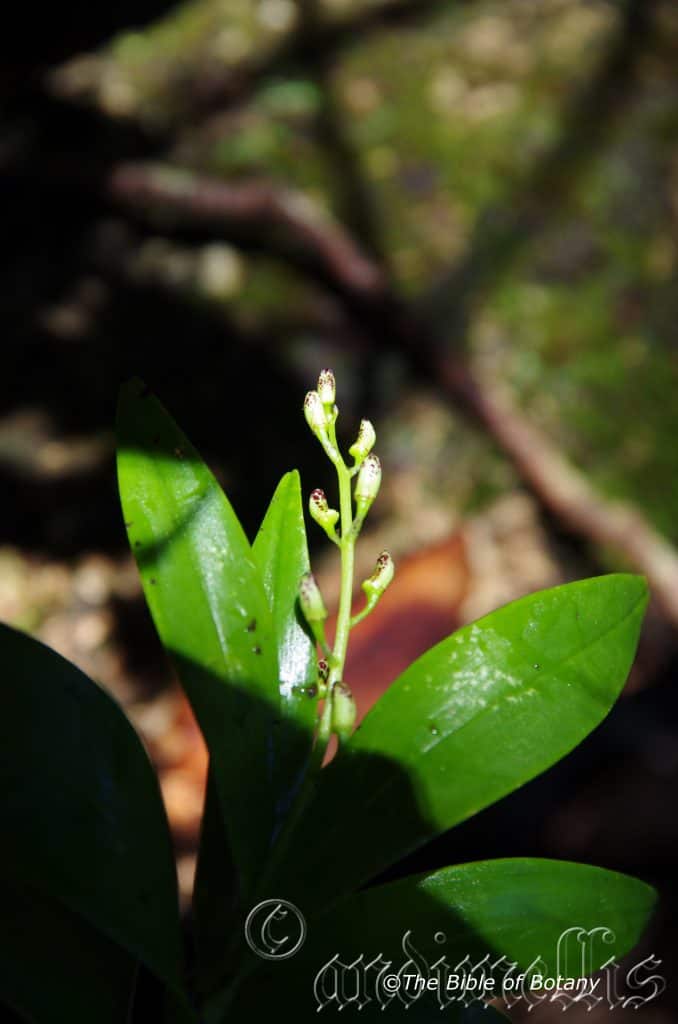
Clarence Valley NSW
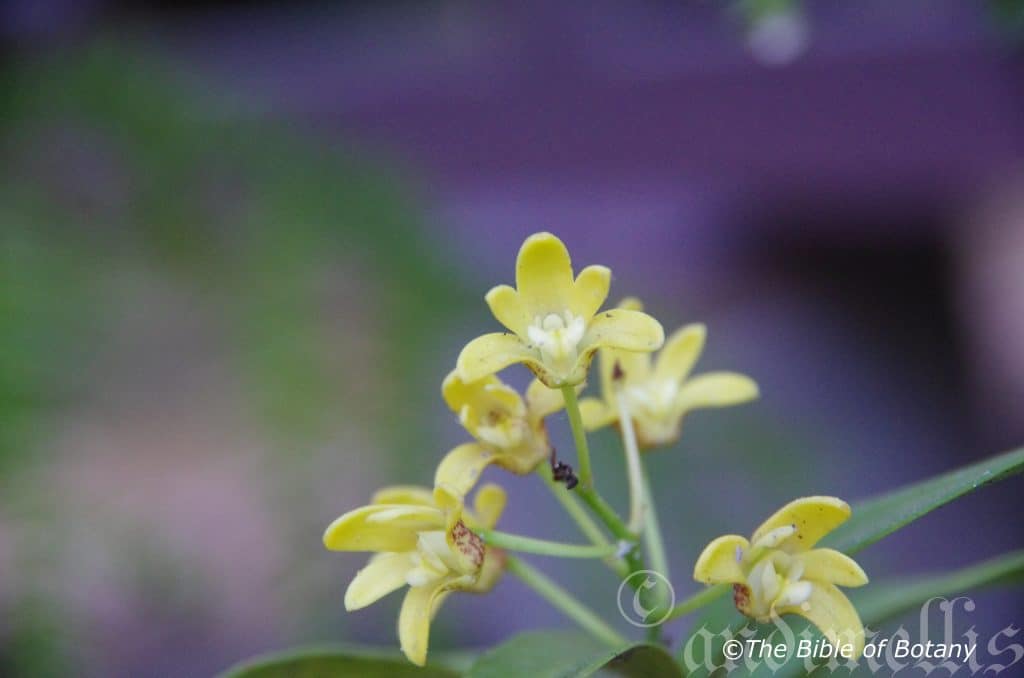
Coffs Harbour NSW
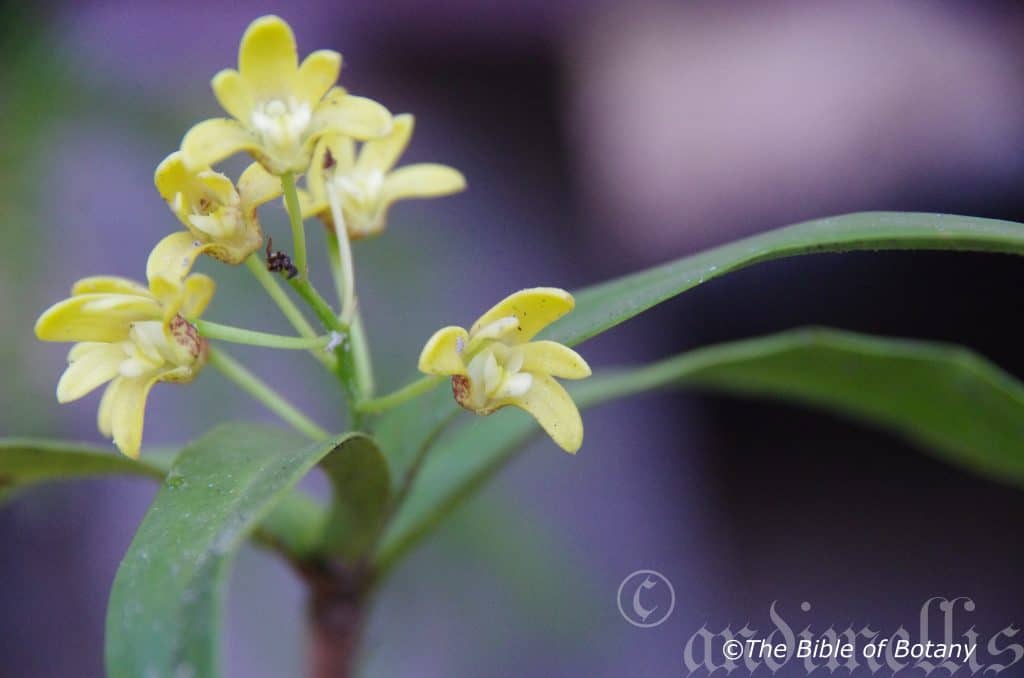
Coffs Harbour NSW
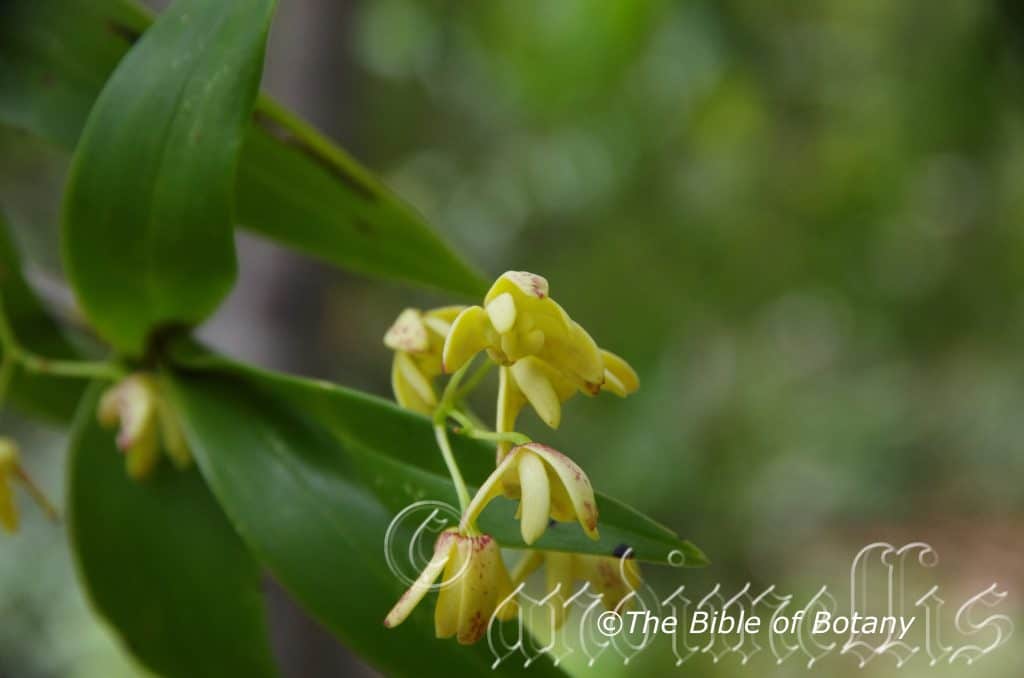
Clarence Valley NSW
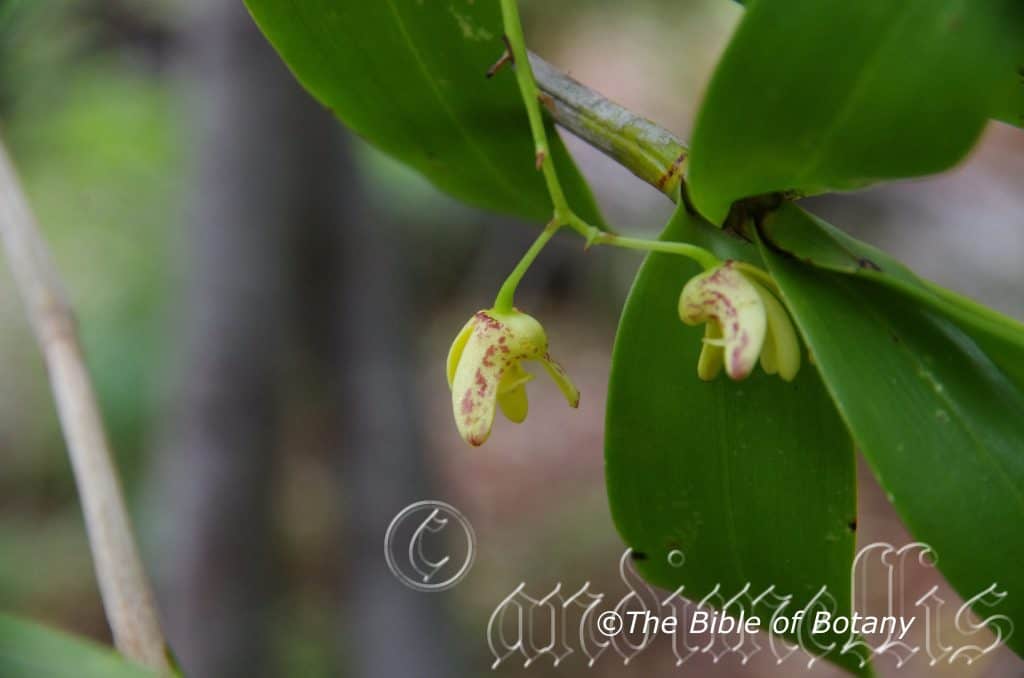
Clarence Valley NSW
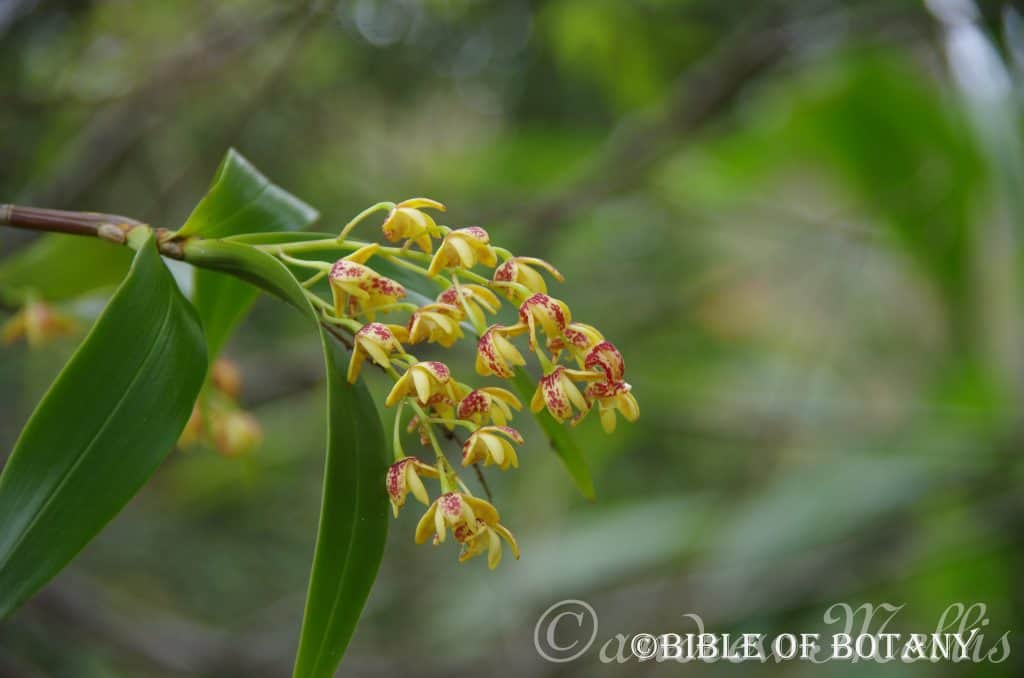
Clarence Valley NSW
xxxxxxxxxxxxxxxxxxxxxxxxxxxxxxxxxxxxxxxxDendrobium gracilicaule
Classification
Class: Monocots
Order: Asparagales
Family: Orcidaceae
Subfamily: Epidendroideae
Tribe: Dendrobieae
Sub Tribe: Dendrobiinae
Genus: From Dendron, which is Ancient Greek for a tree and Bios, which is Ancient Greek for life. It refers to plants, which live on trees to survive, not as parasites or saphrophytic.
Species: From Gracilis, which is Latin for slender and graceful and kaulos which is Ancient Greek for a stem or branch. It refers to stems or pseudo bulbs which are slender and graceful.
Common Name: Spider Orchid.
Distribution:
Dendrobium gracilicaule is found south from Cairns in far north Queensland to the Hunter River in central coastal New South Wales. It is found mainly on and east of the Great Dividing Range. In its northern frontier it is only found in the highlands.
https://avh.ala.org.au/occurrences/search?taxa=Dendrobium+gracilicaule#tab_mapView
Habitat Aspect Climate:
Dendrobium gracilicaule prefers dappled shade. It grows in coastal, littoral and montane rainforests and adjacent wet Eucalyptus forests. The altitude ranges from 50 meters ASL to 900 meters ASL.
The temperatures range from 1 degree in July to 32 degrees in January.
The rainfall ranges from lows of 800mm to 3000mm average per annum. The rainfall is seasonal mainly summer and autumn with dry winters and springs and humid to dry atmospheric conditions between these periods.
Soil Requirements:
Dendrobium gracilicaule grows as an epiphyte on various trees within its range and occasionally it can be found growing as lithophytes on rocks.
Height & Spread:
Wild Plants: 0.3m to 0.6m by 0.5m to 1m.
Characteristics:
Dendrobium gracilicaule grows in a monopodial on medium stems as an epiphyte. The canes are an olive green to greenish yellow, cylindrical and measure 300mm to 600mm in length by 6mm to 10mm in diameter. Roots are thick, glabrous white and radiate out from the base.
The long channelled, oblong, leaves number 3 to 6 and have a long acute apex. The canes are erect to spreading, glabrous and measure 50mm to 130mm in length by 20mm to 40mm width. The conduplicate leaf’s margins are entire. The base is cuneate and clasping while the apex is narrow acute. The thin semi glossy light green leaves are concolourous.
Inflorescences are a long raceme with 5 to 30 flowers. They are terminally produced from present year’s canes or old canes. The upright to semi pendant rachis vary from 60mm to 120mm in length while the pedicels are 10mm to 12mm in length including the 2mm to 3mm ovary which appears to be part of the pedicel but is slightly swollen. The sepals and petals curve forward and outwards from the ovary.
The sepals are oblong and measure 7mm to 10mm in length by 3mm to 4mm in width near the base before they spread to unite and surround the ovary. The sepals have a distinct curve form a distinct to faint midline to the sepal margins. The sepal margins are entire while the apex is mucronate.
The petals are oblong with a mucronate apex and measure 7mm to 9mm in length by 2.5mm to 3mm in width near the base before they surround the ovary.
The labellum is broadly mucronate apex and the margins curving strongly upwards to half from the base where it spreads widely reflexing towards the apex. The margins are entire.
The labellum’s column is 3mm high with a 5mm foot and measures 7mm to 8mm in length by 5mm to 6mm in width. The petals, sepals, and labellum are various shades of yellow and cream. The reverse side of the sepals and petals are marked in deep red or maroon. Flowering occurs from July to September.
Wildlife:
Dendrobium gracilicaule is the host to numerous small native bees when in flower and also hosts the Dendrobium beetle.
Cultivation:
Dendrobium gracilicaule is a beautiful orchid which is rather hardy and easy to grow and to propagate at least as far south as sale in Victoria along the coast. It does very well either in the bush house in a course Cymbidium mix or attached to most trees that do not shed their bark. Do not attach it to Eucalyptus trees as the barks contain resins which Dendrobiums detest. (The exception being D. aemulum)
Trees with mass plantings of mixed orchids look really spectacular and those that have a lot of Dendrobium gracilicaule add interest and curiosity over a long period especially when in flower. Ficus specie, Ceropetalum specie and Elaeocarpus specie are good host trees as is a natural host for this orchid in the wild as are Cupaniopsis specie.
Be ever so vigilant for Steyhopachys formosa the Dendrobium enthusiast’s nightmare. This beetle can inflict a lot of damage in just one season. Plants attached to trees are less likely to be phased by Dendrobium beetle because of natural predators like birds, bats and frogs.
Control of the beetle is simple just squash it. They are slow movers and though like all beetles can fly, would rather resort to hiding as a means of escape. The pupae are just as easy to eliminate. Check the base of all your orchids on a regular basis and again destroy any pupae. These look like small patches of white toothpaste squeezed from the tube. The larvae are the most difficult and will usually need a systemic spray or great concentration to find the small holes on the canes as they bore their way through from the inside. Eggs are yellowish and measure about 1.5mm in length.
The beetle eats buds, flowers, new shoots and developing seed pods. Larvae consume the canes.
Photo with more information can be obtained from the Brisbane Orchid Society.

Propagation:
Seeds: Dendrobium gracilicaule‘s seeds require treatment before sowing. Really Orchid seeds are meant for professionals with time, equipment and space. However if you wish to persevere then here are the basics and you are learning from an amateur. You will need the following, a flask, chloros solution, boiled water, an eye dropper, paper bag, a warm sheltered position and a lot of patience and luck. This is a most difficult orchid to grow even by professionals as it detests root disturbance and being reorientated.
- Collecting the seed: seed can only be collected from fully ripe pods. You may need to watch fully for the pod to commence spitting along the placenta. If possible place the paper bag over the pod and tie it off. If necessary place a plastic bag over the paper bag to prevent rain or moisture contacting the seeds.
- Knowledge is very important now, as different species and genre have various numbers of viable seed in a pod. Viable seeds may be as few as 20 or as many as several million. Check the bag daily and remove once the seed begins to disperse. Shake all the seeds from the pod into the bag.
- Purchase the appropriate agar solution from an orchid society as they will know what you want and which one will be best for your species. Prepare the agar solution and pour into the flask.
- Remove some of the seeds by shaking them into a solution of 1 part chloros to 20 parts water and allow to soak for 10 minutes.
- Remove the seeds with the eye dropper in the solution and spread evenly over the set agar.
- Place the flasks in a room that is will lit with indirect light and the temperature is a consistent 25 to 30 degrees centigrade.
- Wait 4 to 7 months for the seedlings to develop to a stage where they can be removed and planted on into a fine orchid mix. Do not remove the seedlings from their environment of light or temperature for at least another two months. Even at this stage it is best to place the seedlings in a hot house where their environment can be controlled.
Division: Division is the easiest method for amateurs to propagate Dendrobium orchids. At some point, the orchid will become root-bound in its pot or large enough to divide the clump on a tree or slab. The only tools required are sharp sterile knife a slab of cork or pumice stone and some hemp or nylon string. I prefer hemp string because it is totally natural but is difficult to obtain.
The potted Dendrobium: Remove the Dendrobium from its pot and set it on a firm surface. Cut through the roots to create separate sections of the plant. Each piece should include four to five stems and a large chunk of the root system. Repot using a central stick to ensure the plant is tied securely so that it does not move.
Slab plants: Take the slab and cut it down the middle ensuring each section has healthy terminal stems. Retie the new divisions cork or pumice stone onto a new piece of cork or pumice stone. Tie them so that they do not move. Do not over tighten as this cuts off the flow of nutrients to the new leaves.
Treat plants that are growing naturally on a tree in the same way. First cut the plant in half then slice just below the roots into the outer layer of bark being careful not to damage the stems or the xylem and phloem layers of the tree Remove the section and retie it to another section of the tree or cork slab as desired.
Fertilize using Seaweed, fish emulsion or organic chicken pellets soaked in water on an alternate basis. Fertilize every two months until the plants are established then twice annually in early September or March to maintain health, vitality and better flowering.
Further Comments from Readers:
Hi reader, it seems you use The Bible of Botany a lot. That’s great as we have great pleasure in bringing it to you! It’s a little awkward for us to ask, but our first aim is to purchase land approximately 1,600 hectares to link several parcels of N.P. into one at The Pinnacles NSW Australia, but we need your help. We’re not salespeople. We’re amateur botanists who have dedicated over 30 years to saving the environment in a practical way. We depend on donations to reach our goal. If you donate just $5, the price of your coffee this Sunday, We can help to keep the planet alive in a real way and continue to bring you regular updates and features on Australian plants all in one Botanical Bible. Any support is greatly appreciated. Thank you.
In the spirit of reconciliation we acknowledge the Bundjalung, Gumbaynggirr and Yaegl and all aboriginal nations throughout Australia and their connections to land, sea and community. We pay our respect to their Elders past, present and future for the pleasures we have gained.
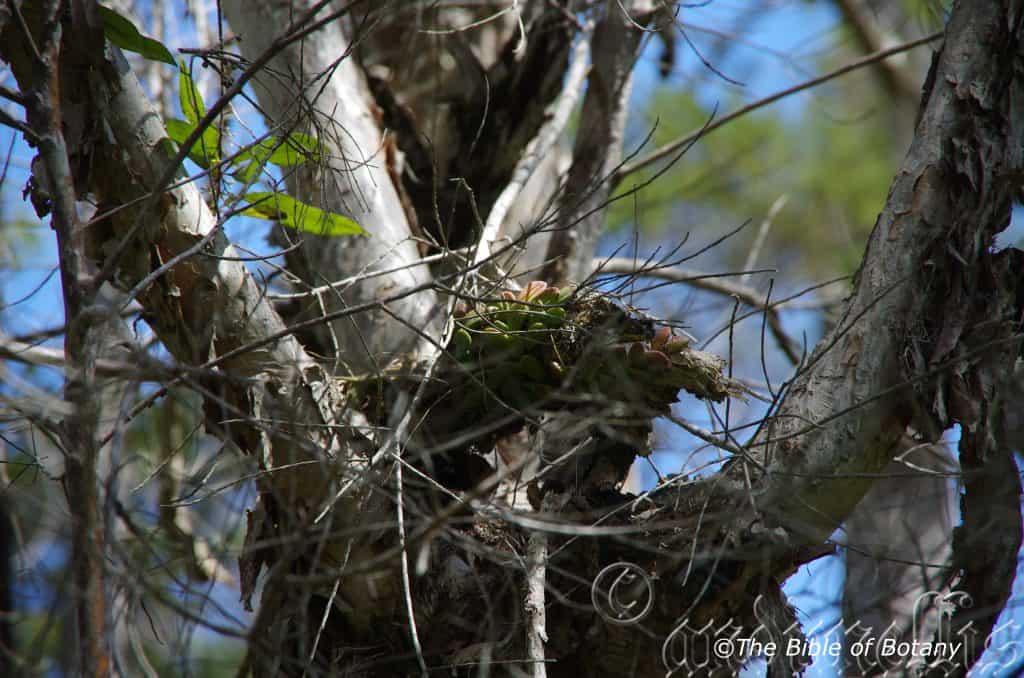
Clarence Valley NSW

Clarence Valley NSW
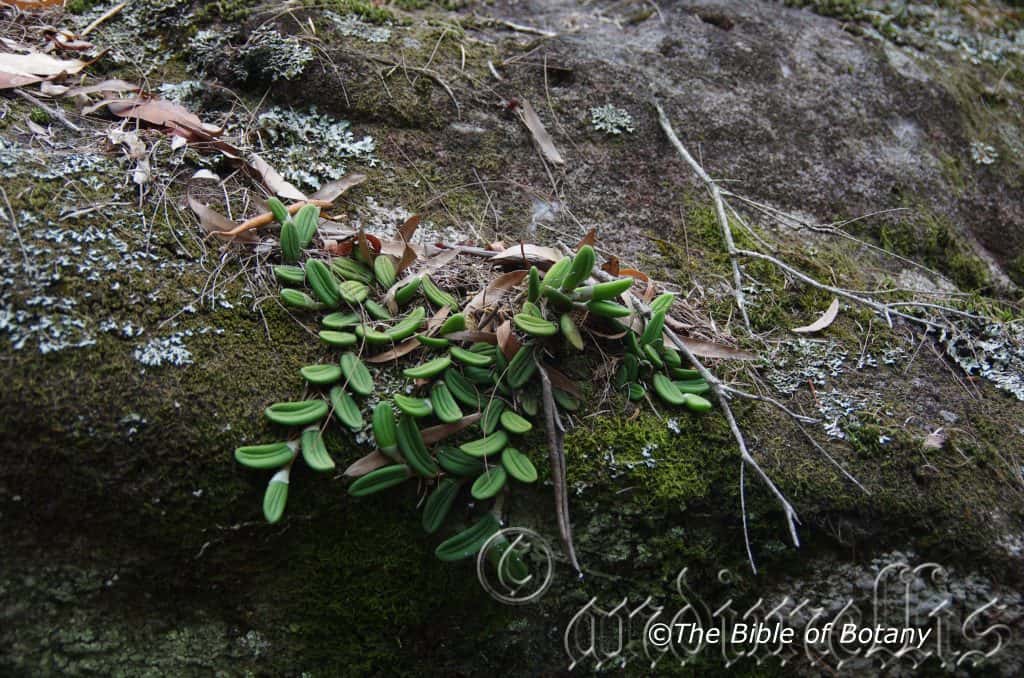
Clarence Valley NSW
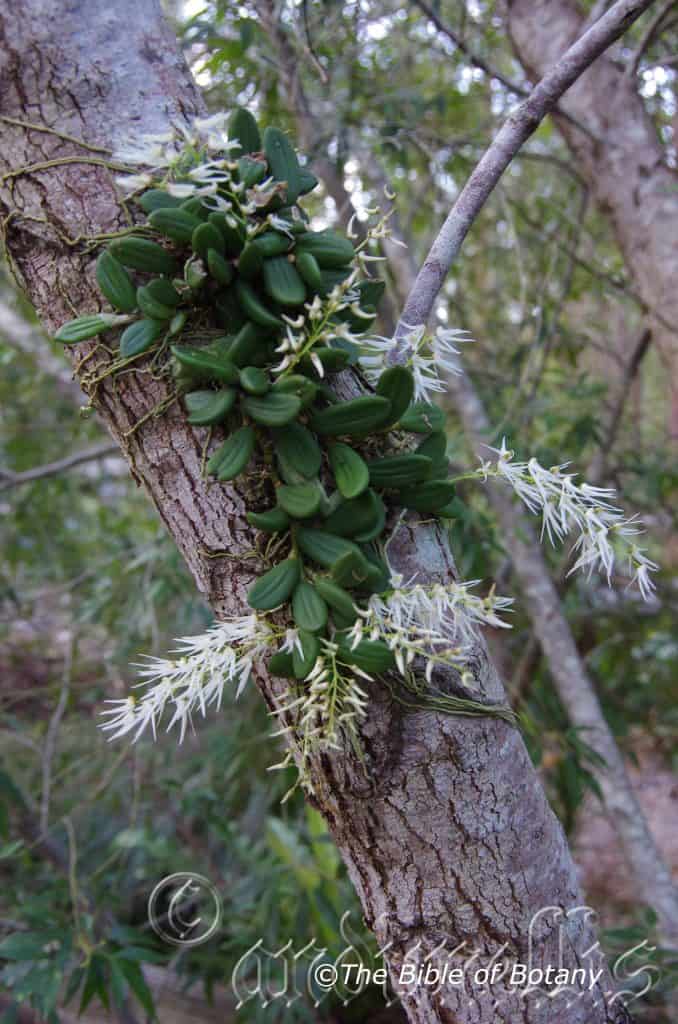
Clarence Valley NSW
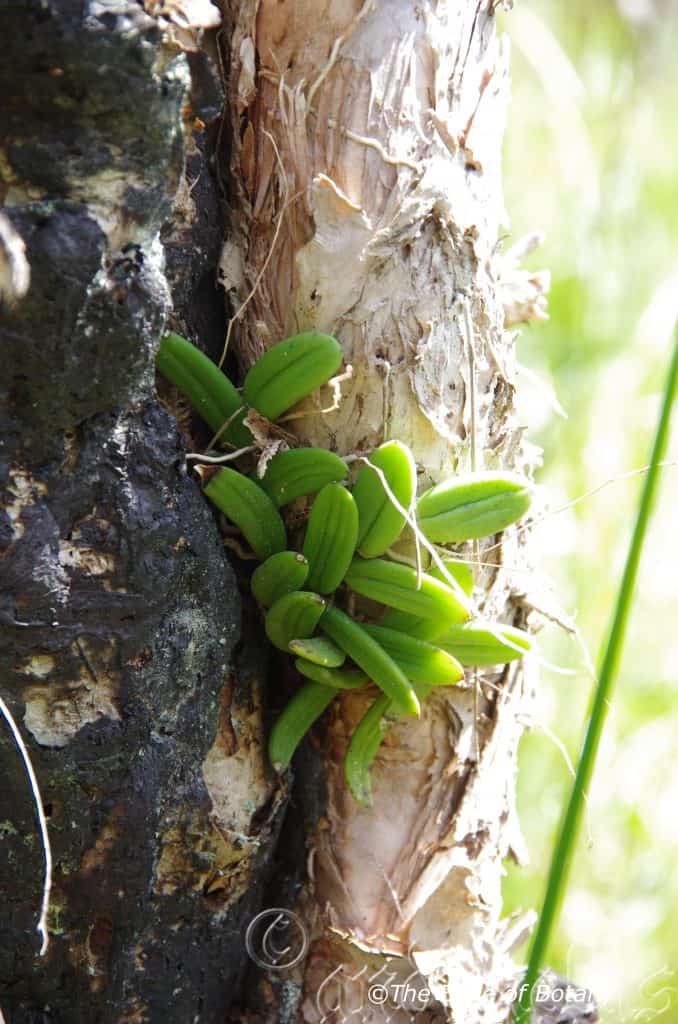
Clarence Valley NSW
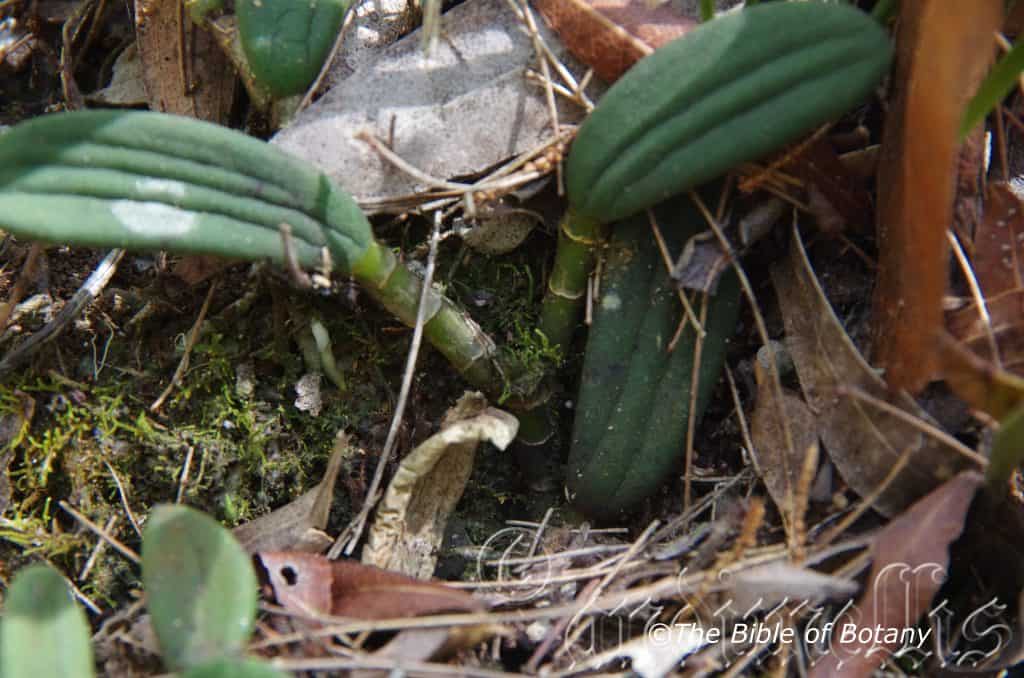
Clarence Valley NSW
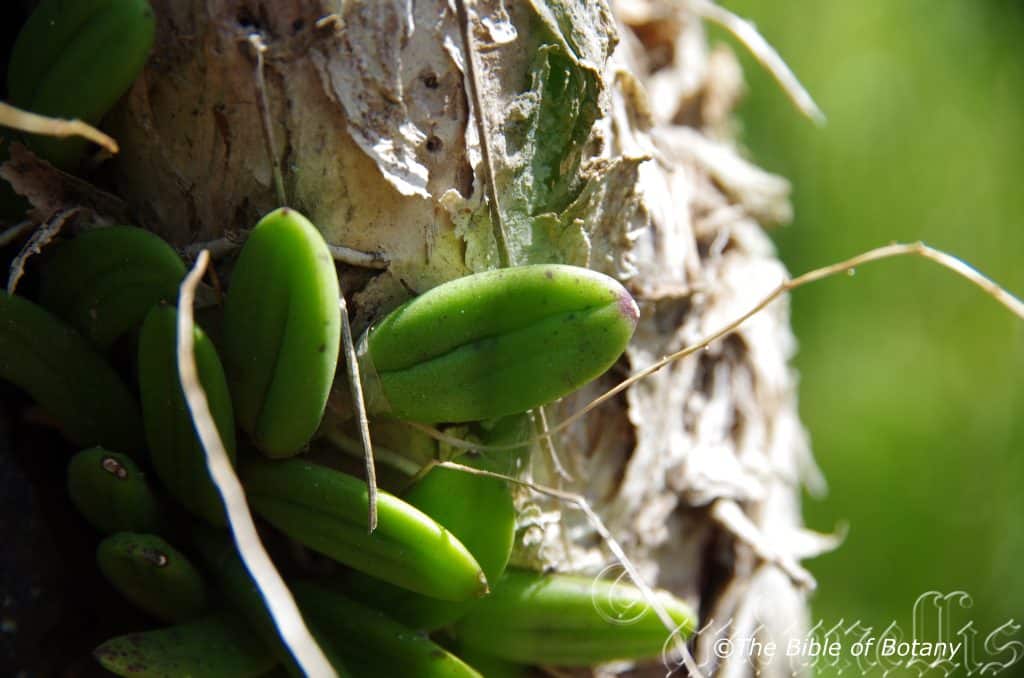
Clarence Valley NSW
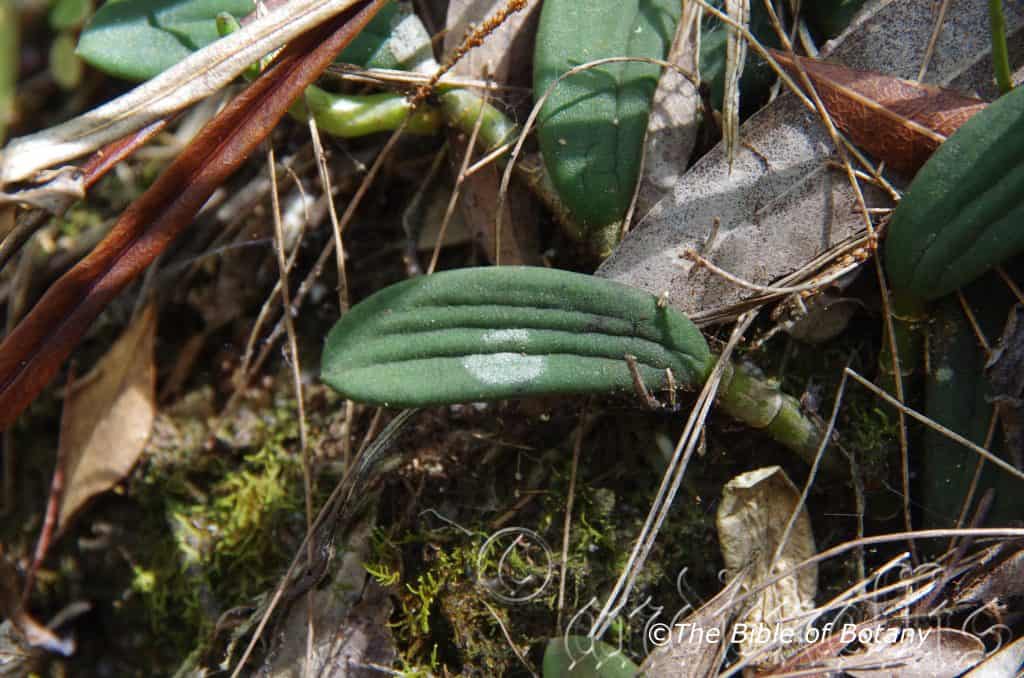
Clarence Valley NSW
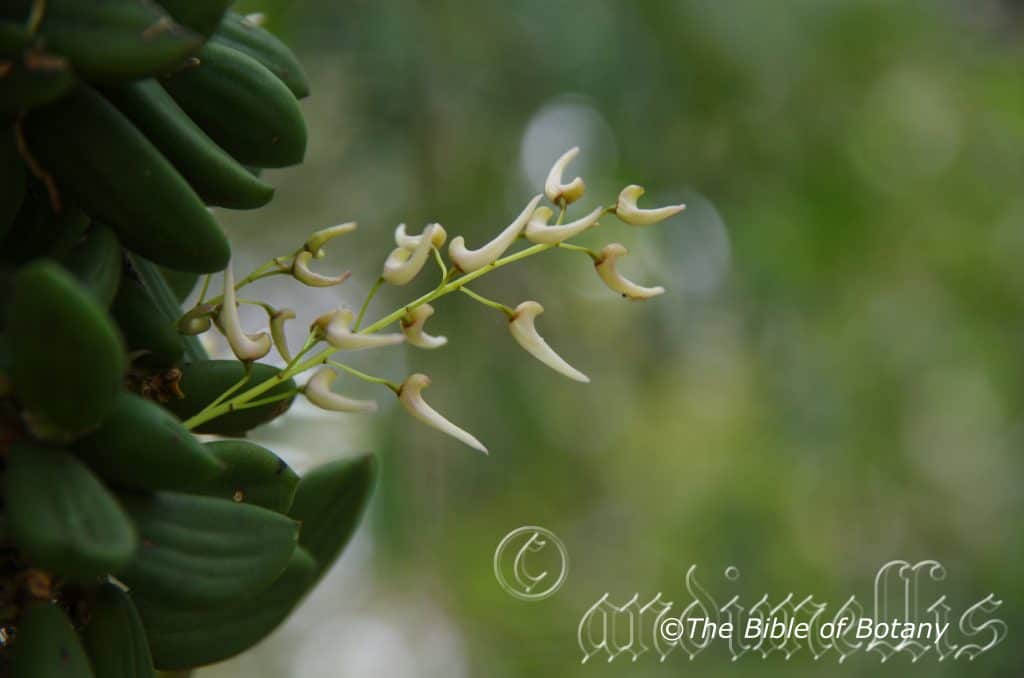
Author’s Garden The Pinnacles NSW
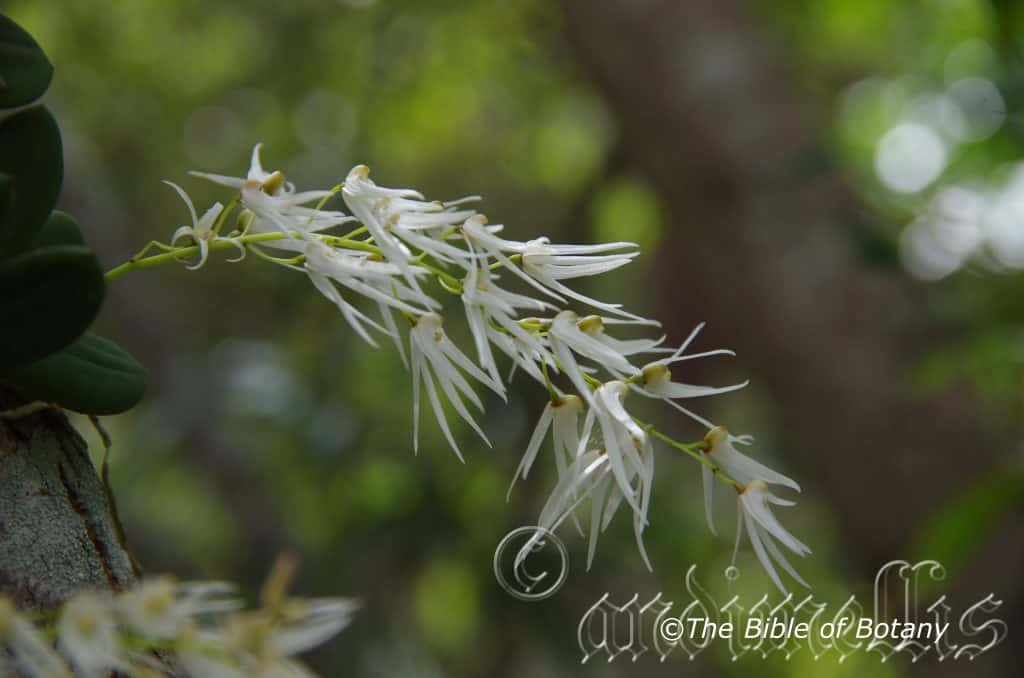
Clarence Valley NSW
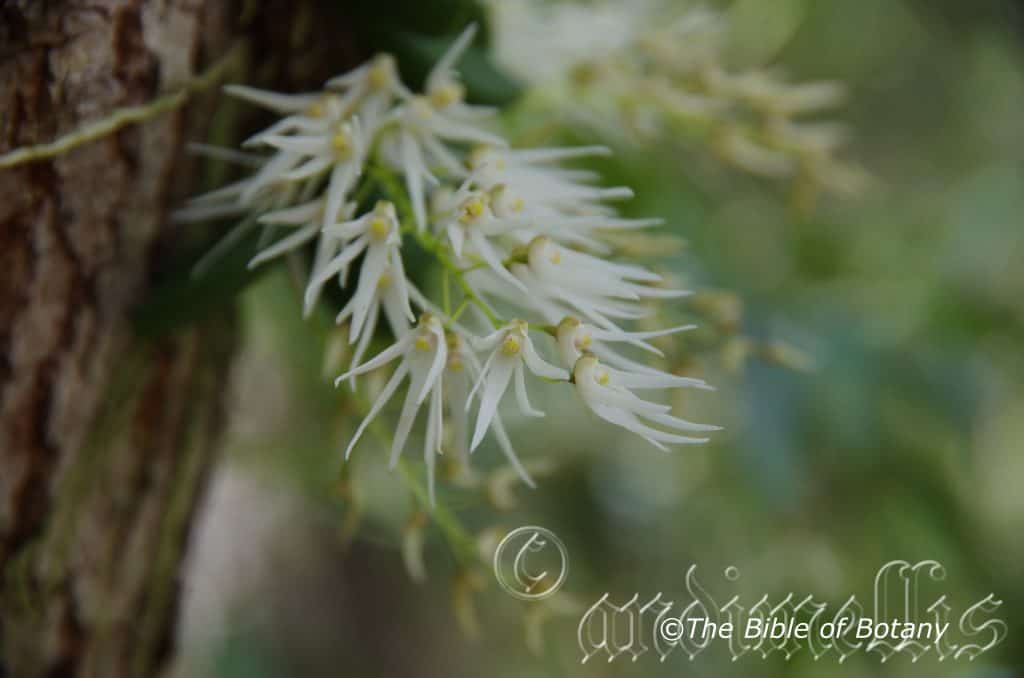
Clarence Valley NSW
Dendrobium linguiforme
Classification
Class: Monocots
Order: Asparagales
Family: Orcidaceae
Subfamily: Epidendroideae
Tribe: Dendrobieae
Sub Tribe: Dendrobiinae
Genus: From Dendron, which is Ancient Greek for a tree and Bios, which is Ancient Greek for life. It refers to plants, which live on trees to survive, not as parasites or saphrophytic.
Species: From Lingua, which is Latin for a tongue and Forme, which is Latin for to take the shape or form of. It refers to the leaves or labellum on orchids, which resemble a tongue.
Common Name: Tongue Orchid.
Distribution:
Dendrobium linguiforme is found south from the Eubenangee and Wooroonooran National Parks in far north Queensland to Ulladulla in southern New South Wales. It is found on the Western Slopes, on the Great Dividing Range to the coast.
https://avh.ala.org.au/occurrences/search?taxa=Dendrobium+linguiforme#tab_mapView
Habitat Aspect Climate:
Dendrobium linguiforme prefers dappled shade but can be found in full shade. It grows in sclerophyll forest, often on exposed rocky sites and coastal littoral rainforests or at times in warm montane rainforests and well developed cool tropical rainforests and adjacent wet Eucalyptus forests. The altitude ranges from 8 meters ASL to 900 meters ASL.
The temperatures range from minus 3 degrees in July to 36 degrees in January.
The rainfall ranges from lows of 700mm to 2700mm average per annum. The rainfall is seasonal mainly summer and autumn with dry winters and springs and humid to dry atmospheric conditions between these periods.
Soil Requirements:
Dendrobium linguiforme grows as an epiphyte on various trees or as a lithophyte on rocks within its range.
Height & Spread:
Wild Plants: 0.01m to 0.03m by 0.5m to 3m.
Characteristics:
Dendrobium linguiforme grows as an epiphyte or lithophyte with prostrate stems. The filiform roots appear along the entire length of the stems. The aerial roots are off white to pale grey, smooth and creep over the rocks or around the trunk and branches of trees.
The single leaf appears from the apex. The elliptical, oblong, to obovate leaves of Dendrobium linguiforme measure 20mm to 40mm in length by 8mm to 16mm in width and 4mm to 6mm thick. The bases are rounded while the apex is obtuse. The dull concolourous or discolourous laminas are deep green to deep grey-green, succulent yet tough and glabrous with 2 or 4 longitudinal furrows on the upper laminas while the lowers are similar or paler in colour and glabrous. The margins are entire. There is a semi persistent white chartaceous sheath at the base of the leaves.
The inflorescences of Dendrobium linguiforme are long racemes with 6 to 60 flowers. The deep green rachises are produced from the leaf axils and are covered in a white chartaceous sheath at the base. The upright to semi pendant, wiry rachises vary from 50mm to 150mm in length while the pedicels measure 10mm to 18mm in length. The sepals and petals curve forward.
The 3 linear sepals are usually white or at times pale cream or very rarely pastel pink. The two lateral sepals measure 15mm to 22mm in length by 3.5mm to 4.5mm in width near the base they spread to unite and surround the ovary. The sepal margins are entire while the apex is tapering.
The dorsal sepal measures 15mm to 22mm in length by 3mm to 4mm in width near the base. The margins are entire.
The 2 linear lateral petals are usually white or at times pale cream or very rarely pastel pink. The lateral petals measure 15mm to 22mm in length by 2.5mm to 3mm in width near the base before they surround the ovary. The margins are entire.
The labellum are usually white or at times pale cream, yellow or very rarely pastel pink and measure 5mm to 6mm in length by 3mm to 4mm in width. The margins are entire.
The labellum’s column measures 2mm to 2.4mm in length while the foot measures 3mm to 3.6mm in length. The flowers appear from September to October.
Wildlife:
Dendrobium linguiforme is the host to numerous small native bees when in flower and also unfortunately hosts the Dendrobium beetle.
Cultivation:
Dendrobium linguiforme is a beautiful flowering orchid which is rather hardy and easy to grow and to propagate at least as far south as sale in Victoria along the coast. It does very well either in the bush house attached to a slab, cork or washed pumice stone or attached to most rainforest trees that do not shed their bark. Do not attach them to Eucalyptus trees as the barks contain resins which most Dendrobium detest.
Trees with mass plantings of mixed orchids look really spectacular and those that have a lot of Dendrobium linguiforme add interest and curiosity over a long period especially when in flower. Ficus specie, Ceropetalum specie and Elaeocarpus are good host trees as they are natural hosts for this orchid in the wild as are the Cupaniopsis specie.
Be ever so vigilant for Steyhopachys formosa the Dendrobium enthusiast’s nightmare. This beetle can inflict a lot of damage in just one season. Plants attached to trees are less likely to be phased by Dendrobium beetle because of natural predators like birds, bats and frogs.
Control of the beetle is simple just squash it. They are slow movers and though like all beetles can fly, would rather resort to hiding as a means of escape. The pupae are just as easy to eliminate. Check the base of all your orchids on a regular basis and again destroy any pupae. These look like small patches of white toothpaste squeezed from the tube. The larvae are the most difficult and will usually need a systemic spray or great concentration to find the small holes on the canes as they bore their way through from the inside. Eggs are yellowish and measure about 1.5mm in length.
The beetle eats buds, flowers, new shoots and developing seed pods. Larvae consume the canes.
Photo with more information can be obtained from the Brisbane Orchid Society.
Propagation:
Seeds: Dendrobium linguiforme‘s seeds require treatment before sowing. Really Orchid seeds are meant for professionals with time, equipment and space. However if you wish to persevere then here are the basics and you are learning from an amateur. You will need the following, a flask, chloros solution, boiled water, an eye dropper, paper bag, a warm sheltered position and a lot of patience and luck. This is a most difficult orchid to grow even by professionals as it detests root disturbance and being reoriented.
- Collecting the seed: seed can only be collected from fully ripe pods. You may need to watch a pod for several days or even weeks following the time it stops swelling for it to turn olive yellow. At this stage the pod must be watched carefully for the pod to commence spitting along the placenta. If possible place the paper bag over the pod and tie it off. If necessary place a plastic bag over the paper bag to prevent rain or moisture contacting the seeds.
- Knowledge is very important now, as different species and genre have various numbers of viable seed in a pod. Viable seeds may be as few as 20 or as many as several million. Check the bag daily and remove once the seed begins to disperse. Shake all the seeds from the pod into the bag.
- Purchase the appropriate agar solution from an orchid society as they will know what you want and which one will be best for your species. Prepare the agar solution and pour into the flask.
- Remove some of the seeds by shaking them into a solution of 1 part chloros to 20 parts water and allow soaking for 10 minutes.
- Remove the seeds with the eye dropper in the solution and spread evenly over the set agar.
- Place the flasks in a room that is will lit with indirect light and the temperature is a consistent 25 to 30 degrees centigrade.
- Wait 4 to 7 months for the seedlings to develop to a stage where they can be removed and planted on into a fine orchid mix. Do not remove the seedlings from their environment of light or temperature for at least another two months. Even at this stage it is best to place the seedlings in a hot house where their environment can be controlled.
Division: Division is the easiest method for amateurs to propagate Dendrobium orchids. At some point, the orchid will become root-bound in its pot or large enough to divide the clump on a tree or slab. The only tools required are sharp sterile knife a slab of cork or pumice stone and some hemp or nylon string. I prefer hemp string because it is totally natural but is difficult to obtain.
The potted Dendrobium: Remove the Dendrobium from its pot and set it on a firm surface. Cut through the roots to create separate sections of the plant. Each piece should include four to five stems and a large chunk of the root system. Repot using a central stick to ensure the plant is tied securely so that it does not move.
Slab plants: Take the slab and cut it down the middle ensuring each section has healthy terminal stems. Retie the new divisions cork or pumice stone onto a new piece of cork or pumice stone. Tie them so that they do not move. Do not over tighten as this cuts off the flow of nutrients to the new leaves.
Treat plants that are growing naturally on a tree in the same way. First cut the plant in half then slice just below the roots into the outer layer of bark being careful not to damage the stems or the xylem and phloem layers of the tree Remove the section and retie it to another section of the tree or cork slab as desired.
Fertilize using Seaweed, fish emulsion or organic chicken pellets soaked in water on an alternate basis. Fertilize every two months until the plants are established then twice annually in early September or March to maintain health, vitality and better flowering.
Further Comments from Readers:
Hi reader, it seems you use The Bible of Botany a lot. That’s great as we have great pleasure in bringing it to you! It’s a little awkward for us to ask, but our first aim is to purchase land approximately 1,600 hectares to link several parcels of N.P. into one at The Pinnacles NSW Australia, but we need your help. We’re not salespeople. We’re amateur botanists who have dedicated over 30 years to saving the environment in a practical way. We depend on donations to reach our goal. If you donate just $5, the price of your coffee this Sunday, We can help to keep the planet alive in a real way and continue to bring you regular updates and features on Australian plants all in one Botanical Bible. Any support is greatly appreciated. Thank you.
In the spirit of reconciliation we acknowledge the Bundjalung, Gumbaynggirr and Yaegl and all aboriginal nations throughout Australia and their connections to land, sea and community. We pay our respect to their Elders past, present and future for the pleasures we have gained.
Dendrobium melaleucaphilum
Classification
Class: Monocots
Order: Asparagales
Family: Orcidaceae
Subfamily: Epidendroideae
Tribe: Dendrobieae
Sub Tribe: Dendrobiinae
Genus: From Dendron, which is Ancient Greek for a tree and Bios, which is Ancient Greek for life. It refers to plants, which live on trees to survive, not as parasites or saphrophytic.
Species: From Melas, which is Ancient Greek for black, Leukos, which is Ancient Greek for white and Philos, which is Ancient Greek for loving or to love. It refers to plants, which prefer habitats or environments which are dominated by a Melaleuca species of tree.
Common Name: Spider Orchid.
Distribution:
Dendrobium melaleucaphilum is found south from the Blackdown Tablelands National Park in central eastern Queensland to the lower Blue Mountains in central eastern New South Wales. It is mainly found on and east of the Great Dividing Range.
https://avh.ala.org.au/occurrences/search?taxa=Dendrobium+melaleucaphilum#tab_mapView
Habitat Aspect Climate:
Dendrobium melaleucaphilum prefers the habitats of Melaleuca styphelioides and grows almost entirely on that species in the wild. On rare occasions it is found as a lithophyte or growing on adjacent rainforest trees. It is found in moist openings in forests and along creeks and streams. The altitude ranges from 5 meters ASL to 100 meters ASL.
The temperatures range from minus 1 degree in August to 36 degrees in January.
The rainfall ranges from lows of 600mm to 1800mm average per annum. The rainfall is seasonal mainly summer and autumn with drier winters and springs and humid to dry atmospheric conditions between these periods.
Soil Requirements:
Dendrobium melaleucaphilum grows as an epiphyte or lithophyte.
Height & Spread:
Wild Plants:0.3m to 0.5m by 0.5m to 1m.
Characteristics:
Dendrobium melaleucaphilum stems are spreading to semi pendant. The canes measure 60mm to 450mm in length by 7mm to 10mm in cross section near the apex. The succulent canes taper from the apex to their bases where they become circular in cross section. The glabrous roots are white and radiate out in under the bark from the base of the canes.
The 2 to 4 divaricate to erect leaves of Dendrobium melaleucaphilum are located at the apex of the canes. The oblong-erect leaves measure 45mm to 90mm in length by 15mm to 25mm width. The bases are broad cuneate to rounded while the apexes are acute to acuminate. The conduplicate, discolourous leaves are thin, coriaceous, glabrous and semi glossy on the upper laminas while the lower laminas are paler and dull. The leaf margins are entire. The semi clasping petioles measure 0.5mm to 2mm in length.
The inflorescences of Dendrobium melaleucaphilum are short racemes with 2 to 9 flowers. They are terminally produced from present year’s canes or old canes. The upright to semi pendant rachis vary from 7mm to 40mm in length while the pedicels are 8mm to 22mm in length including the ovary which appears to be part of the pedicel but actually tapers from the ovary to the rachis. The sepals and lateral petals are erect and lean forward.
The 3 linear sepals are usually pale green to deep dull yellow-green or dull yellow near the base while the apex and upper margins and apex are deep pink, reddish or purple. The dorsal sepal measures 38mm to 60mm in length by 2.5mm to 5mm in width near the base. The 2 lateral sepals measure 40mm to 62mm in length by 2mm to 2.5mm in width near the base before they spread to unite and surround the ovary. The sepal margins are entire while the apex is tapering.
The 2 linear lateral petals usually pale green to deep dull yellow-green or dull yellow near the base while the apex is unmarked or has the upper margins and apex deep pink, reddish or purple. The lateral petals measure 20mm to 32mm in length by 2mm to 2.5mm in width near the base before they surround the ovary.
The labellum are usually cream or rarely white with pink, reddish or purple striations and measure 10mm to 16mm in length by 7mm to 9mm in width. The margins are entire.
The labellum’s column measures 2.5mm to 4mm in length while the foot measures 6mm to 10mm in length. The flowers appear from July to October.
Wildlife:
Dendrobium melaleucaphilum is the host to numerous small native bees when in flower and also hosts the Dendrobium beetle, Stethopachys formosa.
Cultivation:
Dendrobium melaleucaphilum is a beautiful orchid which is rather hardy and easy to grow and to propagate at least as far south as sale in Victoria along the coast. It does very well either in the bush house attached to cork but prefers the forks of Melaleuca styphelioides. Do not attach it to Eucalyptus trees as the barks contain resins which Dendrobiums detest.
Because of its limited number of host trees the orchid will grow on and the limited number of orchids that will successfully grow on paperbarks, spectacular mass plantings of mixed orchids become a very sombre affair. Those trees that have a few Dendrobium melaleucaphilum planted out, in the forks add interest and curiosity especially when in flower.
Be ever so vigilant for Steyhopachys formosa the Dendrobium enthusiast’s nightmare. This beetle can inflict a lot of damage in just one season. Plants attached to trees are less likely to be phased by Dendrobium beetle because of natural predators like birds, bats and frogs.
Control of the beetle is simple just squash it. They are slow movers and though like all beetles can fly, would rather resort to hiding as a means of escape. The pupae are just as easy to eliminate. Check the base of all your orchids on a regular basis and again destroy any pupae. These look like small patches of white toothpaste squeezed from the tube. The larvae are the most difficult and will usually need a systemic spray or great concentration to find the small holes on the canes as they bore their way through from the inside. Eggs are yellowish and measure about 1.5mm in length.
The beetle eats buds, flowers, new shoots and developing seed pods. Larvae consume the canes.
Photo with more information can be obtained from the Brisbane Orchid Society. http://bos.org.au/
Propagation:
Seeds: Dendrobium melaleucaphilum‘s seeds require treatment before sowing. Really Orchid seeds are meant for professionals with time, equipment and space. However if you wish to persevere then here are the basics and you are learning from an amateur. You will need the following, a flask, chloros solution, boiled water, an eye dropper, paper bag, a warm sheltered position and a lot of patience and luck. This is a most difficult orchid to grow even by professionals as it detests root disturbance and being reorientated.
- Collecting the seed: seed can only be collected from fully ripe pods. You may need to watch a pod for several days or even weeks following the time it stops swelling for it to turn olive yellow. At this stage the pod must be watched carefully for the pod to commence spitting along the placenta. If possible place the paper bag over the pod and tie it off. If necessary place a plastic bag over the paper bag to prevent rain or moisture contacting the seeds.
- Knowledge is very important now, as different species and genre have various numbers of viable seed in a pod. Viable seeds may be as few as 20 or as many as several million. Check the bag daily and remove once the seed begins to disperse. Shake all the seeds from the pod into the bag.
- Purchase the appropriate agar solution from an orchid society as they will know what you want and which one will be best for your species. Prepare the agar solution and pour into the flask.
- Remove some of the seeds by shaking them into a solution of 1 part chloros to 20 parts water and allow to soak for 10 minutes.
- Remove the seeds with the eye dropper in the solution and spread evenly over the set agar.
- Place the flasks in a room that is will lit with indirect light and the temperature is a consistent 25 to 30 degrees centigrade.
- Wait 4 to 7 months for the seedlings to develop to a stage where they can be removed and planted on into a fine orchid mix. Do not remove the seedlings from their environment of light or temperature for at least another two months. Even at this stage it is best to place the seedlings in a hot house where their environment can be controlled.
Division: Division is the easiest method for amateurs to propagate Dendrobium melaleucaphilum. At some point, the orchid will become root-bound in its pot or large enough to divide the clump on a tree or slab. The only tools required are sharp sterile knife a slab of cork or pumice stone and some hemp or nylon string. I prefer hemp string because it is totally natural but is difficult to obtain.
The potted Dendrobium melaleucaphilum: Remove the Dendrobium from its pot and set it on a firm surface. Cut through the roots to create separate sections of the plant. Each piece should include four to five stems and a large chunk of the root system. Repot using a central stick to ensure the plant is tied securely so that it does not move.
Slab plants: Take the slab and cut it down the middle ensuring each section has healthy terminal stems. Retie the new divisions cork or pumice stone onto a new piece of cork or pumice stone. Tie them so that they do not move. Do not over tighten as this cuts off the flow of nutrients to the new leaves.
Treat plants that are growing naturally on a tree in the same way. First cut the plant in half then slice just below the roots into the outer layer of bark being careful not to damage the stems or the xylem and phloem layers of the tree Remove the section and retie it to another section of the tree or cork slab as desired.
Fertilize using Seaweed, fish emulsion or organic chicken pellets soaked in water on an alternate basis. Fertilize every two months until the plants are established then twice annually in early September or March to maintain health, vitality and better flowering.
Further Comments from Readers:
Hi reader, it seems you use The Bible of Botany a lot. That’s great as we have great pleasure in bringing it to you! It’s a little awkward for us to ask, but our first aim is to purchase land approximately 1,600 hectares to link several parcels of N.P. into one at The Pinnacles NSW Australia, but we need your help. We’re not salespeople. We’re amateur botanists who have dedicated over 30 years to saving the environment in a practical way. We depend on donations to reach our goal. If you donate just $5, the price of your coffee this Sunday, We can help to keep the planet alive in a real way and continue to bring you regular updates and features on Australian plants all in one Botanical Bible. Any support is greatly appreciated. Thank you.
In the spirit of reconciliation we acknowledge the Bundjalung, Gumbaynggirr and Yaegl and all aboriginal nations throughout Australia and their connections to land, sea and community. We pay our respect to their Elders past, present and future for the pleasures we have gained.
Dendrobium monophyllum
Classification
Class: Monocots
Order: Asparagales
Family: Orcidaceae
Subfamily: Epidendroideae
Tribe: Dendrobieae
Sub Tribe: Dendrobiinae
Genus: From Dendron, which is Ancient Greek for a tree and Bios, which is Ancient Greek for life. It refers to plants, which live on trees to survive, not as parasites or saphrophytic.
Species: From Monos, which is Ancient Greek for one or singular and Phullon/Phyllon, which is Ancient Greek for a leaf or phyllode. It refers to plants, which have a single leaf.
Common Name: Lily of the Valley Orchid.
Distribution:
Dendrobium monophyllum is found south from the Daintree National Park to Paluma National Park and from Kroombit Tops national Park to the Clarence River in northern coastal New South Wales. It is mainly on and east of the Great Dividing Range.
https://avh.ala.org.au/occurrences/search?taxa=Dendrobium+monophyllum#tab_mapView
Habitat Aspect Climate:
Dendrobium monophyllum prefers dappled shade to filtered sunlight. It grows along streams or rivers as an epiphyte on trees in cool moist rainforests or as a lithophyte in moist Eucalyptus forests or closed moist woodlands. The altitude ranges from 50 meters ASL to 260 meters ASL.
The temperatures range from minus 2 degrees in August to 34 degrees in January.
The rainfall ranges from lows of 650mm to 3200mm average per annum. The rainfall is seasonal mainly summer and autumn with dry winters and springs and humid to dry atmospheric conditions between these periods.
Soil Requirements:
Dendrobium monophyllum grows as a lithophyte on rocks.
Height & Spread:
Wild Plants: 0.15m to 0.3m by 0.3m to 0.6m.
Characteristics:
Dendrobium monophyllum’s rhizomes basal stems are prostrate and clearly differentiated from the canes. The basal rhizomes stem-canes measure 20mm to 40mm in length by 5mm to 10mm in diameter. The thick, white, glabrous roots radiate out from along the length of the rhizomes section. The apex section or the true canes are ovoidal to narrow ovoidal, erect, succulent and are pale olive-green to mid olive-yellow. The canes measure 20mm to 100mm in length by 15mm to 30mm in diameter.
The single or rarely 2 conduplicate leaves of Dendrobium monophyllum are long channelled, oblong, divaricate or spreading. The apex leaf measures 50mm to 120mm in length by 15mm to 30mm width. The bases are broad cuneate without a petiole while the apexes are acute, broad acute or obtuse. The discolourous leaves are thin, coriaceous, glabrous and semi glossy on the upper laminas while the lower laminas are paler and dull. The leaf margins are entire.
The inflorescences of Dendrobium monophyllum are long racemes with 5 to 20 flowers. They are terminally produced from present year’s canes. The erect rachis measure 70mm to 170mm in length while the pedicels are 12mm to 25mm in length including the ovary which appears to be part of the pedicel but actually tapers from the ovary to the rachis. The nodding flower’s sepals and lateral petals are erect and lean forward.
The 3 deltoid sepals are pale dull to bright yellow or yellow-green. The dorsal sepal measures 5mm to 7mm in length by 3mm to 5mm in width near the base. The 2 pale dull to bright yellow or yellow-green, lateral sepals measure 6.5mm to 9mm in length by 4mm to 5.5mm in width near the base before they spread to unite and surround the ovary. The sepal margins are entire.
The 2 broad oblong lateral petals are pale dull to bright yellow or yellow-green. The lateral petals measure 4mm to 5mm in length by 3mm to 4mm in width near the base before they surround the ovary.
The labellum are pale dull to bright yellow or yellow-green and measure 5mm to 7mm in length by 3mm to 4mm in width. The margins are entire.
The labellum’s column measures 2mm to 3mm in length while the foot measures 5mm to 6mm in length. The flowers appear from August to October.
Wildlife:
Dendrobium monophyllum is the host to numerous small native bees when in flower and also hosts the Dendrobium beetle.
Cultivation:
Dendrobium monophyllum is a beautiful small orchid which is rather hardy and easy to grow and to propagate at least as far south as the Victorian border along the coast. It does very well either in the bush house in a coarse Cymbidium mix or attached to most trees that do not shed their bark. Do not attach them to Eucalyptus trees as the barks contain resins which Dendrobiums detest.
Trees with mass plantings of mixed orchids look really spectacular and those that have a lot of Dendrobium monophyllum add interest and curiosity over a long period especially when in flower. Ficus specie, Ceropetalum specie and Elaeocarpus specie s are good host trees as is a natural host for this orchid in the wild as is the various species of Cupaniopsis specie.
Be ever so vigilant for Steyhopachys formosa the Dendrobium enthusiast’s nightmare. This beetle can inflict a lot of damage in just one season. Plants attached to trees are less likely to be phased by Dendrobium beetle because of natural predators like birds, bats and frogs.
Control of the beetle is simple just squash it. They are slow movers and though like all beetles can fly, would rather resort to hiding as a means of escape. The pupae are just as easy to eliminate. Check the base of all your orchids on a regular basis and again destroy any pupae. These look like small patches of white toothpaste squeezed from the tube. The larvae are the most difficult and will usually need a systemic spray or great concentration to find the small holes on the canes as they bore their way through from the inside. Eggs are yellowish and measure about 1.5mm in length.
The beetle eats buds, flowers, new shoots and developing seed pods. Larvae consume the canes.
Photo with more information can be obtained from the Brisbane Orchid Society.

Propagation:
Seeds: Dendrobium monophyllum‘s seeds require treatment before sowing. Really Orchid seeds are meant for professionals with time, equipment and space. However if you wish to persevere then here are the basics and you are learning from an amateur. You will need the following, a flask, chloros solution, boiled water, an eye dropper, paper bag, a warm sheltered position and a lot of patience and luck. This is a most difficult orchid to grow even by professionals as it detests root disturbance and being reorientated.
- Collecting the seed: seed can only be collected from fully ripe pods. You may need to watch a pod for several days or even weeks following the time it stops swelling for it to turn olive yellow. At this stage the pod must be watched carefully for the pod to commence spitting along the placenta. If possible place the paper bag over the pod and tie it off. If necessary place a plastic bag over the paper bag to prevent rain or moisture contacting the seeds.
- Knowledge is very important now, as different species and genre have various numbers of viable seed in a pod. Viable seeds may be as few as 20 or as many as several million. Check the bag daily and remove once the seed begins to disperse. Shake all the seeds from the pod into the bag.
- Purchase the appropriate agar solution from an orchid society as they will know what you want and which one will be best for your species. Prepare the agar solution and pour into the flask.
- Remove some of the seeds by shaking them into a solution of 1 part chloros to 20 parts water and allow to soak for 10 minutes.
- Remove the seeds with the eye dropper in the solution and spread evenly over the set agar.
- Place the flasks in a room that is will lit with indirect light and the temperature is a consistent 25 to 30 degrees centigrade.
- Wait 4 to 7 months for the seedlings to develop to a stage where they can be removed and planted on into a fine orchid mix. Do not remove the seedlings from their environment of light or temperature for at least another two months. Even at this stage it is best to place the seedlings in a hot house where their environment can be controlled.
Division: Division is the easiest method for amateurs to propagate Dendrobium orchids. At some point, the orchid will become root-bound in its pot or large enough to divide the clump on a tree or slab. The only tools required are sharp sterile knife a slab of cork or pumice stone and some hemp or nylon string. I prefer hemp string because it is totally natural but is difficult to obtain.
The potted Dendrobium monophyllum: Remove the Dendrobium from its pot and set it on a firm surface. Cut through the roots to create separate sections of the plant. Each piece should include four to five stems and a large chunk of the root system. Repot using a central stick to ensure the plant is tied securely so that it does not move.
Slab plants: Take the slab and cut it down the middle ensuring each section has healthy terminal stems. Retie the new divisions cork or pumice stone onto a new piece of cork or pumice stone. Tie them so that they do not move. Do not over tighten as this cuts off the flow of nutrients to the new leaves.
Treat plants that are growing naturally on a tree in the same way. First cut the plant in half then slice just below the roots into the outer layer of bark being careful not to damage the stems or the xylem and phloem layers of the tree Remove the section and retie it to another section of the tree or cork slab as desired.
Fertilize using Seaweed, fish emulsion or organic chicken pellets soaked in water on an alternate basis. Fertilize every two months until the plants are established then twice annually in early September or March to maintain health, vitality and better flowering.
Further Comments from Readers:
Hi reader, it seems you use The Bible of Botany a lot. That’s great as we have great pleasure in bringing it to you! It’s a little awkward for us to ask, but our first aim is to purchase land approximately 1,600 hectares to link several parcels of N.P. into one at The Pinnacles NSW Australia, but we need your help. We’re not salespeople. We’re amateur botanists who have dedicated over 30 years to saving the environment in a practical way. We depend on donations to reach our goal. If you donate just $5, the price of your coffee this Sunday, We can help to keep the planet alive in a real way and continue to bring you regular updates and features on Australian plants all in one Botanical Bible. Any support is greatly appreciated. Thank you.
In the spirit of reconciliation we acknowledge the Bundjalung, Gumbaynggirr and Yaegl and all aboriginal nations throughout Australia and their connections to land, sea and community. We pay our respect to their Elders past, present and future for the pleasures we have gained.
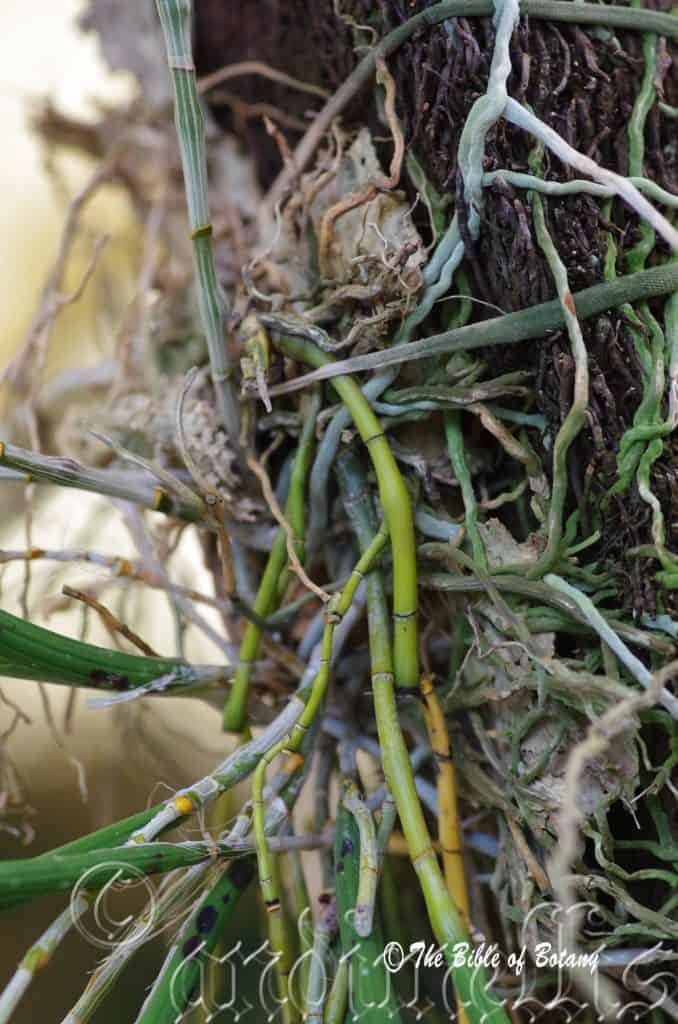
NCBG Coffs Harbour NSW
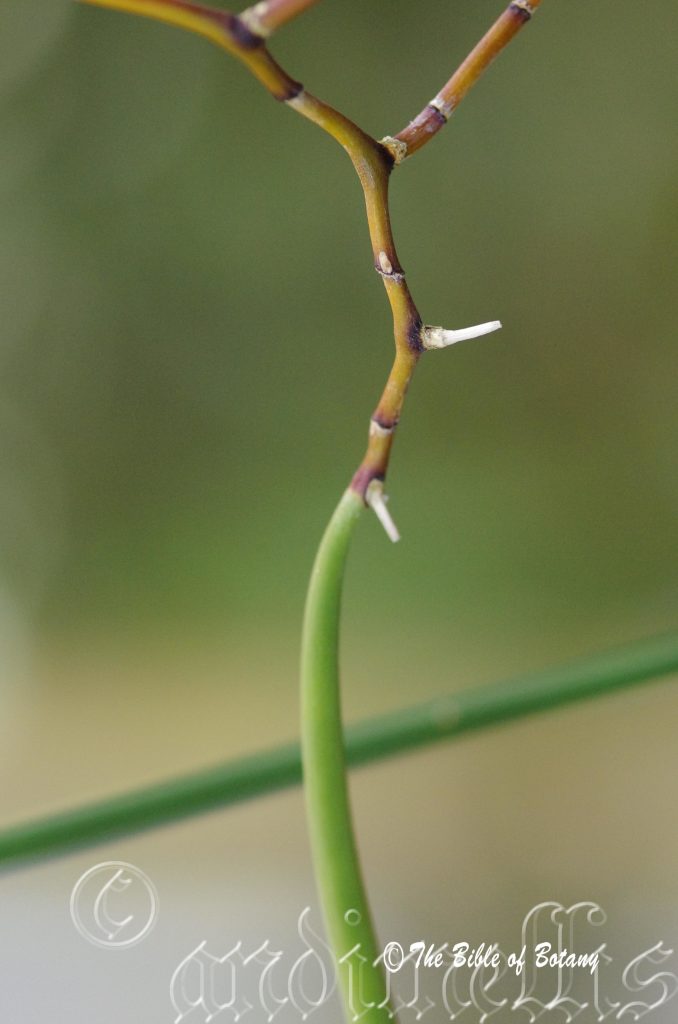
NCBG Coffs Harbour NSW
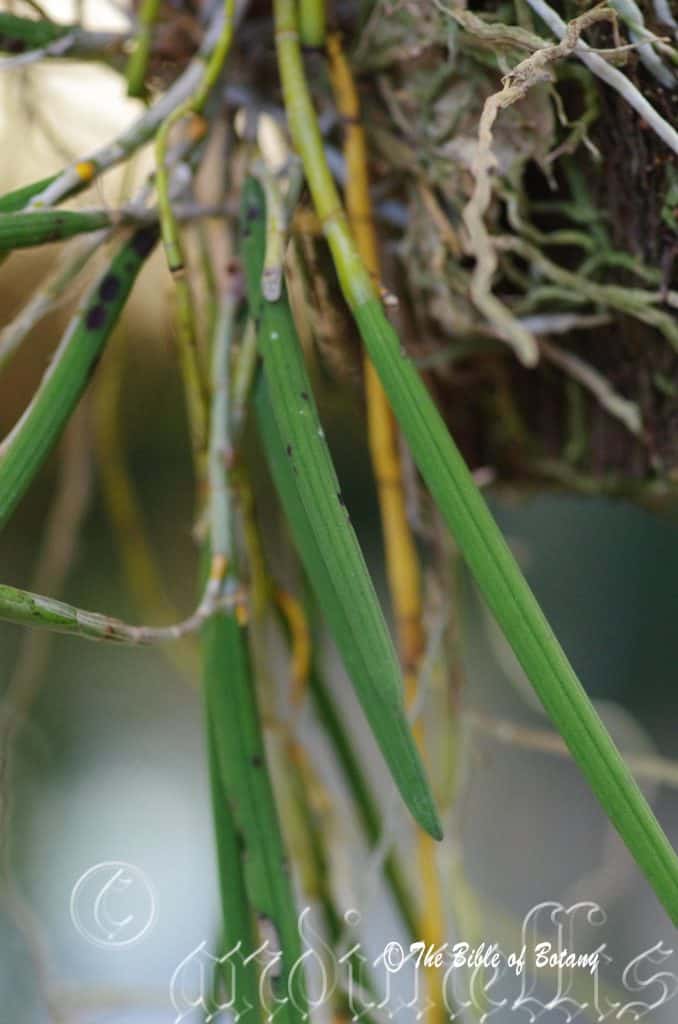
NCBG Coffs Harbour NSW
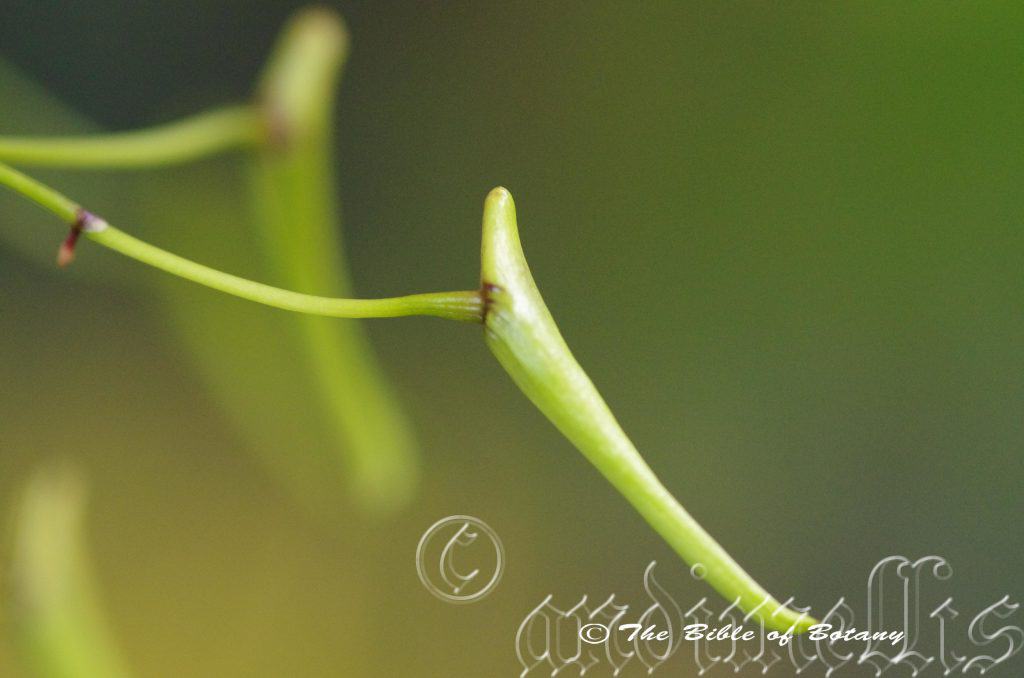
NCBG Coffs Harbour NSW
Dendrobium mortii
Classification
Class: Monocots
Order: Asparagales
Family: Orcidaceae
Subfamily: Epidendroideae
Tribe: Dendrobieae
Sub Tribe: Dendrobiinae
Genus: From Dendron, which is Ancient Greek for a tree and Bios, which is Ancient Greek for life. It refers to plants, which live on trees to survive, not as parasites or saphrophytic.
Species: Is named in honour of Miss Eirene Mort; 1879-1977, who was an Australian teacher and Botanical artist.
Common Name: Spider Orchid.
Distribution:
Dendrobium mortii is found south from Edgecombe Heights Floral Reserve and Conway National Park in far north Queensland to the Barrington Tops National Park in central coastal New South Wales. It is mainly on and east of the Great Dividing Range.
https://avh.ala.org.au/occurrences/search?taxa=Dendrobium+mortii#tab_mapView
Habitat Aspect Climate:
Dendrobium mortii prefers dappled shade to full shade. It usually grows in littoral rainforests, lowland rainforests and montane well developed rainforests. The altitude ranges from 1200 meters ASL to 1500 meters ASL.
The temperatures range from minus 3 degrees in August to 32 degrees in January.
The rainfall ranges from lows of 800mm to 3000mm average per annum. The rainfall is seasonal mainly summer and autumn with dry winters and springs and humid to dry atmospheric conditions between these periods.
Soil Requirements:
Dendrobium mortii grows as an epiphyte on various trees within its range or rarely as a lithophyte on rocks.
Height & Spread:
Wild Plants: 0.6m to 2.6m by 0.5m to 1m.
Characteristics:
Dendrobium mortii stems are spreading to pendent. The grey, glabrous, filiformis roots only develop from the base of the sympodium and usually form large tangled aerial masses as well as clinging to the bark. The stems measure 10mm to 4mm in length 1mm to 1.5mm in diameter.
The single long linear, terete leaf at each apex of Dendrobium mortii has a rounded base and long acute apex. They are erect to spreading, glabrous and measure 15mm to 90mm in length by 2mm to 3.5mm diameter. The leaf’s margins are entire. The concolourous, thin dull deep green leaves have a longitudinal furrow extending from the base to the apex.
The inflorescences of Dendrobium mortii are a short raceme with 1 to 3 flowers. They are terminally produced from present year’s canes. The upright to semi pendant rachis vary from 5mm to 8mm in length while the pedicels are 5mm to 8mm in length including the ovary which appears to be part of the pedicel but actually tapers from the ovary to the rachis. The flower’s sepals and lateral petals are erect and lean forward.
The 3 narrow oblong sepals are green, yellow-green to yellow-brown without or with a few pale pink to carmine pink striations. The dorsal sepal measures 10mm to 15mm in length by 2mm to 3mm in width near the base. The 2 pale dull to bright yellow or yellow-green, lateral sepals measure 10mm to 15mm in length by 2mm to 3mm in width near the base before they spread to unite and surround the ovary. The sepal margins are entire.
The 2 narrow oblong lateral petals are green, yellow-green to yellow-brown without or with a few pale pink to carmine pink striations. The lateral petals measure 10mm to 15mm in length by 1.5mm to 2mm in width near the base before they surround the ovary. The petal margins are entire.
The labellum is pascal green, yellow-green to yellow-brown at the base becoming white at the apex. The labellum has 2 pale pink to carmine pink longitudinal striations and measure 10mm to 15mm in length by 2mm to 2.5mm in width. The margins are entire becoming ruffled near the apex and at the apex.
The labellum’s column measures 12mm to 17mm in length by 5mm to 6mm in width. The column foot measures 4mm to 5mm in length by 4mm to 5mm in width. The lime fragrant flowers appear from September to November.
Wildlife:
Dendrobium mortii is the host to numerous small native bees when in flower and also hosts the Dendrobium beetle.
Cultivation:
Dendrobium mortii is a beautiful large orchid which is rather hardy and easy to grow and to propagate at least as far south as sale in Victoria along the coast. It does very well either in the bush house in a coarse Cymbidium mix or attached to most trees that do not shed their bark. Do not attach them to Eucalyptus trees as the barks contain resins which Dendrobiums detest.
Trees with mass plantings of mixed orchids look really spectacular and those that have a lot of Dendrobium mortii add interest and curiosity over a long period especially when in flower. Ficus specie, Ceropetalum specie and Elaeocarpus specie are good host trees as is a natural host for this orchid in the wild as are Cupaniopsis specie.
Be ever so vigilant for Steyhopachys formosa the Dendrobium enthusiasts nightmare. This beetle can inflict a lot of damage in just one season. Plants attached to trees are less likely to be phased by Dendrobium beetle because of natural predators like birds, bats and frogs.
Control of the beetle is simple just squash it. They are slow movers and though like all beetles can fly, would rather resort to hiding as a means of escape. The pupae are just as easy to eliminate. Check the base of all your orchids on a regular basis and again destroy any pupae. These look like small patches of white toothpaste squeezed from the tube. The larvae are the most difficult and will usually need a systemic spray or great concentration to find the small holes on the canes as they bore their way through from the inside. Eggs are yellowish and measure about 1.5mm in length.
The beetle eats buds, flowers, new shoots and developing seed pods. Larvae consume the canes.
Photo with more information can be obtained from the Brisbane Orchid Society.

Propagation:
Seeds: Dendrobium mortii‘s seeds require treatment before sowing. Really Orchid seeds are meant for professionals with time, equipment and space. However if you wish to persevere then here are the basics and you are learning from an amateur. You will need the following, a flask, chloros solution, boiled water, an eye dropper, paper bag, a warm sheltered position and a lot of patience and luck. This is a most difficult orchid to grow even by professionals as it detests root disturbance and being reorientated.
- Collecting the seed: seed can only be collected from fully ripe pods. You may need to watch a pod for several days or even weeks following the time it stops swelling for it to turn olive yellow. At this stage the pod must be watched carefully for the pod to commence spitting along the placenta. If possible place the paper bag over the pod and tie it off. If necessary place a plastic bag over the paper bag to prevent rain or moisture contacting the seeds.
- Knowledge is very important now, as different species and genre have various numbers of viable seed in a pod. Viable seeds may be as few as 20 or as many as several million. Check the bag daily and remove once the seed begins to disperse. Shake all the seeds from the pod into the bag.
- Purchase the appropriate agar solution from an orchid society as they will know what you want and which one will be best for your species. Prepare the agar solution and pour into the flask.
- Remove some of the seeds by shaking them into a solution of 1 part chloros to 20 parts water and allow to soak for 10 minutes.
- Remove the seeds with the eye dropper in the solution and spread evenly over the set agar.
- Place the flasks in a room that is will lit with indirect light and the temperature is a consistent 25 to 30 degrees centigrade.
- Wait 4 to 7 months for the seedlings to develop to a stage where they can be removed and planted on into a fine orchid mix. Do not remove the seedlings from their environment of light or temperature for at least another two months. Even at this stage it is best to place the seedlings in a hot house where their environment can be controlled.
Division: Division is the easiest method for amateurs to propagate Dendrobium mortii. At some point, the orchid will become root-bound in its pot or large enough to divide the clump on a tree or slab. The only tools required are sharp sterile knife a slab of cork or pumice stone and some hemp or nylon string. I prefer hemp string because it is totally natural but is difficult to obtain.
The potted Dendrobium mortii: Remove the Dendrobium from its pot and set it on a firm surface. Cut through the roots to create separate sections of the plant. Each piece should include four to five stems and a large chunk of the root system. Repot using a central stick to ensure the plant is tied securely so that it does not move.
Slab plants: Take the slab and cut it down the middle ensuring each section has healthy terminal stems. Retie the new divisions cork or pumice stone onto a new piece of cork or pumice stone. Tie them so that they do not move. Do not over tighten as this cuts off the flow of nutrients to the new leaves.
Treat plants that are growing naturally on a tree in the same way. First cut the plant in half then slice just below the roots into the outer layer of bark being careful not to damage the stems or the xylem and phloem layers of the tree Remove the section and retie it to another section of the tree or cork slab as desired.
Fertilize using Seaweed, fish emulsion or organic chicken pellets soaked in water on an alternate basis. Fertilize every two months until the plants are established then twice annually in early September or March to maintain health, vitality and better flowering.
Further Comments from Readers:
Hi reader, it seems you use The Bible of Botany a lot. That’s great as we have great pleasure in bringing it to you! It’s a little awkward for us to ask, but our first aim is to purchase land approximately 1,600 hectares to link several parcels of N.P. into one at The Pinnacles NSW Australia, but we need your help. We’re not salespeople. We’re amateur botanists who have dedicated over 30 years to saving the environment in a practical way. We depend on donations to reach our goal. If you donate just $5, the price of your coffee this Sunday, We can help to keep the planet alive in a real way and continue to bring you regular updates and features on Australian plants all in one Botanical Bible. Any support is greatly appreciated. Thank you.
In the spirit of reconciliation we acknowledge the Bundjalung, Gumbaynggirr and Yaegl and all aboriginal nations throughout Australia and their connections to land, sea and community. We pay our respect to their Elders past, present and future for the pleasures we have gained.
Dendrobium phalaenopsis
zzzzzzzzzzzzzzzzzzzzzzzzzzzzzzzzzzzzzzzzzzzzQueensland’s floral Emblem
Classification
Class: Monocots
Order: Asparagales
Family: Orcidaceae
Subfamily: Epidendroideae
Tribe: Dendrobieae
Sub Tribe: Dendrobiinae
Genus: From Dendron, which is Ancient Greek for a tree and Bios, which is Ancient Greek for life. It refers to plants, which live on trees to survive, not as parasites or saphrophytic.
Species: From Phalaenopsis, which is Ancient Greek for moths and Eidos/Oides, which is Ancient Greek for alike or similar to. It refers to flowers, which look like a moth with rounded, spreading wings. A good example is the Queensland floral emblem the Cooktown Orchid.
Common Names:
Distribution:
Dendrobium phalaenopsis is found south from the Iron Range to west of Cooktown in far north Queensland. It is mainly found on and east of the Great Dividing Range but is not found in or around Cooktown or along the Endeavour River.
https://avh.ala.org.au/occurrences/search?taxa=Dendrobium+phalaenopsis#tab_mapView
Habitat Aspect Climate:
Dendrobium phalaenopsis prefers dappled shade in coastal littoral and montane rainforests and adjacent wet eucalyptus forests. It is found from 10 meters ASL to 760 meters ASL.
The temperatures range from 8 degree in August to 32 degrees in January.
The rainfall ranges from lows of 1800mm to 3200mm average per annum. The rainfall is seasonal mainly summer and autumn with dry winters and springs and humid to dry atmospheric conditions between these periods.
Soil Requirements:
Dendrobium phalaenopsis grows as an epiphyte on various trees within its range or occasionally as a lithophyte on rocks and ledges.
Height & Spread:
Wild Plants:0.3m to 0.8m by 0.5m to 1m.
Characteristics:
Dendrobium phalaenopsis grows as a monopodial on medium stems as an epiphyte. The canes are an olive-green to greenish-yellow, cylindrical and measure 300mm to 800mm in length by 8mm to 16mm in diameter. The white roots are thick, glabrous and radiate out from the base of the canes.
The 3 to 6 long channelled, oblong-lance leaves of Dendrobium phalaenopsis are erect to spreading conduplicate and measure 50mm to 120mm in length by 10mm to 24mm in width. The bases are rounded broad clasping while the apexes are long acute apex. The laminas curve upwards from the mid vein while the margins are entire. The concolourous leaves are deep grass-green to deep bluish-green, glabrous to semi glossy and are arranged on the upper section of the canes.
The inflorescences of Dendrobium phalaenopsis are a long raceme with 6 to 20 individual flowers. They are terminally produced from present year’s canes or from the old canes. The upright to semi pendant rachis measures 100mm to 400mm in length while the pedicels measure 16mm to 24mm in length including the ovary which appears to be part of the pedicel but actually tapers from the ovary to the rachis. The flower’s sepals and lateral petals are divaricate and curve slightly forward from the ovary.
The 3 sepals are usually pale pink to deep pink or at times purple to lilac or rarely white. The lanceolate to broad elliptical dorsal sepal measures 16mm to 28mm in length by 6mm to 9mm in width.
The 2 lateral sepals are usually pale pink to deep pink or at times purple to lilac or rarely white. The oblong lateral sepals measure 14mm to 26mm in length by 25mm to 28mm in width. They are united at the base surrounding the ovary and are strongly divaricate at their apexes. The apexes are acute with an apiculate tip. The sepal margins are entire.
The lateral petals are usually pale pink to deep pink or at times purple to lilac or rarely white. The broad ovate to spathulate lateral petals apexes are emarginate. The lateral petals measure 14mm to 26mm in length by 25mm to 29mm in width near the base. They are united at the base surrounding the ovary and are strongly divaricate at their apexes. The apexes are acute with an apiculate tip. The sepal margins are entire.
The labellums are usually pale pink to deep pink or at times purple to lilac or rarely white. The broad oblong labellum has a decurve to a mucronate apex. The labellum measure 16mm to 28mm in length by 7mm to 15mm in width and are united with the sepals and petals near the base. The margins are entire.
The column foot measures 4mm to 6mm in length by 4mm to 6mm in width. The flowers appear from September to November.
Wildlife:
Dendrobium phalaenopsis is the host to numerous small native bees when in flower and also hosts the Dendrobium beetle, Stethopachys formosa.
Cultivation:
Dendrobium phalaenopsis is a beautiful medium orchid which is rather hardy and easy to grow and to propagate at least as far south as Brisbane. It does very well either in the bush house in a coarse Cymbidium mix or attached to most trees that do not shed their bark. Do not attach them to Eucalyptus trees as the barks contain resins which Dendrobiums detest.
Trees with mass plantings of mixed orchids look really spectacular and those that have a lot of Dendrobium phalaenopsis add interest and curiosity over a long period especially when in flower. Ficus specie, Ceropetalum specie and Elaeocarpus specie are good host trees as is a natural host for this orchid in the wild as are Cupaniopsis specie.
Be ever so vigilant for Steyhopachys formosa the Dendrobium enthusiast’s nightmare. This beetle can inflict a lot of damage in just one season. Plants attached to trees are less likely to be phased by Dendrobium beetle because of natural predators like birds, bats and frogs.
Control of the beetle is simple just squash it. They are slow movers and though like all beetles can fly, would rather resort to hiding as a means of escape. The pupae are just as easy to eliminate. Check the base of all your orchids on a regular basis and again destroy any pupae. These look like small patches of white toothpaste squeezed from the tube. The larvae are the most difficult and will usually need a systemic spray or great concentration to find the small holes on the canes as they bore their way through from the inside. Eggs are yellowish and measure about 1.5mm in length.
The beetle eats buds, flowers, new shoots and developing seed pods. Larvae consume the canes.
Photo with more information can be obtained from the Brisbane Orchid Society.

Propagation:
Seeds: All orchids that are protected by Federal and State Laws and must not be removed from the wild unless you are a land developer, mining company, main Roads department or Forestry Department etc. This includes bulbs, roots, leaves and flowers. No part of any plant can be removed from Federal, State or Local Government land without the prior permission of the authority and this includes the spore.
Dendrobium phalaenopsisseeds require treatment before sowing. Really Orchid seeds are meant for professionals with time, equipment and space. However if you wish to persevere then here are the basics and you are learning from an amateur. You will need the following, a flask, chloros solution, boiled water, an eye dropper, paper bag, a warm sheltered position and a lot of patience and luck. This is a most difficult orchid to grow even by professionals as it detests root disturbance and being reorientated.
- Collecting the seed: seed can only be collected from fully ripe pods. You may need to watch a pod for several days or even weeks following the time it stops swelling for it to turn olive yellow. At this stage the pod must be watched carefully for the pod to commence spitting along the placenta. If possible place the paper bag over the pod and tie it off. If necessary place a plastic bag over the paper bag to prevent rain or moisture contacting the seeds.
- Knowledge is very important now, as different species and genre have various numbers of viable seed in a pod. Viable seeds may be as few as 20 or as many as several million. Check the bag daily and remove once the seed begins to disperse. Shake all the seeds from the pod into the bag.
- Purchase the appropriate agar solution from an orchid society as they will know what you want and which one will be best for your species. Prepare the agar solution and pour into the flask.
- Remove some of the seeds by shaking them into a solution of 1 part chloros to 20 parts water and allow to soak for 10 minutes.
- Remove the seeds with the eye dropper in the solution and spread evenly over the set agar.
- Place the flasks in a room that is will lit with indirect light and the temperature is a consistent 25 to 30 degrees centigrade.
- Wait 4 to 7 months for the seedlings to develop to a stage where they can be removed and planted on into a fine orchid mix. Do not remove the seedlings from their environment of light or temperature for at least another two months. Even at this stage it is best to place the seedlings in a hot house where their environment can be controlled.
Division: Division is the easiest method for amateurs to propagate Dendrobium phalaenopsis. At some point, the orchid will become root-bound in its pot or large enough to divide the clump on a tree or slab. The only tools required are sharp sterile knife a slab of cork or pumice stone and some hemp or nylon string. I prefer hemp string because it is totally natural but is difficult to obtain.
The potted Dendrobium phalaenopsis: Remove the Dendrobium from its pot and set it on a firm surface. Cut through the roots to create separate sections of the plant. Each piece should include four to five stems and a large chunk of the root system. Repot using a central stick to ensure the plant is tied securely so that it does not move.
Slab plants: Take the slab and cut it down the middle ensuring each section has healthy terminal stems. Retie the new divisions cork or pumice stone onto a new piece of cork or pumice stone. Tie them so that they do not move. Do not over tighten as this cuts off the flow of nutrients to the new leaves.
Treat plants that are growing naturally on a tree in the same way. First cut the plant in half then slice just below the roots into the outer layer of bark being careful not to damage the stems or the xylem and phloem layers of the tree Remove the section and retie it to another section of the tree or cork slab as desired.
Fertilize using Seaweed, fish emulsion or organic chicken pellets soaked in water on an alternate basis. Fertilize every two months until the plants are established then twice annually in early September or March to maintain health, vitality and better flowering.
Further Comments from Readers:
Hi reader, it seems you use The Bible of Botany a lot. That’s great as we have great pleasure in bringing it to you! It’s a little awkward for us to ask, but our first aim is to purchase land approximately 1,600 hectares to link several parcels of N.P. into one at The Pinnacles NSW Australia, but we need your help. We’re not salespeople. We’re amateur botanists who have dedicated over 30 years to saving the environment in a practical way. We depend on donations to reach our goal. If you donate just $5, the price of your coffee this Sunday, We can help to keep the planet alive in a real way and continue to bring you regular updates and features on Australian plants all in one Botanical Bible. Any support is greatly appreciated. Thank you.
In the spirit of reconciliation we acknowledge the Bundjalung, Gumbaynggirr and Yaegl and all aboriginal nations throughout Australia and their connections to land, sea and community. We pay our respect to their Elders past, present and future for the pleasures we have gained.
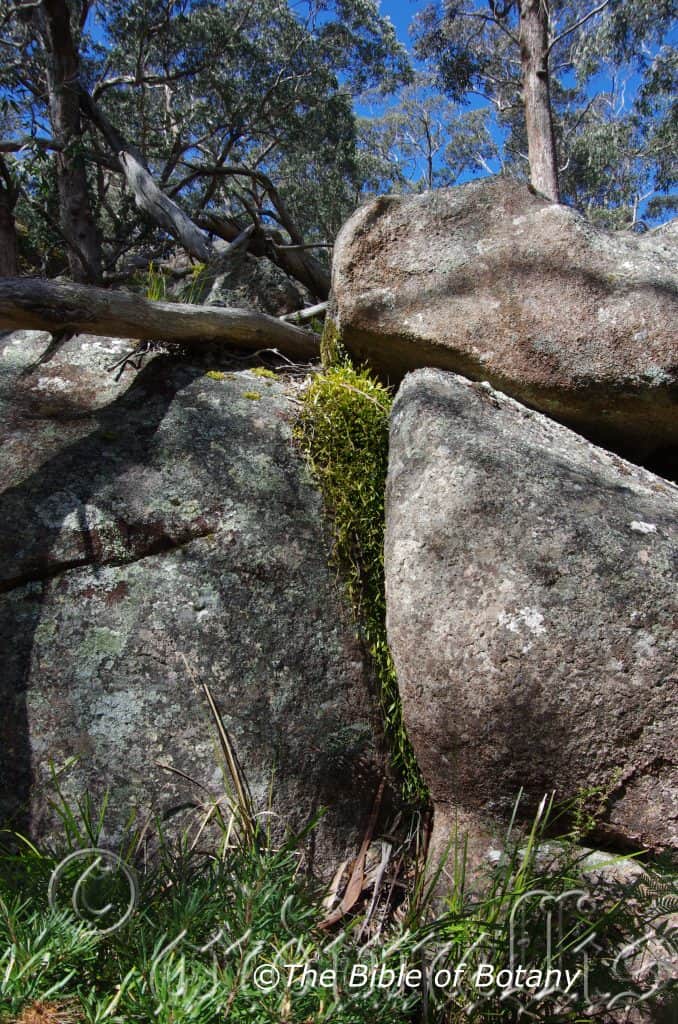
Armidale NSW

Armidale NSW
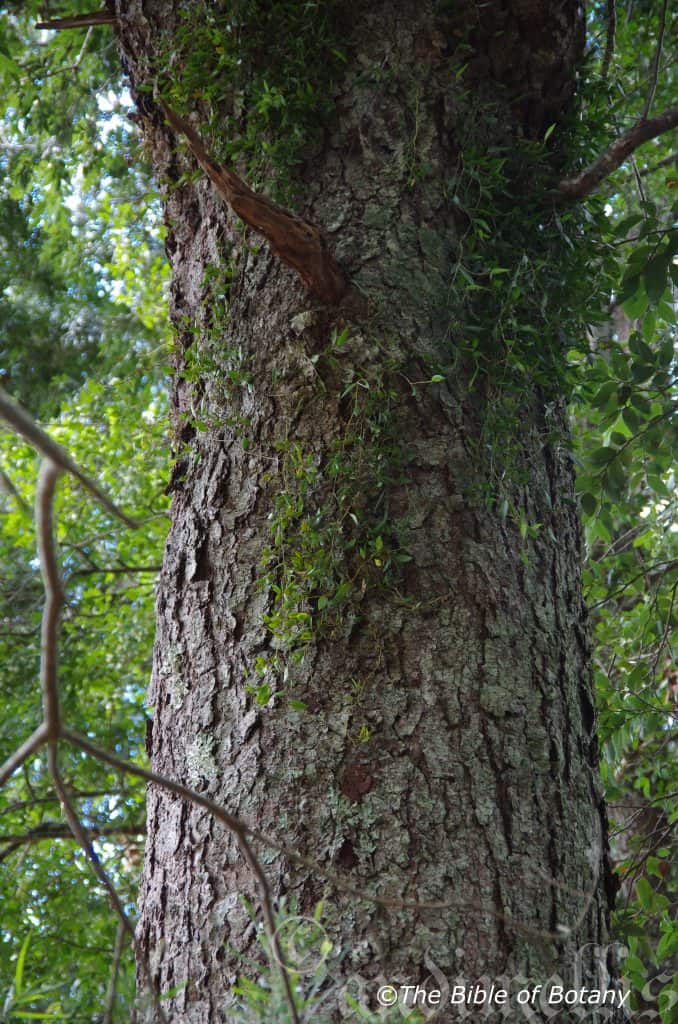
Armidale NSW
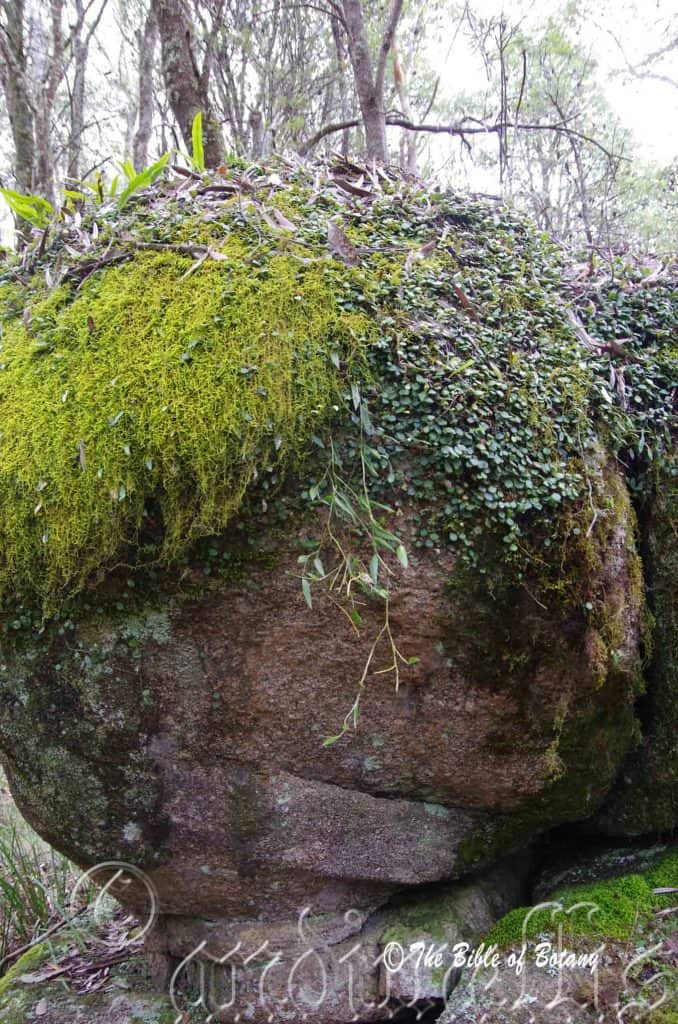
Armidale NSW
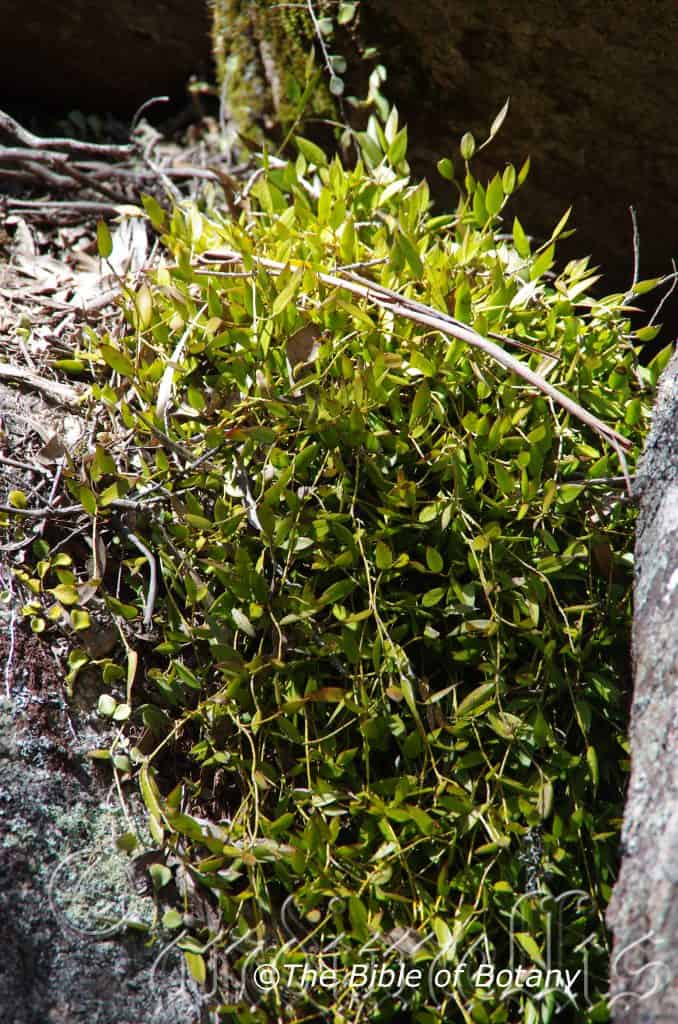
Armidale NSW

Clarence Valley NSW
Coffs Harbour NSW
Coffs Harbour NSW
Coffs Harbour NSW
Coffs Harbour NSW
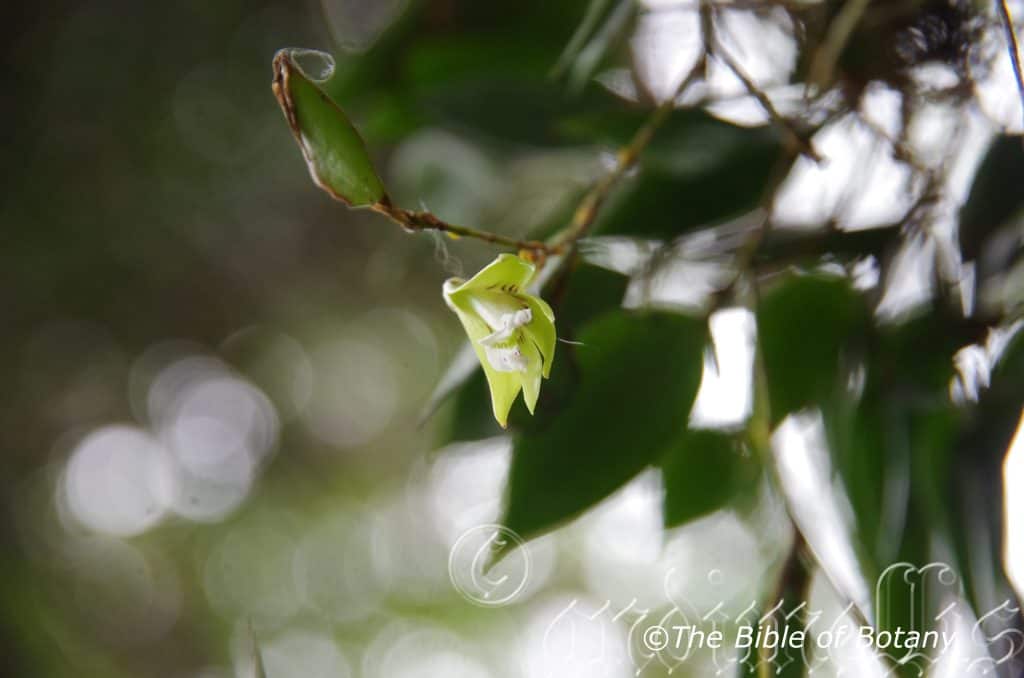
Author’s Garden The PInnacles NSW

Coffs Harbour NSW
Dendrobium pugioniforme
Classification
Class: Monocots
Order: Asparagales
Family: Orcidaceae
Subfamily: Epidendroideae
Tribe: Dendrobieae
Sub Tribe: Dendrobiinae
Genus: From Dendron, which is Ancient Greek for a tree and Bios, which is Ancient Greek for life. It refers to plants, which live on trees to survive, not as parasites or saphrophytic.
Species: From Pugnus, which is Latin for clenched and Forme, which is Latin for to take the shape or form of. It refers to branchlets which are short finishing similar to a clenched hand.
Common Name: Dagger Orchid.
Distribution:
Dendrobium pugioniforme is found south from near Dalby in southern Queensland to near Bega in southern coastal New South Wales. It is found on the eastern side of the Great Dividing Range.
https://avh.ala.org.au/occurrences/search?taxa=Dendrobium+pugioniforme#tab_mapView
Habitat Aspect Climate:
Dendrobium pugioniforme prefers dappled light to full shade. It is found growing as an epiphyte in rainforest trees or as a lithophyte growing on rocks in coastal littoral and montane rainforests. The altitude ranges from 5 meters ASL to 1100 meters ASL.
The temperatures range from 1 degree in August to 35 degrees in January.
The rainfall ranges from lows of 800mm to 1900mm average per annum. The rainfall is seasonal mainly summer and autumn with dry winters and springs and humid to dry atmospheric conditions between these periods.
Soil Requirements:
Dendrobium pugioniforme grows as an epiphyte on various trees within its range or as a lithophyte on rocks.
Height & Spread:
Wild Plants: 0.3m to 2.5m by 0.5m to 1m.
Characteristics:
Dendrobium pugoiniforme grows on thin pendulant stems or as a lithophyte on porous rocks. The filiform pale grey roots are mainly from the base of the sympodium but also from more apical stems. The stems measure 5mm to 30mm in length by 1mm to 1.5mm in diameter. The glabrous creeping roots form a mass of aerial roots as well as the roots which attach it to the bark.
The single thick coriaceous leaf at each apex of Dendrobium pugioniforme’s cane, have a cuneate base and acute apex. The pendulant, ovate to narrow ovate, succulent leaves measure 10mm to 70mm in length by 5mm to 20mm width and 1.5mm to 3mm in thickness. The margins are entire. The concolourous leaves are grass-green, glabrous and semi glossy. The petioles measure 0mm to 3mm in length.
The inflorescences of Dendrobium pugoiniforme are a long raceme usually with 1 or occasionally 2 or 3 flowers. They are terminally produced from present year’s sympodium. The upright to semi pendant rachis measure 4mm to 7mm in length while the pedicels are 4mm to 7mm in length including the ovary which appears to be part of the pedicel but is slightly swollen. The flowers are held erect. The sepals and petals curve slightly forward and outwards from the ovary.
The 3 sepals are usually lime-green to pale yellow-brown or yellow-green with purple to purple-red striations on the basal half. The lanceolate dorsal sepal measures 8mm to 13mm in length by 2mm to 3.2mm in width. The 2 lateral sepals are lime-green to pale yellow-brown or yellow-green with purple to purple-red irregular striations on the base half. The oblong lateral sepals measure 7.5mm to 12mm in length by 2.5mm to 4mm in width near the base before they spread to unite and surround the ovary. The apexes are acute with an apiculate tip. The sepal margins are entire.
The lateral petals are usually lime-green to pale yellow-brown or yellow-green with purple to purple-red striations on the basal half. The lateral petals are narrow oblong with an acute apex. The lateral petals measure 9mm to 14mm in length by 1.5mm to 2.5mm in width near the base before they surround the ovary. The lateral petals margins are entire.
The labellum’s are usually pastel lime-green on the basal half turning cream or white on the apex half. The labellum has purple to purple-red striations on the basal half. The labellum measure 16mm to 28mm in length by 7mm to 15mm in width. The margins are entire near the base and ruffled near the apex.
The columns measure 4mm to 7mm in length by 3mm to 5mm in width. The column foot measures 4mm to 5mm in length. The flowers appear from September to November.
Wildlife:
Dendrobium pugioniforme is the host to numerous small native bees when in flower and also hosts the Dendrobium beetle, Stethopachys formosa.
Cultivation:
Dendrobium pugioniforme is a beautiful orchid which is rather hardy and easy to grow and to propagate at least as far south as sale in Victoria along the coast. It does very well either in the bush house attached to a slab of cork or pumice stone or on most rainforest trees that have a course, rough or furrowed bark. Do not attach them to Eucalyptus trees as the barks contain resins which Dendrobium detest.
Trees with mass plantings of mixed orchids look really spectacular and those that have a lot of Dendrobium pugioniforme add interest and curiosity over a long period especially when in flower. Cassuarina torulosa and Cassuarina cunninghamii are 2 excellent host plants. I have grown this orchid in Nana Glen where it attained a length of over 2.5 meters by 2/3 of the circumference (approximately 450mm in diameter) on the trunk on Casuarina torulosa in just 15 years so remember to place it high in the trees and give it plenty of room to cascade down. The original plat on the tree was just 100mm in length.
Be ever so vigilant for Steyhopachys formosa the Dendrobium enthusiast’s nightmare. This beetle can inflict a lot of damage in just one season. Plants attached to trees are less likely to be phased by Dendrobium beetle because of natural predators like birds, bats and frogs.
Control of the beetle is simple just squash it. They are slow movers and though like all beetles can fly, would rather resort to hiding as a means of escape. The pupae are just as easy to eliminate. Check the base of all your orchids on a regular basis and again destroy any pupae. These look like small patches of white toothpaste squeezed from the tube. The larvae are the most difficult and will usually need a systemic spray or great concentration to find the small holes on the canes as they bore their way through from the inside. Eggs are yellowish and measure about 1.5mm in length.
The beetle eats buds, flowers, new shoots and developing seed pods. Larvae consume the canes.
Photo with more information can be obtained from the Brisbane Orchid Society. – http://bos.org.au/

Propagation:
Seeds: Dendrobium pugioniforme‘s seeds require treatment before sowing. Really Orchid seeds are meant for professionals with time, equipment and space. However if you wish to persevere then here are the basics and you are learning from an amateur. You will need the following, a flask, chloros solution, boiled water, an eye dropper, paper bag, a warm sheltered position and a lot of patience and luck. This is a most difficult orchid to grow even by professionals as it detests root disturbance and being reorientated.
- Collecting the seed: seed can only be collected from fully ripe pods. You may need to watch a pod for several days or even weeks following the time it stops swelling for it to turn olive yellow. At this stage the pod must be watched carefully for the pod to commence spitting along the placenta. If possible place the paper bag over the pod and tie it off. If necessary place a plastic bag over the paper bag to prevent rain or moisture contacting the seeds.
- Knowledge is very important now, as different species and genre have various numbers of viable seed in a pod. Viable seeds may be as few as 20 or as many as several million. Check the bag daily and remove once the seed begins to disperse. Shake all the seeds from the pod into the bag.
- Purchase the appropriate agar solution from an orchid society as they will know what you want and which one will be best for your species. Prepare the agar solution and pour into the flask.
- Remove some of the seeds by shaking them into a solution of 1 part chloros to 20 parts water and allow soaking for 10 minutes.
- Remove the seeds with the eye dropper in the solution and spread evenly over the set agar.
- Place the flasks in a room that is will lit with indirect light and the temperature is a consistent 25 to 30 degrees centigrade.
- Wait 4 to 7 months for the seedlings to develop to a stage where they can be removed and planted on into a fine orchid mix. Do not remove the seedlings from their environment of light or temperature for at least another two months. Even at this stage it is best to place the seedlings in a hot house where their environment can be controlled.
Division: Division is the easiest method for amateurs to propagate Dendrobium pugioniforme. At some point, the orchid will become root-bound in its pot or large enough to divide the clump on a tree or slab. The only tools required are sharp sterile knife a slab of cork or pumice stone and some hemp or nylon string. I prefer hemp string because it is totally natural but is difficult to obtain.
Slab plants: Take the slab and cut it down the middle ensuring each section has healthy terminal stems. Retie the new divisions cork or pumice stone onto a new piece of cork or pumice stone. Tie them so that they do not move. Do not over tighten as this cuts off the flow of nutrients to the new leaves.
Treat plants that are growing naturally on a tree in the same way. First cut the plant in half then slice just below the roots into the outer layer of bark being careful not to damage the stems or the xylem and phloem layers of the tree Remove the section and retie it to another section of the tree or cork slab as desired.
Fertilize using Seaweed, fish emulsion or organic chicken pellets soaked in water on an alternate basis. Fertilize every two months until the plants are established then twice annually in early September or March to maintain health, vitality and better flowering.
Further Comments from Readers:
Hi reader, it seems you use The Bible of Botany a lot. That’s great as we have great pleasure in bringing it to you! It’s a little awkward for us to ask, but our first aim is to purchase land approximately 1,600 hectares to link several parcels of N.P. into one at The Pinnacles NSW Australia, but we need your help. We’re not salespeople. We’re amateur botanists who have dedicated over 30 years to saving the environment in a practical way. We depend on donations to reach our goal. If you donate just $5, the price of your coffee this Sunday, We can help to keep the planet alive in a real way and continue to bring you regular updates and features on Australian plants all in one Botanical Bible. Any support is greatly appreciated. Thank you.
In the spirit of reconciliation we acknowledge the Bundjalung, Gumbaynggirr and Yaegl and all aboriginal nations throughout Australia and their connections to land, sea and community. We pay our respect to their Elders past, present and future for the pleasures we have gained.
Dendrobium schoeninum
Classification
Class: Monocots
Order: Asparagales
Family: Orcidaceae
Subfamily: Epidendroideae
Tribe: Dendrobieae
Sub Tribe: Dendrobiinae
Genus: From Dendron, which is Ancient Greek for a tree and Bios, which is Ancient Greek for life. It refers to plants, which live on trees to survive, not as parasites or saphrophytic.
Species: From Skhoenos, which is Ancient Greek for a sedge or reed. It refers to leaves, which have a vague resemblance to the canes of sedges and reeds.
Common Name: Pencil Orchid.
Distribution:
Dendrobium schoeninum is found south from the Canondale National Park in southern coastal Queensland to Watagan National Park New South Wales. It is mainly found on and east of the Great Dividing Range.
https://avh.ala.org.au/occurrences/search?taxa=Dendrobium+schoenimum#tab_mapView
Habitat Aspect Climate:
Dendrobium schoeninum prefers dappled shade to filtered sunlight. It grows as an epiphyte in coastal swamps, littoral rainforests, along creeks, streams and rivers where there are breaks in the canopy particularly on the trunks and branches of Cassuarina cunninghamii and Cassuarina glauca. It also grows as lithophyte on boulders and cliff faces in rainforest and other semi shady protected site. It is found from sea level to 600 meters ASL.
The temperatures range from 1 degree in July to 33 degrees in January.
The rainfall ranges from lows of 800mm to 1200mm average per annum. The rainfall is seasonal mainly summer and autumn with dry winters and springs and humid to dry atmospheric conditions between these periods.
Soil Requirements:
Dendrobium schoeninum grows as an epiphyte on various trees within its range and occasionally it can be found growing as a lithophyte on rocks.
Height & Spread:
Wild Plants:0.3m to 0.6m by 0.5m to 1m.
Characteristics:
Dendrobium schoeninum grows on thin erect to pendulant stems. The pale grey roots are only produced from the base of the sympodium. The stems measure 20mm to 120mm in length by 1mm to 8mm in diameter. The glabrous creeping roots form a mass of aerial roots as well as the roots which attach it to the bark.
The single, erect, linear leaf of Dendrobium schoeninum’s is terete and measure 30mm to 160mm in length by 2.5mm to 12mm in diameter. The margins are entire. The succulent, concolourous leaves are deep grass-green to sea-green, glabrous and dull with prominently longitudinal furrows.
The inflorescences of Dendrobium schoeninum are a long raceme usually with 1 to 4 flowers. They are terminally produced from present year’s sympodium. The erect rachises measure 15mm to 30mm in length while the pedicels are 4mm to 6mm in length including the ovary which appears to be part of the pedicel but is slightly swollen. The flowers are held erect. The sepals and petals divaricate from the ovary.
The 3 sepals are usually white or at times cream with deep purple striations on the basal half and often purple tinged on the apex half. The oblong tapering dorsal sepal measures 15mm to 24mm in length by 2.5mm to 3.5mm in width. The 2 lateral sepals are white or at times cream with deep purple striations on the basal half and often purple tinged on the apex half. The oblong tapering lateral sepals measures 15mm to 24mm in length by 3.7mm to 5.2mm in width near the base before they spread to unite and surround the ovary. The apexes are acute with an apiculate tip. The sepal margins are entire.
The lateral petals are usually white or at times cream with deep purple striations on the basal half and often purple tinged on the apex half. The lateral petals are narrow oblong with an acute apex. The lateral petals measure 9mm to 14mm in length by 1.5mm to 2.5mm in width near the base before they surround the ovary. The lateral petals margins are entire.
The labellums are usually pascal lime-green or cream with deep purple striations on the basal half and often purple tinged on the apex half. The labellum measure 20mm to 30mm in length by 7mm to 10mm in width. The margins are entire near the base, ruffled near the apex and are marked with deep purple on the margins.
The pascal lime-green or cream columns measure 4mm to 5mm in length. The column foot measures 7mm to 9mm in length. The flowers appear from September to November.
Wildlife:
Dendrobium schoeninum is the host to numerous small native bees when in flower and also hosts the Dendrobium beetle, Stethopachys formosa.
Cultivation:
Dendrobium schoeninum is a beautiful orchid with pendant leaves which is similar to most the other pencil orchids. It is rather hardy and easy to grow and to propagate at least as far south as sale in Victoria along the coast. It does very well either in the bush house in a coarse Cymbidium mix, on a slab of cork or pumice stone or attached to most trees that do not shed their bark. Do not attach them to Eucalyptus trees as the barks contain resins which Dendrobiums detest.
Trees with mass plantings of mixed orchids look really spectacular and those that have a lot of Dendrobium schoeninum add interest and curiosity over a long period especially when in flower. Cassuarina torulosa and Elaeocarpus grandis are good host trees. I have grown this orchid in Nana Glen where it attained a length of over 2 meters by 2/3 of the circumference (approximately 450mm in diameter) of the trunk on Cassuarina torulosa in just 15 years.
Be ever so vigilant for Steyhopachys formosa the Dendrobium enthusiast’s nightmare. This beetle can inflict a lot of damage in just one season. Plants attached to trees are less likely to be phased by Dendrobium beetle because of natural predators like birds, bats and frogs.
Control of the beetle is simple just squash it. They are slow movers and though like all beetles can fly would rather resort to hiding as a means of escape. The pupae are just as easy to eliminate. Check the base of all your orchids on a regular basis and again destroy any pupae. These look like small patches of white toothpaste squeezed from the tube. The larvae are the most difficult and will usually need a systemic spray or great concentration to find the small holes on the canes as they bore their way through from the inside. Eggs are yellowish and measure about 1.5mm in length.
The beetle eats buds, flowers, new shoots and developing seed pods. Larvae consume the canes.
Photo with more information can be obtained from the Brisbane Orchid Society. – http://bos.org.au/
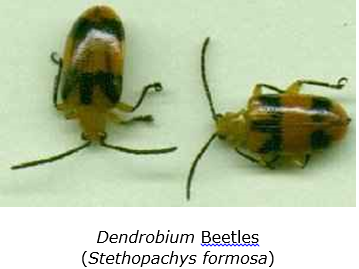
Propagation:
Seeds: Dendrobium schoeninum‘s seeds require treatment before sowing. Really Orchid seeds are meant for professionals with time, equipment and space. However if you wish to persevere then here are the basics and you are learning from an amateur. You will need the following, a flask, chloros solution, boiled water, an eye dropper, paper bag, a warm sheltered position and a lot of patience and luck. This is a most difficult orchid to grow even by professionals as it detests root disturbance and being reorientated.
- Collecting the seed: seed can only be collected from fully ripe pods. You may need to watch a pod for several days or even weeks following the time it stops swelling for it to turn olive yellow. At this stage the pod must be watched carefully for the pod to commence spitting along the placenta. If possible place the paper bag over the pod and tie it off. If necessary place a plastic bag over the paper bag to prevent rain or moisture contacting the seeds.
- Knowledge is very important now, as different species and genre have various numbers of viable seed in a pod. Viable seeds may be as few as 20 or as many as several million. Check the bag daily and remove once the seed begins to disperse. Shake all the seeds from the pod into the bag.
- Purchase the appropriate agar solution from an orchid society as they will know what you want and which one will be best for your species. Prepare the agar solution and pour into the flask.
- Remove some of the seeds by shaking them into a solution of 1 part chloros to 20 parts water and allow to soak for 10 minutes.
- Remove the seeds with the eye dropper in the solution and spread evenly over the set agar.
- Place the flasks in a room that is will lit with indirect light and the temperature is a consistent 25 to 30 degrees centigrade.
- Wait 4 to 7 months for the seedlings to develop to a stage where they can be removed and planted on into a fine orchid mix. Do not remove the seedlings from their environment of light or temperature for at least another two months. Even at this stage it is best to place the seedlings in a hot house where their environment can be controlled.
Division: Division is the easiest method for amateurs to propagate Dendrobium schoeninum. At some point, the orchid will become root-bound in its pot or large enough to divide the clump on a tree or slab. The only tools required are sharp sterile knife a slab of cork or pumice stone and some hemp or nylon string. I prefer hemp string because it is totally natural but is difficult to obtain.
Slab plants: Take the slab and cut it down the middle ensuring each section has healthy terminal stems. Retie the new divisions cork or pumice stone onto a new piece of cork or pumice stone. Tie them so that they do not move. Do not over tighten as this cuts off the flow of nutrients to the new leaves.
Treat plants that are growing naturally on a tree in the same way. First cut the plant in half then slice just below the roots into the outer layer of bark being careful not to damage the stems or the xylem and phloem layers of the tree Remove the section and retie it to another section of the tree or cork slab as desired.
Fertilize using Seaweed, fish emulsion or organic chicken pellets soaked in water on an alternate basis. Fertilize every two months until the plants are established then twice annually in early September or March to maintain health, vitality and better flowering.
Further Comments from Readers:
Hi reader, it seems you use The Bible of Botany a lot. That’s great as we have great pleasure in bringing it to you! It’s a little awkward for us to ask, but our first aim is to purchase land approximately 1,600 hectares to link several parcels of N.P. into one at The Pinnacles NSW Australia, but we need your help. We’re not salespeople. We’re amateur botanists who have dedicated over 30 years to saving the environment in a practical way. We depend on donations to reach our goal. If you donate just $5, the price of your coffee this Sunday, We can help to keep the planet alive in a real way and continue to bring you regular updates and features on Australian plants all in one Botanical Bible. Any support is greatly appreciated. Thank you.
In the spirit of reconciliation we acknowledge the Bundjalung, Gumbaynggirr and Yaegl and all aboriginal nations throughout Australia and their connections to land, sea and community. We pay our respect to their Elders past, present and future for the pleasures we have gained.
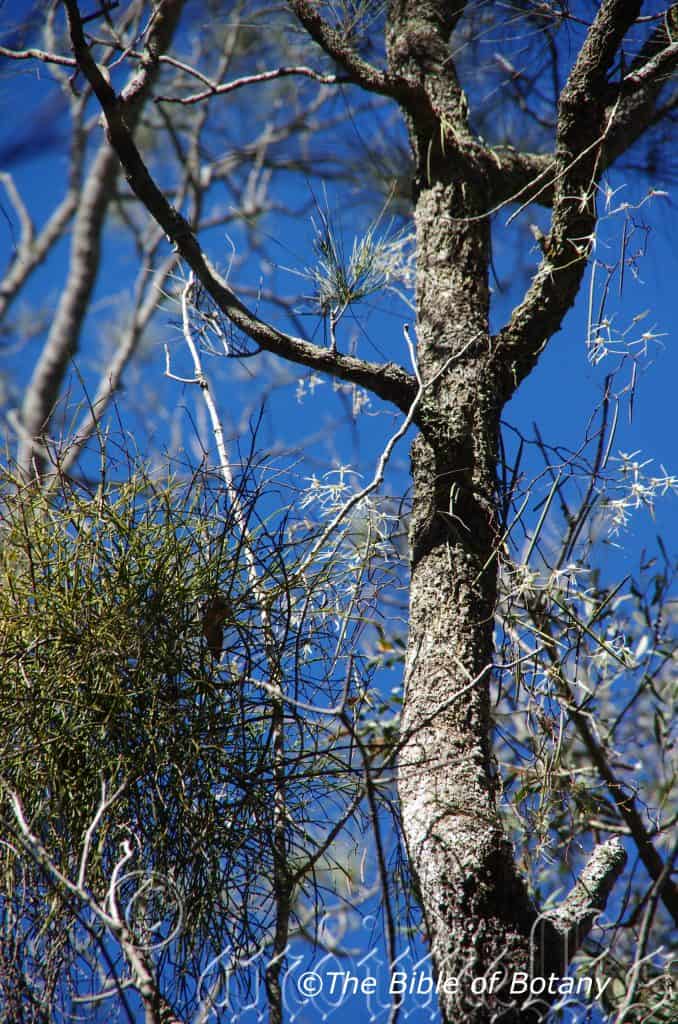
Clarence Valley NSW
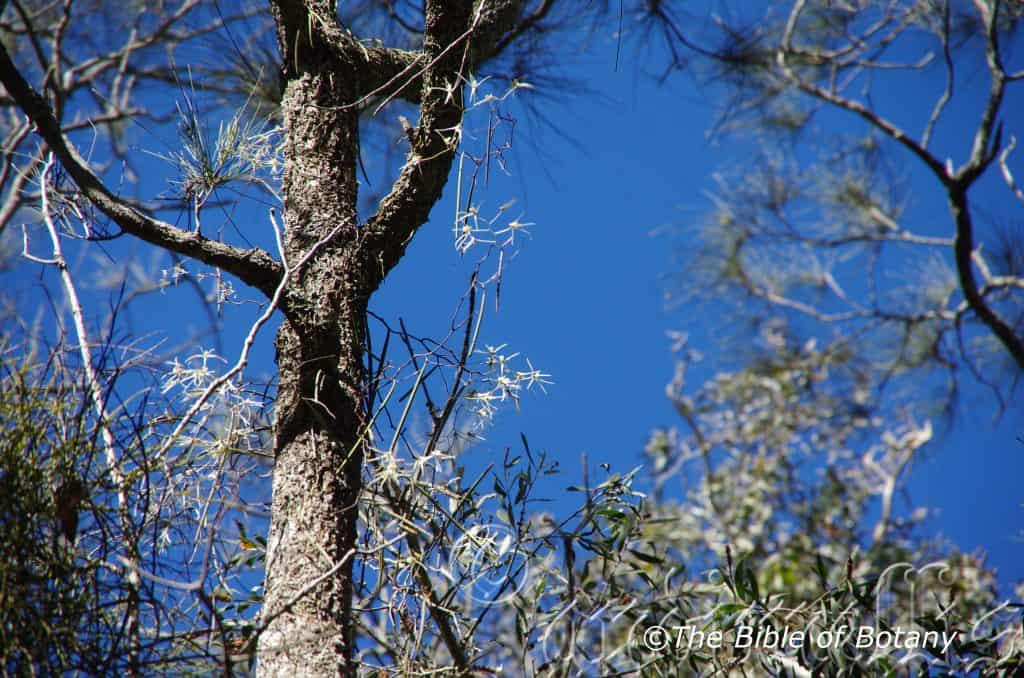
Clarence Valley NSW
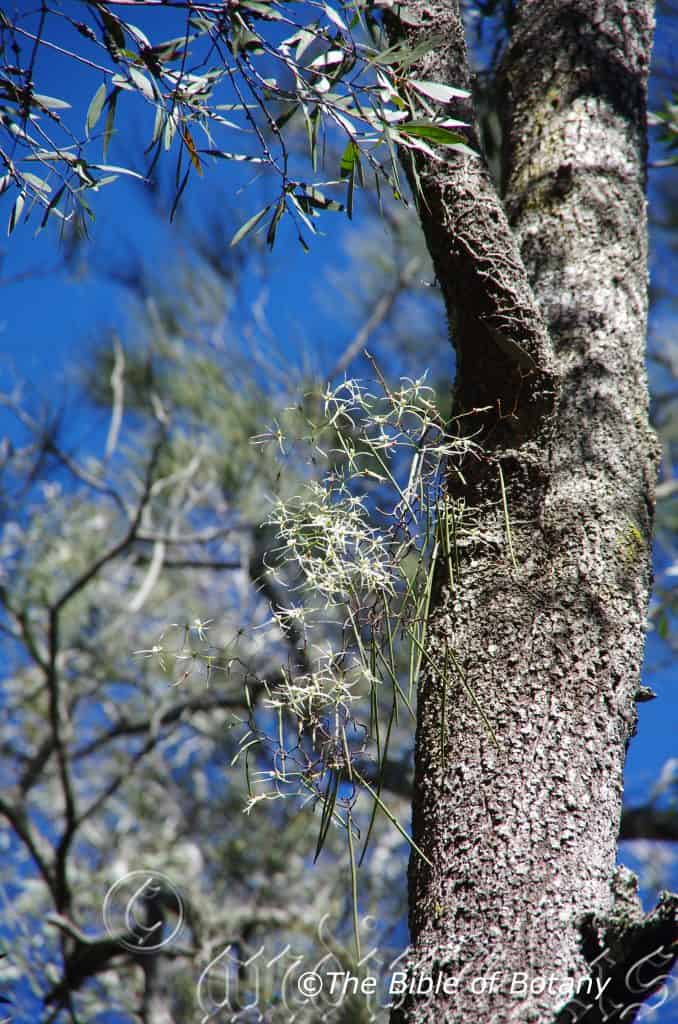
Clarence Valley NSW
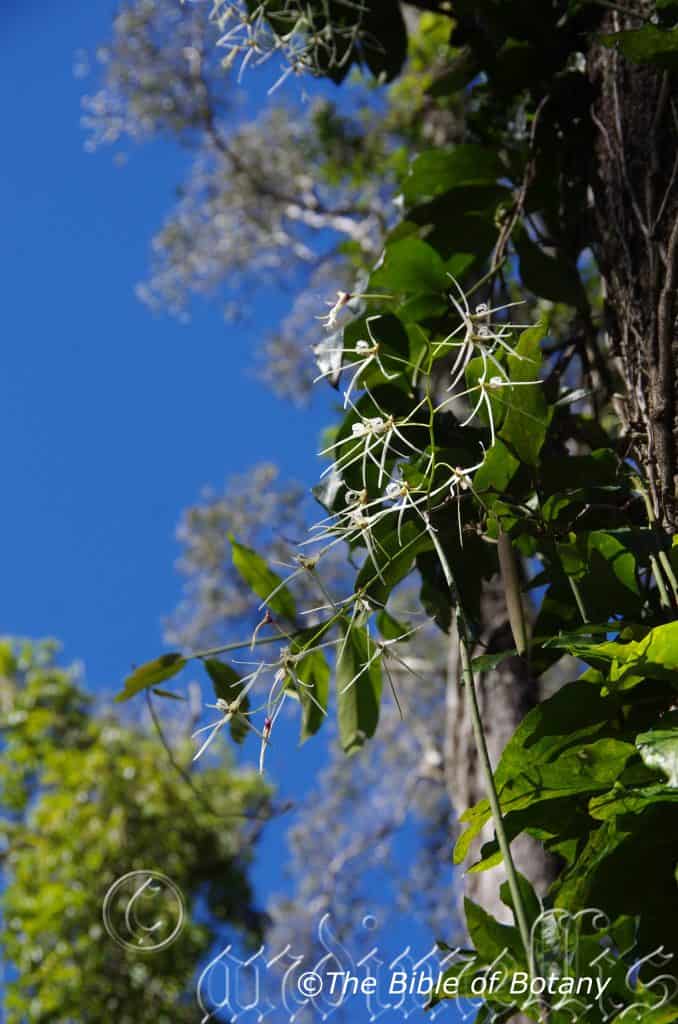
Clarence Valley NSW
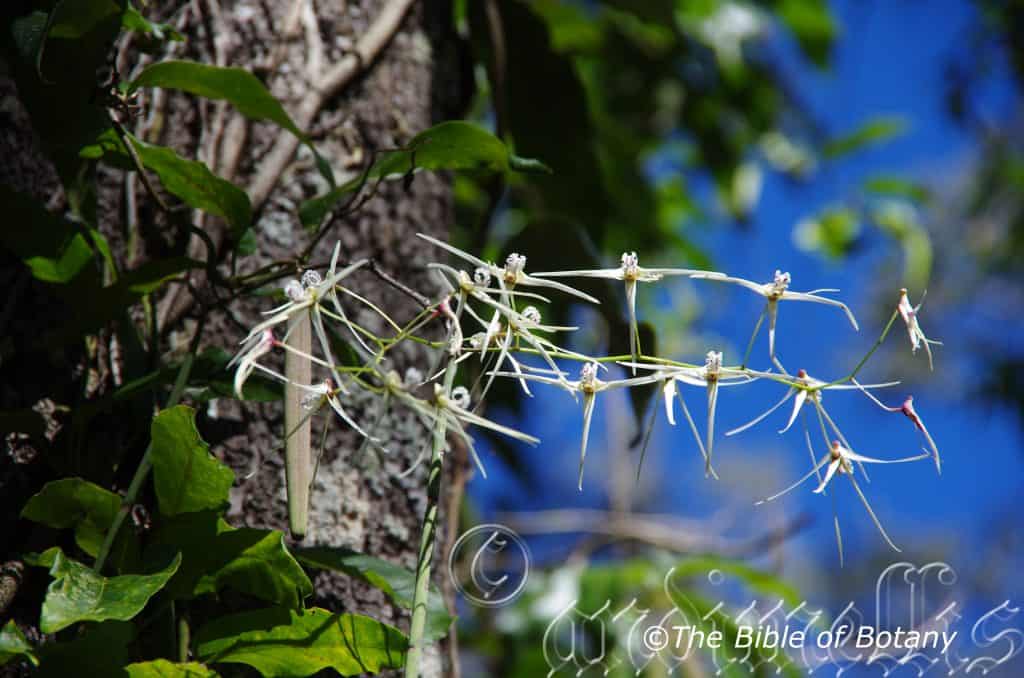
Clarence Valley NSW
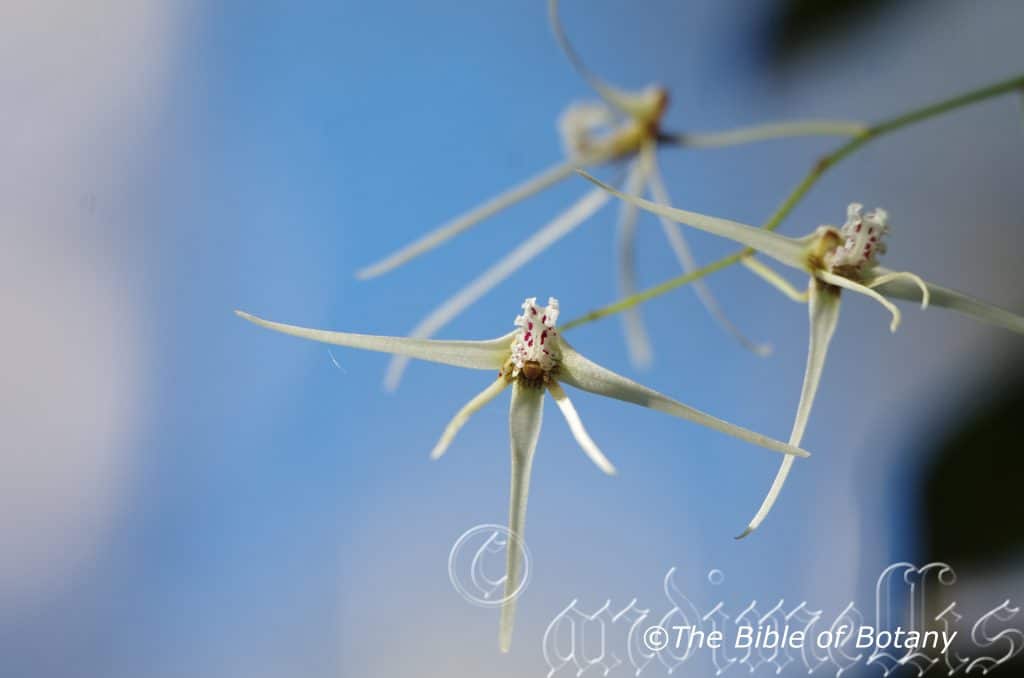
Clarence Valley NSW
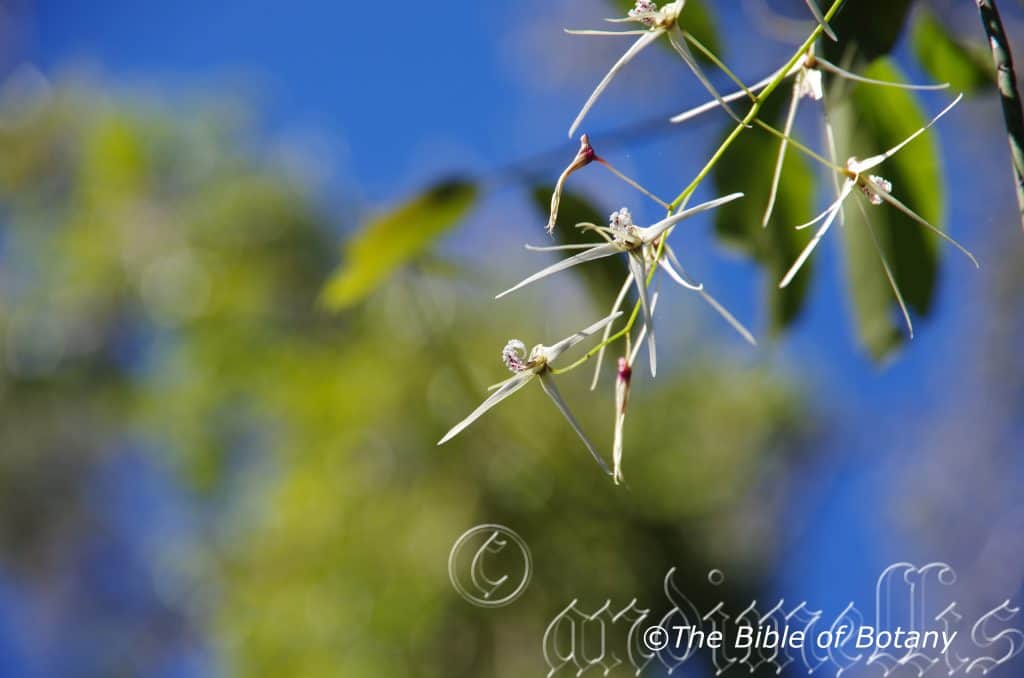
Clarence Valley NSW
Dendrobium teretifolium
Classification
Class: Monocots
Order: Asparagales
Family: Orcidaceae
Subfamily: Epidendroideae
Tribe: Dendrobieae
Sub Tribe: Dendrobiinae
Genus: From Dendron, which is Ancient Greek for a tree and Bios, which is Ancient Greek for life. It refers to plants, which live on trees to survive, not as parasites or saphrophytic.
Species: From Teres, which is Latin for smooth or Terer, which is Latin for to rub and make smooth hence Terete, which is Latin for an imperfectly smooth cylinder and Folium, which is Latin for foliage. It refers to leaves, which are aciculate, long and cylindrical like.
Common Name: Rat Tail Orchid.
Distribution:
Dendrobium teretifolium is found south from Kilkivin in southern coastal Queensland to the Bega district in coastal New South Wales. It is found in several disjunct populations further north on Cape York Peninsula at Bamaga, the Endeavour River National Park, Eungella National Park and the lower Fitzroy River. It is mainly on the eastern side of the Great Dividing Range.
https://avh.ala.org.au/occurrences/search?taxa=Dendrobium+teretifolium#tab_mapView
Habitat Aspect Climate:
Dendrobium teretifolium prefers dappled shade to filtered sunlight. It grows as an epiphyte in coastal freshwater and brackish swamps, littoral rainforests, along estuary and lowland creeks, streams and rivers where there are breaks in the canopy. It is usually found on the trunks and branches of Casuarina glauca however it has been found on some course hard bark rainforest trees along similar habitats. The altitude ranges from 5 meters ASL to 220 meters ASL.
The temperatures range from minus 3 degrees in August to 35 degrees in January.
The rainfall ranges from lows of 750mm to 3200mm average per annum. The rainfall is seasonal mainly summer and autumn with dry winters and springs and humid to dry atmospheric conditions between these periods.
Soil Requirements:
Dendrobium teretifolium grows as an epiphyte mainly on Casuarina glauca.
Height & Spread:
Wild Plants: 0.8m to 2.2m by 0.5m to 1m.
Characteristics:
Dendrobium teretifolium grows as an epiphyte. The stems are an olive-green to pale grey and measure 50mm to 300mm in length by 2mm to 5mm in diameter. The roots are wiry, glabrous white to pale grey and radiate out from the base of the sympodium. They are mainly creeping and aerial.
There is a single pendant leaf at each sympodium. The succulent, terete leaves of Dendrobium teretifolium are narrow oblong and measure 10mm to 60mm in length in length by 3.5mm to 8mm in diameter. The base is rounded while the apex is acute or tapering to a point. The concolourous laminas are deep green to sea-green, dull and glabrous. The margins are entire.
The inflorescences of Dendrobium teretifolium are a long raceme usually with 4 to 15 flowers. They are terminally produced from present year’s sympodium. The erect rachises measure 40mm to 150mm in length while the pedicels are 12mm to 22mm in length including the ovary which appears to be part of the pedicel but is slightly swollen. The flowers are held erect. The sepals and petals are divaricate from the ovary.
The 3 sepals are usually white or pascal cream though pale yellow forms are not uncommon. There are some short deep red-maroon or deep purple almost violet striations close to the base. The narrow oblong, linear tapering dorsal sepal measures 20mm to 40mm in length by 2mm to 3.6mm in width at the base. The 2 lateral sepals are usually white or pascal cream though pale yellow forms are not uncommon. There are some short deep red-maroon or deep purple almost violet striations close to the base. The narrow oblong to linear tapering lateral sepals measures 21mm to 41mm in length by 3.6mm to 6mm in width near the base where they unite and surround the ovary. The apexes are acute-obtuse. The sepal margins are entire.
The lateral petals are usually white or pascal cream though pale yellow forms are not uncommon. There are some short deep red-maroon or deep purple almost violet striations close to the base. The lateral petals are linear with an acute-obtuse apex. The lateral petals measure 22mm to 43mm in length by 1.8mm to 2mm in width near the base before they surround the ovary. The lateral petals margins are entire.
The labellums are usually pascal white to pale yellow, with deep purple almost violet dots. The labellum measure 18mm to 30mm in length by 4mm to 6mm in width. The margins are entire near the base, ruffled on the apex half while the apex tapers to a long flagella.
The pascal white to cream columns measure 2mm to 2.5mm in length. The column foot measures 3mm to 5mm in length. The flowers appear from July to October.
Wildlife:
Dendrobium teretifolium is the host to numerous small native bees when in flower and also hosts the Dendrobium beetle, Stethopachys formosa.
Cultivation:
Dendrobium teretifolium is a beautiful large pendulant orchid, which is rather hardy and easy to grow and to propagate at least as far south as Sydney. It does very well either in the bush house on a slab of cork or pumice stone or attached to most trees that do not shed their bark. Do not attach it to Eucalyptus trees as the barks contain resins which Dendrobiums detest.
Trees with mass plantings of mixed orchids look really spectacular and those that have a lot of Dendrobium teretifolium add interest and curiosity over a long period especially when in flower. Cassuarina species including Casuarina torulosa, Casuarina cunninghamii and especially Casuarina glauca are excellent small and medium trees for hosting many types of orchids that prefer light dappled shade with some sun light.
Be ever so vigilant for Steyhopachys formosa the Dendrobium enthusiast’s nightmare. This beetle can inflict a lot of damage in just one season. Plants attached to trees are less likely to be phased by Dendrobium beetle because of natural predators like birds, bats and frogs.
Control of the beetle is simple just squash it. They are slow movers and though like all beetles can fly try to use hiding as a means of escape. The pupae are just as easy to eliminate. Check the base of all your orchids on a regular basis and again destroy any pupae. These look like small patches of white toothpaste squeezed from the tube. The larvae are the most difficult and will usually need a systemic spray or great concentration to find the small holes on the canes as they bore their way through from the inside. Eggs are yellowish and measure about 1.5mm in length.
The beetle eats buds, flowers, new shoots and developing seed pods. Larvae consume the canes.
Photo with more information can be obtained from the Brisbane Orchid Society. – http://bos.org.au/

Propagation:
Seeds: Dendrobium teretifolium seeds require treatment before sowing. Really Orchid seeds are meant for professionals with time, equipment and space. However if you wish to persevere then here are the basics and you are learning from an amateur. You will need the following, a flask, chloros solution, boiled water, an eye dropper, paper bag, a warm sheltered position and a lot of patience and luck. This is a most difficult orchid to grow even by professionals as it detests root disturbance and being reorientated.
- Collecting the seed: seed can only be collected from fully ripe pods. You may need to watch a pod for several days or even weeks following the time it stops swelling for it to turn olive yellow. At this stage the pod must be watched carefully for the pod to commence spitting along the placenta. If possible place the paper bag over the pod and tie it off. If necessary place a plastic bag over the paper bag to prevent rain or moisture contacting the seeds.
- Knowledge is very important now, as different species and genre have various numbers of viable seed in a pod. Viable seeds may be as few as 20 or as many as several million. Check the bag daily and remove once the seed begins to disperse. Shake all the seeds from the pod into the bag.
- Purchase the appropriate agar solution from an orchid society as they will know what you want and which one will be best for your species. Prepare the agar solution and pour into the flask.
- Remove some of the seeds by shaking them into a solution of 1 part chloros to 20 parts water and allow to soak for 10 minutes.
- Remove the seeds with the eye dropper in the solution and spread evenly over the set agar.
- Place the flasks in a room that is will lit with indirect light and the temperature is a consistent 25 to 30 degrees centigrade.
- Wait 4 to 7 months for the seedlings to develop to a stage where they can be removed and planted on into a fine orchid mix. Do not remove the seedlings from their environment of light or temperature for at least another two months. Even at this stage it is best to place the seedlings in a hot house where their environment can be controlled.
Division: Division is the easiest method for amateurs to propagate Dendrobium teretifolium. At some point, the orchid will become root-bound in its pot or large enough to divide the clump on a tree or slab. The only tools required are sharp sterile knife a slab of cork or pumice stone and some hemp or nylon string. I prefer hemp string because it is totally natural but is difficult to obtain.
Slab plants: Take the slab and cut it down the middle ensuring each section has healthy terminal stems. Retie the new divisions cork or pumice stone onto a new piece of cork or pumice stone. Tie them so that they do not move. Do not over tighten as this cut’s off the flow of nutrients to the new leaves.
Treat plants that are growing naturally on a tree in the same way. First cut the plant in half then slice just below the roots into the outer layer of bark being careful not to damage the stems or the xylem and phloem layers of the tree Remove the section and retie it to another section of the tree or cork slab as desired.
Fertilize using Seaweed, fish emulsion or organic chicken pellets soaked in water on an alternate basis. Fertilize every two months until the plants are established then twice annually in early September or March to maintain health, vitality and better flowering.
Further Comments from Readers:
Hi reader, it seems you use The Bible of Botany a lot. That’s great as we have great pleasure in bringing it to you! It’s a little awkward for us to ask, but our first aim is to purchase land approximately 1,600 hectares to link several parcels of N.P. into one at The Pinnacles NSW Australia, but we need your help. We’re not salespeople. We’re amateur botanists who have dedicated over 30 years to saving the environment in a practical way. We depend on donations to reach our goal. If you donate just $5, the price of your coffee this Sunday, We can help to keep the planet alive in a real way and continue to bring you regular updates and features on Australian plants all in one Botanical Bible. Any support is greatly appreciated. Thank you.
In the spirit of reconciliation we acknowledge the Bundjalung, Gumbaynggirr and Yaegl and all aboriginal nations throughout Australia and their connections to land, sea and community. We pay our respect to their Elders past, present and future for the pleasures we have gained.
Dendrobium tetragonum
Classification
Class: Monocots
Order: Asparagales
Family: Orcidaceae
Subfamily: Epidendroideae
Tribe: Dendrobieae
Sub Tribe: Dendrobiinae
Genus: From Dendron, which is Ancient Greek for a tree and Bios, which is Ancient Greek for life. It refers to plants, which live on trees to survive, not as parasites or saphrophytic.
Species: From Tetra, which is Ancient Greek for four and Gona/Gonos, which is Ancient Greek for an angle or bent knee. It refers to structures or organs, which have four angles thus are square in cross section at the apex.
Common Name: TreeSpider Orchid.
Distribution:
Dendrobium tetragonum is found south from the Iron Range National Park on Cape York Peninsula in far north Queensland to the Illawarra district in central coastal New South Wales. It is found on and east of the Great Dividing Range.
https://avh.ala.org.au/occurrences/search?taxa=Dendrobium+tetragonum#tab_mapView
Habitat Aspect Climate:
Dendrobium tetragonum prefer dappled shade to full shade. It is found in well-developed littoral rainforests to well-developed sub-tropical rainforests and tropical rainforests along riparian zones, gallery forests and notophyll vine forests. The altitude ranges from 8 meters ASL to 300 meters ASL.
The temperatures range from minus 2 degree in August to 38 degrees in January.
The rainfall ranges from lows of 900mm to 3200mm average per annum. The rainfall is seasonal mainly summer and autumn with dry winters and springs and humid to dry atmospheric conditions between these periods.
Soil Requirements:
Dendrobium tetragonum grows as an epiphyte on various trees within its range and occasionally it can be found growing as a lithophyte on rocks particularly Granite boulders.
Height & Spread:
Wild Plants: 0.1m to 0.7m by 0.3m to 0.8m.
Characteristics:
Dendrobium tetragonum grows as an epiphyte. The canes are spreading to pendulant. They are thin in the basal half while the apex half is succulent and swells to a square cross section in the upper half before tapering slightly towards apex. The glabrous, wiry roots spread out from the base of the canes. The canes measure 60mm to 450mm in length by 7mm to 9mm in diameter. The new canes are covered in a thin, white coriaceous sheath.
Dendrobium tetragonum’s divaricate to erect, conduplicate leaves are elliptical and measure 30mm to 80mm in length in length by 15mm to 25mm in width and 1mm to 3mm thick. The bases are broad cuneate and clasp the apex of the cane while the apexes are long tapering acuminate. The 2 to 5 concolourous leaves are located at the apex of the canes and are deep green to sea-green, and semi glossy on the upper laminas and dull on the lower laminas. The margins are entire.
The inflorescences of Dendrobium tetragonum are short wiry racemes usually with 1 to 5 flowers. They are terminally produced from present years or previous year’s sympodium. The erect rachises measure 5mm to 40mm in length while the pedicels are 9mm to 16mm in length including the ovary which appears to be part of the pedicel but is slightly swollen. The flowers are held erect. The sepals and petals are divaricate, pendulant and from the ovary.
The 3 sepals are usually pale grass-green to yellow-green to deep dull yellow, usually with reddish or maroon markings along the margins. The narrow oblong to linear tapering dorsal sepal is twisted measures 19mm to 30mm in length by 1.9mm to 3mm in width at the base. The 2 lateral sepals are narrow oblong to linear-tapering. The lateral sepals are divaricate and decurve strongly downwards from close to the base to the apex. The lateral sepals measure 18mm to 31mm in length by 5.5mm to 7.5mm in width near the base where they expand greatly, unite and surround the ovary. The apexes are acute. The sepal margins are entire.
The lateral petals are usually pale grass-green to yellow-green to deep dull yellow, usually with reddish or maroon markings along the margins. The lateral petals are linear with acute apexes. The lateral petals measure 16mm to 28mm in length by 1.5mm to 2.5mm in width near the base before they surround the ovary. The lateral petals margins are entire.
The labellums are usually cream, usually with reddish striations. The labellum measure 8mm to 10mm in length by 4mm to 8mm in width. The margins are entire near the base, ruffled on the apex half while the apex tapers to a long flagella.
The pascal white to cream columns measure 2.5mm to 4mm in length. The column foot measures 5mm to 6mm in length. The sweetly scented flowers appear from May to October.
Wildlife:
Dendrobium tetragonum is the host to numerous small native bees when in flower and also hosts the Dendrobium beetle, Stethopachys formosa.
Cultivation:
Dendrobium tetragonum is a beautiful orchid with unusual square canes. It is hardy and easy to grow and to propagate at least as far south as the New South Wales, Victorian border along the coast. It does very well either in the bush house on a slab of cork or pumice stone or attached to most trees that do not shed their bark. Do not attach them to Eucalyptus trees as the barks contain resins which Dendrobiums detest.
Trees with mass plantings of mixed orchids look really spectacular and those that have a lot of Dendrobium pugioniforme add interest and curiosity over a long period especially when in flower. Ficus species, Ceropetalum species and Elaeocarpus species are good host trees as is a natural host for this orchid in the wild as are the various species of Cupaniopsis species.
Be ever so vigilant for Steyhopachys formosa the Dendrobium enthusiast’s nightmare. This beetle can inflict a lot of damage in just one season. Plants attached to trees are less likely to be phased by Dendrobium beetle because of natural predators like birds, bats and frogs.
Control of the beetle is simple just squash it. They are slow movers and though like all beetles can fly try to use hiding as a means of escape. The pupae are just as easy to eliminate. Check the base of all your orchids on a regular basis and again destroy any pupae. These look like small patches of white toothpaste squeezed from the tube. The larvae are the most difficult and will usually need a systemic spray or great concentration to find the small holes on the canes as they bore their way through from the inside. Eggs are yellowish and measure about 1.5mm in length.
The beetle eats buds, flowers, new shoots and developing seed pods. Larvae consume the canes.
Photo with more information can be obtained from the Brisbane Orchid Society. – http://bos.org.au/

Propagation:
Seeds: Dendrobium tetragonum seeds require treatment before sowing. Really Orchid seeds are meant for professionals with time, equipment and space. However if you wish to persevere then here are the basics and you are learning from an amateur. You will need the following, a flask, chloros solution, boiled water, an eye dropper, paper bag, a warm sheltered position and a lot of patience and luck. This is a most difficult orchid to grow even by professionals as it detests root disturbance and being reorientated.
- Collecting the seed: seed can only be collected from fully ripe pods. You may need to watch a pod for several days or even weeks following the time it stops swelling for it to turn olive yellow. At this stage the pod must be watched carefully for the pod to commence spitting along the placenta. If possible place the paper bag over the pod and tie it off. If necessary place a plastic bag over the paper bag to prevent rain or moisture contacting the seeds.
- Knowledge is very important now, as different species and genre have various numbers of viable seed in a pod. Viable seeds may be as few as 20 or as many as several million. Check the bag daily and remove once the seed begins to disperse. Shake all the seeds from the pod into the bag.
- Purchase the appropriate agar solution from an orchid society as they will know what you want and which one will be best for your species. Prepare the agar solution and pour into the flask.
- Remove some of the seeds by shaking them into a solution of 1 part chloros to 20 parts water and allow to soak for 10 minutes.
- Remove the seeds with the eye dropper in the solution and spread evenly over the set agar.
- Place the flasks in a room that is will lit with indirect light and the temperature is a consistent 25 to 30 degrees centigrade.
- Wait 4 to 7 months for the seedlings to develop to a stage where they can be removed and planted on into a fine orchid mix. Do not remove the seedlings from their environment of light or temperature for at least another two months. Even at this stage it is best to place the seedlings in a hot house where their environment can be controlled.
Division: Division is the easiest method for amateurs to propagate Dendrobium tetragonum. At some point, the orchid will become root-bound in its pot or large enough to divide the clump on a tree or slab. The only tools required are sharp sterile knife a slab of cork or pumice stone and some hemp or nylon string. I prefer hemp string because it is totally natural but is difficult to obtain.
Slab plants: Take the slab and cut it down the middle ensuring each section has healthy terminal stems. Retie the new divisions cork or pumice stone onto a new piece of cork or pumice stone. Tie them so that they do not move. Do not over tighten as this cuts off the flow of nutrients to the new leaves.
Treat plants that are growing naturally on a tree in the same way. First cut the plant in half then slice just below the roots into the outer layer of bark being careful not to damage the stems or the xylem and phloem layers of the tree Remove the section and retie it to another section of the tree or cork slab as desired.
Fertilize using Seaweed, fish emulsion or organic chicken pellets soaked in water on an alternate basis. Fertilize every two months until the plants are established then twice annually in early September or March to maintain health, vitality and better flowering.
Further Comments from Readers:
Hi reader, it seems you use The Bible of Botany a lot. That’s great as we have great pleasure in bringing it to you! It’s a little awkward for us to ask, but our first aim is to purchase land approximately 1,600 hectares to link several parcels of N.P. into one at The Pinnacles NSW Australia, but we need your help. We’re not salespeople. We’re amateur botanists who have dedicated over 30 years to saving the environment in a practical way. We depend on donations to reach our goal. If you donate just $5, the price of your coffee this Sunday, We can help to keep the planet alive in a real way and continue to bring you regular updates and features on Australian plants all in one Botanical Bible. Any support is greatly appreciated. Thank you.
In the spirit of reconciliation we acknowledge the Bundjalung, Gumbaynggirr and Yaegl and all aboriginal nations throughout Australia and their connections to land, sea and community. We pay our respect to their Elders past, present and future for the pleasures we have gained.
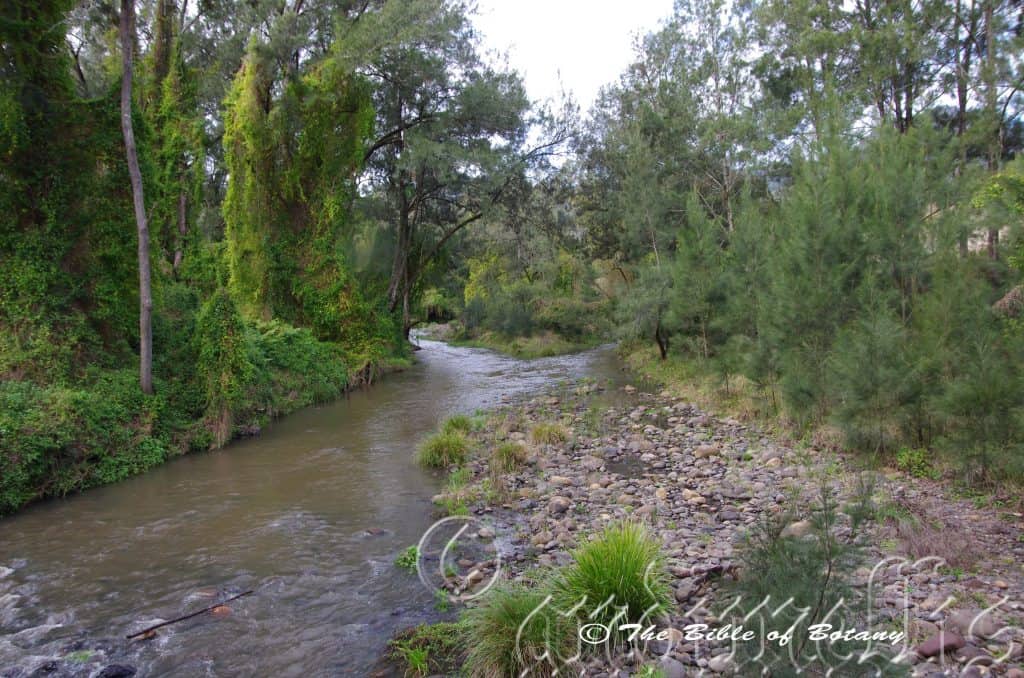
Border Ranges National Park NSW
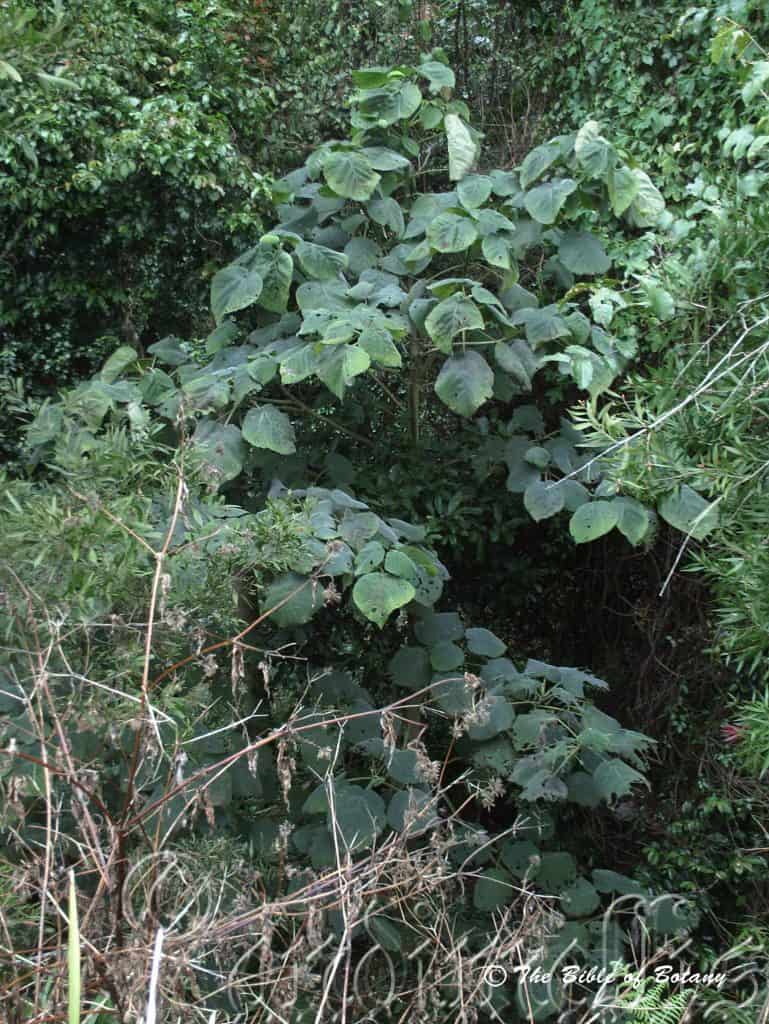
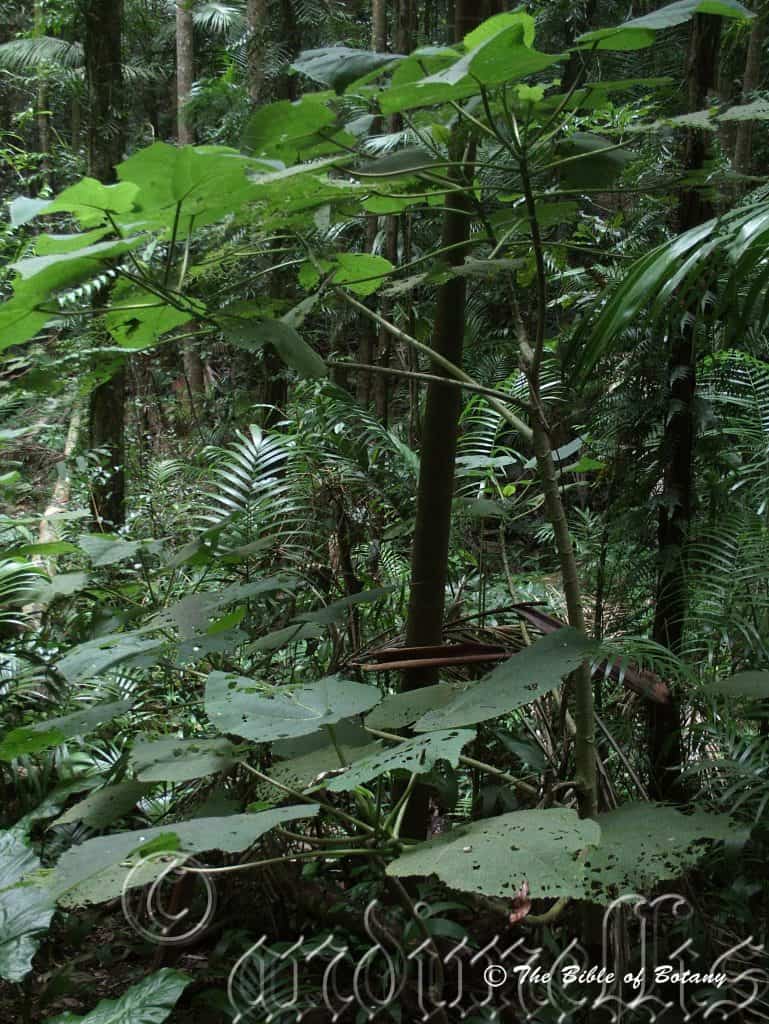
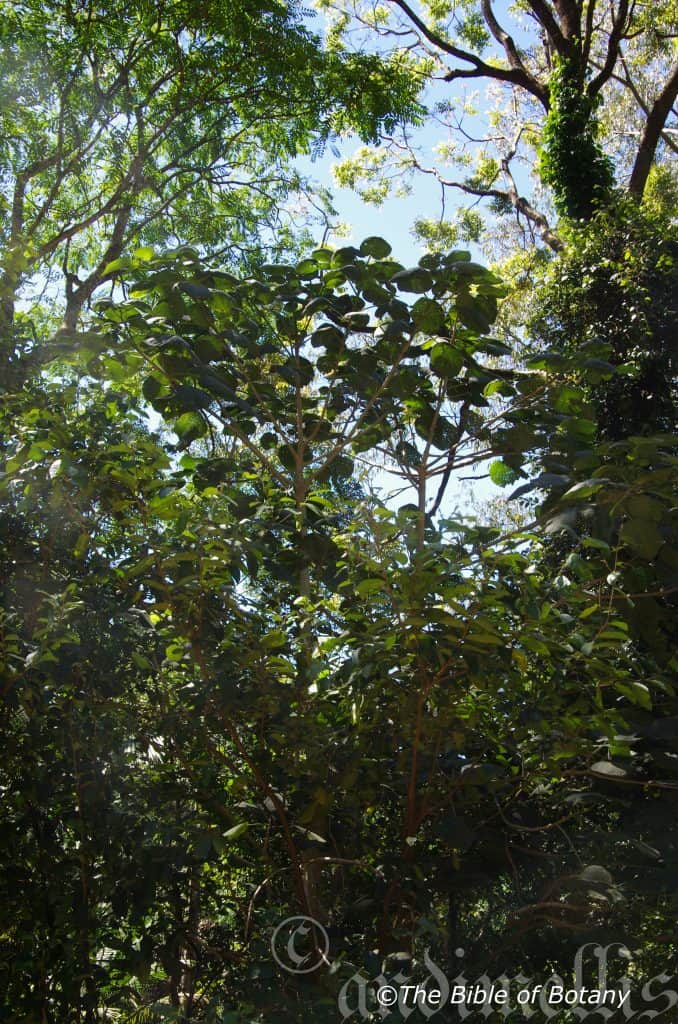
Border Ranges National Park NSW
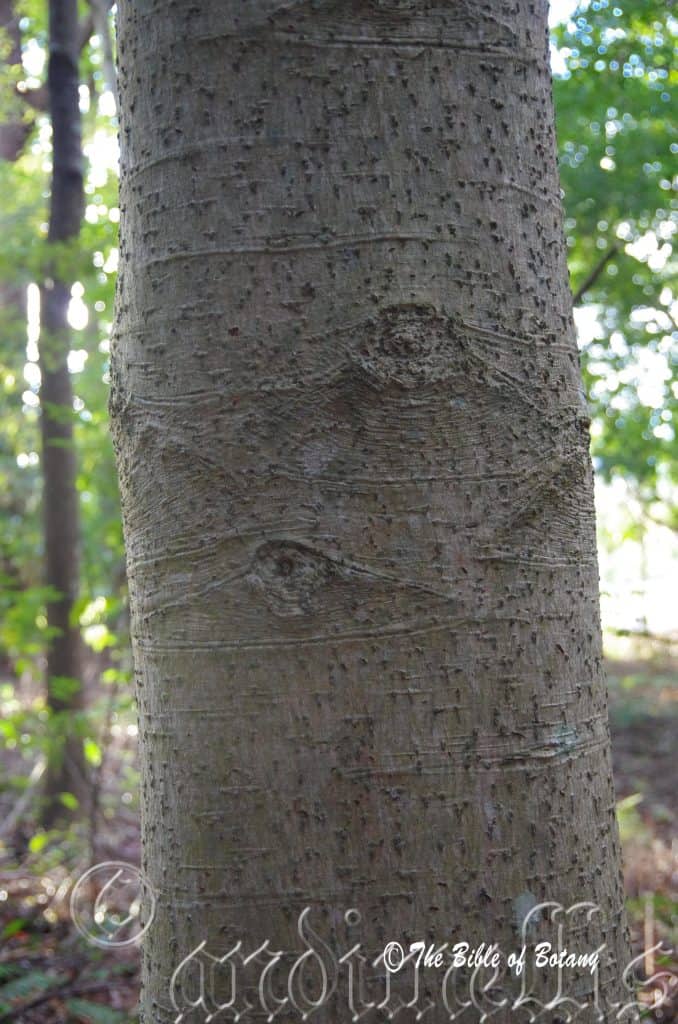
Border Ranges National Park NSW
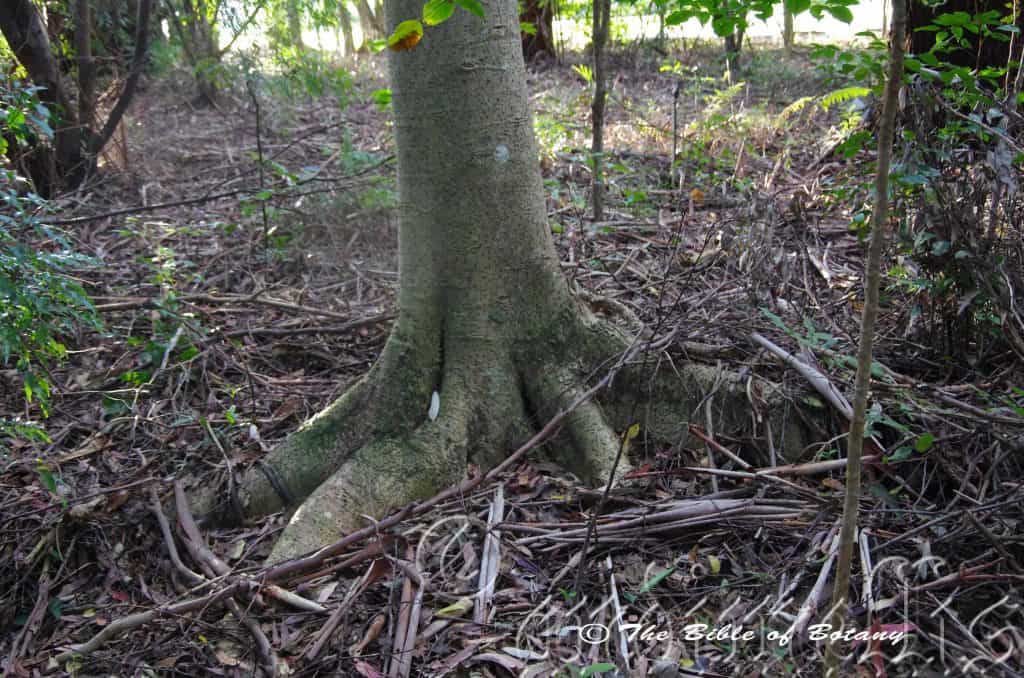
Border Ranges National Park NSW
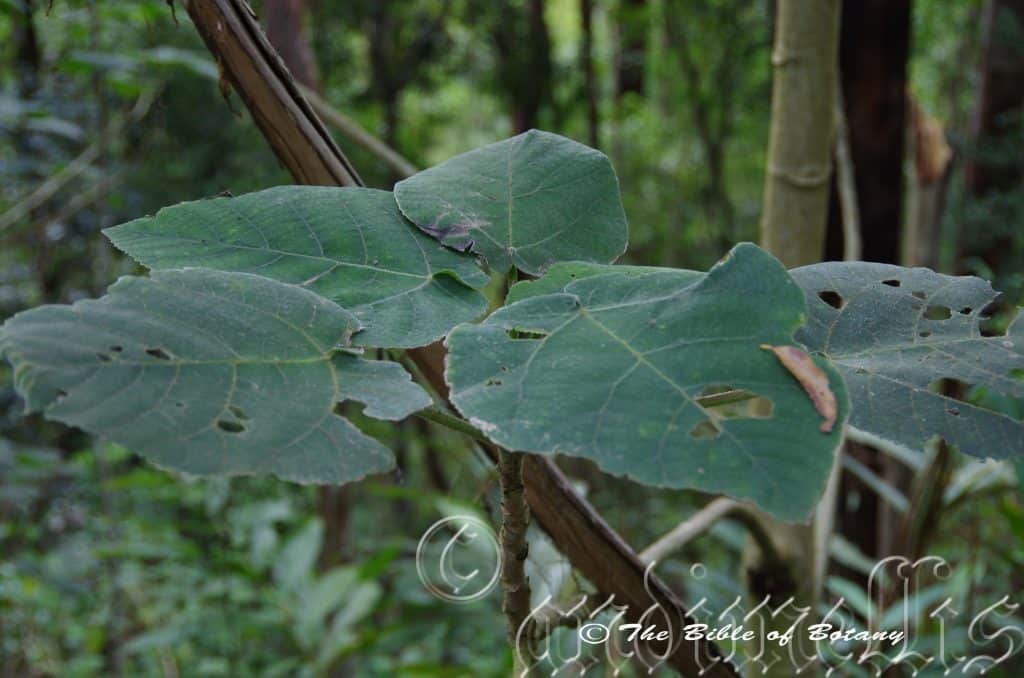
Border Ranges National Park NSW
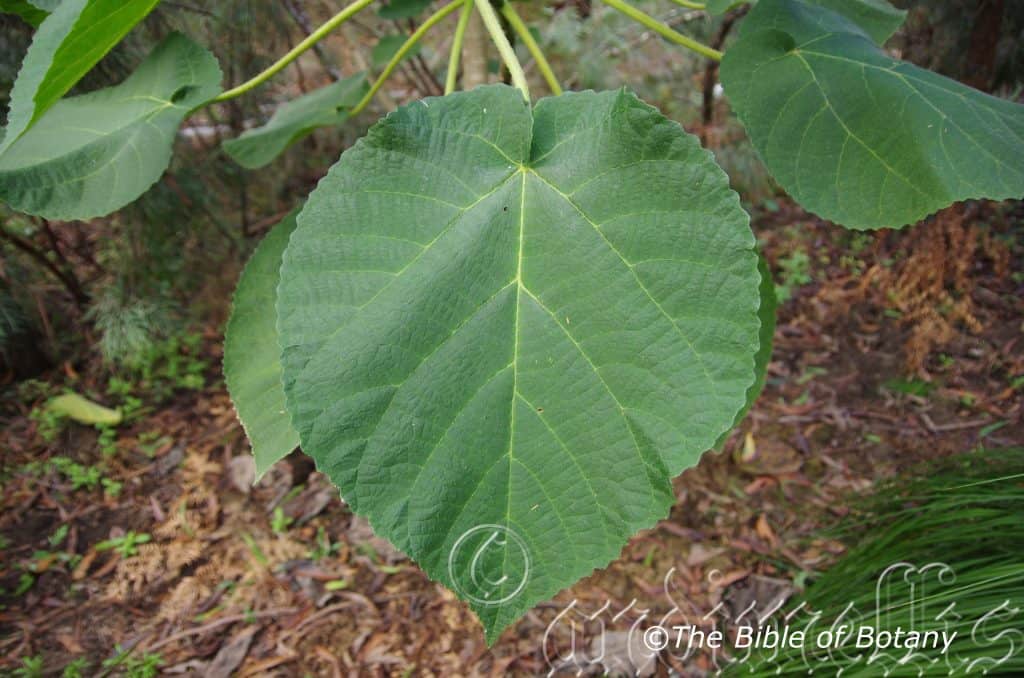
Author’s Garden The Pinnacles NSW
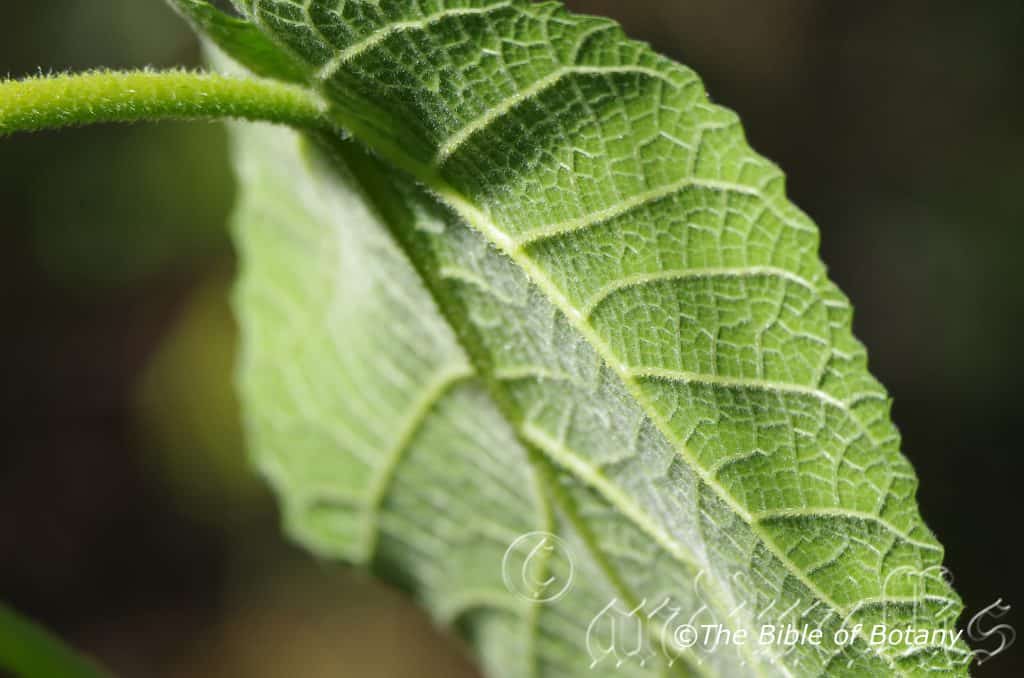
Author’s Garden The Pinnacles NSW
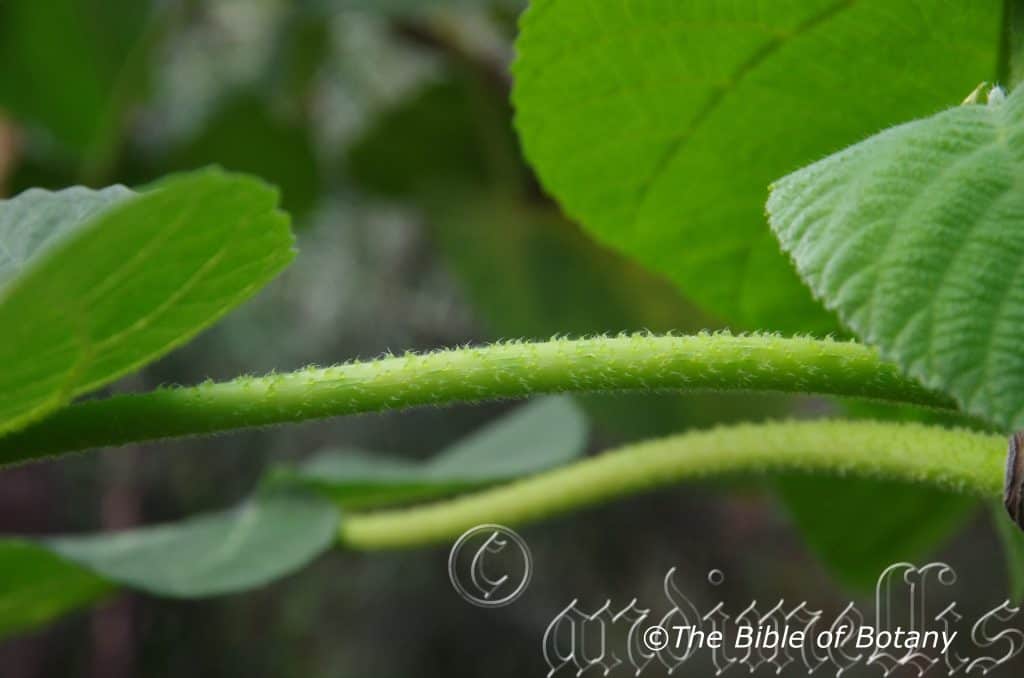
Author’s Garden The Pinnacles NSW
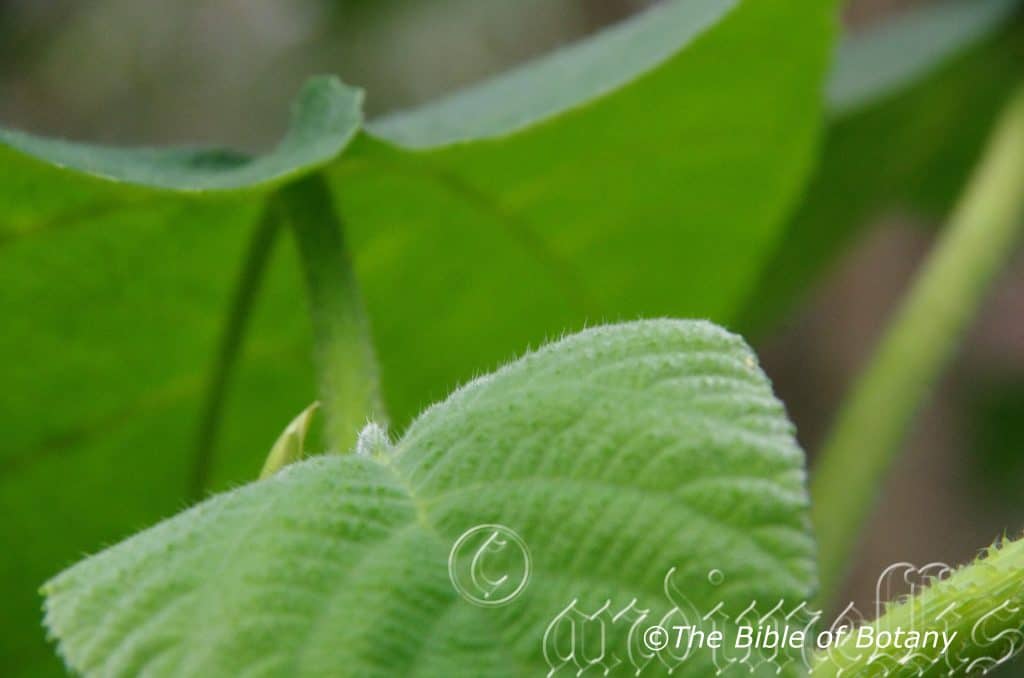
Author’s Garden The Pinnacles NSW
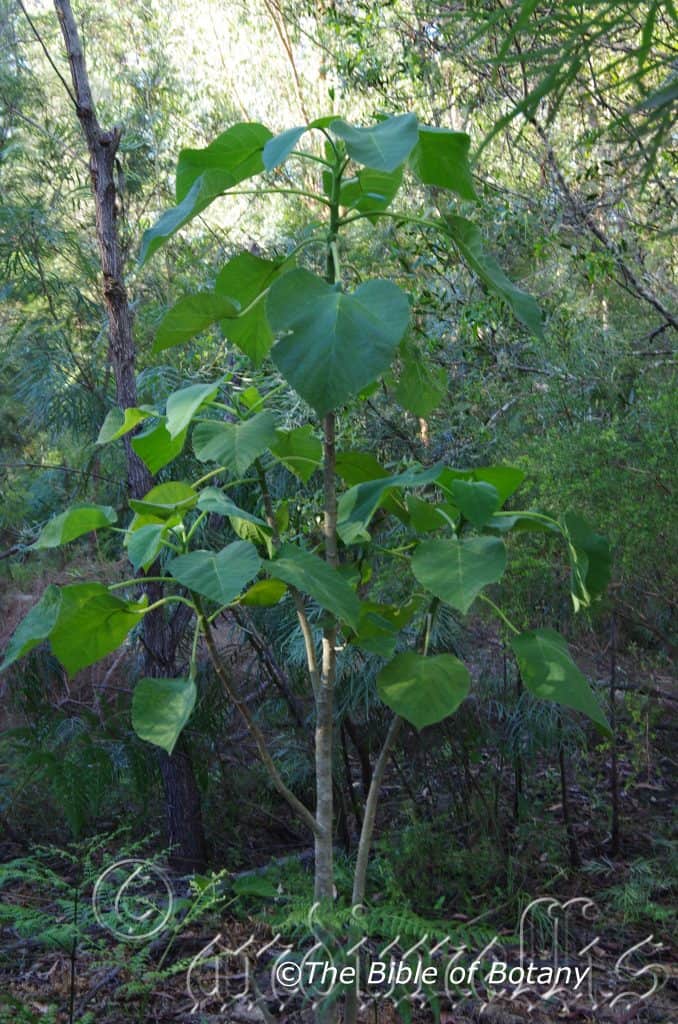
Author’s Garden The Pinnacles NSW
Dendrocnide excelsa
Classification
Kingdom: Magnoliophyta
Division: Magnolopsidas
Order: Rosales
Family: Urticaceae
Genus: From Dendron, which is Ancient Greek for a tree and Knid, which is Ancient Greek for a nettle. It refers to the nettle type hairs, which are capable of yielding a severe stinging or burning sensation.
Species: From Ex, which is Ancient Greek for out of the ordinary, outside or external and Celsa, which is Latin for high. It refers to trees, which are taller than other species in the genus.
Common Name: Giant Stinging Tree.
Distribution:
Dendrocnide excelsa is found south from Cairns in far north Queensland to the Hunter Valley in New South Wales. It is found mainly on the eastern side of The Great Dividing Range to the coast.
https://avh.ala.org.au/occurrences/search?taxa=Dendrocnide+excelsa#tab_mapView
Habitat Aspect Climate:
Dendrocnide excelsa prefers full sun to dappled shade. It usually grows in cooler tropical rainforests and moist Eucalyptus forests adjacent to rainforests. The altitude ranges from 400 meters ASL to 700 meters ASL.
The temperatures range from 2 degrees in July to 36 degrees in January.
The rainfall ranges from lows of 900mm to 3200mm average per annum.
Soil Requirements:
Dendrocnide excelsa prefers better quality sandy loams to medium clays. The soils are derived from decomposed brown basalt, black basalt and shale. The soils pH ranges from 5pH to 6pH. It does not tolerate waterlogged soils. Non saline soils to moderately saline soils are not tolerated at all.
Height & Spread:
Wild Plants: 35m to 40m to 15m x 25m
Characteristics:
Dendrocnide excelsa grows as a strong upright tree. The fluted trunks are pale grey glabrous to tuberculate lumps and corky. The stems and branchlets are rough dark grey brown with the leaf scars of fallen leaves. The new growth is grass-green and glabrous.
The alternate leaves of Dendrocnide excelsa are broadly ovate. They measure 100mm to 250mm in length by 70mm to 210mm in width. The base is cordate, at times the two lobes overlapping each other while the apex is broadly apiculate. The concolourous laminas are pale blue-green to pale grass-green and covered in fawn, translucent echinate hairs. The margins are regularly toothed on juvenile leaves and those in light to heavy shade while those exposed to sunlight tend to have fewer teeth and become smaller. The petioles measure 5mm to 20mm in length.
The leaves are covered in silicon echinate hairs which break off on contact and penetrate the skin releasing a liquid which causes a very painful burning sensation to any part of the body that makes contact with the leaves or petioles. The pain can last for several hours or even weeks. It is more severe when showering in hot water over this period. I had heard that the juice of the cunjevoi Alocassia brisbanensis, is a remedy to lessen the pain. From experience this is a total fabrication or wives tale. It definitely does not work. I have been hit three times once when we were off the beaten track. We decided on taking a short cut and when we were crawling under a series of lianes; Cissus species, we crawled over an area where dead, discarded leaves had accumulated. The leaves were still as virulent as the day they dropped from the tree. This day near Atherton will last in my and my children’s memories forever. As a Cunjevoi Alocassia brisbanensis, was nearby we tried it out with no result.
The liquid was first thought to be formic acid similar to that in a bee sting. Later scientist related the poison to histamines but now the poison is being tested with no conclusive results at hand. Until they know what is causing the pain or burning, my advice is to recognize the tree and give it a wide berth or at least treat it with great respect.
The inflorescences of Dendrocnide excelsa are born on panicles. The rachis measures 100mm to 125mm in length. The flowers are a very pale yellow to white and are born on 20mm to 25mm petioles. The rachis and pedicels are glabrous bright pale green glossy and appear from the leaf axils. Dendrochnide excelsa flowers from late November through to early February.
The fruits of Dendrocnide excelsa are an achene. The achene measures 2mm in length and 2mm in diameter and are black and warty. The pedicels become swollen to 5mm in diameter and look like miniature pale pink to deep carmine raspberries but are clustered together like grapes. The fruits ripen from March through to April. The fruits have a pleasant raspberry taste with a sharpness of lime added. Be very careful when handling the fruit as even when the fruit is eaten I have had the unpleasant surprise of a virulent hair or two on occasions breaking off in my mouth. Fortunately the pain within the mouth is short lived.
Wildlife:
Dendrocnide excelsa leaves are attacked by beetles in the Chrysomelid family when not attacking my Curcuba plants. The beautiful caterpillars of Theretra clotho also eats the leaves and young shoots. The green ring tail possum, Pseudochirops archeri apparently eats the leaves in north Queensland, obviously without any ill effects.
Cultivation:
Dendrocnide excelsa is a beautiful large tree with attractive large velvety leaves that is not recommended for the small or even the medium size garden. Large gardens may find a place hidden well back from paths and where children won’t be found playing.
The fruit was a staple part of the Australian Aborigines diet. If collecting the fruit, be very careful and aware of leaves which can cause a lot of pain. The fruits are juicy similar to raspberry with lemon and sugar. It is quite refreshing but may contain the odd silicon rod to remind you that you are still dealing with a Dendrocnide specie. Definitely worth the effort if you know how to handle and remove the fruits.
Propagation:
Seeds: Dendrocnide excelsa seeds do not require treatment before sowing. Sow fresh seeds directly into a seed raising mix and cover with 5mm of the mix. Place the trays in a cool sheltered position under 30mm to 50mm shade. When the seedlings are 25mm to 50mm tall, prick them out and plant them into 50mm native tubes using a seed raising mix. Use gloves as the trees will have the stinging hairs even at this age.
Once the seedlings reach 150mm to 200mm in height plant them out into their permanent position.
Fertilize using Seaweed, fish emulsion or organic chicken pellets soaked in water on an alternate basis. Fertilize every two months until the plants are established then twice annually in early September or March to maintain health, vitality and better flowering.
Further Comments from Readers:
Hi reader, it seems you use The Bible of Botany a lot. That’s great as we have great pleasure in bringing it to you! It’s a little awkward for us to ask, but our first aim is to purchase land approximately 1,600 hectares to link several parcels of N.P. into one at The Pinnacles NSW Australia, but we need your help. We’re not salespeople. We’re amateur botanists who have dedicated over 30 years to saving the environment in a practical way. We depend on donations to reach our goal. If you donate just $5, the price of your coffee this Sunday, We can help to keep the planet alive in a real way and continue to bring you regular updates and features on Australian plants all in one Botanical Bible. Any support is greatly appreciated. Thank you.
In the spirit of reconciliation we acknowledge the Bundjalung, Gumbaynggirr and Yaegl and all aboriginal nations throughout Australia and their connections to land, sea and community. We pay our respect to their Elders past, present and future for the pleasures we have gained.
Dendrocnide moroides
Classification
Kingdom: Magnoliophyta
Division: Magnolopsidas
Order: Rosales
Family: Urticaceae
Genus: From Dendron, which is Ancient Greek for a tree and Knid, which is Ancient Greek for a nettle. It refers to the nettle type hairs, which are capable of yielding a severe stinging or burning sensation.
Species: From Morus, which is Latin for a mulberry and Eidos/Oides, which is Ancient Greek for alike or similar to. It refers to plants, which have fruits or leaves, which resemble the Morinda genus also known as mulberries. It refers to the similar taste of the fruits with an occasional sting.
Common Name: Shinning Leaf Stinging Tree or Gympie Gympie or Gympie stinger.
Distribution:
Dendrocnide moroides is found south from Cape Tribulation in far north Queensland to the Mount Warning National Park and the Border Ranges National Park in New South Wales. It is found on and east of the Great Dividing Range.
https://avh.ala.org.au/occurrences/search?taxa=Dendrocnide+moroides#tab_mapView
Habitat Aspect Climate:
Dendrocnide moroides prefers full sun to dappled shade. It grows in well-developed rainforests, along moist riverine gullies, gallery forests or river flats. The altitude ranges from 100 meters ASL to 900 meters ASL.
The temperatures range from 4 degrees in July to 36 degrees in January.
The rainfall ranges from lows of 1000mm to 3200mm average per annum.
Soil Requirements:
Dendrocnide moroides prefers better quality light clays to medium clays. The soils are derived from decomposed basalts and shale. The soils pH ranges from 5pH to 6pH. It does not tolerate waterlogged soils however soils have even moisture throughout the year. Non saline soils to moderately saline soils are tolerated.
Height & Spread:
Wild Plants: 4m to 6m by 4m to 5m.
Characteristics:
Dendrocnide moroides grows as a strong upright small tree. The trunks are a light grey glabrous with the scars of fallen leaf basis visible on larger branches. The stems and branchlets are glabrous light green turning light fawn grey further down the stems with the leaf scars clearly visible from fallen leaves.
The light blue green velvety alternate leaves are broadly ovate. They measure 100mm to 250mm in length by 80mm to 210mm in width. The base is peltate while the apex is broad acute to broad apiculate. The lamina is concolourous while the lamina’s margin has regular teeth. Both the upper and lower laminas are densely covered in strong translucent echinate hairs. The mid vein is prominent below for half its length. Petioles are 100mm to 250mm in length.
Dendrocnide moroides is apparently the most virulent of the stinging trees to be stung by. My personal experiences tell me that they all cause severe burning sensations and it all depends on the degree of your own personal pain barrier and the amount of the venom injected. I am not prepared to volunteer for any live testing. The leaves are covered in silicon hairs. These break off on contact and penetrate the skin releasing a liquid which causes a very painful burning sensation to any part of the body that makes contact with the leaves or petioles. The pain can last for several hours or even weeks. It is more severe when showering in hot water over this period. I had heard that the juice of the cunjevoi or Alocassia brisbanensis is a remedy to lessen the pain. From experience this is a total fabrication or wives tale. It definitely does not work or at least it did not have any affect when I applied. I have been hit several times.
The liquid was first thought to be formic acid similar to that in a bee sting. Later scientist related the poison to histamines but now the poison is being tested with no conclusive results at hand. Until they know what is causing the pain or burning, my advice is to recognize the tree and give it a wide berth or at least treat it with great respect.
The dioecious inflorescences are born on panicles. The rachises are 120mm to 150mm in length. The flowers are unisexual, white and are born on 20mm to 25mm pedicels. The rachis and pedicels are glabrous bright green glossy and appear from the leaf axils. Dendrochnide moroides flowers from late November through to early February.
The fruits are an achene. They are 2mm long black and warty. The pedicels become swollen to 5mm in diameter and look like miniature pale pink to deep carmine raspberries. The fruits ripen from March through to April.
The fruits have a pleasant raspberry taste with a sharpness of lime added. Be very careful when handling the fruit as even when the fruit is eaten I have had the unpleasant surprise of a virulent hair or two breaking off in my mouth. Fortunately the pain within the mouth is short lived and not as virulent as those received from the leaves or petioles.
Wildlife:
Dendrochnide moroides leaves are attacked by beetles in the Chrysomelid family. The beautiful caterpillars of Theretra clotho also eats the leaves and young shoots. All the moths in the Lepidoptera family eat the leaves of Dendrocnide.
Cultivation:
Dendrocnide moroides is a beautiful large tree with attractive large velvety leaves that is not recommended for the small or even the medium size garden. small gardens may find a place hidden well back from paths and where children won?t be found playing.
The fruit was a staple part of the Australian Aborigines diet. The fruit; if collecting be very careful, is juicy similar to raspberry with lemon and sugar. They are quite refreshing but may contain the odd silicon rod to remind you that you are still dealing with Dendrocnide specie. Definitely worth the effort if you know how to handle and remove the fruits.
This is the best of the trees to grow for fruit as it fruits from an early age and can be maintained as a large shrub for the enthusiast. Plant the shrubs in rows 5 meters apart and plant individual shrubs at 5 meter centers for an orchard.
Pickers may be hard to find so all picking would have to be done by yourself. The fruit has a good shelf life and should demand good prices. Other problems associated with the commercial growing are weed control as the lawn mower would stir up fallen leaves and the chances of brushing against leaves is high as would be insurances. Once these minor difficulties have been overcome competition could see you in a monopoly or an oligopoly at worst to negotiate prices. Good Luck!
Propagation:
Seeds: Dendrocnide moroides‘s seeds do not require treatment before sowing. Sow fresh seeds directly into a seed raising mix and cover with 5mm of the mix. When the seedlings are 25 to 50 mm tall, prick them out and plant them into 50mm native tubes using a seed raising mix. Use gloves as the trees will have the stinging hairs even at this age.
Fertilize using Seaweed, fish emulsion or organic chicken pellets soaked in water on an alternate basis. Fertilize every two months.
Fertilize using Seaweed, fish emulsion or organic chicken pellets soaked in water on an alternate basis. Fertilize every two months until the plants are established then twice annually in early September or March to maintain health, vitality and better flowering.
Further Comments from Readers:
Hi reader, it seems you use The Bible of Botany a lot. That’s great as we have great pleasure in bringing it to you! It’s a little awkward for us to ask, but our first aim is to purchase land approximately 1,600 hectares to link several parcels of N.P. into one at The Pinnacles NSW Australia, but we need your help. We’re not salespeople. We’re amateur botanists who have dedicated over 30 years to saving the environment in a practical way. We depend on donations to reach our goal. If you donate just $5, the price of your coffee this Sunday, We can help to keep the planet alive in a real way and continue to bring you regular updates and features on Australian plants all in one Botanical Bible. Any support is greatly appreciated. Thank you.
In the spirit of reconciliation we acknowledge the Bundjalung, Gumbaynggirr and Yaegl and all aboriginal nations throughout Australia and their connections to land, sea and community. We pay our respect to their Elders past, present and future for the pleasures we have gained.
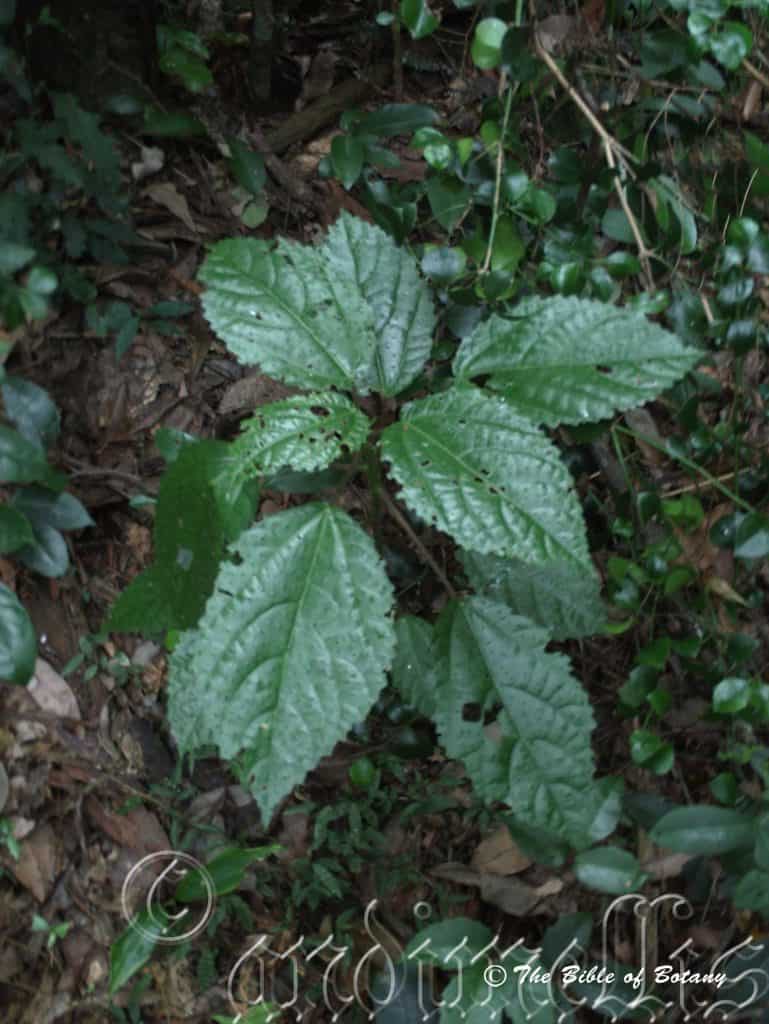
Mount Nebo Qld.
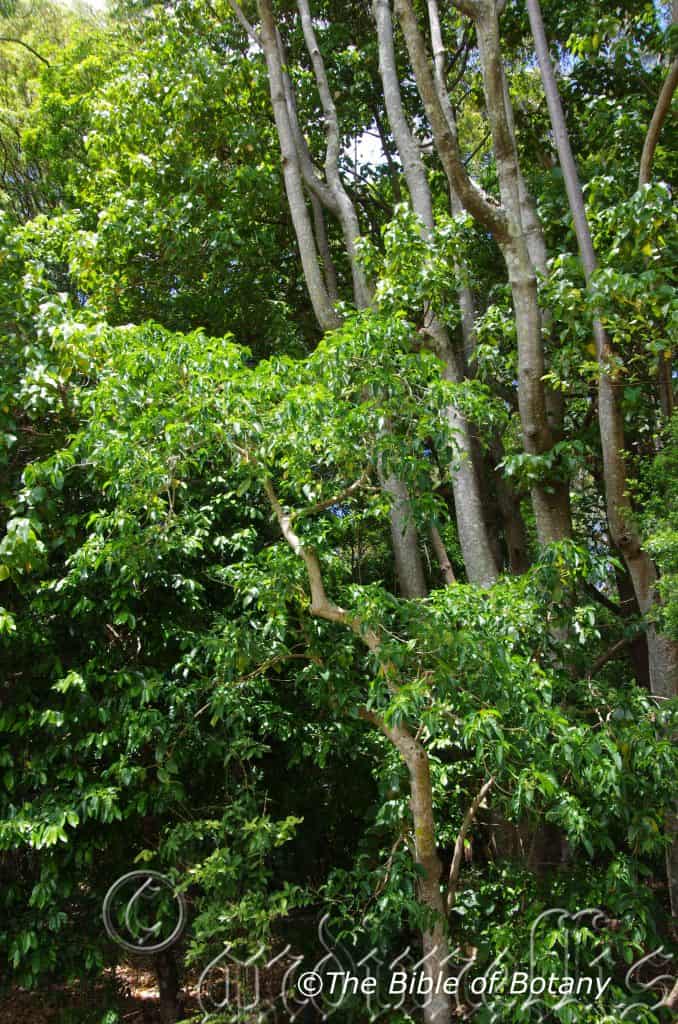
NCBG Coffs Harbour NSW
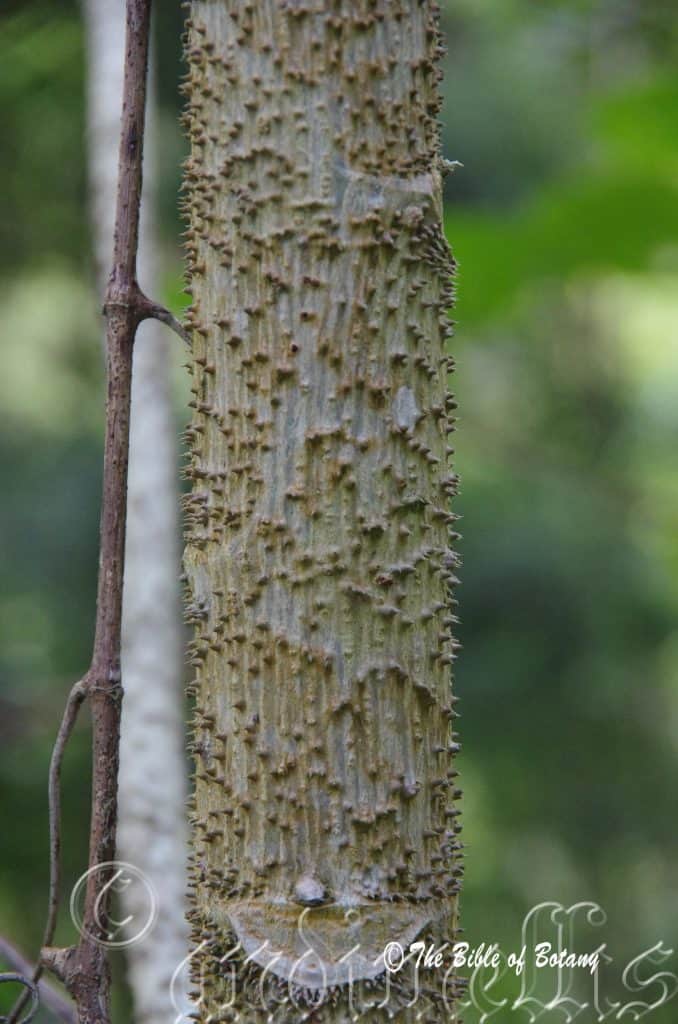
Dorrigo NSW
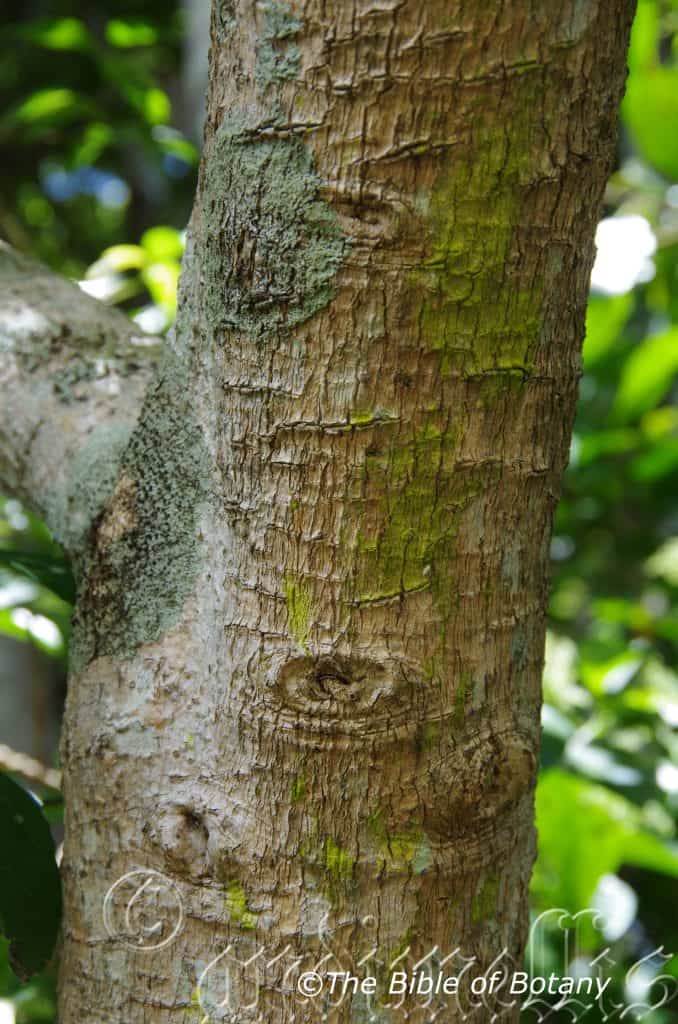
NCBG Coffs Harbour NSW
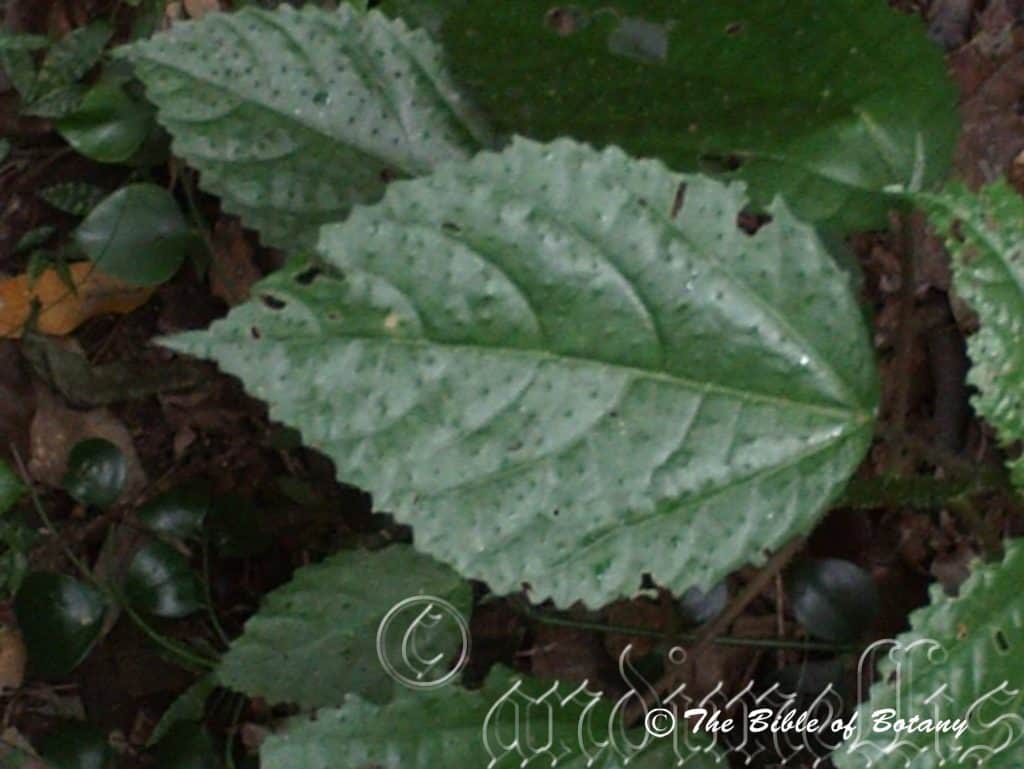
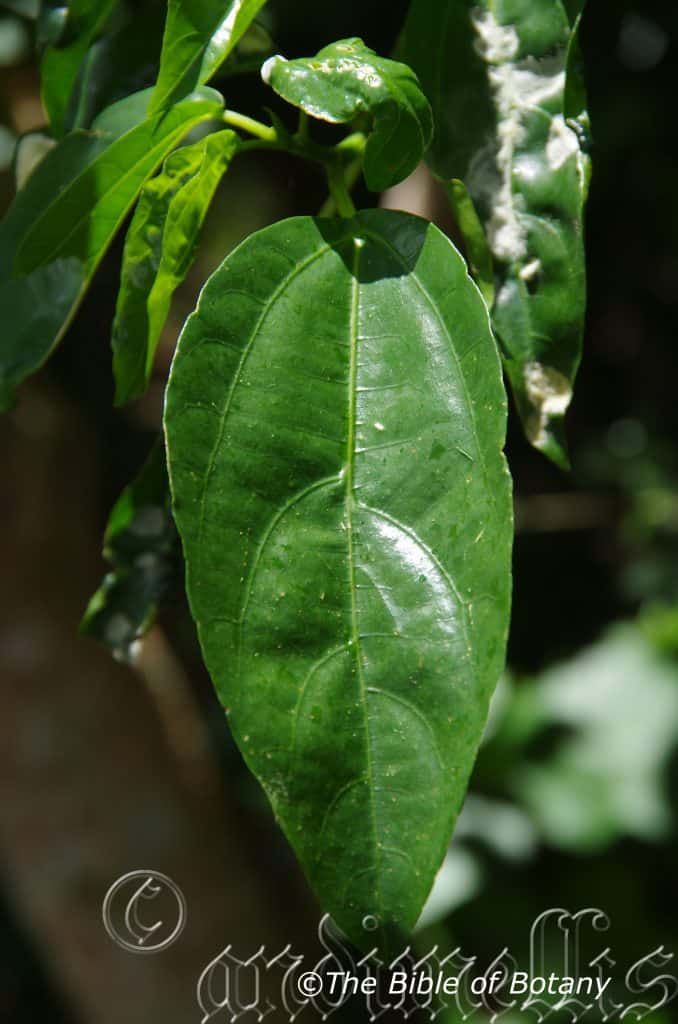
NCBG Coffs Harbour NSW
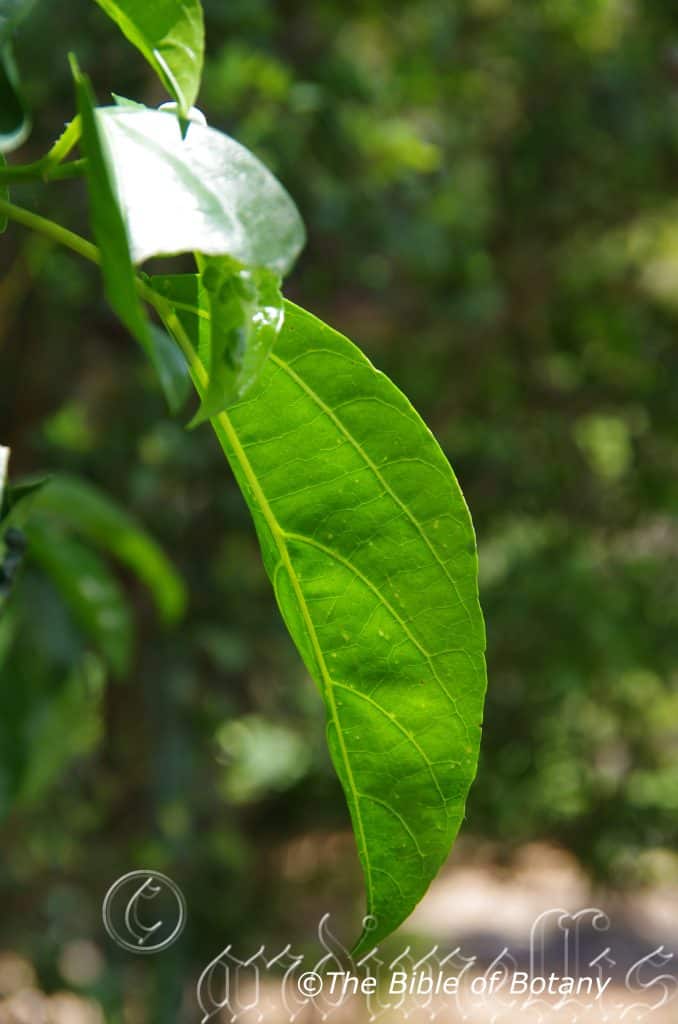
NCBG Coffs Harbour NSW
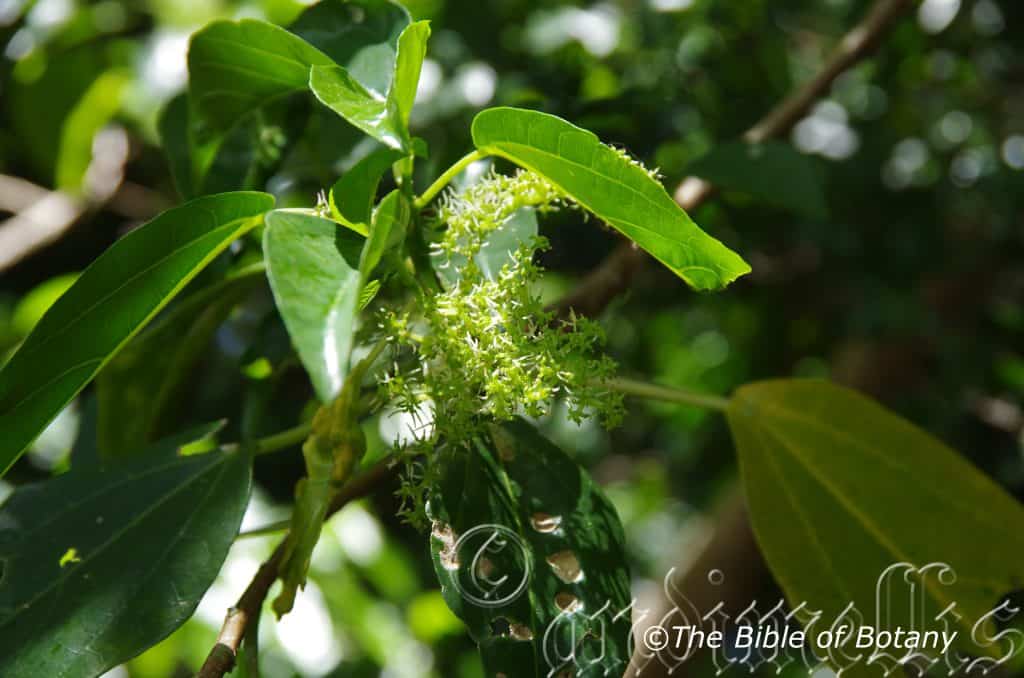
NCBG Coffs Harbour NSW
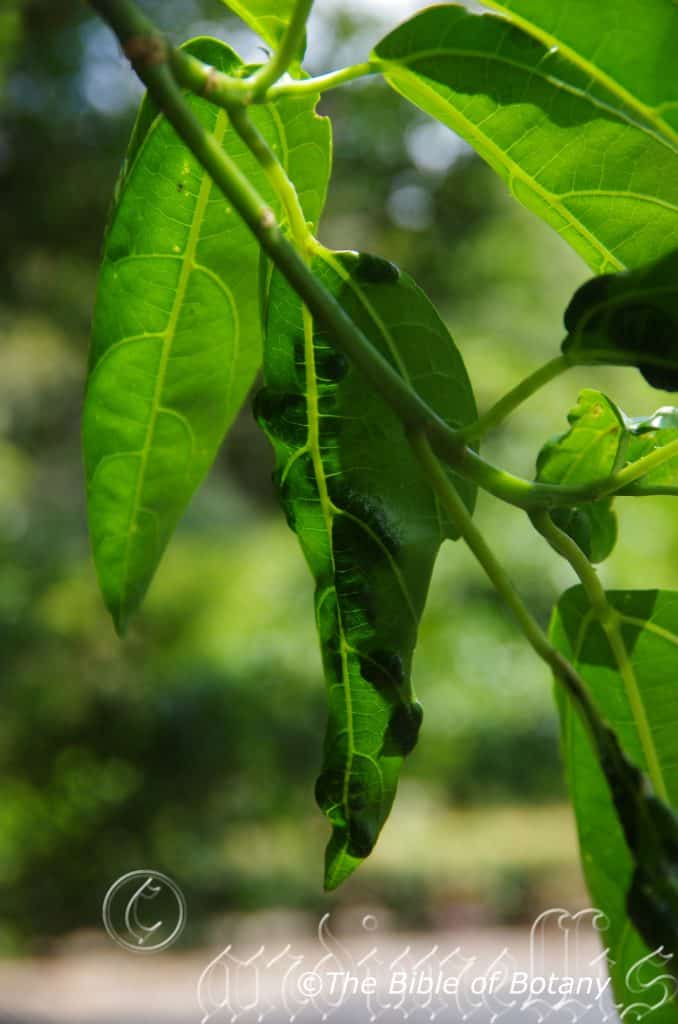
NCBG Coffs Harbour NSW
Dendrocnide photinophylla
Classification
Kingdom: Magnoliophyta
Division: Magnolopsidas
Order: Rosales
Family: Urticaceae
Genus: From Dendron, which is Ancient Greek for a tree and Knid, which is Ancient Greek for a nettle. It refers to the nettle type hairs, which are capable of yielding a severe stinging or burning sensation.
Species: From Fotos, which is Ancient Greek for light and Phullon/Phyllon, which is Ancient Greek for a leaf. It refers to the leaves, which are very glossy.
Common Name: Shinning Leaf Stinging Tree.
Distribution:
Dendrocnide photinophylla is found south from Cooktown in far north Queensland to the Richmond River west of Sydney in New South Wales. It is mainly found on and east of The Great Dividing Range.
https://avh.ala.org.au/occurrences/search?taxa=Dendrocnide+photinophylla#tab_mapView
Habitat Aspect Climate:
Dendrocnide photinophylla prefers full sun to dappled shade. It grows in warm subtropical rainforests to moist Eucalypt forests adjacent to well-developed rainforests. It is found in drier areas than the previously mentioned species of Dendrocnide. The altitude ranges from 40 meters ASL to 800 meters ASL.
The temperatures range from 2 degrees in July to 36 degrees in January.
The rainfall ranges from lows of 800mm to 3200mm average per annum.
Soil Requirements:
Dendrochnide photinophylla prefers better quality light gravelly clays to medium clays. The soils are usually derived from decomposed basalts and shale. The soils pH ranges from 5pH to 7pH. It does not tolerate waterlogged soils. Non saline soils to moderately saline soils are tolerated.
Height & Spread:
Wild Plants: 25m to 30m by 15m to 20m
Characteristics:
Dendrocnide photinophylla grows as a strong upright tree. The fluted or flanged trunks on old trees are brown glabrous. The stems and branchlets are glabrous brown with the leaf scars of fallen leaves.
The alternate leaves are elliptical to ovate. They measure 60mm to 130mm in length by 30mm to 80mm in width. The base is rounded while the apex is broad acuminate to apiculate. Juvenile leaves are usually cordate with tuberculate bumps where the virile hairs stand erect. The discolourous laminas are deep glossy green while the lower lamina is paler and dull or semi glossy. The lamina margin is usually crenate but can be entire. Petioles measure 20mm to 60mm in length.
The leaves are sparsely covered in silicon hairs. These hairs are not as virulent in Dendrocnide photinophylla as other species in quantity or pain. These break off on contact and penetrate the skin releasing a liquid which causes a very painful burning sensation to any part of the body that makes contact with the leaves or petioles. The pain can last for several hours or even weeks. It is more severe when showering in hot or cold water over this period. I had heard that the juice of the cunjevoi or Alocassia brisbanensis is a remedy to lessen the pain.
The liquid was first thought to be formic acid similar to that in a bee sting. Later scientist related the poison to histamines but now the poison is being tested with no conclusive results at hand. Until they know what is causing the pain or burning, my advice is to recognize the tree and give it a wide berth or at least treat it with great respect.
Inflorescences are born on panicles. The rachises are 50mm to 65mm in length. The flowers are white or pale creamy green and are born on 20mm to 25mm long pedicels. The rachis and pedicels are glabrous bright light green glossy and appear from the leaf axils. Dendrochnide photinophylla flowers from late November through to early February and again with a smaller flowering in July to August especially in the northern parts of its range.
The fruits are an achene. The achenes measure 2mm in length by 2mm in diameter black and glabrous. The pedicels become swollen to 6mm in diameter and look like miniature pale creamy green to pale creamy lemon or white raspberries hanging like a small bunch of grapes. The fruits ripen from March through to April.
The fruits have a pleasant raspberry taste with a sharpness of lemon added. Be very careful when handling the fruit as even when the fruit is eaten I have had the unpleasant surprise of a virulent hair or two breaking off in my mouth. Fortunately the pain within the mouth is short lived and far less virulent than that of the leaves.
Wildlife:
Dendrocnide photinophylla leaves are attacked by beetles in the Chrysomelid family when not attacking my Curcuba plants. The beautiful caterpillars of Theretra clotho also eats the leaves and young shoots. The green possum also consumes the fruits and leaves in northern rainforests.
Cultivation:
Dendrocnide photinophylla is a beautiful large tree with attractive large glossy, velvety leaves that is not recommended for the small or even the medium size garden. Large gardens may find a place hidden well back from paths and where children won’t be found playing.
The fruit was a staple part of the Australian Aborigines diet. The fruit if collecting be very careful is juicy similar to raspberry with lemon and sugar. They are quite refreshing but may contain the odd silicon rod to remind you that you are still dealing with Dendrocnide specie. Definitely worth the effort if you know how to handle and remove the fruits. This is the best plant of the Dendrocnide species to grow as the hairs if broken in the skin are nowhere as virulent as the other species. The fruits are amongst the best tasting fruit of the native fruits but care should be taken when removing and consuming them.
When it comes to cultivation this is the best of the trees to grow for fruit because the leaves are less painful when brushed against. The trees can probably be pruned as I have seen smaller trees damaged and reshoot from near the base indicating that small bushy shrubs could be cultivated. These smaller suckers have produced fruit. While the fruit is not as plentiful they could offer the keen enthusiast a start which could later spread to the other know genus.
Pickers may be hard to find so all picking would have to be done by yourself. The fruit has a very good shelf life and should demand good prices. Other problems associated with the commercial growing are weed control as the lawn mower would stir up fallen leaves and the chances of brushing against leaves is high as would be insurances. Once these minor difficulties have been overcome competition could see you in a monopoly or an oligopoly at worst to negotiate prices. Good Luck!
Propagation:
Seeds: Dendrocnide photinophylla‘s seeds do not require treatment before sowing. Sow fresh seeds directly into a seed raising mix and cover with 5mm of the mix. When the seedlings are 25mm to 50mm tall, prick them out and plant them into 50mm native tubes using a seed raising mix. Use gloves as the trees will have the stinging hairs even at this age.
Once the seedlings reach 150mm to 200mm in height plant them out into their permanent position.
Fertilize using Seaweed, fish emulsion or organic chicken pellets soaked in water on an alternate basis. Fertilize every two months until the plants are established then twice annually in early September or March to maintain health, vitality and better flowering.
Further Comments from Readers:
Hi reader, it seems you use The Bible of Botany a lot. That’s great as we have great pleasure in bringing it to you! It’s a little awkward for us to ask, but our first aim is to purchase land approximately 1,600 hectares to link several parcels of N.P. into one at The Pinnacles NSW Australia, but we need your help. We’re not salespeople. We’re amateur botanists who have dedicated over 30 years to saving the environment in a practical way. We depend on donations to reach our goal. If you donate just $5, the price of your coffee this Sunday, We can help to keep the planet alive in a real way and continue to bring you regular updates and features on Australian plants all in one Botanical Bible. Any support is greatly appreciated. Thank you.
In the spirit of reconciliation we acknowledge the Bundjalung, Gumbaynggirr and Yaegl and all aboriginal nations throughout Australia and their connections to land, sea and community. We pay our respect to their Elders past, present and future for the pleasures we have gained.
Bushland Beach Qld.
The Pinnacles NSW
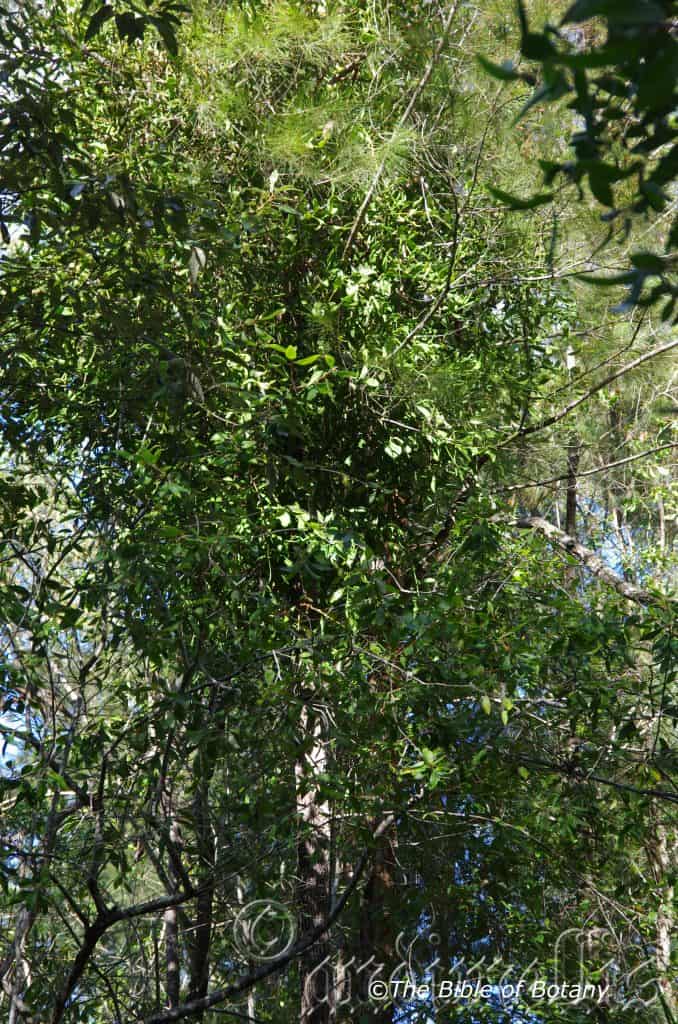
The Pinnacles NSW
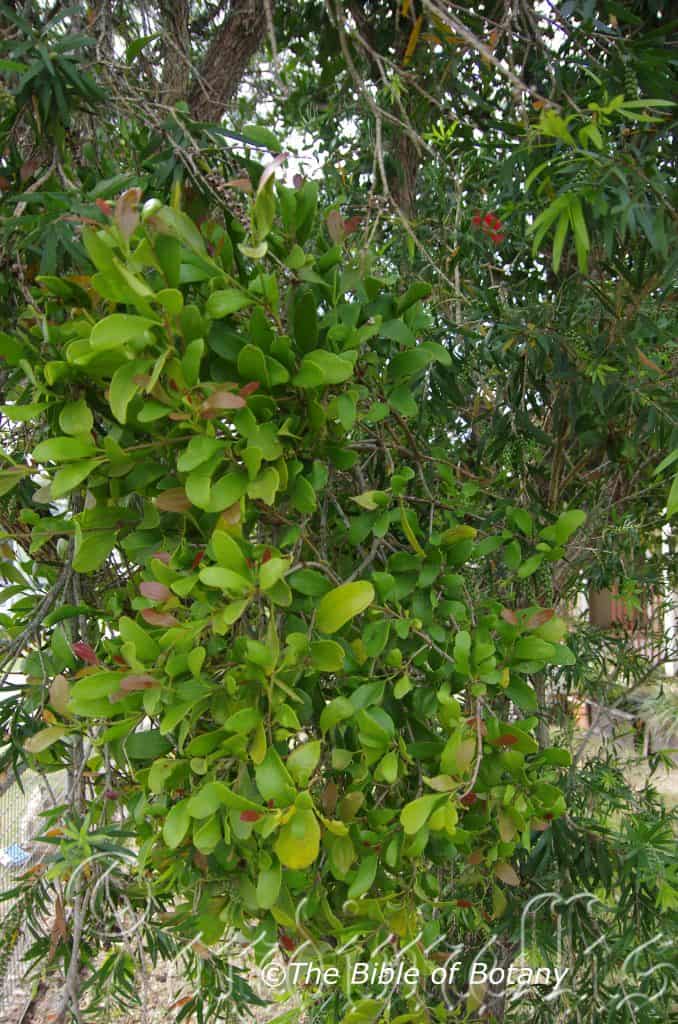
Woodburn Police Station NSW
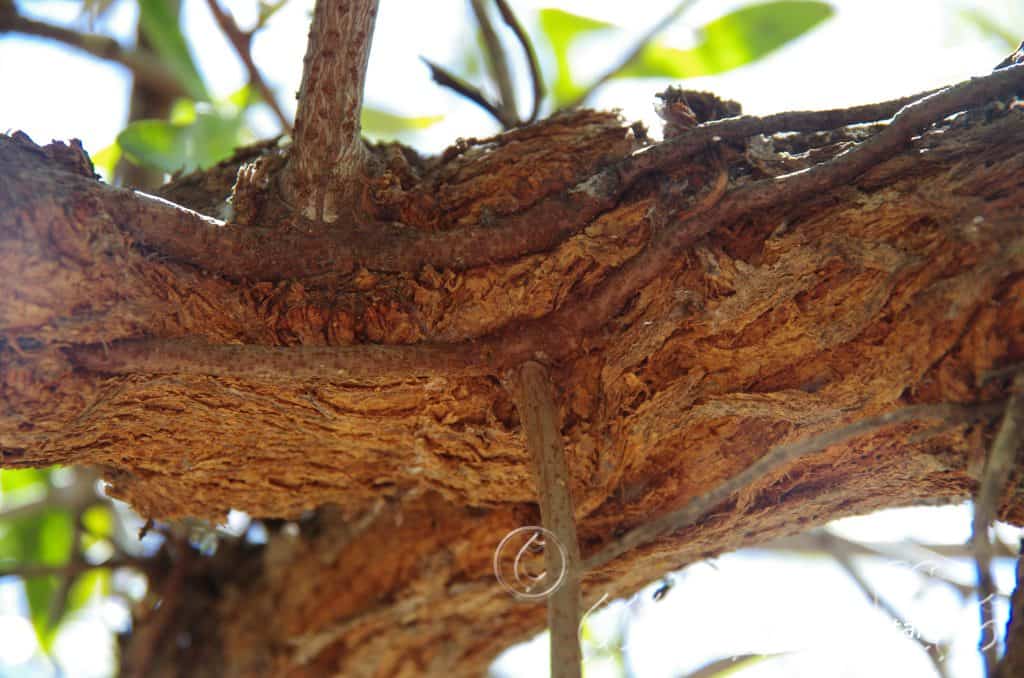
Author’s Garden The Pinnacles NSW
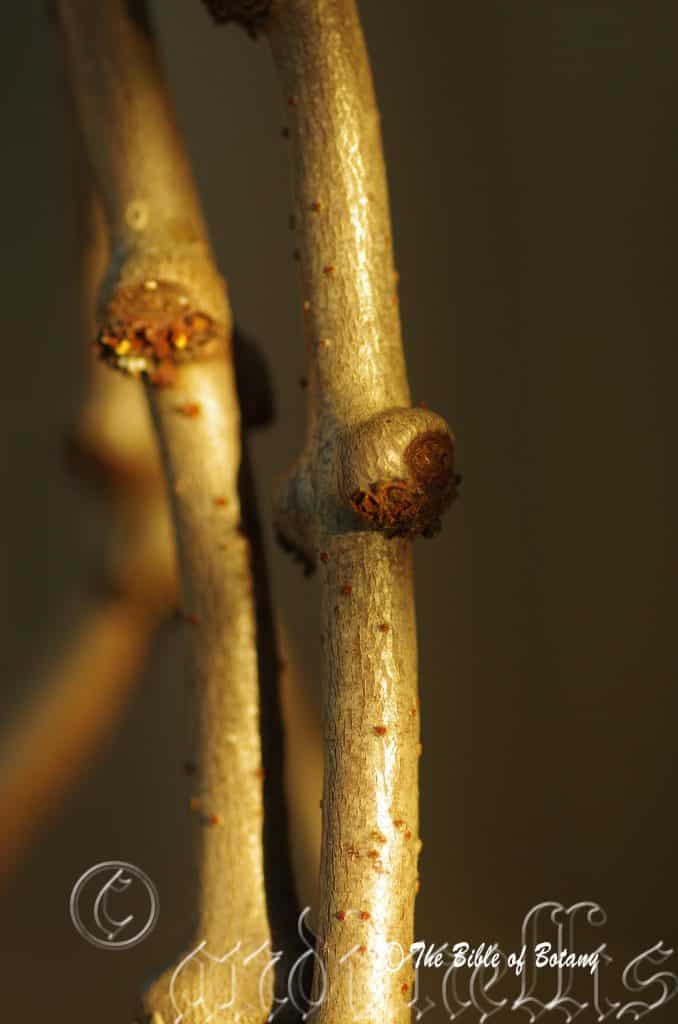
Condon Qld.
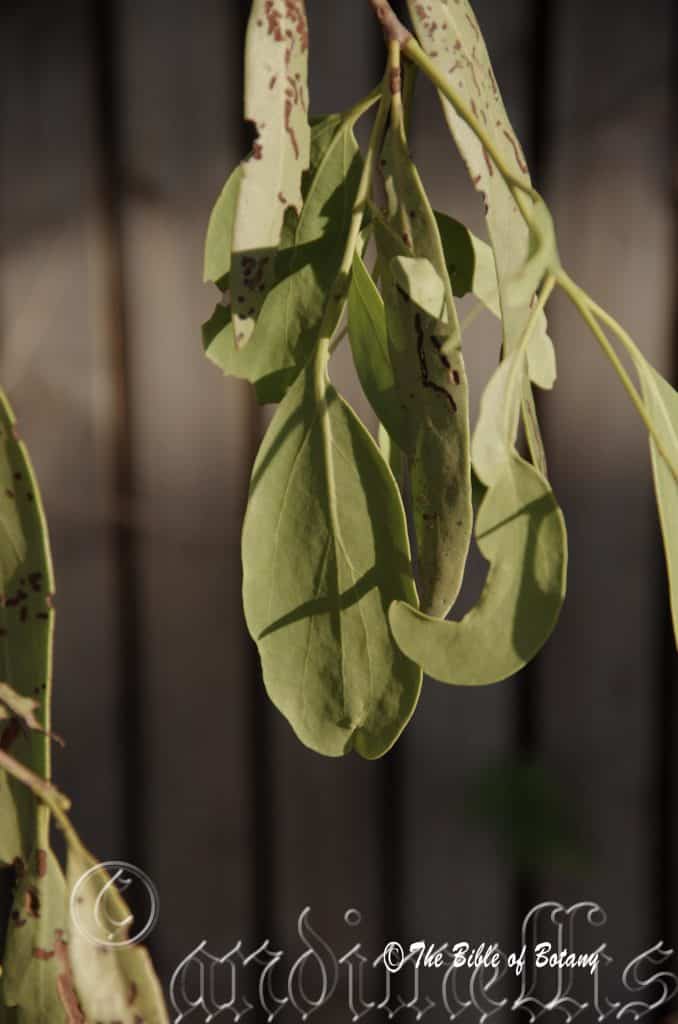
Condon Qld.
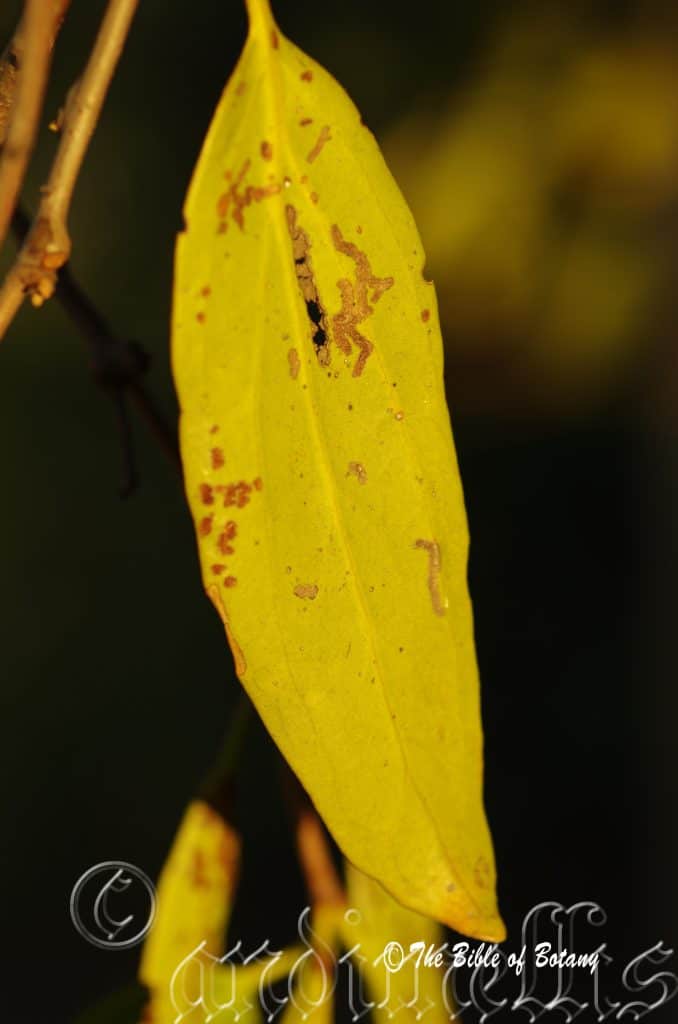
Condon Qld.

Bushland Beach Qld.
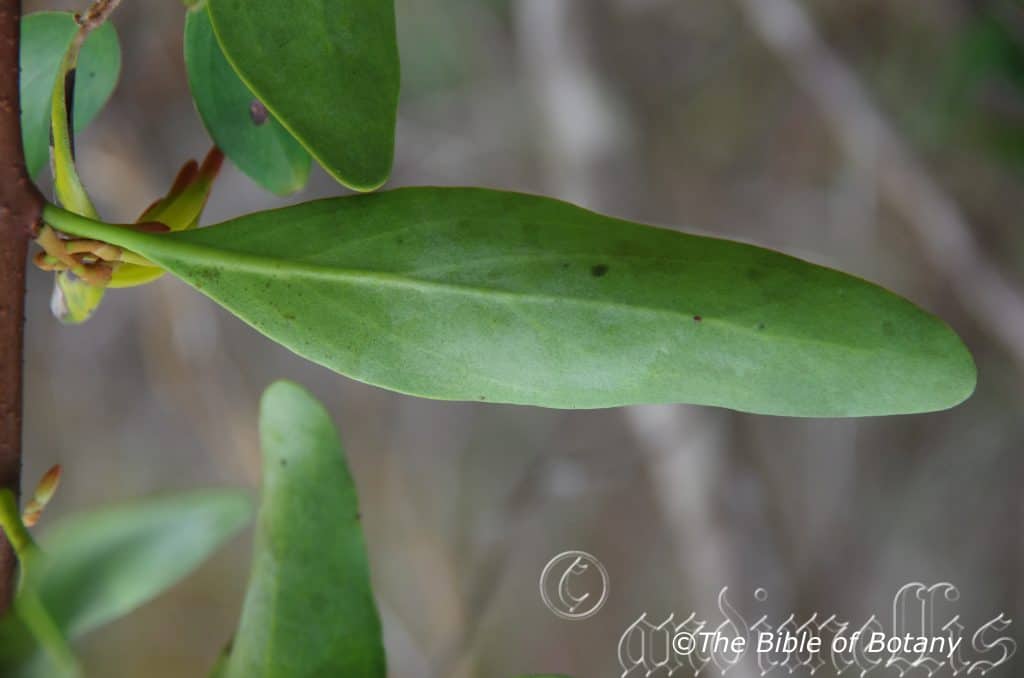
The Pinnacles NSW
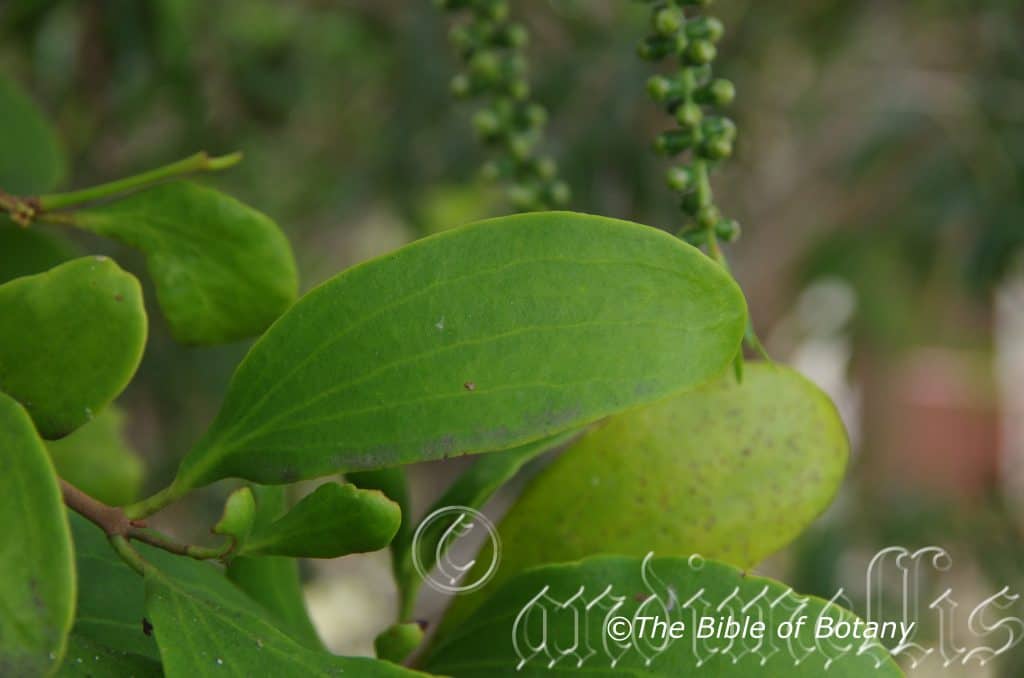
Woodburn Police Station NSW
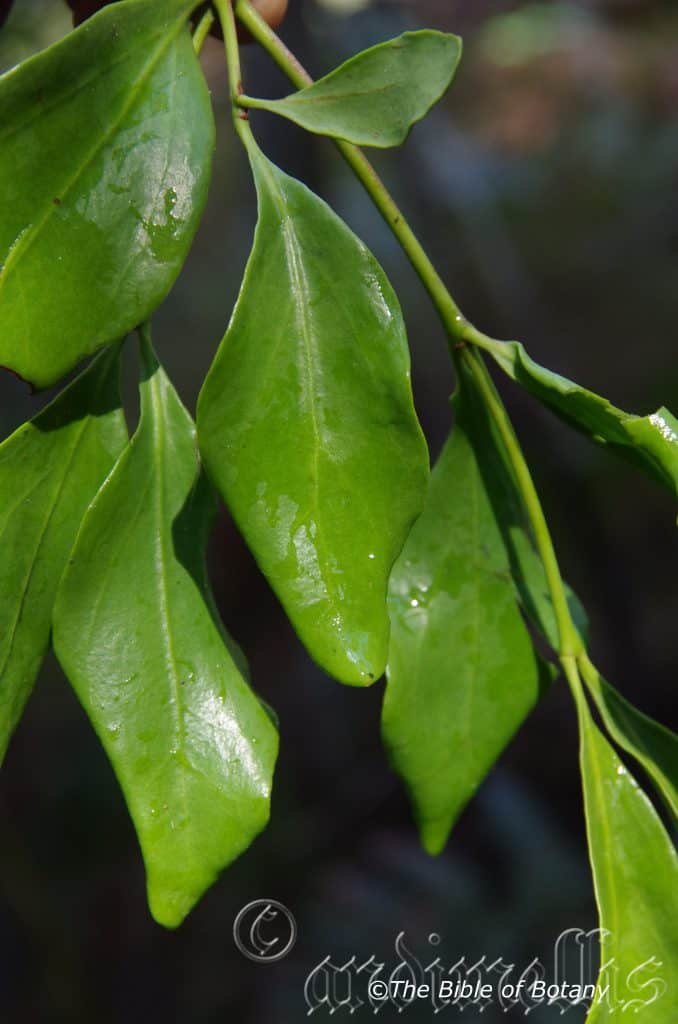
The Pinnacles NSW
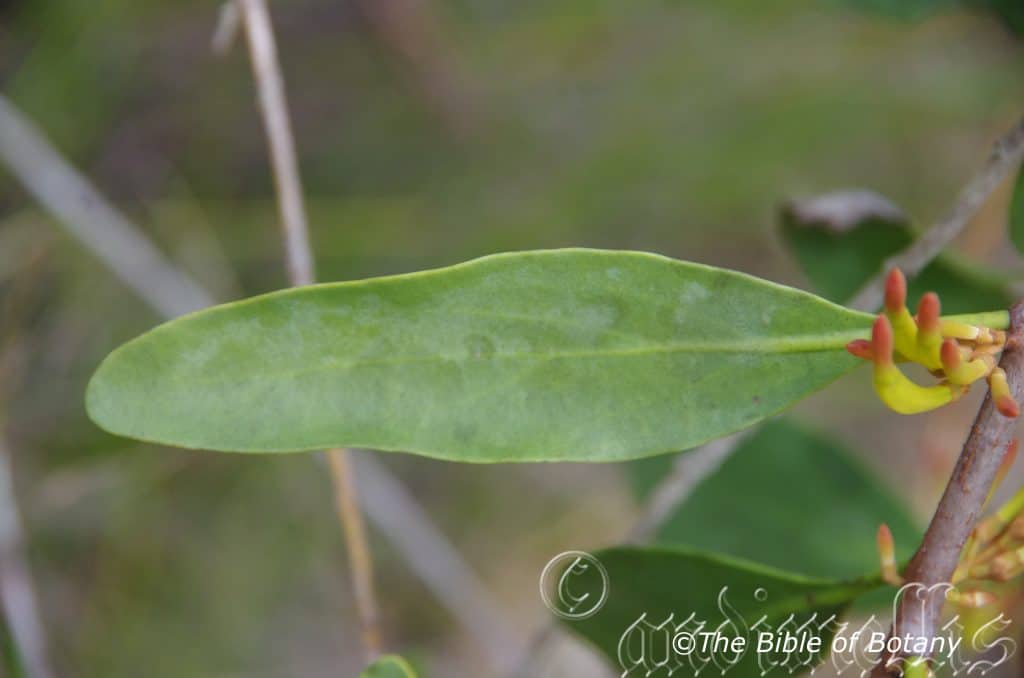
The Pinnacles NSW
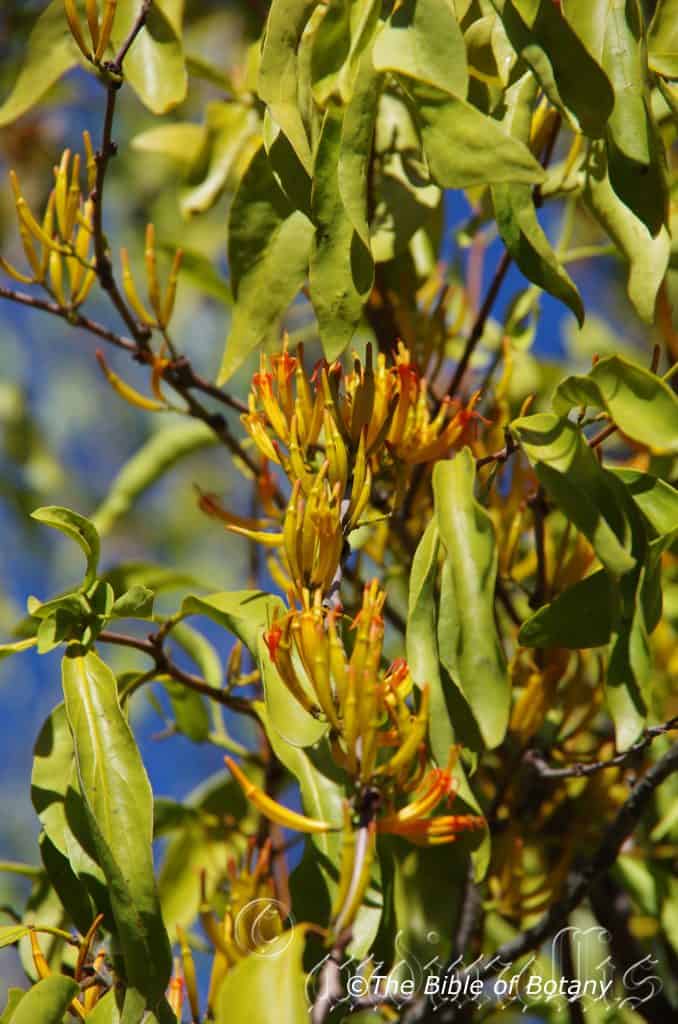
Bushland Beach Qld.
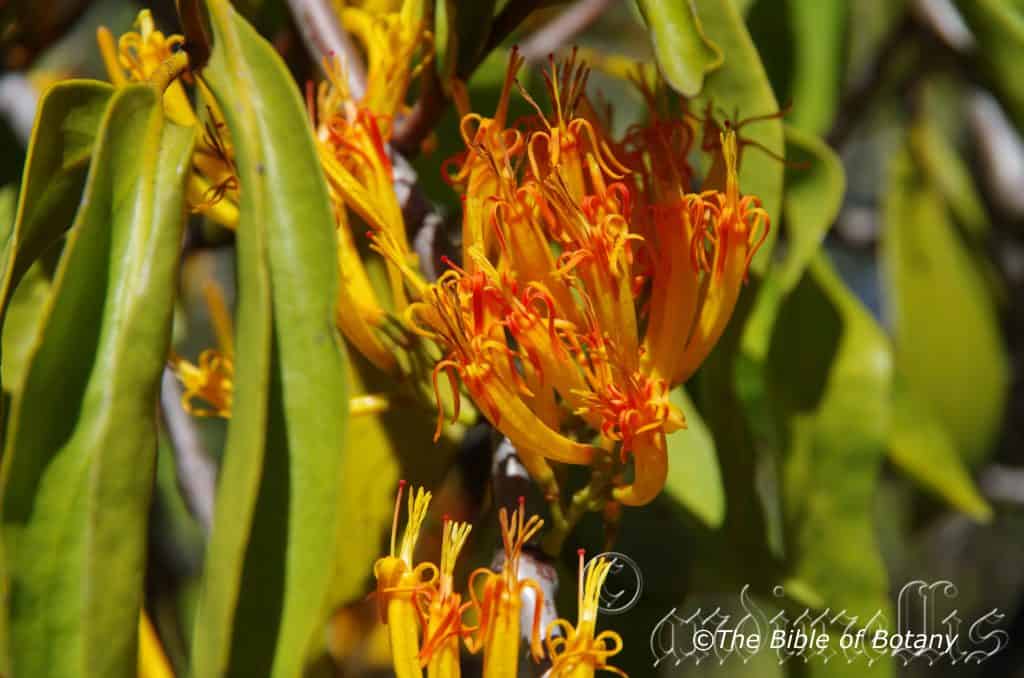
Bushland Beach Qld.
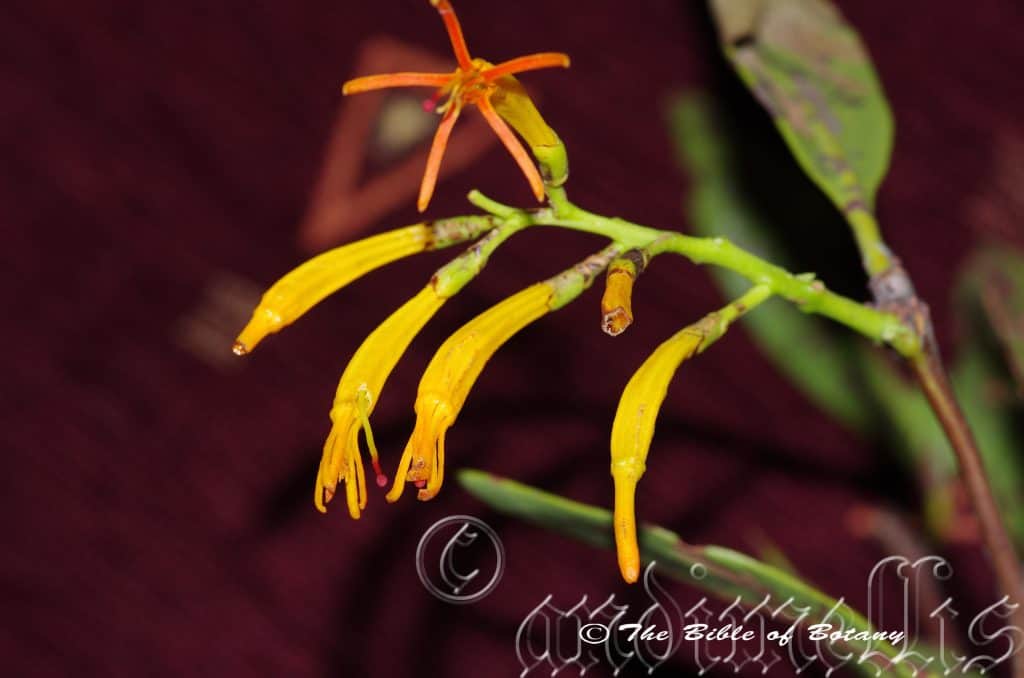
Condon Qld.
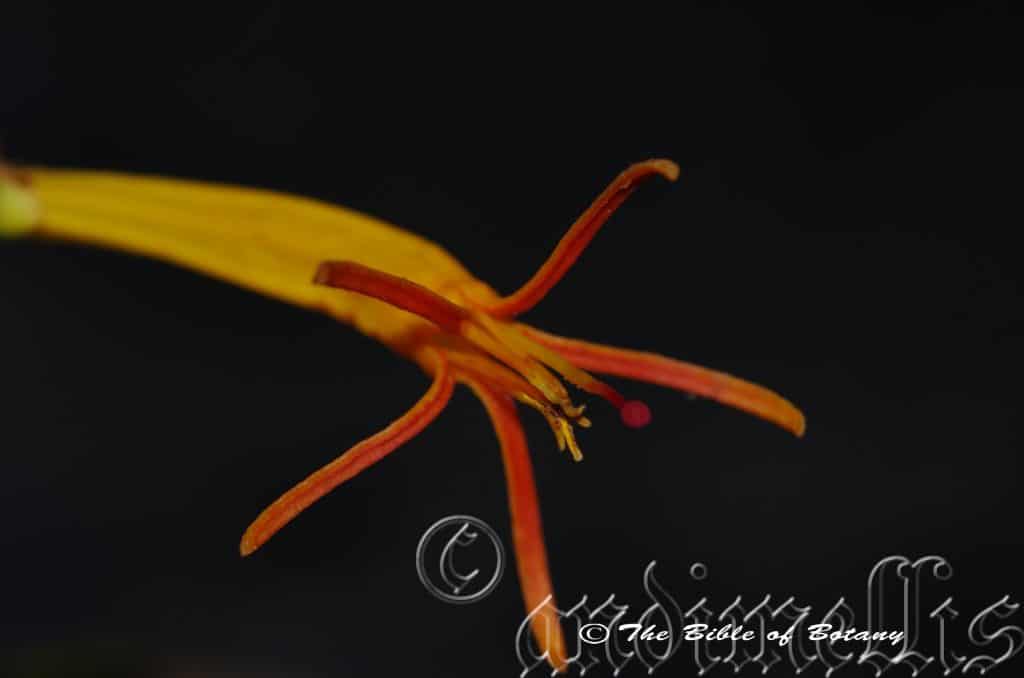
Condon Qld.
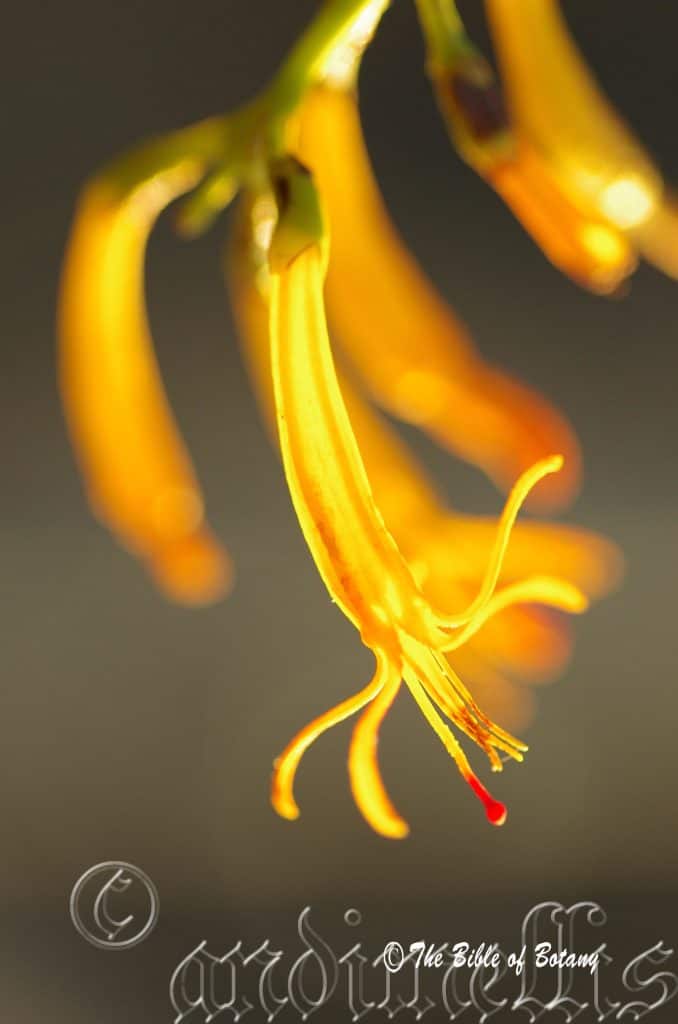
Condon Qld. using ultra violet light.
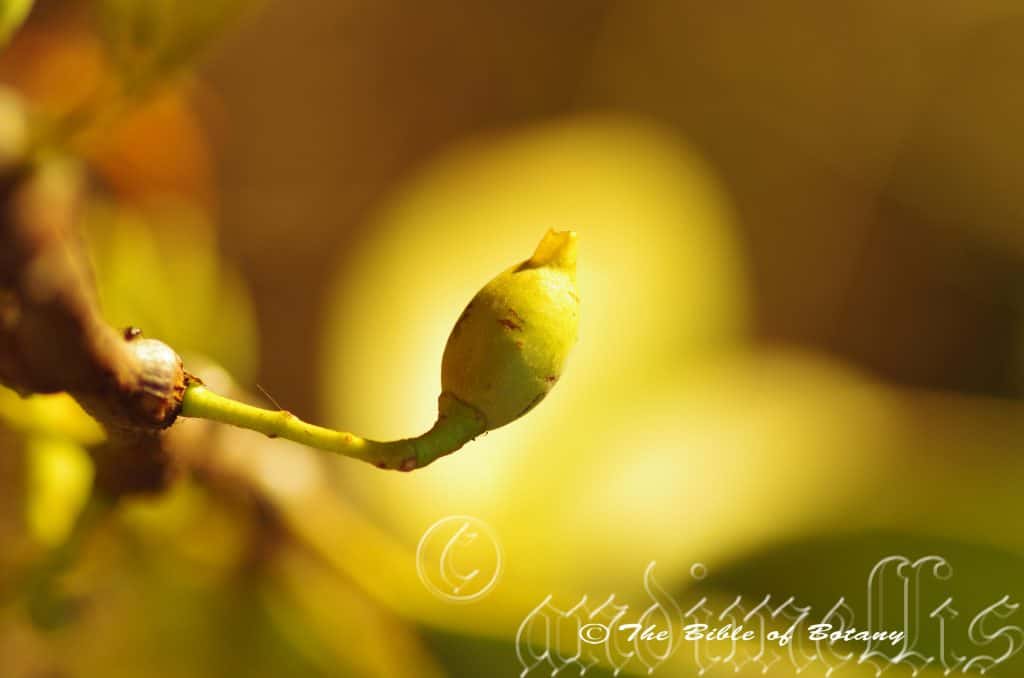
Condon Qld. using ultra violet light.
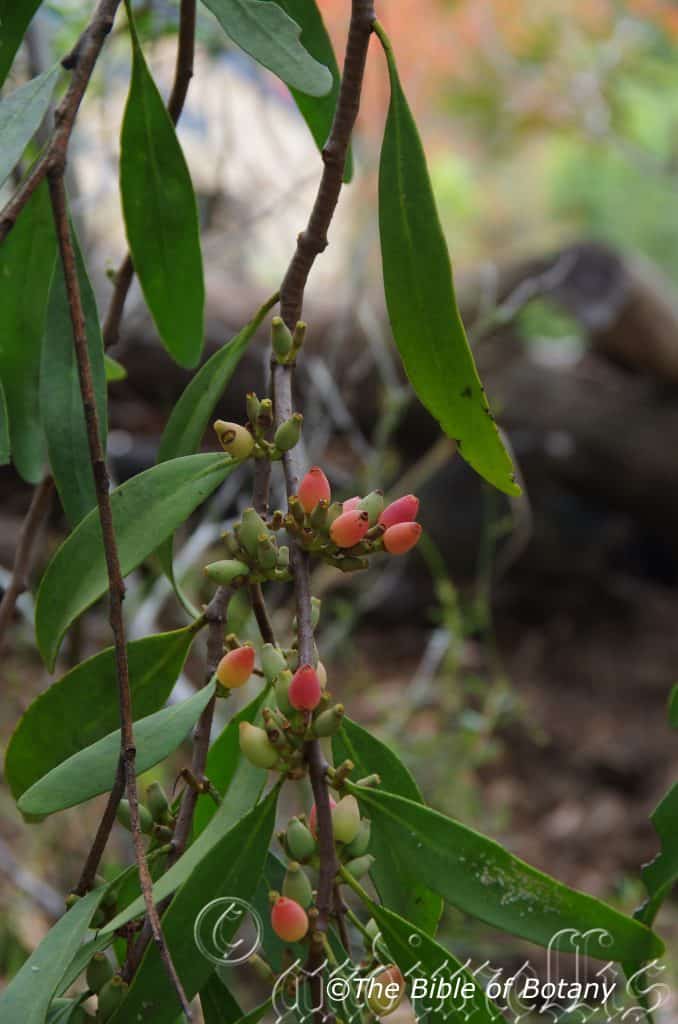
Author’s Garden The Pinnacles NSW
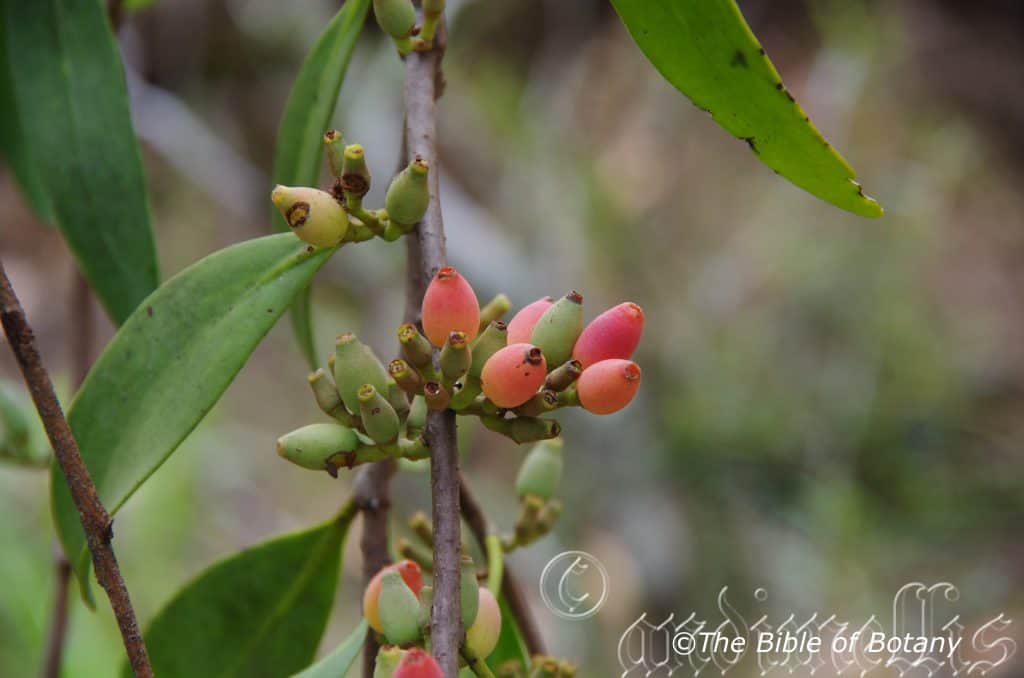
Author’s Garden The Pinnacles NSW
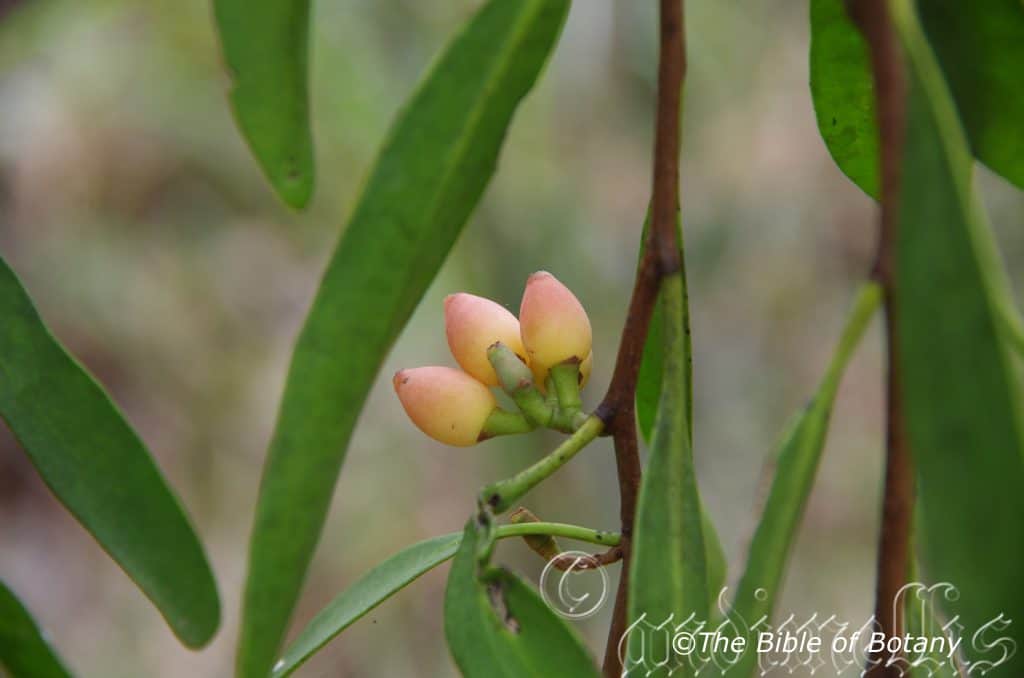
Author’s Garden The Pinnacles NSW
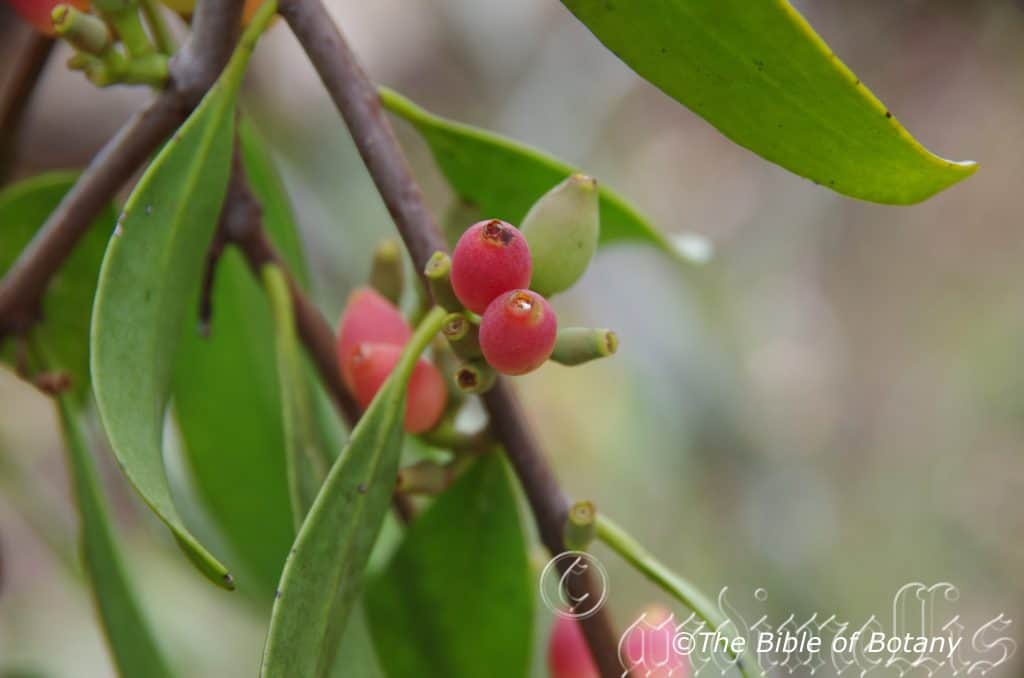
Author’s Garden The Pinnacles NSW

Delias nigrina chrysalis Author’s garden The Pinnacles NSW
Brush tail possum?Trichosurus vulpecula regurgitation of seeds found on the ground at sunrise Author’s Garden The Pinnacles NSW
Dendrophthoe vitellina
Classification
Unranked: Eudicots
Unranked: Core Eudicots
Order: Santalales
Family: Loranthaceae
Genus: From Dendron, which is Ancient Greek for a tree and Phthinein, which is Ancient Greek for to waste away. It refers to many diseases and plant fungi which are parasitic or hemi parasitic and usually lead to the death of its host.
Species: From Vitellinus, which is Latin for an egg yolk and Ina, which is Latin for to change the noun into an adjective. It refers to flowers, which resemble the deep yellow-orange colour of an egg yolk.
Common Name: Long Flowered Appostle Mistletoe.
Distribution:
Dendrophthoe vitellina is found around Darwin and Wessel Marchinbar Islands in the Northern Territory.
In the east it is found south from the tip of Cape York Peninsula in far north Queensland to Mallacoota in north eastern Victoria.
https://avh.ala.org.au/occurrences/search?taxa=Dendrophthoe+vitellina#tab_mapView
Habitat Aspect Climate:
Dendrophthoe vitellina grow in full sun to dappled shade as a parasitic plant mainly favouring Myrtaceae as their hosts. It is found in both dry and moist schlerophyll forests, closed Eucalyptus forests and open woodlands. The altitude ranges from 10 meters ASL to 1000 meters ASL.
The temperatures range from minus 4 degrees in July to 36 degrees in January.
The rainfall ranges from lows of 800mm to 3200mm average per annum.
Soil Requirements:
The host plants grow in a wide variety of soils.
Height & Spread:
Wild Plants: 1m to 2m by 1m to 2m.
Characteristics:
Dendrophthoe vitellina is a strong vigorous parasite with deep grey-brown haustorium. The plants are with or without epicortical runners. The pendent stems are semi glossy grey-brown while the new growth is covered in brown tomentose hairs.
Dendrophthoe vitellina‘s alternate to subopposita leaves are narrow lanceolate to elliptical and measure 40mm to 160mm in length by 6mm to 30mm in width. The petioles measure 3mm to 20mm in length. The bases are attenuate while the apex are obtuse. The concolourous laminas are grey-green, dull blue-green or dull greensand glabrous. The laminas are flat, recurve slightly upwards from the mid vein to the margins and are flat or decurve near the apexes. The laminas margins are entire.
The inflorescences of Dendrophthoe vitellina are born in clusters and short racemes from the leaf axils. The racemes measure 5mm to 20mm in length. There are 5 to 20 individual flowers in the cluster and racemes. The pedicels measure 1.5mm to 4mm in length. The linear bracts measure 1.2mm to 1.6mm in length. The grey-green calyxes are covered in brown tomentose hairs and scales. The calyxes including the dimorphic lobes measure 3mm to 4mm in length. The yellow, orange or rarely red corollas measure 25mm to 50mm in length by 5mm to 10mm in diameter. The corollas are covered in brown tomentose hairs. The yellow to red corolla lobes measure 5mm to 12mm in length.
The pale yellow exserted anthers measure 5mm to 10mm in length.
The ovary is covered in brown tomentose hairs and measures 2.5mm to 3mm in length by 2.5mm to 3mm in diameter. The red, glabrous, exserted styles measure 30mm to 60mm in length.
The fruits of Dendrophthoe vitellina are ovoidal drupes. The drupes measure 10mm to 15mm in length by 4.5mm to 12.The green drupes turn yellow to carmine-red when ripe.
Wildlife:
Dendrophthoe vitellina supports several small birds which are responsible for distribution of the seeds by consuming the fruits. The most common is the beautiful little Mistletoe Bird (Dicaeum hirundinaceum). The Lewin honeyeater (Meliphaga lewinii) has been observed eating the fruits.
The list of butterflies certainly indicates where the plants are vulnerable. The main butterflies that feed on the leaves are Purple Azure Ogyris genoveva, the Imperial White Delias harplyce, and the Northern Jezabel Delias argenthona.
The fleshy fruit is consumed by the Brushtail possum Trichosurus vulpecula, and probably other possums. The last photo appears to be fruits regurgitated after a pig out or should I say a Possum out after a big night out in our garden. Obviously had a gut full!
Cultivation:
Dendrophthoe vitellina is not worthy of cultivation, as it will cause decline in smaller host plants. However the plants will make great conversation pieces especially when in flower or for the edible fruits. For those who wish to grow a plant or have one already existing on the block. It makes an interesting addition to the garden. It is a great study feature for children and adults alike. The seeds must be placed onto the branches of the selected specie mentioned in the chapter Parasitic Plants for their best chance of survival.
Propagation:
Seeds:
Dendrophthoe vitellina can be cultivated by taking the fruits and squeezing the seeds out onto the branch of a shrub or tree that is not particularly wanted using the viscous flesh as the glue. Germination usually takes place within a couple of days, with the haustoria noticeable at the same time.
As can be seen on the photo using light from low wattage bulbs the effect was striking and may produce similar but different results under ultra violet light as well. If you have some please forward so other readers can observe the differences under different light formats.
Further Comments from Readers:
Hi reader, it seems you use The Bible of Botany a lot. That’s great as we have great pleasure in bringing it to you! It’s a little awkward for us to ask, but our first aim is to purchase land approximately 1,600 hectares to link several parcels of N.P. into one at The Pinnacles NSW Australia, but we need your help. We’re not salespeople. We’re amateur botanists who have dedicated over 30 years to saving the environment in a practical way. We depend on donations to reach our goal. If you donate just $5, the price of your coffee this Sunday, We can help to keep the planet alive in a real way and continue to bring you regular updates and features on Australian plants all in one Botanical Bible. Any support is greatly appreciated. Thank you.
In the spirit of reconciliation we acknowledge the Bundjalung, Gumbaynggirr and Yaegl and all aboriginal nations throughout Australia and their connections to land, sea and community. We pay our respect to their Elders past, present and future for the pleasures we have gained.
xxxxxxxxxxxxxxxxxxxxxxxxxxxxxxxxxxxxxxxxxxxxxDenhamia bilocularis
Classification:
Division:
Unranked: Eudicots
Order: Celastrales
Family: Celastraceae
Subfamily: Celastriodeae
Genus: Is named in honour of Dixon Denham; 1786-1828, who was an English explorer in Africa and fought in the Battle of Waterloo.
Species: From Bi/Bis, which are Greek/Latin for two and Loculus, which is Latin for an apartment. It refers to a fruit having two locules or compartments.
Common Name: Orange Bark.
Distribution:
Denhamia bilocularis is found in several disjunct populations south from the Daintree National Park in far north Queensland to near Kempsey on the north coast of New South Wales. I have seen several reports/photos of the plant existing on Cape York Peninsula but have no conclusive evidence that I consider reliable.
https://avh.ala.org.au/occurrences/search?taxa=Maytenus+bilocularis#tab_mapView
Habitat Aspect Climate:
Denhamia bilocularis prefers dappled light to full sun. It grows adjacent to moist rain forests in dry rainforests, moist Eucalyptus forests or gallery forests. The altitude ranges from 30 meters ASL to 850 meters ASL.
The temperatures range from minus 3 degrees in August to 37 degrees in January.
The rainfalls range from lows of 500mm to an average of 2500mm.
Soil Requirements:
Denhamia bilocularis prefers average quality soils sandy loams to medium clays where leaf litter accumulates. The soils are derived from decomposed sandstone, laterites, shale, brown basalts or black basalts. The soils pH. ranges from 6pH to 7pH. It does not tolerate waterlogged soils. Non saline soils to moderately saline soils are tolerated.
Height & Spread:
Wild Plants: 8m to 10m by 3m to 4.5m.
Characteristics:
Denhamia bilocularis’s trunk is pale creamy brown, pale creamy grey or a pale rusty-brown. The branchlets are similar to the trunks colouration but lack the markings caused by lichens and mosses.
Denhamia bilocularis’ alternate slightly asymmetrical leaves are oblong to ovate or obovate and measure 30mm to 100mm in length by 15mm to 35mm in width. It is very variable even on the same plant. The base is cuneata to attenuate while the apex is acuminate to broadly acuminate. The discolourous laminas are deep sea-green semi glossy and glabrous on the upper lamina while the lower lamina is much paler. Immature leaves are pale lime green to pale lime-green with a rusty-brown tinge and glossy. The margins are unevenly armed with rigid spinose teeth which become more crenate near the base. The mid vein is prominent below and distinctly visible from above. The petiole measures 2mm to 5mm in length while.
The inflorescence of Denhamia bilocularis is a short raceme born from the leaf axils. They measure 12mm to 20mm in length by 12mm to 20mm in diameter. The pedicels measures 2mm to 2.5mm in length The 4 or 5 semi-elliptical sepals are cream to pale creamy-green and measure 0.2mm to 0.5mm in length. The 4 or 5 semi-elliptical petals are cream to pale green and measure 1.5mm to 2mm in length by 1.5mm to 2mm in width. The short, stout style measures 2mm to 2.5mm in length and is lime green while the 4 or 5 white stamens measure 1.5 to 2mm in length. The anthers are white. The flowers appear from September to December.
Denhamia bilocularis’s fruit is a small, globose to obovoid glabrous capsule. The capsules measure 5mm to 8mm in length by 4mm to 6.5mm in diameter. The 2 valved, coriaceous capsules are bright yellow to bright orange-yellow. The single or more often 2 black seeds measure 2.5mm to 4mm in length by 2mm to 3.5mm in diameter and are surrounded by a bright orange-yellow to bright yellow aril. The capsules ripen from late March to early August.
Wildlife:
Maytenus bilocularis wildlife is unknown to the author.
Cultivation:
Denhamia bilocularis makes an excellent medium size tree for a park like scene or specimen tree in the garden. It always look green and fresh especially where adequate ground moisture is retained, with a deep organic mulch, whether it is grown in light shade or full sun. It is very suitable on sandy clay soils to medium clays. It is most suitable for small gardens close to the coast in warm temperate, subtropical, tropical or even semi-arid gardens. As a garden subject it will grow from 5 meters to 8 meters by 3 meters to 6 meters wide when grown in the open. It is cold tolerant to temperatures at least as low as minus 3 degrees once established. It is however very slow growing and even with a good fertilizing program and moisture will grow less than 1 meter a year.
It also looks good adjacent to small areas of bush close to paths or the house so its beautiful glossy foliage can be admired frequently. When planted in small groups of 2 or 3 it creates dense shade for other shade loving plants.
It can be used as a shade tree in semi protected areas. It is an excellent tree for an addition to a dry rainforest garden. When planting the trees in a rainforest try to place them near the edge so the proliferation of flowers and colourful fruits can be fully enjoyed and their natural bushy shape is not interfered with.
It is useful as a backdrop small tree contrasting with smaller finer leaf shrubs that are planted in the foreground. This gives the impression that it likes being the center of attention which they deserve.
The prickly leaf forms make excellent hedge rows if kept trimmed or a tall dense boundary line can be made. Try using it in an informal manner in front of buildings to break up hard lines and to soften structures. This can be done by Planting both shrubs and trees together in unequal free flowing curves using height and depth.
It could make an ideal plant for a Bonsai collector.
The leaves can be used in floral arrangements but take note that growth is very slow and recovery is just as slow.
Propagation:
Seeds: Denhamia bilocularis‘s seeds can be sown directly into a seed raising mix. Cover the seeds with 2mm to 3mm of fine weed free mulch and keep moist. Place the tray in a warm sunny position. When the seedlings are 30mm to 50mm tall, prick them out and plant them into 50mm native tubes using a good organic mix.
Once the seedlings reach 150mm to 200mm in height they can be planted out into their permanent position.
Fertilize using seaweed, fish emulsion or organic chicken pellets soaked in water on an alternate basis. Fertilize every two months until the plants are established then annually in early September to October to maintain health, vitality and better flowering.
Further Comments from Readers:
Hi reader, it seems you use The Bible of Botany a lot. That’s great as we have great pleasure in bringing it to you! It’s a little awkward for us to ask, but our first aim is to purchase land approximately 1,600 hectares to link several parcels of N.P. into one at The Pinnacles NSW Australia, but we need your help. We’re not salespeople. We’re amateur botanists who have dedicated over 30 years to saving the environment in a practical way. We depend on donations to reach our goal. If you donate just $5, the price of your coffee this Sunday, We can help to keep the planet alive in a real way and continue to bring you regular updates and features on Australian plants all in one Botanical Bible. Any support is greatly appreciated. Thank you.
In the spirit of reconciliation we acknowledge the Bundjalung, Gumbaynggirr and Yaegl and all aboriginal nations throughout Australia and their connections to land, sea and community. We pay our respect to their Elders past, present and future for the pleasures we have gained.
Stockyard Creek Coaldale NSW

Morgan’s Camp Trail Fortis Creek National Park NSW

Morgan’s Camp Trail Fortis Creek National Park NSW
Morgan’s Camp Trail Fortis Creek National Park NSW
Morgan’s Camp Trail Fortis Creek National Park NSW
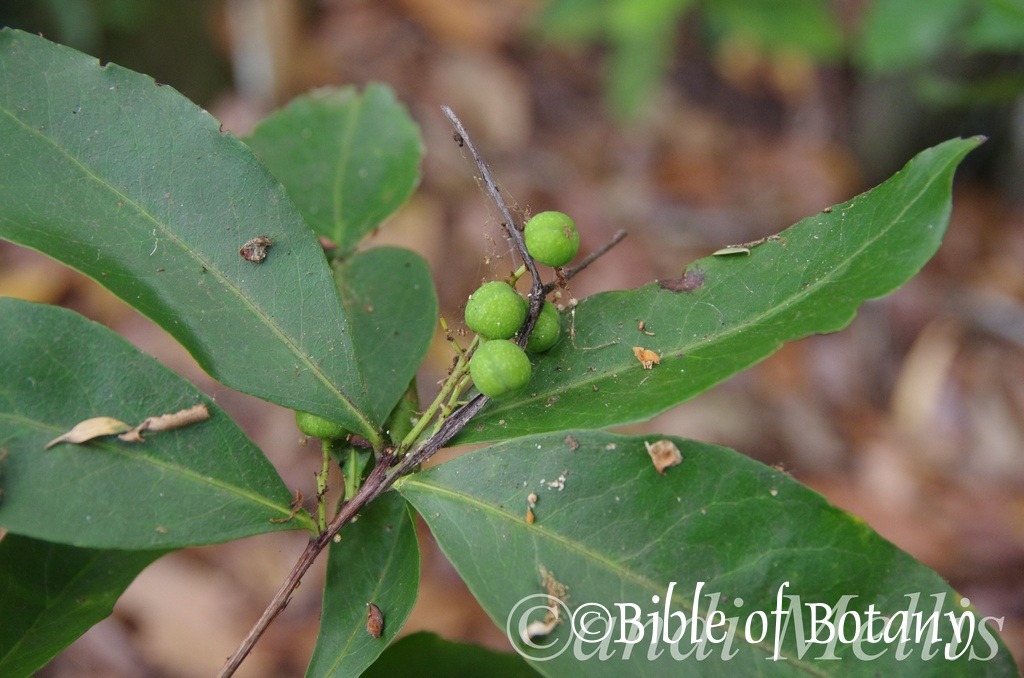
Stockyard Creek Coaldale NSW
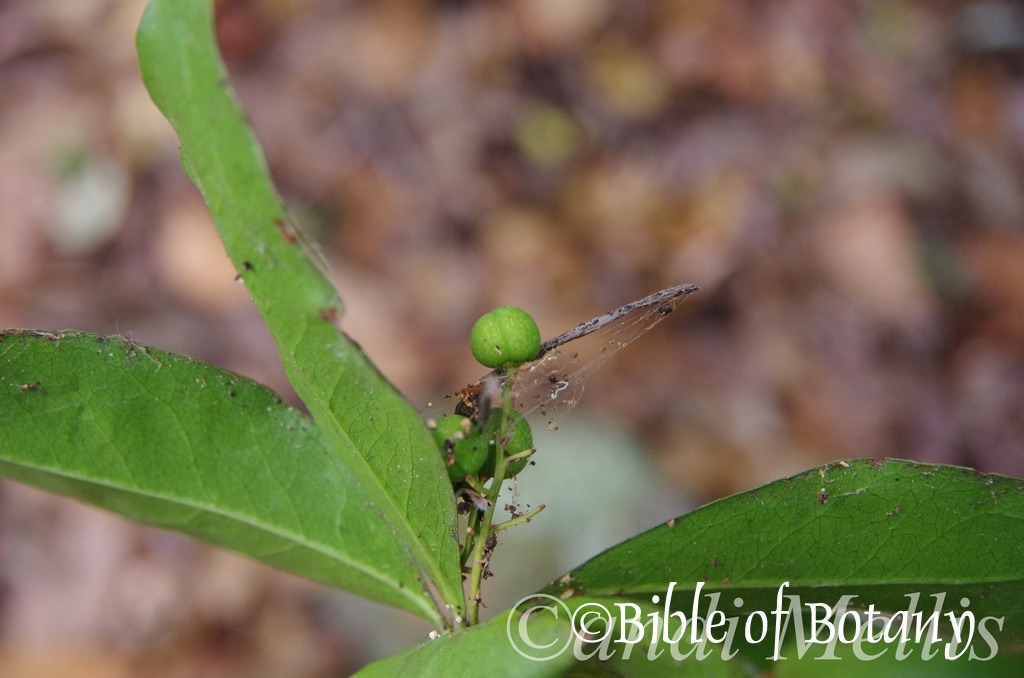
Stockyard Creek Coaldale NSW
Denhamia celastroides
Classification
Unranked: Eudicots
Unranked: Rosids
Order: Celastrales
Family: Celastraceae
Genus: Is named in honour of Dixon Denham; 1786-1828, who was an English explorer in Africa and fought in the Battle of Waterloo.
Species: From Kelastros, which is Ancient Greek for bitter-sweet and Eidos/Oides, which is Ancient Greek for alike or similar too. It refers to parasitic plants, which resemble the Celastrus genus. A good example is the leaves of the parasitic plant which mimics its host’s leaves that are often plants in the Ligustrum genus.
Common Name: Denhamia or Orange Boxwood.
Distribution:
Denhamia celastroides is found in several disjunct populations south from the Daintree National Park in far north Queensland to Wingham in central coastal New South Wales. It is mainly found on and east of The Great Dividing Range. There is a noticeable exception with an isolated population found near Normanton in far north western Queensland which may indicate the species is more widespread than the maps indicate.
https://avh.ala.org.au/occurrences/search?taxa=Denhamia+celastroides#tab_mapView
Habitat Aspect Climate:
Denhamia celastroides prefers full sun to dappled shade. It grows in all types of cool moist rainforests and moist Eucalypt forests adjacent to rainforests. The altitude ranges from 50 meters ASL to 950 meters ASL.
The temperatures range from minus 3 degrees in August to 36 degrees in January.
The rainfall ranges from lows of 800mm to 3200mm average per annum.
Soil Requirements:
Denhamia celastroides prefers better quality friable loams to medium clays. The soils are usually derived from brown basalt and black basalt with the noticeable exception surrounding Normanton where yellow-orange podsolic soils are present. The soils pH ranges from 5pH to 7pH. It does not tolerate waterlogged soils. Non saline soils to very saline soils are tolerated. Coastal mountain forms may not have the same salt tolerances as those plants growing around Normanton.
Height & Spread:
Wild Plants: 6m to 10m by 4m to 7m
Characteristics:
Denhamia celastroides is a slow growing bushy shrub to upright tree. The mid grey bark is glabrous. The stems and branchlets are glabrous mid grey to grey-brown. The new growth is grass-green and striated or slightly furrowed and covered in scales and or caduceus, rusty hirsute hairs. The new growth is deep purple and glossy.
The alternate to subopposita leaves of Denhamia celastroides are elliptical to oblanceolate or rarely lanceolate. They measure 40mm to 120mm in length by 10mm to 45mm in width. The bases are cuneate while the apexes are acute to acuminate or at times acute-obtuse. The discolourous laminas are deep grass-green, glabrous and dull while the lower laminas are slightly paler. The laminas are flat and decurve downwards close to the apexes. The lamina margins are finely and irregularly toothed or rarely entire. The mid vein and lateral veins are slightly prominent on the upper laminas and are visible from the lower laminas. The petioles measure 2mm to 5mm in length.
The inflorescences of Denhamia celastroides are born on small clusters or a short raceme from the axils. The racemes measure 20mm to 60mm in length while the pedicels measure 10mm to 16mm in length. The flowers are white or pale creamy green and measure 8mm to 10mm in diameter. The 5 ovate to spathulate petals are pale green to creamy green and measure 2.4mm to 2.6mm in length. The lime green disc measures 2.5mm to 3mm in diameter.
The 5 pastel green filaments measure 1.5mm to 2mm in length while the cream anthers measure less than 0.5 mm in length.
The pistil is trilobed and measures 1.5mm to 2mm in length. The flowers appear from October to November.
Denhamia celastroides fruits are ovoidal capsules. The capsules measure 10mm to 17mm in length by 6mm to 12mm in diameter. The green capsules turn deep yellow and split longitudinally when ripe. The style is persistent on the capsules. The black seeds are almost completely surrounded by a deep red-brown aril. The fruits ripen from March through to April.
Wildlife:
Denhamia celastroides wildlife consists of several species of the Tiger Crane flies in the Nephrotoma including Nephrotoma australasiae which feed on the nectar.
Cultivation:
Denhamia celastroides is a beautiful slow growing small tree with attractive large bright green leaves and bright yellow fruits. In cultivation the tree usually grows 4 meters to 6 meters in height by 4 meters to 5 meters in diameter when grown in the open.
It is best used adjacent to small areas of bush close to paths or the house so their deep yellow fruits which hang for many weeks can be viewed regularly. It is great in small rockeries as the feature plant. It can be planted in small groups of 2 or 3, as a standalone plant to create a harsh barren look with other arid plants or densely planted below to give vibrant colour. If it is surrounded by shorter plants with various foliage and red flowers it will dominate at the center giving an expansive look to the bed especially when it is in fruit. This is one plant that benefits highly from being mass planted or planted in scattered clumps. There small size enables this to be achieved even in small and medium size gardens.
It can also be used as the main trees in small rainforest gardens where the trunks can be used to grow small epiphytic ferns and orchids. It is drought tolerant and frost resistant once established.
It would make excellent bonsai plants being slow growing, long lived and easy to work.
Propagation:
Seeds: Denhamia celastroides’s seeds do not require treatment before sowing. Sow fresh seeds directly into a seed raising mix and cover with 5mm of the mix. When the seedlings are 25mm to 50mm tall, prick them out and plant them into 50mm native tubes using a seed raising mix.
Fertilize using Seaweed, fish emulsion or organic chicken pellets soaked in water on an alternate basis. Fertilize every two months until the plants are established then twice annually in early September or March to maintain health, vitality and better flowering.
Further Comments from Readers:
Hi reader, it seems you use The Bible of Botany a lot. That’s great as we have great pleasure in bringing it to you! It’s a little awkward for us to ask, but our first aim is to purchase land approximately 1,600 hectares to link several parcels of N.P. into one at The Pinnacles NSW Australia, but we need your help. We’re not salespeople. We’re amateur botanists who have dedicated over 30 years to saving the environment in a practical way. We depend on donations to reach our goal. If you donate just $5, the price of your coffee this Sunday, We can help to keep the planet alive in a real way and continue to bring you regular updates and features on Australian plants all in one Botanical Bible. Any support is greatly appreciated. Thank you.
In the spirit of reconciliation we acknowledge the Bundjalung, Gumbaynggirr and Yaegl and all aboriginal nations throughout Australia and their connections to land, sea and community. We pay our respect to their Elders past, present and future for the pleasures we have gained.
Denhamia moorei
Classification
Unranked: Eudicots
Unranked: Rosids
Order: Celastrales
Family: Celastraceae
Genus: Is named in honour of Dixon Denham; 1786-1828, who was an English explorer in Africa and fought in the Battle of Waterloo.
Species: Is named in honour of Charles Moore; 1908-2003, who was a New Zealand born Australian, who was Director of the Sydney Botanic gardens, a prodigious herbarium collector adding over 9,000 plants to the national Herbarium.
Common Name: Denhamia or Orange Boxwood.
Distribution:
Denhamia moorei is restricted to a small area within the boundaries of the southern section of the Guy Fawkes River National Park, Dorrigo National Park, Point Lookout near Ebor and Mount Hyland in Willi Willi National Park in central coastal New South Wales. It is found on the Great Dividing Range.
https://avh.ala.org.au/occurrences/search?taxa=Denhamia+mooreioides#tab_mapView
Habitat Aspect Climate:
Denhamia moorei prefers full sun to dappled shade. It grows in cool moist temperate rainforests or cool moist open Eucalypt forests. The altitude ranges from 1100 meters ASL to 1400 meters ASL.
The temperatures range from minus 5 degrees in August to 36 degrees in January.
The rainfall ranges from lows of 1250mm to 1650mm average per annum. Orographic precipitation is very high in these areas and could equate to a doubling of the real rainfall received.
Soil Requirements:
Denhamia moorei prefers better quality friable loams to medium clays. The soils are derived from brown basalt or black basalt. The soils pH ranges from 5pH to 5.5pH. It does not tolerate waterlogged soils. Non saline soils to slightly saline soils are tolerated.
Height & Spread:
Wild Plants: 5m to 8m by 4m to 7m
Characteristics:
Denhamia moorei is a slow growing bushy shrub to upright tree. The mid grey bark is glabrous. The stems and branchlets are glabrous mid grey to grey-brown while the new growth is grass-green and striated or slightly furrowed and covered in scales and or caduceus, rusty hirsute hairs. The new growth is deep purple and glossy.
The alternate leaves of Denhamia moorei are usually oblanceolate or occasionally narrow elliptical and measure 20mm to 60mm in length by 4mm to 17mm in width. The base is cuneate to attenuate while the apex is acute to obtuse. The concolourous laminas are deep grass-green and glabrous. The laminas are flat and decurve slightly as they approach the apexes. The laminas margins are usually entire to slightly crenate but can be entire and recurved. The petioles measure 1mm to 2mm in length.
The inflorescences of Denhamia moorei are born in small clusters of 1 to 3 flowers from the axils. The grass-green pedicels measure 50mm to 65mm in length. The flowers are white or pale creamy green and measure 9.5mm to 11mm in diameter. The 5 ovate to spathulate petals are pale green to creamy green and measure 3.3mm to 3.5mm in length. The lime green disc measures 3mm to 3.5mm in diameter.
The 5 white filaments measure 1.8mm to 2.2mm in length while the white anthers measure less than 0.5 mm in length.
The white pistil is trilobed and measures 1.5mm to 1.7mm in length. The flowers appear from October to November.
Denhamia moorei fruits are ovoidal capsules. The capsules measure 10mm to 18mm in length by 6mm to 12mm in diameter. The green capsules turn deep yellow and split longitudinally when ripe. The style is persistent on the capsules. The deep brown to black seeds are almost completely surrounded by a scarlet-red aril. The fruits ripen from March through to April.
Wildlife:
Denhamia moorei wildlife consists of several species of the Tiger Crane flies in the Nephrotoma including Nephrotoma australasiae which feed on the nectar.
Cultivation:
Denhamia moorei is a beautiful slow growing small tree with attractive large bright green leaves and bright yellow fruits. In cultivation the trees usually grow 4 meters to 5 meters in height by 3 meters to 4 meters in diameter when grown in the open.
Denhamia moorei makes a good dense hedge and safe wildlife corridor for birds to travel along. It can be easily pruned and respond quickly to light pruning. It is drought tolerant and frost resistant once established.
In the formal or Japanese Garden it can be used as the feature plant beside a water feature. Imagine a small pond with fish swimming. Beside it is a Denhamia moorei leaning out over the water or standing there with a perfect shape. This is very powerful yet formal and relaxing. It can partially surround such a scene and still look effective. Use them in small groups with larger rocks or in front of a large log. The large log gives a strong horizontal affect with depth if placed on an angle. Right along the front plantings of Hybanthus monopetalus would further add to the formal look. They can be a mixture of the purple flowered Hybanthus monopetalus with one of the yellow or orange flowering forms. The vertical stems and linear leaves will create a longer looking log that has a greater diameter. The plants are dainty yet display a very relaxing and thought provoking scene with the Denhamia moorei looming strongly overhead.
It can also be used as the main tree in small rainforest garden where the trunk can be used to grow small epiphytic ferns and orchids.
It would make excellent bonsai plants being slow growing, long lived and easy to work.
Propagation:
Seeds: Denhamia moorei‘s seeds do not require treatment before sowing. Sow fresh seeds directly into a seed raising mix and cover with 5mm of the mix. When the seedlings are 25mm to 50mm tall, prick them out and plant them into 50mm native tubes using a seed raising mix.
Fertilize using Seaweed, fish emulsion or organic chicken pellets soaked in water on an alternate basis. Fertilize every two months until the plants are established then twice annually in early September or March to maintain health, vitality and better flowering.
Further Comments from Readers:
Hi reader, it seems you use The Bible of Botany a lot. That’s great as we have great pleasure in bringing it to you! It’s a little awkward for us to ask, but our first aim is to purchase land approximately 1,600 hectares to link several parcels of N.P. into one at The Pinnacles NSW Australia, but we need your help. We’re not salespeople. We’re amateur botanists who have dedicated over 30 years to saving the environment in a practical way. We depend on donations to reach our goal. If you donate just $5, the price of your coffee this Sunday, We can help to keep the planet alive in a real way and continue to bring you regular updates and features on Australian plants all in one Botanical Bible. Any support is greatly appreciated. Thank you.
In the spirit of reconciliation we acknowledge the Bundjalung, Gumbaynggirr and Yaegl and all aboriginal nations throughout Australia and their connections to land, sea and community. We pay our respect to their Elders past, present and future for the pleasures we have gained.
Denhamia pittosporoides
Classification
Unranked: Eudicots
Unranked: Rosids
Order: Celastrales
Family: Celastraceae
Genus: Is named in honour of Dixon Denham; 1786-1828, who was an English explorer in Africa and fought in the Battle of Waterloo.
Species: From Pitta, which is Ancient Greek for resinous pitch, Spora, which is Ancient Greek for a seed and Eidos/Oides, which is Ancient Greek for alike or similar to. It refers to seeds, which resemble those of the Pittosporum genus.
Subspecies: Denhamia pittosporoides subsp. angustifolia. From Angusta, which is Latin for narrow, and Folium, which is Latin for foliage. It usually refers to leaves, which are narrow but not linear.
Subspecies: Denhamia pittosporoides subsp. pittosporoides. From Pitta, which is Ancient Greek for resinous pitch, Spora, which is Ancient Greek for a seed and Eidos/Oides, which is Ancient Greek for alike or similar to. It refers to seeds, which resemble those of the Pittosporum genus.
Common Name:
Distribution:
Denhamia pittosporoides is found in several disjunct populations south from the Cairns to Charters Towers in northern to central Queensland to the Hastings River catchment in central coastal New South Wales. It is found on the Great Dividing Range to the coast and as far west as the Carnarvon Gorge National Park in Queensland. It is relatively rare in New South Wales.
Denhamia pittosporoides subsp. angustifolia is found on the Great Dividing Range between Cairnes and Mackay in Queensland.
Denhamia pittosporoides subsp. pittosporoides is found on the Great Dividing Range north of Townsville and south of Rockhampton to far north eastern New South Wales.
https://avh.ala.org.au/occurrences/search?taxa=Denhamia+pittosporoides#tab_mapView
Habitat Aspect Climate:
Denhamia pittosporoides prefers full sun to dappled shade. Denhamia pittosporoides subsp. angustifolia grows from 500 meters ASL to 800 meters ASL while Denhamia pittosporoides subsp. pittosporoides is found from 600 meters ASL to 1000 meters ASL. It is found growing in drier, cool tropical rainforests and adjacent moist Eucalypt forests.
The temperatures range from minus 1 degree in August to 38 degrees in January.
The rainfall ranges from lows of 950mm to 3000mm average per annum.
Soil Requirements:
Denhamia pittosporoides prefers friable sandy loams to medium clays. The soils are usually derived from decomposed brown basalt and black basalt, metamorphic rocks, fatty sandstone, shale and laterites. The soils pH ranges from 5pH to 7pH. It does not tolerate waterlogged soils. Non saline soils to moderately saline soils are tolerated.
Height & Spread:
Wild Plants: 6m to 9m by 4m to 7m
Characteristics:
Denhamia pittosporoides is a slow growing small upright tree often multitrunked. The mid grey bark is glabrous. The stems and branchlets are glabrous mid grey to grey-brown while the new growth is grass-green and striated or slightly furrowed and covered in scales and or caduceus, rusty hirsute hairs. The new growth is deep purple and glossy.
The leaves of Denhamia pittosporoides subsp. pittosporoides are clustered in pseudo whirls. They are usually oblong to lanceolate or occasionally elliptical or rarely oblong-ovate and measure 70mm to 110mm in length by 15mm to 25mm in width. The base is cuneate or attenuate while the apex is acute to obtuse. The discolourous laminas are grass-green to olive-green and glabrous on the upper laminas while the lower laminas are paler. The laminas are flat to recurve slightly upwards from the mid vein to the margins. The laminas margins are usually entire. The mid vein is prominent on the upper lamina and is visible from the lower lamina. The stipules are small and usually inconspicuous. The petioles measure 3mm to 11mm in length.
The leaves of Denhamia pittosporoides subsp. angustifolia are clustered in pseudo whorls. They are usually oblong to lanceolate or occasionally elliptical and measure 35mm to 80mm in length by 4mm to 11mm in width. The base is cuneate or attenuate while the apex is acute to obtuse. The discolourous laminas are mid olive-green and glabrous on the upper laminas while the lower laminas are paler. The laminas are flat. The laminas margins are usually finely, irregularly toothed. The mid vein is prominent on the upper lamina and is visible from the lower lamina. The caduceus lanceolate stipules measure 2.8mm to 3.2mm in length. The petioles measure 4mm to 11mm in length.
The inflorescences of Denhamia pittosporoides are born in small panicles from the axils. The grass-green rachises and pedicels are glabrous. The rachises measure 20mm to 42mm in length while the pedicels measure 0.5mm to 1.2mm in length. The pascal green sepals are semi orbicular, concave and measure 1.5mm in length. The white or pale creamy green flowers measure 9.5mm to 11mm in diameter. The 5 oblong to spathulate petals are white and measure 2.4mm to 2.6mm in length. The lime green disc measures 1.2mm to 1.5mm in diameter.
The 5 white filaments measure 1.4mm to 1.6mm in length while the white anthers measure less than 0.5 mm in length.
The lime-green pistil measures 1mm to 1.3mm in length. The flowers appear from October to November.
Denhamia pittosporoides subsp. pittosporoides fruits are woody to coriaceous, ovoidal capsules. The capsules measure 12mm to 16mm in length by 20mm to 24mm in diameter. The green capsules turn deep yellow and split longitudinally when ripe. The calyx is persistent at the base while the style is persistent at the apex. The deep brown to black seeds are almost completely surrounded by a scarlet-red aril. The 2 to 5 seeds each measure 5mm to 6mm in length by 3mm to 4mm in diameter. The fruits ripen from March through to April.
Denhamia pittosporoides subsp. angustifolia fruits are woody to coriaceous, ovoidal capsules. The capsules measure 10mm to 16mm in length by 10mm to 18mm in diameter. The green capsules turn deep yellow and split longitudinally when ripe. The calyx is persistent at the base while the style is persistent at the apex. The deep brown to black seeds are completely surrounded by a scarlet-red aril. The 2 to 5 elliptical seeds each measure 6mm to 8mm in length by 4mm to 5mm in diameter. The fruits ripen from March through to April.
Wildlife:
Denhamia pittosporoides wildlife consists of several species of the Tiger Crane flies in the Nephrotoma genus including Nephrotoma australasiae, which feed on the nectar.
Cultivation:
Denhamia pittosporoides is a beautiful slow growing small tree with attractive large bright green leaves and large bright yellow fruits. In cultivation the tree will grow 4 meters to 6 meters in height by 4 meters to 5 meters in diameter when grown in the open.
It is suitable adjacent to small areas of bush close to paths or the house so its deep yellow fruits which hang for many weeks can be viewed regularly. It is a good small tree for medium rockeries as the feature plant. It can be planted in small groups of 2 or 3, as a standalone plant to create a harsh barren look with other arid plants or densely planted below to give vibrant colour. If it is surrounded by shorter plants with variation in foliage and red flowers it will dominate at the center giving an expansive look to the bed especially when it is in fruit. This is one plant that benefits highly from being mass planted or planted in scattered clumps. Its small size enables this to be achieved even in small and medium size gardens.
It can also be used as the main trees in small rainforest gardens where the trunks can be used to grow small epiphytic ferns and orchids. It is drought tolerant and frost resistant once established.
It could make an excellent bonsai plant as it is slow growing, long lived and has relatively flexible btranches.
Propagation:
Seeds: Denhamia pittosporoides‘s seeds do not require treatment before sowing. Sow fresh seeds directly into a seed raising mix and cover with 5mm of the mix. When the seedlings are 25mm to 50mm tall, prick them out and plant them into 50mm native tubes using a seed raising mix.
Fertilize using Seaweed, fish emulsion or organic chicken pellets soaked in water on an alternate basis. Fertilize every two months until the plants are established then twice annually in early September or March to maintain health, vitality and better flowering.
Further Comments from Readers:
Hi reader, it seems you use The Bible of Botany a lot. That’s great as we have great pleasure in bringing it to you! It’s a little awkward for us to ask, but our first aim is to purchase land approximately 1,600 hectares to link several parcels of N.P. into one at The Pinnacles NSW Australia, but we need your help. We’re not salespeople. We’re amateur botanists who have dedicated over 30 years to saving the environment in a practical way. We depend on donations to reach our goal. If you donate just $5, the price of your coffee this Sunday, We can help to keep the planet alive in a real way and continue to bring you regular updates and features on Australian plants all in one Botanical Bible. Any support is greatly appreciated. Thank you.
In the spirit of reconciliation we acknowledge the Bundjalung, Gumbaynggirr and Yaegl and all aboriginal nations throughout Australia and their connections to land, sea and community. We pay our respect to their Elders past, present and future for the pleasures we have gained.
Denhamia sylvestris
Classification:
Unranked: Eudicots
Order: Celastrales
Family: Celastraceae
Subfamily: Celastroideae
Genus: Is named in honour of Dixon Denham; 1786-1828, who was an English explorer in Africa and fought in the Battle of Waterloo.
Species: From Sylvāticum, which is Latin for a forest. It refers to growing in, on or beneath trees in a forest.
Common Name: Narrow Leafed Orange Bark.
Distribution:
Denhamia sylvestris is found south from Bauple in southern Queensland to Picton on the south coast of New South Wales.
https://avh.ala.org.au/occurrences/search?taxa=Denhamia+sylvestris#tab_mapView
Habitat Aspect Climate:
Maytenus sylvestris prefers dappled light to full sun. It grows adjacent to moist rain forests, in dry rainforests or moist Eucalyptus forests. The altitude ranges from 30 meters ASL to 950 meters ASL.
The temperatures range from minus 4 degrees in August to 38 degrees in January.
The rainfalls range from lows of 500mm to an average of 1850mm.
Soil Requirements:
Denhamia sylvestris prefers average quality sandy loams to medium clays where leaf litter accumulates. The soils are derived from decomposed sandstone, laterites, shale, brown basalts or black basalts. The soils pH. ranges from 6pH to 7pH. It does not tolerate waterlogged soils. Non saline soils to moderately saline soils are tolerated.
Height & Spread:
Wild Plants: 2.5m to 5m by 2.5m to 3m.
Characteristics:
Denhamia sylvestris trunk is pale creamy brown, pale creamy grey or a pale creamy fawn and glabrous. The branches are pale grey-brown and covered in white lenticels. The branchlets are lime green, while the new shoots are square with 3mm to 3.5mm brown linear stipules.
Denhamia sylvestris has alternate leaves are narrow elliptical to lanceolate or oblanceolate and measure 15mm to 80mm in length by 3mm to 15mm in width. The base is attenuate while the apex is narrow acute, narrow acuminate or narrow mucronate. The concolourous laminas are lime green to grass-green semi glossy and glabrous. Immature leaves and new growth are rusty-brown and glossy. The margins are entire or more often have a sparse row of fine teeth. The mid vein is slightly prominent on both laminas. The petiole measures 1mm to 2mm in length while.
The inflorescence of Denhamia sylvestris is a short raceme, clustered or singularly born from the leaf axils or from the old stipules on the branchlets. They measure 6mm to 7mm in diameter. The pedicels measure 5mm to 10mm long. The 5 semi-elliptical sepals are cream to pale green and measure 1mm to 1.2mm in length by 2mm in width. The 5 oblong petals are cream to pale green and measure 1.6mm to 2mm in length by 1.5mm in width. The short, stout pyramidal lime green style measures 1mm while the stigma divides into 2 flat oblong or broad acuminate lobes. The 5 white stamens are opposite the petals and measure 2mm to 2.2mm in length while the anthers are also white. The flowers appear from October to December.
Denhamia sylvestris‘s fruit is a small, globose to obovoidal, glabrous capsule. The capsules measure 4mm to 8mm in length by 3.2mm to 6.5mm in diameter. The 2 valve, coriaceous capsules is bright orange-yellow. The 2 valve capsules contain 1 to 4 black seeds measure 1.5mm to 2mm in diameter and are surrounded by a bright orange–yellow aril. The style is persistent on the fruit. The capsules ripen from late March to early August.
Wildlife:
Maytenus sylvestris is the host tree for many small native orchids like the Tangle Root Orchid, Plectorrhiza tridentata.
Cultivation:
Denhamia sylvestris makes an excellent small narrow tree for a park like scene or specimen tree in the garden. It also makes a beautiful large shrub. It always look green and fresh especially where adequate ground moisture and a deep layer of organic mulch is maintained on the soil, whether it is grown in light shade or full sun. It is very suitable on sandy clay soils to medium clays and poor shale based soils and shale. It is most suitable for small gardens close to the coast in temperate, subtropical, tropical or even semi-arid gardens. As a garden subject it will grow from 3 meters to 4 meters by 3 meters to 4 meters diameter when grown in the open. It is cold tolerant to temperatures at least as low as minus 5 degrees once established. It is however very slow growing and even with a good fertilizing program and moisture will grow less than 1 meter a year.
It can be used as shade trees in semi protected areas. It is an excellent tree for an addition a dry rainforest garden. When planting the tree in a rainforest consider placing it near the edge so the proliferation of flowers can be fully enjoyed and its natural bushy shape is not interfered with.
It is useful as a backdrop small tree contrasting with smaller finer leaf shrubs that are planted in the foreground. This gives the impression that they like being the center of attention which they deserve.
Try using it in an informal or formal manner in front of buildings to break up hard lines and to soften structures. This can be done by planting both shrubs and trees together in unequal free flowing curves using height and depth. If taller trees are required then try using Denhamia bilocularis as the tree and Denhamia sylvestris as the shrub. The foliages would also be of great interest and contrast being large and deep green against the finer lemon green and brown new growth.
It would make an ideal plant for Bonsai collectors as I have seen some very twisted gnarled specimens on rock ledges and granite outcrops in the Guy Fawkes National Park.
Propagation:
Seeds: Denhamia sylvestris‘s seeds can be sown directly into a seed raising mix. Cover the seeds with 2mm to 3mm of fine weed free mulch and keep moist. Place the tray in a warm sunny position. When the seedlings are 30mm to 50mm tall, prick them out and plant them into 50mm native tubes using a good organic mix.
Once the seedlings reach 150mm to 200mm in height they can be planted out into their permanent position.
Fertilize using seaweed, fish emulsion or organic chicken pellets soaked in water on an alternate basis. Fertilize every two months until the plants are established then annually in early September to October to maintain health, vitality and better flowering.
Further Comments from Readers:
Hi reader, it seems you use The Bible of Botany a lot. That’s great as we have great pleasure in bringing it to you! It’s a little awkward for us to ask, but our first aim is to purchase land approximately 1,600 hectares to link several parcels of N.P. into one at The Pinnacles NSW Australia, but we need your help. We’re not salespeople. We’re amateur botanists who have dedicated over 30 years to saving the environment in a practical way. We depend on donations to reach our goal. If you donate just $5, the price of your coffee this Sunday, We can help to keep the planet alive in a real way and continue to bring you regular updates and features on Australian plants all in one Botanical Bible. Any support is greatly appreciated. Thank you.
In the spirit of reconciliation we acknowledge the Bundjalung, Gumbaynggirr and Yaegl and all aboriginal nations throughout Australia and their connections to land, sea and community. We pay our respect to their Elders past, present and future for the pleasures we have gained.
All information is included in good faith and has been thoroughly researched prior to printing. The website or the author does not warrant or guarantee the accuracy of any information on these pages, nor does the website or the author accept any responsibility for any loss arising from the use of the information found within. The views and opinions are strictly those of the author or those members who chose to actively participate in the contents herein.