Oriental culture shares with the world many wondrous and beautiful forms of art. None may be as alluring as the living Chinese and Japanese art of Bonsai. While the word bonsai comes from the Japanese “a scene” it is associated with both Chinese and Japanese cultures. There are references to gardens of trimmed and potted plants as early as the Roman and Egyptian empires. It is believed the migration of this type of gardening proceeded through India into China and then Japan. In China it was illegal to grow plants bigger or better than the Emperor so common people with a love for gardening grew and developed the art of 盆景 pénjǐng; literally translated as Tray Scene, (bonsai) to its present form to save their soles.
A common misconception is that bonsai trees are dwarf trees or shrubs. Nothing could be further from the truth. The Asian art of bonsai is in training and maintaining full size species in shallow confined pots. This process does not produce a dwarf but instead a miniature. All aspects of a normal size plant or tree are kept intact. The specimen must be proportioned, must have all the affectations of its real life cycle. It must be healthy and must function as if it were full size. The ability to obtain this level of horticultural art is truly the embodiment of this garden art.
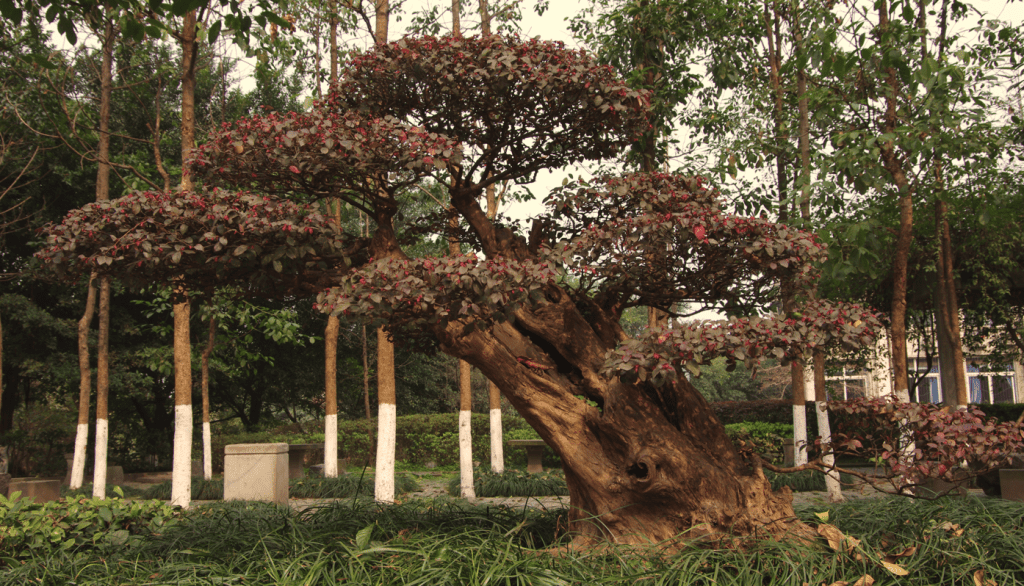
With a little artistic creation anyone can create the beauty in this art. When I began writing this book I had no real conception of what was required or needed to be a good bonsai gardener. Some 10 years later I have a 5 year old Ligustrum sinensis, an 8 year old Podocarpus chinensis which reminds me of home and a 10 year old Loropetalum chinensis proving even a mug like me can grow bonsai indoors. It is not as difficult as what it appears. To grow bonsai and to care for it properly so it can live for a long time, if not longer, than their full size wild cousins. These trees or shrubs can be of almost any variety of plant. Once the basic understanding of how to maintain a bonsai is learned, you can support many trees on your window sill, bush house, verandah or outside in the garden as there are no limitations. A great example is the row of very old Loropetalum chinensis being grown on the Chong Qing University campus at Sha Ping Ba. See photo. These shrubs are hundreds of years old.
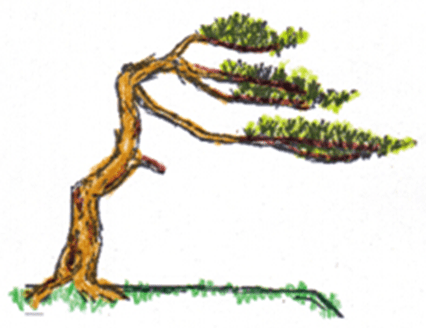
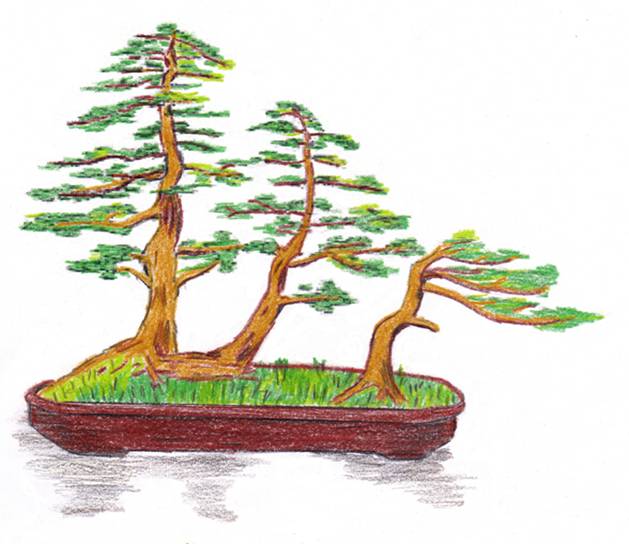
Bonsai are placed into three basic categories depending on the method of growing, the single trunk, the multiple trunk and the group plantings usually of one species. Within each category are various styles that are obtained by the trimming and manipulating the growth of limbs and roots. The single trunk for example can be further divided into erect, slanting or cascading. The continuation of this ‘training’ can be a challenge, but with a little knowledge, experience and tools, it is among the most rewarding experiences a gardening enthusiast can have.
* Your home Environment needs to be similar to what the trees would experience in the wild. This means that locally indigenous plants are best. Think of the temperature variation, humidity, rainfall and aspect the plant naturally grows under in the wild. That is why I selected the 3 native Chinese plants for my window sill collection.
* Your home Environment needs to be similar to what the trees would experience in the wild. This means that locally indigenous plants are best. Think of the temperature variation, humidity, rainfall and aspect the plant naturally grows under in the wild. That is why I selected the 3 native Chinese plants for my window sill collection.
* You need to monitor the trees Watering requirements closely so they are kept moist but not wet unless they are a swamp plant or on the drier side for arid plants. The type of water you use is imperative to the plants health. I rarely use tap water unless I run out preferring to use rain water or air conditioning water which I collect when shopping from the many stores that allow this precious commodity to drip down the sides of buildings or into the drains.
* Feeding your Bonsai will depend on the type of plant grown. In my case I make my own compost in the apartment with fresh fruit and vegetable scraps and feed the plants regularly on the compost. The Bonsai soil remains fertile and living. The trees must have a dormancy period similar to what they would experience over winter in the wild.
* The Grooming of your Bonsai is the repotting, pruning and maintenance.
* Health Care must be considered and the gardener must be vigilant for insects and diseases that may attack or affect your tree with the view of preventing them from arising and promptly treating any problems that do arise.
* Training your tree to keep its shape and size. Wiring or weights and how to do it. My Ligustrum has never seen a wire; instead I used weights attached to the new growth to shape the tree.
* Constant TLC is needed to ensure the continued good health of your Bonsai tree
Potting mix: The potting mix for bonsai plants must be of good quality and process good drainage. I recommend well what I was told is to use 3 parts normal potting mix with 1 part good home made compost and 1 part pebbles. The pebbles improve the drainage and help the roots to stay divide.
Selection: Bonsai is an art not a starvation process to stunt the plants. There are no magic properties in the tree, no genetic engineering or dwarfing hormones so selecting healthy trees from your local nursery or from ones that you have grown is fine. It is possible to bonsai almost any longevity tree or shrub, although some are more suitable than others. Once you gain confidence you can experiment with different plants. Try to find one that grows well in your area and is easily obtainable, this will mean you have a wider group to choose from.
From our index select a plant from your local district. People new to bonsai tend to look for trees that have been left in the pot too long or are distorted for some reason. Trees that are invariably stressed or diseased should be avoided. A bonsai is not a deformed tree but a tree that has been stylized by the artist, you. Natural looking trees are always selected that are healthy, young sturdy with a good root system. Start with a tree that is small enough for you to manage easily.
The tree should have a definite trunk line that is wider at the base and tapers to the top while a shrub should have a few well formed branches.
There must be low branches and they should be healthy. The first and thickest must be about one third of the way up the trunk. This doesn’t mean you can’t trim small branches off below this or reduce the height of your finished tree.
There must be plenty of branches on the tree. This will give you a good selection to choose from in your design and allow for foliage removal to compensate for root removal.
Remove the weeds and top layer of soil to check that the main roots are healthy. These are invariably a few centimeters below the soil level, small feeder roots may grow up but you are looking for the thick main roots that come from the trunk. Make sure they are evenly spaced and healthy. Soilless mixes are generally unsatisfactory as the plants will stress quickly, the roots are usually not well developed as the growers are more interested in top growth for resale rather than the plants wellbeing.
Now look at the leaves. They must be in proportion to the trees growth, small and typical for that genus and species. Even with nursery stock there may be some variance in leaf size if grown from seed so have a look.
Trees should have the ability to shoot from any position on the trunk and branches, if you are unsure ask.
Remember, there is no right and wrong, it’s your tree and if you think it looks right then it is right.
Styling your tree: After selecting your tree and taking it home place it on the work bench for a further inspection. All bonsai have a front and a back; see if you can decide which side will become your front. There are five basic bonsai styling techniques.
* Remove weeds and the surface soil so you can see where the main roots for your tree start.
* Take a sharp pair of pointed scissors or bonsai secateurs and remove any dead wood and old leaves. Then remove any leaves growing from the bottom of the branches.
* Now you need to rotate the plant and decide which side part of the plant will stand at the front. The front should have the first main branch growing about 1/3 of the way up your tree to the left or right. Try to find a branch that fits this description, which will narrow your angles down to two. From the front of your tree you should be able to see a lot of the trunk but still have branches at the back to give depth. You can remove branches to achieve this. You should not have roots or branches coming straight out at you from the front of the tree. No two trees are alike and all are unlikely to fit this description perfectly but keep all these factors in mind when deciding.
* Choose the branches you wish to use in your design. It is common for beginners to retain too much foliage, remember you want your plant to look like a tree not a manicured shrub. The gaps between the foliage are just as important as the foliage itself. The first branch is 1/3 of the way up your tree to the left or right. The next branch should be slightly above and out to the other side. Try to avoid branches that are opposite and at the same height. This is called a bar branch and is undesirable. The third branch should be at the back and slightly higher again. Follow this pattern as best you can up your tree. When you have chosen which branches will remain, remove all the unwanted branches. The basic shape of your tree should be triangular. It can be any shaped triangle but must conform to that basic shape. Lightly trim your remaining branches so they are longer at the base of the tree and shorter towards the top. You should now have the basic outline of your tree.
* If your plant is in a Plastic Bag you can cut and roll down the top to expose the roots. Quite often the main roots start well below the surface of the soil due to the drying nature of pots. The structure of the surface roots of your bonsai can be an attractive feature so it is important to find where the main roots start. If your plant is in a plastic bucket or hard pot you may have to remove it from the pot at this stage. If you do you will have to take extra care not to let the roots dry out while you are working on them. A small spray bottle filled with water to mist the exposed roots frequently will help alleviate this problem.
Carefully remove the soil from around the roots until you find a thicker set at the trunk. This will usually be quite obvious and is even more pronounced on cutting grown stock. On smaller trees like this the soil will fall away easily. Remember if you have removed your tree from the pot keep the remaining roots damp.
If you are unsure don’t worry you can always bring them up on the next repot or they may become clearer when you come to plant your tree in your Bonsai pot.
Trim away the small exposed roots. This will allow you to see the full extent of the trunk you have to work with. Stand back and examine your tree, try to imagine the finished bonsai. If you still cannot see the finished tree in your minds eye don’t be discouraged At least try to determine the best front for your tree.
To enhance the branch placement you may use wire. This is not always necessary but it can improve a tree quickly and dramatically.
Potting and wiring: Wiring is sometimes seen as another form of bonsai torture for these little trees but it is really no different to staking or espaliering fruit trees. The wire is only on for a short time; long enough to set the branch in the new position and then it is removed. It is quite possible to create a perfectly acceptable tree without wiring using a clip and grow technique but the use of wire speeds up the whole process and allows you more flexibility in your design.
The wire used is a soft copper or aluminum; try to get wire that is about one third the thickness of the branch to be bent. Wire stripped from electrical cable is perfectly adequate but if you can’t find any, you may have to contact your local bonsai nursery. The trick with wiring is to make sure that one end is anchored properly; you can achieve this by pushing one end into the soil if bending the trunk or wiring two branches at the same time.
Practice on a branch you have removed or on a near by tree before you start on your tree. The turns of the wire should be kept at an angle of 45 degrees and quite firm against the branch, be careful not to tear the bark or worse, snap your branch. Go slowly and keep it tidy, people will be looking at it for a few months before you can remove it.
The length of time you leave it on will vary depending on the type of tree and the time of the year. Keep a close eye on it and when it starts to look too tight, cut it off. If the branch springs back, it will need rewiring. Don’t leave the wire so long that it cuts grooves into the bark.
With your tree all wired and roughly to the shape you require its time to pot. The pot is an important part of the whole bonsai process it can make or break your design. Use a proper bonsai pot they should have quite large drainage holes and some kind of feet to lift the base off the ground. As well as these two horticultural requirements this is a piece of art you’re creating so the pot should be part of your overall design.
Repotting: Repotting is carried out to prevent your plant becoming root bound and to provide additional nutrient to the soil. It helps maintain your tree in a small pot but does not reduce the size of your tree. Apart from watering, it is probably one of the most important and misunderstood processes in Bonsai.
Early spring is the best time to repot. Prepare all the items you will require. Tools, soil, clean water, mesh, gravel or cover stones. These should be on hand as the process should be carried out as quickly as possible to prevent the roots drying out any more than is necessary.
Trees are usually repotted every 2 years however I have been lazy and with the organic feeding the trees seem to be healthy and still grows strongly even after 5 years. The feeder roots are still active on the surface.
Where the root ball has become a solid mass and lifts from the pot with relative ease it is time to repot. If you made a mistake and bought a cheaper pot that curves inwards near the top you may have to run a sharp, sterile knife around the edge. Remove any pieces of mesh that were not wired to the pot and have become embedded in the roots.
Carefully remove the layer of moss from the surface and place it in a cool moist position. A plastic bag will suffice. Remove about one third of the root mass from around the outside and bottom of the ball. To do this you can use a bonsai root hook. Tease the roots out and sever with a sharp sterile pair of secateurs.
Replace the mesh over the holes. This can be done by tying it down with a piece of wire and poking it through the hole at the bottom. This will prevent it moving when you replace the soil or as the roots grow around it. The mesh will prevent the soil falling out and ants and other detrimental wildlife from entering.
Place a layer of soil in the bottom of your pot deep enough so that the trunk and upper roots will remain above the upper lip of the pot and reposition the plant where you want it.
Replace the removed soil with fresh bonsai soil. You may need to make sure the soil is down around the bottom edges of the pot. I use, used ice cream sticks for this purpose.
Replace the moss to help protect the surface and to alleviate weeds and it looks good too.
Water in thoroughly with half strength seaweed or fish emulsion.
Trimming: Now is the time to trim your tree. Remove any excess growth. Repotting is a good time to thin your plants foliage mass to help reduce the stress of replanting.
Care and maintenance: Bonsai trees are usually out door plants so leave them outdoors. When I lived in China; during the latter stages of writing of this book we lived in a 36 story apartment block so were compelled to look at the possibility of growing indoors. We elected to grow our plants indoors on the open window sill in the computer room, lounge room, bedroom and on the verandah. For most situations the trees are unsuitable unless carefully selected. The wrong trees will die or at least suffer severe set back weaken or lose vitality. Certainly bring them in when you have guests or need a center piece on your dinner table but don’t leave it indoors for more than two or three days at a time.
Your new tree will need a little bit of special care for a short time. Place it in a shady spot out of the wind and keep it well watered but not wet.
Trees will generally last for at least a year and usually 2 or 3 years is more the norm in the pot it’s in without repotting and at least 6 months without feeding. You may need to feed it through spring and summer in the following season. Use an organic liquid fertilizer at half strength like liquid sea weed, fish emulsion or worm liquid on a monthly basis.
Fertilize using Seaweed, fish emulsion or organic chicken pellets soaked in water on an alternate basis. Fertilize every two months until the plants are established then twice annually to maintain health, vitality and better flowering.
Happy Bonsaiing.
Further comments from Members:
Hi reader, it seems you use The Bible of Botany a lot. That’s great as we have great pleasure in bringing it to you! It’s a little awkward for us to ask, but our first aim is to purchase land approximately 1,600 hectares to link several parcels of N.P. into one at The Pinnacles NSW Australia, but we need your help. We’re not salespeople. We’re amateur botanists who have dedicated over 30 years to saving the environment in a practical way. We depend on donations to reach our goal. If you donate just $5, the price of your coffee this Sunday, We can help to keep the planet alive in a real way and continue to bring you regular updates and features on Australian plants all in one Botanical Bible. Any support is greatly appreciated. Thank you.
In the spirit of reconciliation we acknowledge the Bundjalung, Gumbaynggirr and Yaegl and all aboriginal nations throughout Australia and their connections to land, sea and community. We pay our respect to their Elders past, present and future for the pleasures we have gained.
All information is included in good faith and has been thoroughly researched prior to printing. The website or the author does not warrant or guarantee the accuracy of any information on these pages, nor does the website or the author accept any responsibility for any loss arising from the use of the information found within. The views and opinions are strictly those of the author or those members who chose to actively participate in the contents herein.