“A picture says a thousand words.” Never a truer statement has ever been made when it comes to this book. On that basis there needs to be an additional 20,000,000 odd words added to the 5,440,400 words already written.
I have never claimed to be a professional photographer nor do I profess to be an expert on taking great photos. The following tips come from experience and practice which are essential to taking photos that people admire.

Since digital cameras have come to the fore good photos are in everyone’s reach. Photography is about capturing a moment in history or following your interests in pictures. You capture your interest in a moment of time. When photographing what I love I become completely manic, the adrenalin affects my sleep pattern to the point I am unable to sleep, concentrating on how can I achieve the best shot in a photograph on what nature has perfected over the millenniums.

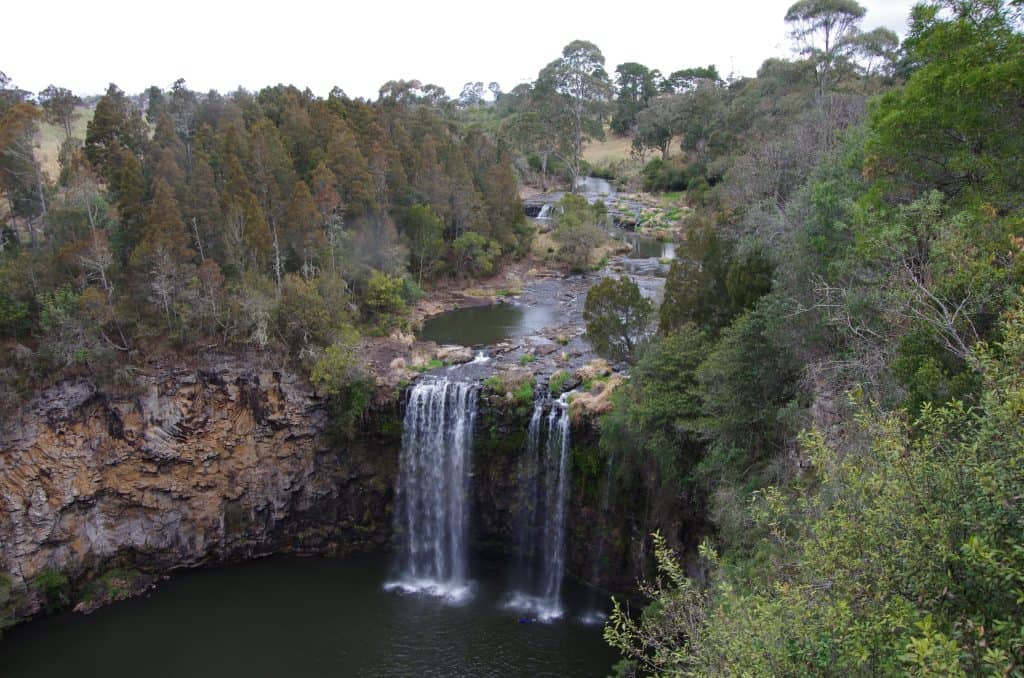
Could they have been taken differently, at a different time – sunrise, sunset, a different angle – to emphasise the trees, have a person involved – lonliness or a fisherman, children playing a fun shot, the trajectory is limitless based on your view at the time. take a few minutes and think what angles you would employ. The selfie now becomes absolutely boring.
The perfect photograph is so elusive it often appears as though it will always escape my ultimate grasp. But still, I remain totally focused on securing that ultimate high, I receive when the light, the air flow, the color, the background, the subject itself and a myriad of other obstacles all present themselves in front of lens are overcome.
A few seconds, a few centimeters or a slight shift in the settings of the camera can make huge differences in getting that great shot. The photos I reject and delete are what make my photos look good to the casual observer.
Below are two photographs of a mangrove, Avicennia marina were taken at different times of the day about 1 hour apart. The first depicts a new start, a beginning and struggle, while the second emphasise ageing and death. Both display the various variations in silhouettes of the species and the habit it grows in. Neither really has an emphasis on peace and tranquillity. One is harsh, while the other has some expectation. There is warmth and there is blunt coldness. Every photograph should express what the photographer wishes to convey. Could you imagine being an Avicennia and waking up to this every morning or taking a dip on the rising tide twice a day? Bothe trees are off centre yet the photos still have good balance.

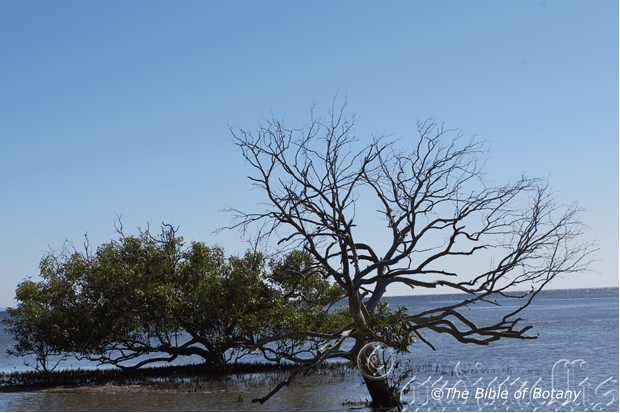
The upper photograph moved slightly to a lower position than the above photos.
You do not need expensive equipment or great experience. If you follow the following instructions, good photos will be produced. Everyone can do it.
The upper photograph moved slightly to a lower position than the above photos. You do not need expensive equipment or great experience. If you follow the following instructions, good photos will be produced. Everyone can do it. Do not be frightened to change settings and practice as “Practice makes perfect.”
Camera:
In today’s market cameras are endless. My oldest photos were taken on a good Chinese camera bought in 1996. A phoenix (A Chinese copy of the Pentax so I have been told.) SLR. It served the purpose for good all round photos with a shutter speed from 1 second extended down to 1,000th of a second.
Later photos were taken on a digital movie camera that was also used as a still camera. RICHO 720P. The photos were O.K for subjects that were consistently 10 meters to infinity from the camera but were not good for close up photography. Enter the DSLR camera.
My next camera was the Pentax K5, 20,800 yuan ($3,000.00) complete with the standard 15-65mm lens, telephoto lens 60-225mm lens, a macro lens, Pentax 2.5f 1:1, a silver umbrella, 9 coloured umbrellas a sliver and gold reflector cleaning cloth, brush and air pump, back up battery, battery charger, good quality carry bag, good 200mm to 2.2mm tripod and spare card. The enjoyment with plants, nature and the family is worth every cent. With this net book you can take your own photos and add your own pages copying my format, even changing it to suit your own ideas or life style or add to my collection of photos which will be donated to the Australian Virtual Herbarium through my local Botanic Garden.
My latest camera is the Pentax r with the Sigma telephoto lens 70-500mm. At just 7500yuan ($1250 Aust.11.07.2014) is unbelievable value and light weight for such a lens. I was tossing up between this lens and the Tamrom 150-600mm lens which also offers great value in a light weight lens.

I have the Pentax K5 set up with the 18-65mm lens while the Pentax r is set up with the Sigma 70-500mm lens meaning I only ever have to change 1 lens if the need suddenly warrants the change.
For photographing plants the following features should be present. The camera is suitable for standard prints without clipping as it has a 4:3 ratio. A 2:3 ratio is better if large prints are required.
The camera also comes with Image stabilization so important when taking photos outdoors without a tri-pod.
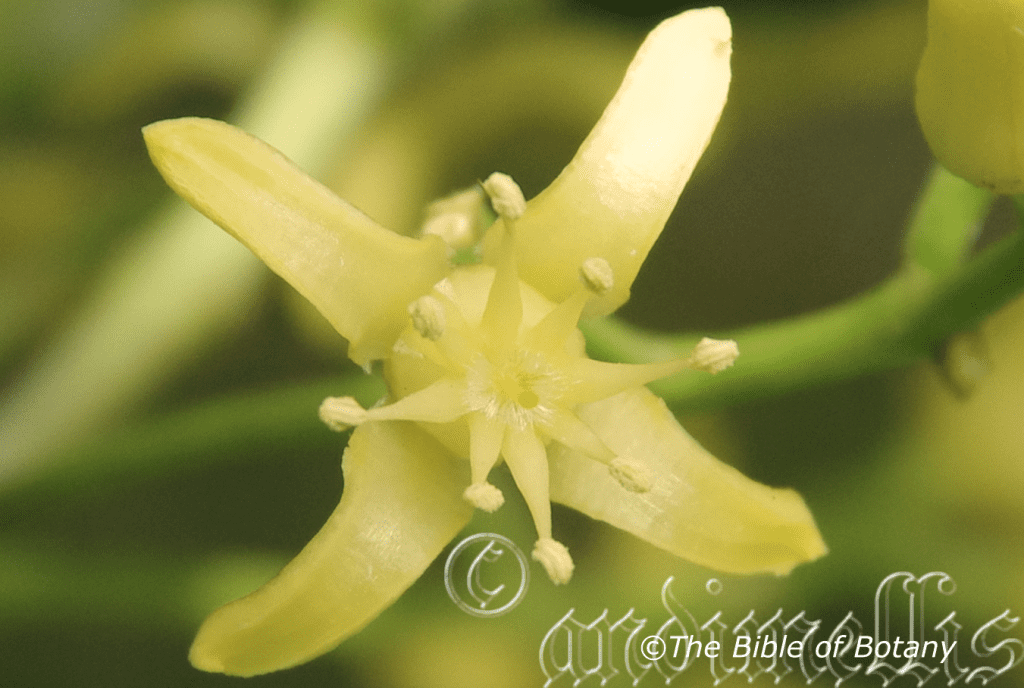
This camera is compatible with every macro and telescopic lens made by Pentax and the Pentax range from Sigma. The macro lens is a must for detail when photographing small flowers, leaf structure stems or even styles and filaments.
Colour control is something I do not know how I ever coped with it before. The Pentax colour is very true even with purples which have been a real dilemma with negative analogue cameras in the past.
Dust control is a feature you really do need when changing lenses as often as you do when photographing plants.
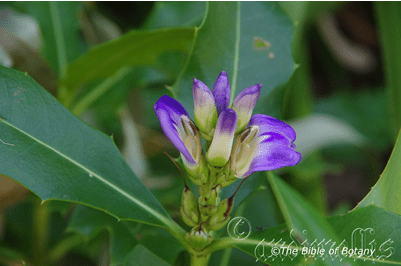
Here are four distinctly contrasting photographs which depict the subject accurately at the time and what was intended. The top photo was taken using natural light. The second photo pink filter, the third a blue filter added to enhance the flower colour and the third used a yellow filter. Now days the cameras have this quality built in and gives greater control.


Extras that you may want to help you deliver better pictures are a tripod, a reflective umbrella silver and gold, 9 umbrellas in colours of cream, white, black, red, yellow, blue, green, orange and purple to enhance colour variation under other than optimum lighting. Three different size vases with enough sand to fill them are essential. A packet of mixed sized plastic straws, 6 pegs and a small Swiss knife can also be very handy.
The tripod will be needed when photographing in poor light where a longer exposure time is needed. Close up photography will also need the use of a tripod to hold the camera steady. A cheap one is all that is required, though the better ones offer more flexibility and sturdiness.
The umbrellas are great cheap additions to eliminate glare, or even diffuse the light which maybe too bright. They can also be used to subtly change the colour tones in the photograph by using the different coloured umbrellas.
Two pieces of white satin material are very handy to carry with you. These can reflect light onto the subject or again help the umbrella to diffuse the sun’s glare.
The square meter of material needs to have a large button hole sown in the centre. I use the material as a background to highlight or soften the contrast between the subject and the surroundings. The button hole is used to give a better perspective than the old shot taken by resting the subject on the material. How is it done?
Take a vase: Fill it with sand. Select the coloured material you want as your back ground. Lay the cloth over the vase so that the button hole covers the lip of the vase. Place a suitable size straw through the button hole and into the sand. Now place the stem, flower, umbel or other interesting section you want to photograph in the straw. This will give a more natural look instead of that half dead look. You can turn the vase around easily to get better angles without moving the camera or move the camera above the subject. The pegs are used to clip the sheets to twigs the umbrella etc. The knife can be used for trimming the subject, cutting of the straws or opening that bottle of what ever you are drinking at the time.
These few basic items will give you great flexibility and manoeuvring yet are all easy to carry in a small bag. My wife enjoys the walks and assisting in taking the photos which adds to our over all pleasure of the photos we take.
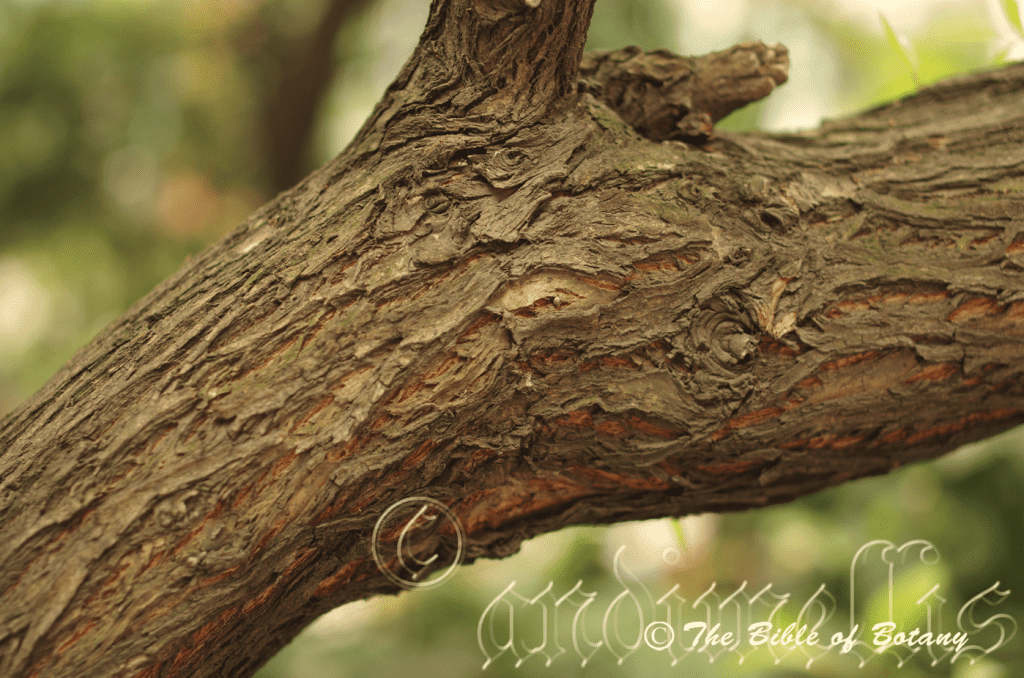
Trunks to Anthers on Flowers:
No matter which season it is winter, spring, summer or autumn it is time to get out there and photograph the flowers. I have 2 cameras set up the Pentax k5 with a 15mm to 65mm lens and the K50 with a 55mm to 300mm telephoto lens. I also carry a 10mm fixed lens and a 1:1 macro lens with my handy tripod. Initially I was satisfied with getting some reasonable photographs for the book now it’s an obsession to get the best photos I can. Cameras have come along way in the past decade and photos a decade ago just don’t have that real oomph about them.
In Australia we are so lucky, step outside and into sunshine, a park or even wilderness and there are flowers to be found. It is all there for us 365 days of the year.
Here are 10 tips that I use and remember these are from an amateur not a professional sharp shooter.
- Sun or Overcast Days: Photographing flowers on an overcast day if it is possible is ideal. Otherwise an umbrella is the next best thing. For subtle differences in colour and light I carry or should I say the wife carries a black, white, yellow, red and blue umbrella everywhere.
Overcast days are best because the light is diffuse and not glary which is perfect for photographing flowers. Soft even light on an overcast day compliments the delicacy of strong coloured flowers and removes the bright patches often associated with white, lilac and pale blue flowers. There are no shadows and no harsh bright spots to contend with, which makes it easier to get a correct exposure.
- Backlight: will make your flowers glow and often gives that halo affect seen on professional photographs. It works better with deep coloured flowers than pale coloured or white flowers. Backlight happens when the sun is directly in front of you lighting your flower from behind. Because flower petals are translucent, backlight makes flowers appear to glow.
Try to capture backlit flowers late in the day when the sun is close to the horizon which will cast nice warm light on the rest of your image too. You might even be able to catch some rays of light filtering through the trees.
3. Watch out for wind
When it comes to photographing flowers in Australia wind is your perpetual enemy and August when there are more blooms is also the worst month of the year on the east coast. The easiest way to avoid a breeze is to get up early in the morning or do it late in the afternoon when there is less wind about. This is where the reflectors or umbrellas come to the fore again as they can be used to deflect breezes while giving shade.
Your other option is to bring a flower inside but that is impractical if you want a snap of the leaves and smaller branches. I have photographed flowers indoors but am opposed to removing natural flowers from the environment.
- Get closer: Flowers are beautiful and like the wife is a pleasure to get close to. There are a number of ways to go about making the close up images of flowers we all love.
The use of a telephoto lens and zoom in to the flowers offers you the chance to get close or to bring flowers closer to you that are out of reach like up in a tree or across a stream. In this case, make sure you take note of the minimum focusing distance of the lens. This is usually marked on the outside of the lens. For example, my 50-250mm telephoto lens has a minimum focusing distance of 1.2 meters. It simply will not focus on anything closer.
The other solution is to use a dedicated macro lens which has the ability to focus on objects that are close to the end of the lens. This is where the Pentax 2.5mm 1:1 macro lens come in handy. The later is great for photographing anthers, stigmas and other very small objects but are time consuming setting up and if there is a strong breeze you find yourself getting frustrated with blurred shots even at the higher speed. Use the umbrellas and reflector to divert breezes air currents remember a 1mm movement on a 1mm anther is 50mm on the computer screen.
5. Use a reflector: If your subject is in the shade, you can use a reflector to bounce some light back towards your subject and make the flower more vibrant.
6. Avoid a cluttered background: As with every photograph, the background can make or break the image and the main focus should be on the flower, bark or leaf. Change your position, move around and see which angle is the best.
7. Use a shallow depth of field: You can achieve this by using a wide aperture (low aperture number) such as f/2.8 to f/4. The effect is even more pronounced if you are using a telephoto lens with a wide aperture compared to the macro lens.
8. Make it sharp: Even if you are using a shallow depth of field, it is essential that at least part of the flower is sharp. Use a tripod, a cable release or your camera’s two second timer, and the mirror lock up function for the best results.
Remember that even if there doesn’t appear to be much wind, flowers move in the slightest of breezes. If your flower isn’t sharp, try using a faster shutter speed with the lower aperture number.
Finally, check your focus and if necessary use manual focus to ensure the camera is focused on the most important part of the subject.
9. Change Your Angle: Move around and try some different angles for more interesting images. A few degrees can make all the difference. Try photographing the flower from behind or underneath, vertically above looking down, laterally or some angle in between to capture a point of view that is different from what we usually see. I often take photos down on my knees or even lying down
10. Focus through another flower: Focusing through one flower to another in the background can give unusual results. Remember in tip number 4 that your lens has a minimum focusing distance? You can use that to your advantage by setting the lens at its minimum distance then refocus on the flower in the background without moving the camera!
10. Stay Focused; Remember take notes on what, which, how when, where and why.
Wildlife Photography
Before we start this section there is a guide of flowering plants that are a guaranteed source for attracting insects, birds and mammals listed under Honey and Pollen producers. The first list is confined mainly to native bees while the second list attracts a wide range of insects, birds and mammals and if you are fortunate enough the odd native carnivore. Feral animals witnessed by me are always given the hurry along.
Water stations are another great area to photograph higher order wildlife as they need water on a regular basis. Water is like standing outside the local shop and photographing the customers as they file in and out. Do not underestimate the attraction of a good local ephemeral pool during dry spells.
Now for a few hints from an expert and I couldn’t agree more. Wildlife photography is the next step, catching a bird a butterfly or even an ant among the flowers gives one a great high. The best wildlife images create a powerful emotional connection between the viewer and the animal, but success requires planning, timing, and technique. Here are a few tips for getting started.
I agree with Joe Decker who is a photographer and writer for Photocritic as well as a photography teacher. You can see some of his nature photography at www.joedecker.net. I have been influenced by his suggestions below and keep them in mind when shooting animals. With a camera, guns are banned in this book.
Another excellent site for photography tips is from David Peterson. David is the creator of Digital Photo Secrets, and the Photography Dash courses and loves teaching photography to fellow photographers all around the world. You can follow him and I fully recommend his web site to all http://www.digital-photo-secrets.com
1. Keep Shooting:
“Heck with how many batteries or cards you go through, just keep the finger on the trigger.” I took hundreds of photos of 2 water skaters courting and mating in mid air. Eagerly returned home to find the most intimate shots were blurred.
Expect to burn through a lot of memory cards shooting wildlife. While you may occasionally be able to presage the decisive moment in a wildlife shot, more often than not it will be difficult to know exactly when the body position, the facial expression, and the composition of the image in front of you will all come together as an animal is in motion. Continuous shooting, extra batteries and many, fast memory cards will improve your odds of getting an effective image. If I find only one in a couple dozen of my landscape images are “good” by my own criteria, then that ratio might climb to “one in a few hundred” shots for wildlife. Joe said “the first time he photographed polar bears he shot two cards full of images in less than an hour, and netted three portfolio images.” Depending on the card Joe had that may have been 1,200 to 5,000 photographs and that is a lot of editing. The beauty of digital cameras is you can keep shooting for a fraction of the old cost enhancing your chances for that great photograph that everyone is proud of. This is the big advantage that the Pentax K5 and K50 cameras have as they have a longer lasting battery and larger cards, are lighter to hold for longer periods and quieter when rapid shooting.
2. The Eyes Have It:
Like human portraits, wildlife portraits gain life by making a connection between the viewer and the animal, and as with humans, the window to that connection is the eye. When the practical needs of nature photography (super telephoto lenses, wide apertures) leave the photographer with a very narrow depth of field it is almost always essential that the eye, if nothing else, be in focus. Our brains are almost hardwired to notice faces and to look for the eyes, if the eyes aren’t sharp in the primary subject of your photograph, most times, it just won’t work. Bonus tip: A tiny bit of fill light from a flash (maybe 1.5 or more stops down under the “correct” fill flash exposure) can help create effective catch light in the eye to enhance this effect. I like to use the umbrellas to direct more natural light on my subject rather than resort to flash but everyone to their own. While photographing birds in a bird hide in eastern Tibet we were confronted with the unexpected and the camera just kept clicking. Not sure whether it was nerves or controlled clicking but the end result was wow.
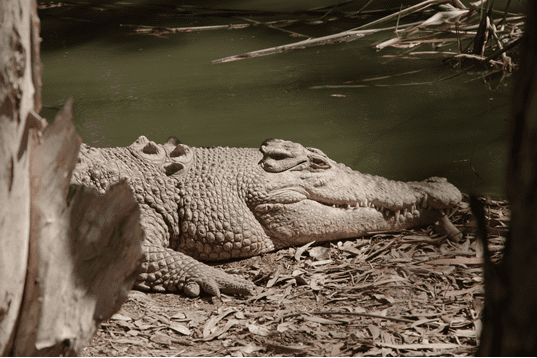
3. Understand Your Subject:
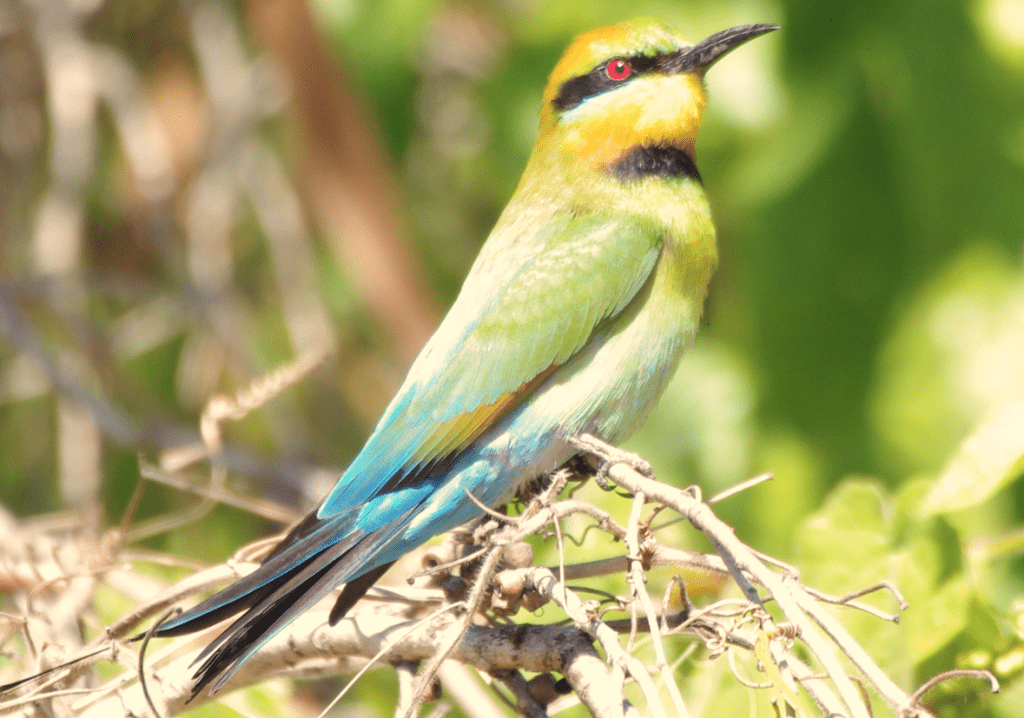
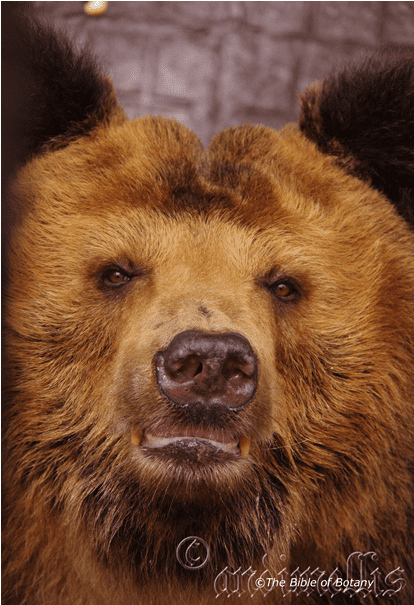
With wildlife, particularly big game which includes Koalas, kangaroos and crocodiles learn a bit about your subject before hand for the safety of the animals, for your own safety, and for better photographs. Getting too close to many animals, particularly birds may see them abandon their eggs or nest entirely. Spending time learning about your subject isn’t just about safety. The colourful birds I photograph in gardens are usually habitual so over a few days it is easy to work from which direction they came, which direction they will leave and how long they will stay. This gives you the opportunity to position yourself, how close you can get which are the best angles, work out your exposures and exactly how much movement the birds will tolerate before feeling threatened. Even migratory birds will com from a certain direction and the chances are the following day a new flock will present itself.
4. Movement, Facing and Space:
Another lesson from human portraiture we can use in wildlife photography is the idea of composing based on facing and direction. In general photographs of moving animals are best composed giving more room in front of the animal’s movement than in back. Similarly, when an animal is looking to one side or another in a photograph, providing room in the direction the animal is looking usually results in a more effective image. If it is possible to show what the animal is looking at; particularly if that too is interesting, can be even more effective.
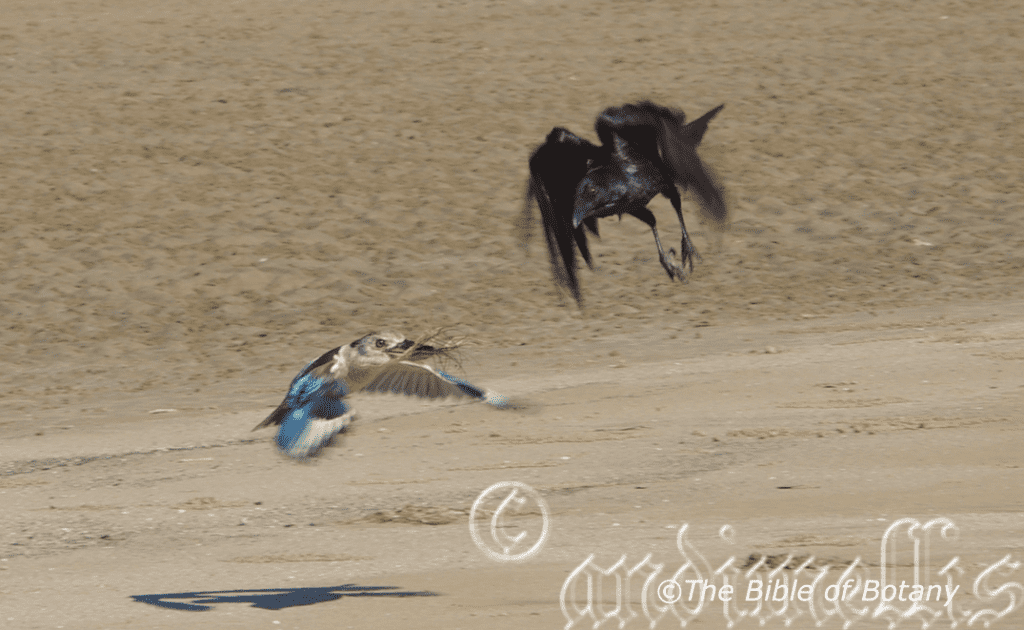
Be prepared: Have the camera ready in auto is critical when not actually photographing. You will never know when that opportune photograph comes along. Action shots realise extreme pleasure. I once sat for ages, watching and waiting for a Hawk to strike and when it did it was all over in a split second a blink of an eye and the opportunity was lost. Then,; on another occasion, rapid fire I caught an opportunistic crow endeavouring to steal nesting material from a blue wing Kookaburra and the eventual scurrying of the crow as the kookaburra turned on the crow following the dropping of the material. Here the the eyes have it with the head being in perfect focus, while the blurring of the wings displays movement and is acceptable.. I didn’t have time to set the speed settings. If I wasn’t in auto this shot would have been lost.
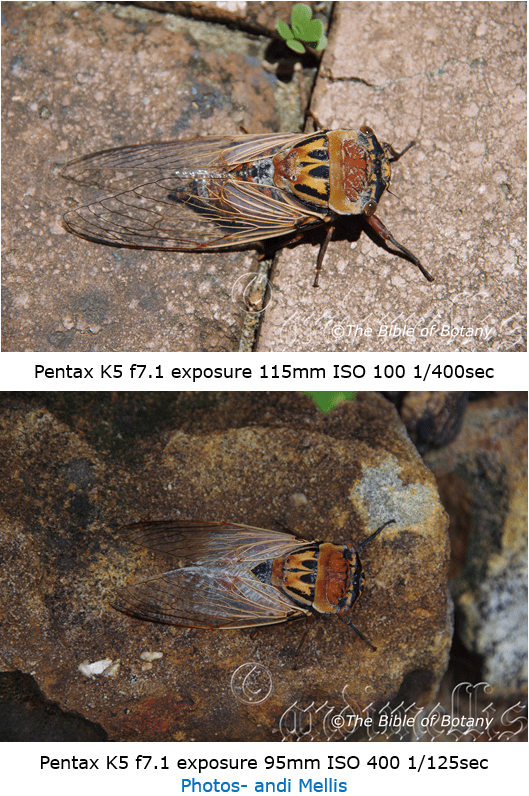
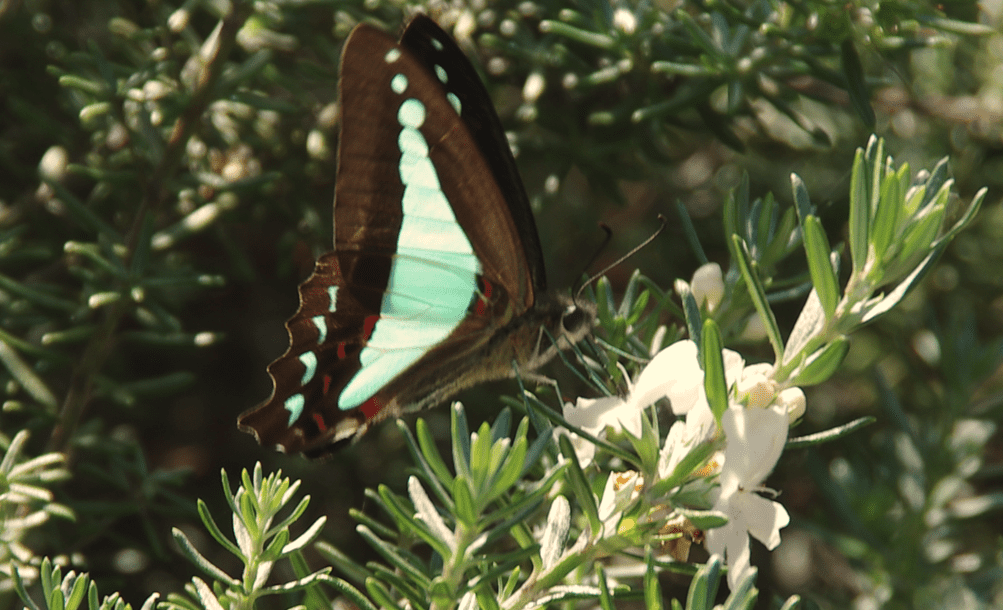
Insect Photography
Tips for insect photography are where you are taking your photography to the next Level. Close up photography is a must for insects; they are small and intricate. This is detail photography. Use the appropriate equipment to get the best results which includes a macro lens which is designed for extreme close ups. I bought a new camera the Pentax r with a 70mm to 500mm f5-6.5 lens and tripod for better close up work will be achieved. You will also find the tripod gold/silver reflector and umbrellas really useful in this section.
“Don’t fear them…..photograph them! Bugs and spiders make fascinating subjects for any macro photographer.” David Peterson Really macro photography brings out the best in every spider, caterpillar and anther.
Your camera may be hand held or used with a tripod, but be as quiet as you can and don’t use sudden movements to prevent scaring the insect away. Focus on the creature, making sure it is sharp. Use a shallow DOF (depth of field) to create a completely blurred out background and make the bug stand out more.
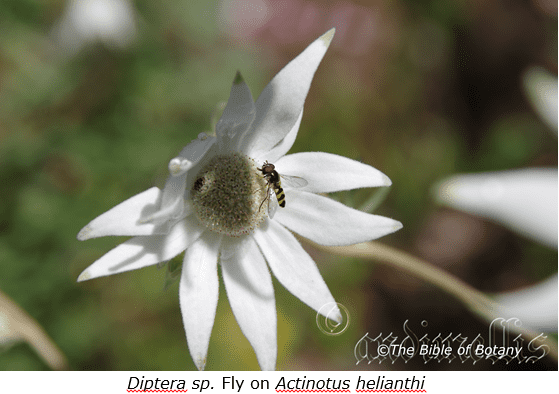
1. Use Creative Angles: Think creatively and be creative for dramatic photos that are different. Move above the creature, move slowly and quietly to photograph from different interesting angles. Your image can be even more striking if it includes a colorful flower even if it is blurred in the background. Most flowers will attract at least one type of insect so focus on it and wait for the insect to come to you. Stand over it, lie down beside it and patiently wait for an insect to land. Once the insect has landed or is attempting to land keep shooting or use rapid fire. The Pentax can take up to 25 shots a second which means a lot of editing but also a lot more chances of securing that photograph that didn’t get away. Most cameras offer 3 or 5 rapid shots with a single or two step down and a single or two step up on auto which increases the chances of securing a memorable photo.
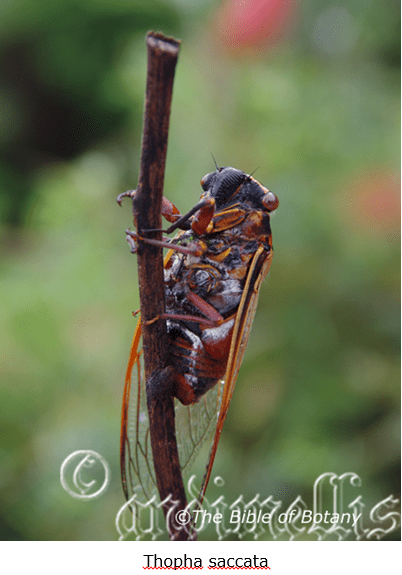
2. Keep it in Focus: Keeping an insect in focus is very tough if you are using a macro lens and handholding the camera too. This is because when you use a shallow depth of field, you give yourself a smaller margin for error. Because of this fact you should always use a tripod to avoid blur, and use the smallest aperture possible. Use auto and manual focus and see which one works better for you; sometimes auto takes a while to “find” the subject you want. For larger insects, focus on the head.

3. Capture Moving Insects: Flying insects provide even more difficulty in avoiding camera blur. You can avoid blur by choosing a fast shutter speed of 1/250s and above or by using flash to freeze the action. Remember to put your camera on a tripod and use a cable release, a remote, or the camera’s self timer to take the image. Remember that by pressing the shutter, you cause a slight movement, and when the image is magnified, any blur will be apparent.
4. Look for Vivid Colors: Consider using a ring light flash; this is a flashgun that is in the shape of a doughnut and fits on the end of your lens. The resulting image has an even, shadowless finish, perfect for insects as it highlights their details without creating a shadowy distraction. Zooming in close means that the striking contrast between colors is very clear but the field is very small.

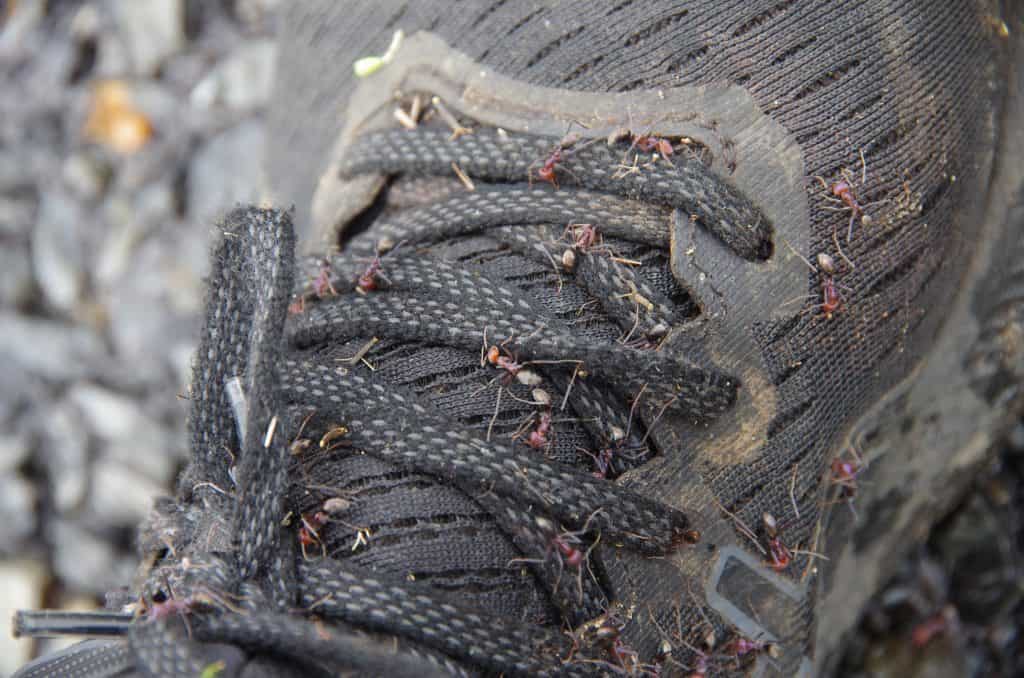
5. Catch them in Action: Insects have a tendency to be on the move all the time and will not cooperate with you and just sit around on flowers all day so you can take that perfect snap. To photograph an ant get low on the ground; use the satin cloth to rest your camera on and photograph the insect while it is engaging in its daily tasks. You may have to use fill in flash if the sun is not very bright, or the umbrellas and reflectors so there is a little bit more detail on the insect. Because they are so small, make sure your focus is perfect and on the insect, not the background. Turn the mode dial to AV (Aperture Priority) mode and select a large aperture (f/2-f/5.6) for a blurred background.
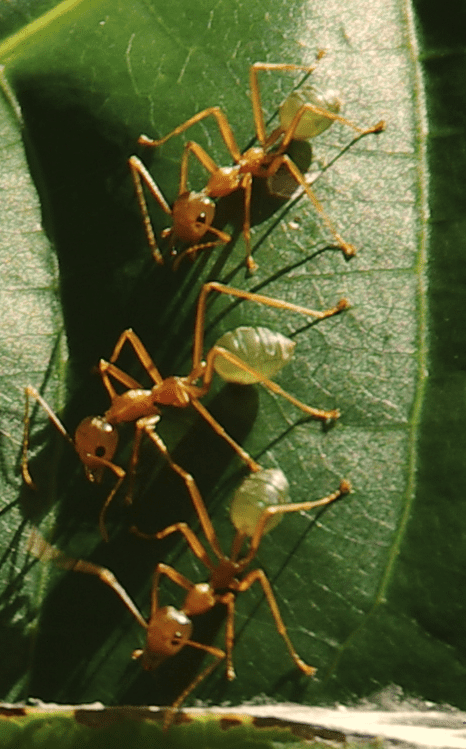
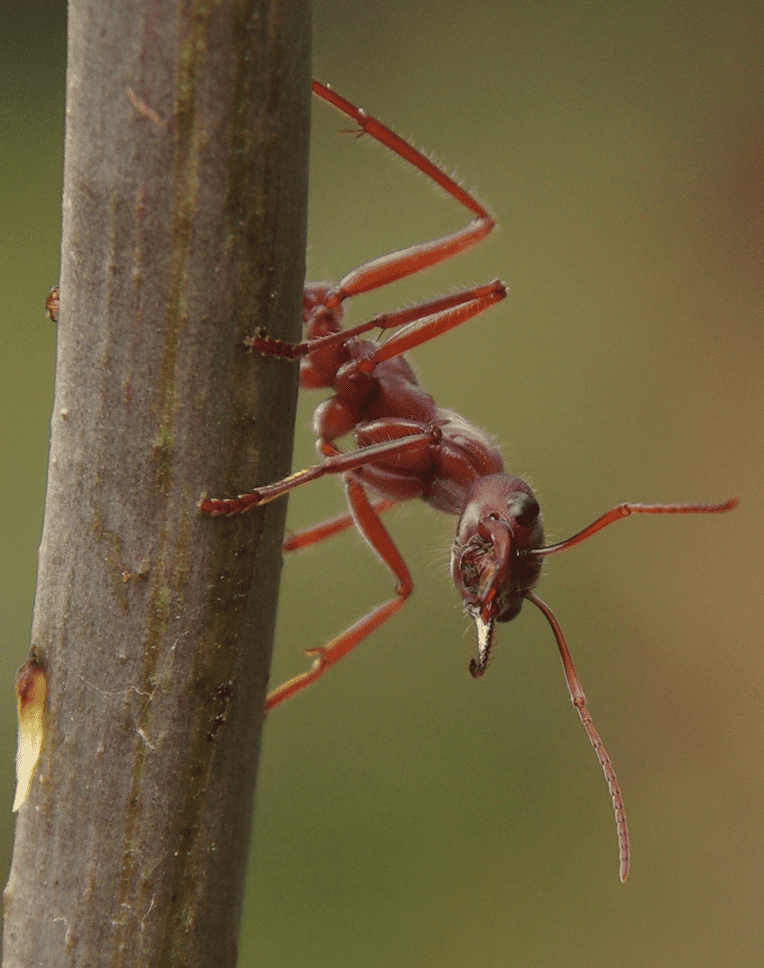

While photographing ants can give great pleasure there are those other times.
Recommended Settings: Insects are very small and always look best when they stand out from the background. Therefore, use a shallow depth of field, usually f/2.8 as a result you should be able to have a relatively fast shutter speed too. Insects move quickly, so don’t be afraid to use sports mode since it allows you to capture subjects that are moving rapidly.
Recommended Equipment:
A macro lens is important if you want to take very sharp close up images, but there are less expensive alternatives. You can buy attachments called extension tubes that give great close-ups. Use a tripod or monopod wherever possible. Use colored cards to make quick and attractive backdrops whether you’re photographing insects indoors or out.
There are many insects out there in varying colors, shapes and sizes. These are just some of the reasons why insect photography is so appealing. You need to be patient since insects are hard to spot and they can move around quickly.
Now once you have the photographs naming and editing so important.
Naming: Naming and dating (Good digital cameras do this automatically) photos of plants helps to convey the season that the plant was in flower fruit or leaves for future reference. If the photos are detailed with the place they were taken then a revisit to the site is possible at a more opportune time in the future. For example I take a photo of Alyxia flowers and the photo is not just what I want or the flowering season was at an end. I know the date and place where the photo was taken and can return the following year a week earlier and presto click click click a new and better photo can be realized.
Elimination: I have taken literally thousands of photos and keep the best 100. I eliminate 3 to 10 out of 10 photos. At times I have eliminated, casting aside every photo unless I know it can never be repeated. This may seem difficult but as you gain a new appreciation for detail and quality it becomes easier as you become more critical of your shots and your standard rises to new heights.
Editing: The process of editing is extremely important as you will see below. Back home remember to edit your photos as soon as possible. Write the name of the plant, date, place, weather, unusual events, or unusual markings anything that will make the days last for weeks. Do not rely on your memory.
This is very important as I have photographed plants I thought were a particular species. Years later we have realized that what we photographed years before were either very rare or are now entirely different species. A good example of this was Acacia fimbriata sub sp. peragusta which is now Acacia peragusta. Angophora subvelutina turned out to Angophora robor which is class three endangered. The red hirsute juvenile leaves caught my attention then with the locality being an area where the former is not found really sparked my inquisitiveness and this was years later.
I also have 2 plants which we have photos of, which we know now; have not been described. How many more do we have in our box of unnamed plants that await the same outcome?
Further in China what was just a routine walk in the mountains turned out to be a wonderful rediscovery of a rare class 1 tree fern. The tree fern was unknown in this provincial area and was awaiting the unsuspecting photographer or naturalist to come along. At first the locals said it doesn’t exist here. Farmers knew about it but were unaware of its rarity. I have at the time of writing this paragraph began to propagate it from spore (We have about 20 plants at the first true frond stage.) and will teach the locals how to do it and make money from it while at the same time protecting what we have newly discovered.
Remember share your photographs. Please advise us of any photographs you send if we can place them on our site. Remember too that in the future we will donate all our photos to the National Herbarium collection for further studies. You will be given full credit but give us the details of the photographs when and where the photographs were taken.
Most of all enjoy the experiences nature can share with you.
Further Comments from Members:
All information is included in good faith and has been thoroughly researched prior to printing. The website or the author does not warrant or guarantee the accuracy of any information on these pages, nor does the website or the author accept any responsibility for any loss arising from the use of the information found within. The views and opinions are strictly those of the author or those members who chose to actively participate in the contents herein.
“Hi reader, it seems you use The Bible of Botany a lot. That’s great as we have great pleasure in bringing it to you! It’s a little awkward for us to ask, but our first aim is to purchase land approximately 1,600 hectares to link several parcels of N.P. into one at The Pinnacles NSW Australia, but we need your help. We’re not salespeople. We’re amateur botanists who have dedicated over 30 years to saving the environment in a practical way. We depend on donations to reach our goal. If you donate just $5, the price of your coffee this Sunday, We can help to keep the planet alive in a real way and continue to bring you regular updates and features on Australian plants all in one Botanical Bible. Any support is greatly appreciated. Thank you.”
In the spirit of reconciliation we acknowledge the Bundjalung, Gumbaynggirr and Yaegl and all aboriginal nations throughout Australia and their connections to land, sea and community. We pay our respect to their Elders past, present and future for the pleasures we have gained.